Menu Close

Author: uk365guy

{How to automate business process with Power Automate Desktop}

Hello Everyone,

Today I am going to show how to do simple business automation with Power Automate Desktop.
Things must have:
1. You should download Window Desktop or Laptop to download Power Automate Desktop
2. Download Power Automate Desktop for free from Here
Once Power Automate Desktop(PAD)  Installed, Pin it to your taskbar.
Open the PAD and cretae a new flow “Create a excel file and close”
Open newly created flow and open the Excel tab, drag the “Launch Excel”.

Click save…

Then drag the “save file” from excel tab again, click on save button.
Drag the “Display Message”  box from  “Message boxes” Give message box title, message to display, “message box icon” i have chosen “information”,
Message box button “OK”.
Default button First button.
Keep Message box always on top slide button to yes.
Close message box automatically again a slide button to yes.
Timeout set to “1”.
Finally click Save.

Lastly drag the “Close Excel” and  click save.

 
Click to Save the flow.


So you will see all the steps like below image:
Now you can click on play button to see the Power Automate Desktop process in action.
This is a simple PAD where you can automate to process with just click of a button.
I hope this helps.
Malla Reddy(aka UK365GUY)
Share this:

{How to stop Model Driven App user from exporting Confidential data into Excel}

Hello Everyone,

Suppose there is a requirement to not to allow users from exporting the data from Model Driven Apps ..
How would it be possible?
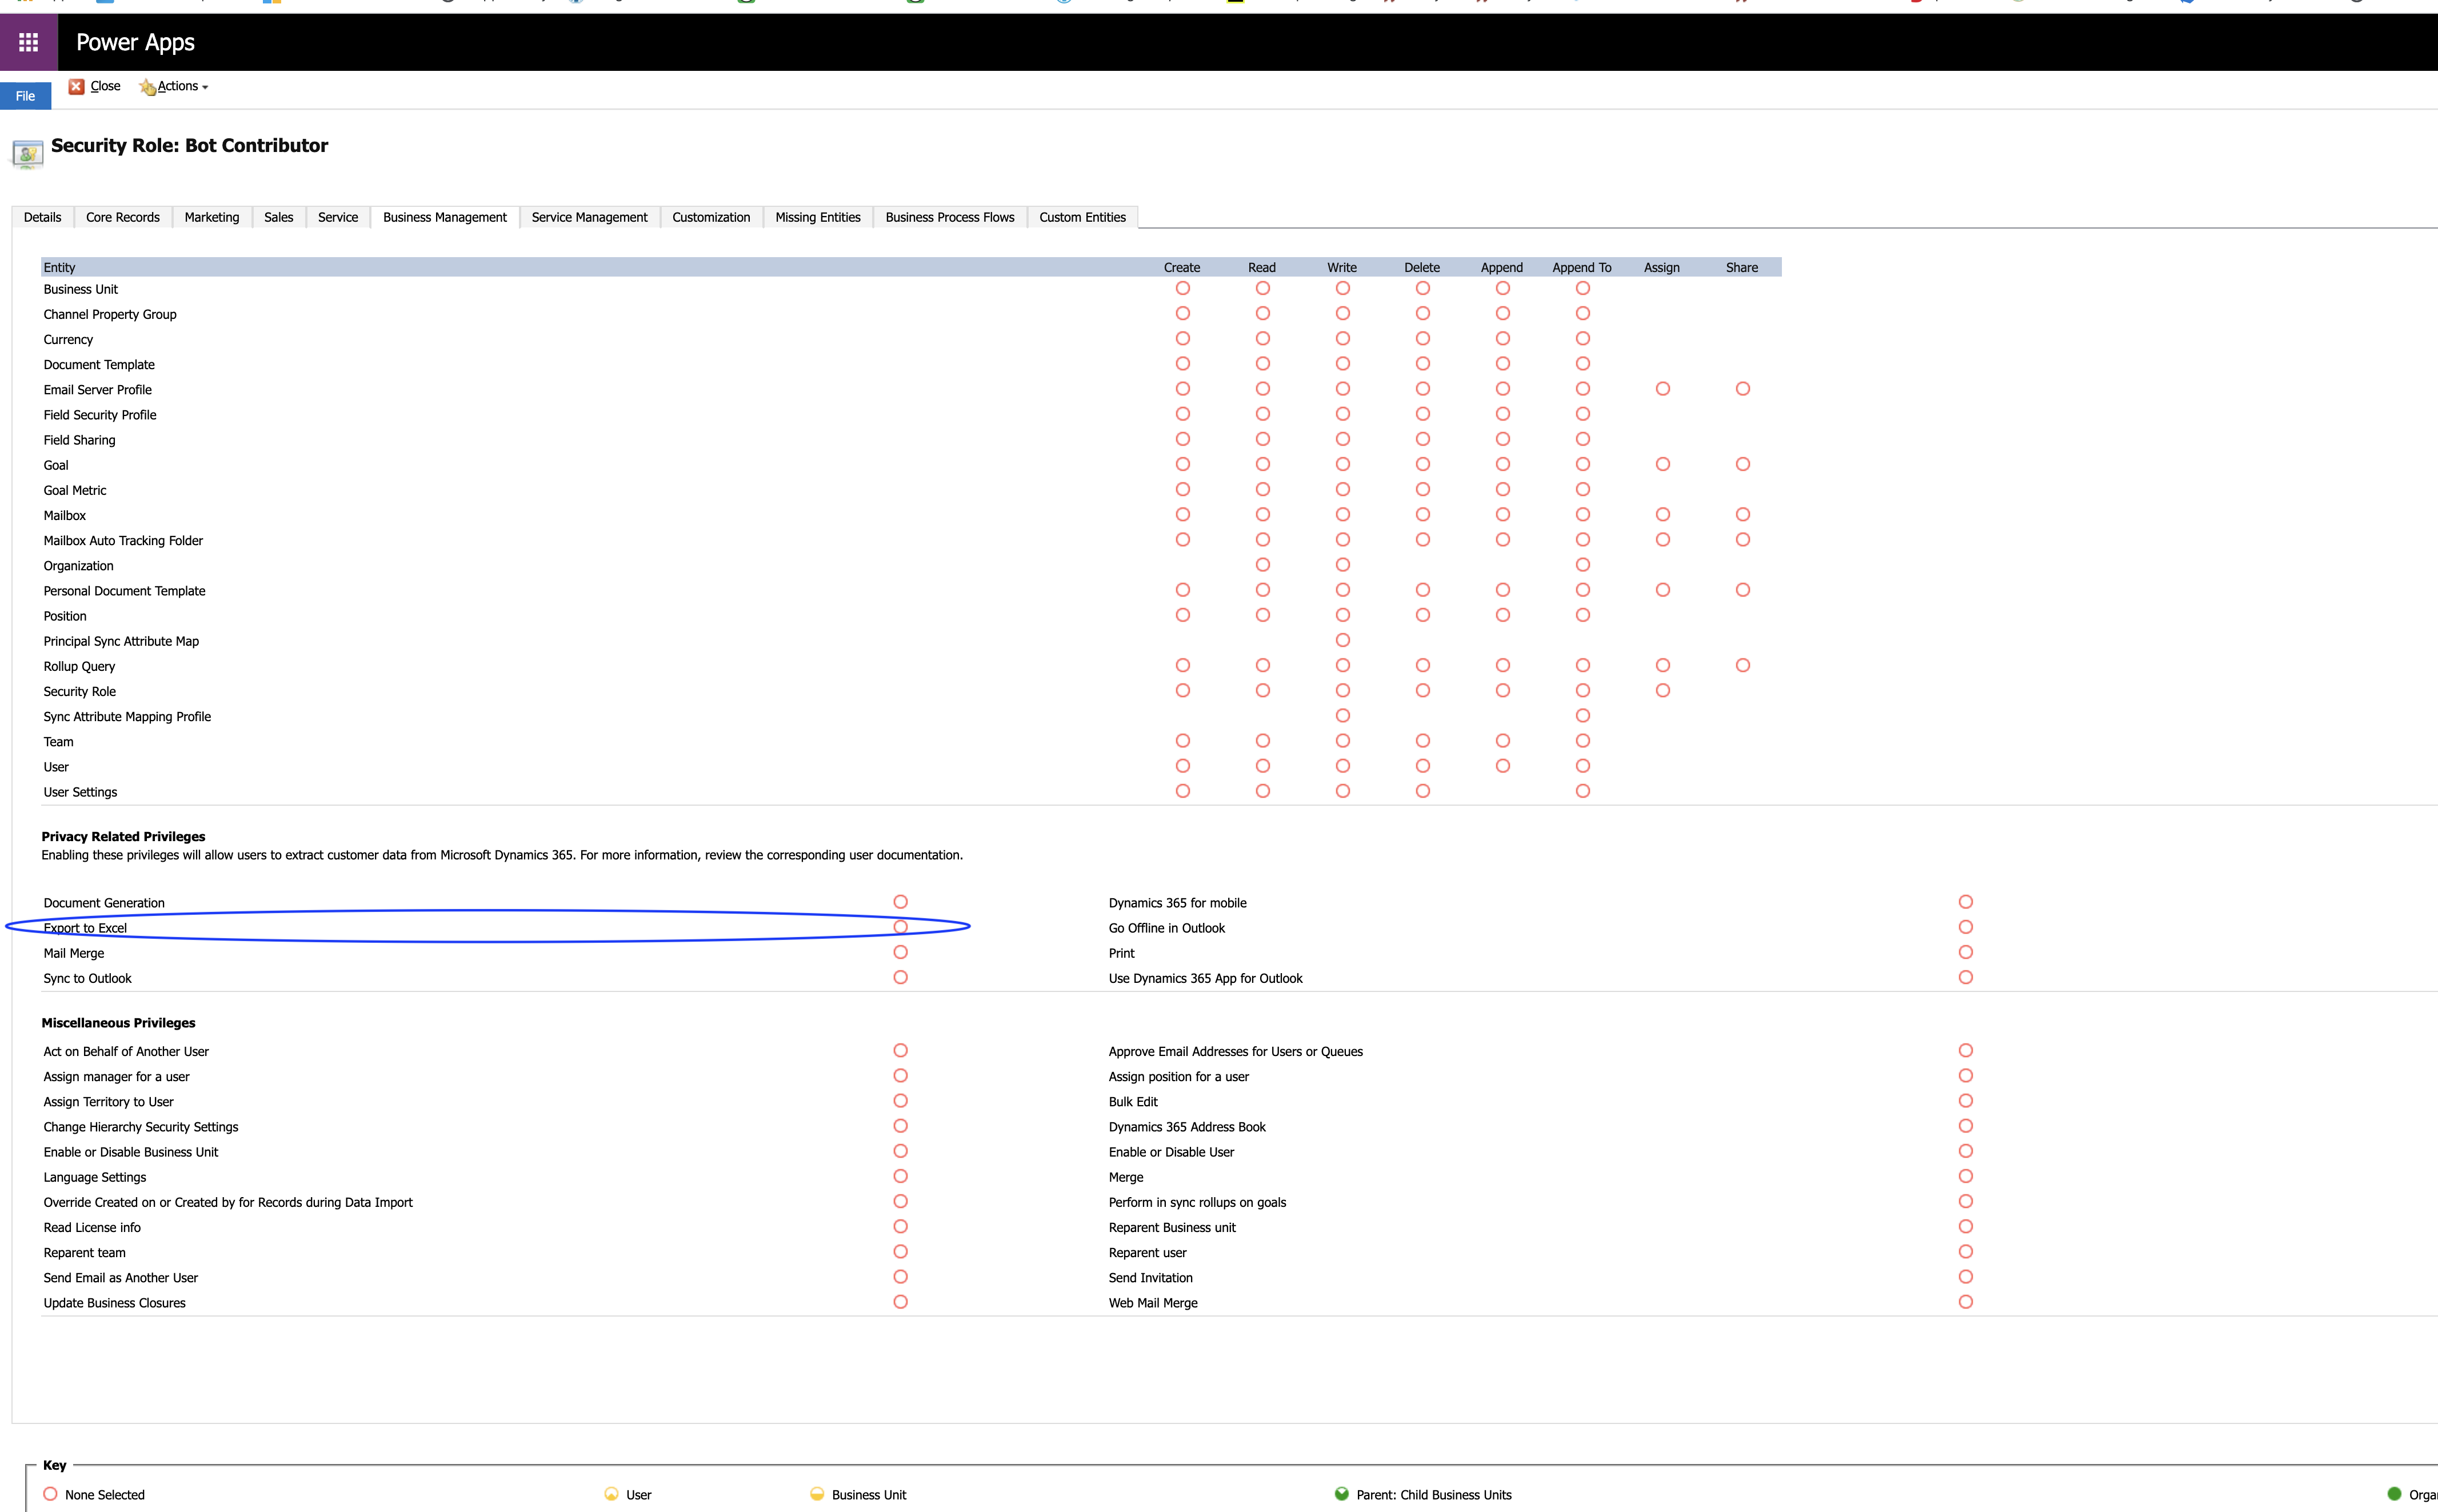
Its simple in security roles previleges there a previlege called ” Export to Excel”
You need to select none then only the users dont get the capacity to export the data to excel..
So any user who is having this kind role security role, they are not able to export the data into excel anymore.
Its as simple as that, no customizations required or Ribbon Workbench.
I hope this helps.
Malla Reddy(aka UK365GUY)
Share this:

{How to update security roles to the table forms on Model Driven Apps using unmanaged solution}

Hello Everyone,

Suppose there is requirement to apply security roles to the table forms by default, doing this manually on the Model Driven App tables is daunting task.
Simple solution is create a new solution and add all the tables required to apply security to all forms on those tables.
Follow these steps:
1. Create a solution.
2. Add tables required to apply security to the forms.
3. Publish all customizations.
4. Export the solution as unmanaged.
5. Import the solution into the other environments.
Bingo thats all your new security to the forms have been applied with out manual work of opening each table and apply security.
I hope this helps.
Malla Reddy(aka UK365GUY)
Share this:

{How to apply security roles to model driven apps using unmanaged solution into other environments}

Hello Everyone,

I am going to share a scenario, there is a requirement to apply security roles to the Model Driven Apps in different environments.
Lets gets started.
Suppose there are 50 security roles that needs to be applied to Model Driven Apps in different environments as part of the solution deployment to the various stages of the software development life cycle.
1. Create a solution
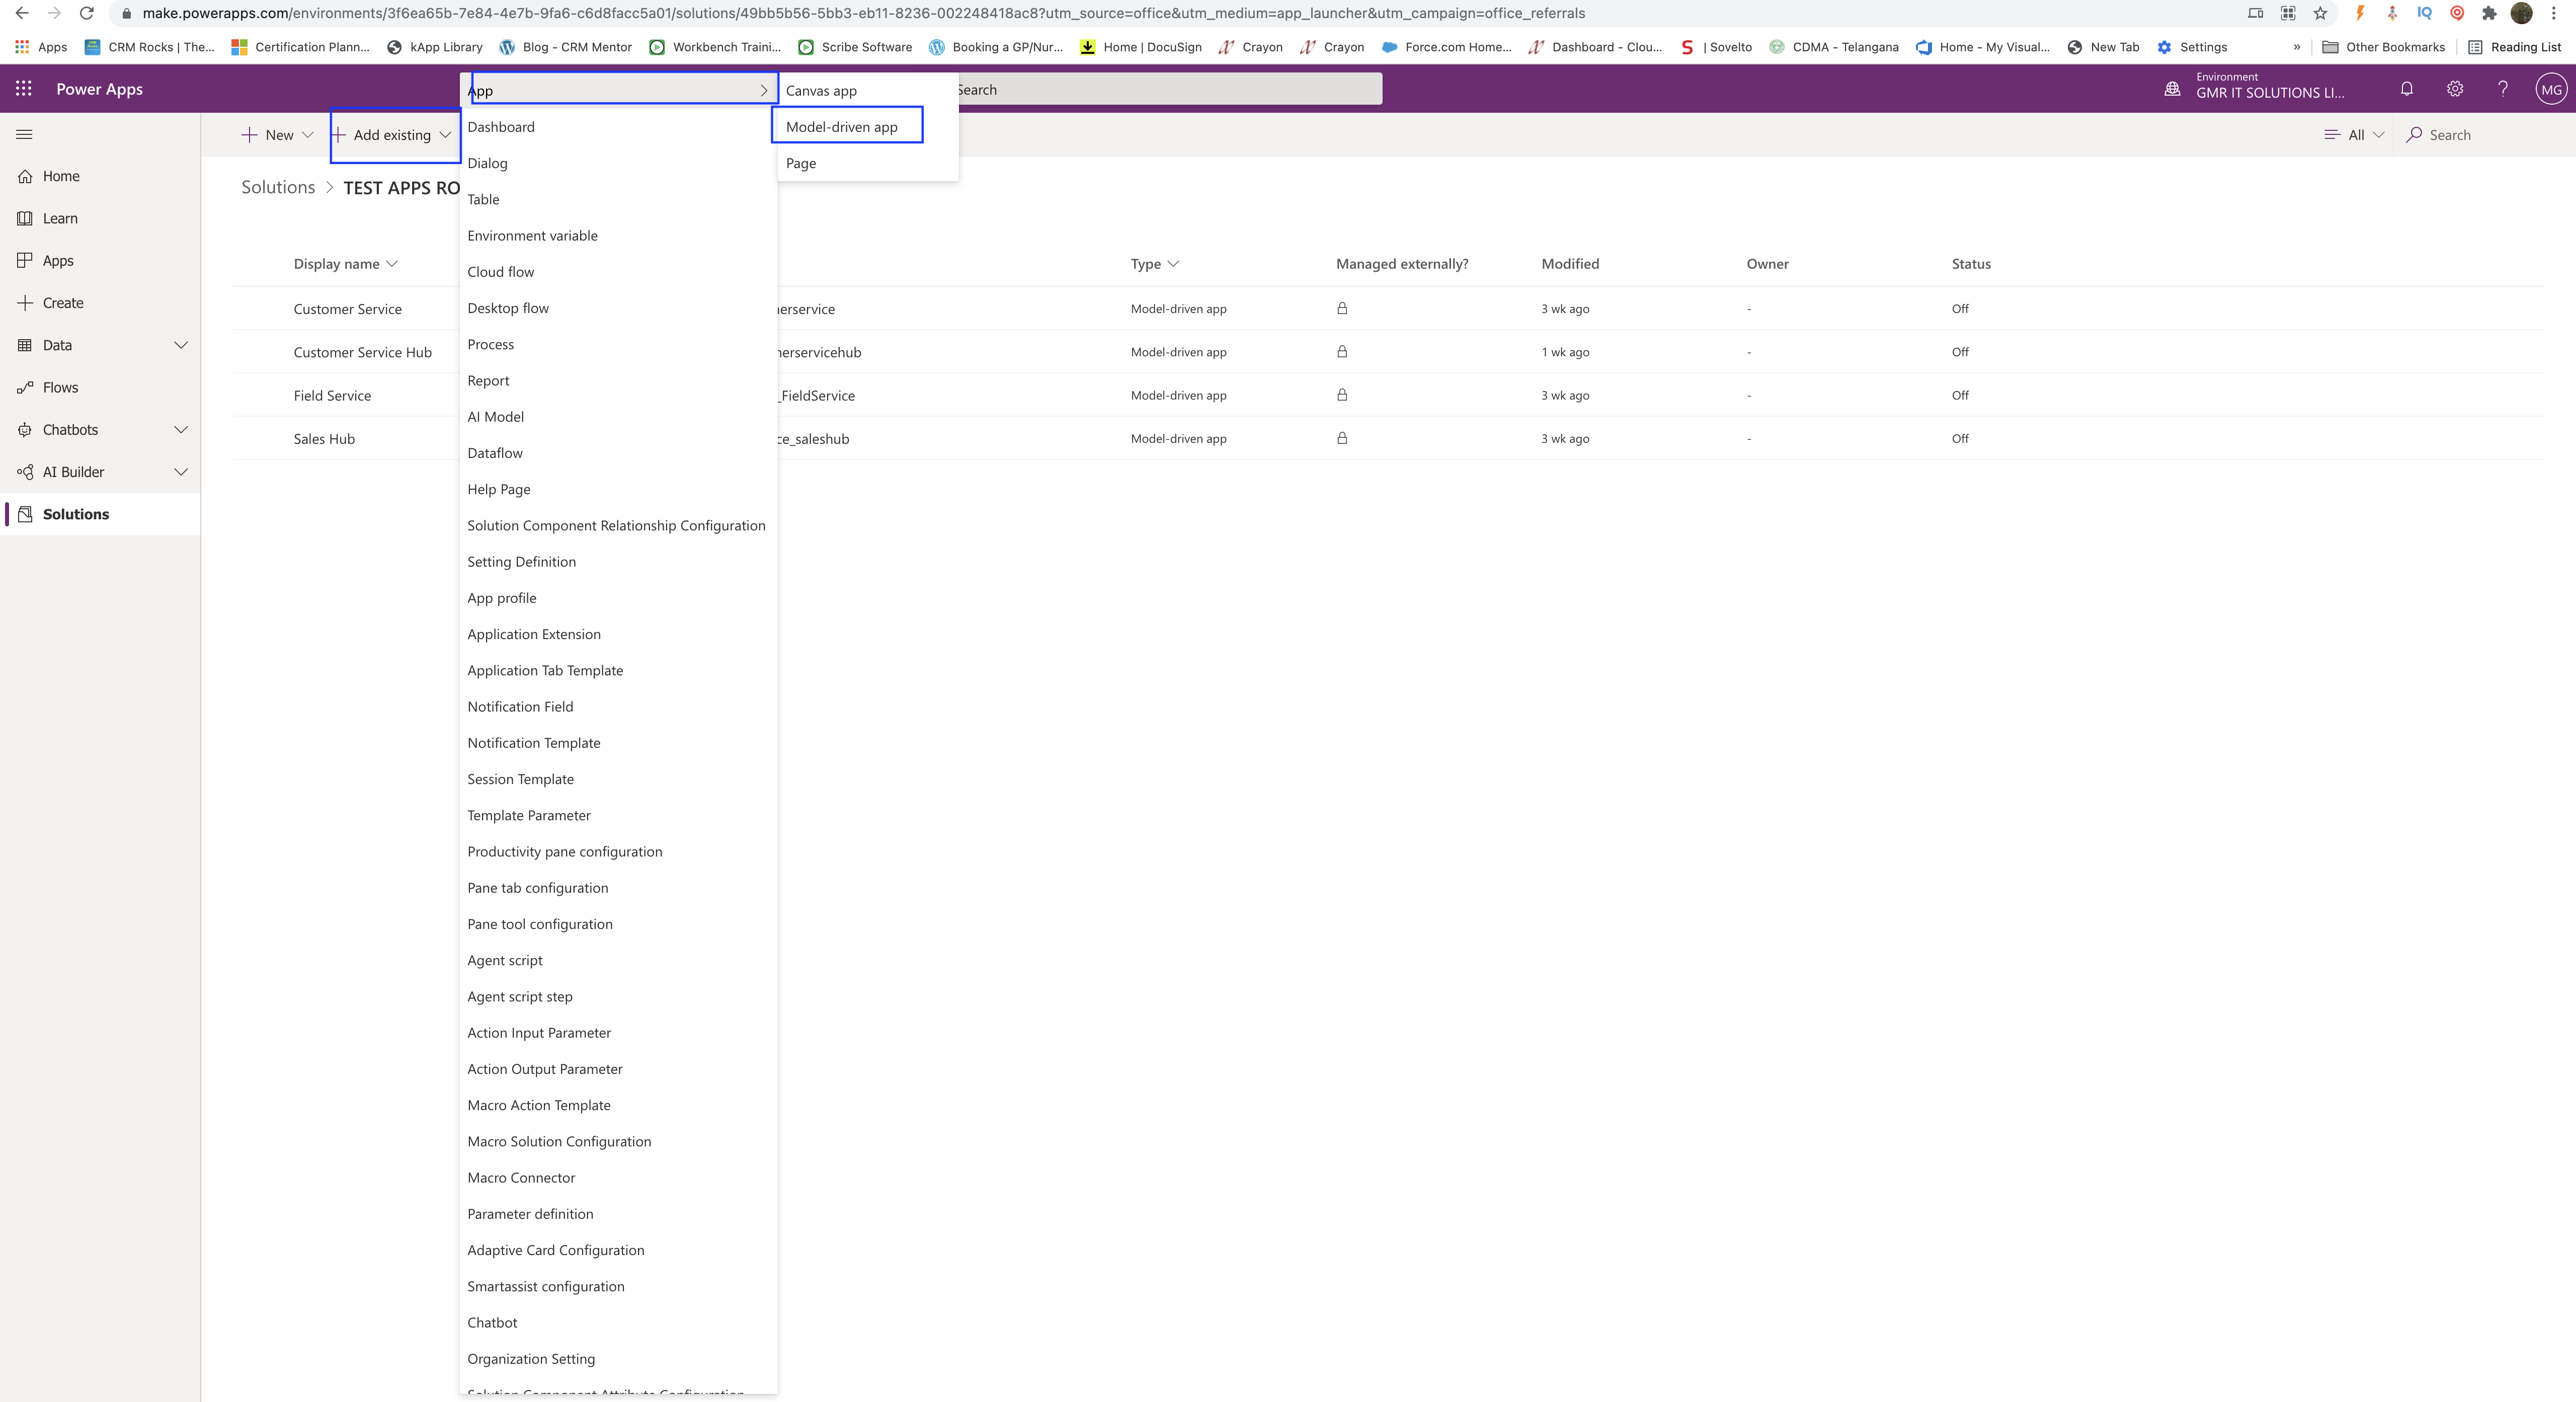
2. Click on add existing and select “App” then select the ” Model Driven App” see below image…
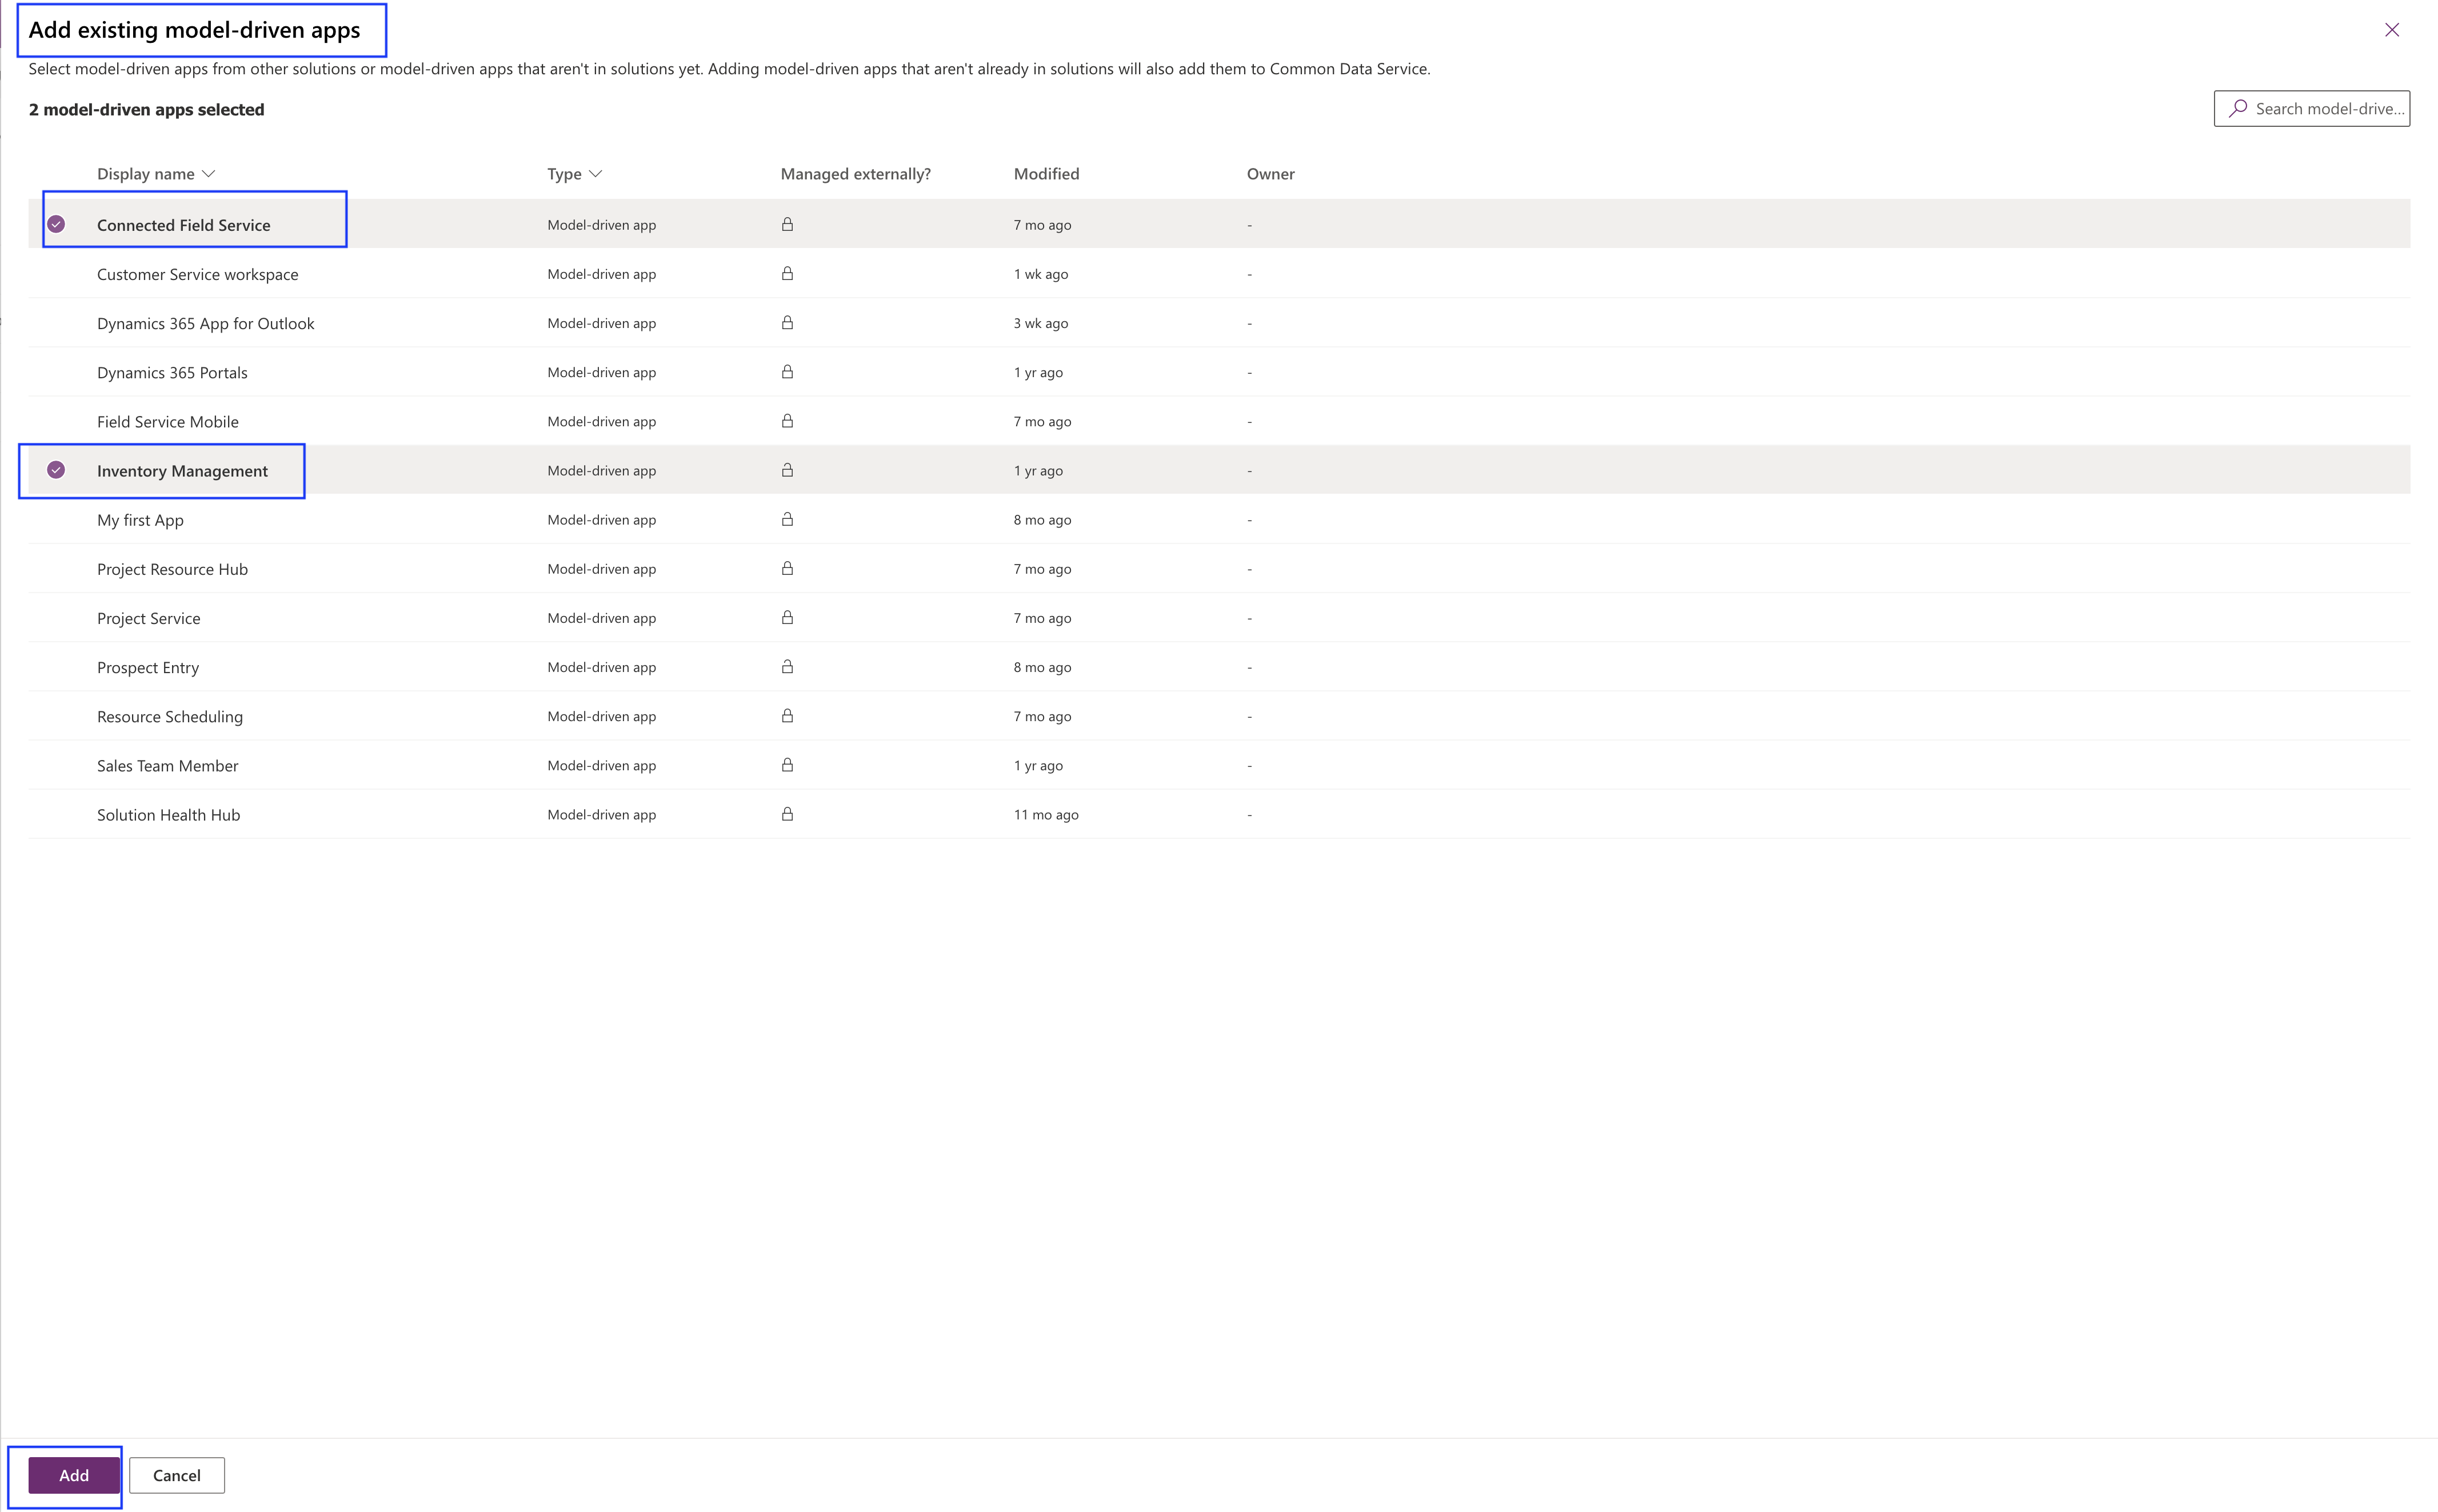
Then select the Model Driven Apps from the list of Apps and click add to the solution.

Once the required apps are selected then you can export the solution as unmanaged to different environments to make all the environments App looks identical.

I hope this helps.

Malla Reddy(aka UK365GUY)

Share this:

How to enable Mobile Offline Capabilities to users on new Power Platform Admin Centre for Dynamics 365 Field Service App

Hello Everyone,

Today i am going to show how to enable mobile offline capabilities in Power Platform Admin Centre.

Lets gets started.

Login into your power platform admin center Here

Then select the environment you want to enable this mobile offline capabilities.
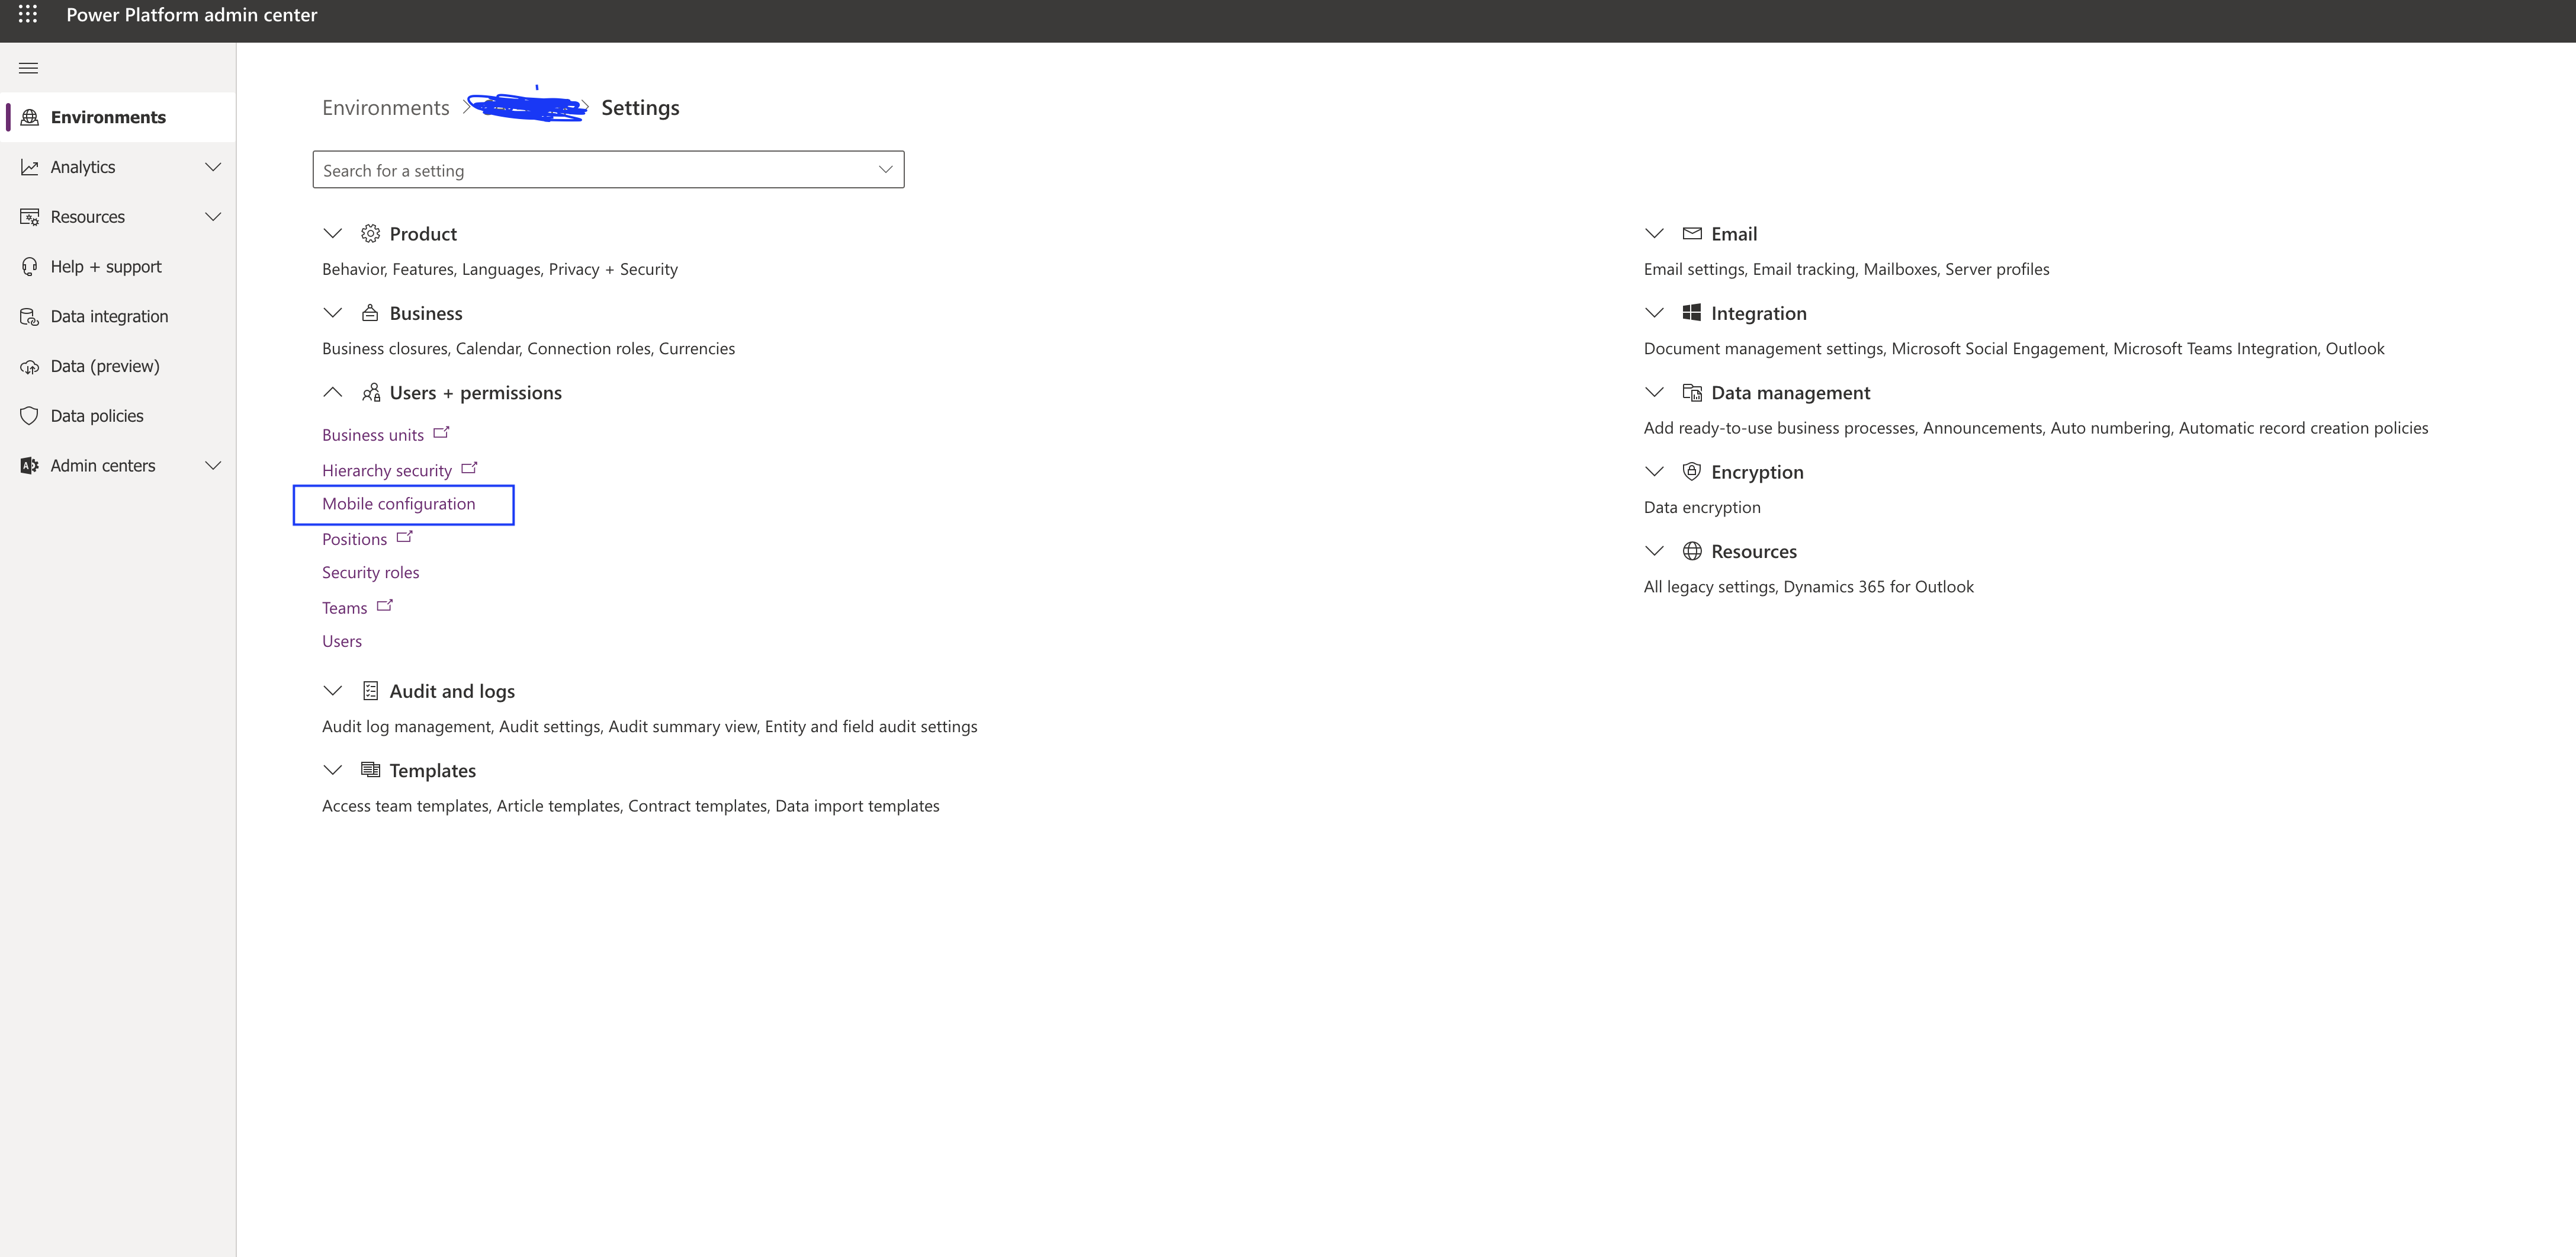
PowerPlatform Admin Centre

Click on Settings and under the users & permissions section click the drop down and select the “Mobile Configuration”.

You will be presented with the below profile, if the profile is not created then create new one.

Profile

In this blog post i have created field service mobile- profile and i have chosen the required tables to show the user during the offline access to the Dynamics 365 field service app. It is mainly for the field service technicians and service technicians.

Also you can select the users who are required to get access to the Dynamics 365 Field Service App from on Mobile Offline.

I hope this helps.

I hope this helps
Malla Reddy( aka UK365GUY)

Share this: