Menu Close

Author: uk365guy

{How to} How to create a lead scanning or uploading a business card on power platform dynamics 365 sales app

Hello Everyone,

Today i am going to show how you can quickly create a lead just uploading or scan the business card with a click of a button on Dynamics 365 Sales App.

Let’s gets started.

Scenario: Suppose you are at trade show and at your company stand and customers interested in your products or services might give you their contact details i.e business cards.

In old days you need to carry the business card to your office next morning and enter manually all your potential customer details on customer relationship management or any stand alone application.

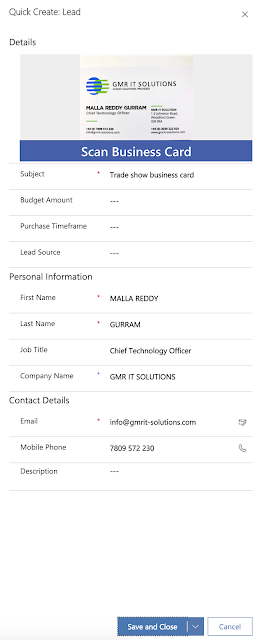
Now with the Power Platform Dynamics 365 Sales App Business card scanner, with the click of a button all the information is auto filled.

Login into your Dynamics 365 Sales Hub App

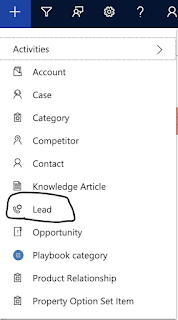
Click on the Quick create and select the “lead” entity.

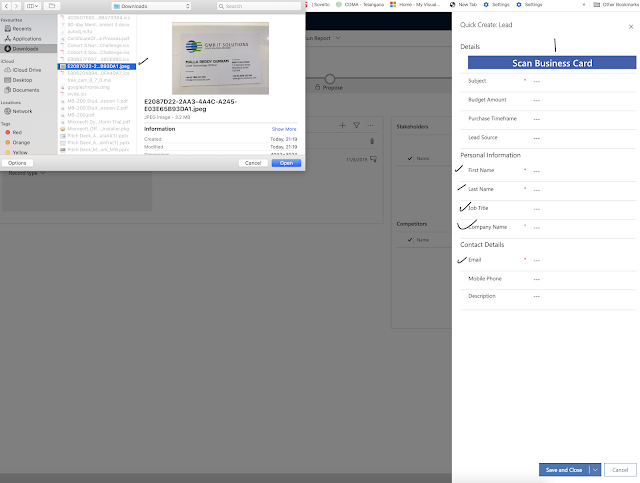
You will be presented with QUICK create form.

As you can see, i have selected the business card from my desk top and the scan business card reader with built AI functionality all the data will be scanned and auto populates, magic right? 🙂

This feature is very useful for busy field sales representatives.

I hope this helps.

For Microsoft Dynamics 365 Consultancy|Power Apps|Training|Support|Licensing|Web Hosting|Websites

Contact us: https://www.gmrit-solutions.com

Share this:

{How to} How to set up trial version on your existing Power Platform Tenant

Hello Everyone,

Today i am going to share quick tip on how to set up a trail from your existing Dynamics 365 Subscription.

Let gets started..

Login to your power platform tenant.

www.admin.powerplatform.microsoft.com

Enter your existing power platform credentials, make sure you are system administrator or global administrator role to perform this task..

Once you have successfully logged into the admin center of the power platform, click on the “environment” which is found on the left side of the page.

You will see all the environments of your tenant,

Please note: Earlier on the Dynamics 365 Customer Engagement admin center, you call same “environments” as “instances”.

Click on the “New” button you will be presented with small web page on the right hand side of the admin center..

Name your environment and select the “Type” = Trial, in the Trial down field you will see three field values:

1. Sandbox

2. Production

3. Trail

I will expand more on the third “Type” as you all aware sandbox and production environments require subscription, so “Trial” option is free.

While creating the trial you don’t need to pay for anything.

Region:

Region is where you are currently residing, choosing non geo location of your area will be impacted as you may face slowness while accessing your application. so choose right region.

Purpose:

What purpose you want to use trial environment.

Lastly Create Database for this environment: Create a database and build apps by using Common Data Service(CDS) for Apps as a datastore.

Once you select all the options from the new environment window click next..

If you select create database then you need to fill all the selections and also the “Enable Dynamics 365 Apps” currently dynamics 365 apps enabled for production environment, so you can create a trial and associate with this environment.

If you want sample data and apps, you can enable that by enabling the button, regarding the security group can select them if you want to test it out on the trial environment.

Finally you will see trial environment created.

I hope this helps..

For Microsoft Dynamics 365 Consultancy|Power Apps|Training|Support|Licensing|Web Hosting|Websites

Contact us: https://www.gmrit-solutions.com

Share this:

{Did you know} Dynamics 365 Web client settings now in Power Platform

Hello Everyone,

Today i am going to show how the Dynamics 365 Web Client transformed into the Power Platform Settings.

Let’s gets started.

Usually when we are using the new Unified Interface any settings configuration is rendered into the web client area but now you can do all in Power Platform.

For example: You are on the Dynamics 365 Sales App would like to do some system wide settings.

You click on little gear icon.

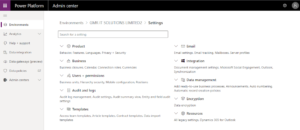
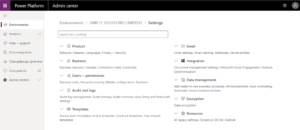
Now you can see all system wide settings on the Power Platform Admin Center itself, no more page rendering on the web client.

I hope this helps.

For Microsoft Dynamics 365 Consultancy|Power Apps|Training|Support|Licensing|Web Hosting|Websites
Share this:

{How to} Power Platform Dynamic 365 Sales App settings render Unified Interface only

Hello Everyone,

Today i am going to show how you can quickly set the Unified Interface only for any Dynamic 365 App’s either it may be

Dynamic 365 Sales App
Dynamic 365 Customer Service App
Dynamics 365 Field Service App

For example:

Login into your Dynamic 365 Sales App and click on the little gear icon..

Now settings page is displayed on the Power Platform area.

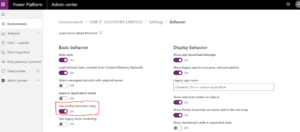
Click on the “Settings” with gear icon..

Now save the settings..

When you login into the dynamics 365 sales app it automatically renders Unified Interface only.

I hope this helps.

For Microsoft Dynamics 365 Consultancy|Power Apps|Training|Support|Licensing|Web Hosting|Websites
Share this:

{How to} Power Platform One place for reference for the latest videos and deck

Hello Everyone,

I thought this blog post might be very useful for quick reference for Power Platform consultants and administrators to get to know more about the Microsoft Power Platform.

Topics:

1. Latest best practices for Power Platform Center of Excellence (CoE)
Center of Excellence: Tried and tested techniques
2. Top tips
3. what’s new.

If you are looking for latest updates using mediums like videos and decks, then look no further here is the link.

Videos and PowerPoint Presentations.

I hope this helps.

For Microsoft Dynamics 365 Consultancy|Power Apps|Training|Support|Licensing|Web Hosting|Websites
Share this: