With the release of wave 2 October 2019, there is a new feature added to Dynamics 365 Apps for UCI only.
One of my client have a requirement to auto populate the contact and accounts data when filling the existing contact and account fields on new “lead” record created.
They are still using the Web client of Dynamics 365 Sales Application.
Lets see this in action.
Dynamics 365> Sales > Lead > New Lead
Fill the Business Process Flow of Qualify stage fields, see below image:
Once you fill in those fields on Business Process Flow and the associated Lead record fields will be auto populated.
Now i have selected the existing contact field from lookup then the “Name”, “Job Title”, “Telephone”, “Email” fields auto populated
Similarly fill the account field on the lead form and Company field is auto populated.
But if you need to fill rest of the fields of “company” like website and address fields then you need to write workflow or script to auto populated.
I hope this helps.
It’s been while i haven’t blogged about Dynamics 365 Customer Engagement.
Now i have some spare time where i can share a feature on the Dynamics 365 App for Outlook.
A lot of Dynamics 365 Customer Engagement end clients had a requirement of sending same type of emails to their on boarded customers, so composing the same email for customers is a lot of manual task and time consuming.
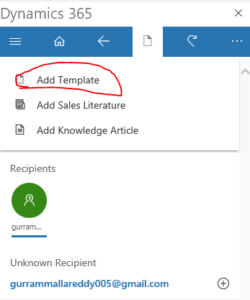
There is a feature on Dynamics 365 App for Outlook, when composing an email you can add the email template and that template will pick up the contact information from Dynamics 365 and email is composed automatically with all the details.
You can add following to your email body:
1. Add Template
2. Add Sales Literature
3. Add Knowledge Articles
so let’s see “Add Template” in action..
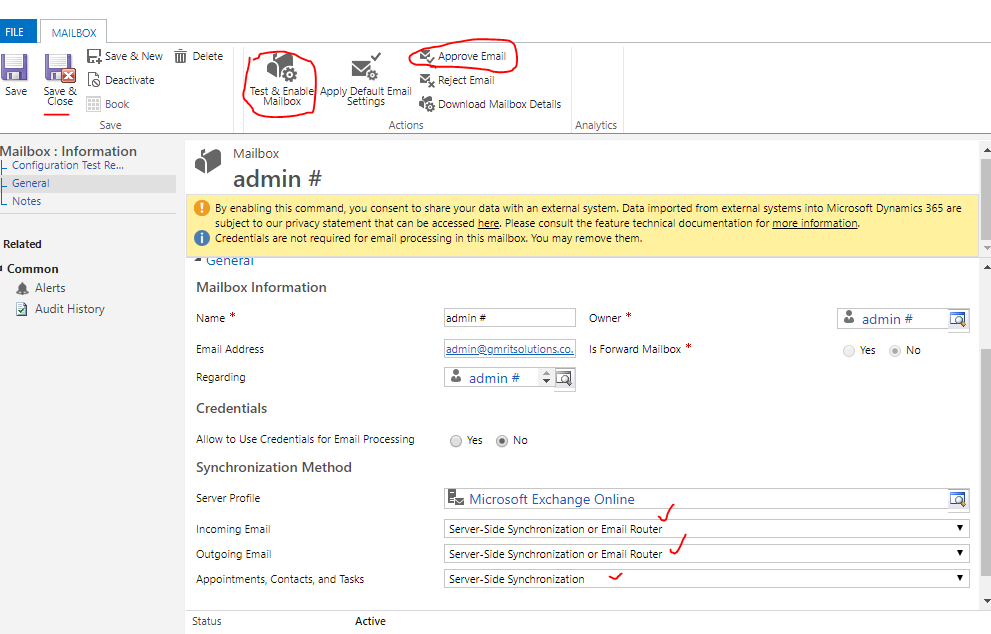
Open your Outlook( i assume your outlook have Dynamics 365 App for outlook is in Sync.. if not you need to enable your mailbox in Dynamics 365 Customer Engagement.
Once you open the Outlook click on new email to send out the email to your customer for on boarded welcome email.
Insert the “To” email and click on the Dynamics 365 Icon.
“Make sure the recipient should be in Dynamics 365 as lead, contact or user otherwise App will not allow to add the template document.”
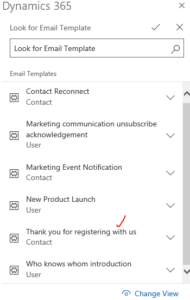
Now choose the template which you will get as default email templates or you can design new template and upload to the Dynamics 365 if you have a permissions otherwise you can request Dynamics 365 System Administrator to help with import the template for you.
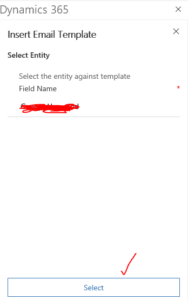
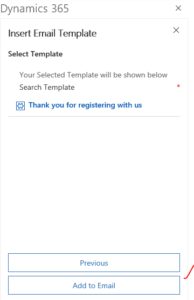
Click on the “Select” template and select the template you want add to the email, for example i have chosen “Thank you for registering with us” email template..
Today i am going to share quick tip of how to add an entity and filter views on Dynamics 365 App for Outlook.
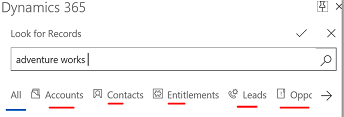
You know what i am referring to, ok you got it ? if not see below screen shot..
So there might be requirement to only show certain entities and view and hide unnecessary entities to the Dynamics 365 App for Outlook users.
In that situation we can modify the site map of the “Dynamics 365 App for Outlook”.
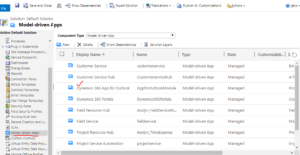
Go to the Settings > Customizations > Customize the system > Model driven Apps > Double click on the Dynamics 365 App for Outlook..
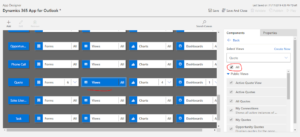
Refer to the below screen shot.
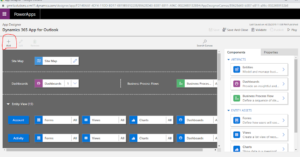
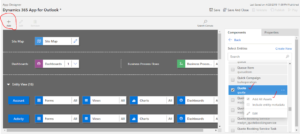
Once you double click on the Dynamics 365 App for Outlook.. Sitemap will be opened and click add(+) then select the entity you want to add,
for instance i will add “Quote” and check box ” add all assets” and click on the Views you want to show on the Dynamics 365 App for Outlook..
Refer to the below screen shot..
Select the “Quote” entity and check the ” Add All Assets”.
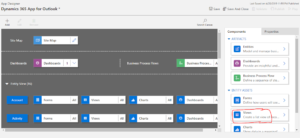
Now you can change the views as well see below screen shot.
Click on the view and select “All” check box.
Now “Save and Close”.
Contact us: https://www.gmrit-solutions.com
{"@odata.context":"https://gmritsolutions.api.crm11.dynamics.com/api/data/v9.1/$metadata#solutions(installedon,friendlyname,solutionid)","value":
[{"@odata.etag":"W/"6694851"","installedon":"2019-04-16T20:45:54Z","friendlyname":"Common Data Service Starter Portal (Preview)","solutionid":"45f03a00-8f20-416d-84ac-d4b42335be29","publisher1.customizationprefix":"adx"},
{"@odata.etag":"W/"6654090"","installedon":"2019-04-16T20:18:31Z","friendlyname":"Dynamics 365 Portals - Portal base","solutionid":"3e1103ed-03dd-40ea-ad09-86307e9f76f5","publisher1.customizationprefix":"adx"},
{"@odata.etag":"W/"6612642"","installedon":"2019-04-16T20:12:39Z","friendlyname":"Dynamics 365 Portals - Portal dependencies","solutionid":"df0ae7e0-303e-48dc-8505-677fbcf78c0a","publisher1.customizationprefix":"msa"},
{"@odata.etag":"W/"23476555"","installedon":"2018-10-27T09:15:11Z","friendlyname":"Dynamics 365 Portals - Customer Self-Service Portal","solutionid":"567ff3d1-decd-4b8f-8e8f-462bd93b4598","publisher1.customizationprefix":"adx"},
{"@odata.etag":"W/"6689114"","installedon":"2018-10-27T09:14:12Z","friendlyname":"Dynamics 365 Portals - Azure Storage","solutionid":"27c5fa97-e7cc-4581-b63e-6062c1106a33","publisher1.customizationprefix":"adx"},
{"@odata.etag":"W/"23476489"","installedon":"2018-10-27T09:13:09Z","friendlyname":"Dynamics 365 Portals - Knowledge Management","solutionid":"e1b8cbee-2873-4a58-b800-d09c208c1076","publisher1.customizationprefix":"adx"},
{"@odata.etag":"W/"23462052"","installedon":"2018-10-27T09:12:46Z","friendlyname":"Dynamics 365 Portals - Customer Service","solutionid":"4dabac1c-f651-4c1f-a832-dad3cff25e3a","publisher1.customizationprefix":"adx"},
{"@odata.etag":"W/"6694818"","installedon":"2018-10-27T09:11:56Z","friendlyname":"Dynamics 365 Portals - Timeline","solutionid":"186ee3f5-df46-49c6-b382-51a5e03f51cb","publisher1.customizationprefix":"adx"},
{"@odata.etag":"W/"23461464"","installedon":"2018-10-27T09:11:45Z","friendlyname":"Dynamics 365 Portals - Discussion Forums Workflows","solutionid":"af409dd1-695f-4e58-a5b7-7d1bba34ac78","publisher1.customizationprefix":"adx"},
{"@odata.etag":"W/"23461256"","installedon":"2018-10-27T09:10:40Z","friendlyname":"Dynamics 365 Portals - Discussion Forums","solutionid":"d40a1f96-4177-4d77-85b6-eae77c50f3a3","publisher1.customizationprefix":"adx"},
{"@odata.etag":"W/"6687816"","installedon":"2018-10-27T09:10:11Z","friendlyname":"Dynamics 365 Portals - Feedback","solutionid":"75495799-fdde-4509-af1c-634e2a9a2e02","publisher1.customizationprefix":"adx"},
{"@odata.etag":"W/"6687068"","installedon":"2018-10-27T09:08:26Z","friendlyname":"Dynamics 365 Portals - Web Forms","solutionid":"4c86be73-383c-4d29-9c7d-56f09278ce23","publisher1.customizationprefix":"adx"},
{"@odata.etag":"W/"6666362"","installedon":"2018-10-27T09:08:12Z","friendlyname":"Dynamics 365 Portals - Identity Workflows","solutionid":"d198f55a-4863-46b6-a1f8-2572be847019","publisher1.customizationprefix":"adx"},
{"@odata.etag":"W/"6665836"","installedon":"2018-10-27T09:08:06Z","friendlyname":"Dynamics 365 Portals - Identity System Workflows","solutionid":"67962fc1-b7e5-498f-9a28-b43979a0451c","publisher1.customizationprefix":"adx"},
{"@odata.etag":"W/"6665576"","installedon":"2018-10-27T09:07:33Z","friendlyname":"Dynamics 365 Portals - Identity","solutionid":"aafc7111-77d7-42bb-8a69-ede43d058d4f","publisher1.customizationprefix":"adx"},
{"@odata.etag":"W/"6660262"","installedon":"2018-10-27T09:07:05Z","friendlyname":"Dynamics 365 Portals - Web Notification","solutionid":"6cb7aa68-9fb6-4105-ba07-ea84b88660df","publisher1.customizationprefix":"adx"},
{"@odata.etag":"W/"6658857"","installedon":"2018-10-27T09:06:56Z","friendlyname":"Dynamics 365 Portals - Portal Base Workflows","solutionid":"6e45c281-e54a-47d5-bb18-d370a39ad783","publisher1.customizationprefix":"adx"},
{"@odata.etag":"W/"6658447"","installedon":"2018-10-27T09:06:48Z","friendlyname":"Dynamics 365 Portals - Portal Base System Workflows","solutionid":"a6f4f1dc-9f78-405b-b58d-9184766a2c12","publisher1.customizationprefix":"adx"},
{"@odata.etag":"W/"23443114"","installedon":"2018-10-27T09:02:03Z","friendlyname":"Dynamics 365 Portals - Portal Base","solutionid":"d0da2c41-8ab6-471c-8067-23e2dd0af27b","publisher1.customizationprefix":"adx"},
{"@odata.etag":"W/"23382108"","installedon":"2018-10-27T08:59:37Z","friendlyname":"Dynamics 365 Portals - Portal Dependencies","solutionid":"2b2711c5-0489-48f3-848c-1db5ee9f2a37","publisher1.customizationprefix":"msa"},
{"@odata.etag":"W/"23357506"","installedon":"2018-10-27T08:58:37Z","friendlyname":"Dynamics 365 Portals - Bing Maps Helper","solutionid":"cb1d69c2-b5c8-4dca-831c-5df952608517","publisher1.customizationprefix":"adx"},
{"@odata.etag":"W/"1839080"","installedon":"2018-10-27T08:58:24Z","friendlyname":"Dynamics 365 Portals - Get Record ID Workflow Helper","solutionid":"19ca57b7-4b06-44fe-bb06-73b2c8ed11fc","publisher1.customizationprefix":"adx"}]}
Contact us: https://www.gmrit-solutions.com


