Menu Close

Blog

Slide 1

Microsoft Business Applications Blogposts, YouTube Videos and Podcasts

Helping Businesses with Technology

Slide 2

Microsoft Business Applications Blogposts, YouTube Videos and Podcasts

Helping Businesses with Technology

Slide 3

Microsoft Business Applications Blogposts, YouTube Videos and Podcasts

Helping Businesses with Technology

previous arrow
next arrow

{How to} Use Access Team Template on Modern UI Dynamics 365 Sales

Hello Everyone,

Today I am going to share how to use Access Team Template on Modern UI of Dynamics 365 Sales.

Let’s get’s started

Super users or System Admin’s are get used to classic UI when using Access Team Templates, with the introduction of Modern UI how we can use the Access Team Plates?

Let’s see in action.

First of all Login into www.make.powerapps.com

Select the environment of where you want to use the Access Team Templates.

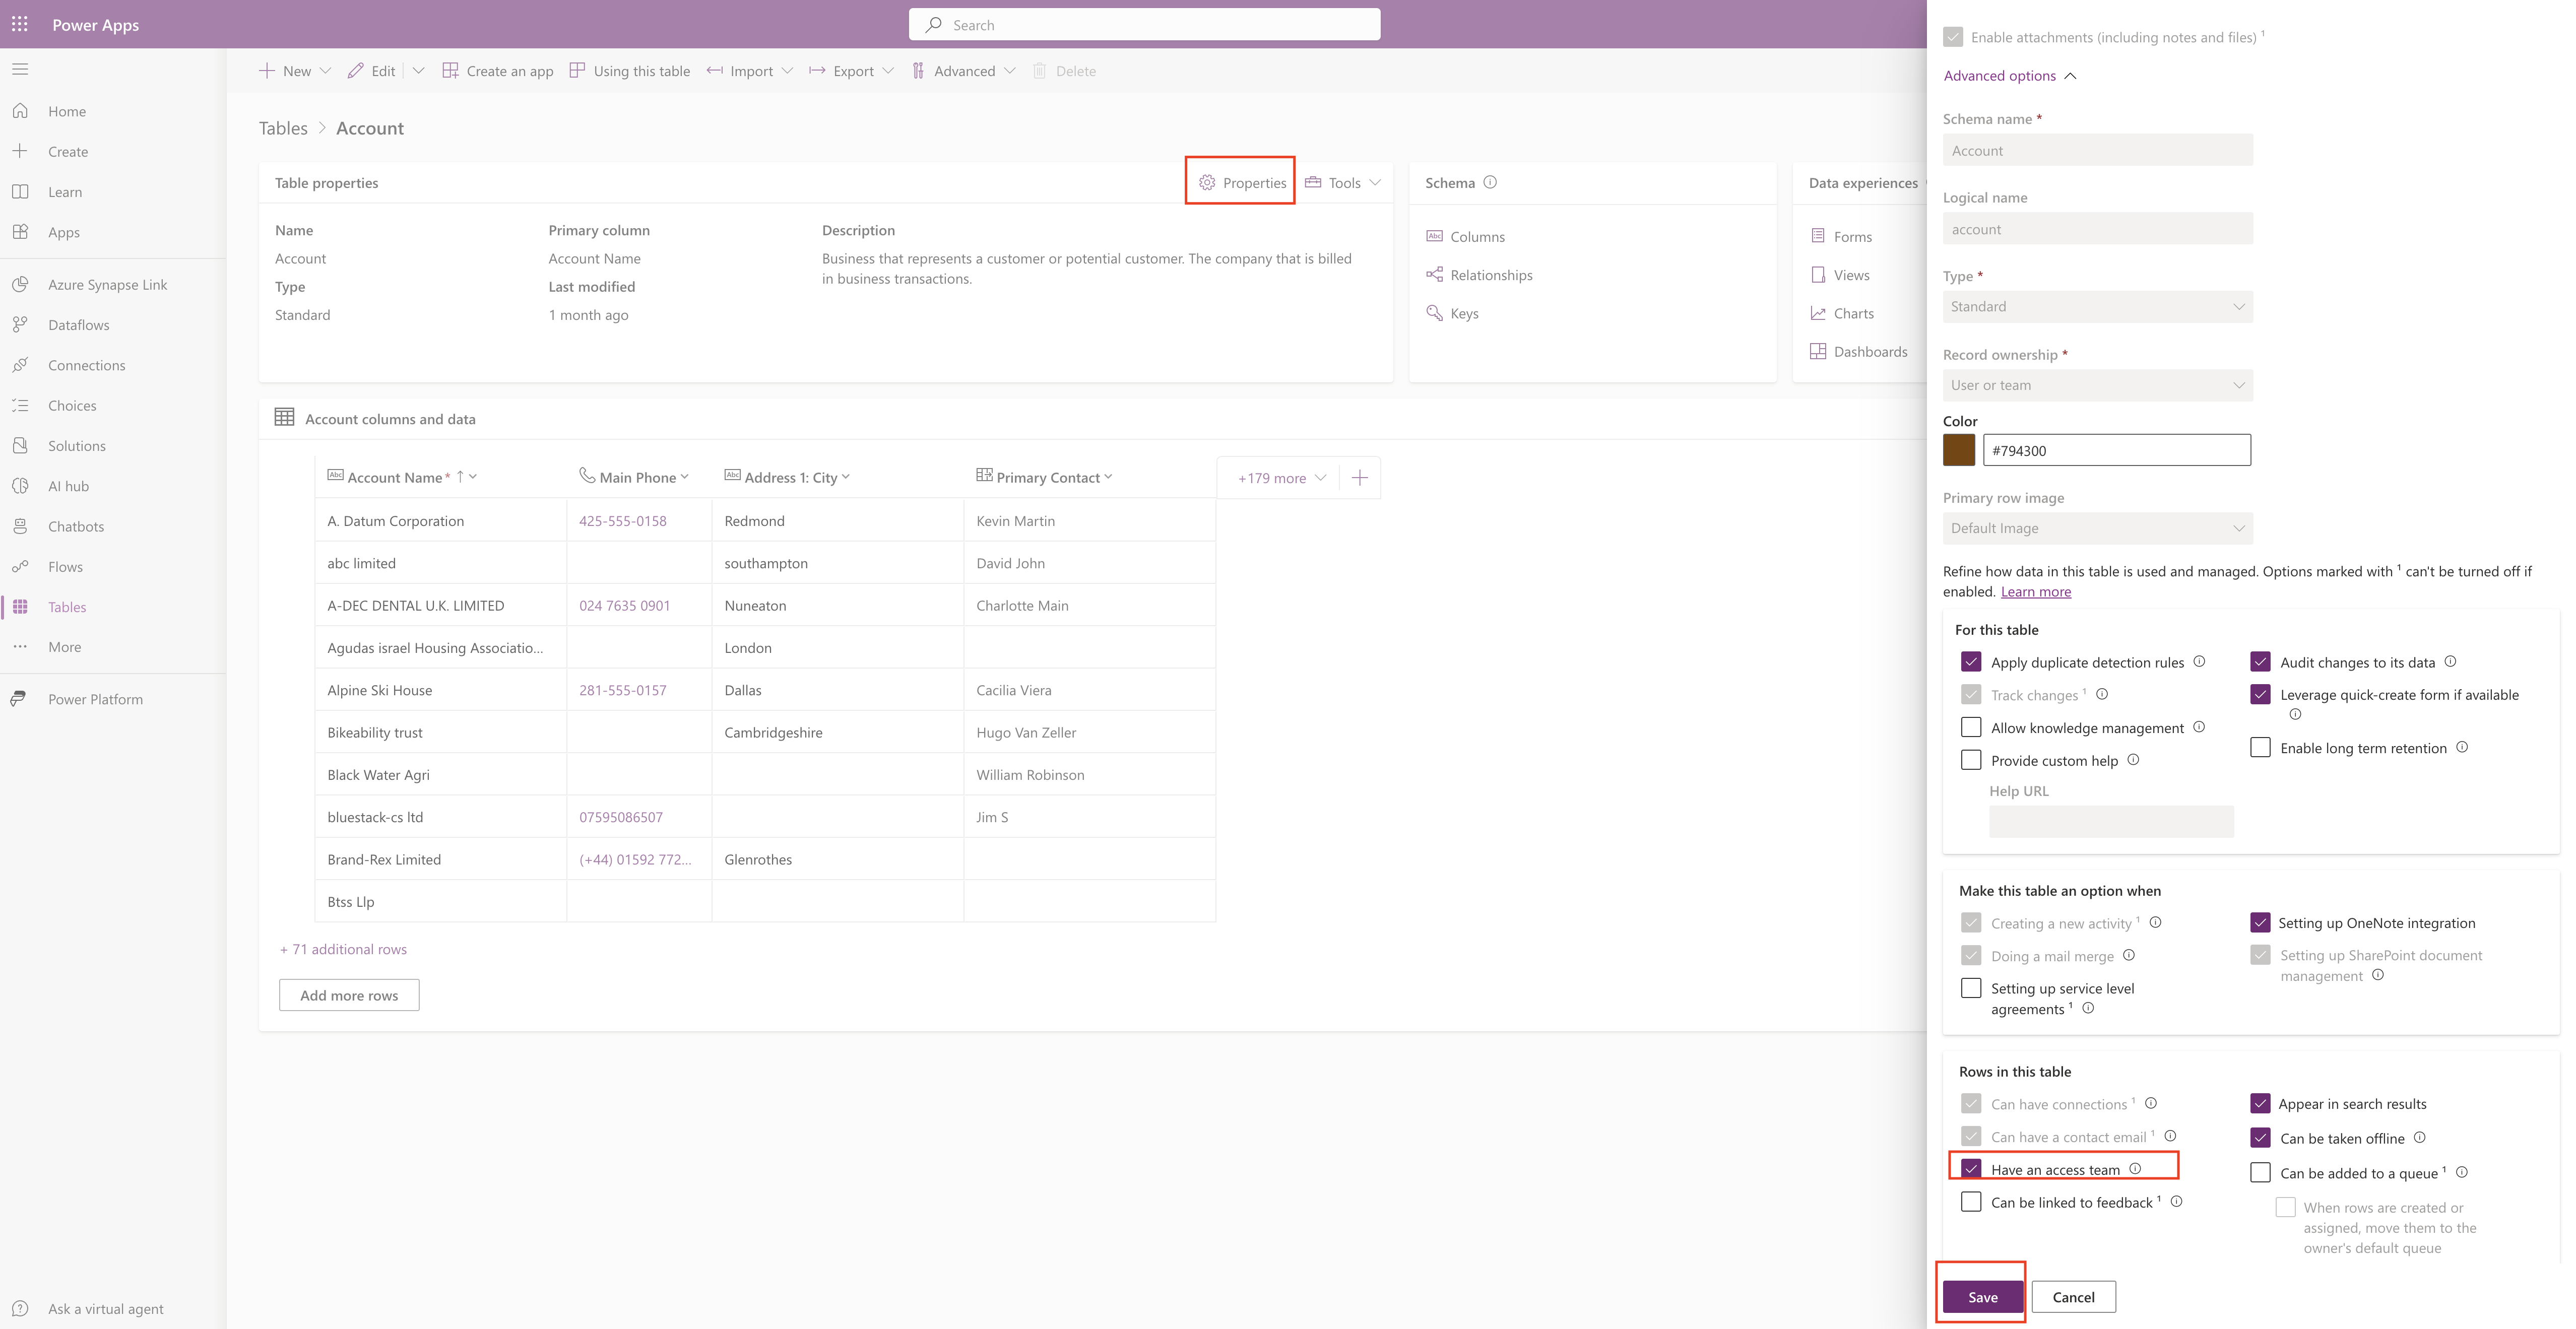
In this example open the Account Table and click on Properties and check the have an access team

Then click SAVE.

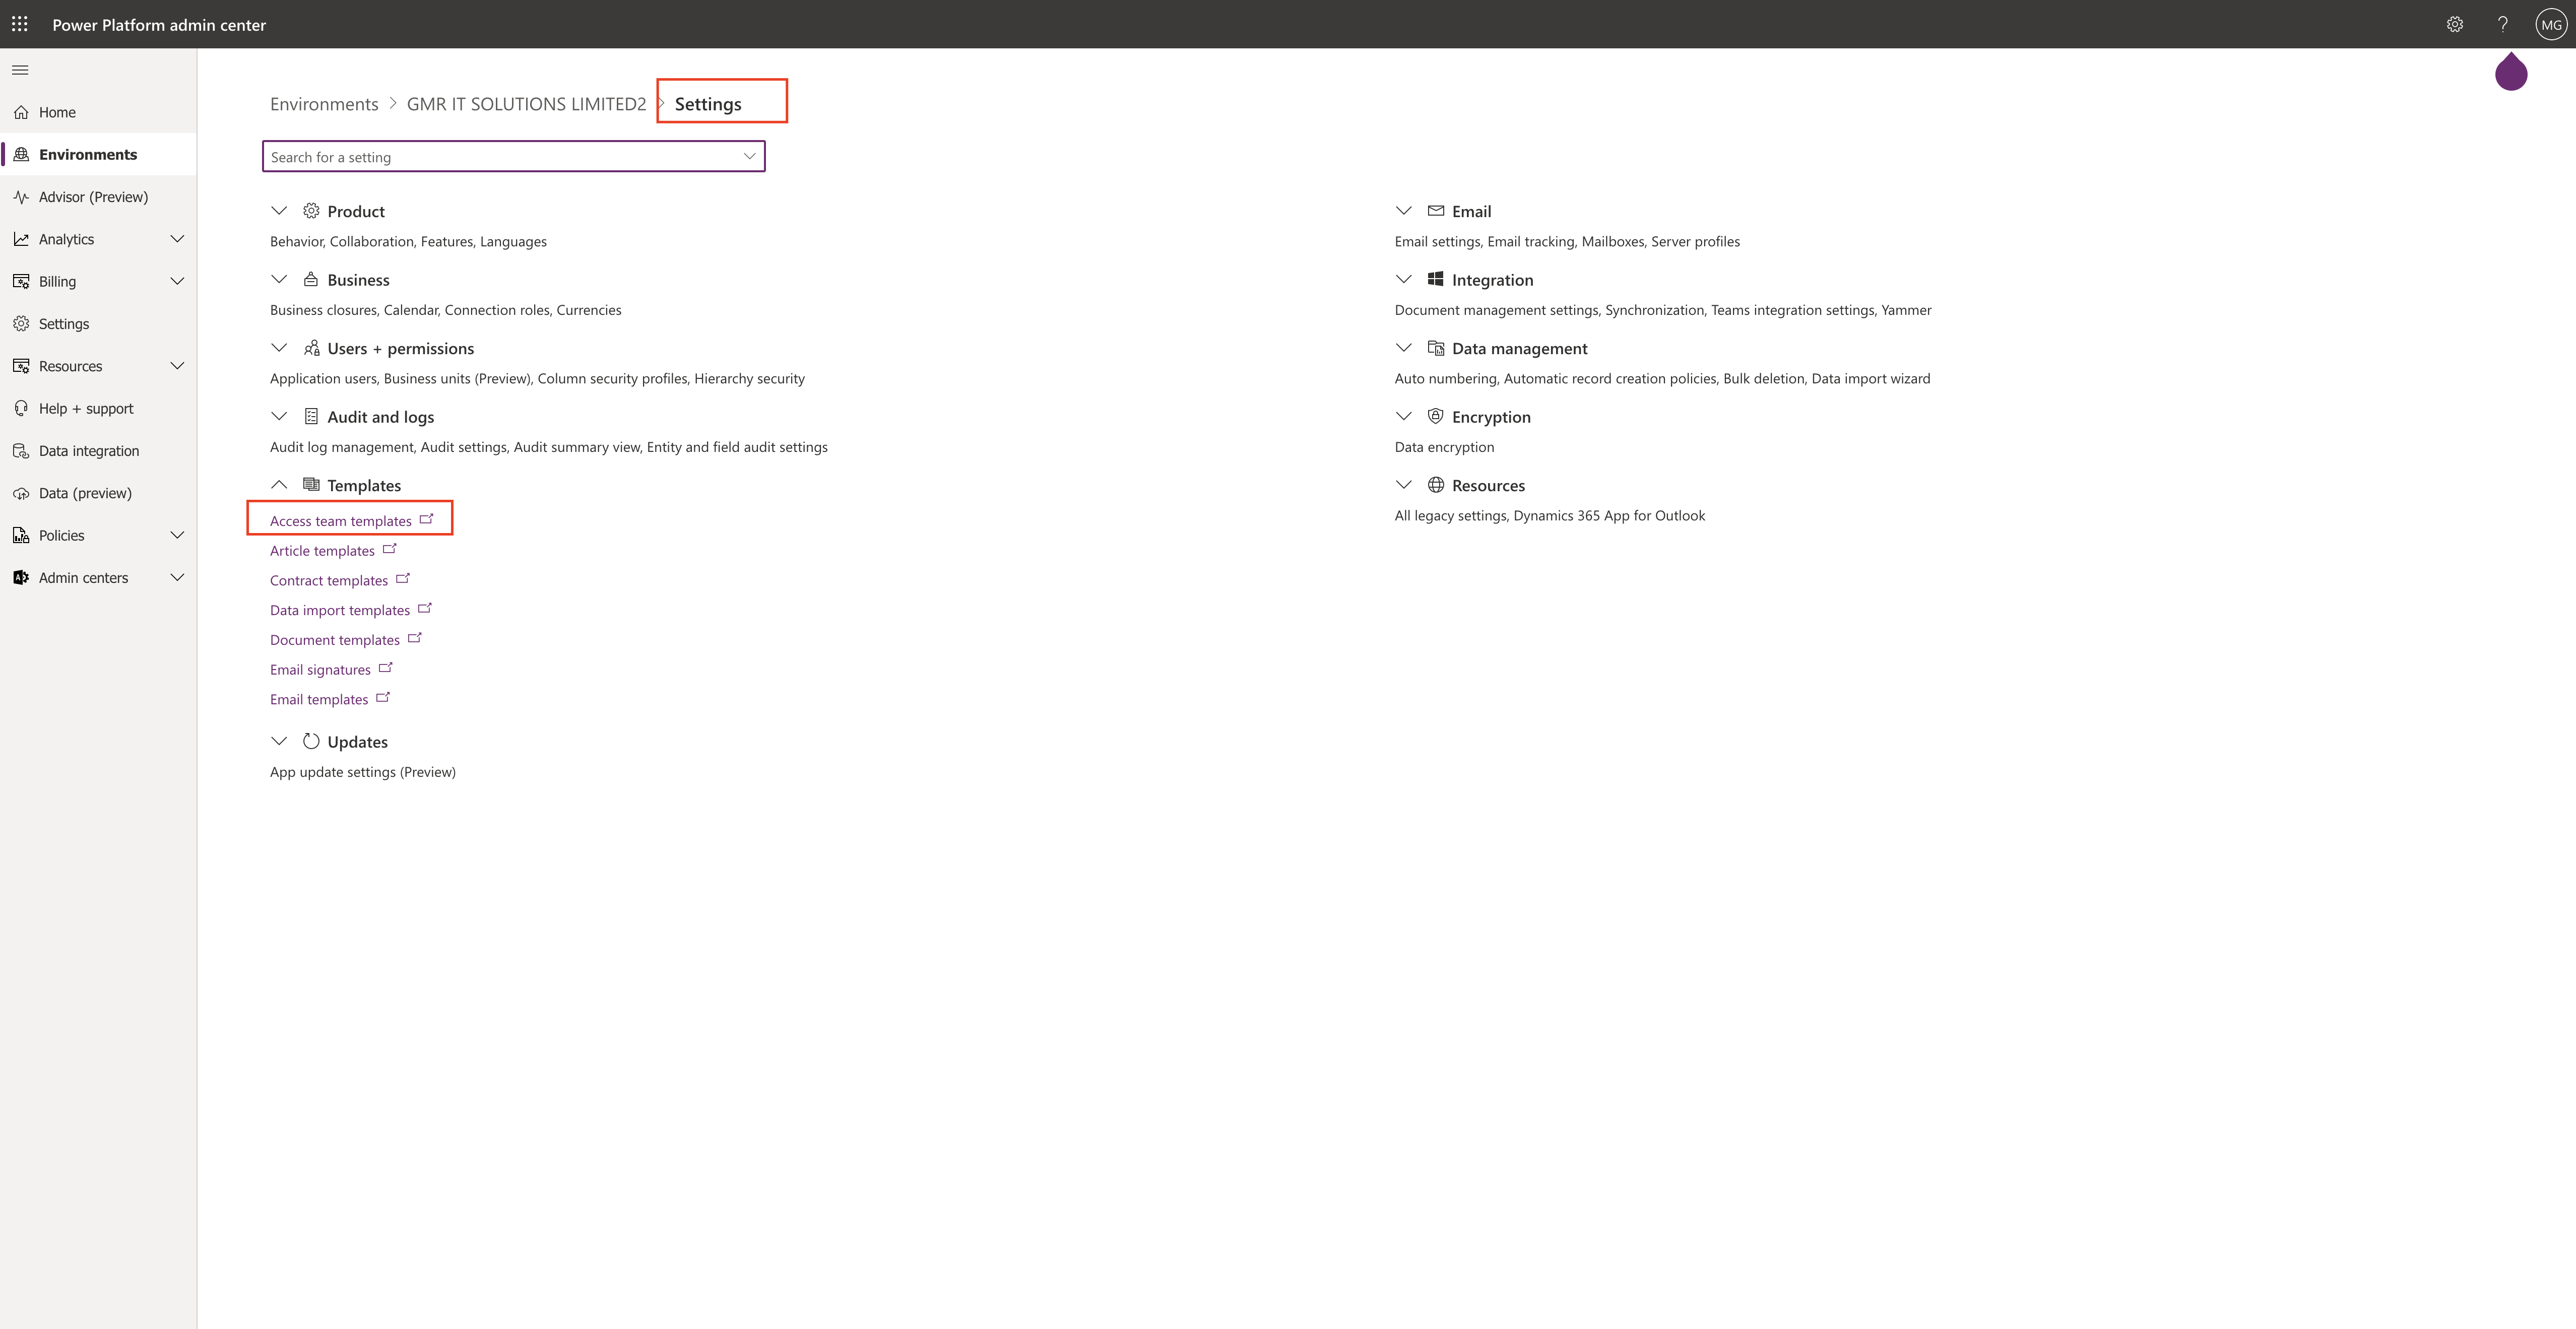
Head over to the Power Platform Admin Center: www.admin.powerplatform.onmicrosoft.com

Go to the Environment Settings and Expand Templates then click on the Access Team Templates.

Then a new window will popup and configure the Access Team Template with:

Name

Entity

Description

Save the template.

Now we have created Access Team Template and if you need to move this configuration into another environment.

Then create a solution from Maker Power Platform Portal.

Create a Solution.

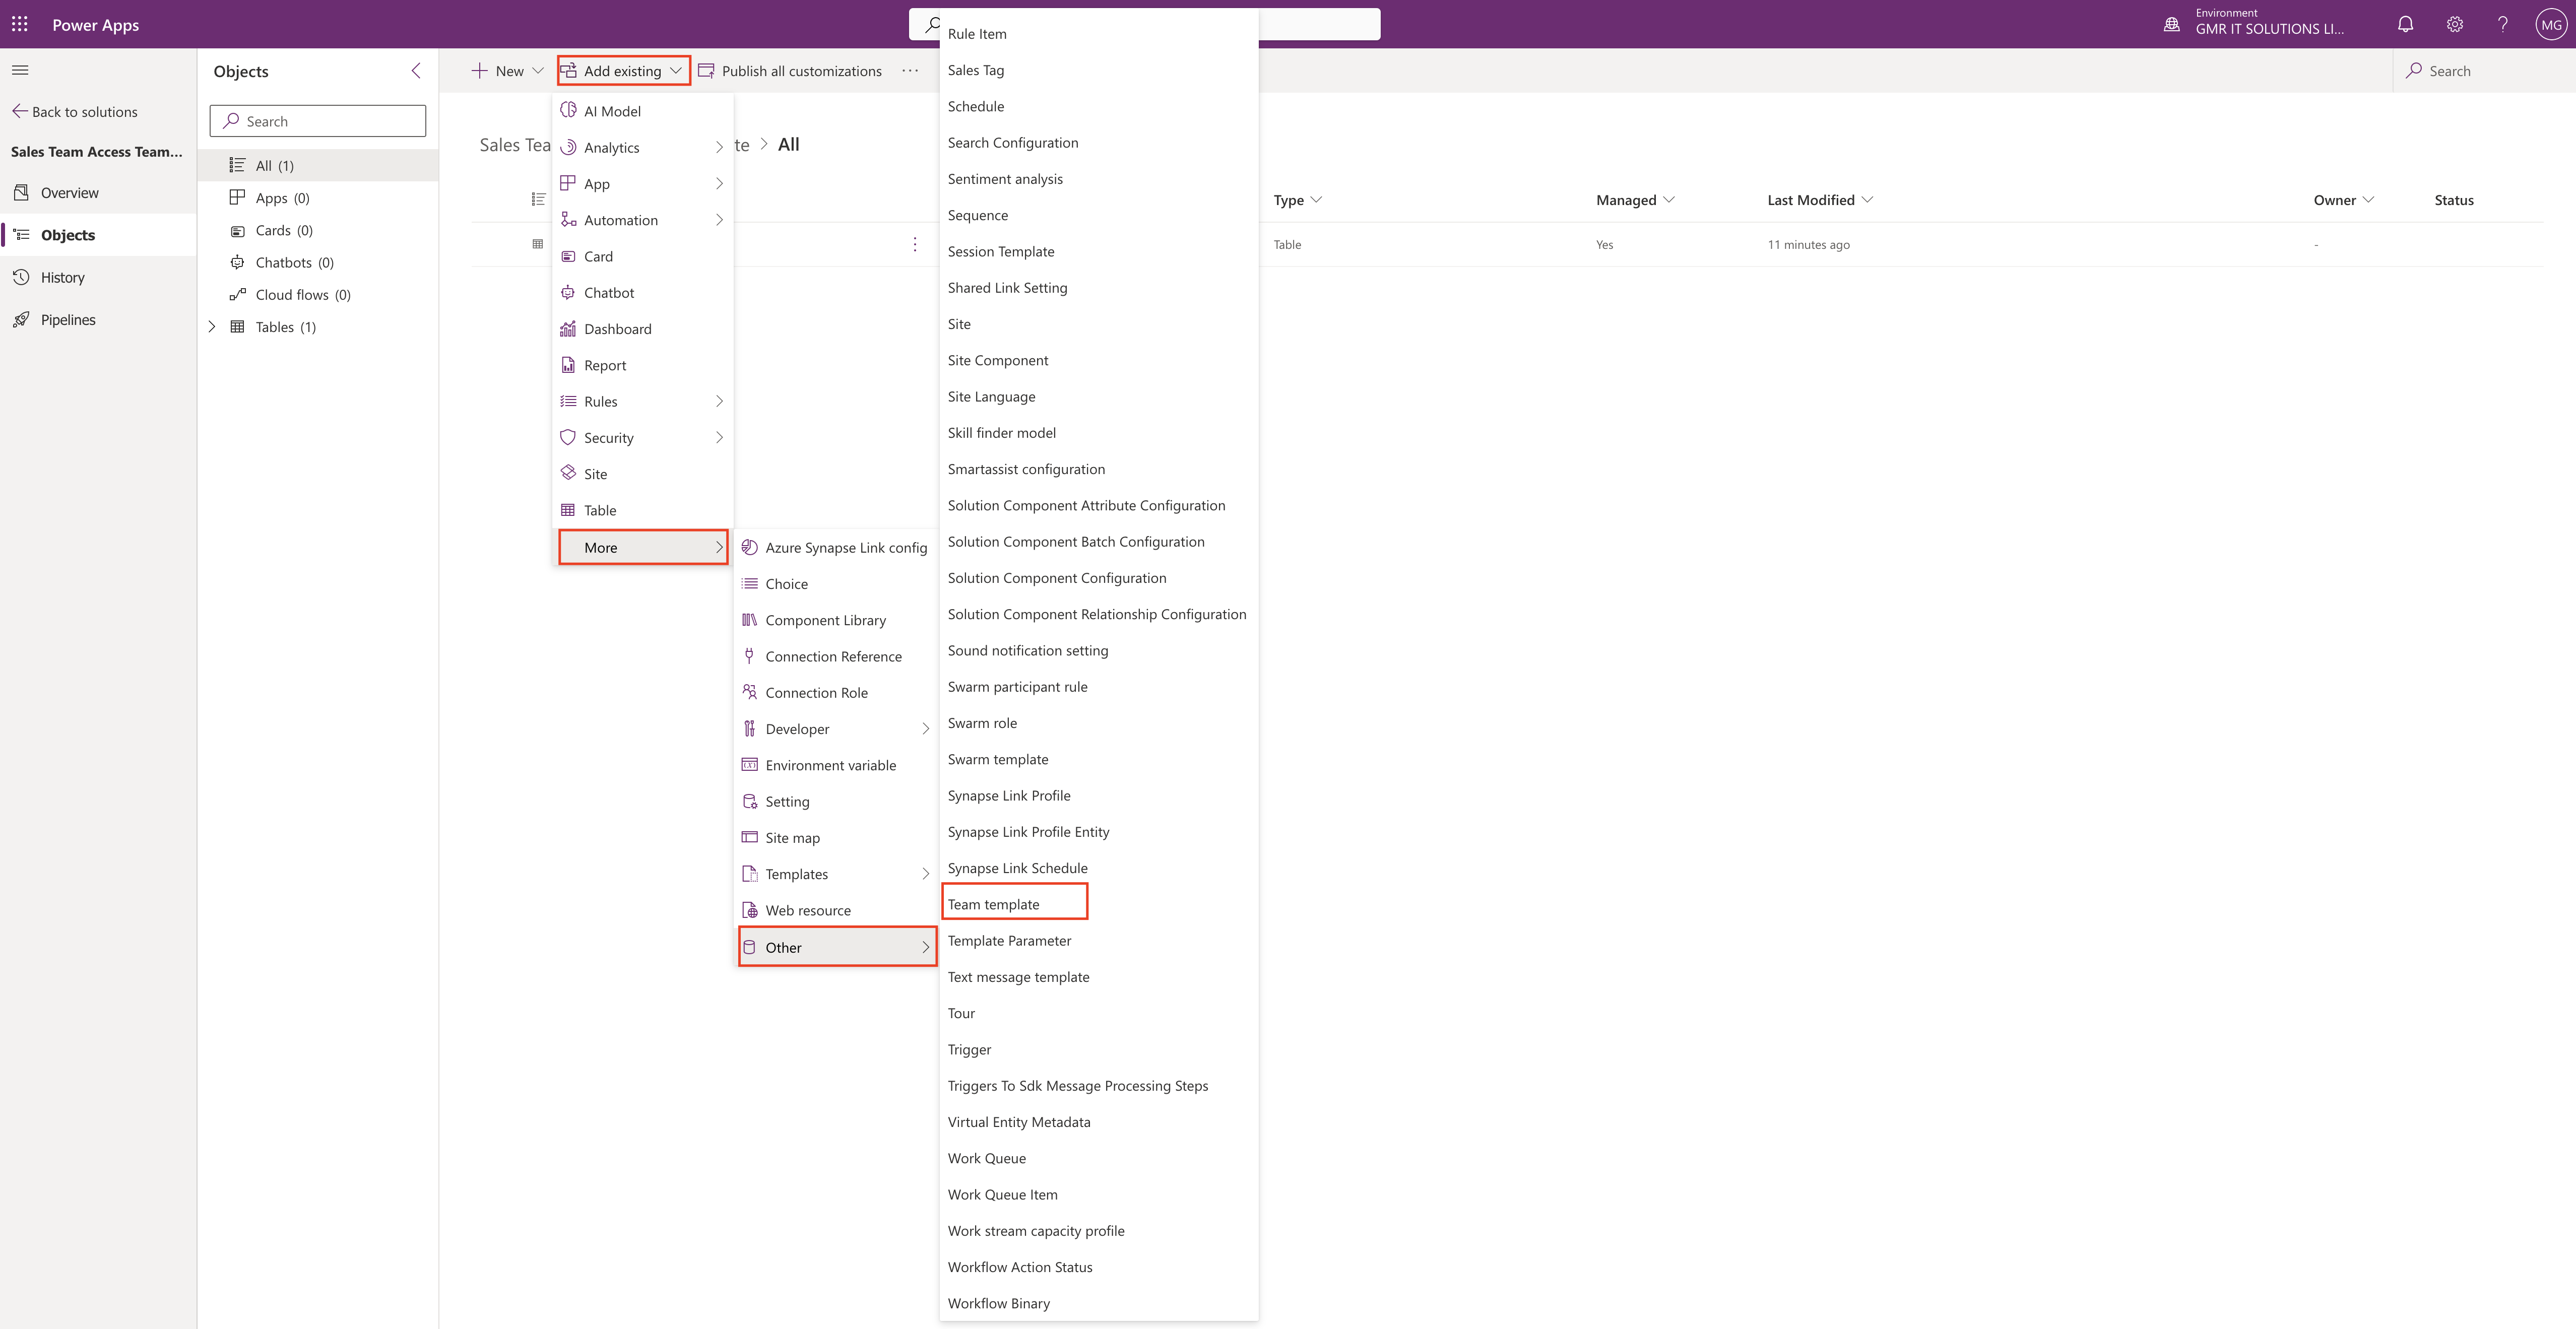
Then add the Template to it by going into add existing and select OTHERS then select the Team Template.

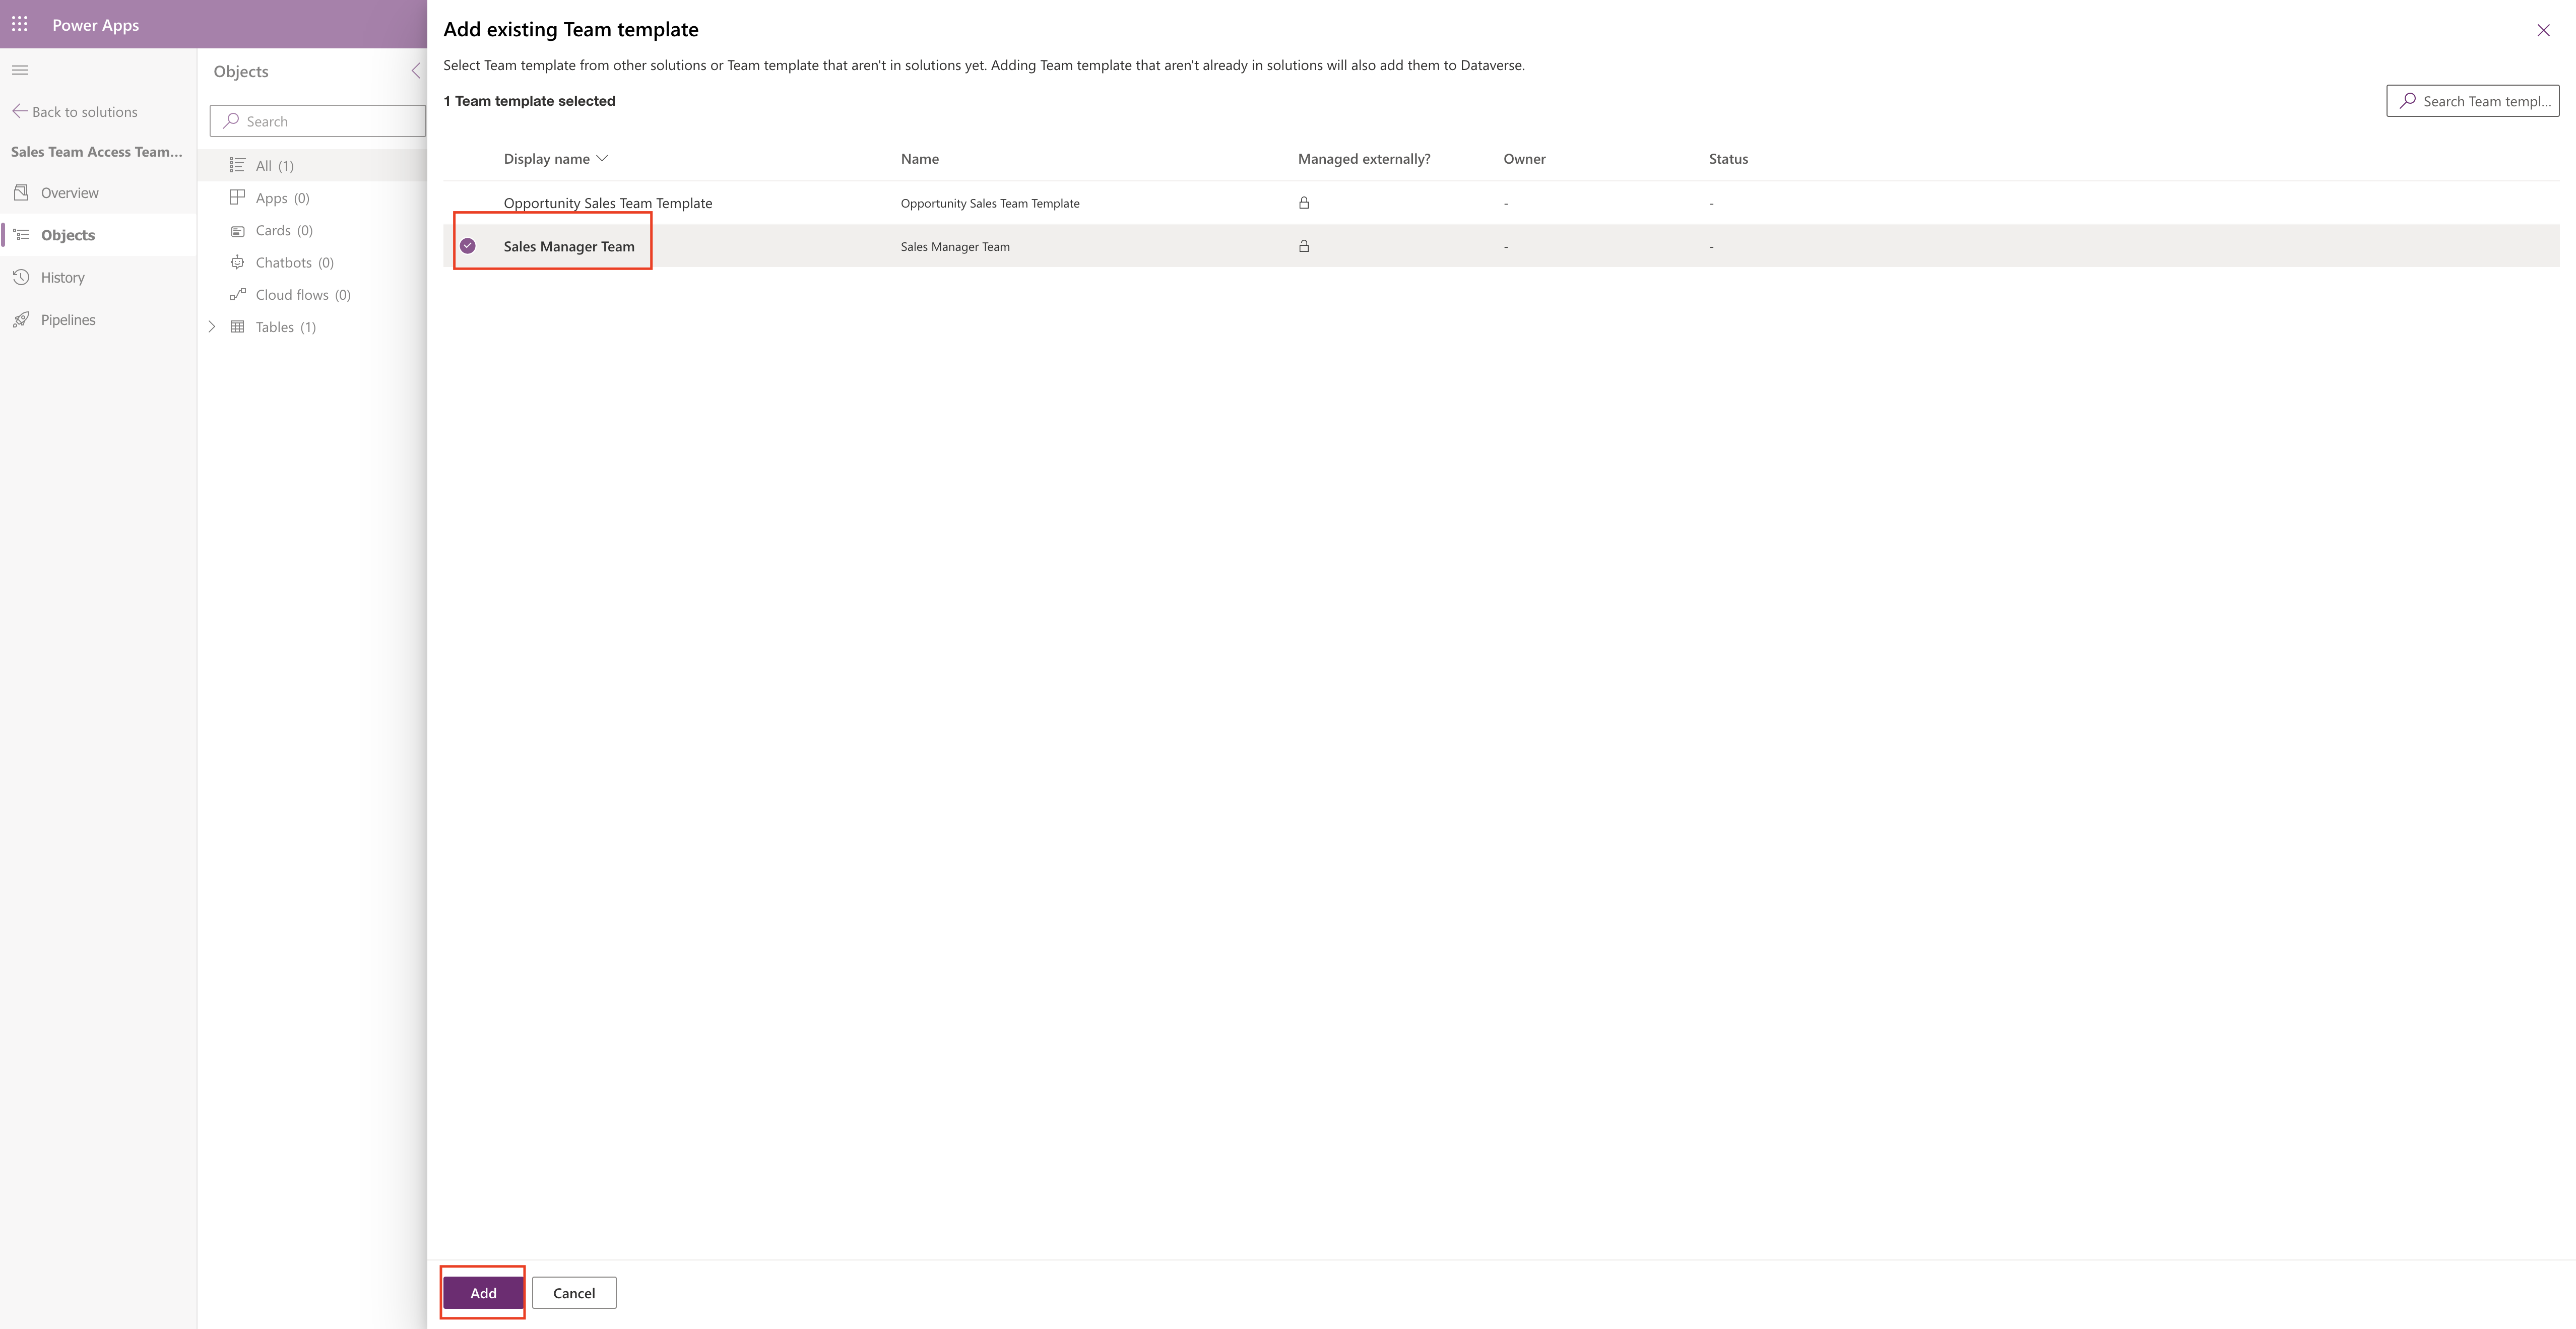
Then select the Sales Manager Team template and the Add it.

Now next step is to add the form where we need to embed the Access Team Template on the subgrid.

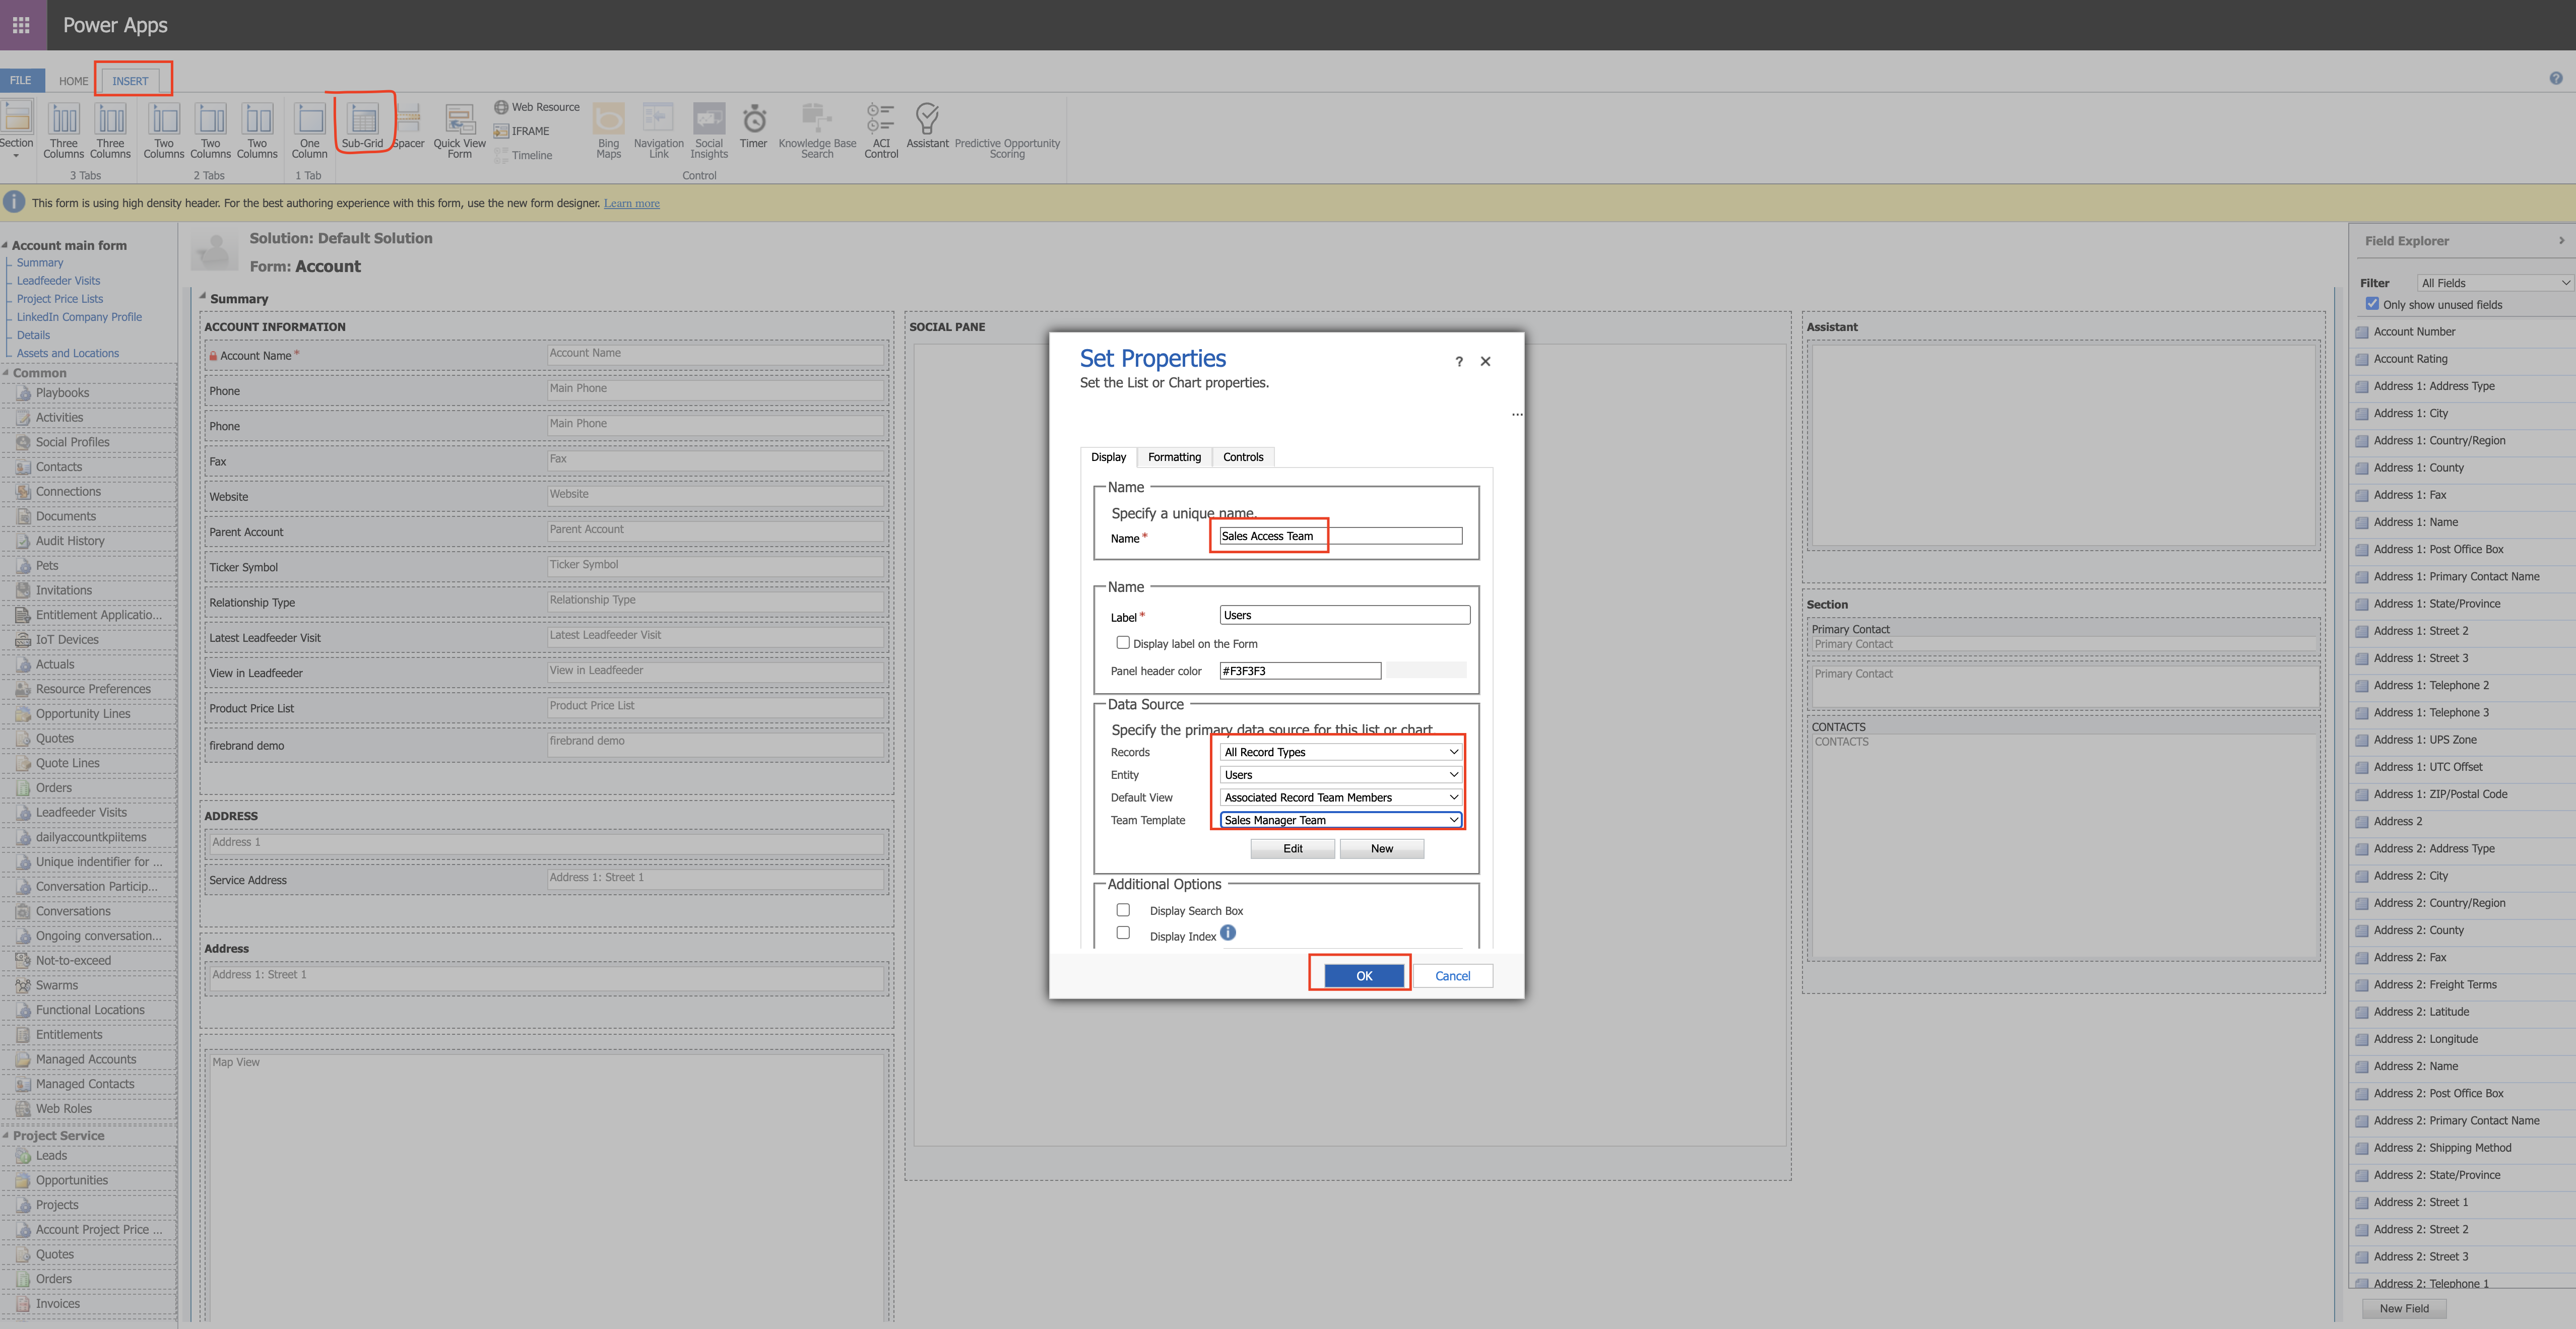
Go to the classic view of the customization and open the Account Table and the main form add the subgrid by clicking on the Inser Tab.

Configure the name and associated records and save.

On Account table the form changes needs to be added then publish the changes on the form.

Now head back to the solution and publish all customizations.

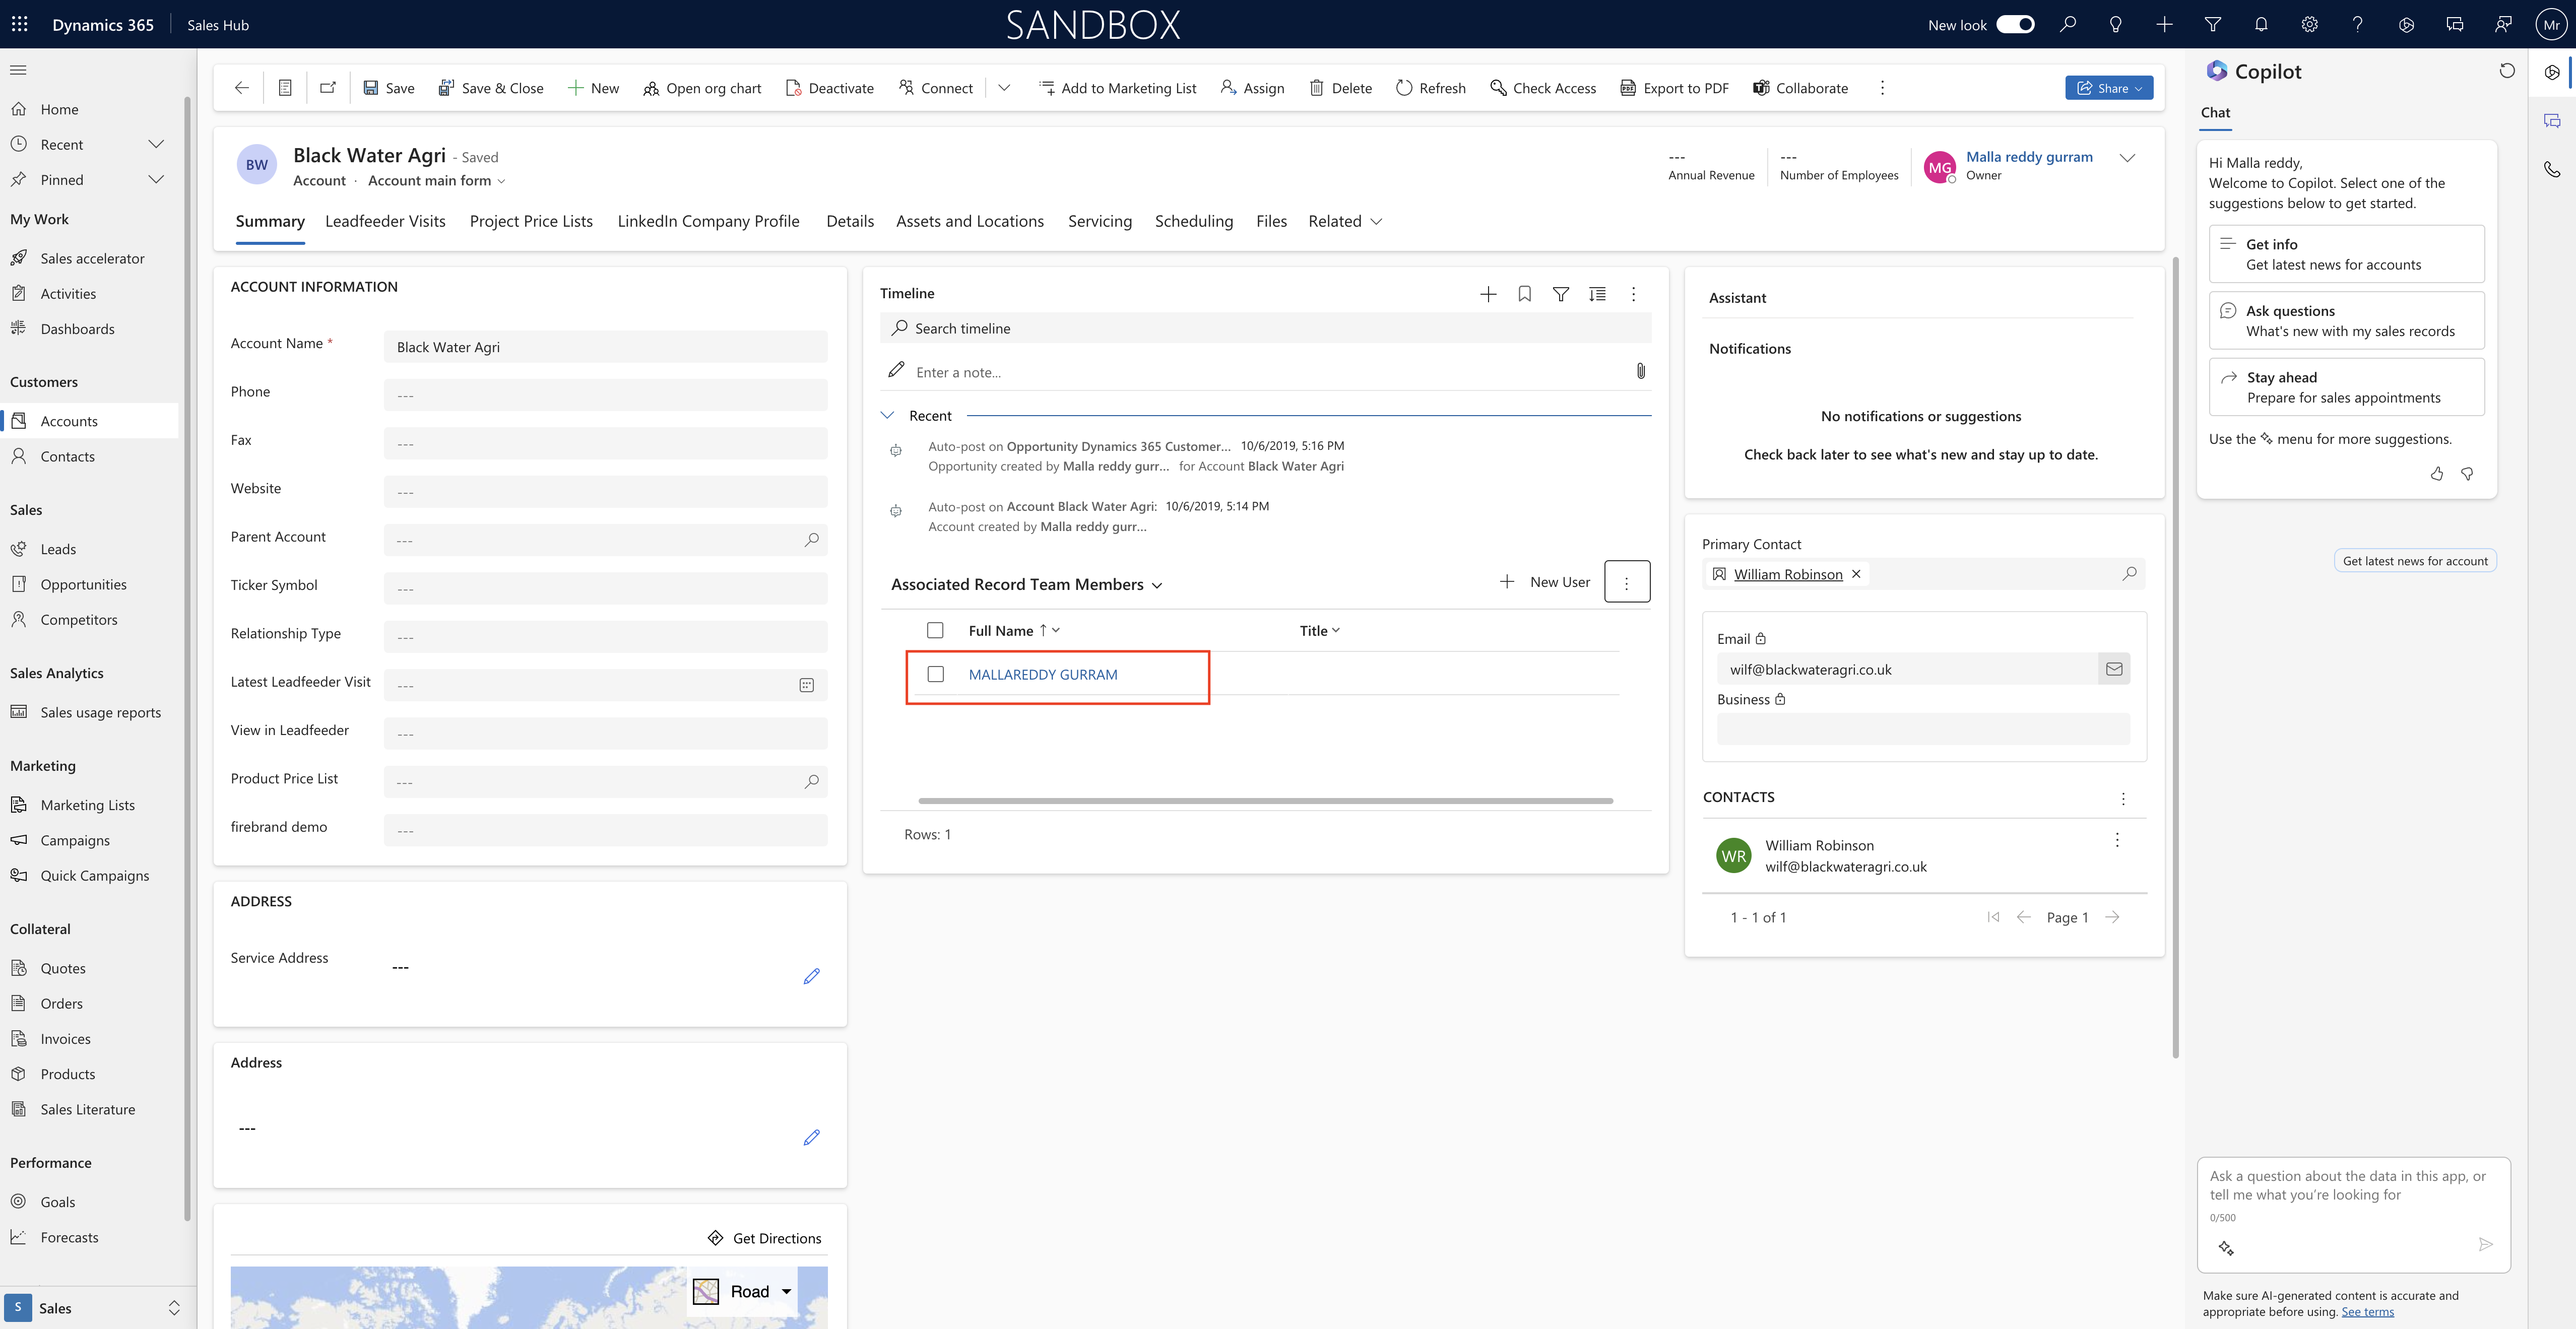
Then if you want to publish the changes in another environment then export the solution as unmanaged or managed and import into another environment then you will be able to see the access team on the Account record.

That’s it for today.

I hope this helps.

Malla Reddy Gurram
#365BlogPostsin365Days

Share this:

{How to} Allow users to get AI suggestions when creating formula columns

Hello Everyone,

Today I am going show preview feature of how to allow users to get AI suggestions when creating formula columns.

Let’s get’s started.

When you are creating canvas apps and you want to add formula to the canvas app with the use of AI generative Suggestions you will get the required suggestion from it.

How do you get that?

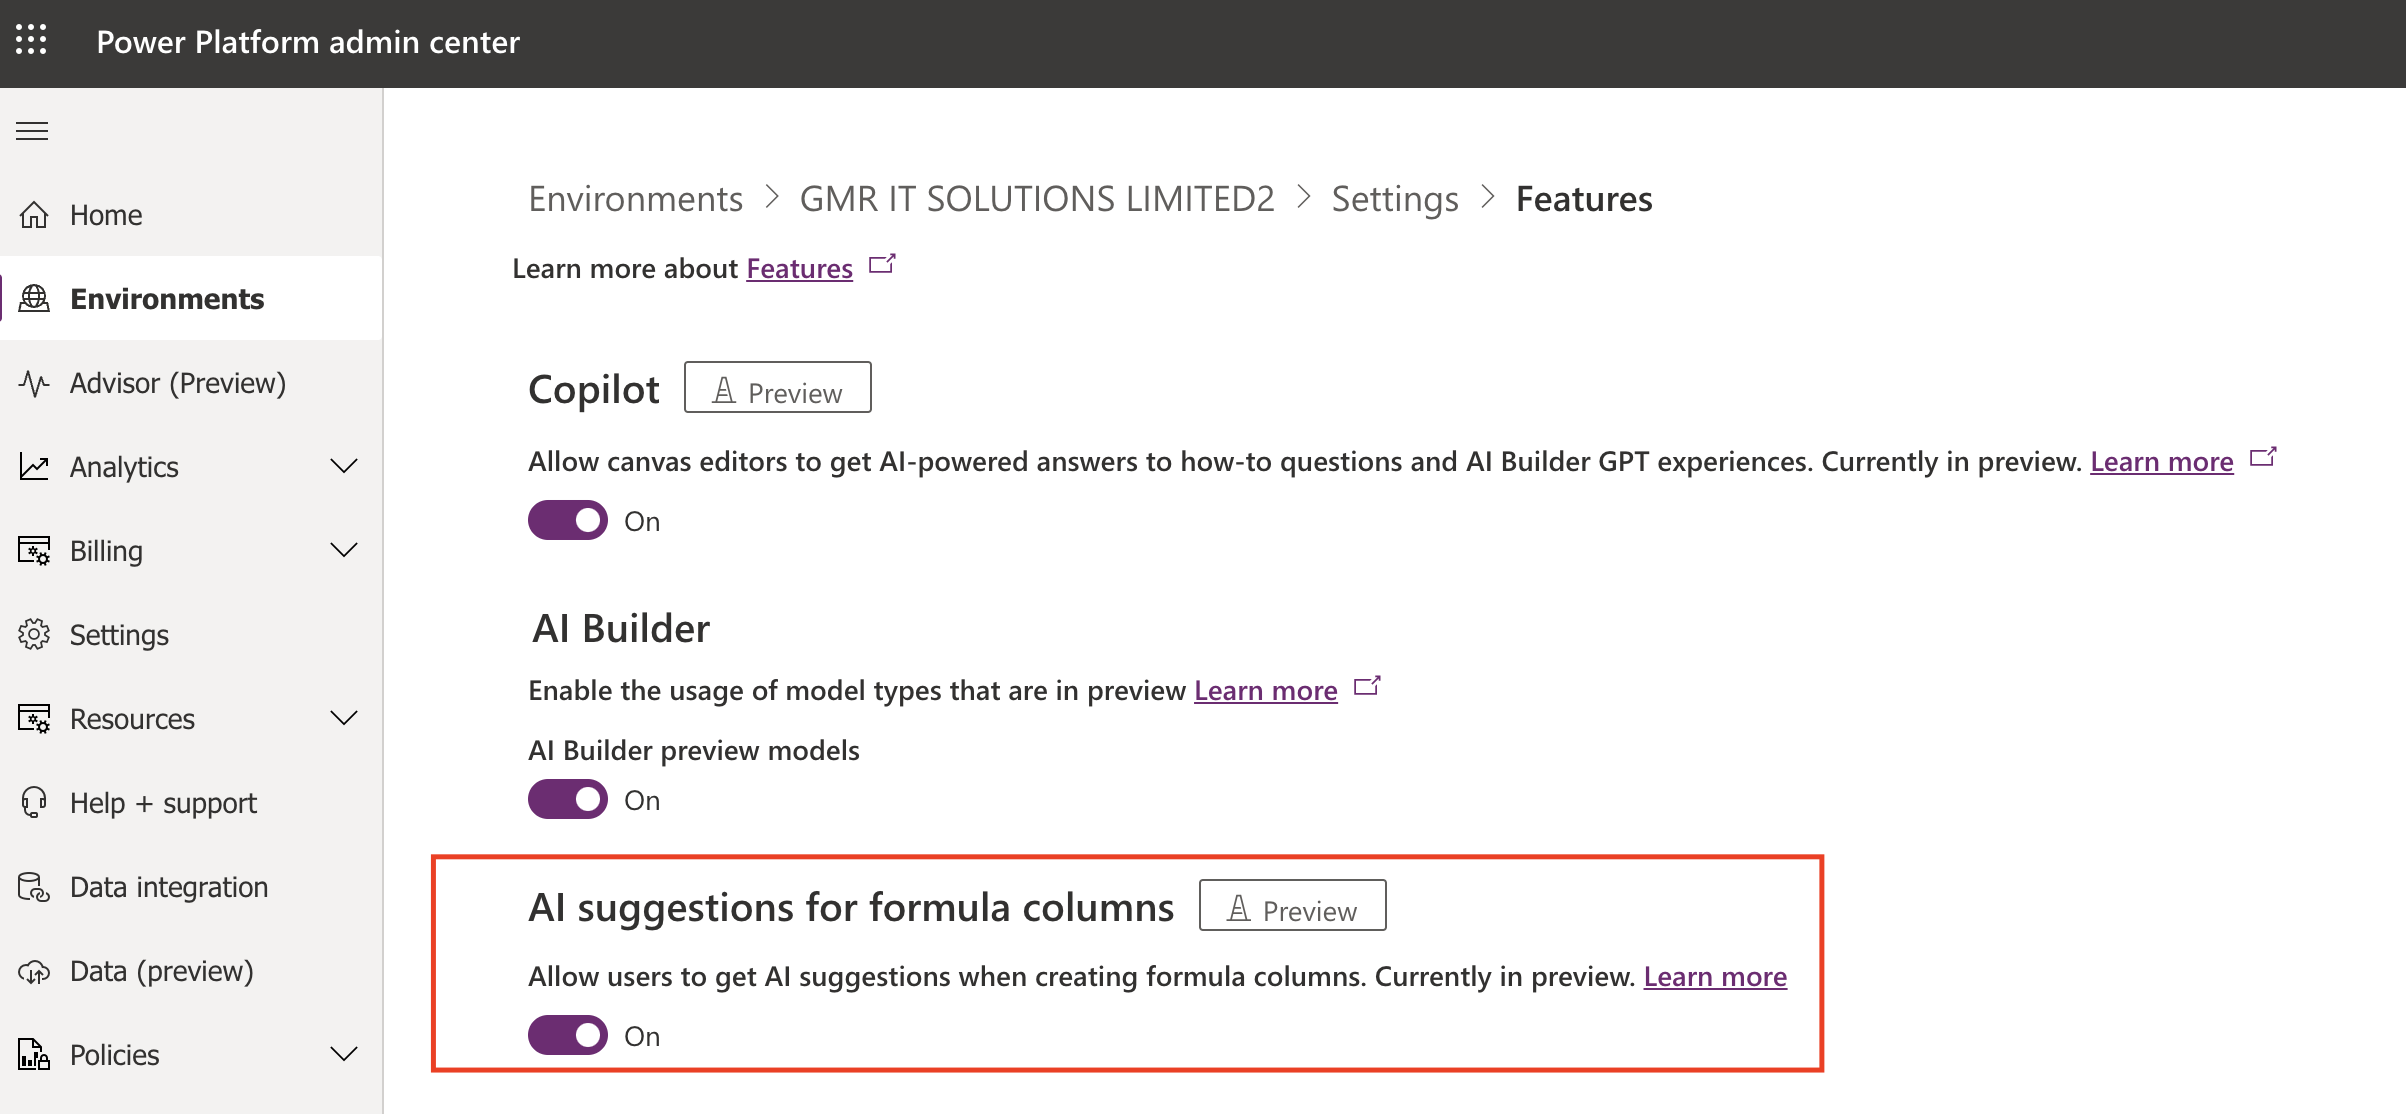
Login into Power Platform Admin Center.

Then go to settings and Features:

Turn ON AI Suggestions for formula Columns.

That’s it for today.

I hope this helps.

Malla Reddy Gurram(@UK365GUY)
#365BlogPostsin365Days

Share this:

{How to} Choose a session from mulitple sessions event in Dynamics 365 Marketing

Hello Everyone,

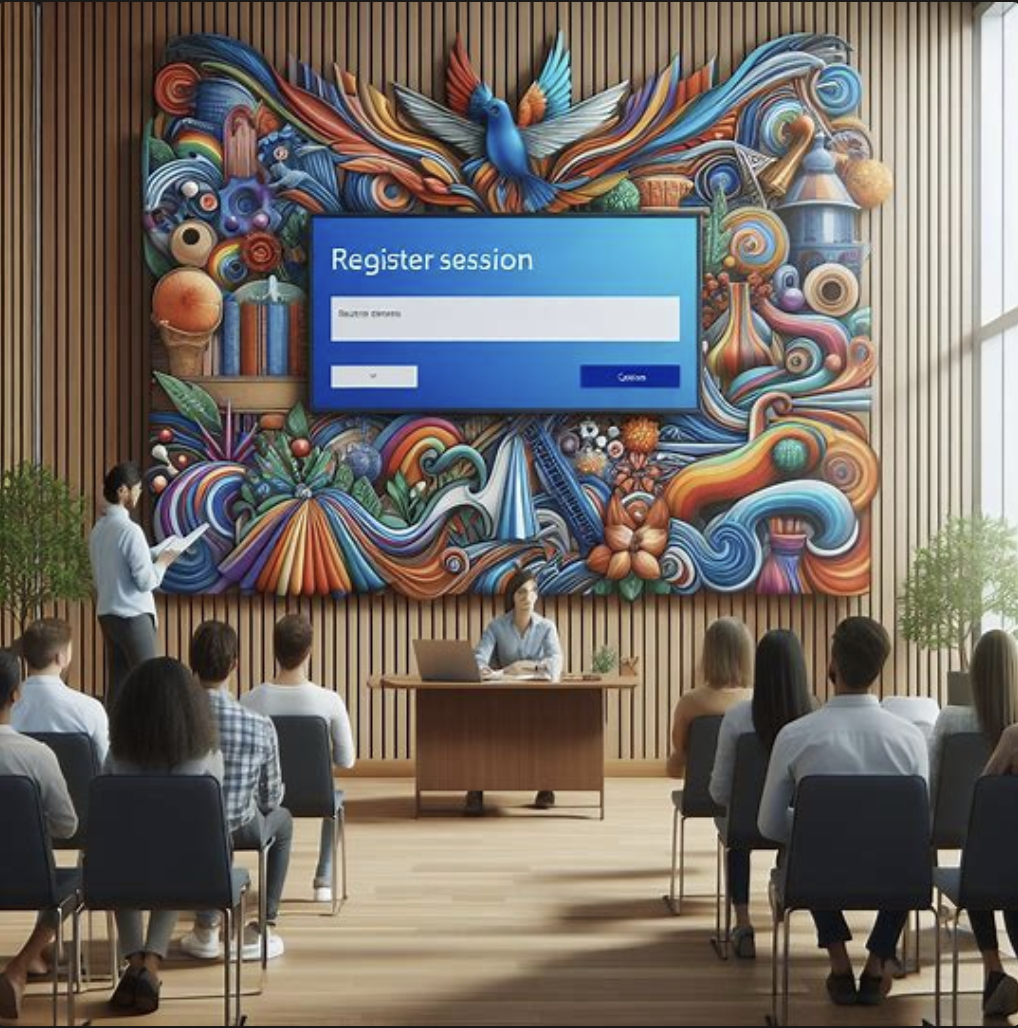
Today I am going to share my thoughts on how to register for session from multiple sessions event on Dynamics 365 Marketing.
Let’s get’s started.

Boosting Participation and simplifying planning for events with multiple session based registrations in Dynamics 365 Marketing involves leveraging the platform’s capabilities to manage complex event structures efficiently.

Dynamics 365 Marketing provides a seamless integration of event planning, execution and follow up processes making it easier for organization to host events that cater to diverse audience interests.

Here’s a strategy to maximize participation and streamline event planning using Dynamics 365 Marketing.
Step 1: Create Your Event Framework

Define Event Objectives: Clearly define what you aim to achieve with your event, including learning outcomes, networking opportunities or showcasing products/services.

Event Setup: Utilize Dynamics 365 Marketing to set up your main event, detailimng its overall theme, duration and key information. This serves as the umbrella for all the sessions.

Step 2: Organize Sessions

Session Planning: Plan various sessions within the main event, catering to different topics expertise levels, or audience segments. Each session can have its unique set of speakers, timings and capacity limits.

Session-Based Registration: Enable attendees to register for individual sessions. This approach allows participants to customize their event experience based on their interests, increasing overall engagement.

Step 3: Personalize Marketing Communications

Segment: Use Dynamics 365 Marketing to segment your audience based on their preferences, past behaviors or demographic information. This enables targeted marketing efforts.

Customized Invitations: Send personalized invitations for the event or specific sessions. Highlight the value and relevance of sessions to each segment to increase interest and registrations.

Step 4: Simplify Registrations

User-Friendly Registration Process: Ensure the registration portal is intutive, providing clear information on sessions, speakers and other event details. Allow attendees to register for multiple session easily.

Automated Confirmation and Reminders: Set up automated confimation emails and reminders for registered sessions, including calendars invites. This helps in keeping the event on top of attendees minds.

Step 5: Engage Attendees

Interactive Elements: Incorporate interactive elements such as Q&A Sessions,polls, or networking opportunities within each session to enhance engagement.

Real-Time Engagement: Use Dynamics 365 Marketing during the event to send real-time notifications or changes in the schedule, session reminders or additional information to enhancd the attendees experience.

Step 6: Analyze and Follow Up

Feedback Collection: Post-event collect feedback for each session and the overall event, Utilize Dynamics 365 Marketing to automate this process, sending surveys to attendees.

Event Analytics: Analyze participation rates, session populatity feedback scores and other metrics within Dynamics 365 Marketing to assess the event’s success and identify areas for improvement.

Step 7: Leverage Integration for Comprehensive Insights

Integration with Dynamics 365 Customer Insights: Utilize Integration to gain deeper insights into attendees behavior and preferences, enhancing future event planning and personalized marketing stratgies.

Sales and Marketing Synergy: Leverage the integration with Dynamics 365 Sales to follow up on leads generated from the event, ensuring a smooth transiton from event participation to sales engagement.
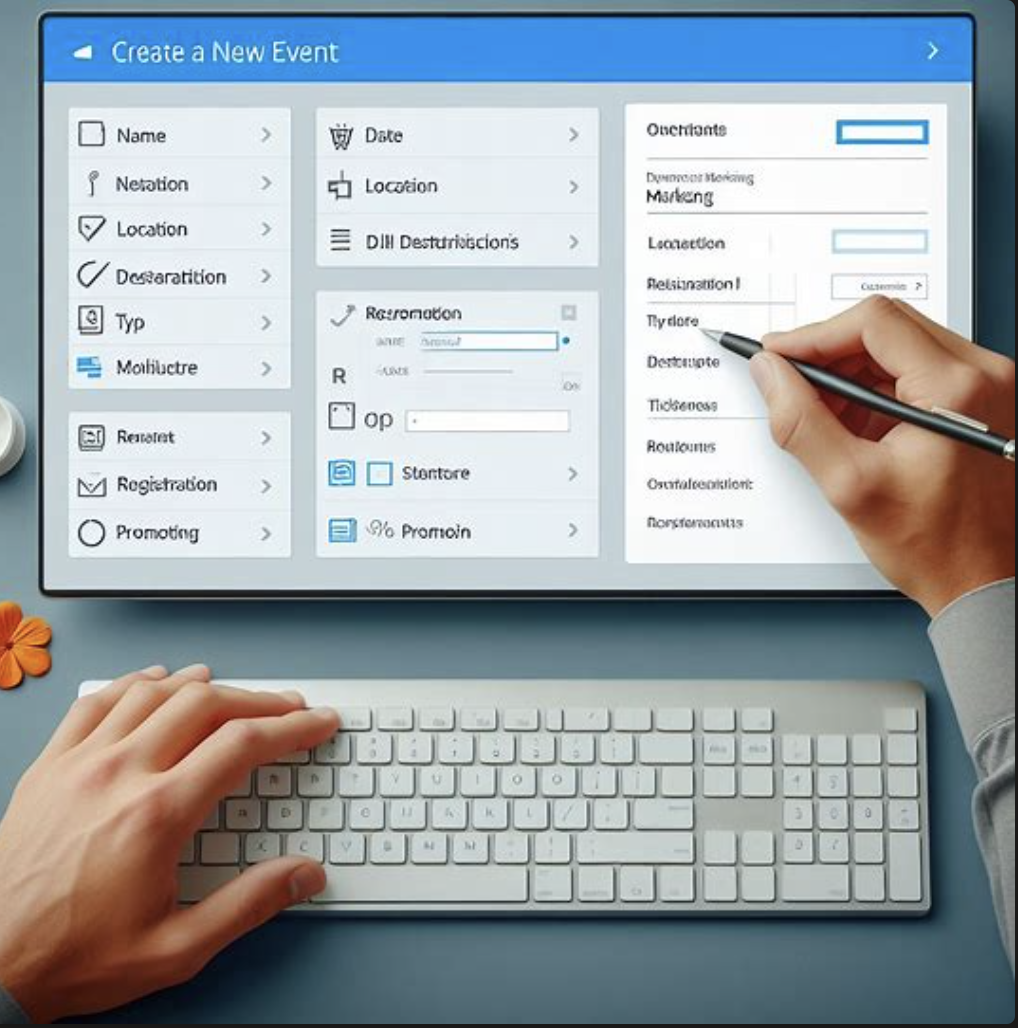
By following these steps and leveraging the robust features of Dynamics 365 Marketing for events with multiple session-based registrations, organizations can not only boost participation rates but also significantly simplify the planning and execution process.

This strategic approach ensures that each attendee has a personalized and engaging experience, leading to higher satisfaction and better outcomes for both the attendees and the organizers.

That’s it for today.

I hope this helps.

Malla Reddy Gurram
#365BlogPostsin365Days
Share this:

{How to} Create description using AI on Model Driven App

Hello Everyone,

Today I am going to show how to create a description using AI for Model Driven App.

Let’s get’s started.

When you create Model Driven App you may need to give it a name and optional description for the Model Driven App.

How to generate description for your model driven App?

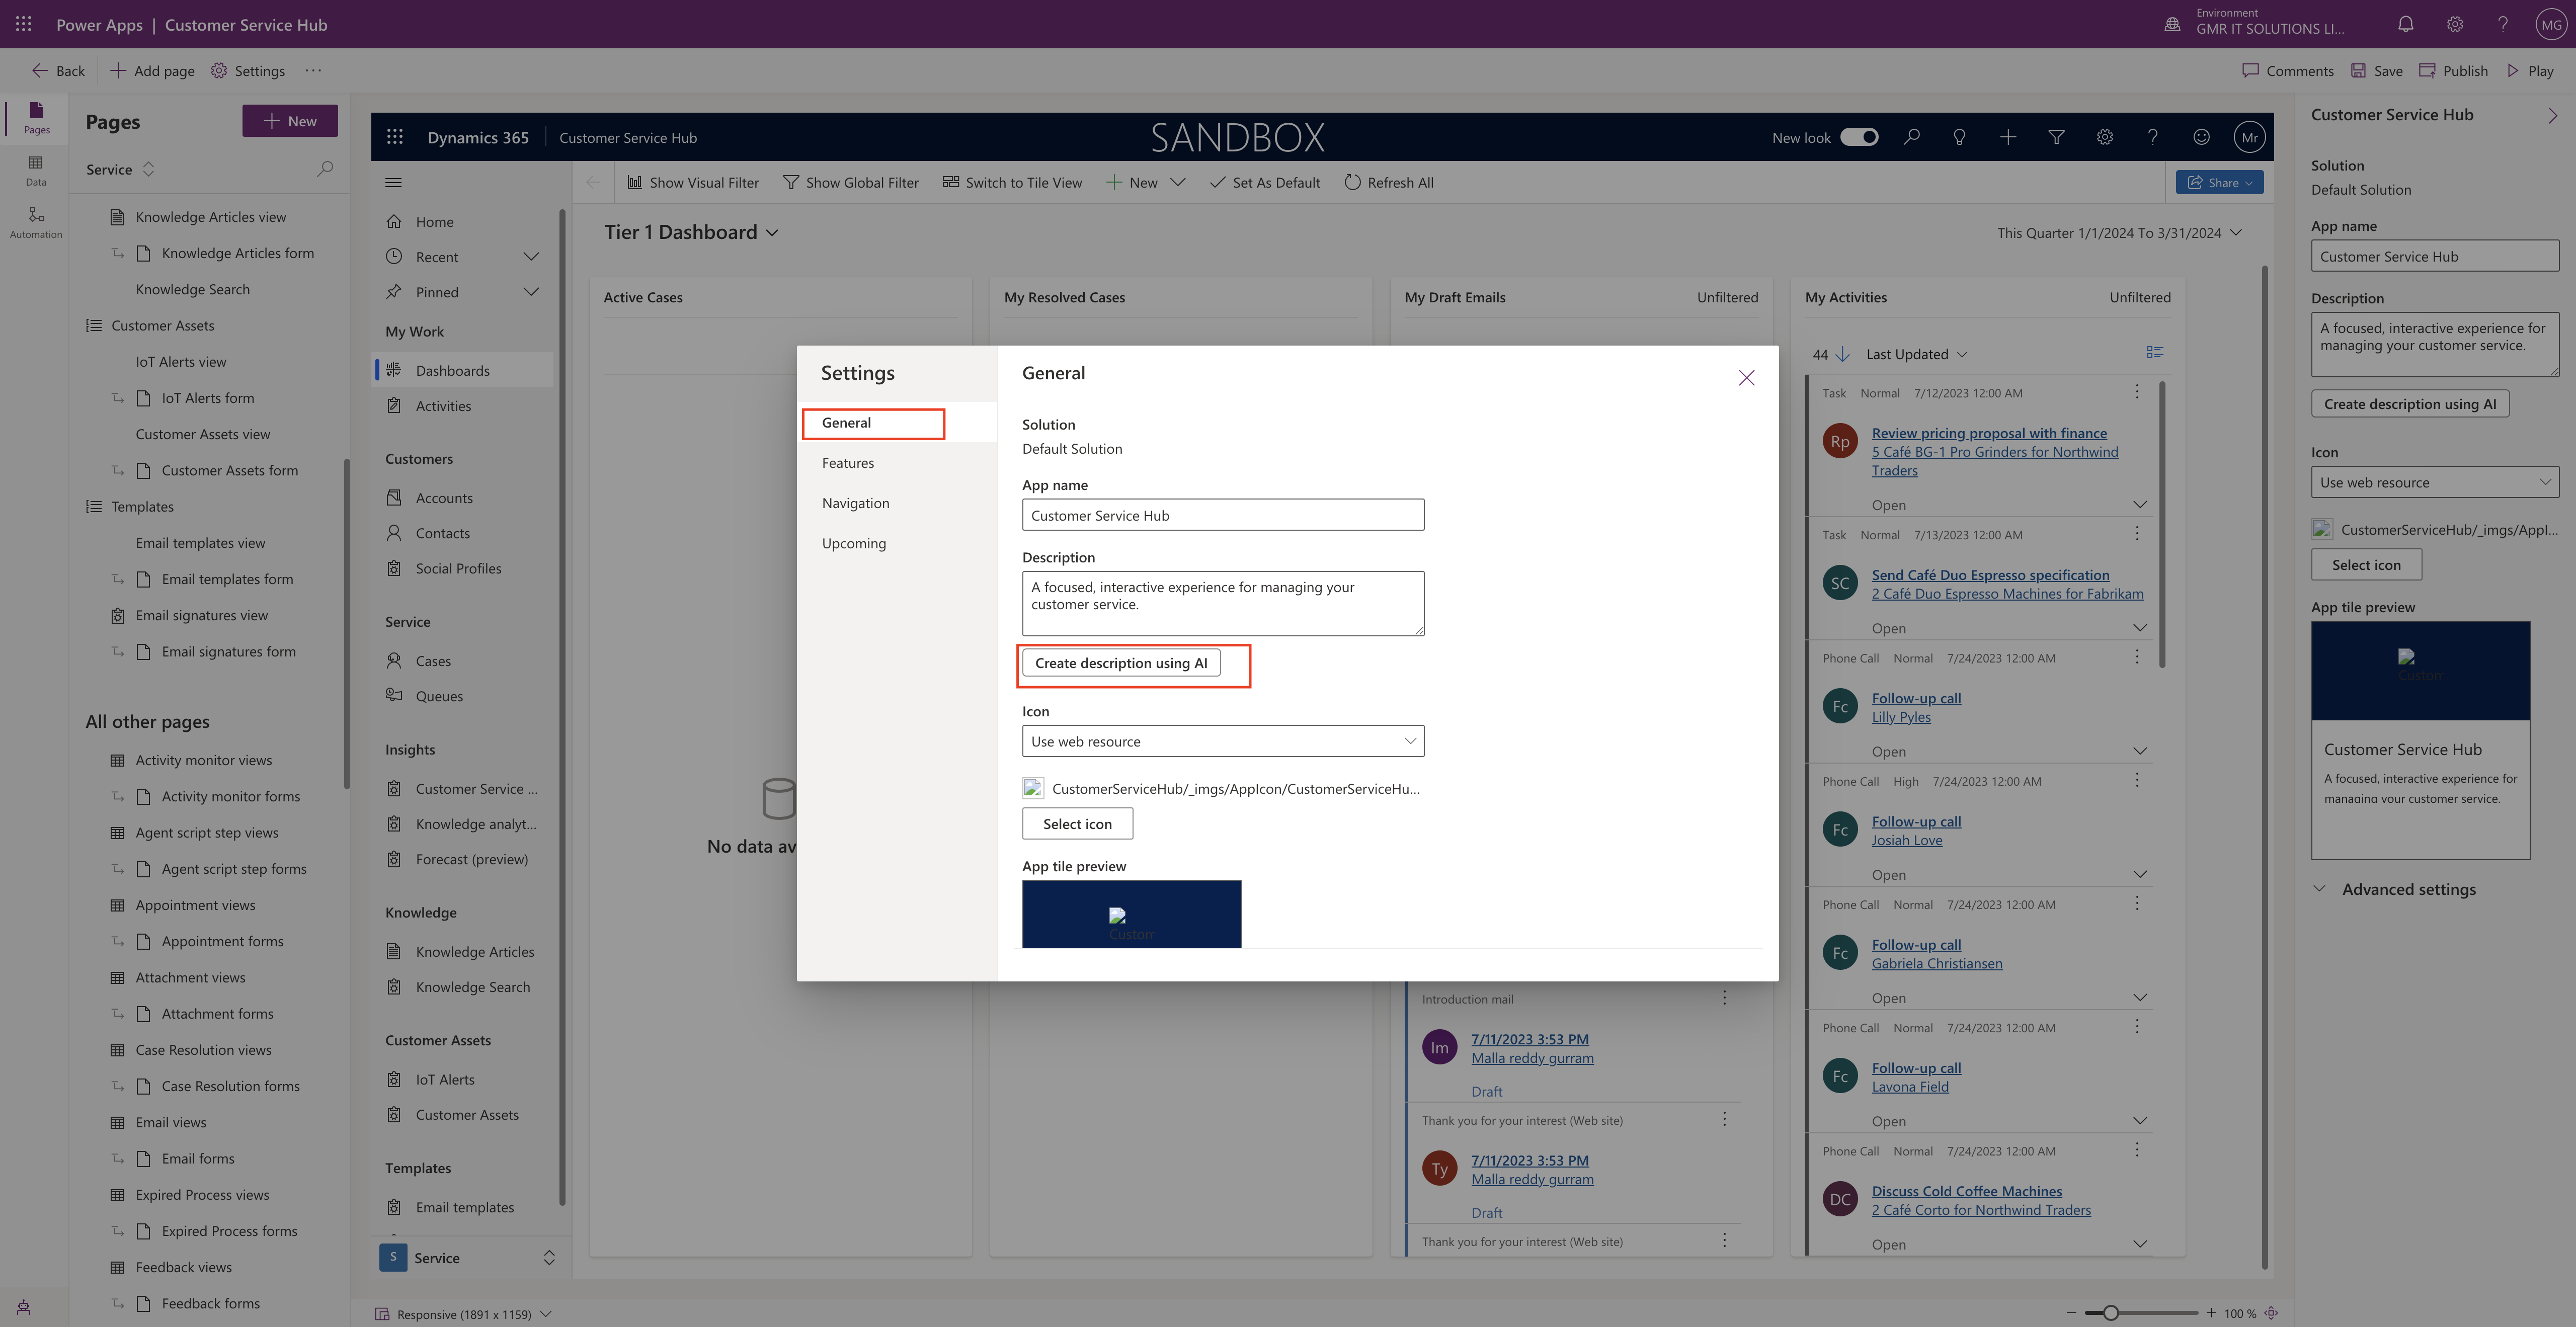
Open your Model Driven App in Design Mode.

With the Create Description using AI option, when you click on it, it can generate description for you.

That’s it for today.

I hope this helps.

Malla Reddy Gurram(@UK365GUY)
#365BlogPostsin365Days

Share this:

{Do you know} Schedulers and dispatchers get recommendations from Microsoft Teams

Hello Everyone,

Today I am going to show new feature benefits that schedulers and dispatchers get recommendations to choose technicians or workers to schedule work orders based on their availability, skills, or expertise.

Let’s get’s started.

Dispatchers will recieve recommendations on Teams – Scheduling assistant recommends workers and time slots for the jobs.

Scheduling assistant is available in Field Service Integrations for Microsoft 365 applications, including Microsoft Teams.

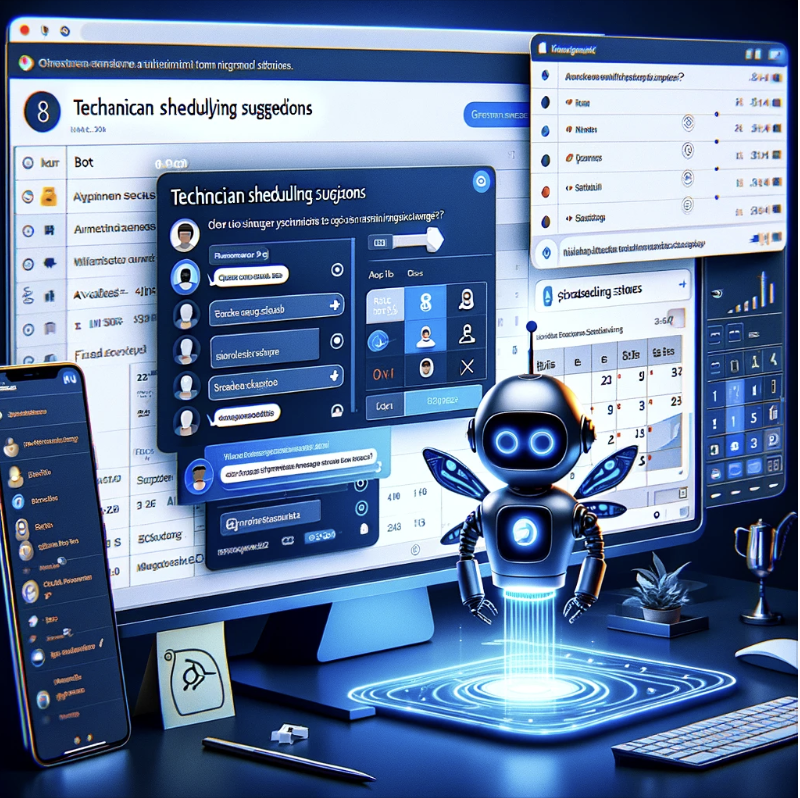
Here’s an illustration showing the integration of technician scheduling suggestions within Microsoft Teams. This visual representation demonstrates how such a system can provide efficient scheduling solutions directly through the Teams platform.

1. Open Microsoft Teams.

2. Go to Apps: Search for Dynamics 365 Field Service

3. Add the app.

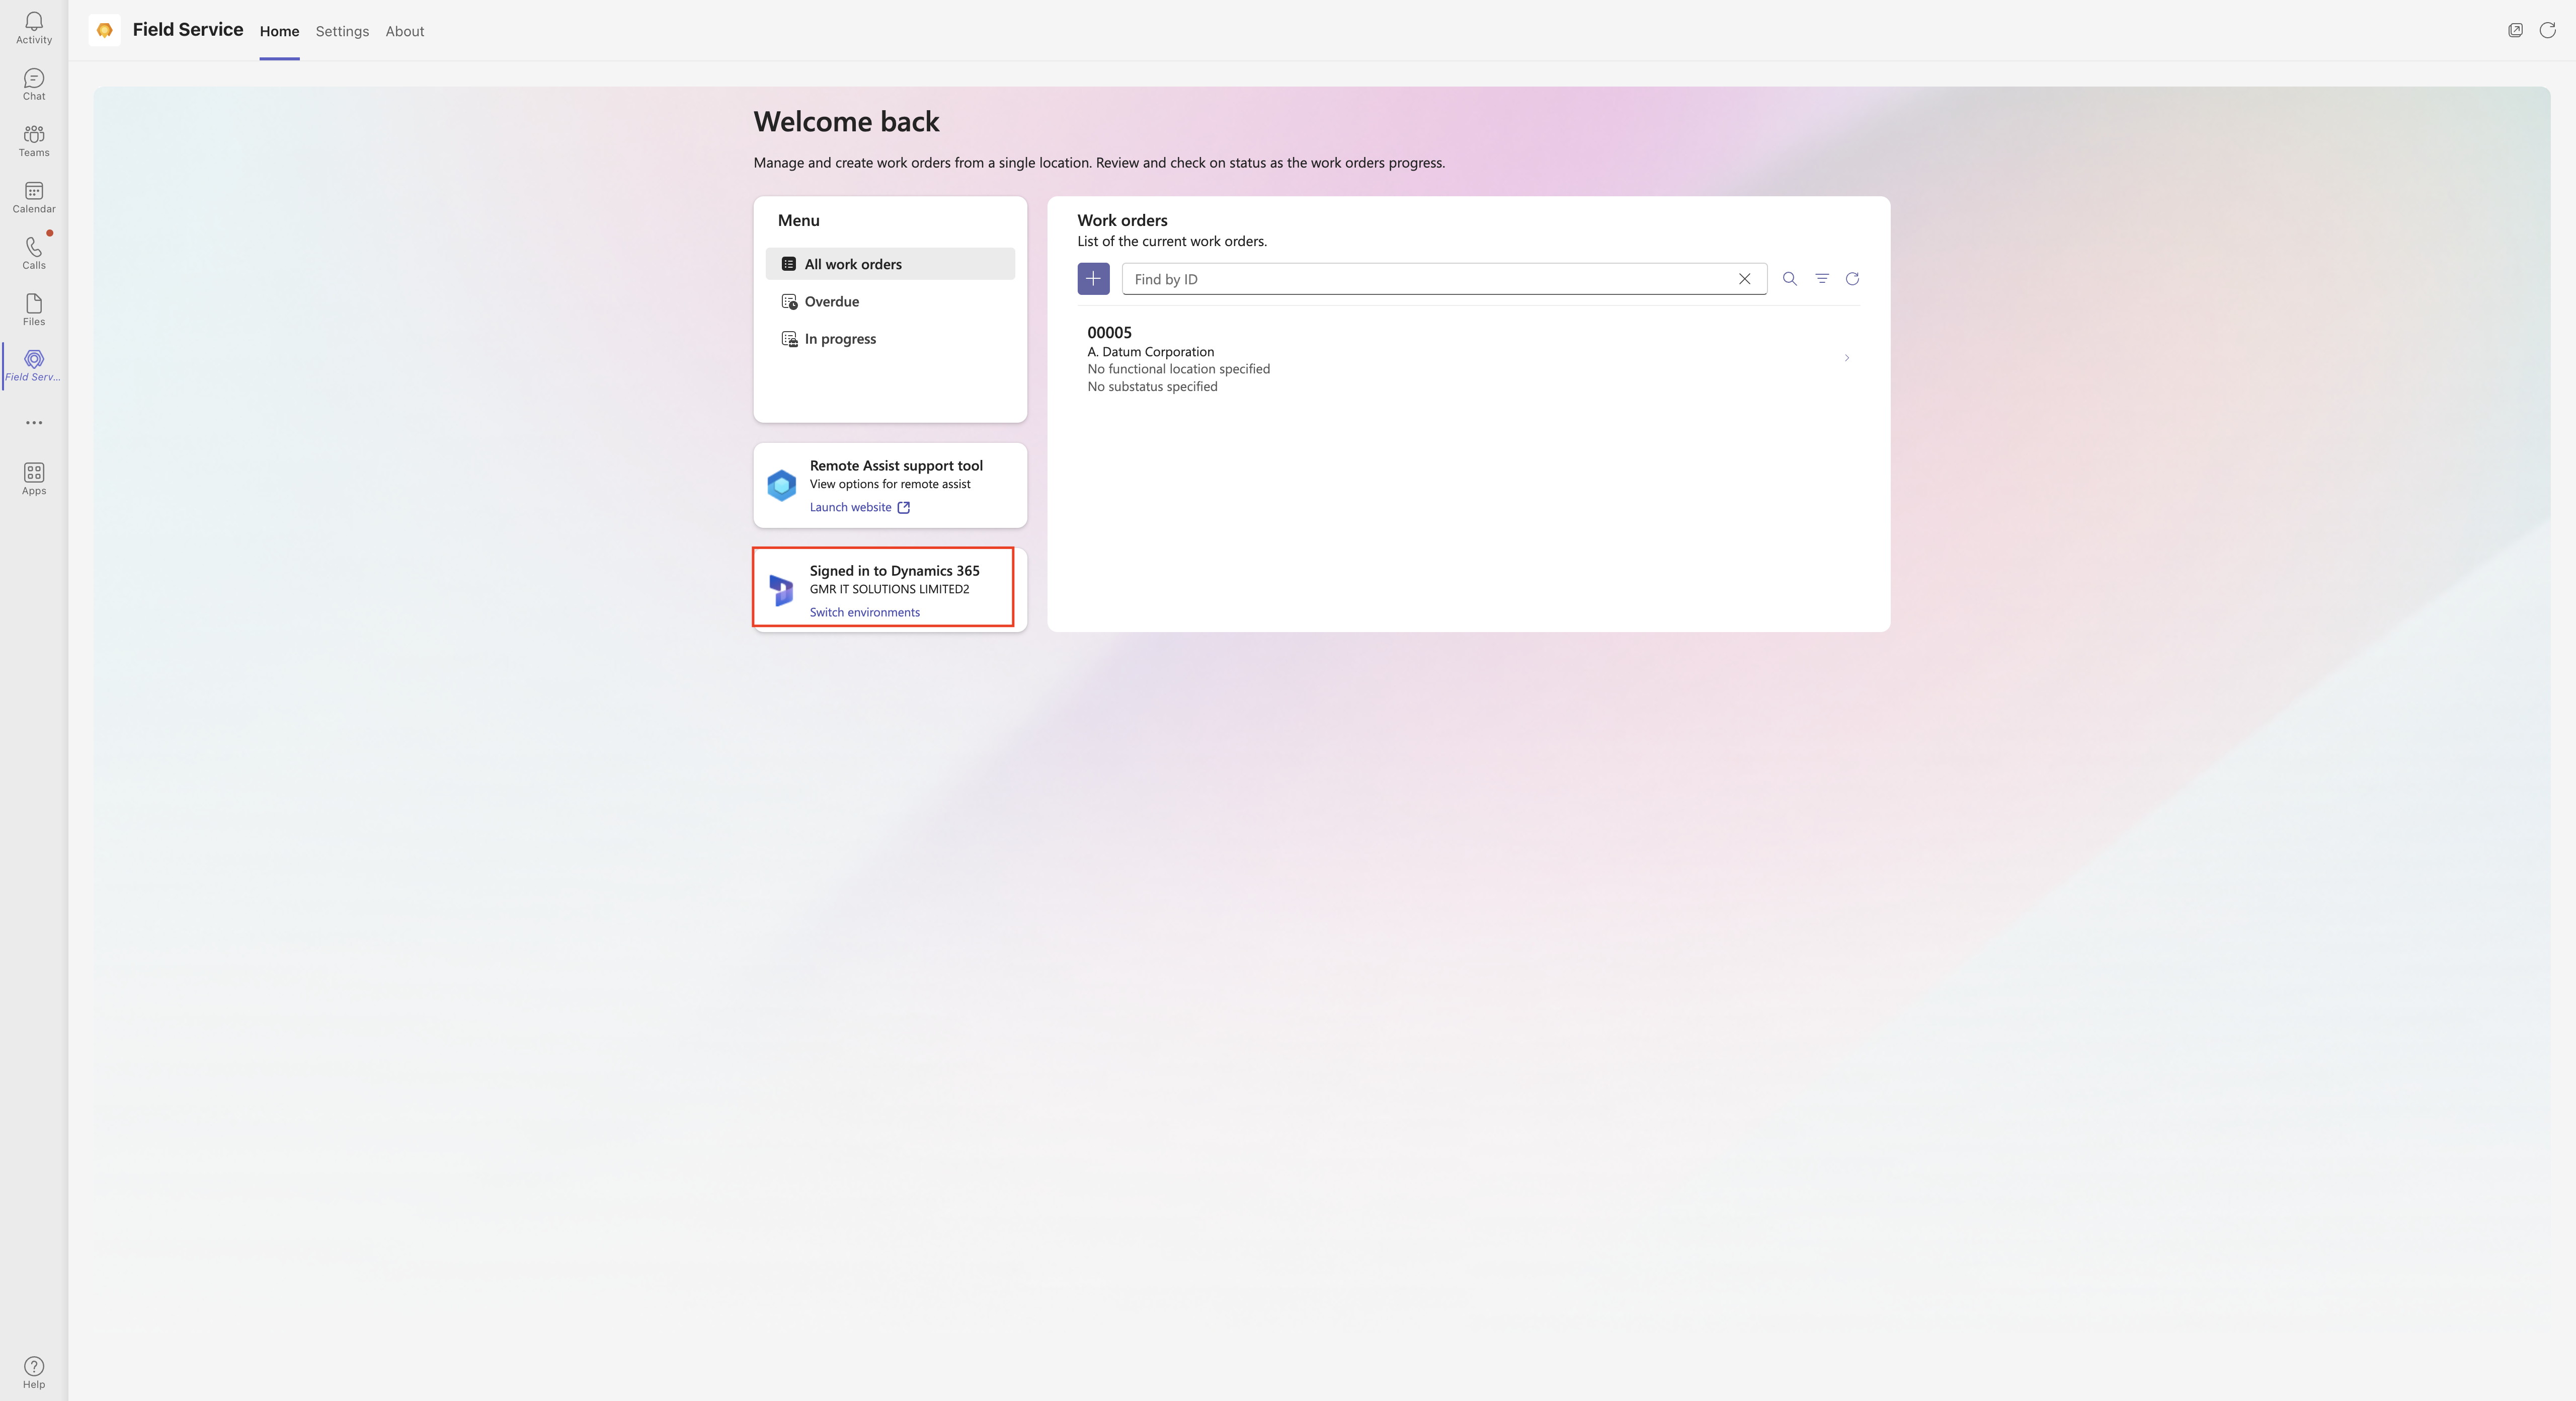
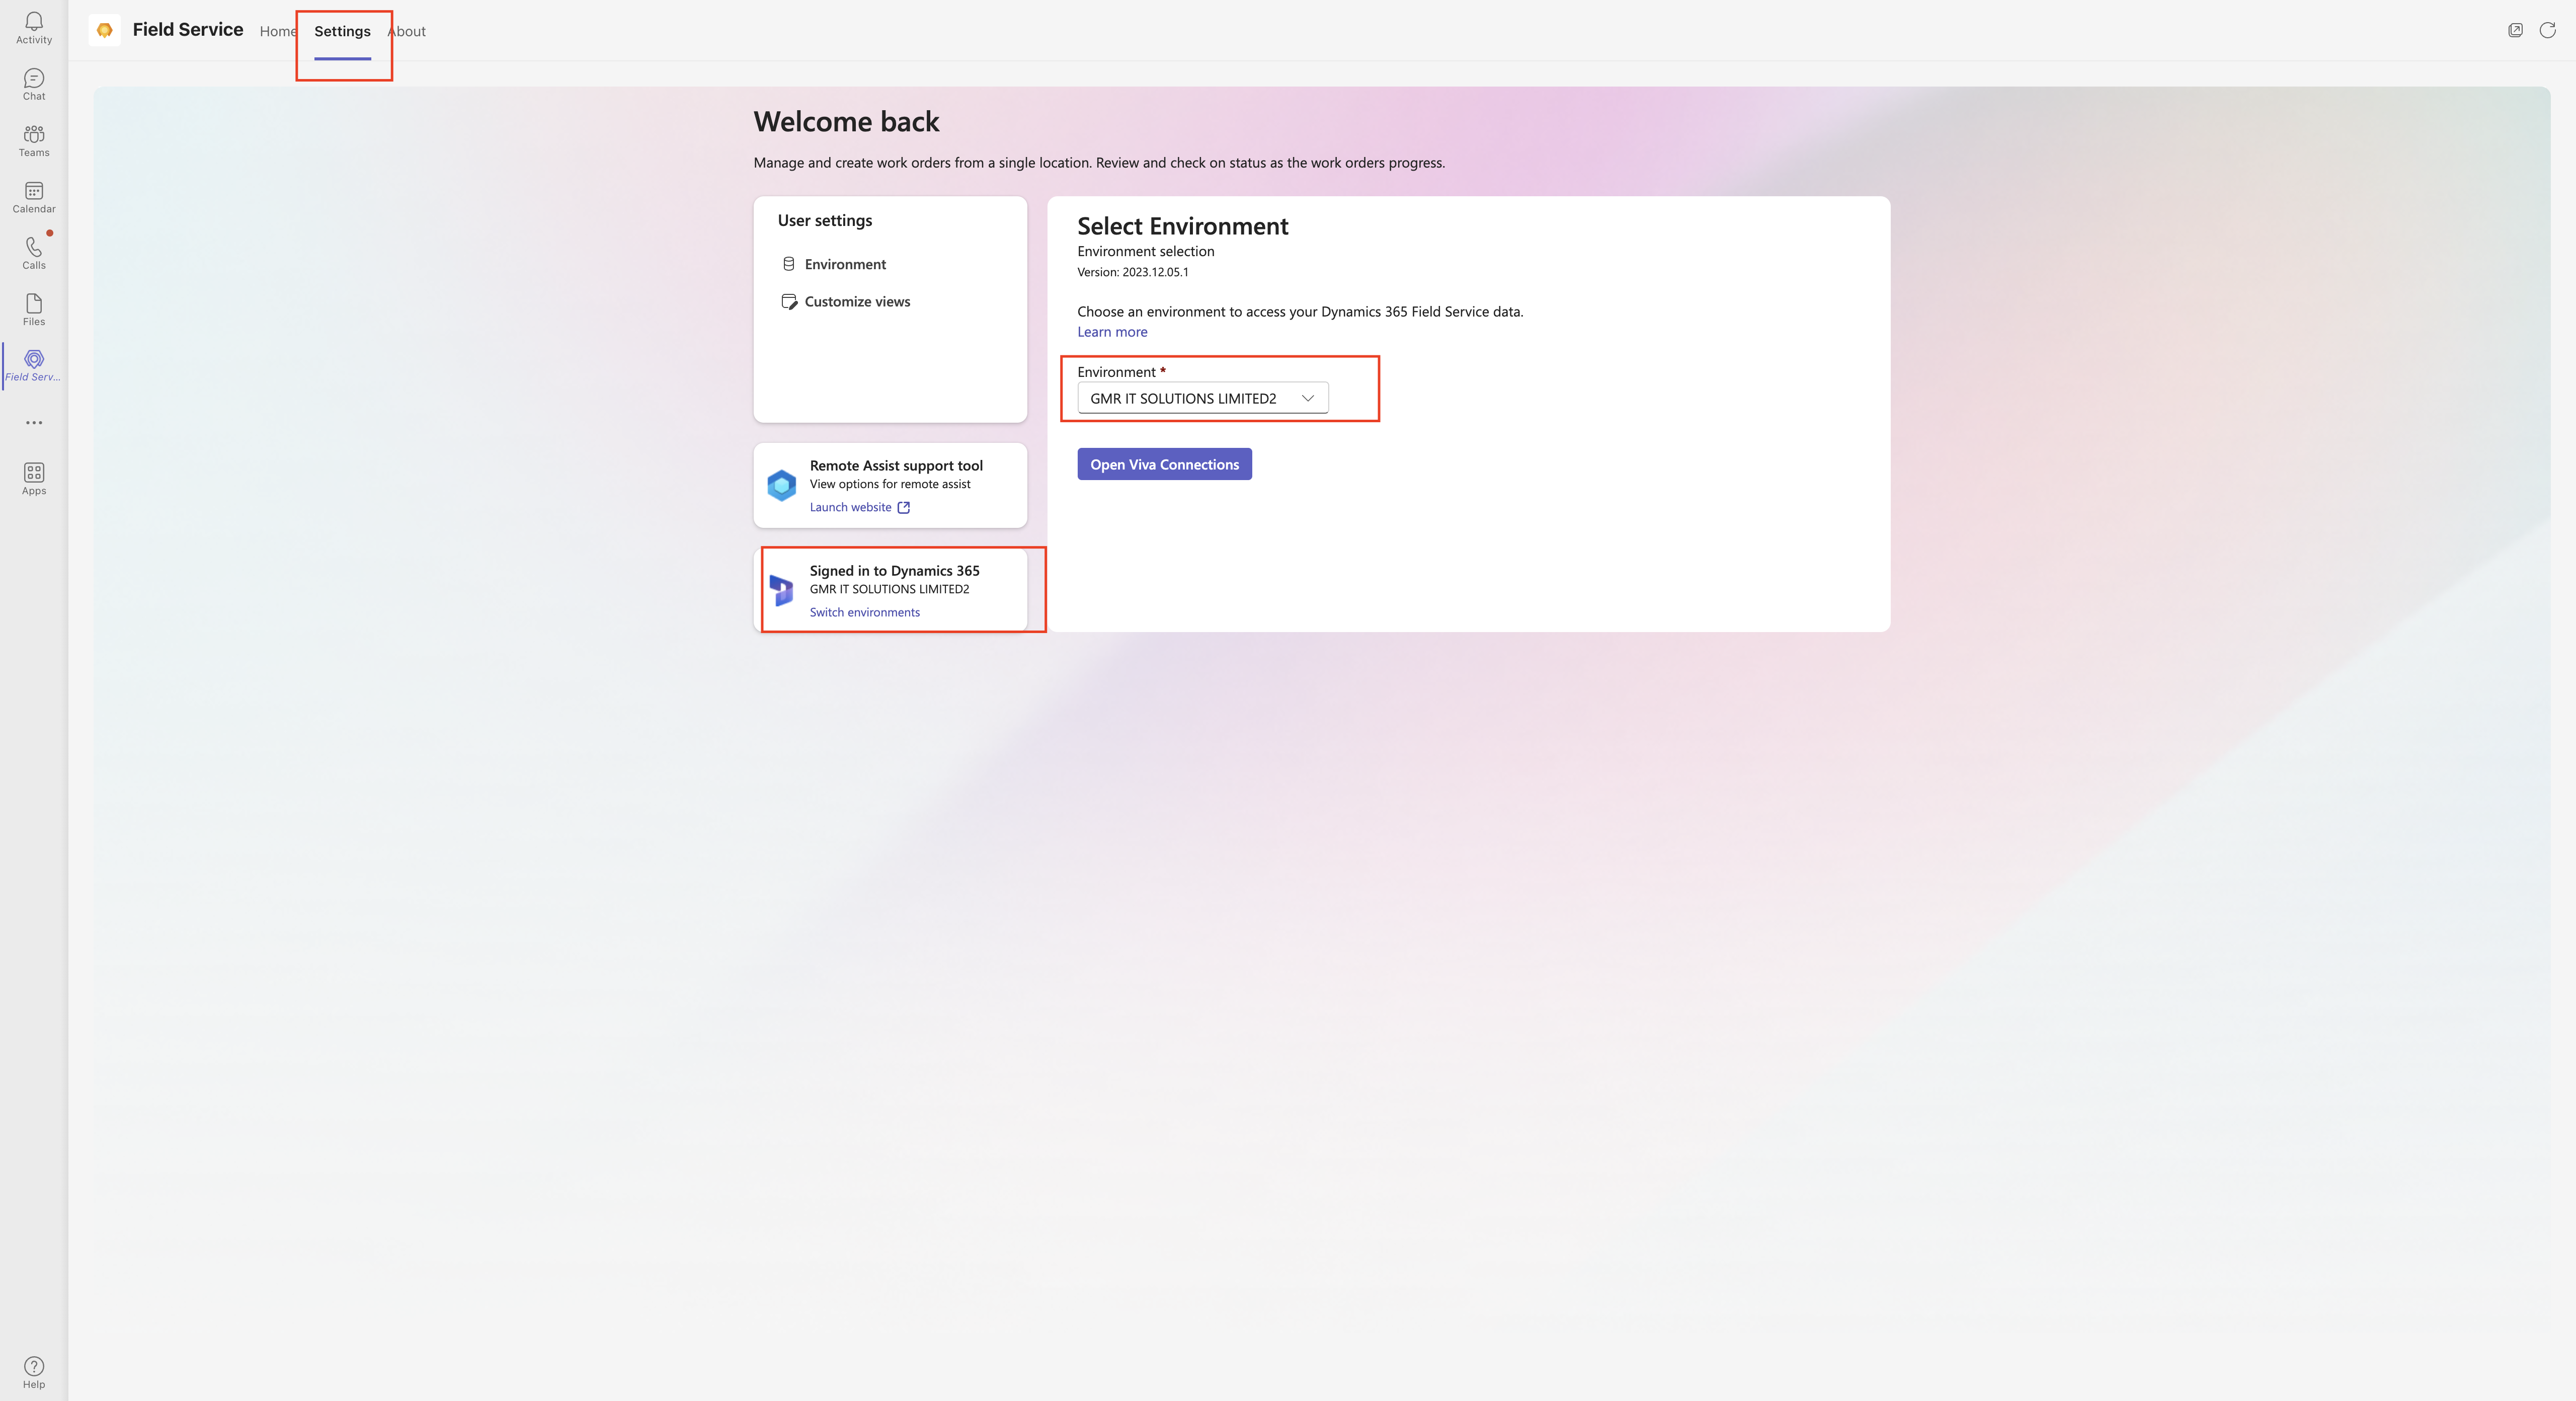
4. Once Dynamics 365 Field Service App is opened go to settings on the app.

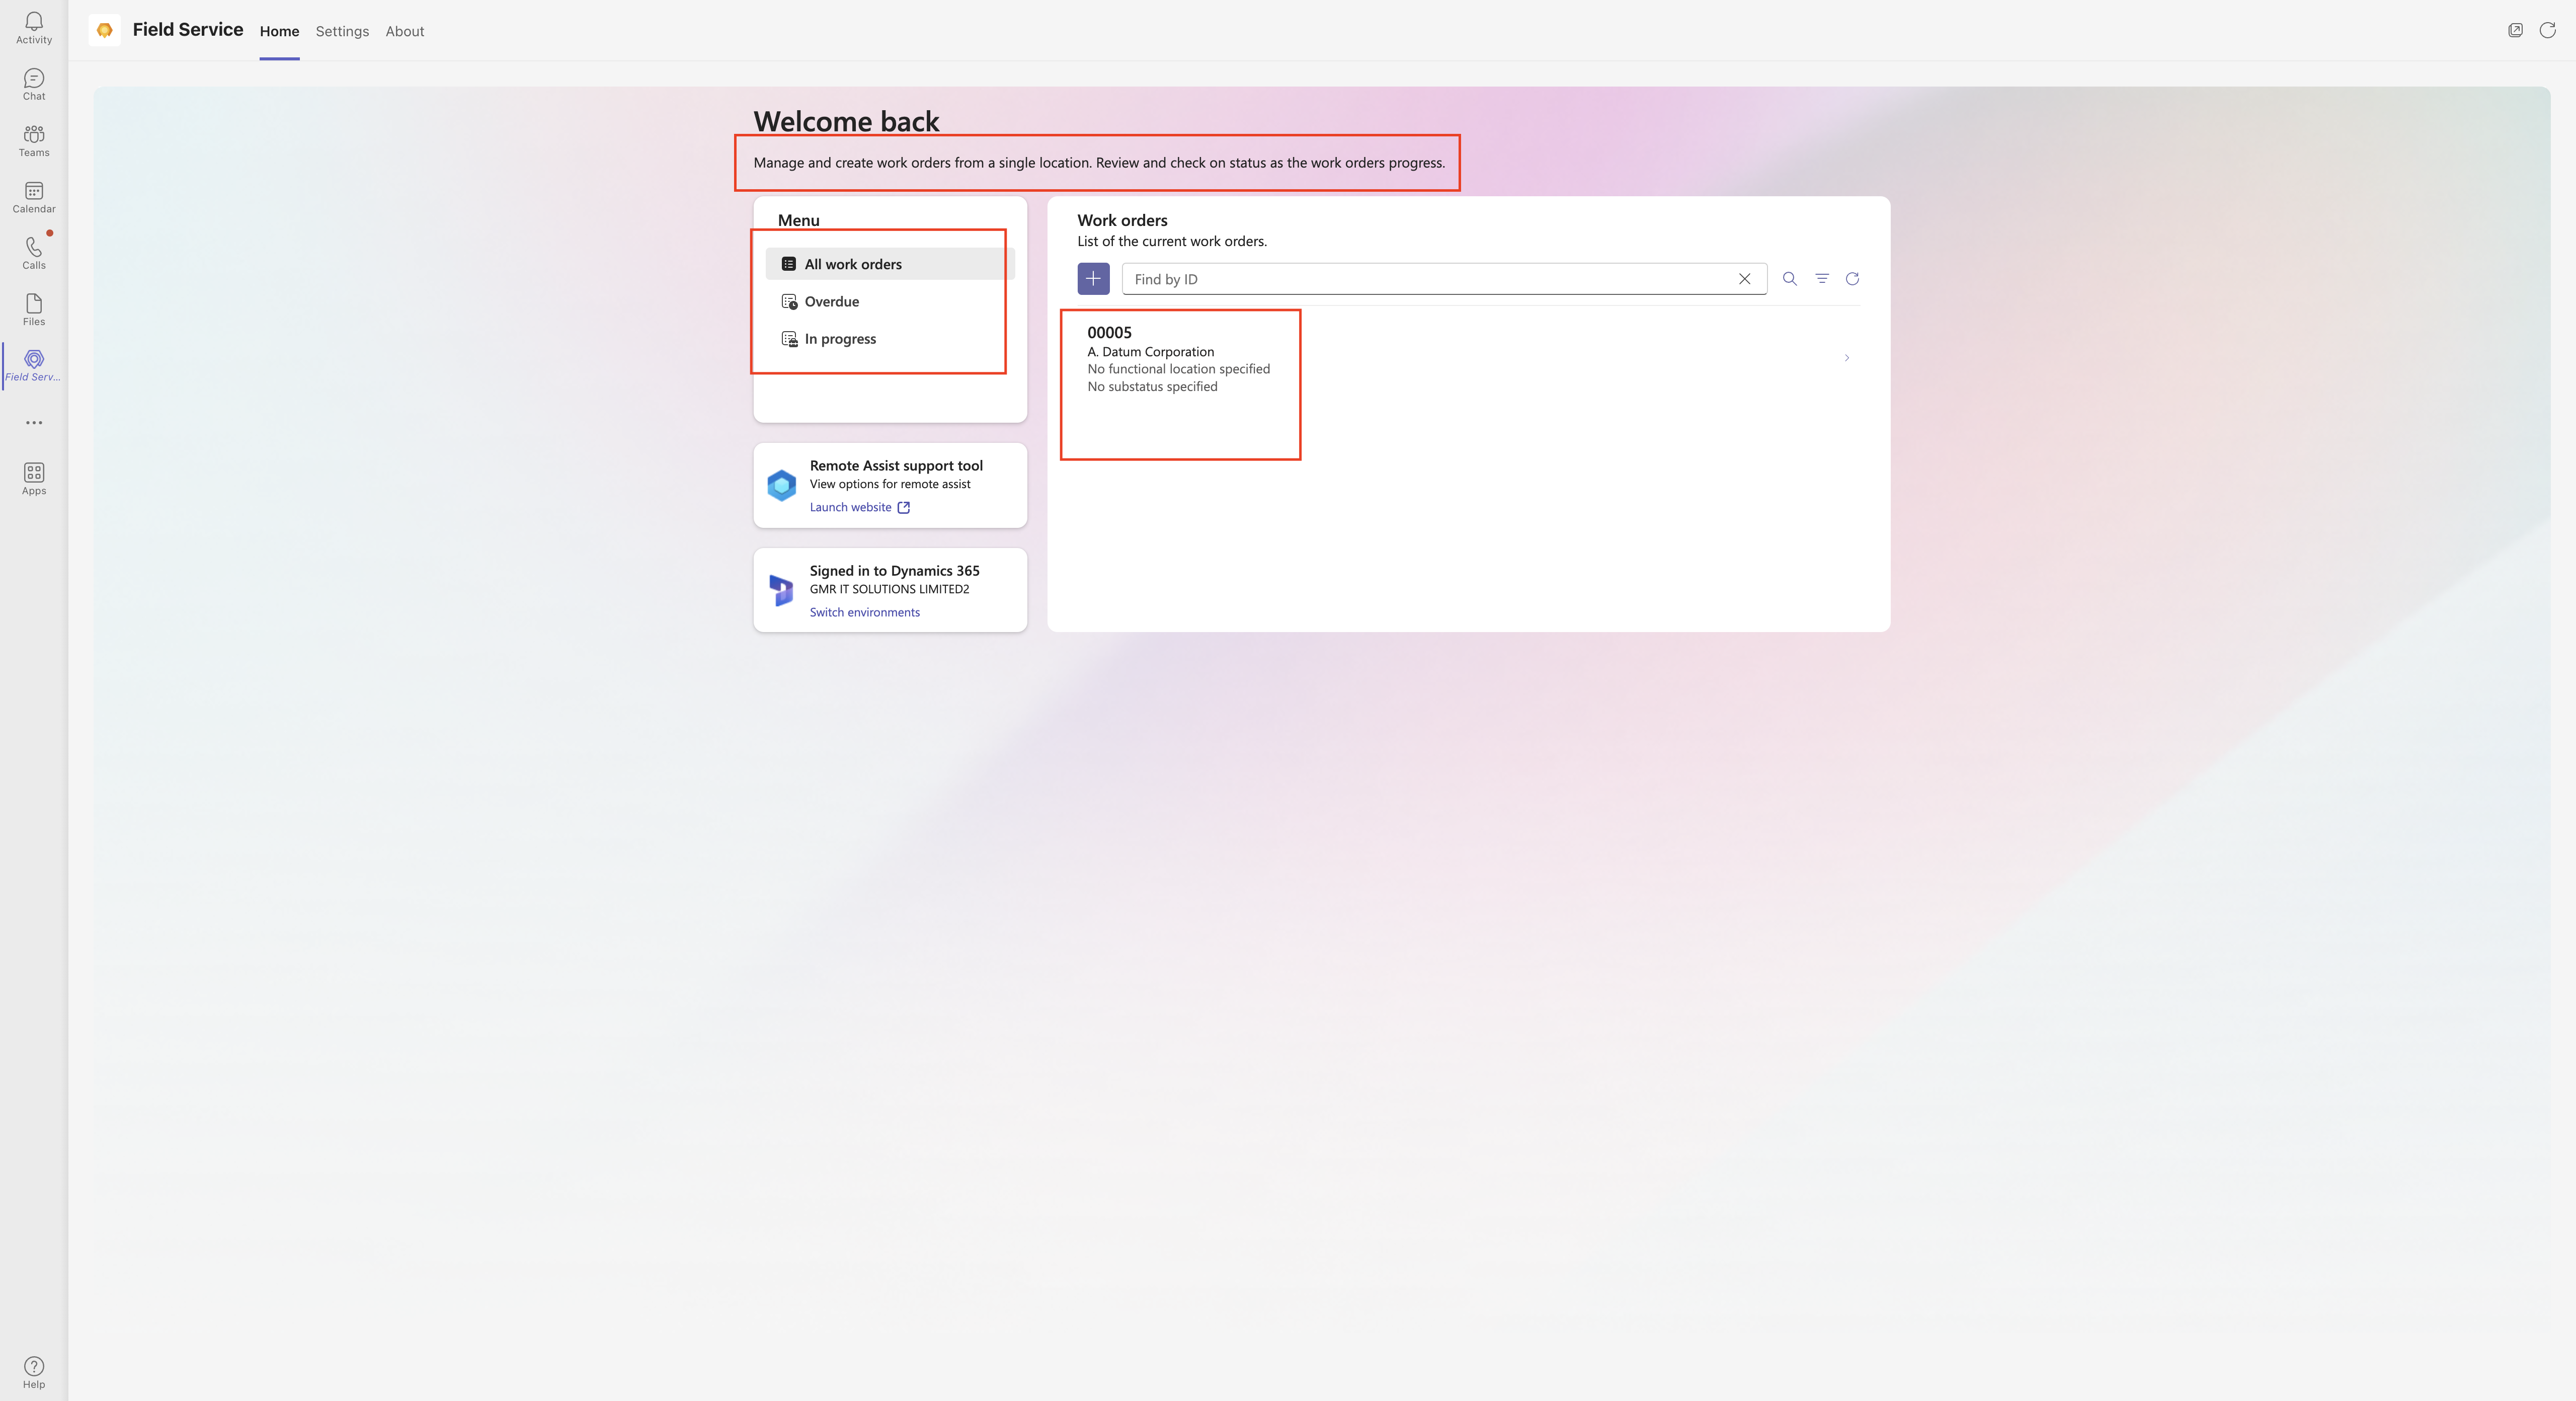
5. Signin into the environment and configure the views for the work orders(see above image).

6. Then select the Home Tab on the App.

That’s it for today.

I hope this helps.

Malla Reddy Gurram(@UK365GUY)
#365BlogPostsin365Days

Share this: