Menu Close

Blog

Slide 1

Microsoft Business Applications Blogposts, YouTube Videos and Podcasts

Helping Businesses with Technology

Slide 2

Microsoft Business Applications Blogposts, YouTube Videos and Podcasts

Helping Businesses with Technology

Slide 3

Microsoft Business Applications Blogposts, YouTube Videos and Podcasts

Helping Businesses with Technology

previous arrow
next arrow

{How to} set up Guided Channel Setup in Dynamics 365 Customer Service

Hello Everyone,

Today i am going to show how to set up Guided Channel Setup in Dynamics 365 Customer Service.
Let’s get’s started.

Suppose you want to configure how the customers can contact your business either Email or Case in Dynamics 365 Customer Service.

How do you do that?

Login into Customer Service Hub an choose the Customer Service Admin Center.

Then click on the Guided channel Setup.

There are 4 steps which needs to be fulfilled in order to complete the set up.

1. Introduction
2. Setup name
3.Channel type
4. Summary

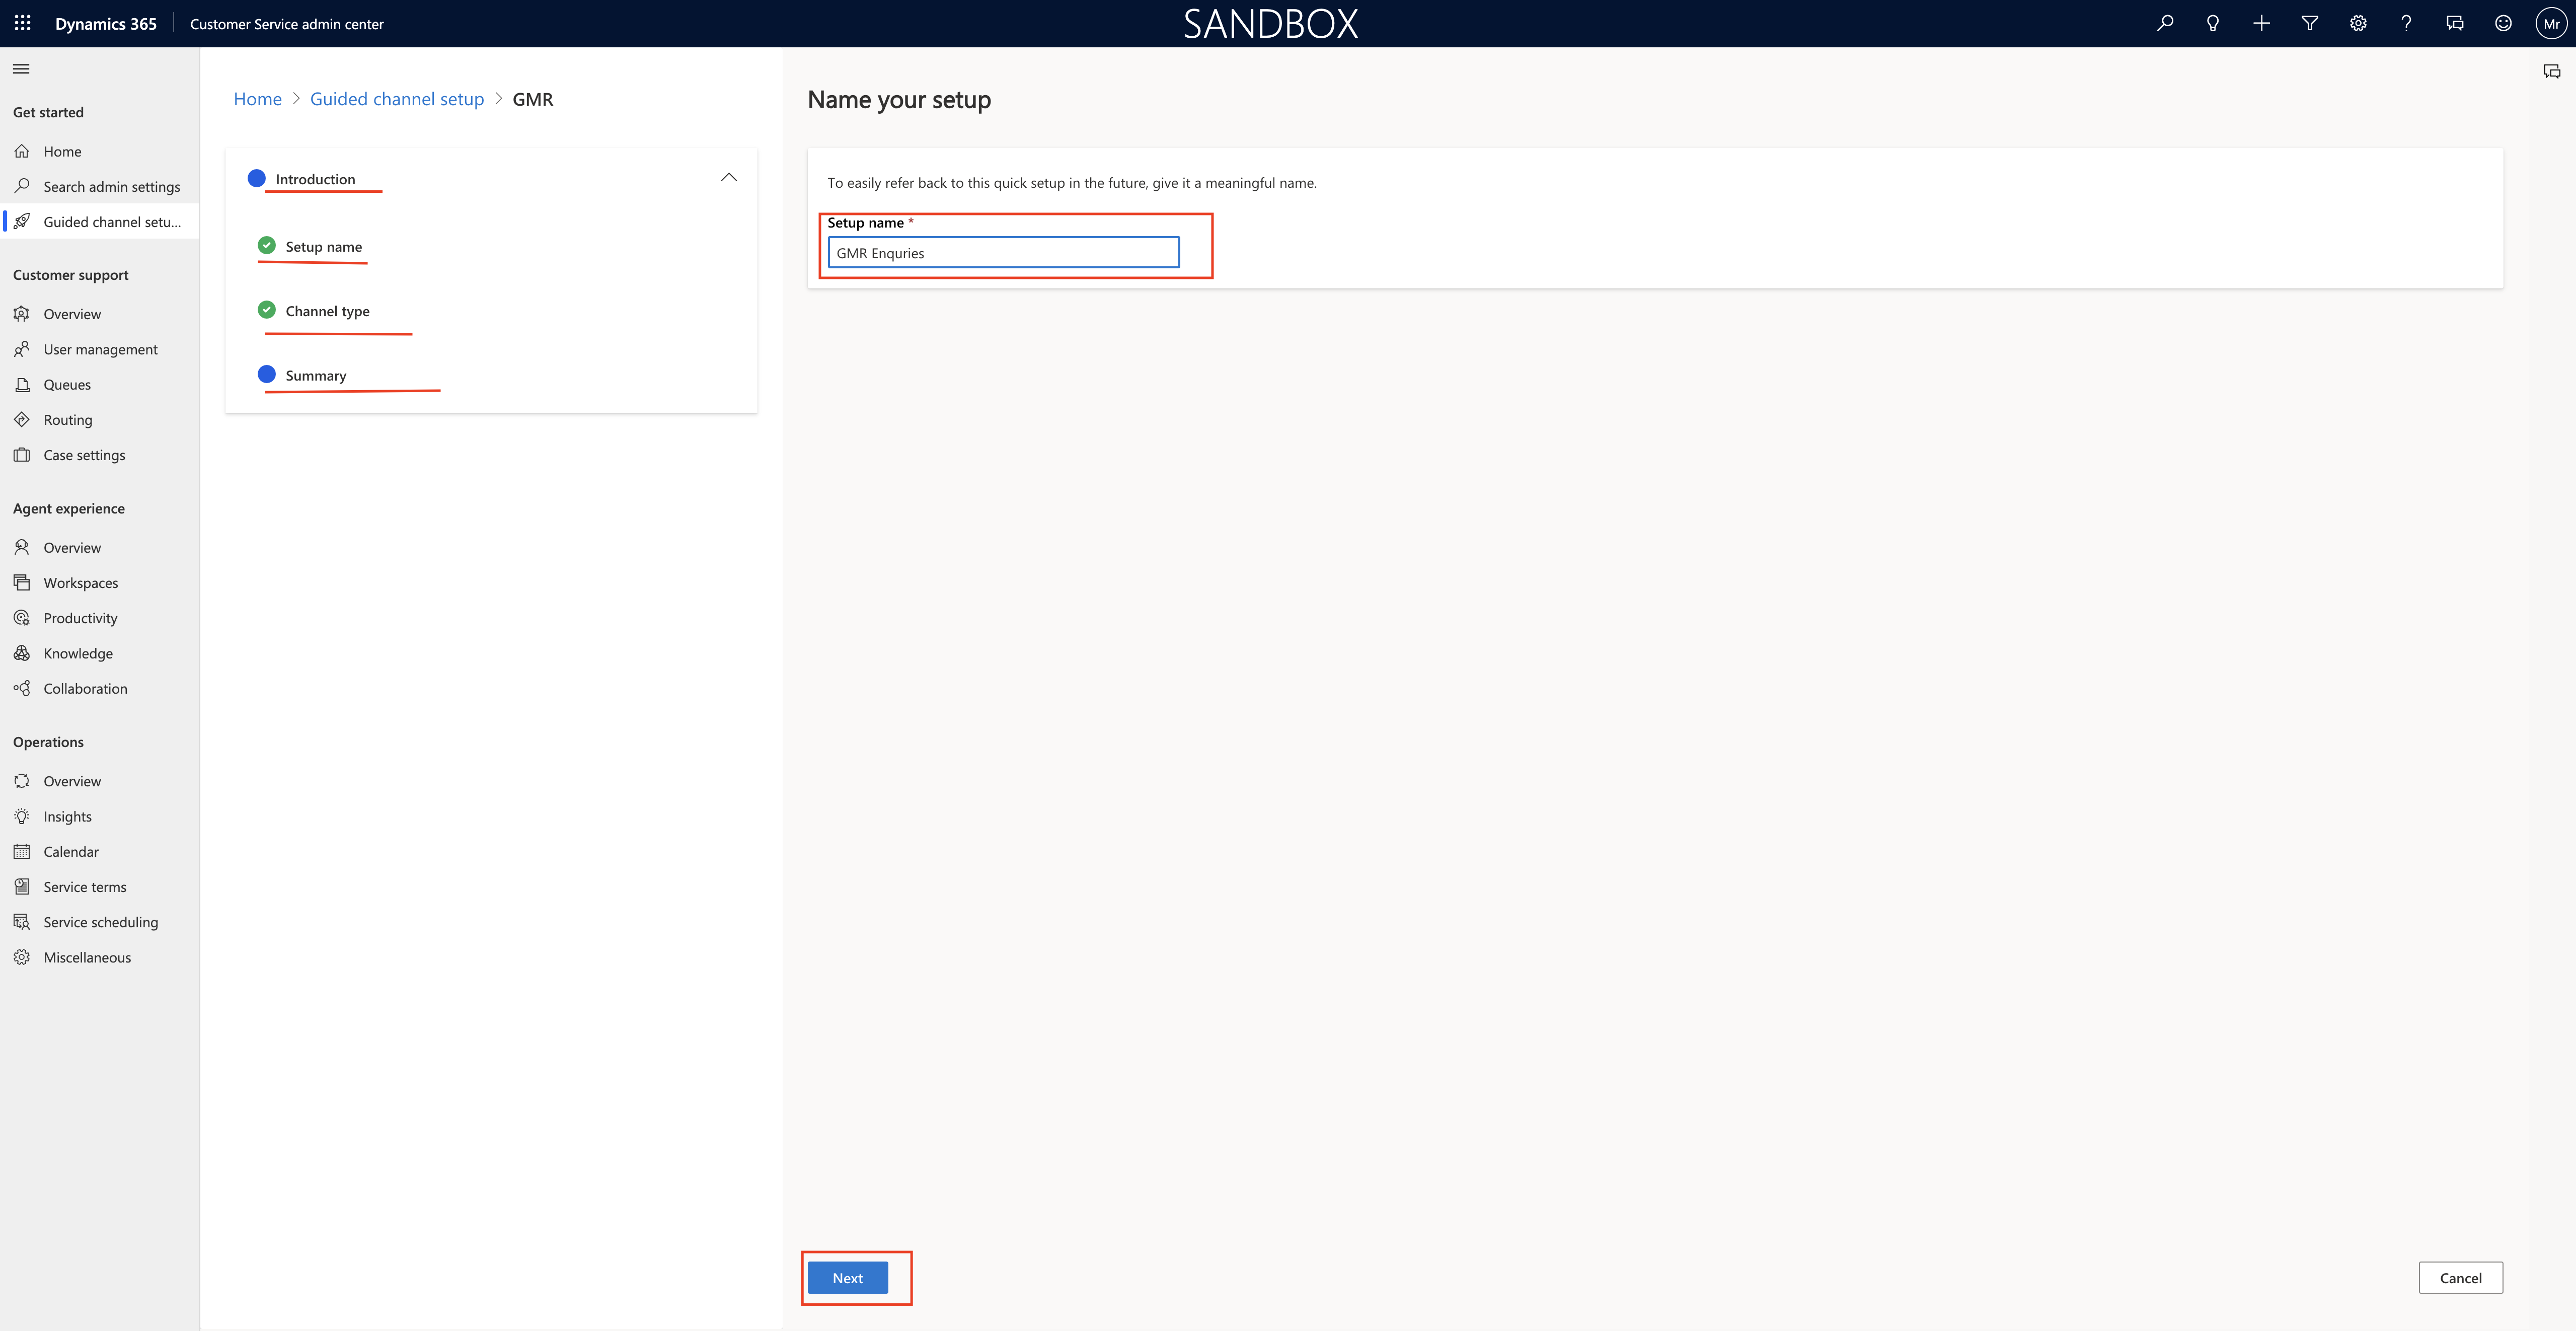
Setup name: Give it a name for the Channel and click next.
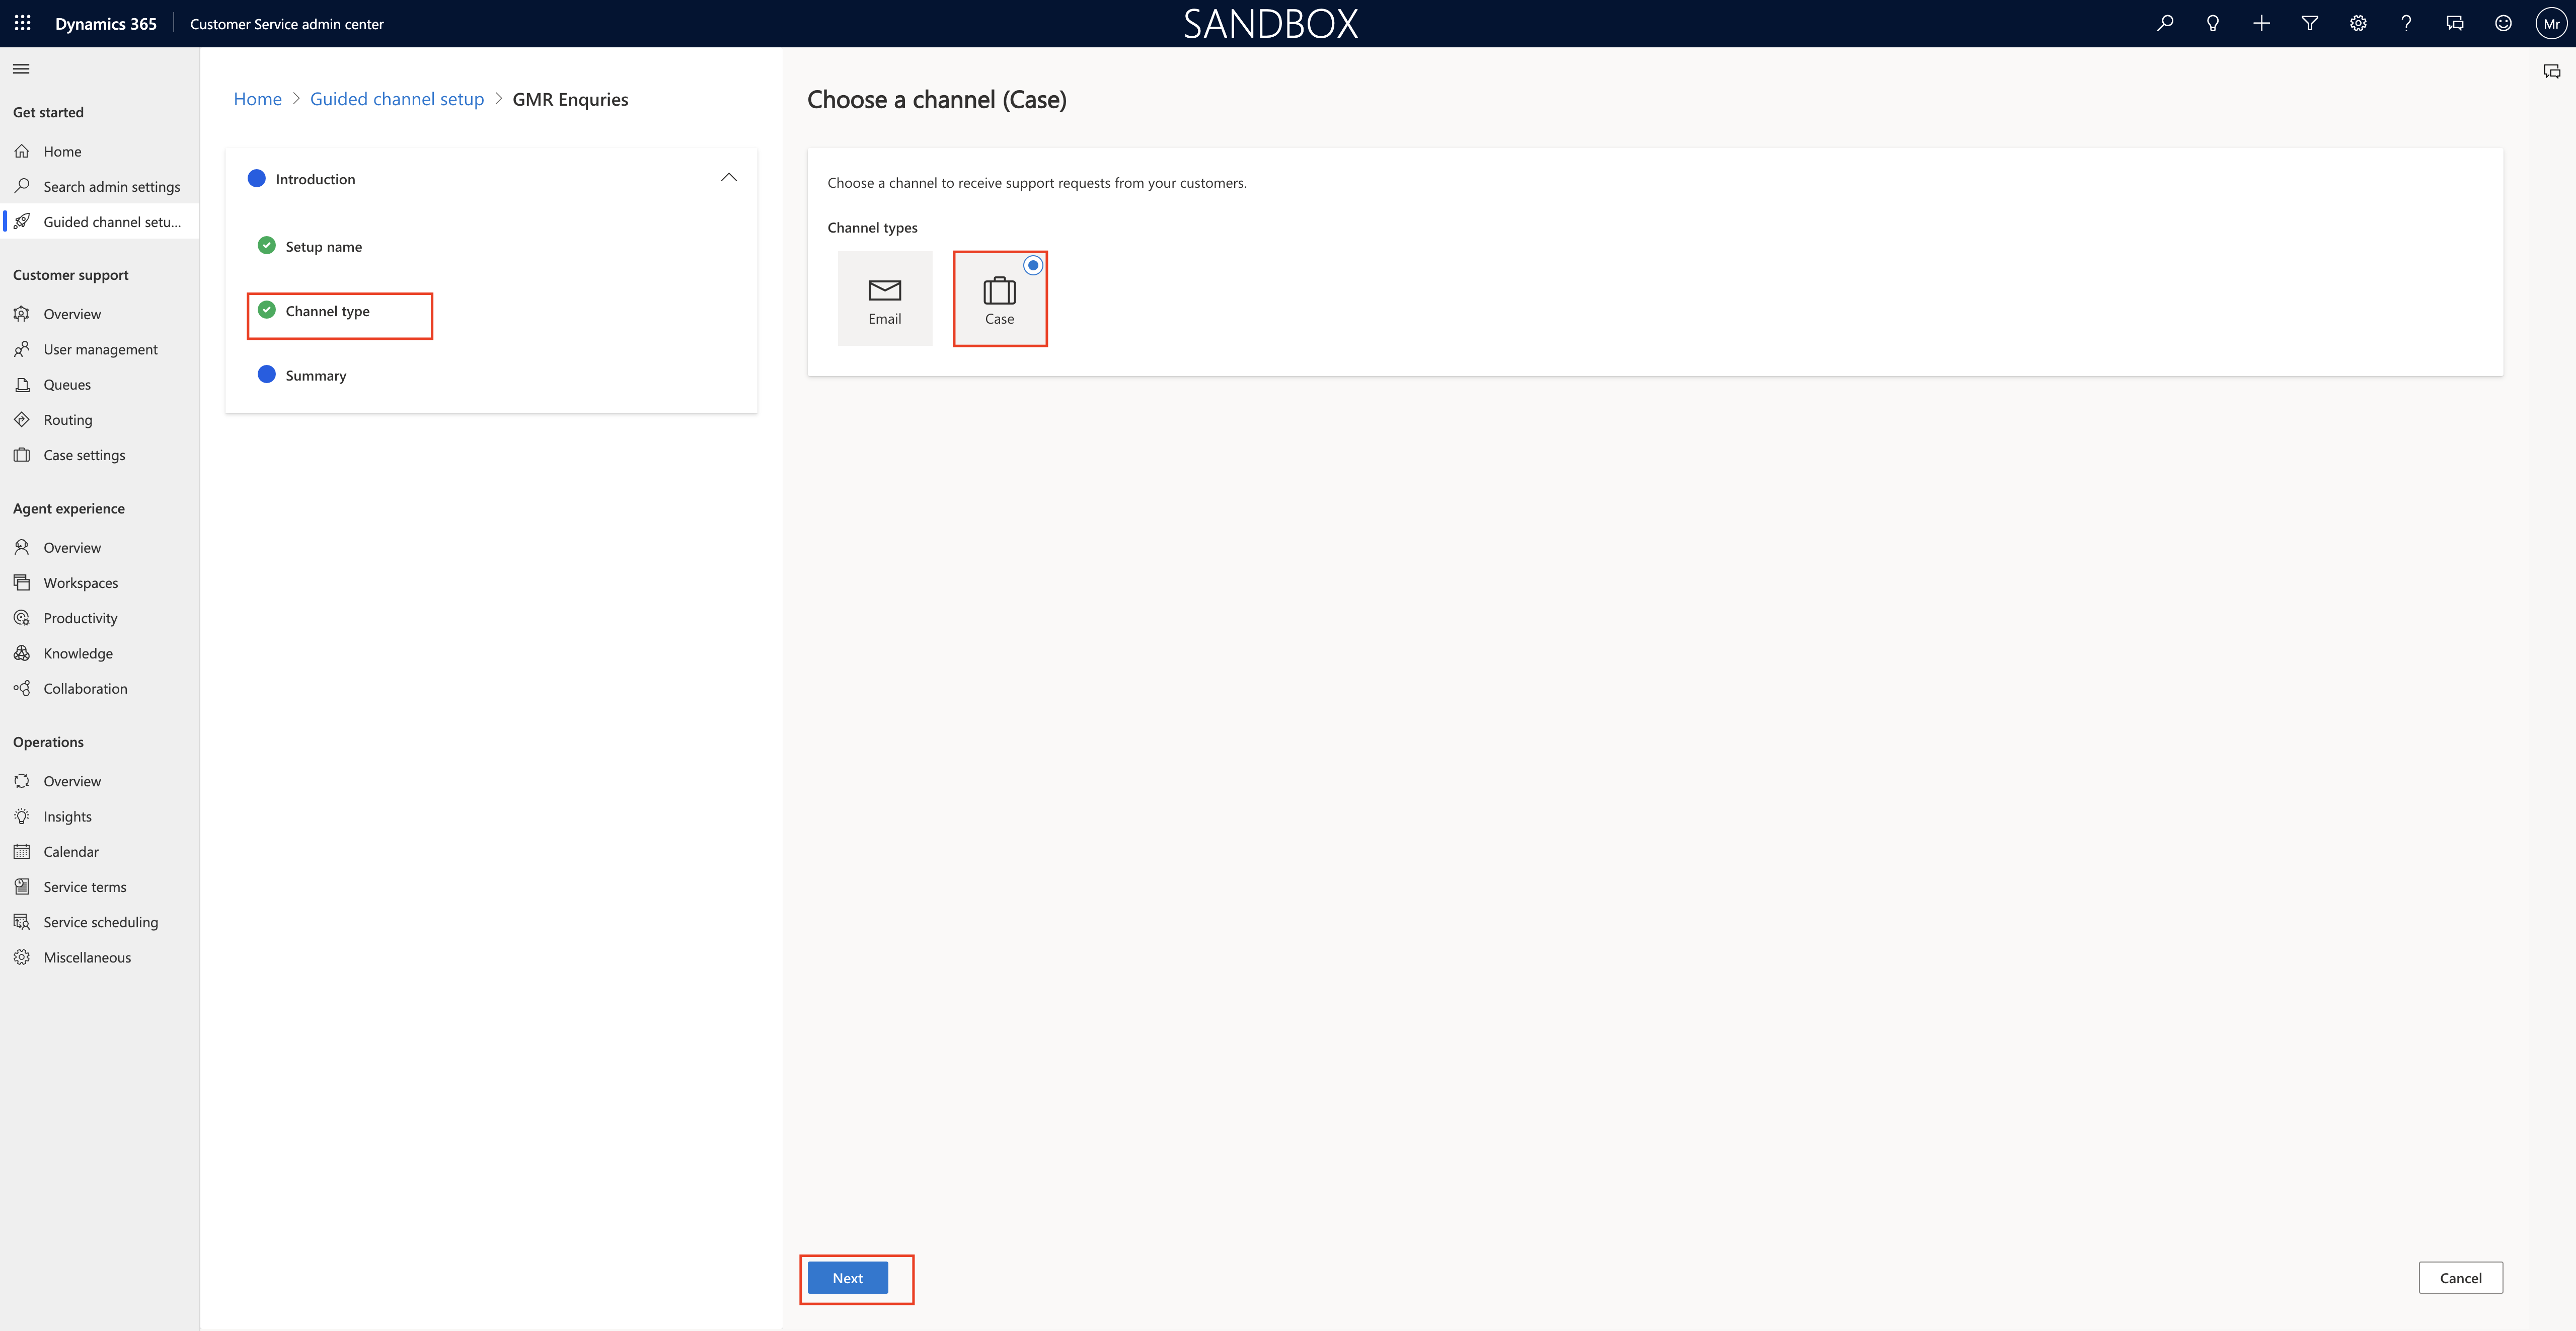
Channel Type: Here you can select either Email or Case and click next.
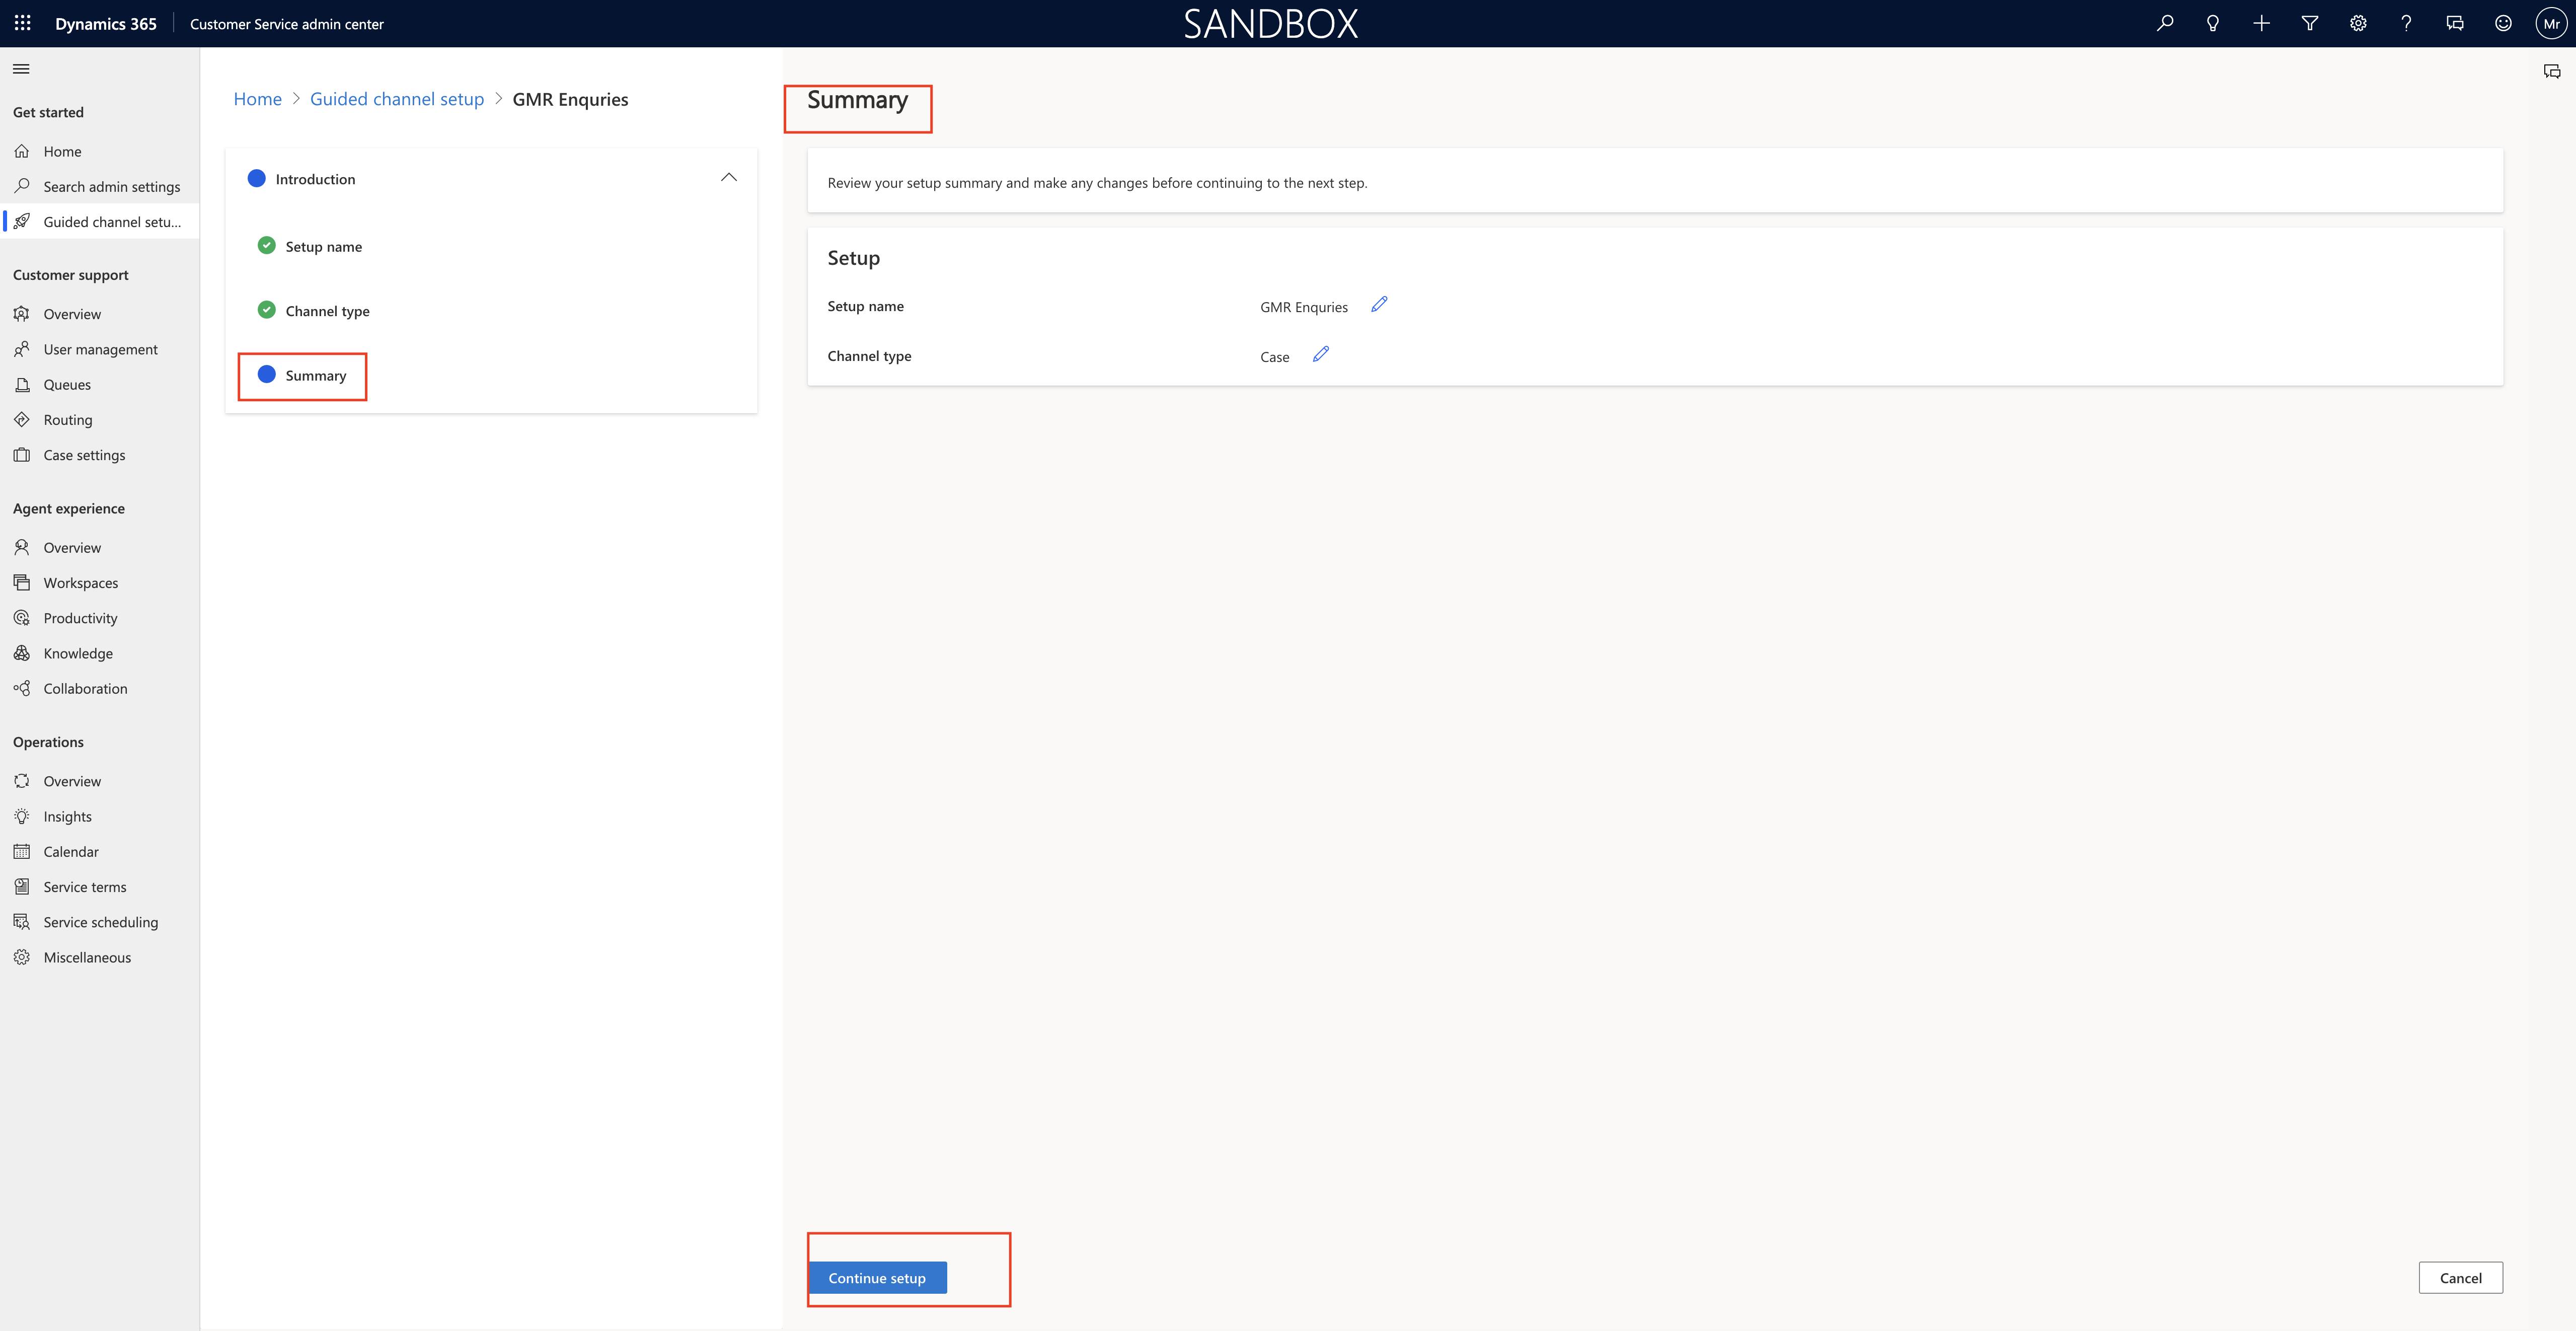
Summary: you can see the setup name and channel type and click on Continue Setup.
Then it will prompt with Create User Accounts and assign Dynamics 365 Product licenses to them via the Microsoft 365 Admin Center. To access the Microsoft 365 Admin Center, you or someone at your organizations needs to be a Microsoft 365 tenant admin.
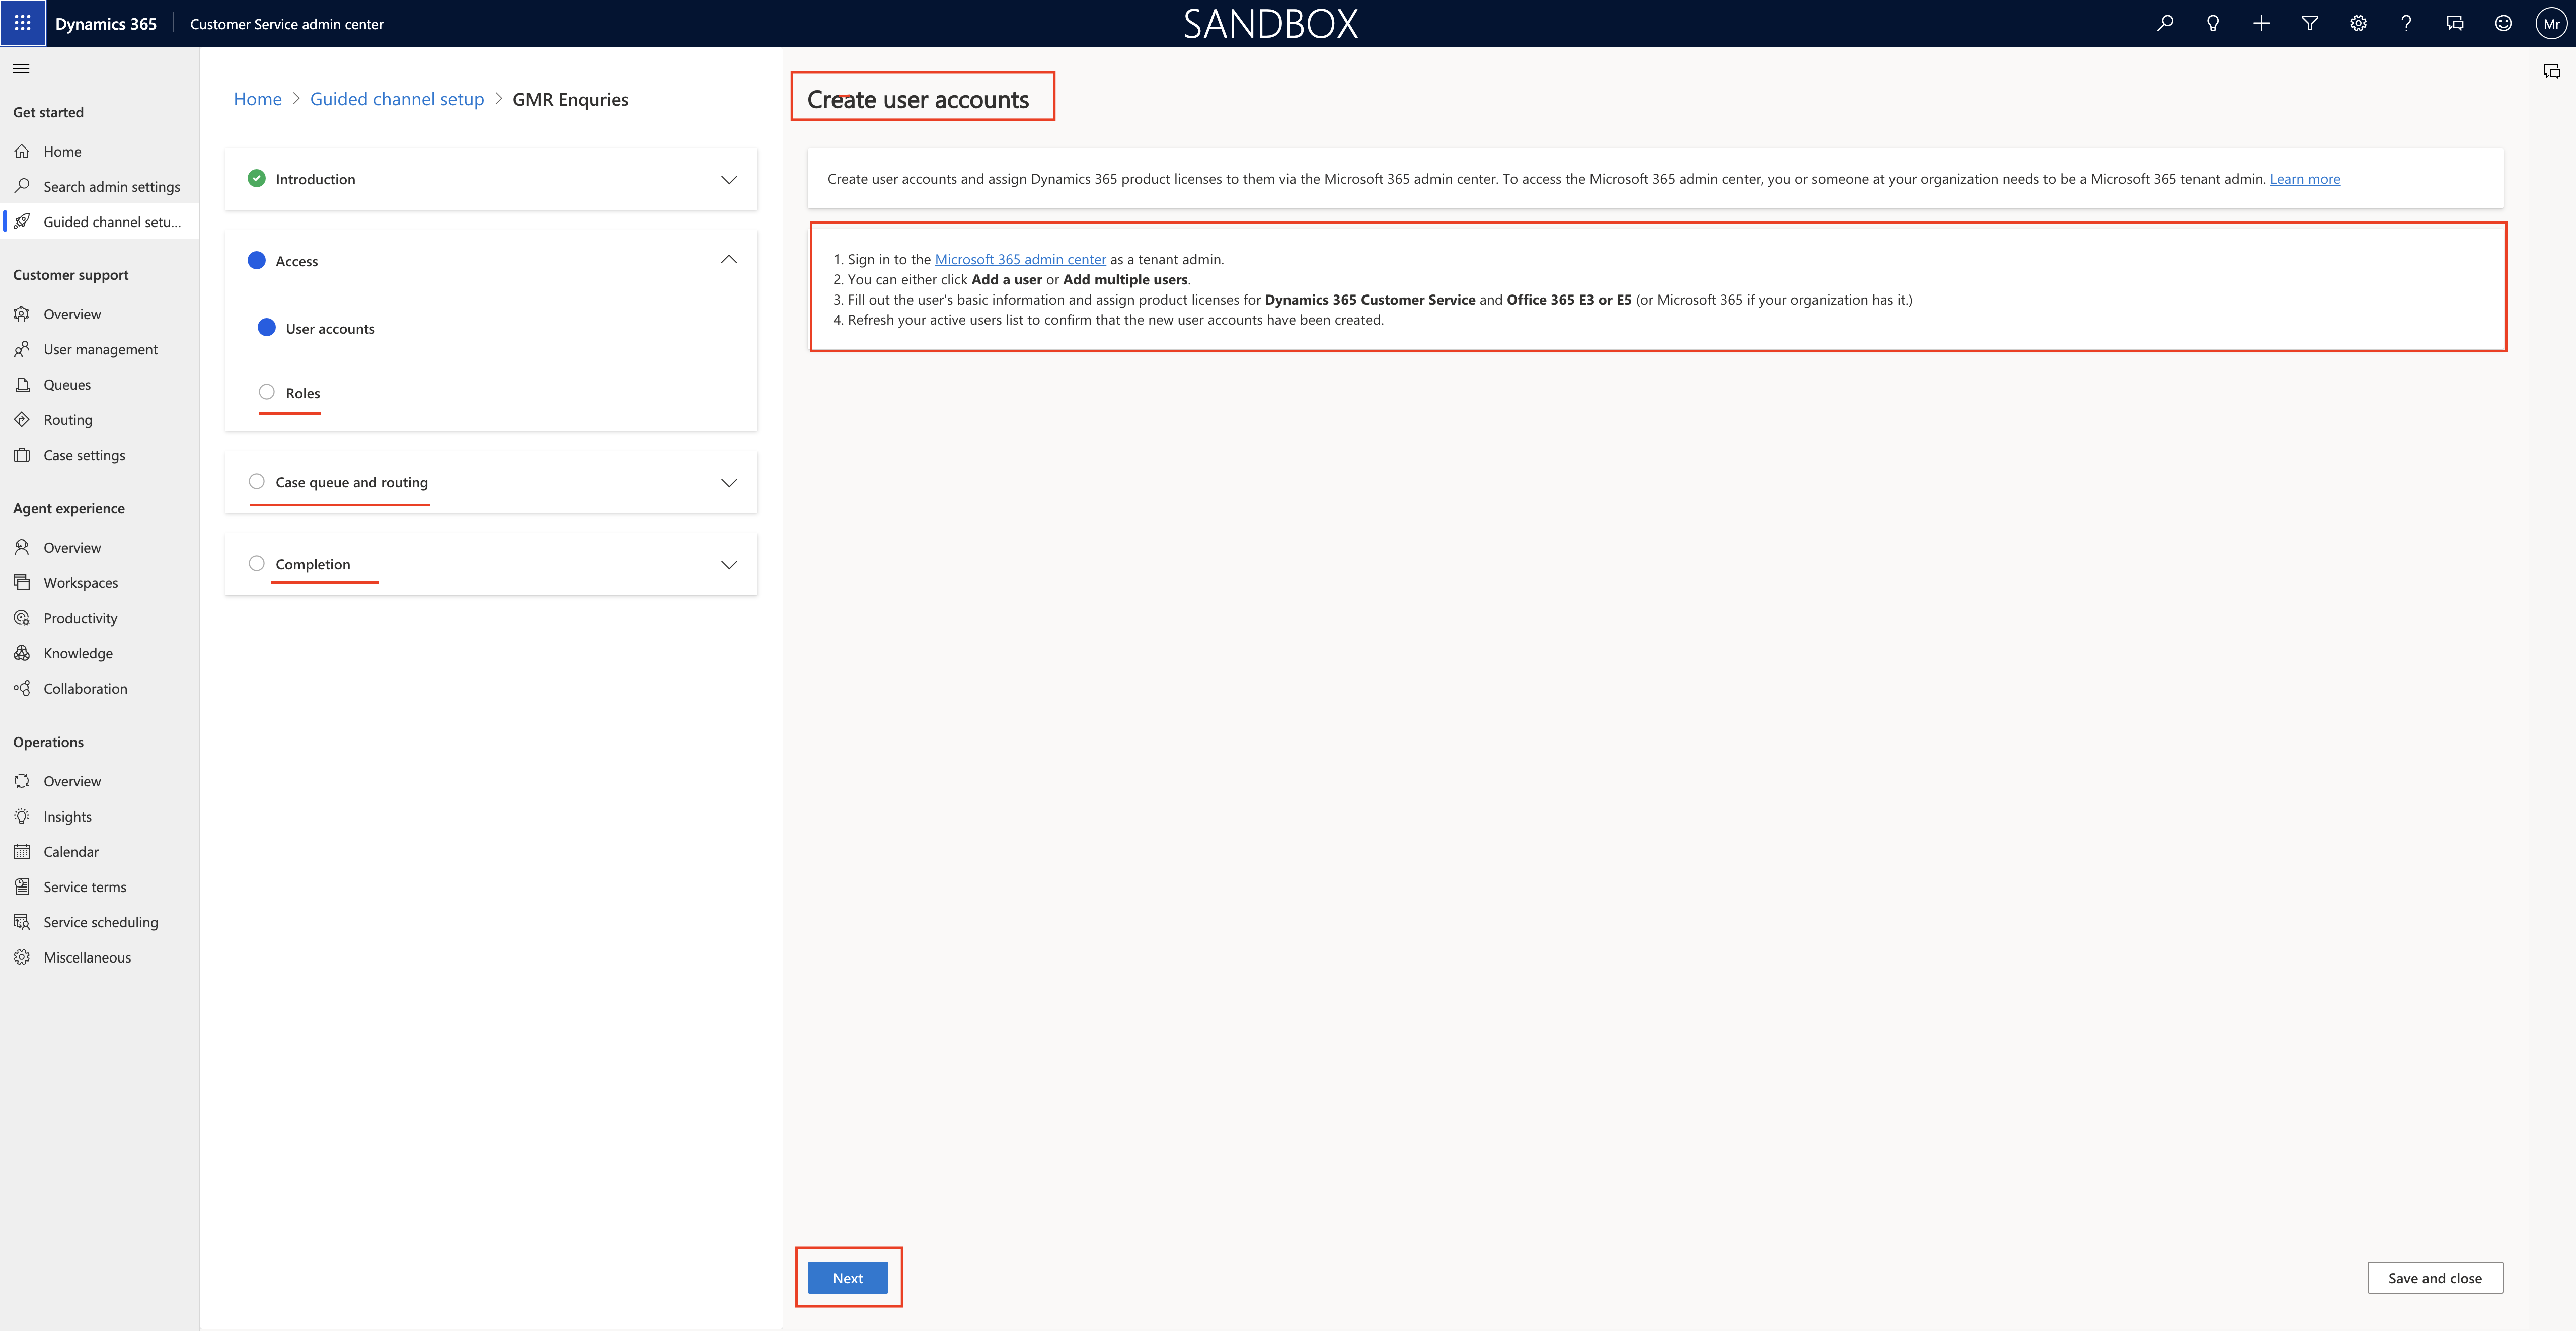
Once you fulfil all the configuration steps, click NEXT.

Next steps to complete are:

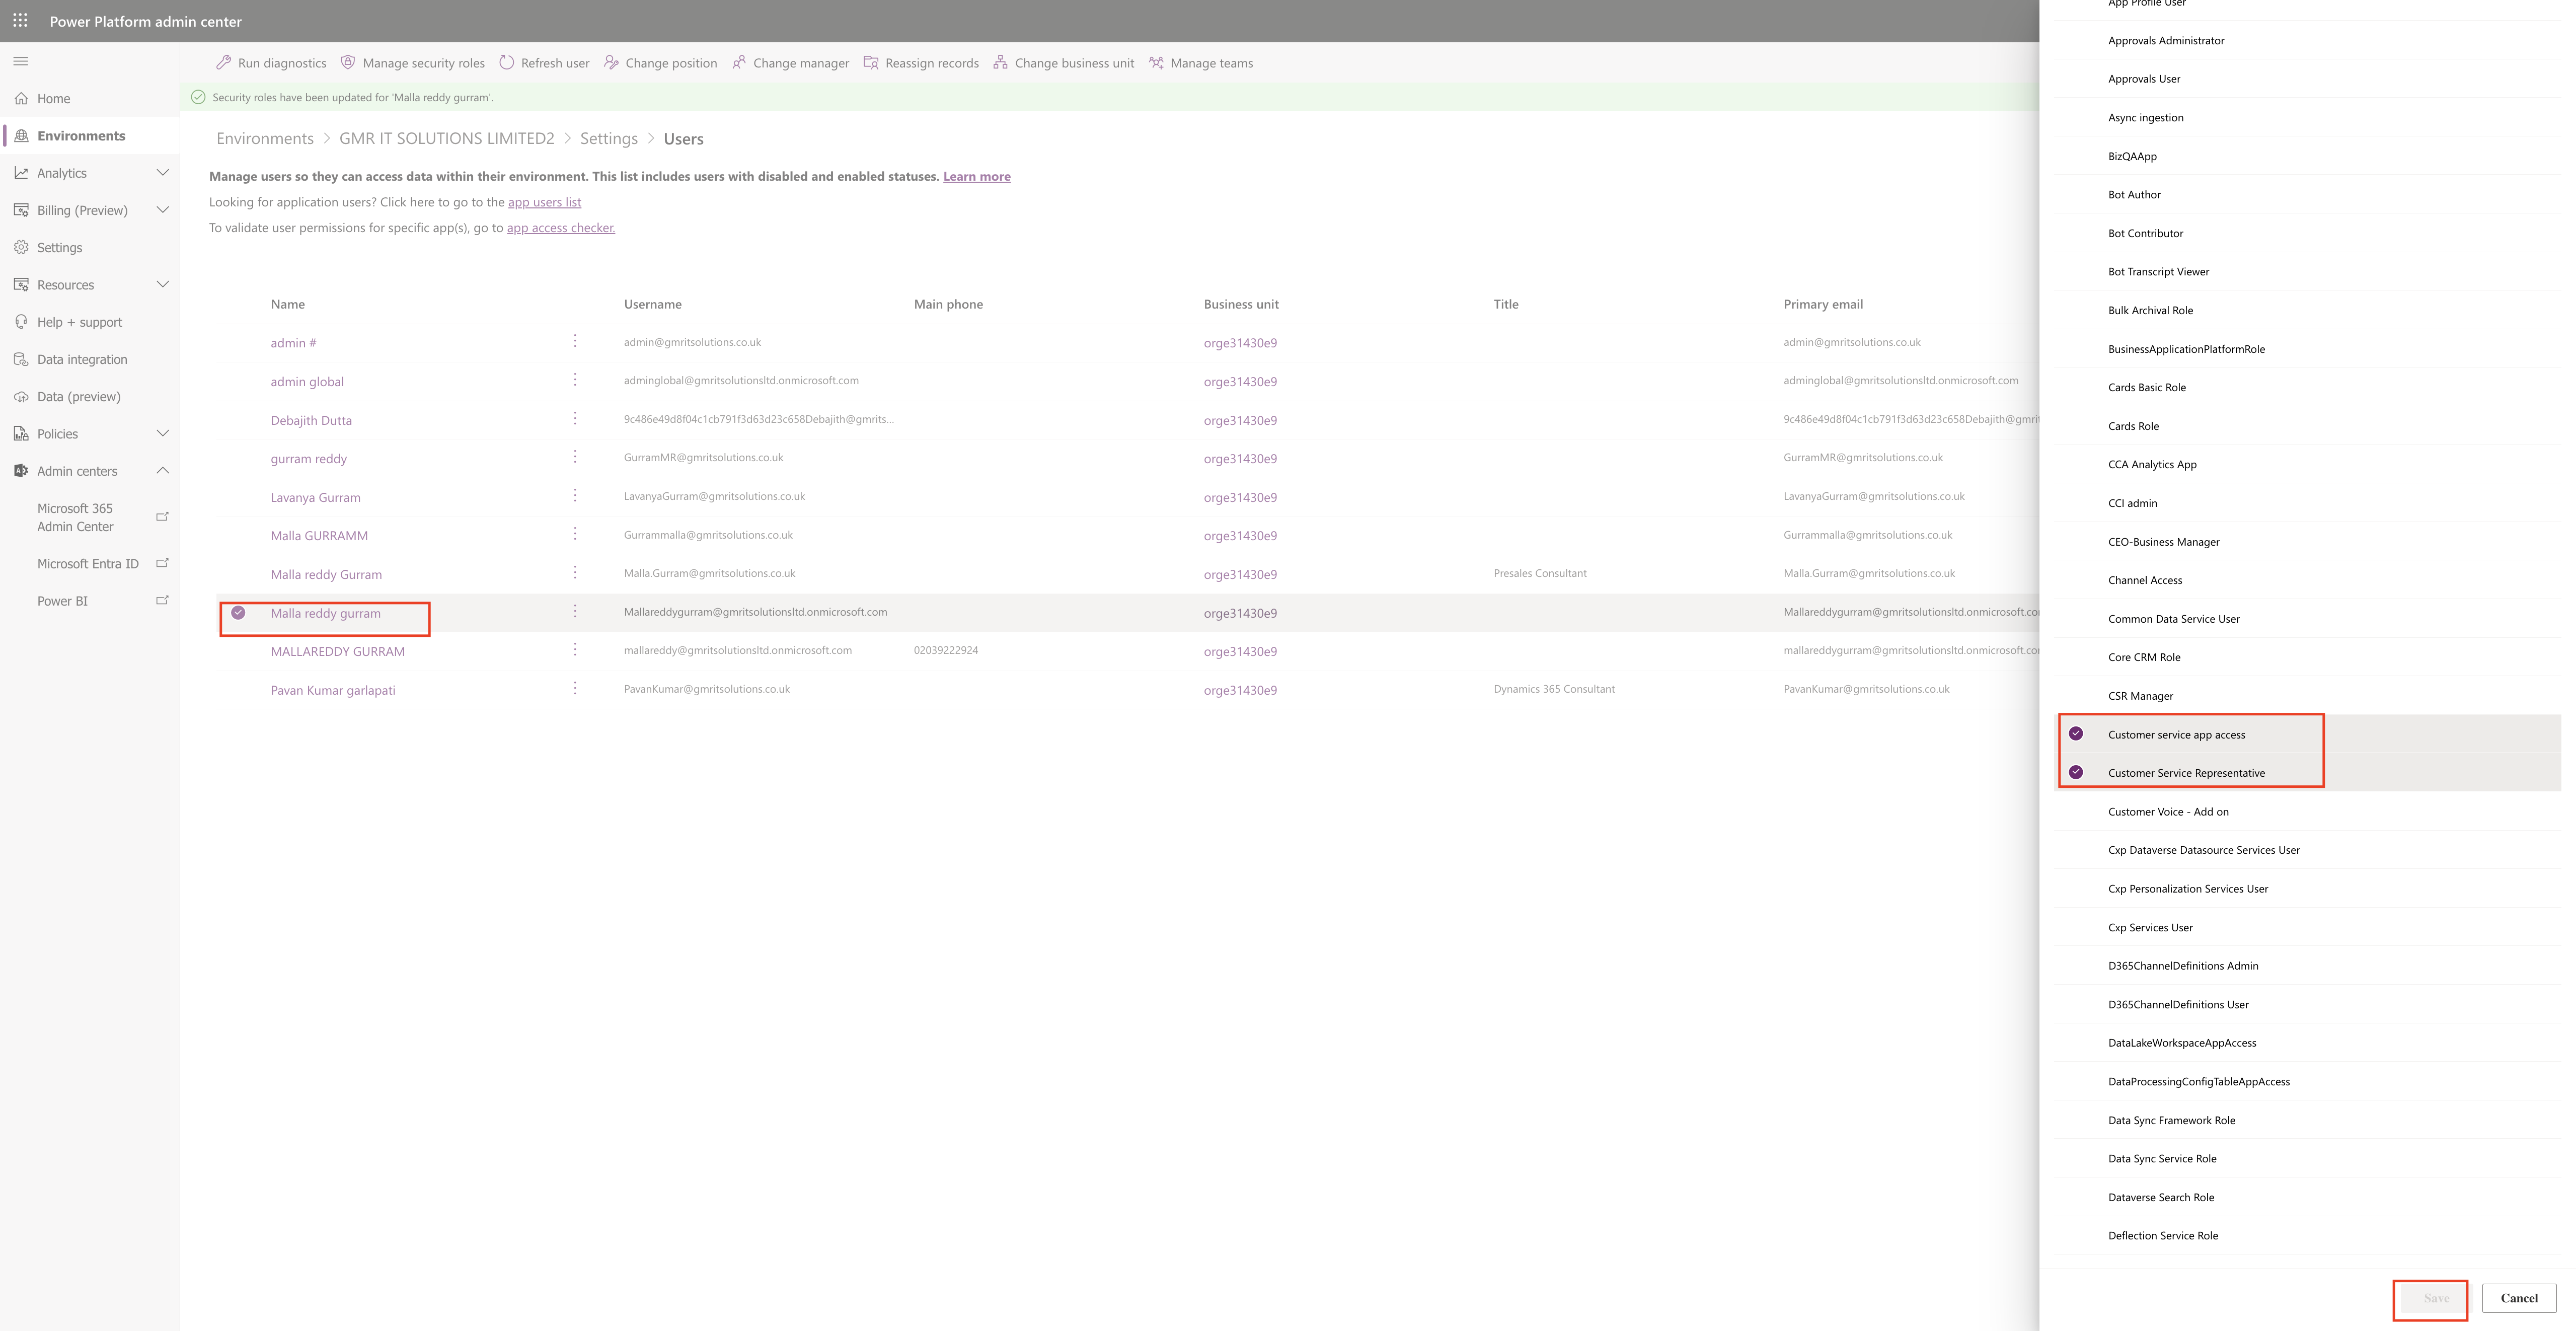
1. Roles
2, Case Queue and routing
3. Completion.
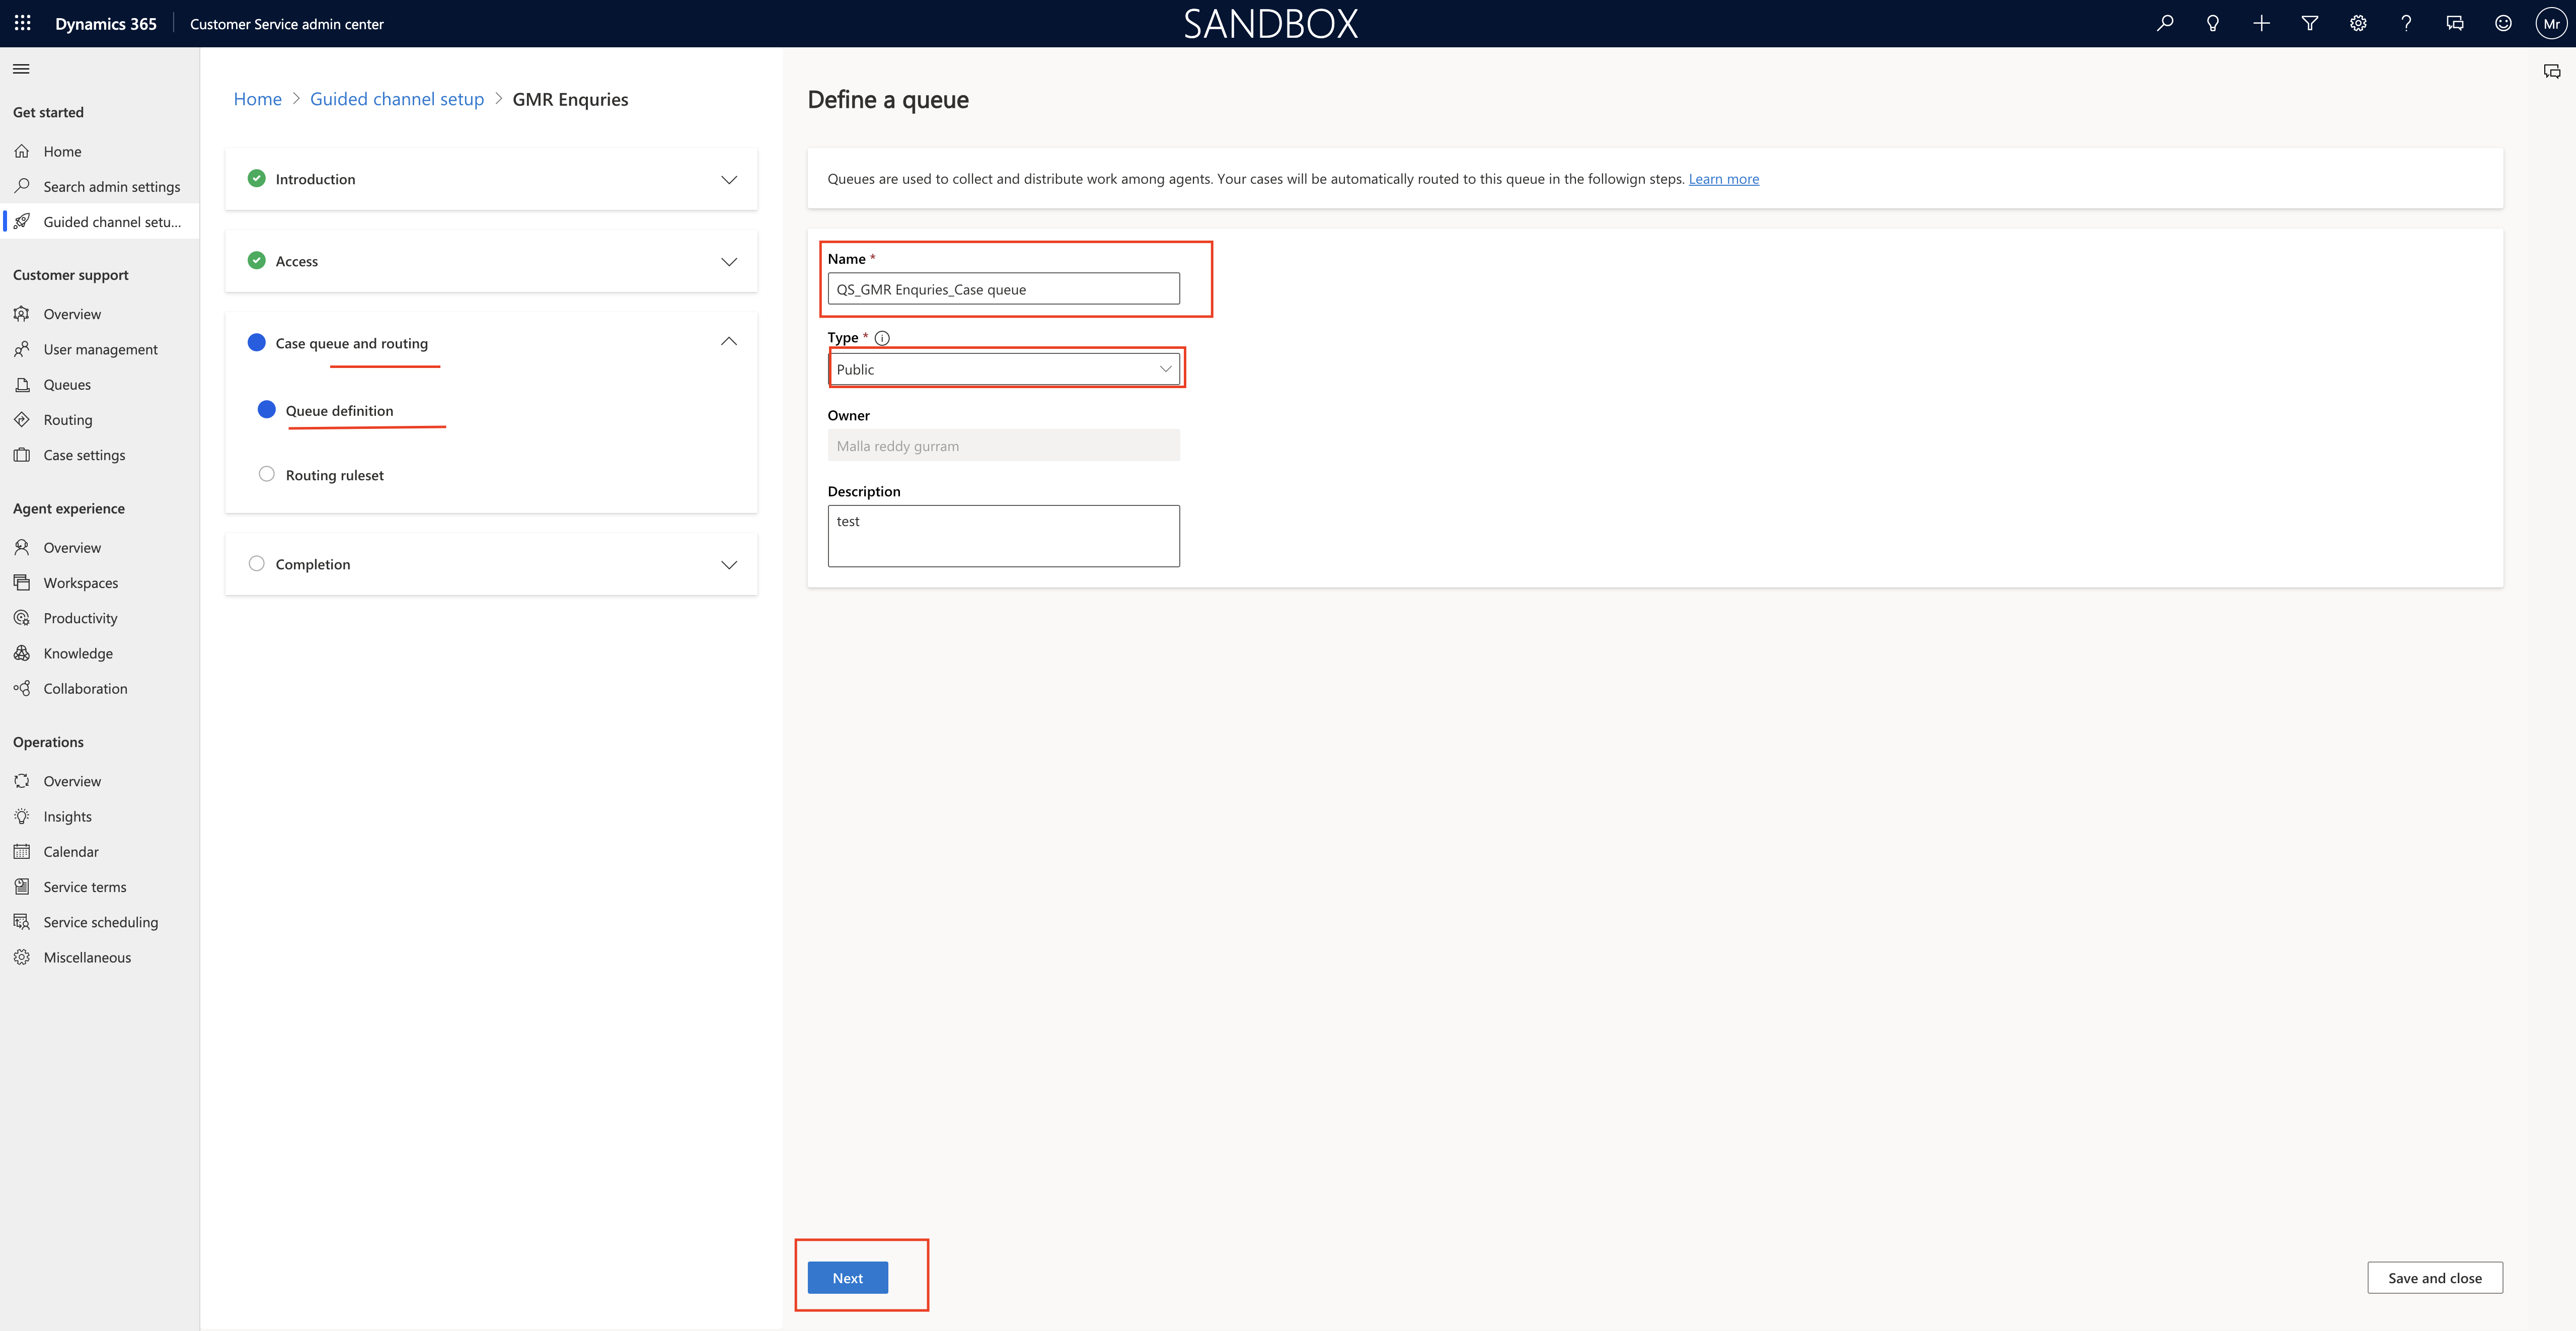
Now you need to define a queue: Name, type as public or private, owner, description and click NEXT.
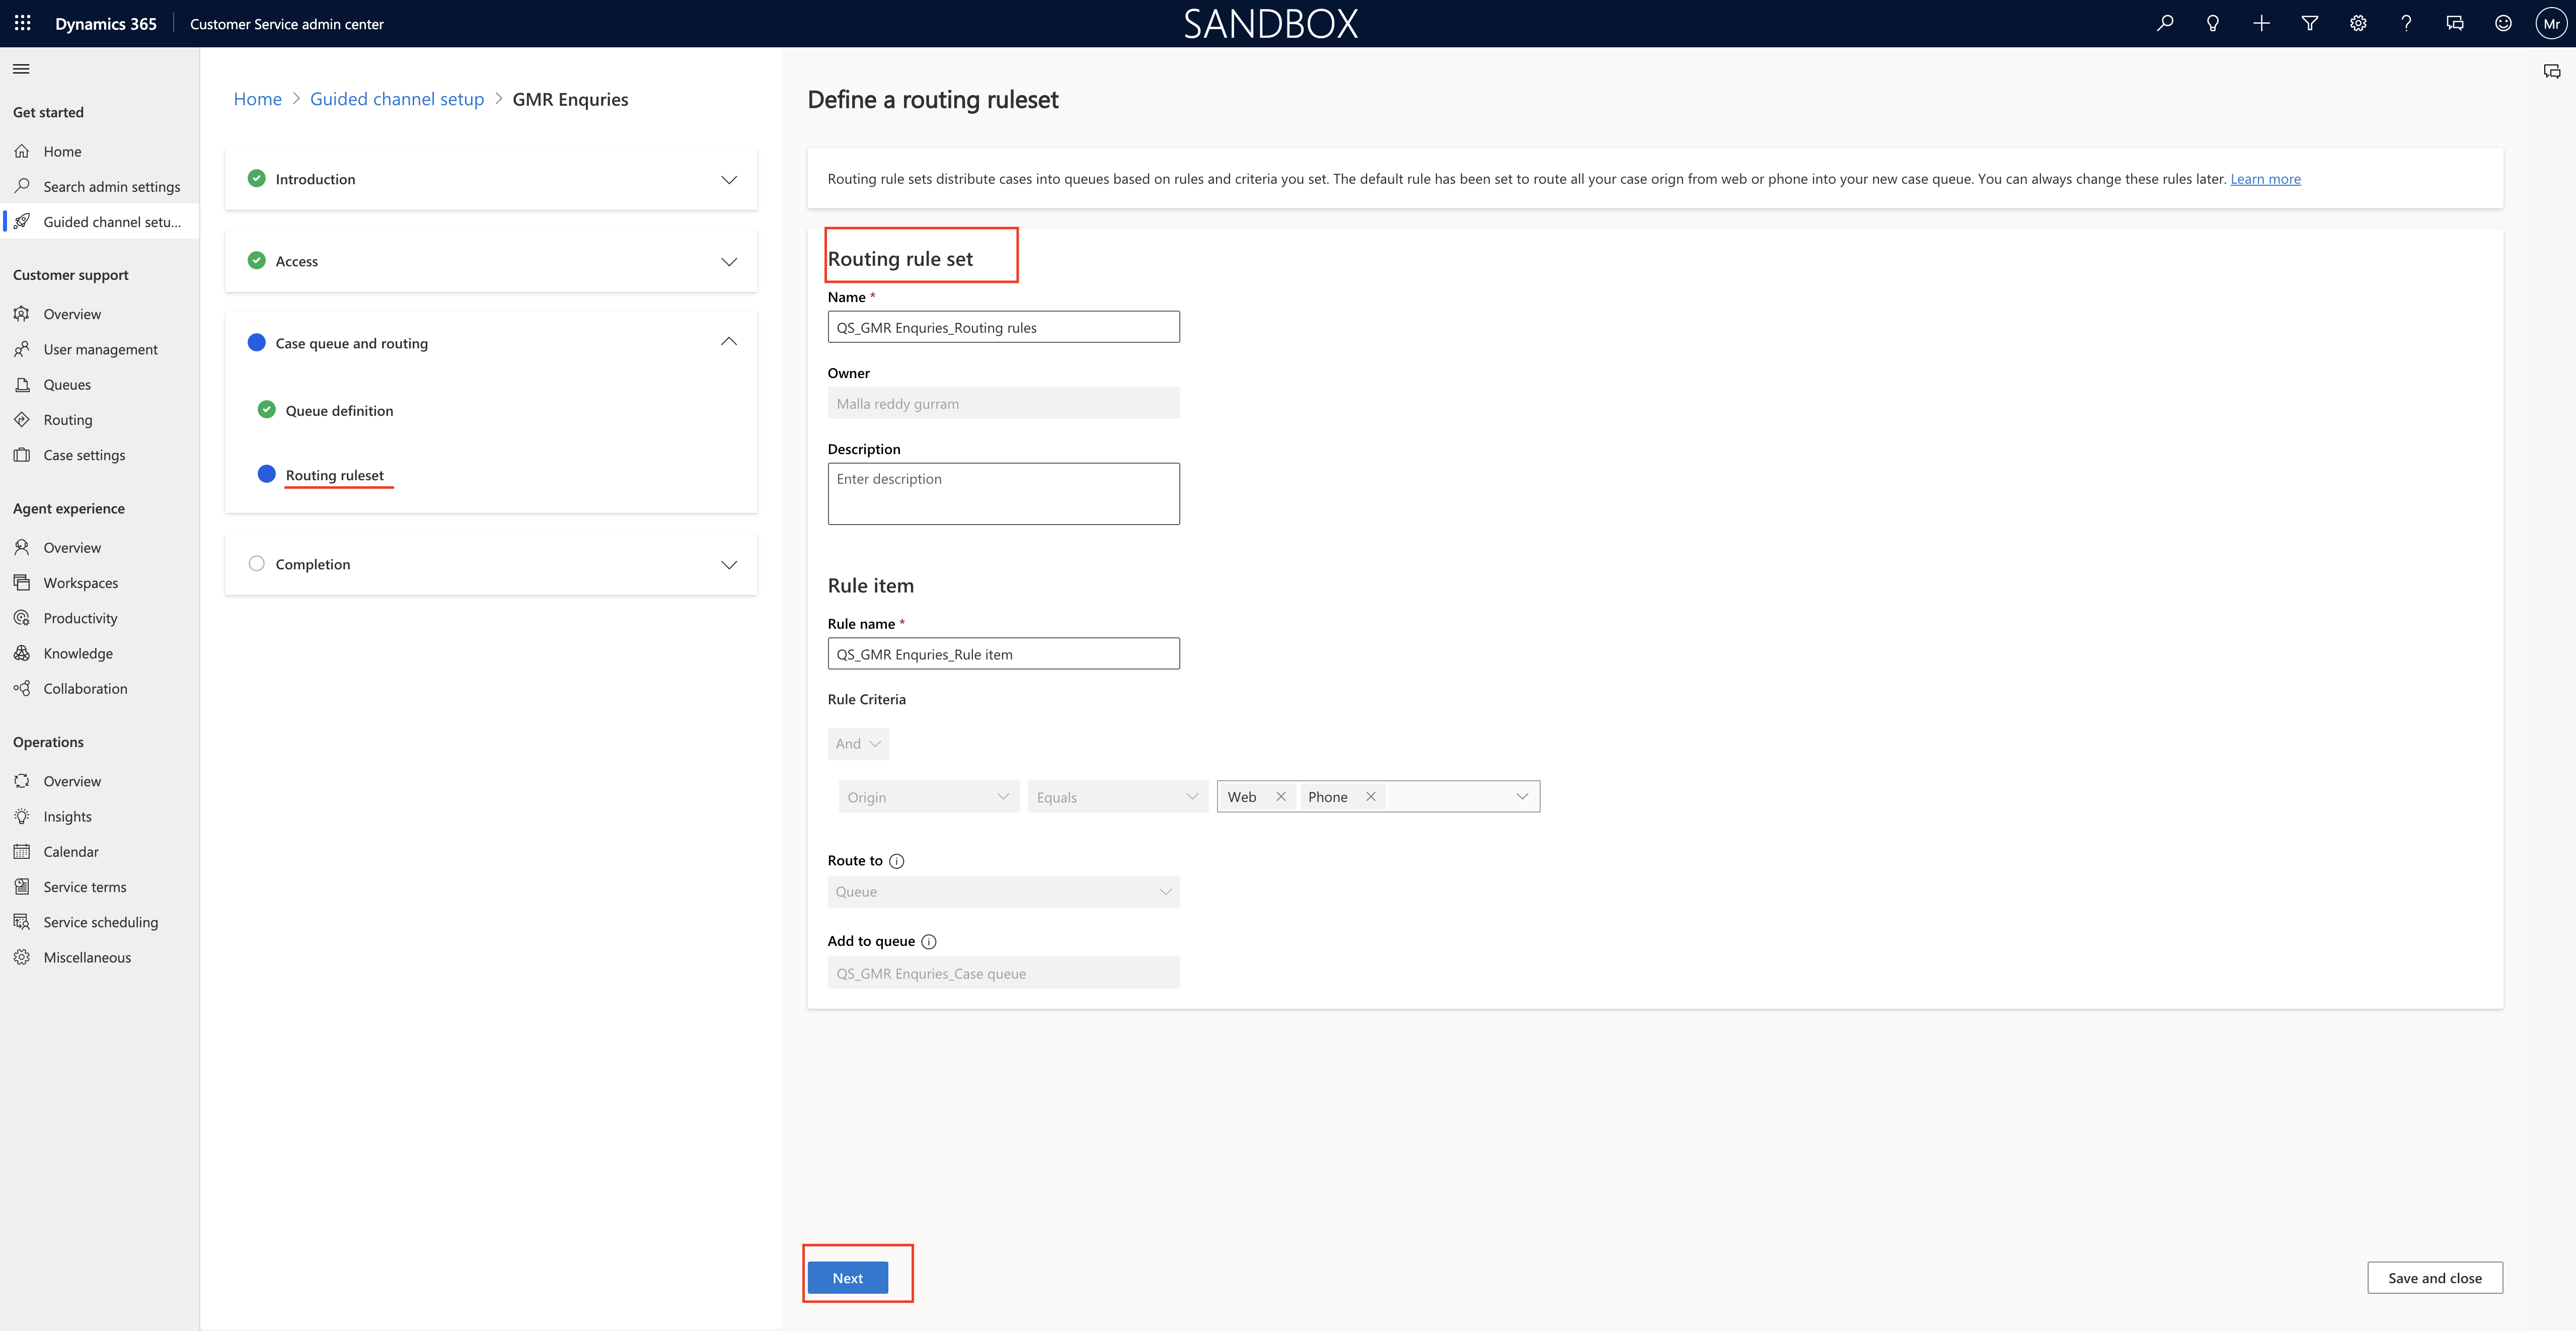
Define a routing ruleset:

Name, Description, Rule name, criteria, route to, add to queue and click Next.
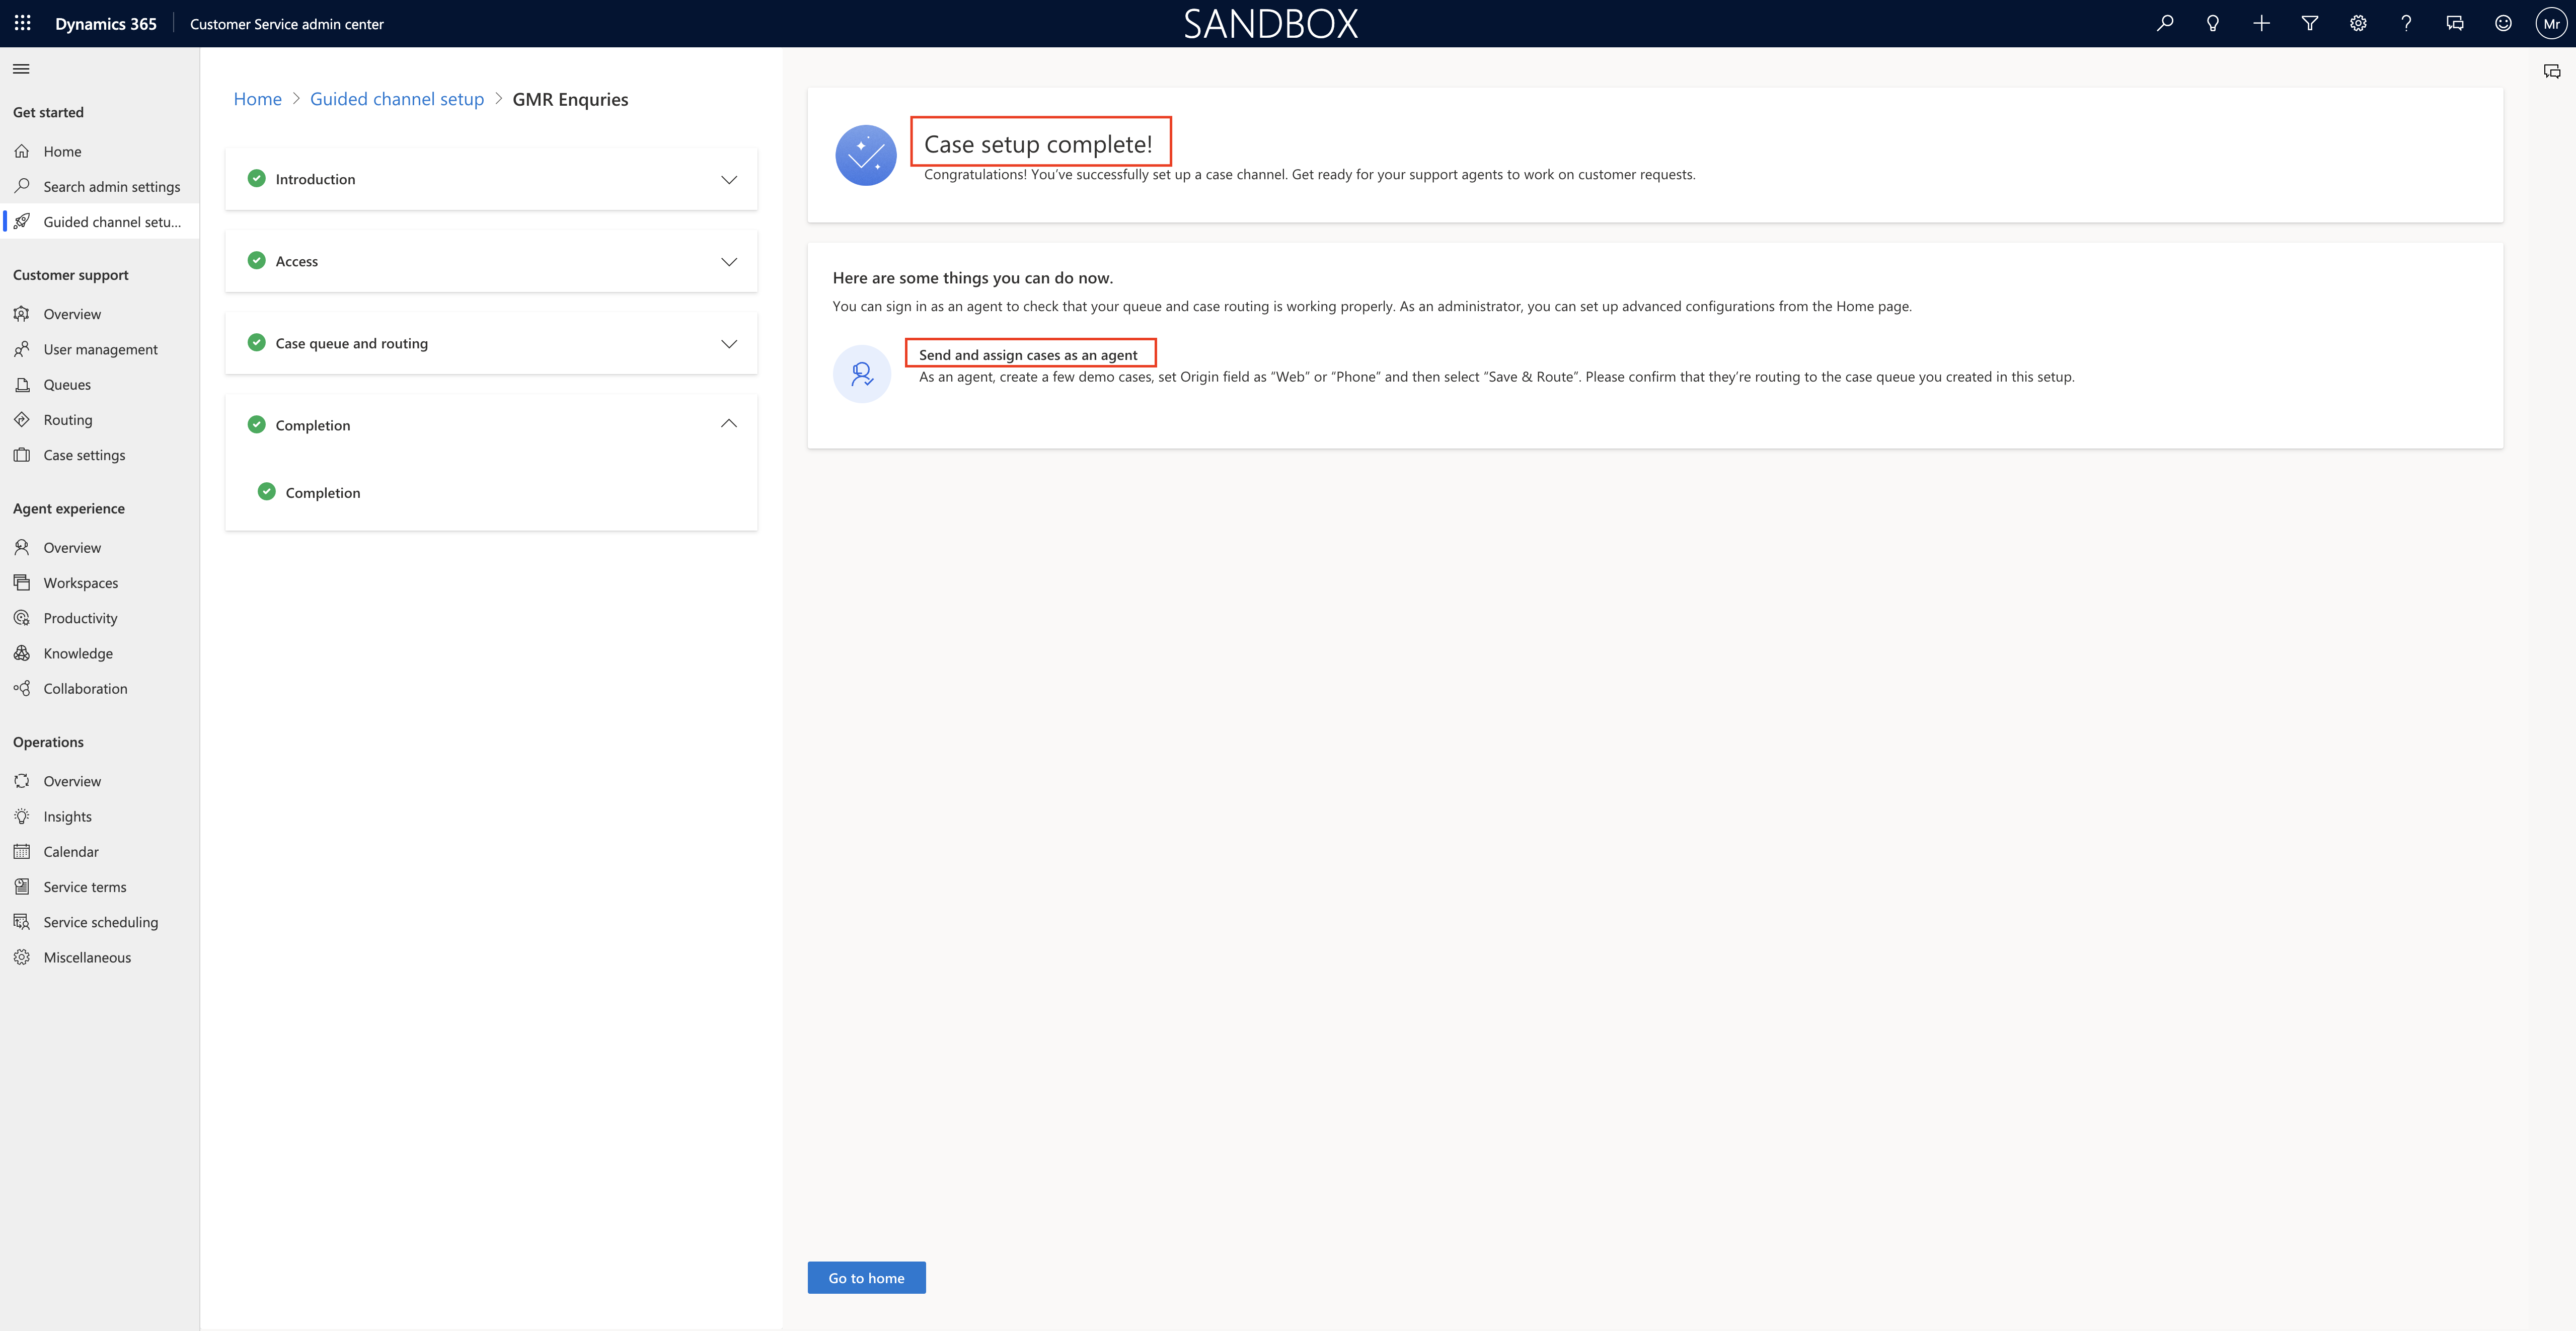
Final step to completion:

You can sign as an agent to check that your queue and case routing is working properly.

As a administrator, you can set up advanced configurations from the home page.
That’s it for today.

I hope this helps.

Malla Reddy Gurram(@UK365GUY)
#365BlogPostsin365Days

Share this:

{How to} enable case forecasting(Preview) in Dynamics 365 Customer Service

Hello Everyone,

Today I am going to share how to enable case forecasting in Dynamics 365 Customer Service.

Let’s get’s started.

Login into Dynamics 365 and choose Customer Service admin center App.

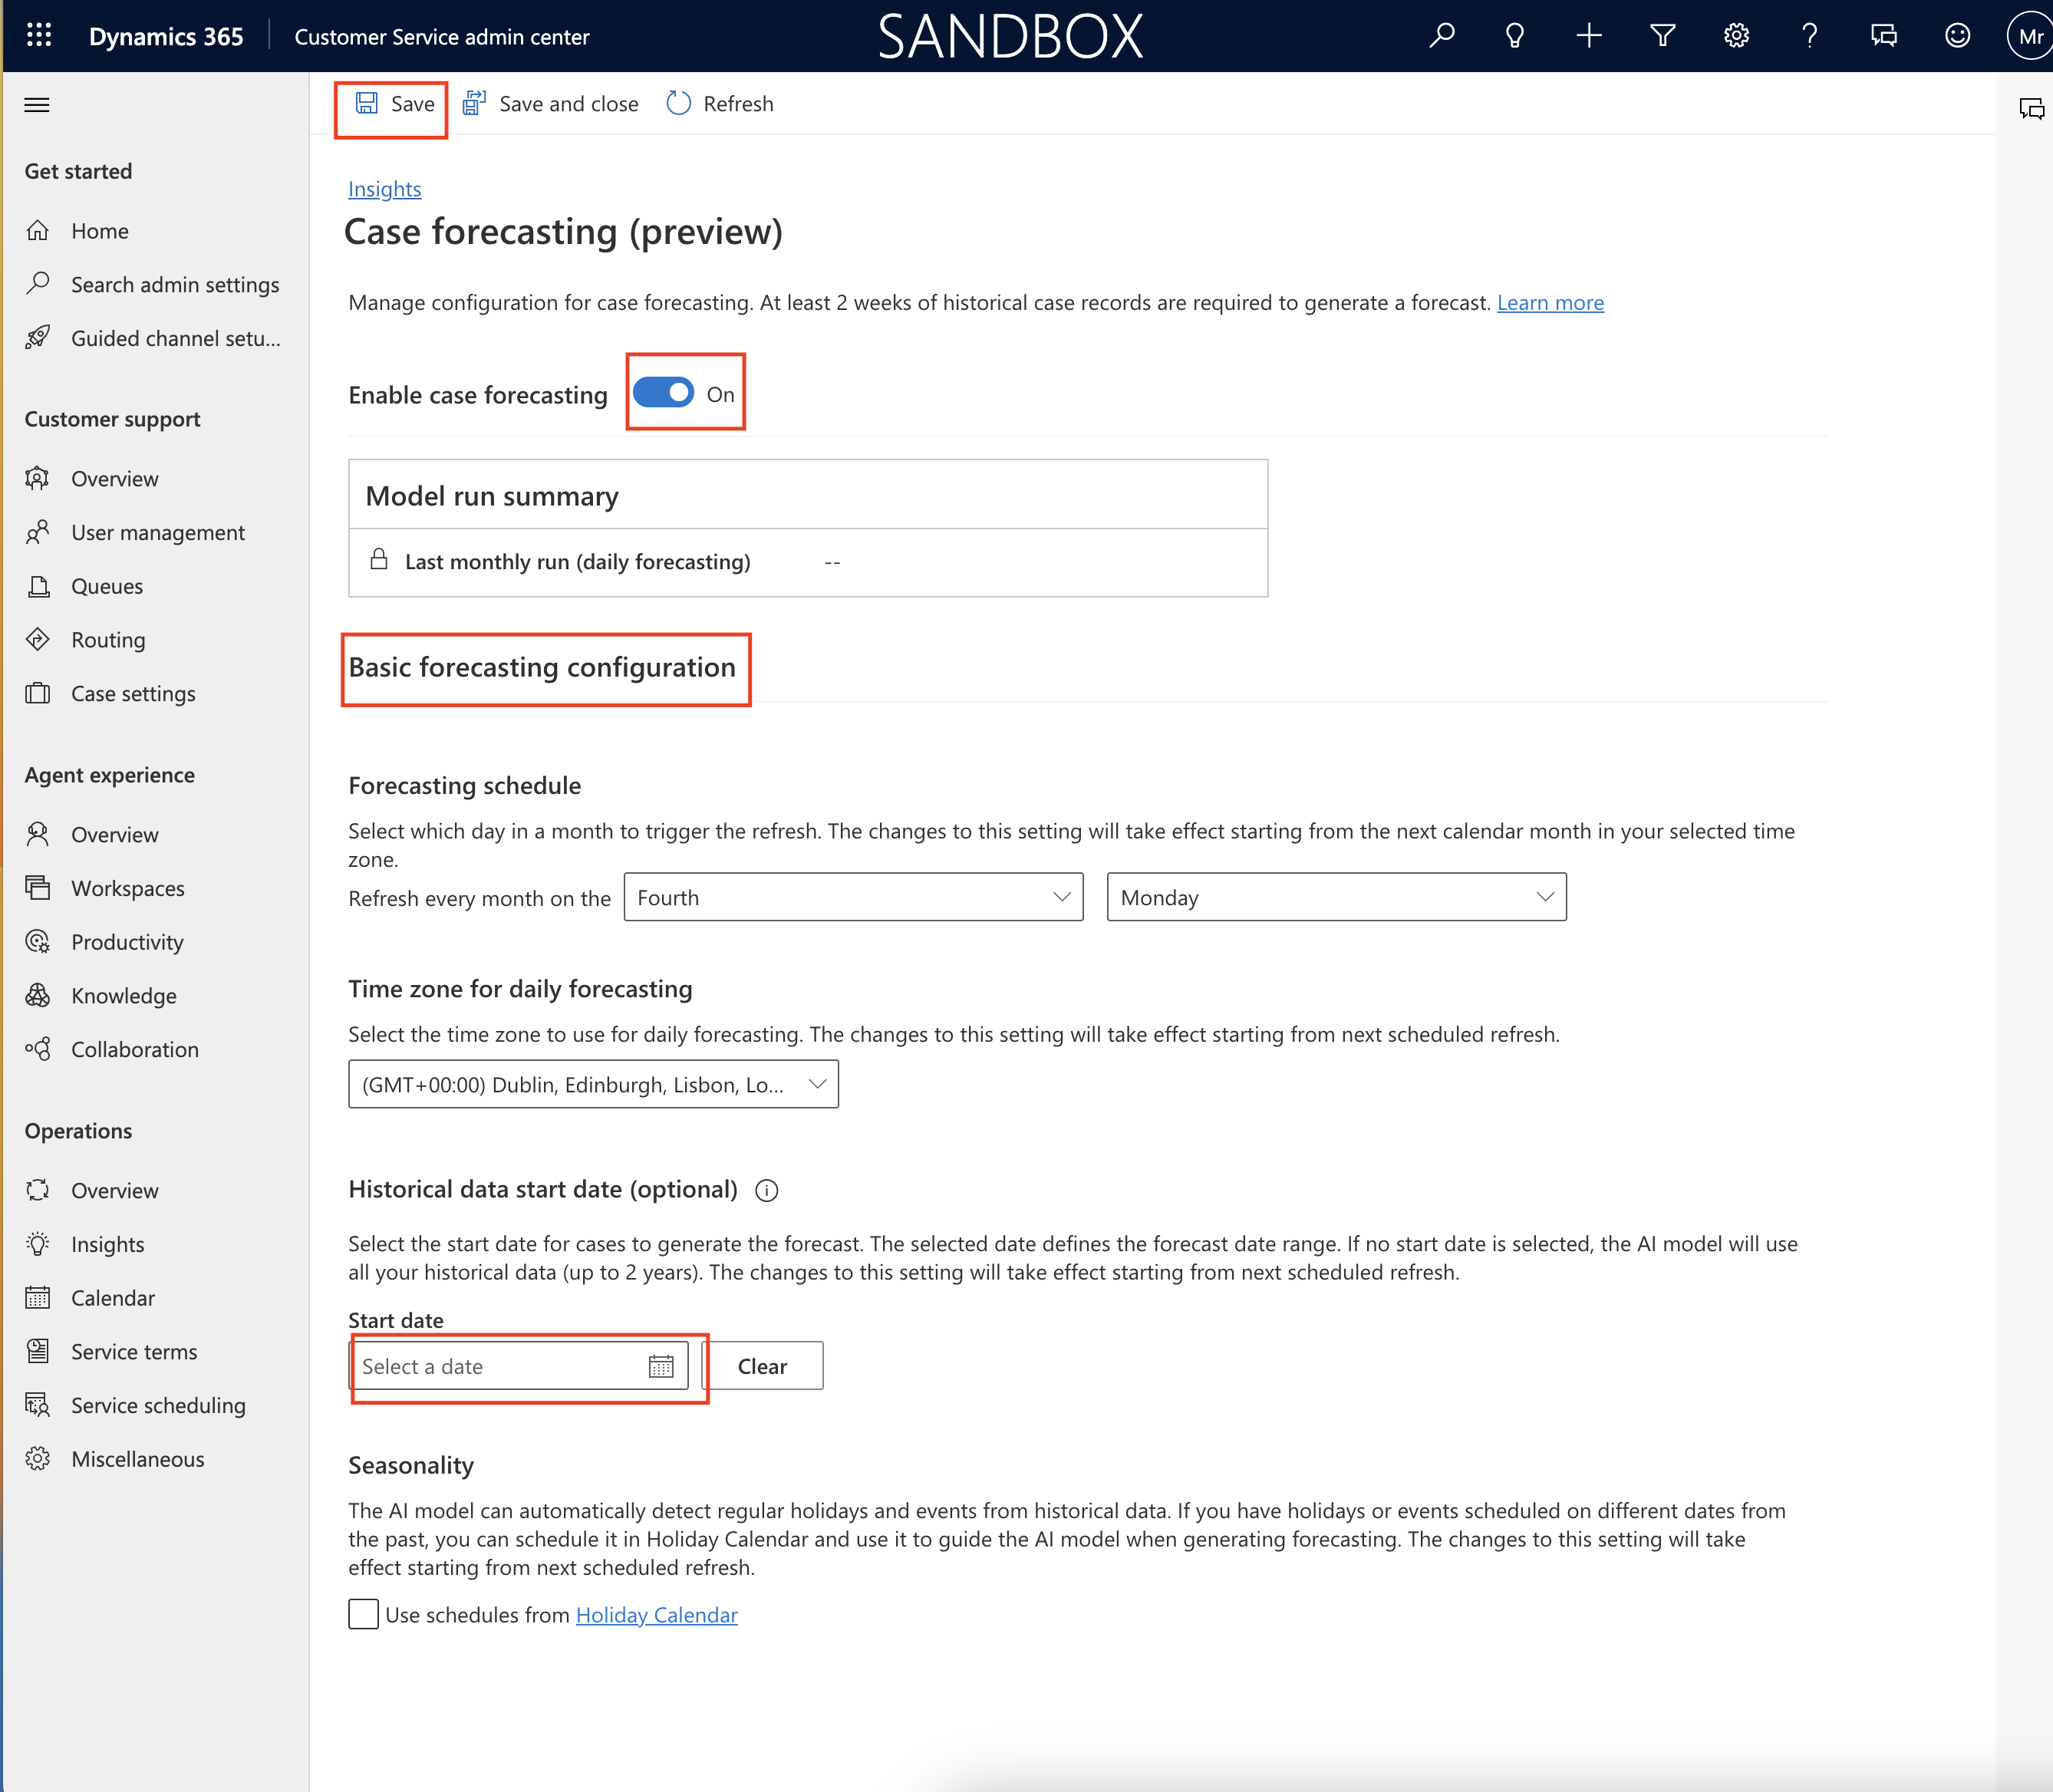
Case forecasting(preview)

Manage configuration for case forecasting. At least 2 weeks of historical case records are required to generate a forecast.

Enable case forecasting = ON.

Basic forecasting configuration:

Forecasting schedule: Select which day in a month to trigger the refresh. The changes to this setting will take effect starting from the next calendar month in your selected time zone.

You can set the refresh for every week.

Time zone for daily forecasting:

Select the time zone to use for daily forecasting. The changes to this settings will take effect starting from next scheduled refresh.

Historical data start date is optional and you can set if you want one.

Seasonality: The AI model can automatically detect regular holidays and events from historical data. if you have holidays or events scheduled on different dates from the past, you can schedule it in Holiday Calendar and use it to guide the AI model when generating forecasting. The changes to this setting will take effect starting from next scheduled refresh.

Turn on Use scheduled from Hoilday Calendar.

That’s it for today.

I hope this helps.

Malla Reddy Gurram(@UK365GUY)
#365BlogPostsin365Days
Share this:

{How to} turn on unified routing in Dynamics 365 Customer Service

Hello Everyone,

Today i am going to show how to enable unified routing in Dynamics 365 Customer Service.

Let’s get’s started.

Login into Dynamics 365 and choose the Customer Service Admin Center App.

Turn on the Unified Routing = ON

For more information about the benifits and prequisites click Here

That’s it for today.

I hope this helps

Malla Reddy Gurram(@UK365GUY)
#365BlogPostsin365Days

Share this:

{How to} Enable Enhanced Full Case Form in Dynamics 365 Customer Service

Hello Everyone,

Today I am going to share what is the significance of Enhanced Full Case Form in Dynamics 365 Customer Service.

Let’s get’s started.

In the Dynamics 365 Customer Service – Agents create and work on multiple cases and need to switch between multiple screens to view customer details or refer to past cases and prior interactions.

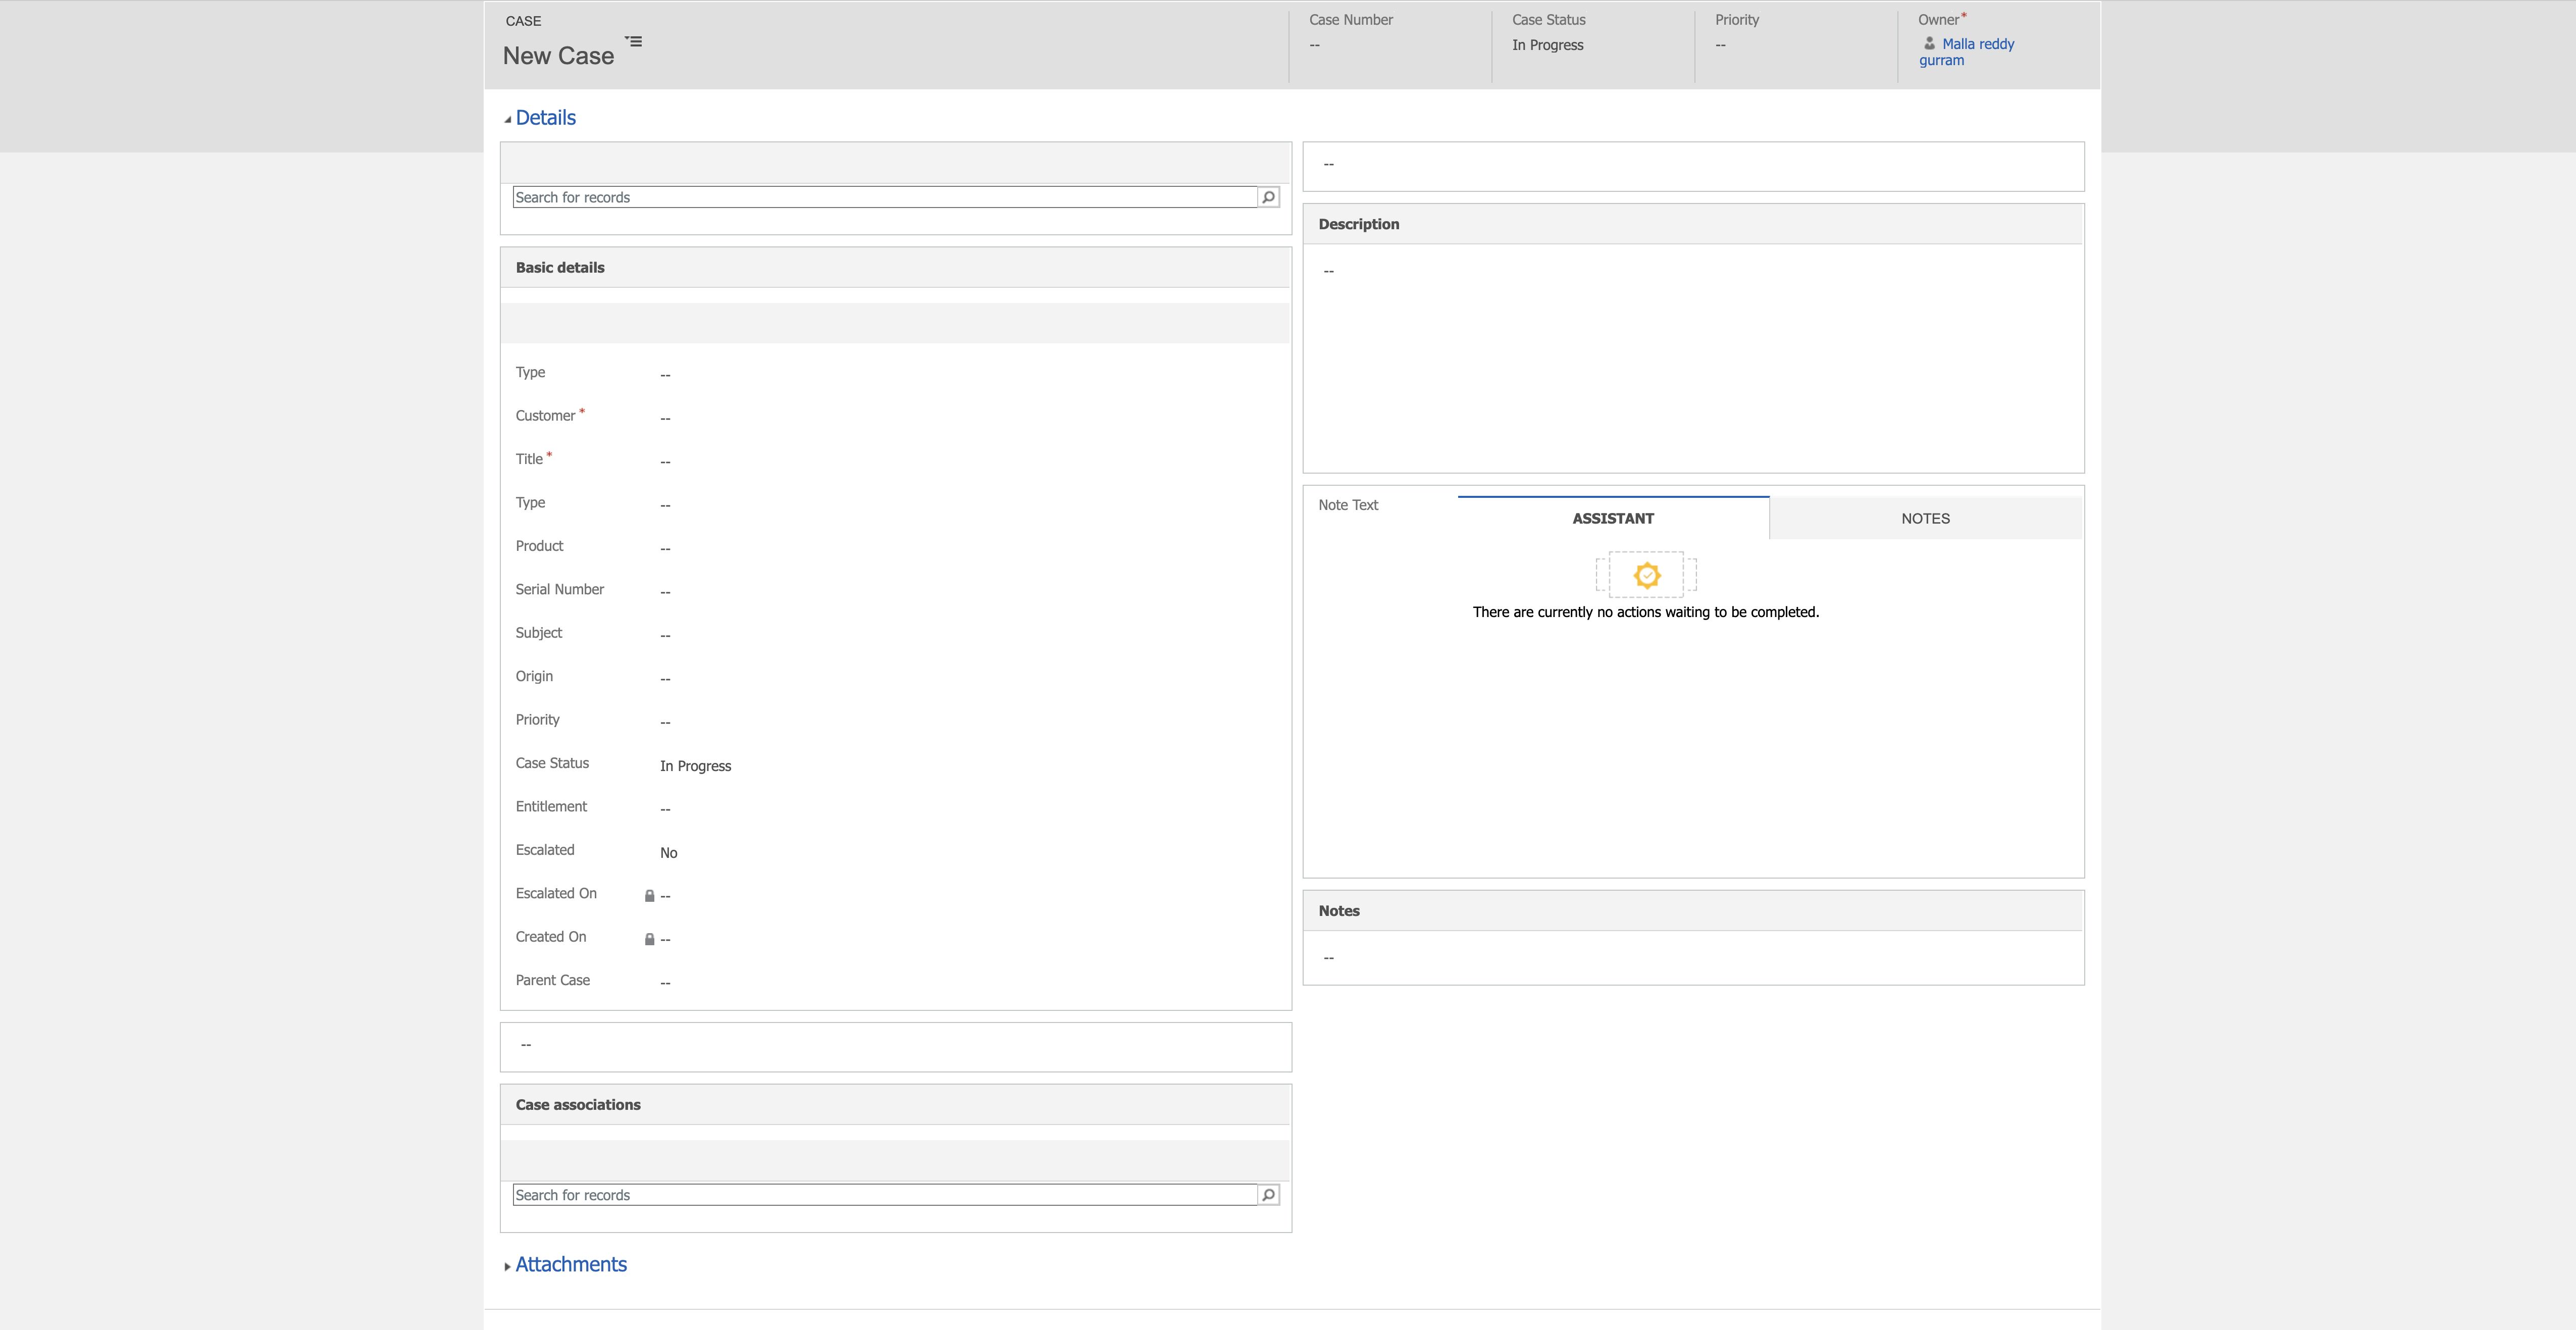
At the moment agents can upload attachments and capture notes during case creation.

This type of capturing information on case form is unnecessary repetitive tasks.

So Agents need an intutitive case form that allows them to find the relevant information and perform operations quickly.

New Enhanced Full Case Form have:

Can upload the attachments on separate section with great visibility, description field with RTE capabilities to capture rich case details.

You can add key information without losing sight of customer details, past cases, and previous inteeractions, this will avoid case duplication.

You can add notes during case creation.

Access all the attachments related to a case in a consolidated view.

How to activate ENHANCED FULL CASE FORM?

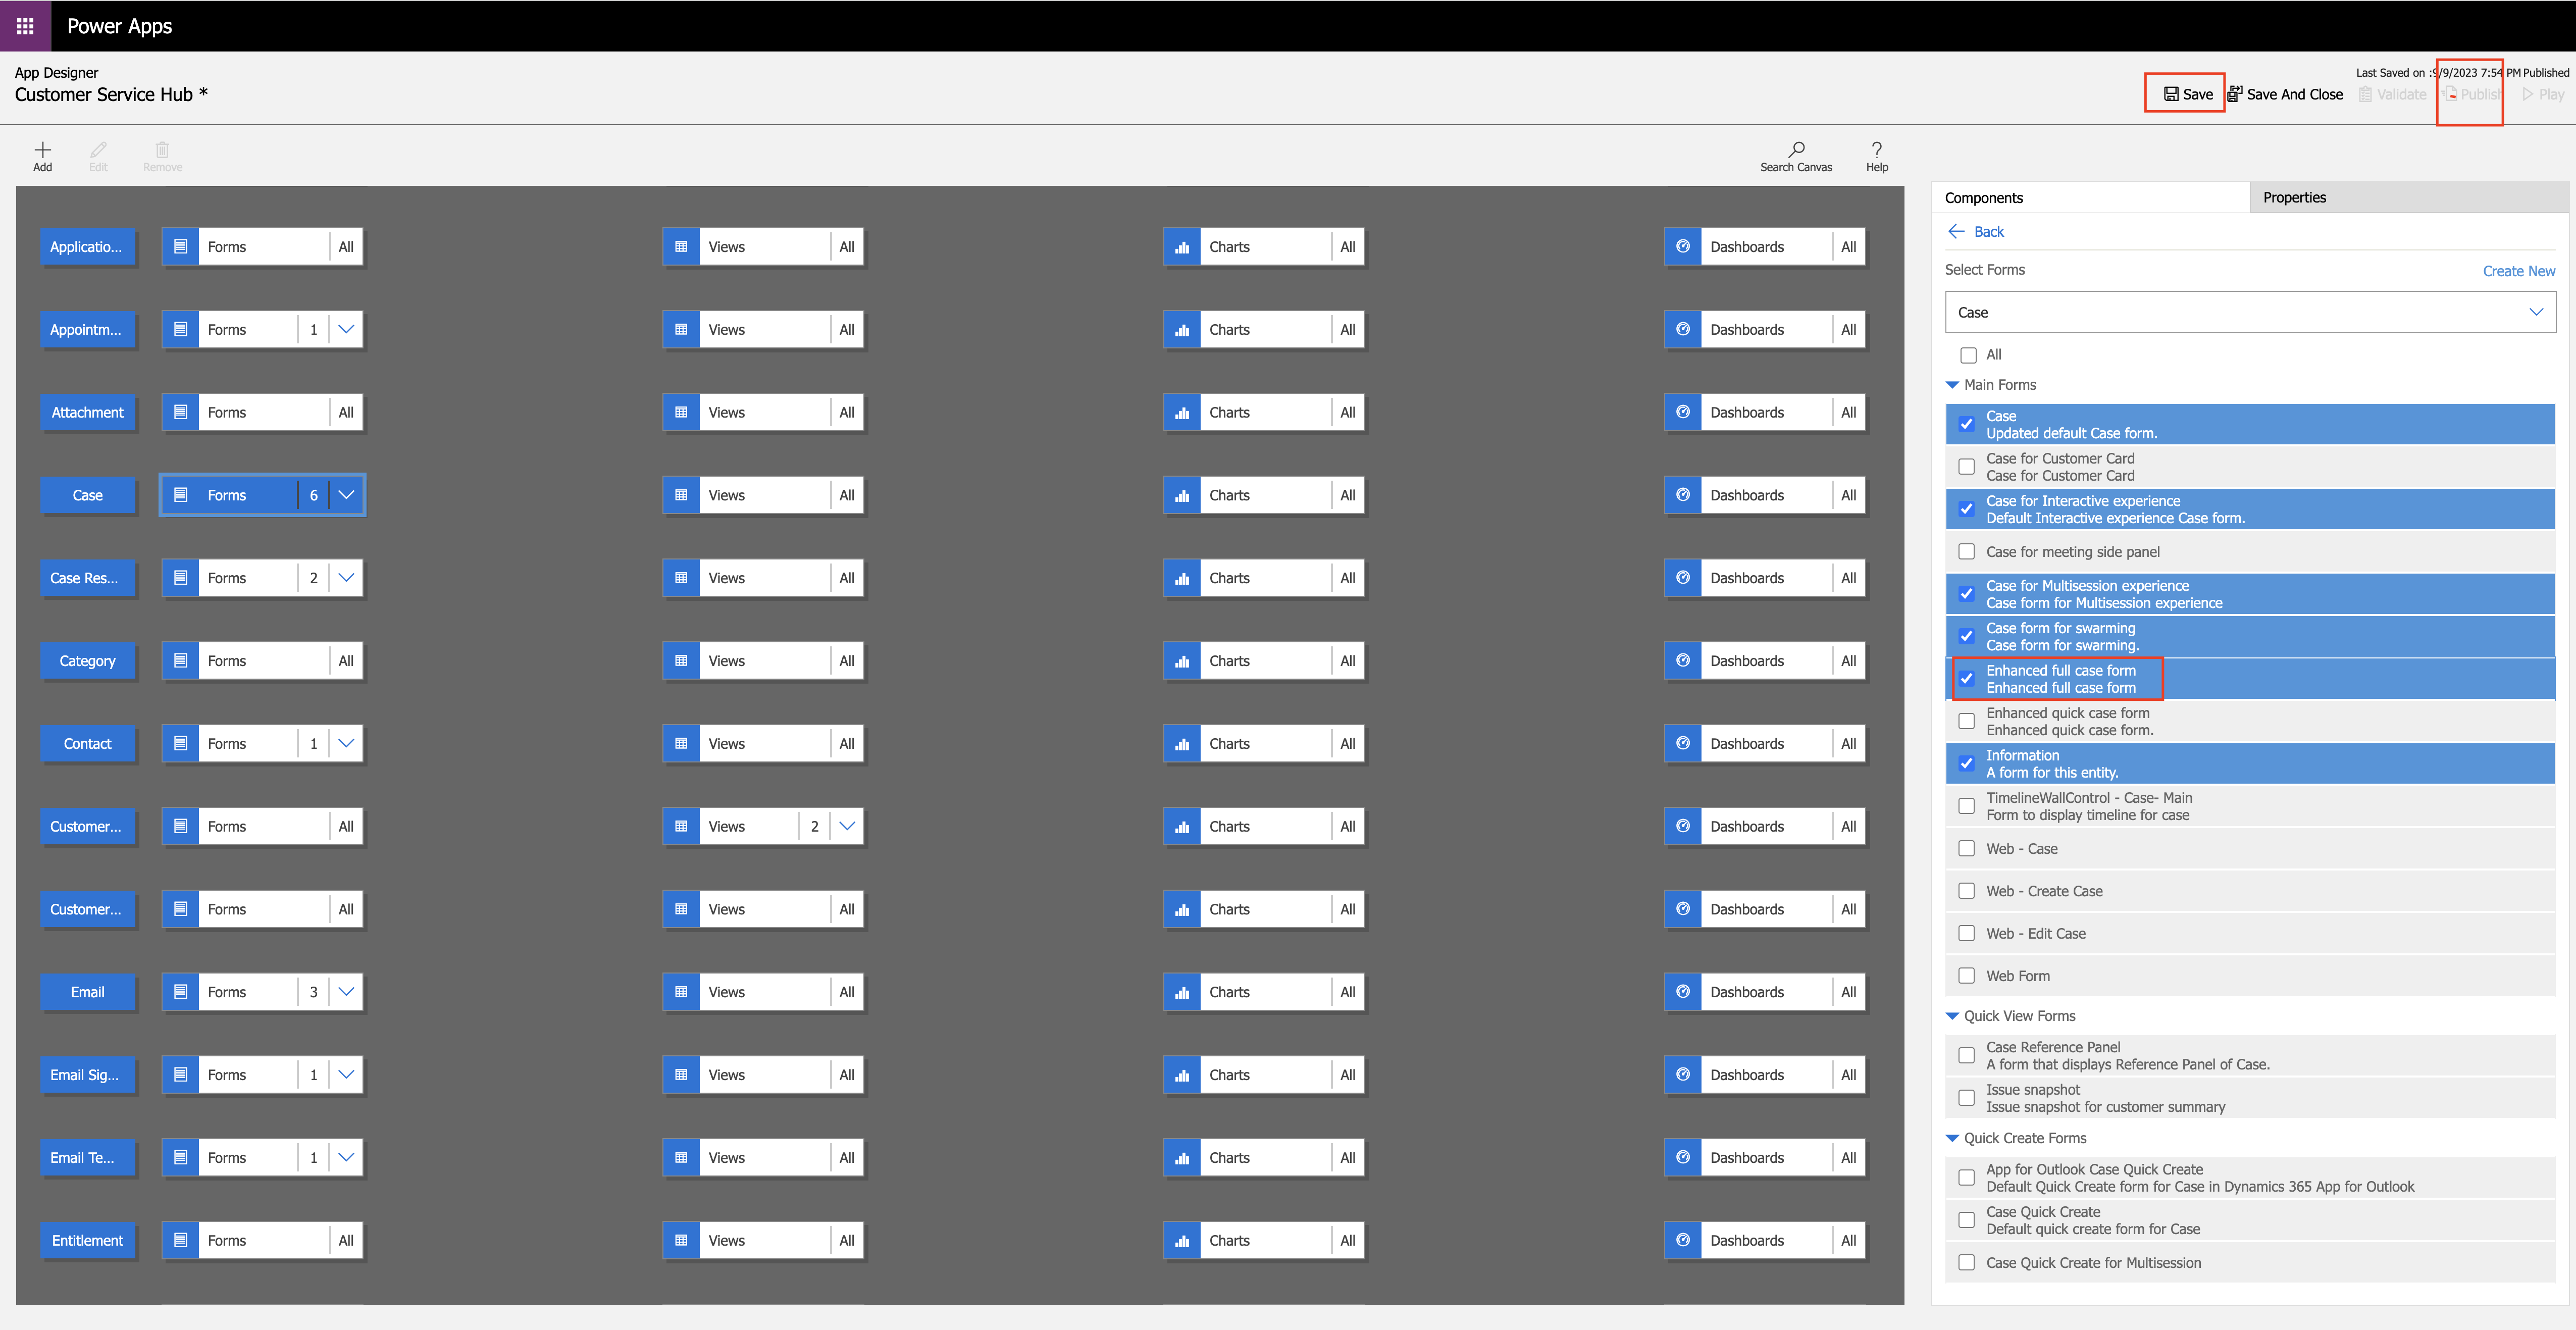
Login into Dynamics 365 Customer Service Hub.

Open the site map of the customer service hub and check the box of the enhanced full case form.
and save and publish the changes.

Now open the case form and choose the enhanced full case form.

Now you case see the attachment section, description and notes.

That’s it for today.

I hope this helps

Malla Reddy Gurram(@UK365GUY)
#365BlogPostsin365Days

Share this:

Set Advisor Program Preview in Dynamics 365 CE Apps

Hello Everyone,

Today i am going to show how it looks when an advisor program is enabled in your organisation.

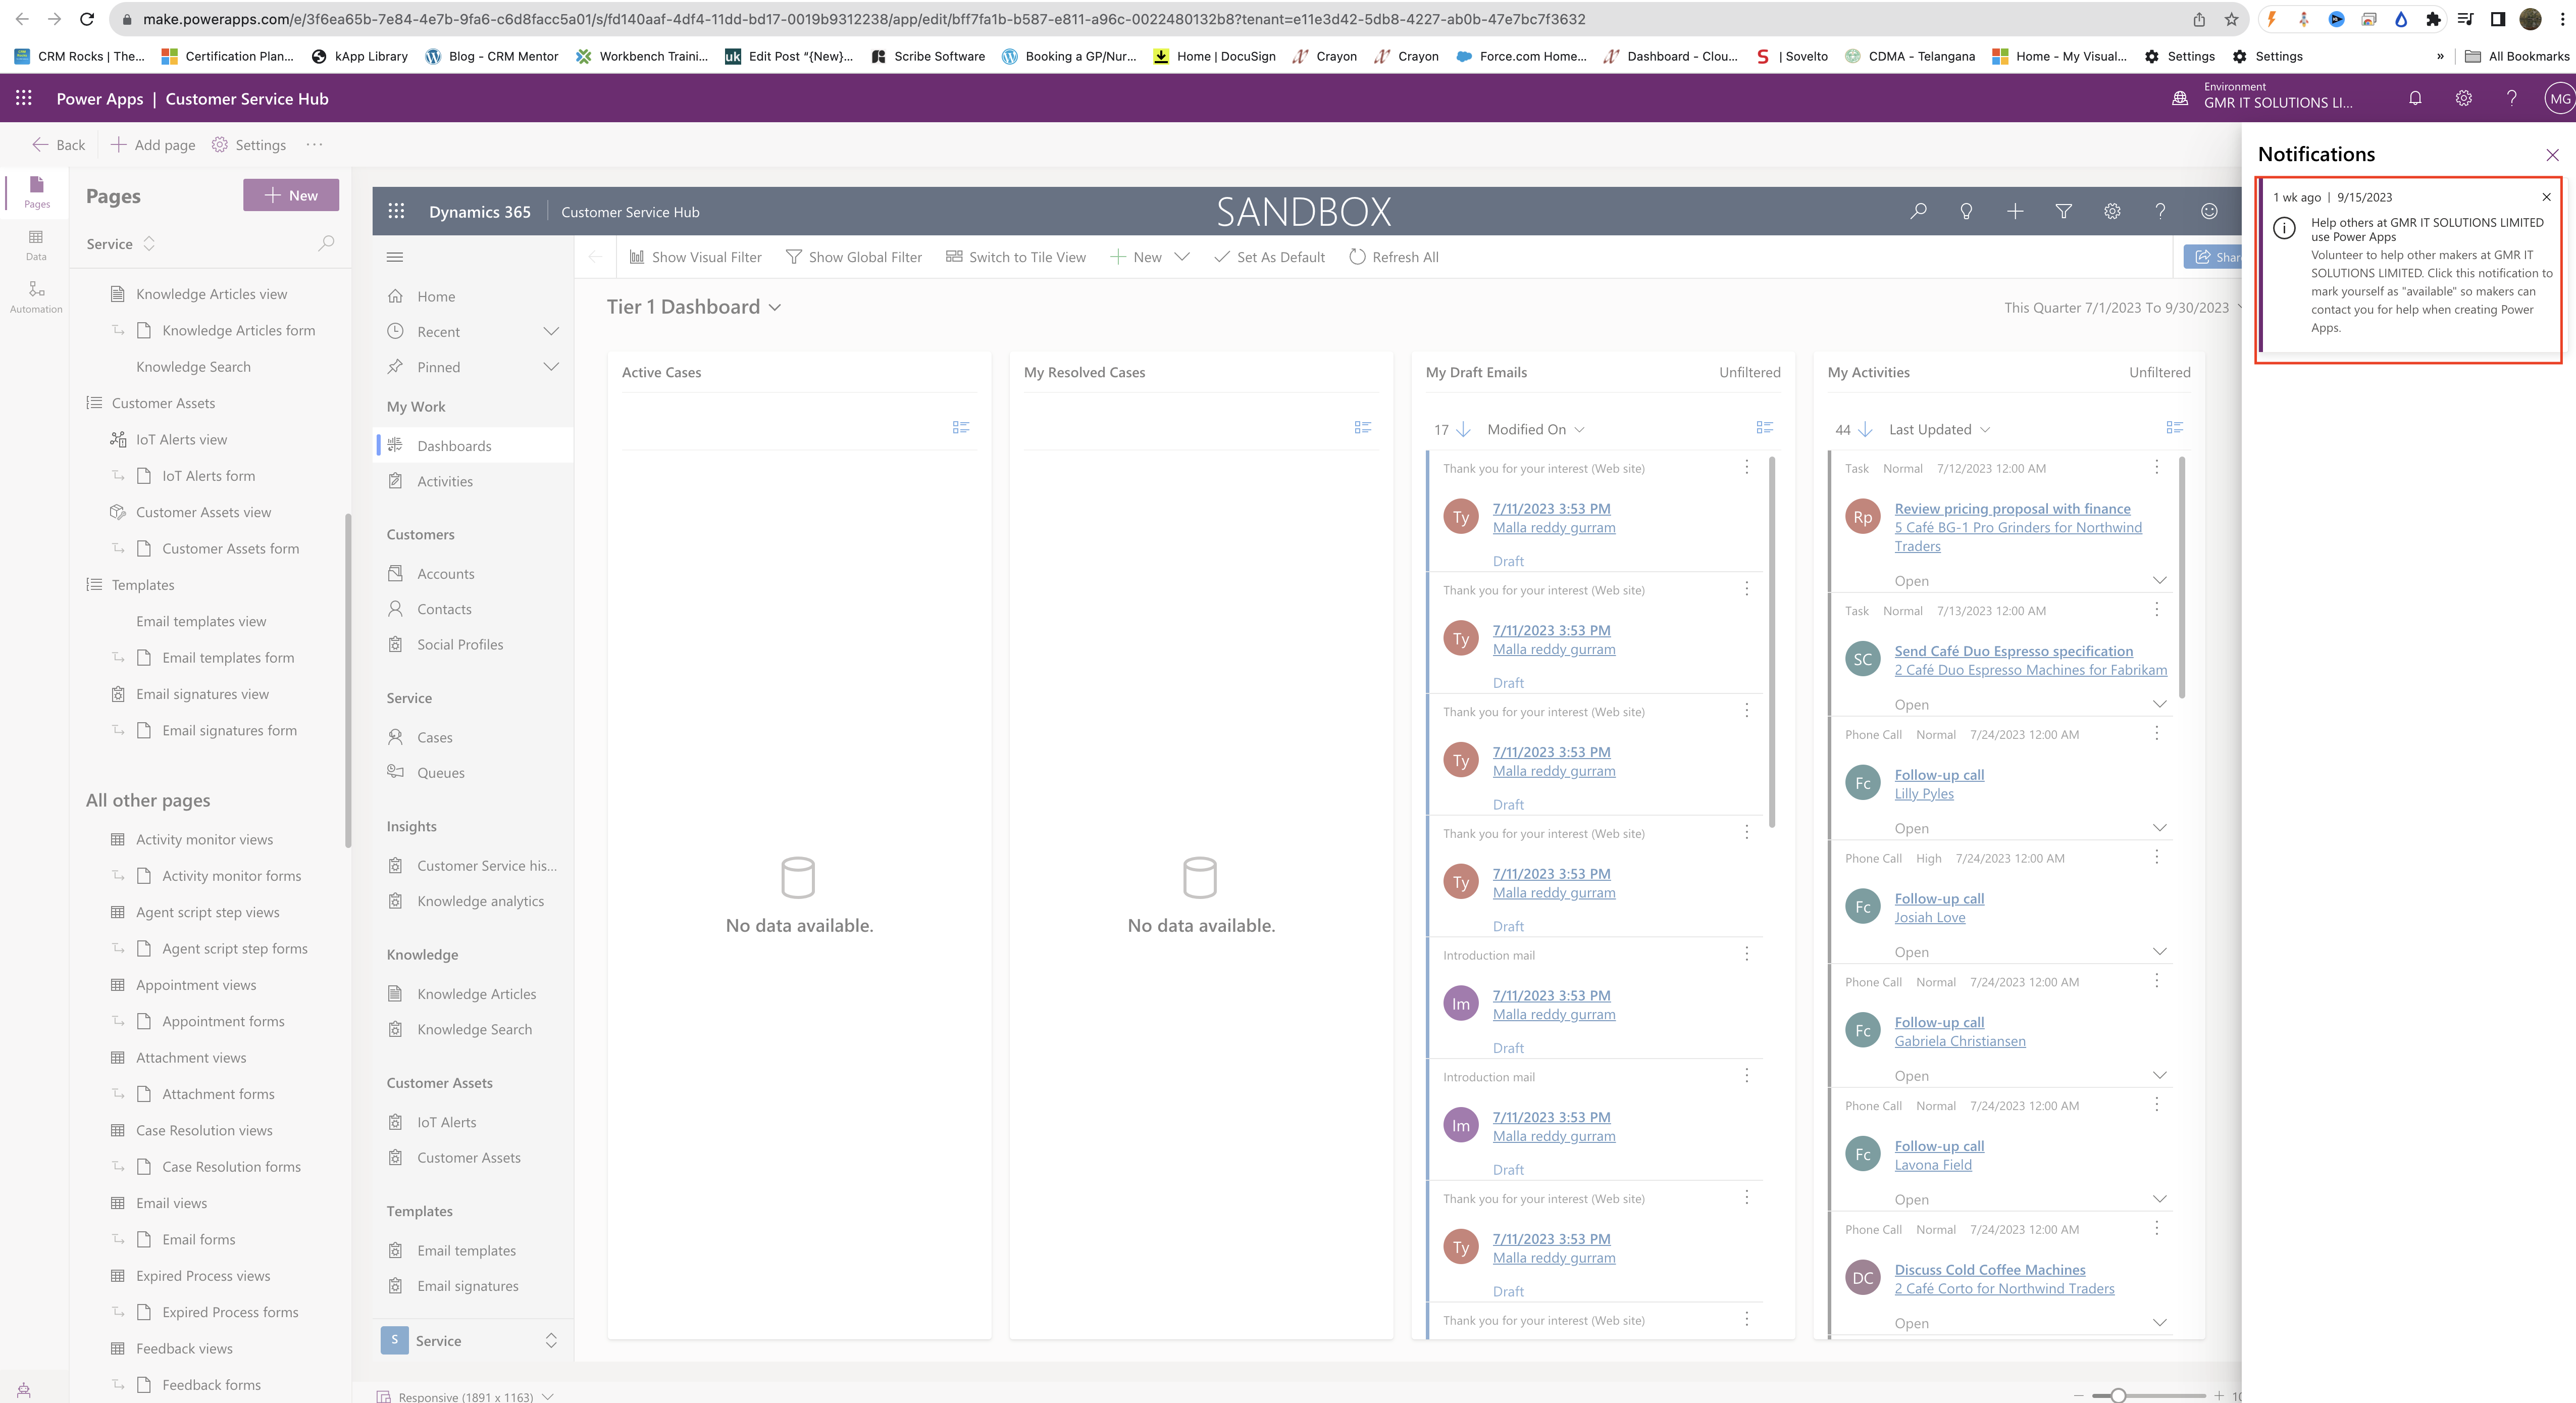
Suppose if your organisation is enabled the Advisor Program(Preview) feature in your organisation so when a user from the advisor program logins in then the user will be prompted with a slide whether you want to volunteer to help other makers at your organisation.

The user has to be click the notification as available so makers can contact the user for help when creating Power Apps.

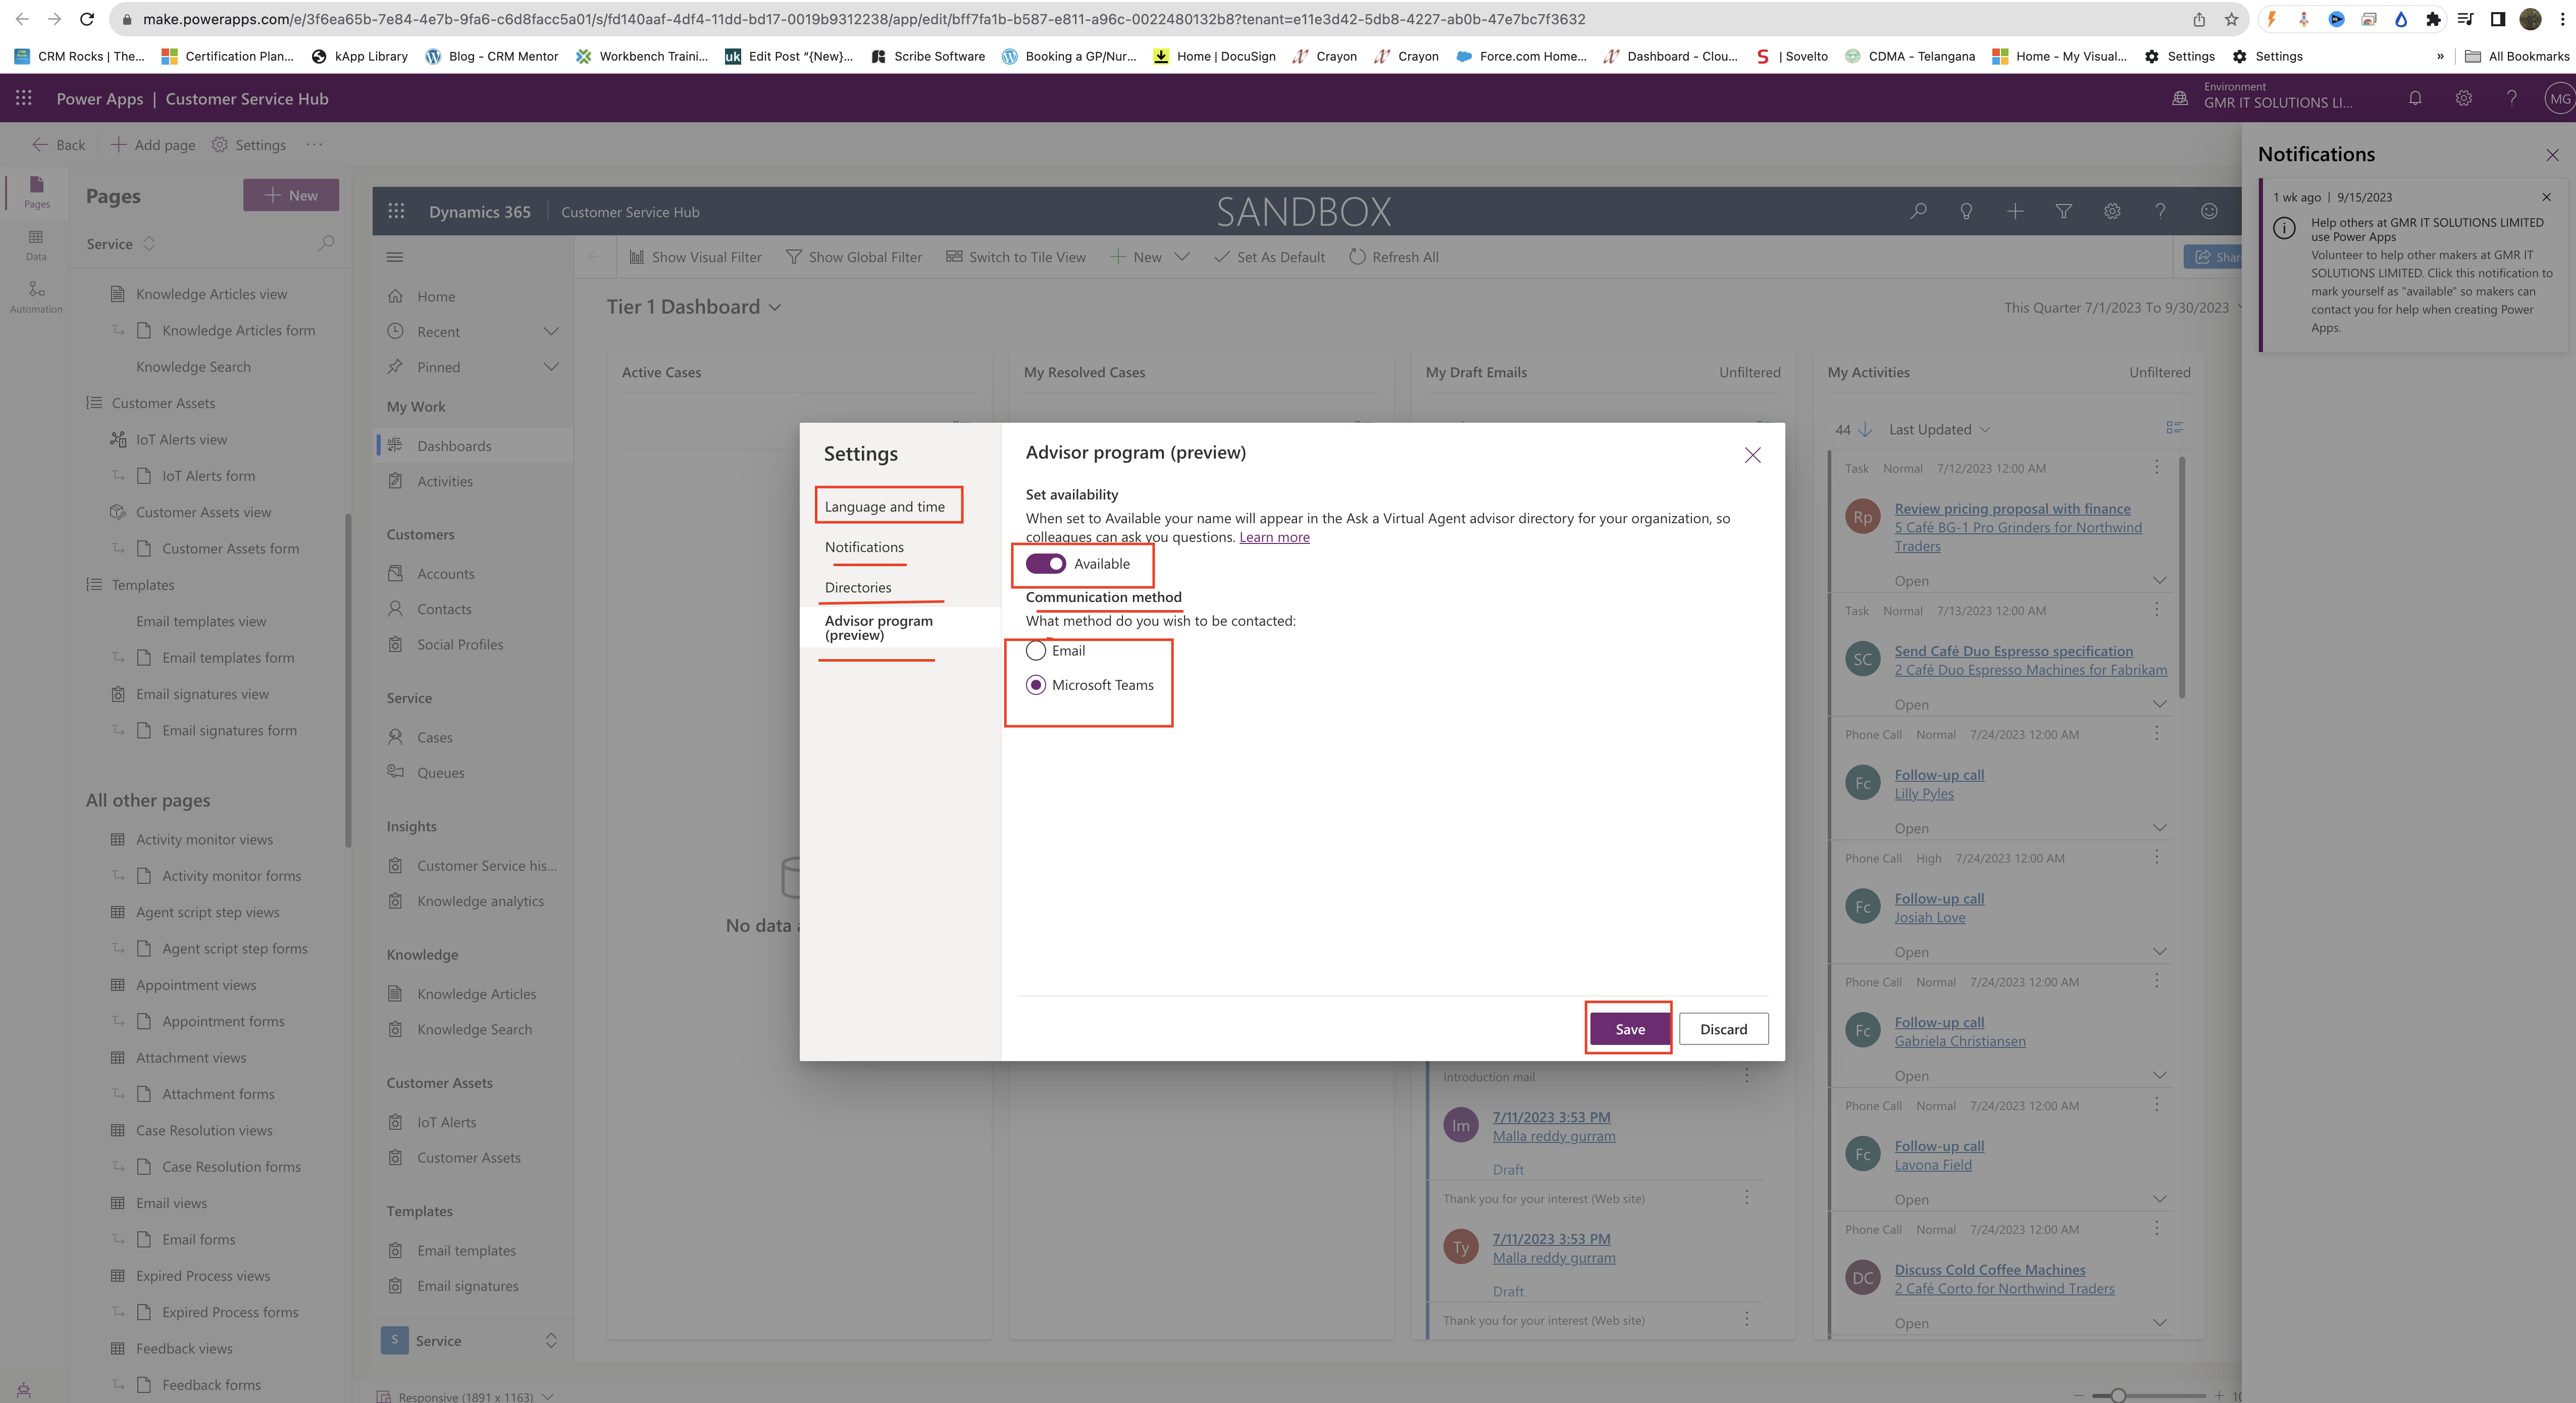
In the settings:

Set the language and time, notification like the newsletter with tips and offers about the power apps, Directories you can choose if you are in multiple organisations.

Advisor Program(PREVIEW) Set the availability and communication method as either email or Microsoft Teams.

That’s it for today.

I hope this helps.
Malla Reddy Gurram(@UK365GUY)
#365BlogPostsin365Days

Share this: