Menu Close

Blog

Slide 1

Microsoft Business Applications Blogposts, YouTube Videos and Podcasts

Helping Businesses with Technology

Slide 2

Microsoft Business Applications Blogposts, YouTube Videos and Podcasts

Helping Businesses with Technology

Slide 3

Microsoft Business Applications Blogposts, YouTube Videos and Podcasts

Helping Businesses with Technology

previous arrow
next arrow

{How to} add Power Apps grid control to views for an table

Hello Everyone,

Today I am going to share how to add Power Apps grid control to views for an table.

Let’s get’s started.

What is Power Apps grid control?

It allows Power Apps read-only grid control, allowing users to view, open and edit records from views and subgrids.

Also allow inline editing, the conrol provides other capabilities including a modern data browsing experience via infinite scrolling, allowing users to scroll indefinitely through data until they find the records they’re interested in, and an ability to customize the visual appearance of columns for specific needs.

Like the read-only grid control, this control supports the latest Microsoft accessibilty standarda and aligns with the latest Microsoft design guidance.

Note: This control will eventually replace all read only and editable grids in model driven apps.

How to enable Power Apps grid control to views for an entity?

1.Go to the solution explorer and open the entity you want and select it.

2. On the control tab, select Add control

3. In the Add control dialog box, select the Power Apps grid control and then select Add.
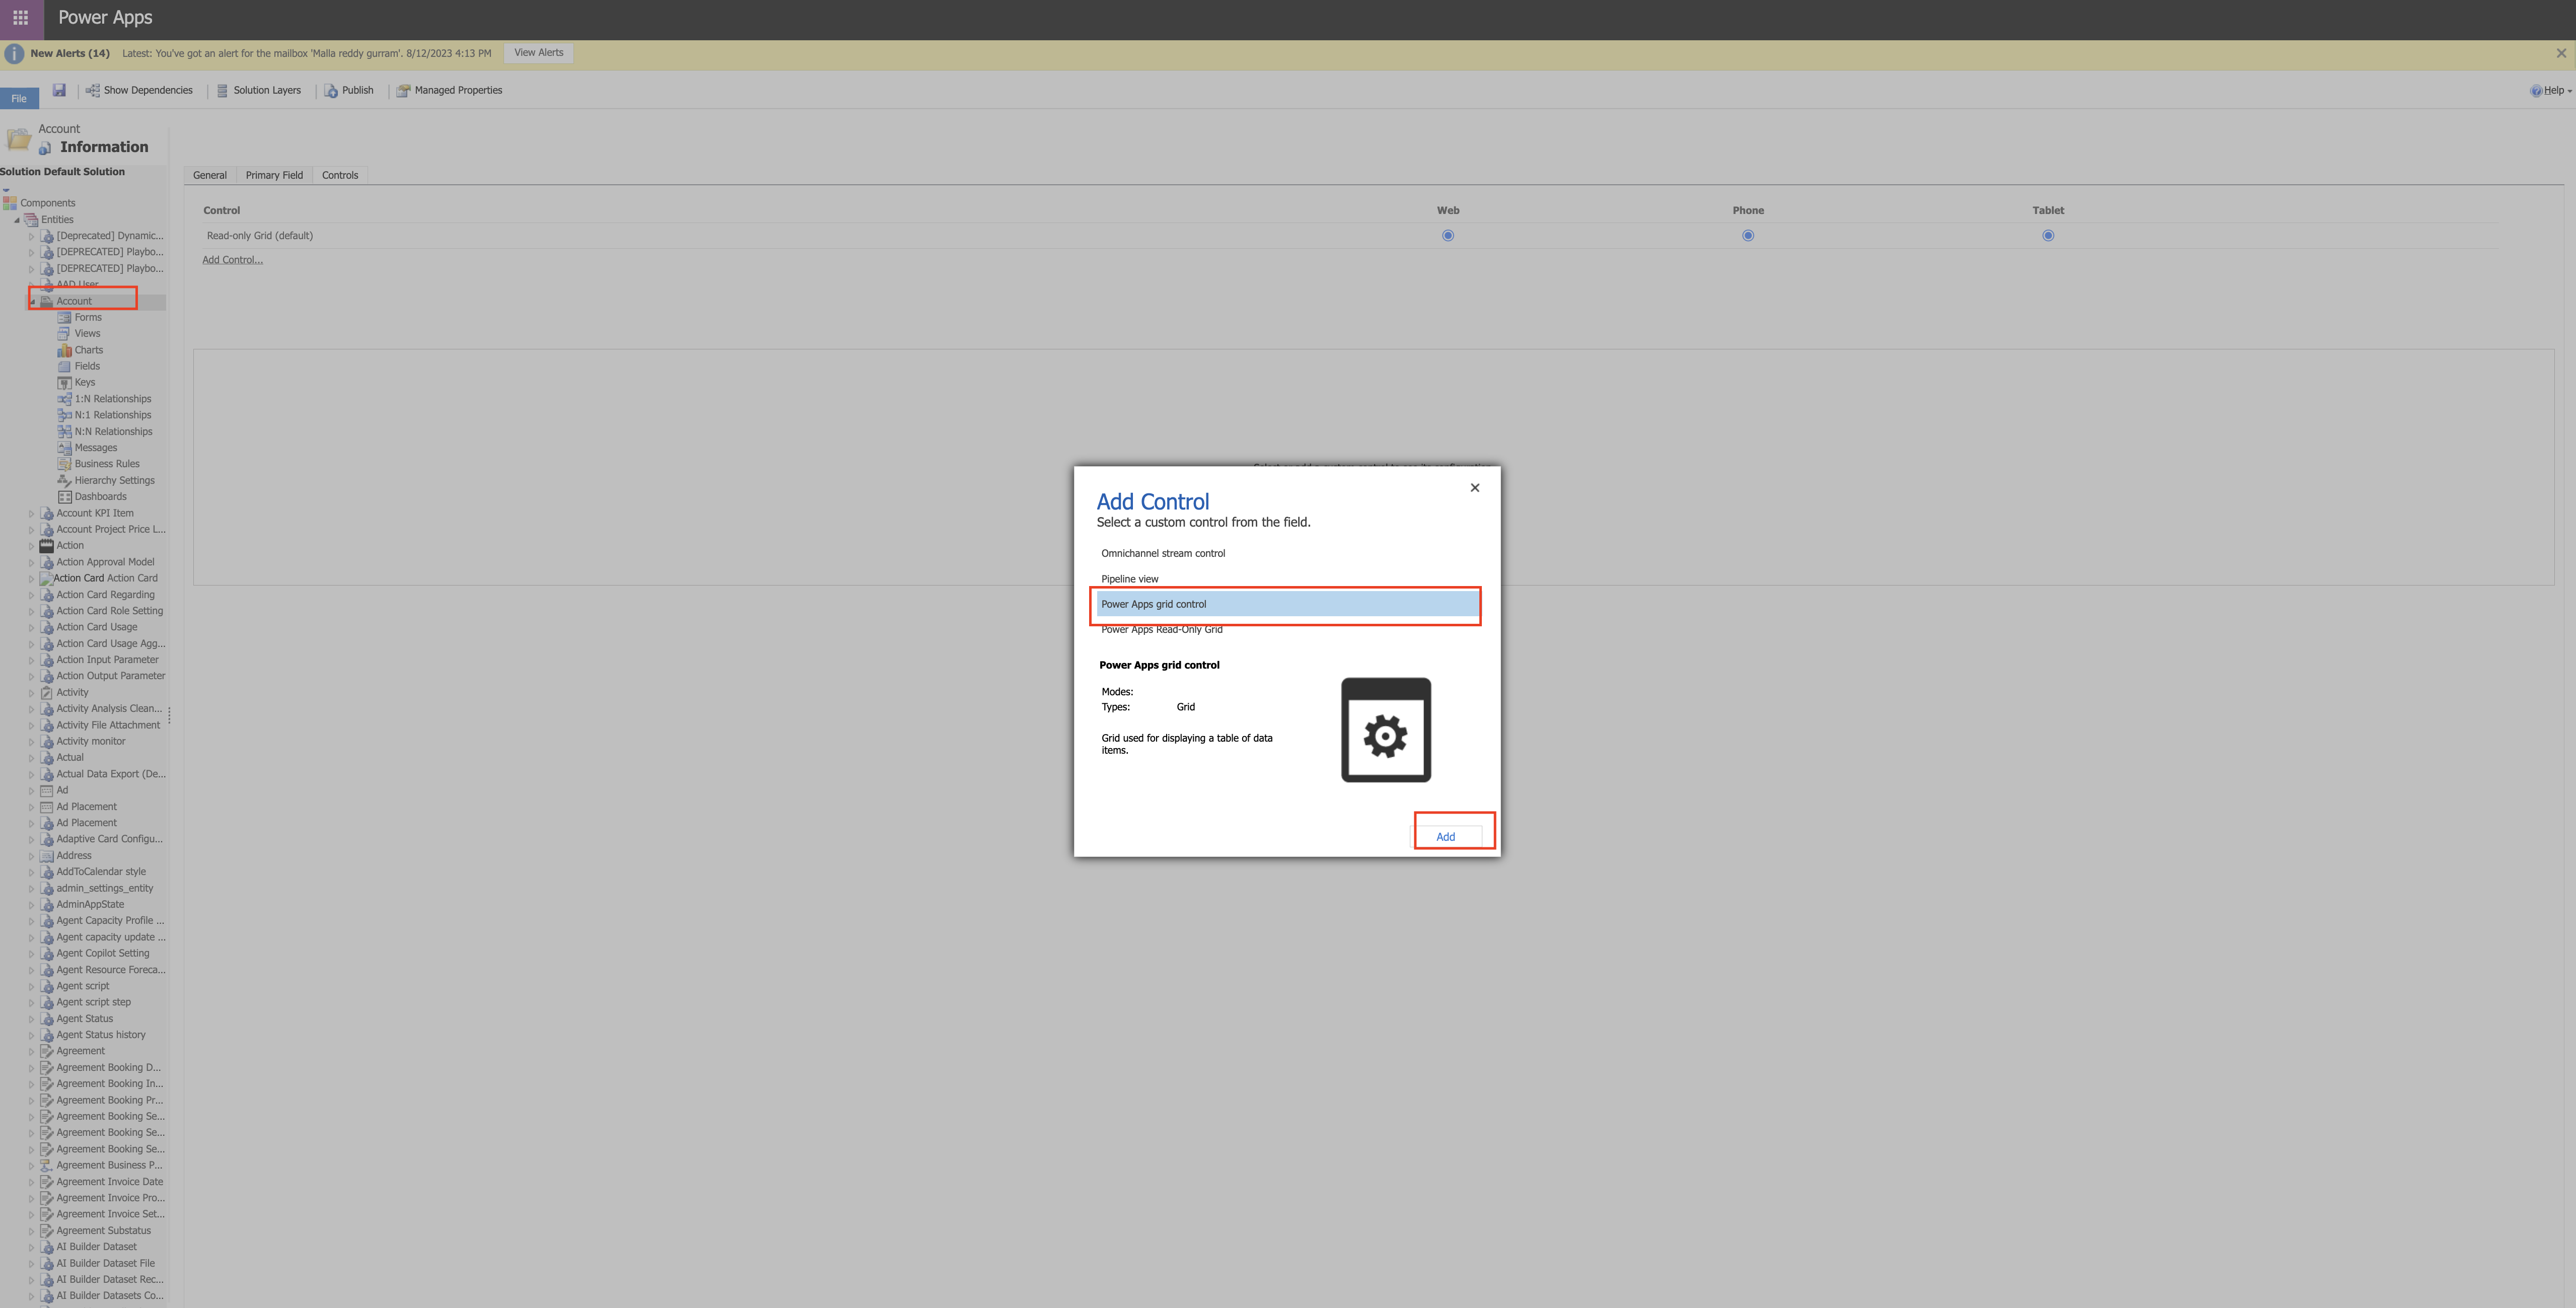
Configure the Power Apps grid control by selecting for web or phone or tablets then this makes the control default control for the selected clients.

Then save and publish the changes.

Go back to the account record and see the grid view.

That’s it for today.

I hope this helps.
Malla Reddy Gurram(@UK365GUY)
#365BlogPostsin365Days

Share this:

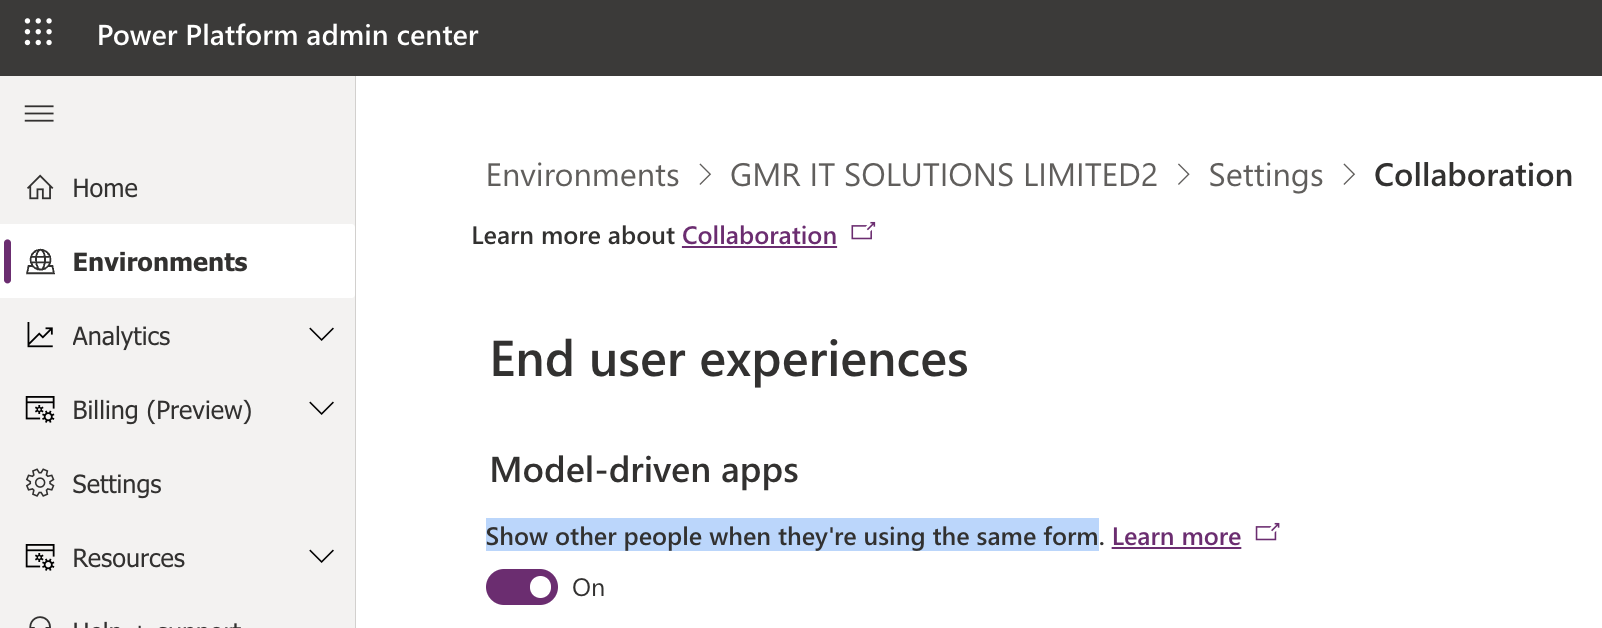
Show other people when they’re using the same form on Power Apps Model Driven Apps

Hello Everyone,

Today i am going to show how to enable and Show other people when they’re using the same form in Model Driven Apps.

Let’s get’s started.

Firstly how to enable this feature:

Login into www.admin.powerplatform.microsoft.com

Go to settings > collabarations > turn on Show other people when they are using same form(see below screenshot)

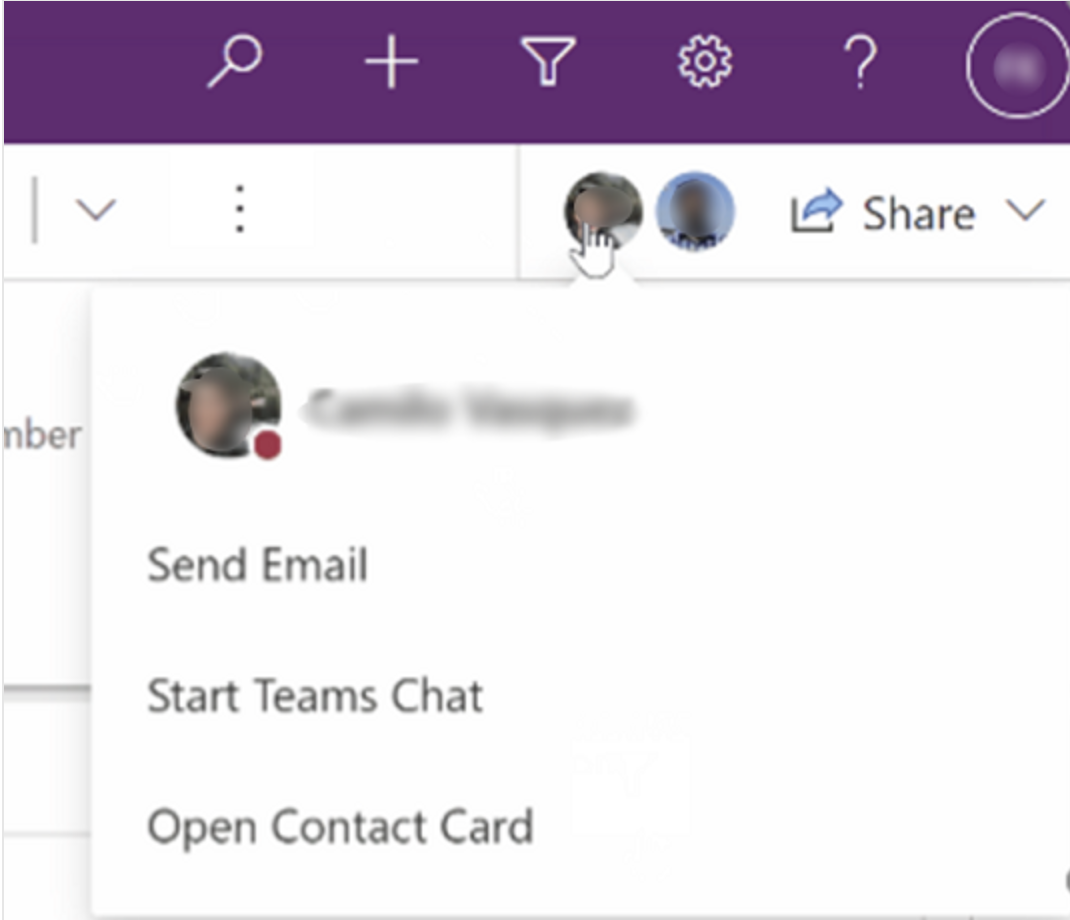
Suppose you are using the case record and your co-worker is working on same record, then you can see other users who are working in the same record as well as select a user picture to see their online status, send them an email or start a teams chat too.

Note: This feature uses Azure Fluid Relay Service Availability, so you must have this feature available in your region if you want to try this feature.

Also users must be able to access fluidrelay.azure.com

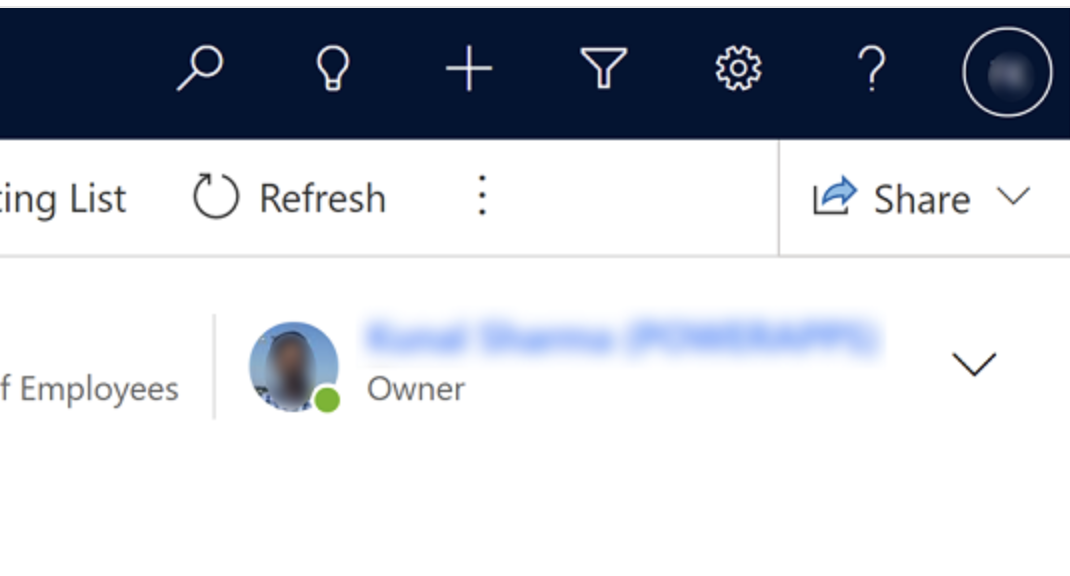
You can also see the user’s status and picture: App users for example record owner as well as the users appearing in grids and lookups are displayed with their picture and online status.

Note: Available in Model Driven Apps and cannot be disabeld, extended to user lookups and grid user columns.

Share Privilege on a record and you email a record link to a colleague, the colleague will automatically get read access to the record.

That’s it for today.

I hope this helps
Malla Reddy Gurram(@UK365GUY)
#365BlogPostsin365Days
Share this:

{How to } Add a table to the Quick Create on Application Ribbon Global Home Page in Dynamics 365

Hello Everyone,

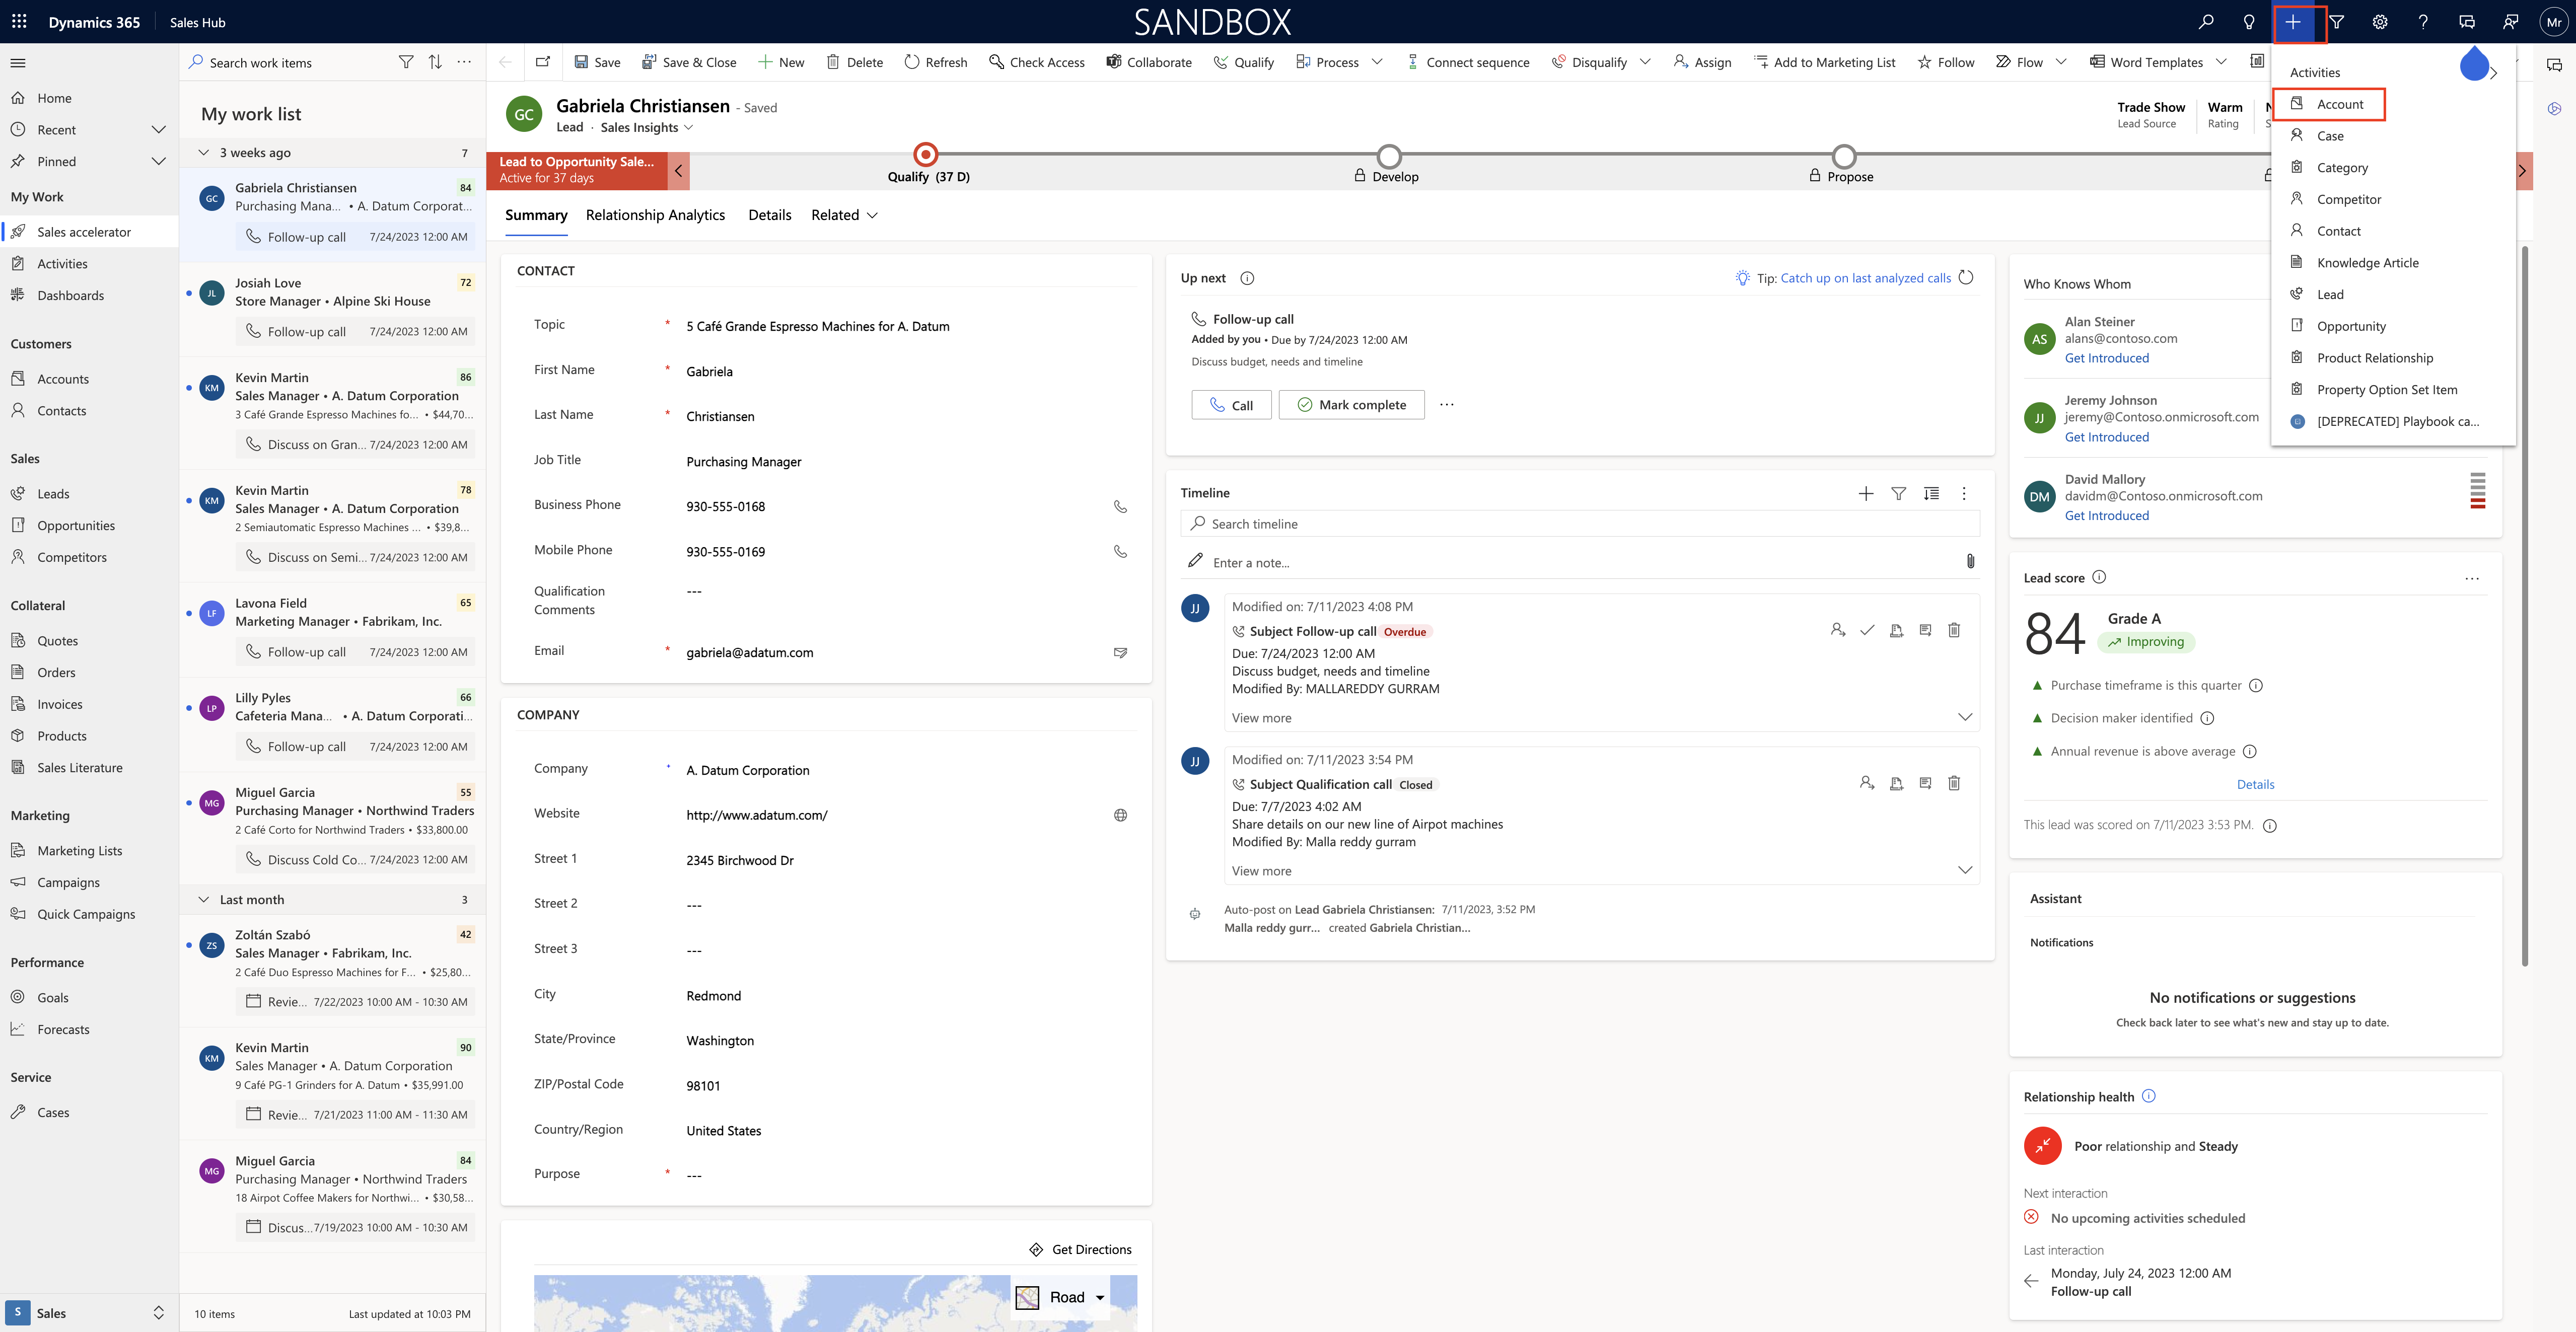
Today i am going to share how to add a table to Quick Create on Application Ribbon Global Home Page in Dynamics 365 Sales App.

Let’s get’s started.

Suppose you have requirement to add a table to Quick Create on Application Ribbon Global Home Page, Where do you enable this feature on a table?

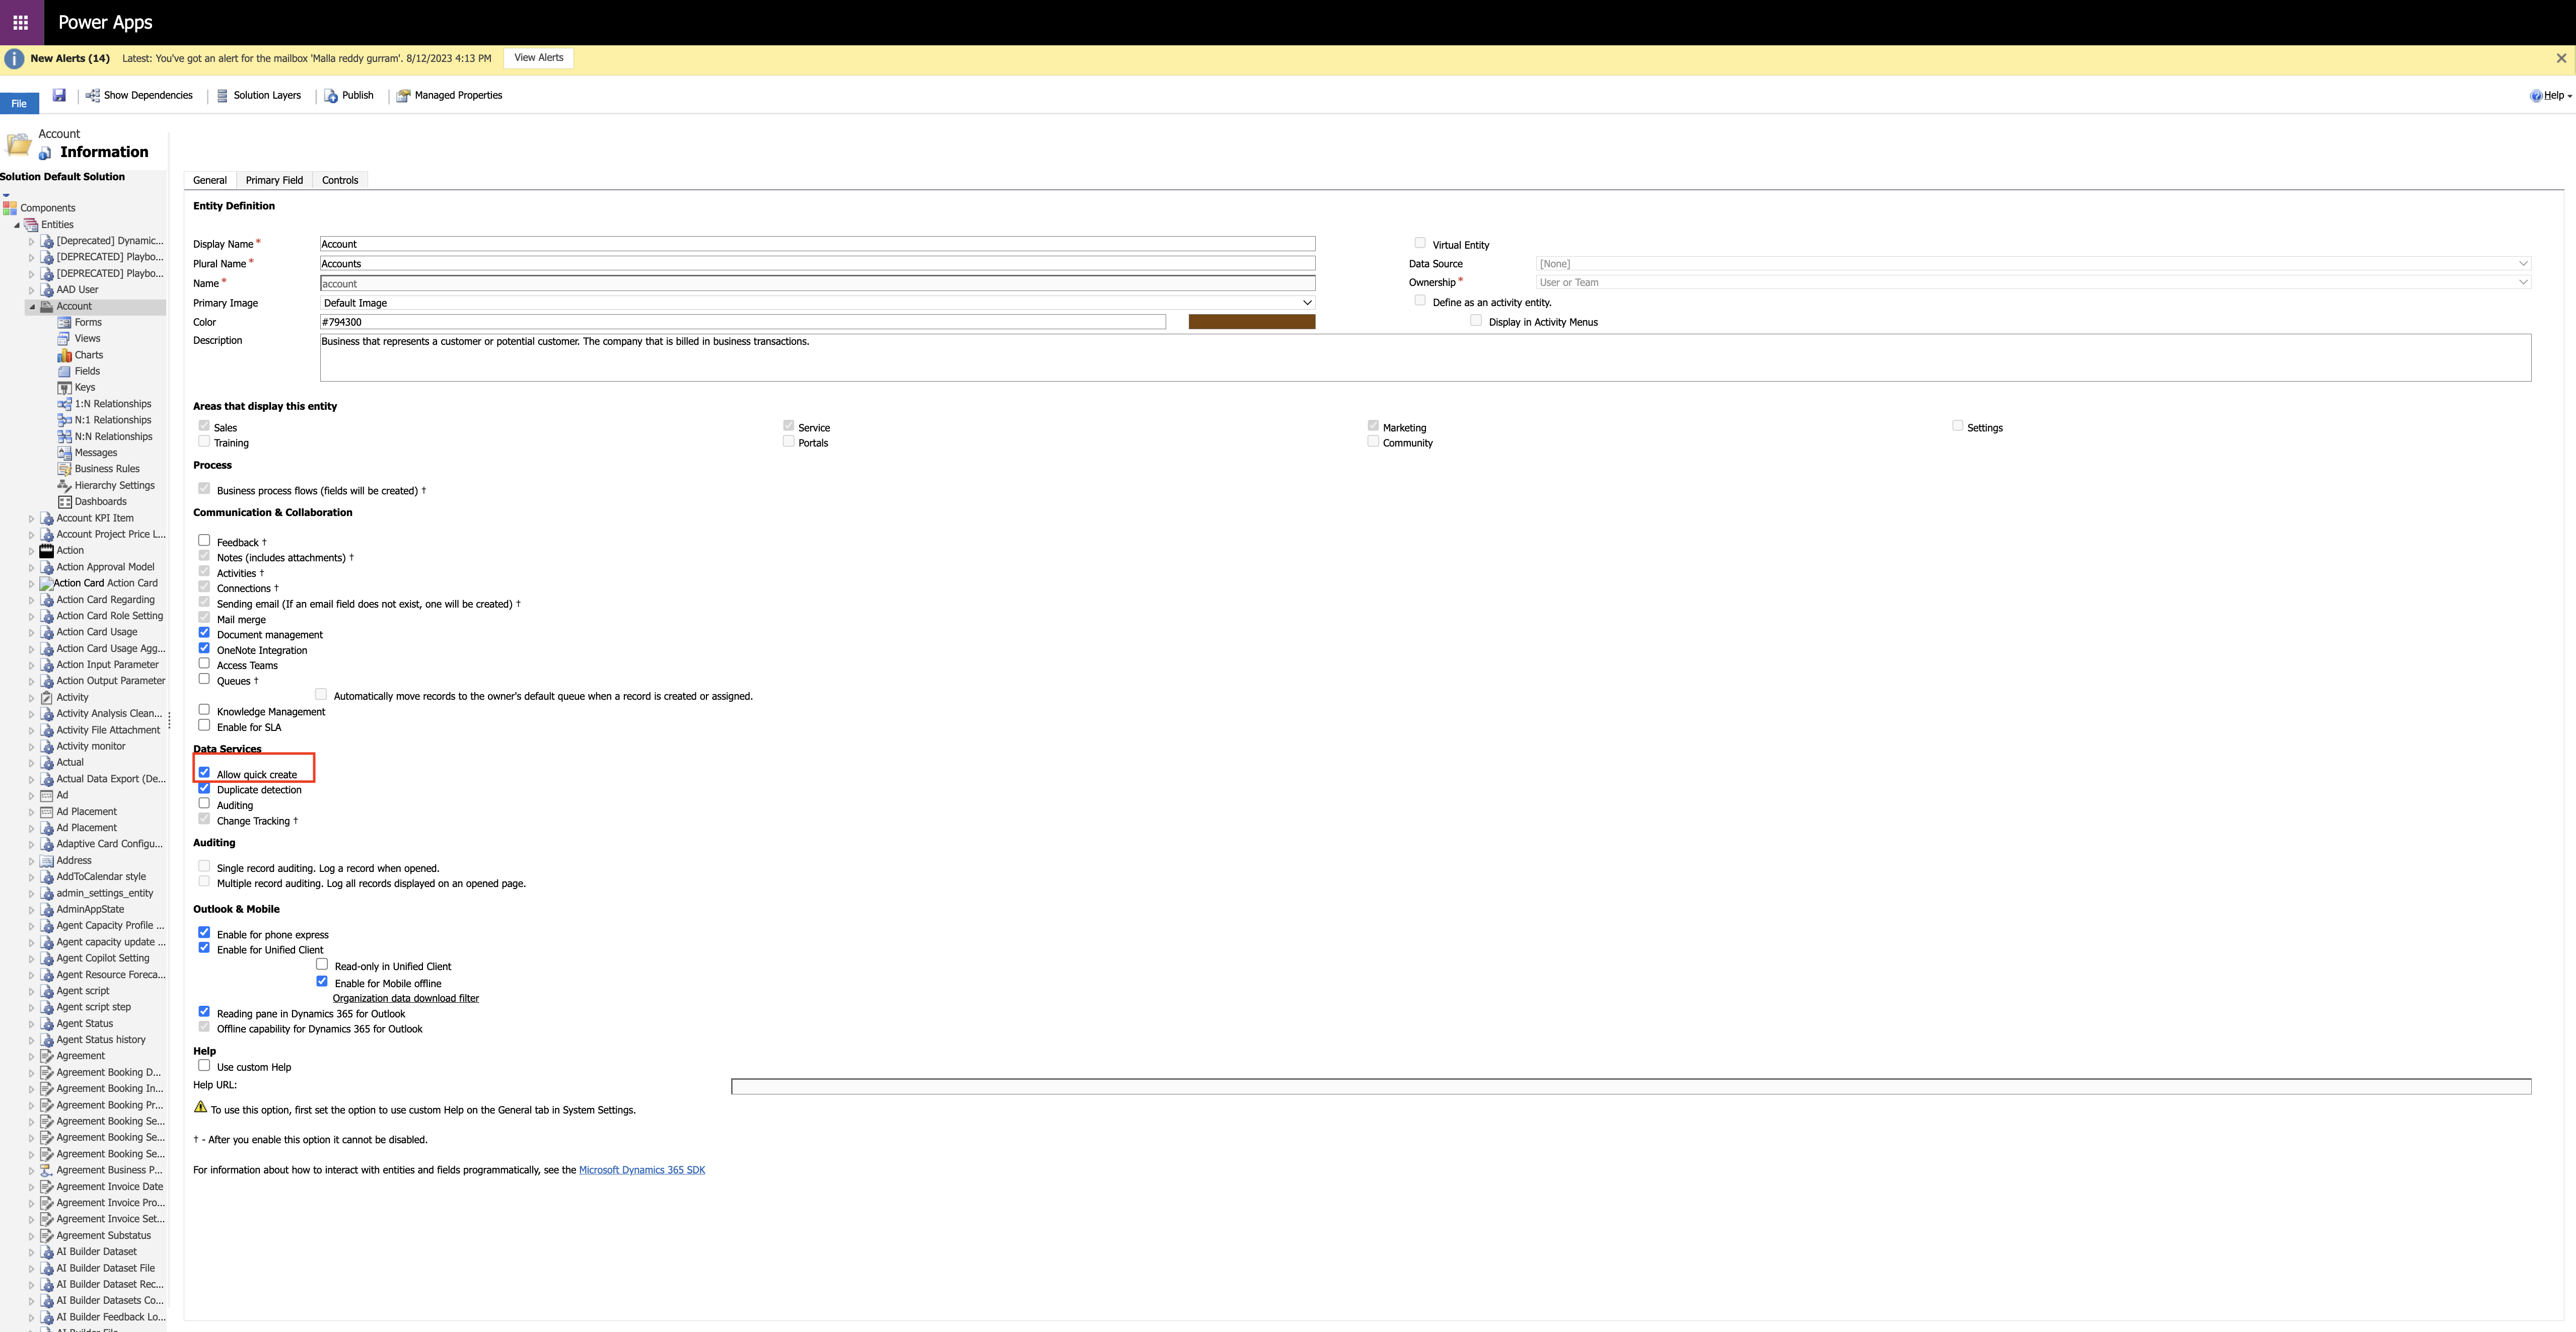
When you are creating a table you have an option to check the box for Allow Quick Create.

Once you check the box then save and publish the changes…

Also check on the site map to add the Quick Create Account checked.

It will automatically appear on the Application Ribbon in Dynamics 365 Sales Global Home Page.

That’s it for today.

I hope this helps
Malla Reddy Gurram(@UK365GUY)
#365BlogPostsin365Days
Share this:

{Do you know} Now you can directly access partners apps in Model Driven App

Hello Everyone,

Today i am going to share how to use partner apps straight from Model Driven App.

Let’s get’s started.

As you know there thousands of Partner Apps in Marketplace to easily solutionize your business needs, so now you can access those partner apps from your Model Driven App.

How do you do that ?

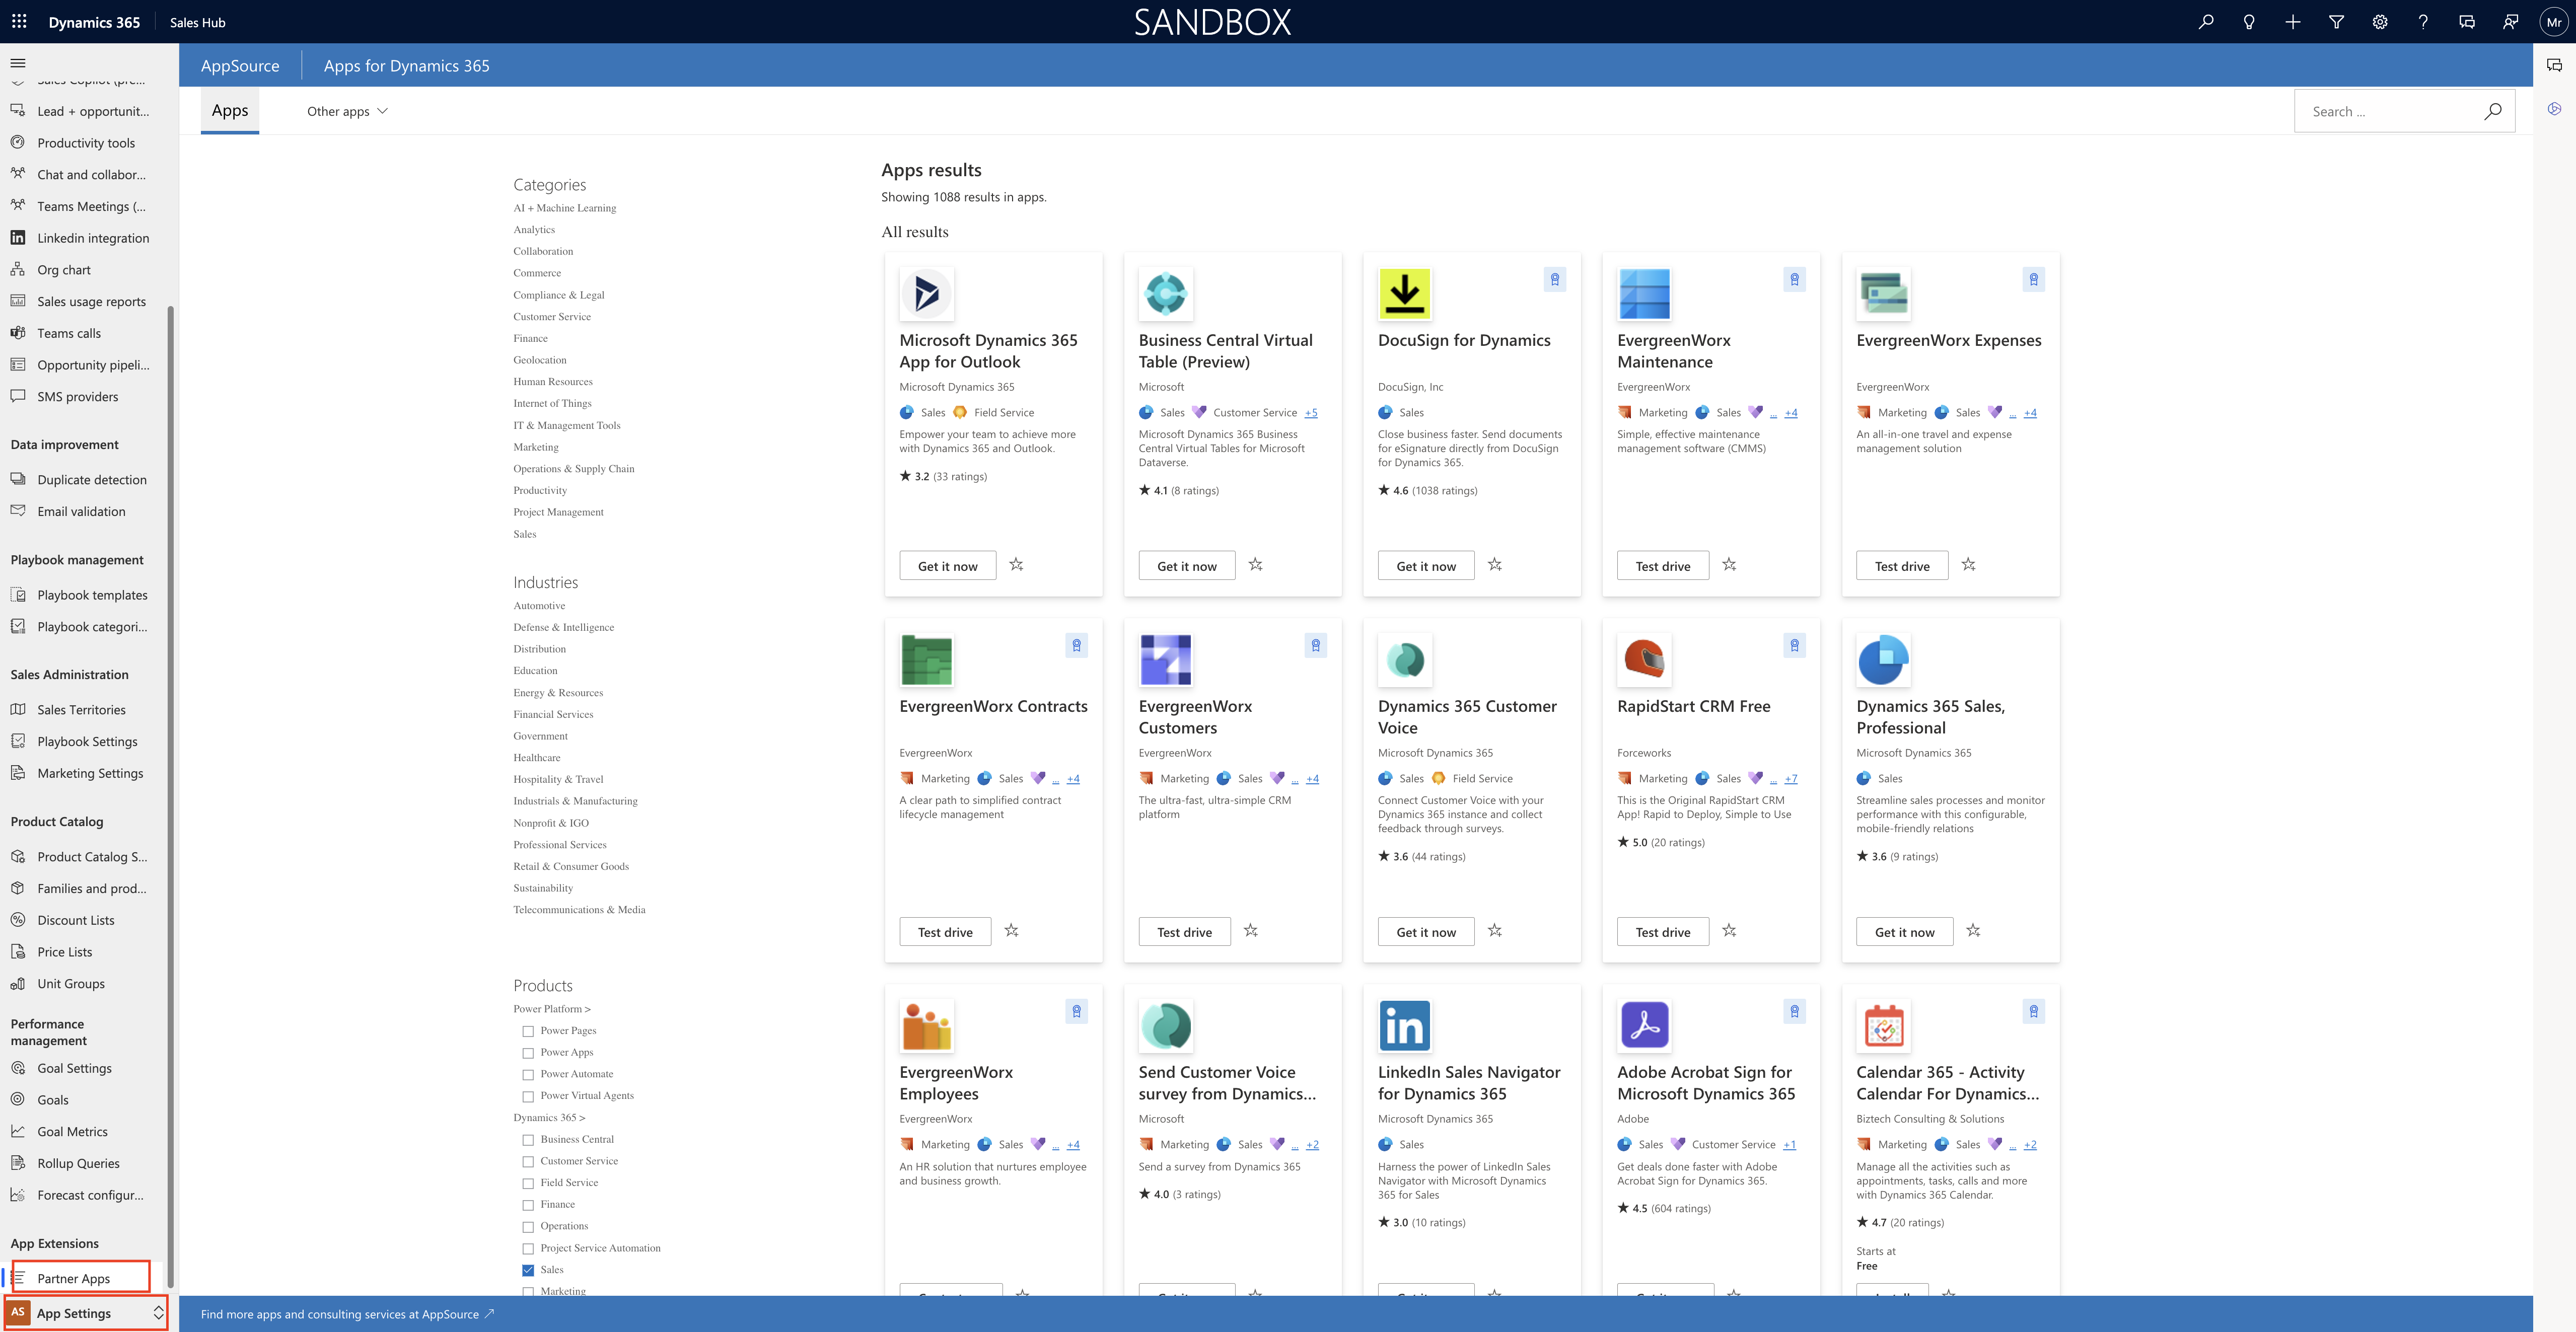
Login into your model driven app lets say Dynamics 365 Sales.

Change the settings to “App Settings”

Then in the App Extensions: Select the Partner Apps

Then you will see the Partner Apps on the right hand side of the screen.

The Apps includes Microsoft free apps and Microsoft Partner Apps too, so some of them are for free trial and then subscription based.

So overall its good feature to see this change straight inside the model driven app instead of browsing on other webiste.

That’s it for today.

I hope this helps
Malla Reddy Gurram(@UK365GUY)
#365BlogPostsin365Days

Share this:

{How to} Enable Excel to Table in Dataverse and Canvas App on Power Platform Environment

Hello Everyone,

Today i am going to show how to enable “Excel to Table in Dataverse and Canvas App on Power Platform Environment”.

Let’s get’s started.

What you mean by “Excel to Table in Dataverse and Canvas App on Power Platform Environment”?

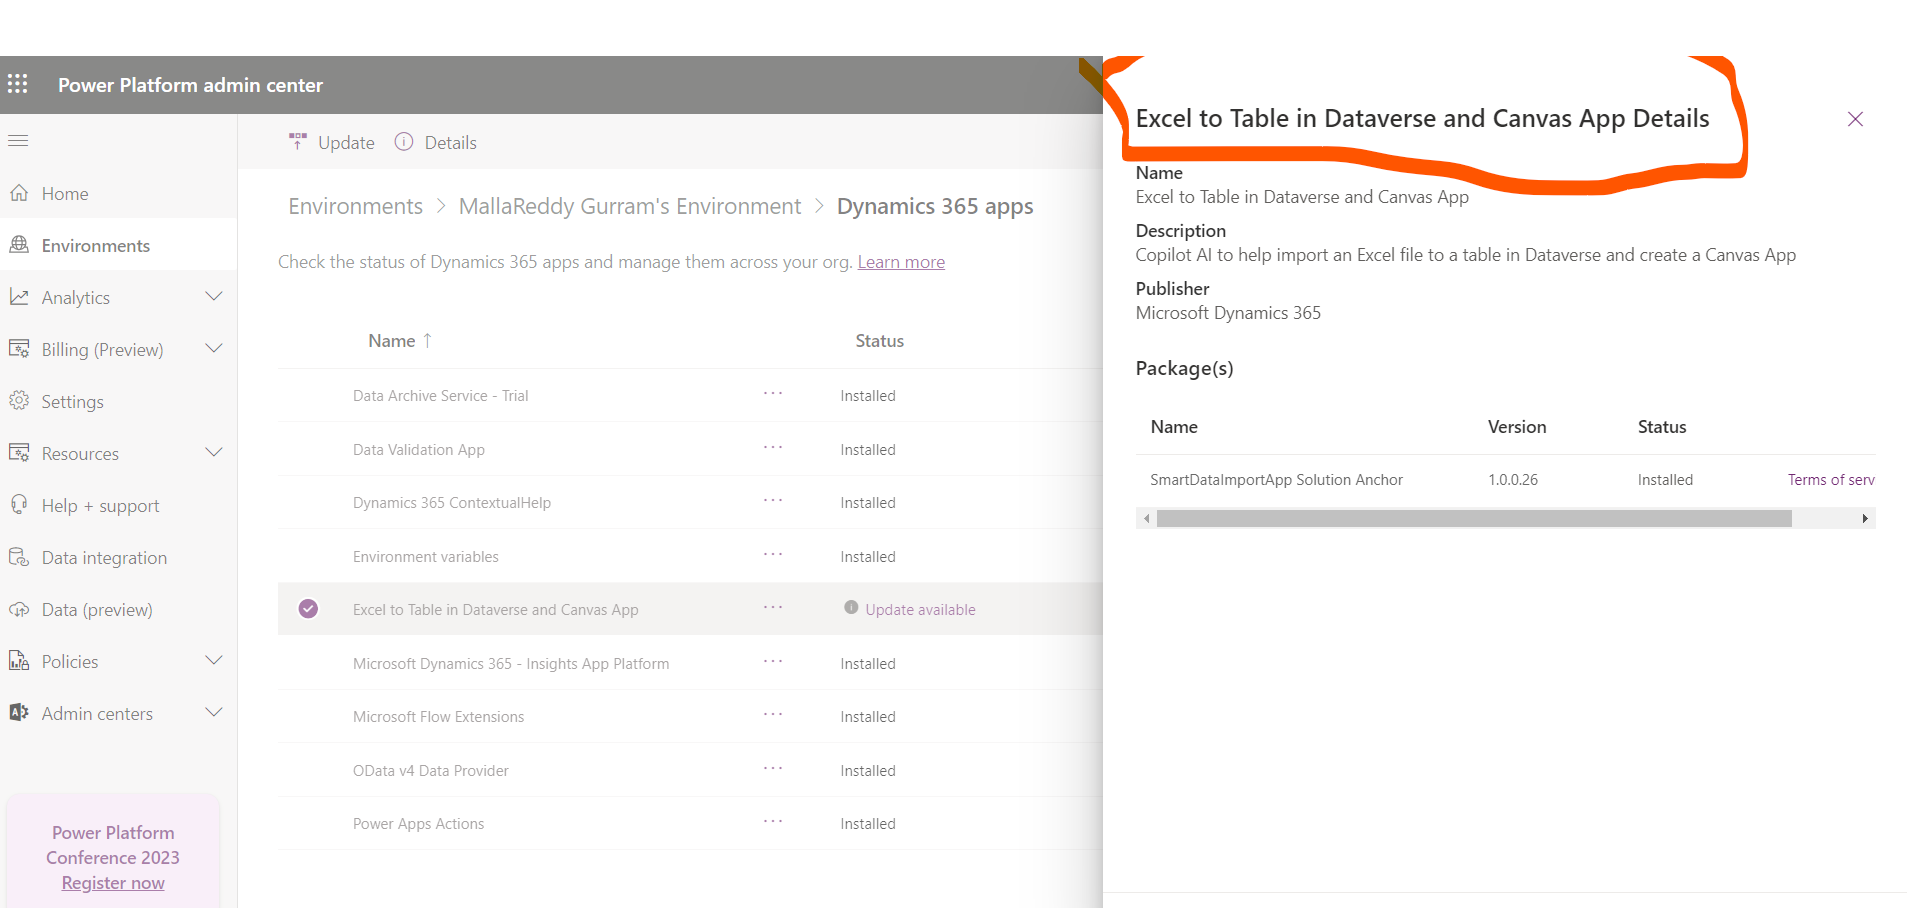
This is a new feature which allows Copilot AI to help import an Excel file to a table in Dataverse and create a Canvas App.

How to activate or install the app in your environment?

Login into www.admin.powerplatform.microsoft.com

1. Click on the environment and select the environment where you want to install the app.

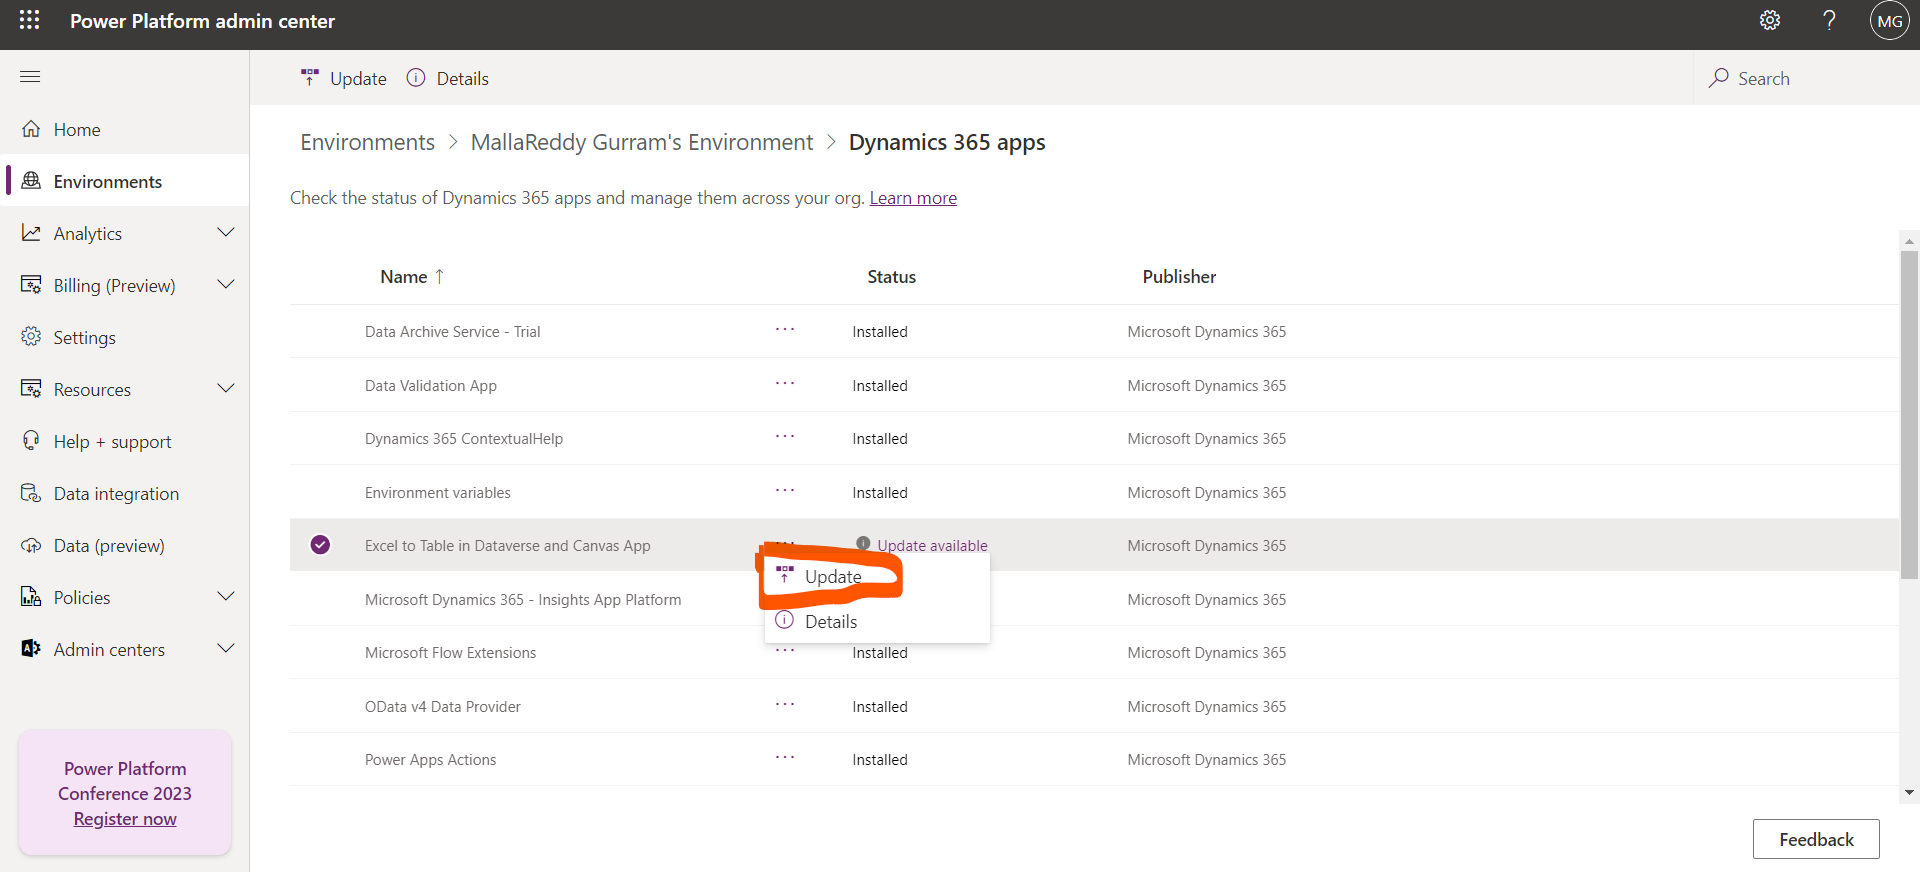
2. Locate the “Excel to Table in Dataverse and Canvas App.

3. If it is not installed then click install or if there are any updates available then click on update.

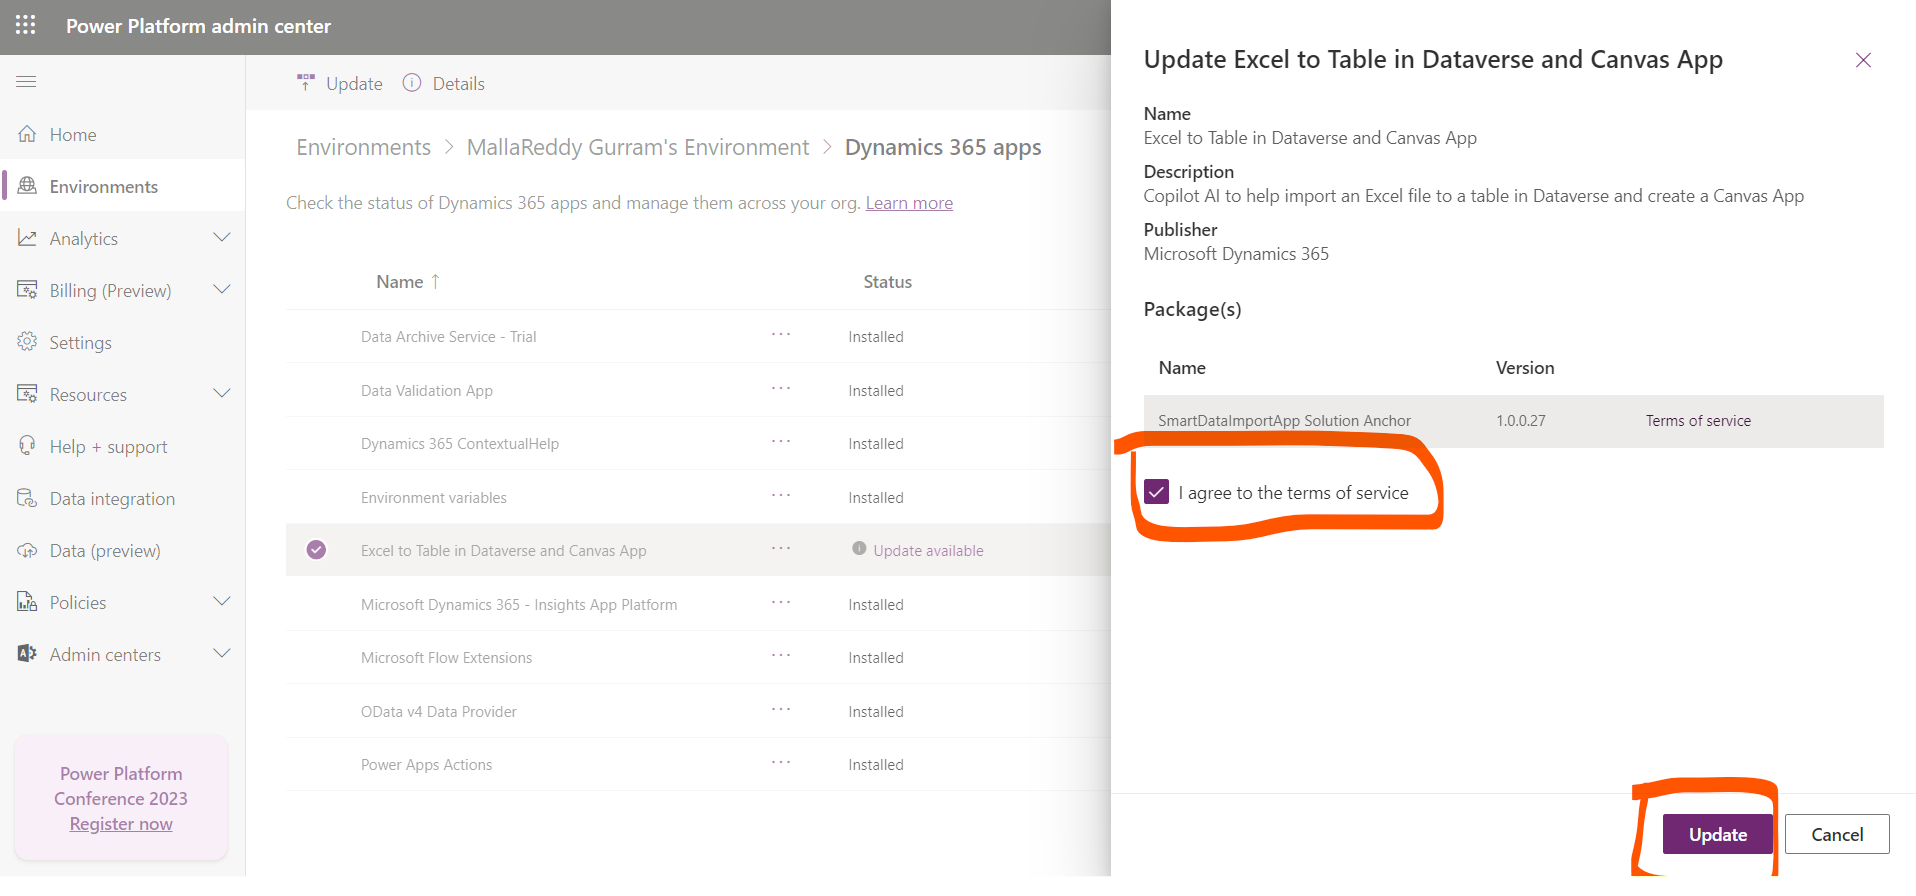
A new pop up will be displayed to agree terms and conditons to update the changes.

Then the updates will be installed and you are good to go with the import of Excel file into Dataverse to create a Table and Canvas App.

That’s it for today.

I hope this helps
Malla Reddy(@UK365GUY)
#365BlogPostsin365Days
Share this: