Menu Close

Category: Blog

{Do you know} Integrate Dynamics 365 Field Service with Business Central

Hello Everyone,

Today I am going to share my thoughts on Integration of Dynamics 365 Field Service with Dynamics 365 Business Central.

Let’s get’s started.

To integrate Dynamics 365 Field Service with Business Central, follow these steps:
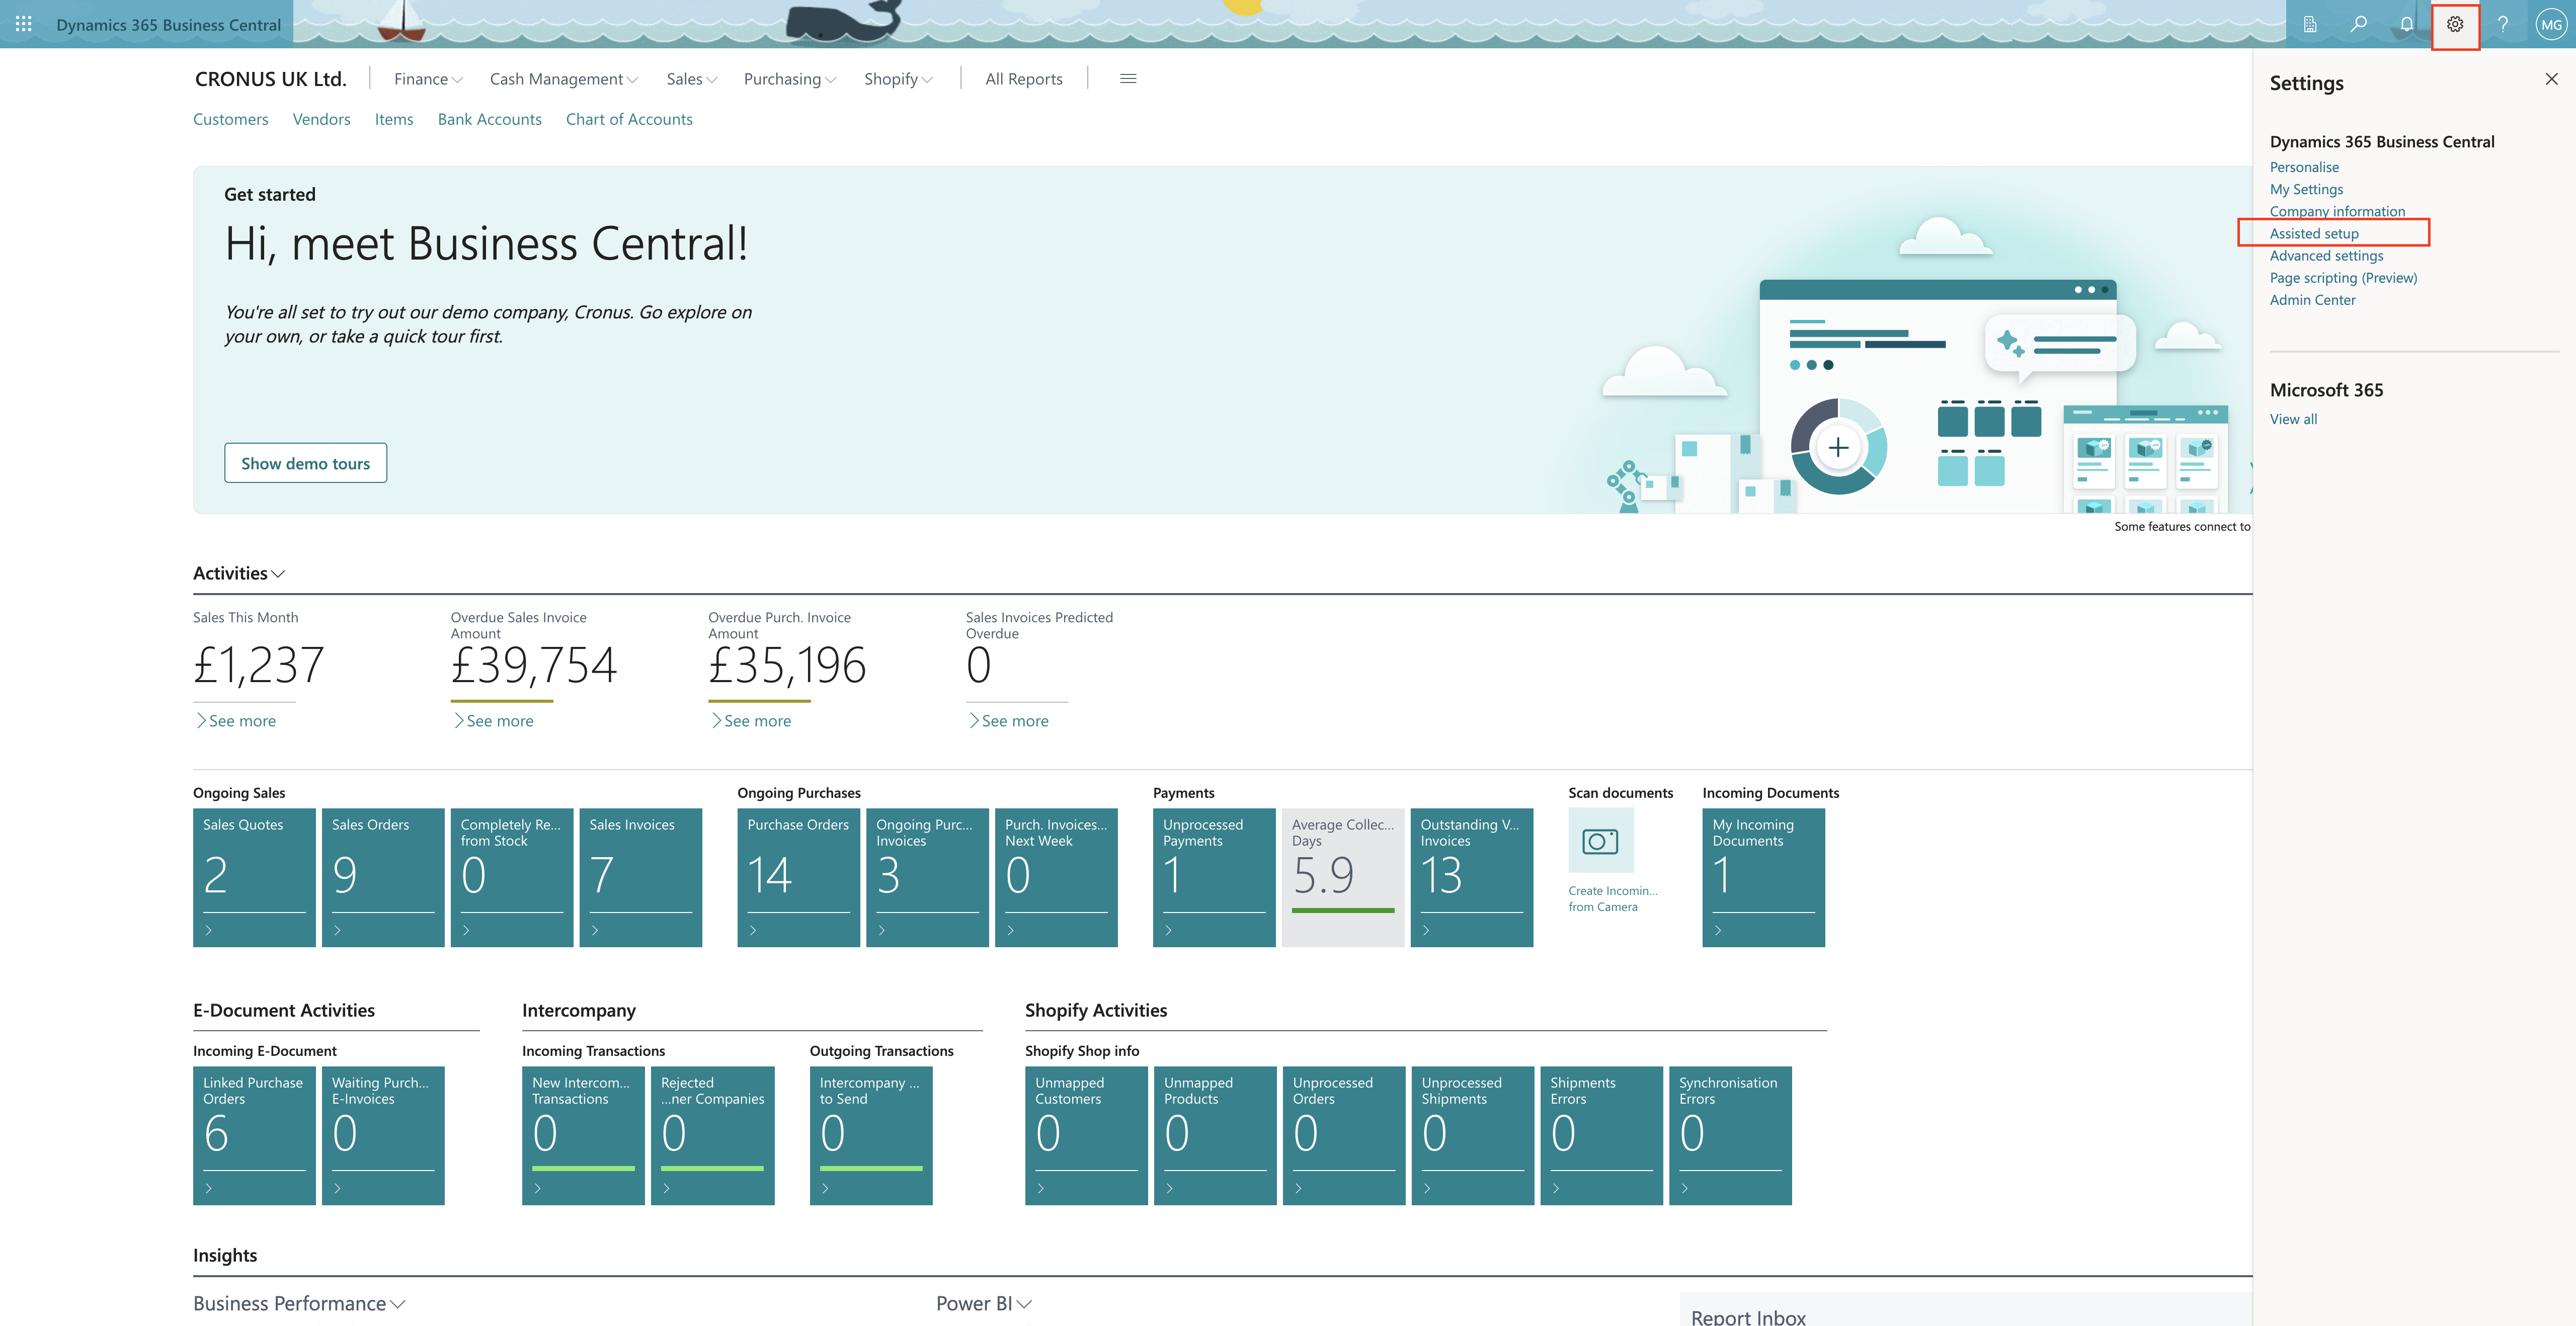
1. In Business Central, go to the Assisted Setup page.

2. Choose Set up integration to Dynamics 365 Field Service.

3. Run the assisted setup guide.
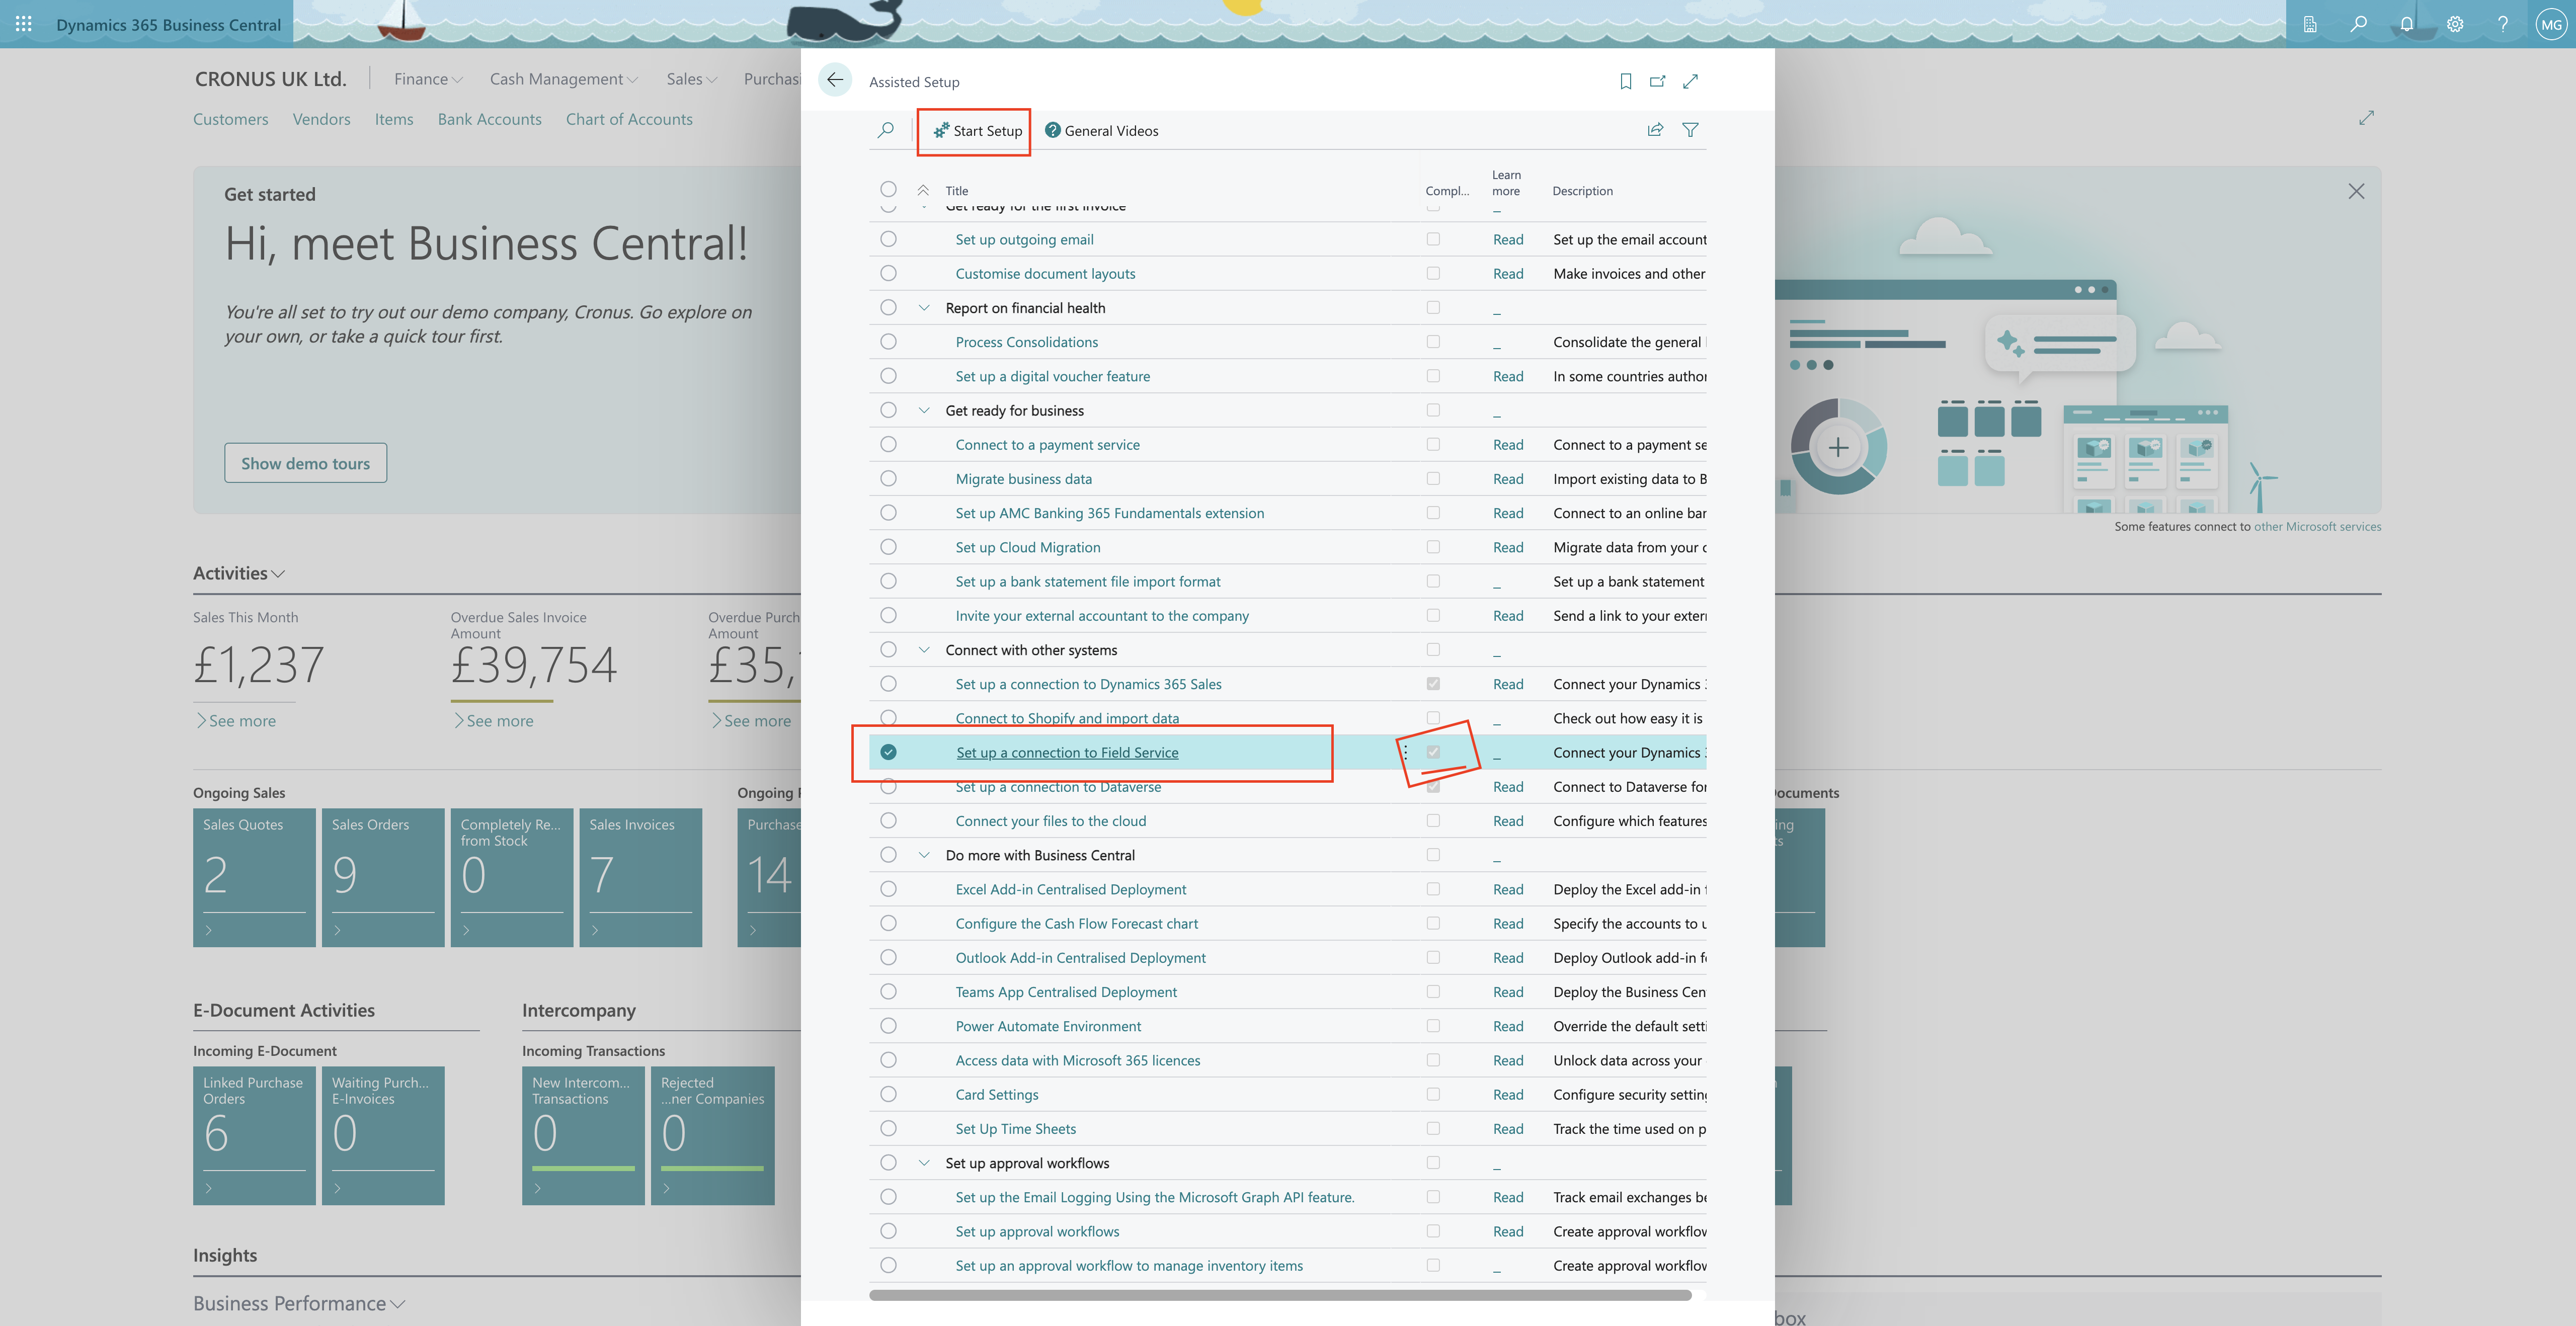
4. Import the Dynamics 365 Field Service Solution.

5. Enable the Dynamics 365 Field Service Connection.
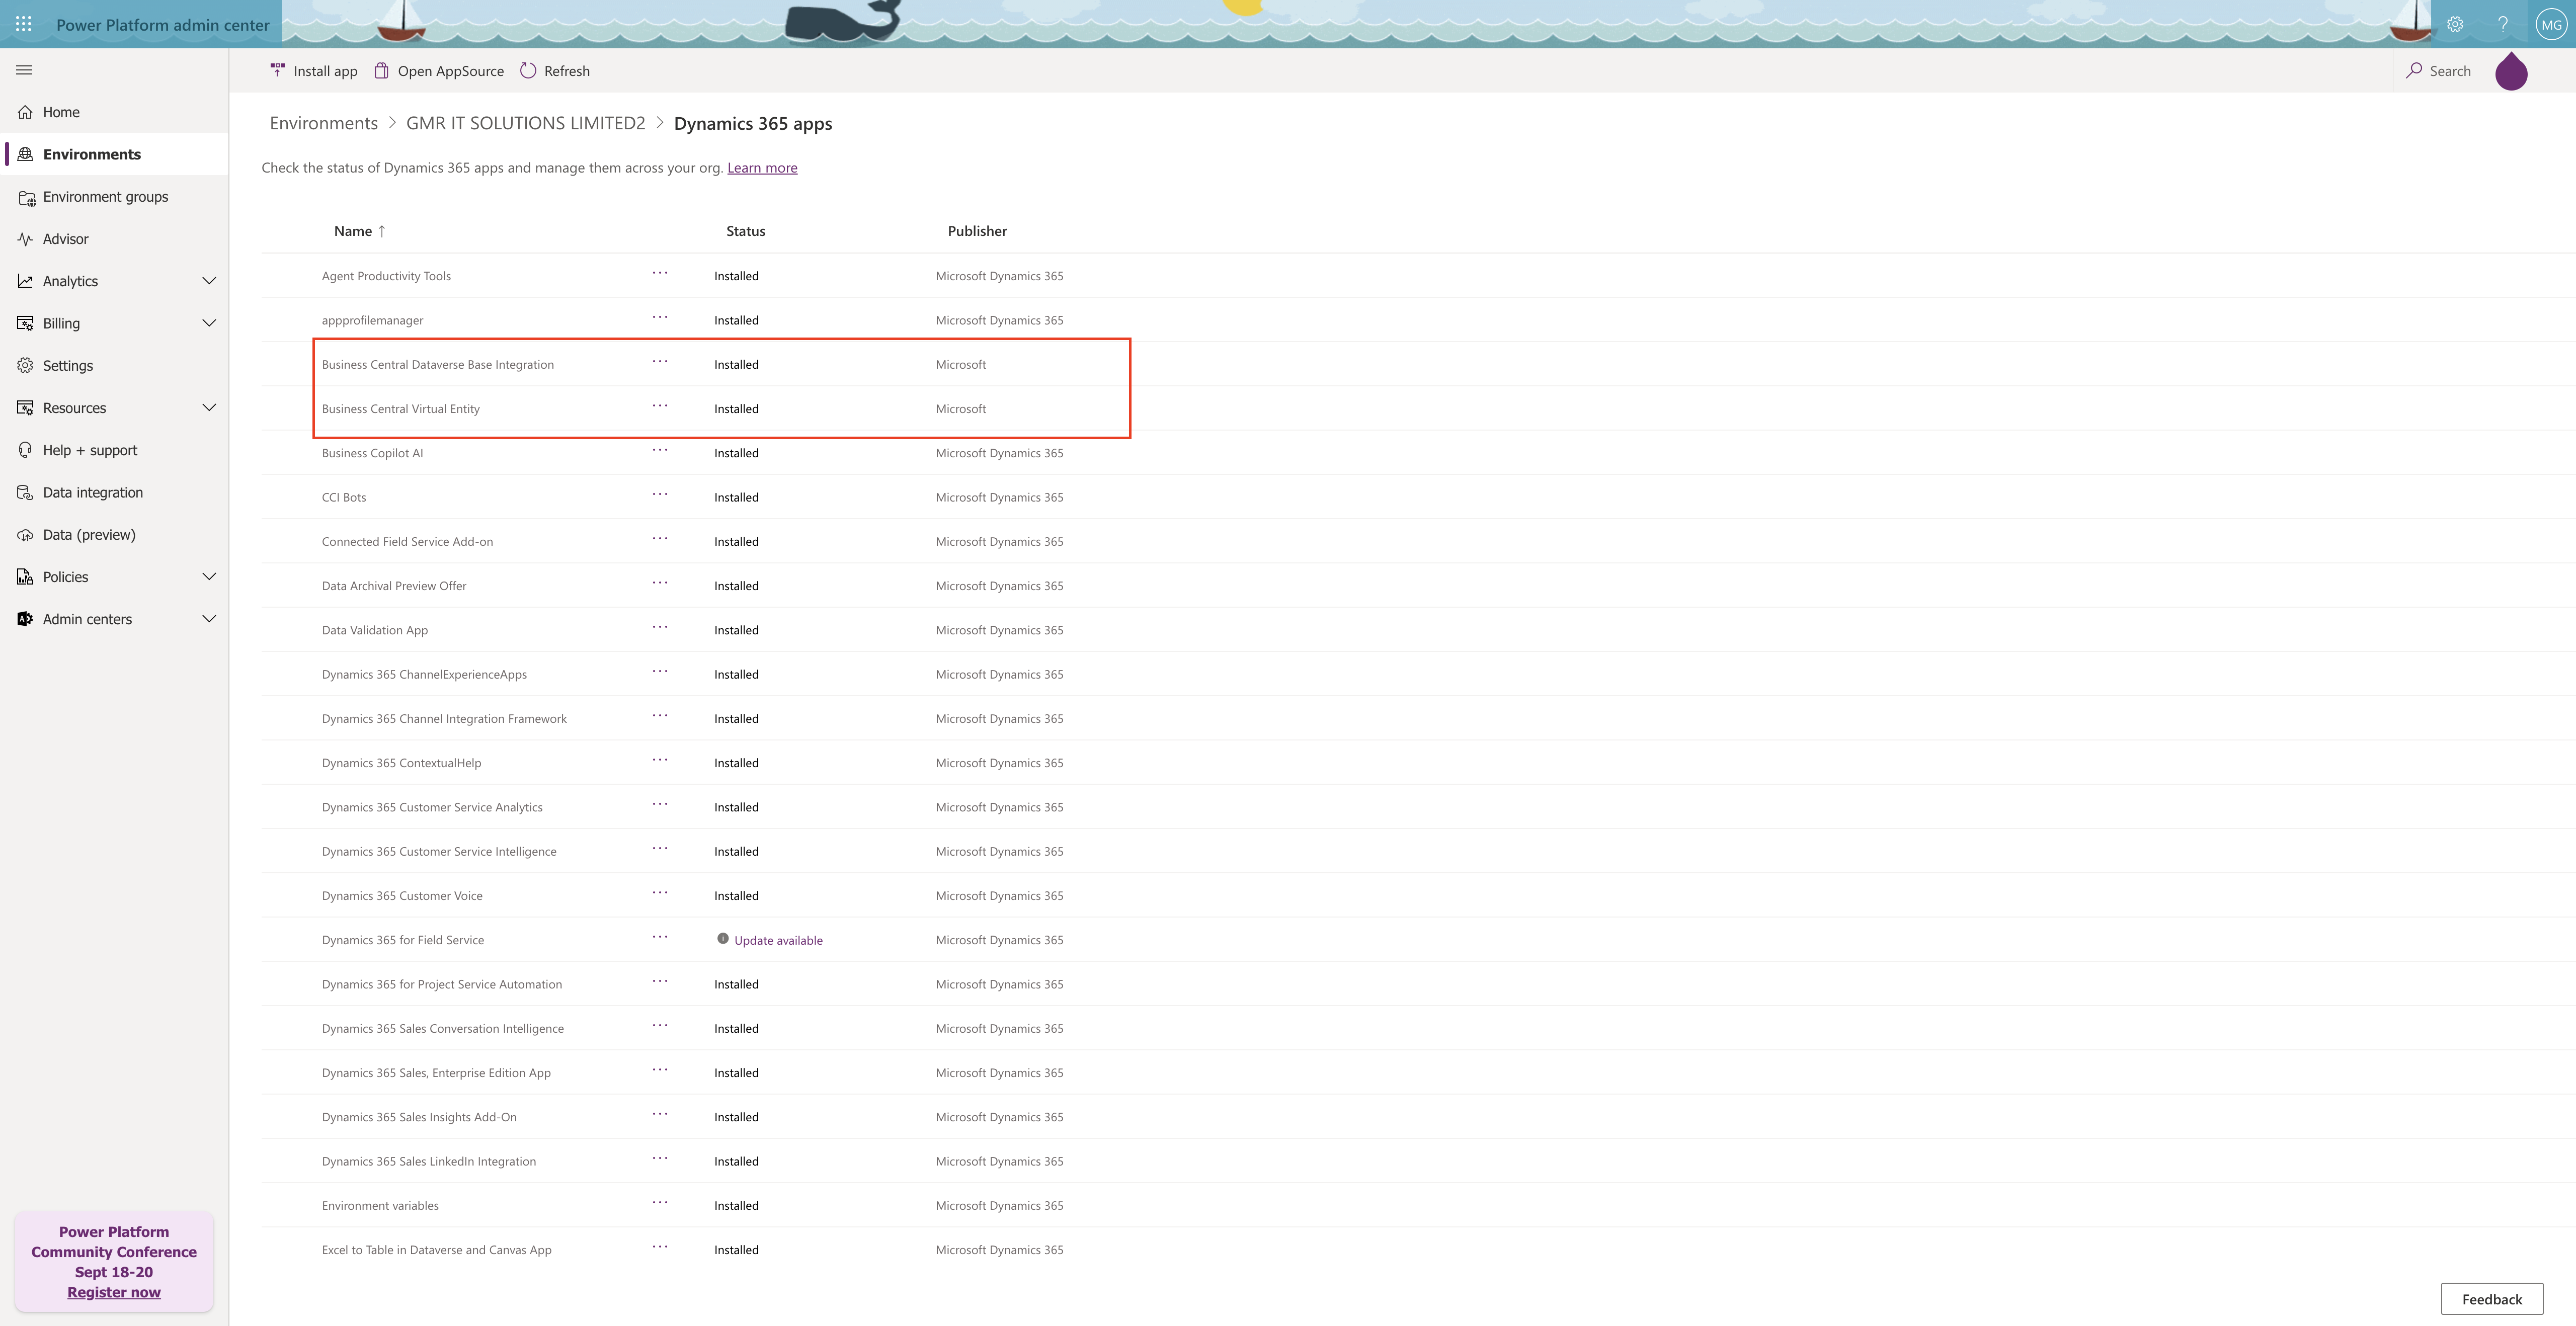
This integration streamlines service operations, allowing you to create and manage work orders in Field Service, track service tasks, assign resources, and capture consumption details. Once work orders are completed, data seamlessly transfers to Business Central for further processing, including invoicing and fulfillment.

It’s a unified and efficient workflow that eliminates manual data entry and improves financial management!.

That’s it for today.

I hope this helps.

Malla Reddy Gurram(@UK365GUY)
#365blogpostsin365days

Share this:

{Do you know} Manage postal codes globally on Dynamics 365 Field Service

Hello Everyone,

Today I am going to share my thoughts on managing postal codes globally on Dynamics 365 Field Service.

Let’s get’s started.

Managing postal codes globally in Dynamics 365 Field Service is crucial for efficient service operation’s.

Here’s how you can achieve this:

1. Global Postal Code Support:

Organisations can now handle service areas with identical postal code across different countries.

To set this up, add a country code to your postal code table. This territory will automatically match based on both the country code and postal code.

2. Configuration Steps:

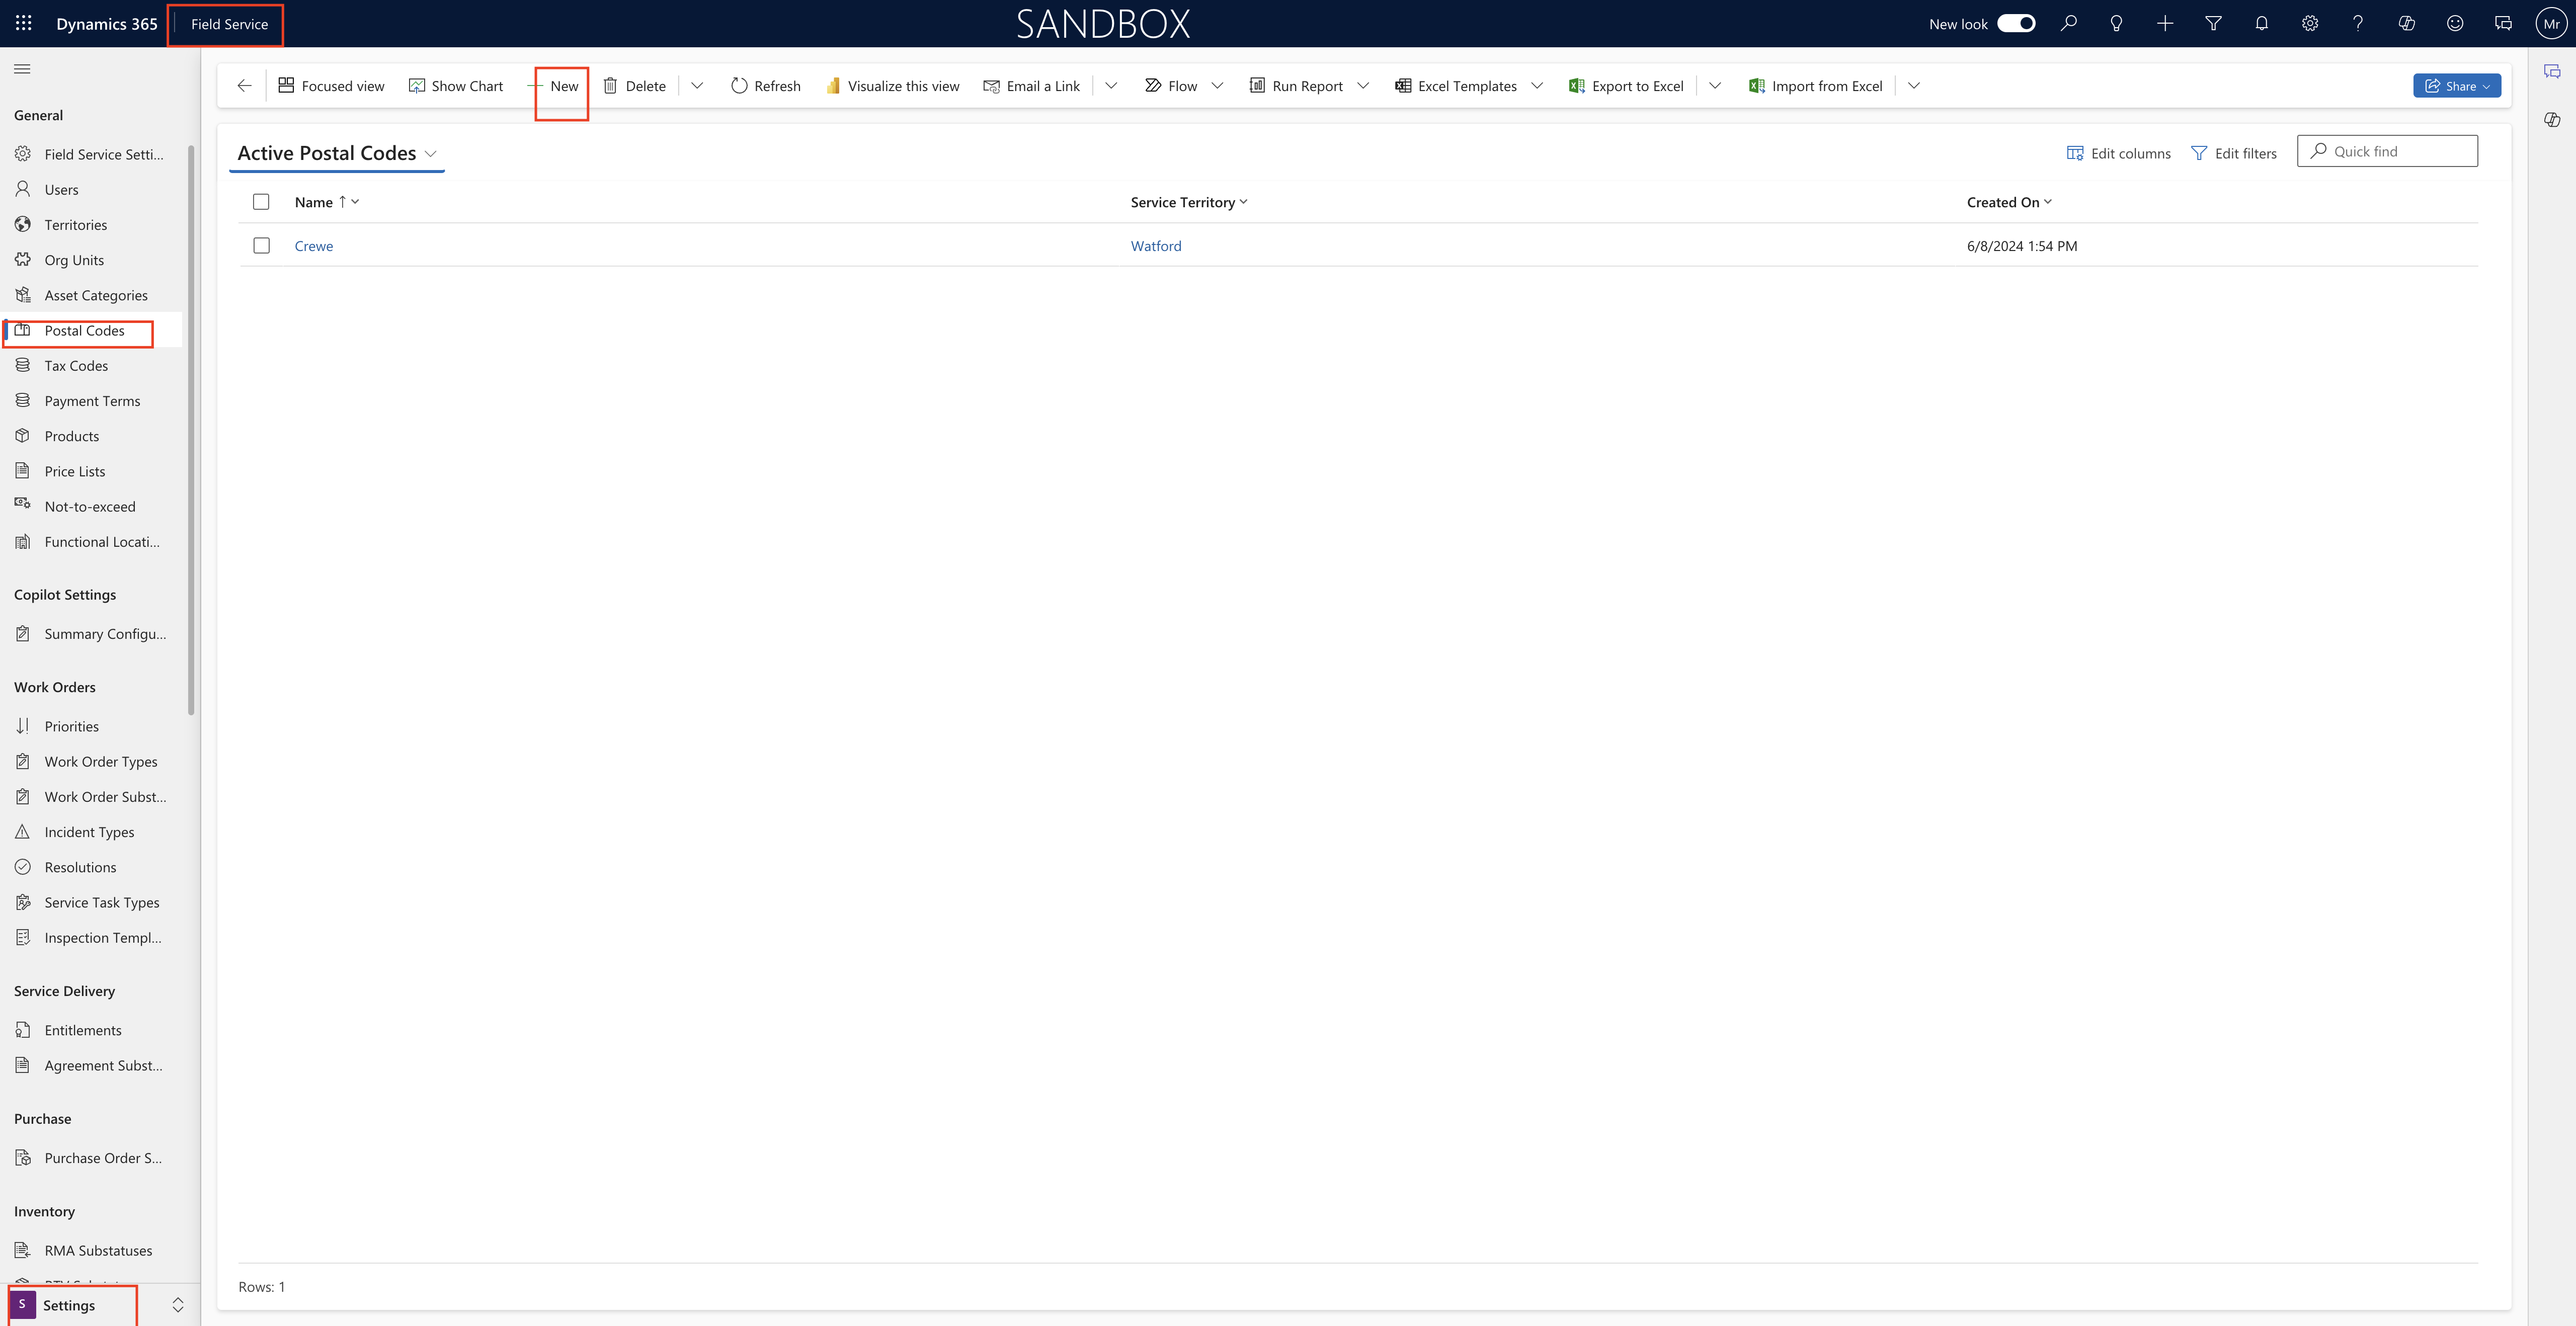
In Dynamics 365 Field Service, open the Settings area.

Navigate to the General section and select Postal Codes.

Choose the postal code you want to modify and edit the record. You can also bulk edit muliple records if needed.

Don’t forget to save your changes.

By appending country codes to the postal codes of your service territory.you’ll improve global support and streamline operations.

That’s it for today.

I hope this helps.

Malla Reddy Gurram(@UK365GUY)
#365blogpostsin365days

Share this:

{Do you know} Get automatic prompts from Copilot on Dynamics 365 Customer Service

Hello Everyone,

Today I am going to share my thoughts on the Dynamics 365 Customer Service getting automatic prompts from Copilot.

Let’s get’s started.

Copilot in Dynamics 365 Customer Service Provides real-time assistance to customer service agents.

One of its features is automatic prompts. When enabled in the Customer Service admin center, these prompts give contextual suggestions to agents based on the active case or customer conversation context.

This helps agent quickly ask questions and get help, ultimately reducing handle times and improving agent and customer satisfaction.

If you’re interested in enabling personal quick replies, you can enable this feature from customer service admin center, automatic prompts give contextual suggestions to agents on what they can do next based on the active case or customer conversation context.

This makes it easier for customer service agents to quickly ask questions and get help.

That’s it for today.

I hope this helps.

Malla Reddy Gurram(@UK365GUY)
#365blogpostsin365days
Share this:

{How to} Customize how records are sorted in the Dynamics 365 Customer Service inbox

Hello Everyone,

Today I am going to share my thoughts on the Customizing how records are sorted in the Dynamics 365 Customer Service Inbox.

Let’s get’s started.

Certainly! To customize how records are sorted in the Dynamics 365 Customer Service inbox, follow these steps:

1. Admin Configuration:

As a administrator, access the Customer Service admin center app.

Navigate to Workspace in the site map.

Next to Agent experience profiles, select Manage

2. Custom Sort:

The custom sort feature users to choose their desired attributes for sorting records beyond just customer and date.

Configure the agent sort experience by entity to give agents the flexibility they need to drill down into their inbox.

3. Agent Experience:

When creating or editing a view, you can also customize sorting for specific columns.

In the Configure Sort Order dialog box, select the column you want to sort by (ascending or descending order) and click OK.

That’s it for today.

I hope this helps.

Malla Reddy Gurram(@UK365GUY)
#365blogpostsin365days

Share this:

{How to} Bring your own entity into the inbox on Dynamics 365 Customer Service

Hello Everyone,

Today I am going to share my thoughts on bringing your own entity into the inbox on Dynamics 365 Customer Service.

Let’s get’s started.

In Dynamics 365 Customer Service, administrators can add custom entities to the inbox and custom entities to the inbox and create inbox views.

The feature provides by allowing you to add and view results from the inbox views panel.

Here are the details:

1. Business Value:

As an administrator, you gain the ability to add your custom entity to the inbox, enhancing the user experience.

You can create customized views tailored to the needs of your users.

2. Feature Details:

Bring your Own Entity(BYOE):

An admin level configuration experience for the inbox.

Supports any entity that’s enabled in the Customer Service workspace app.

Allow agents to manage all their work items from a central location.

3. How to configure:

In the Customer Service admin center:

Navigate to Workspaces.

Next to Agent experience profiles, select the profile you want to edit.

Under Inbox, choose Edit.

You can also bring your own entities into the inbox by editing the profile in the Customer Service workspace app.

That’s it for today.

I hope this helps.

Malla Reddy Gurram(@UK365GUY)
#365blogpostsin365days
Share this: