Menu Close

Tag: #365blogpostsin365days

{How to} Improve engagement by editing emails in live journeys in Dynamics 365 Customer Insights – Journeys

Hello Everyone,

Today I am going to share my thoughts on the preview feature: improve engagement by editing emails in live Journeys on Dynamics 365 Customer Insights.

Let’s get’s started.

To improve engagement by editing emails in live journeys, follow these steps in Dynamics 365 Csutomer Insights – Journeys:
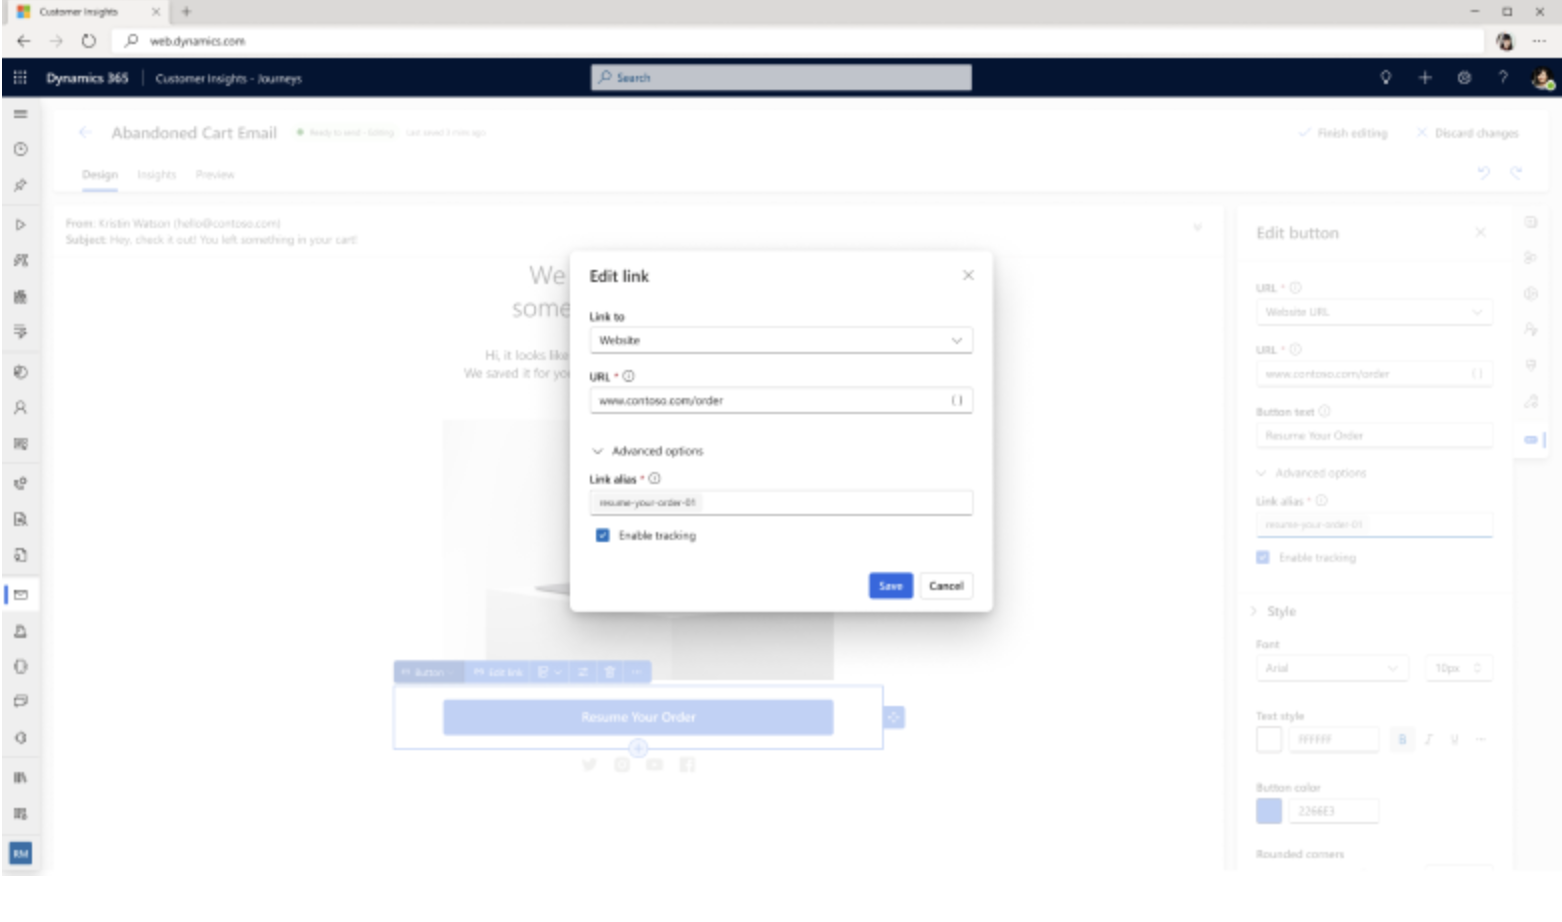
1. In your journeys, select the email tile, then go to properties and choose the email title.

2. Click the edit button in the email editor, then select continue.

3. Make the desired changes to the email components that can be edited in a live journey.

4. Select finish editing to apply the changes.

This feature allows you to easily modify email content and design without disrupting the customer experience.

You can adapt to changing customer needs and preferences while optimizing engagement and conversion rates.

That’s it for today.

I hope this helps.

Malla Reddy Gurram(@UK365GUY)
#365blogpostsin365days

Share this:

{How to} Integrate financial and inventory management from Dynamics 365 Field Service

Hello Everyone,

Today I am going to share my thoughts on integrating the financial and inventory management from Dynamics 365 Field Service.

Let’s get’s started.

Integrating financial and inventory management can significantly enhance operational efficiency. Here are some ways to achieve this:

1. Dynamics 365 Integration:

Dynamics 365 Field Service can seamlessly integrate with Dynamics 365 Finance and Dynamics 365 Supply Chain Management. By enabling this integration, you connect work order related financial and inventory data without additional effort or complexity.

Real-time pricing and costing information from work orders can be synced into finance and operations apps, ensuring accurate financial tracking.

2. Benefits of Integration:

Optimized Inventory: Integration allows you to plan effectively and meet product availabilty and ROI goals.

Visibility: Supply chain partners gain visibility into inventory levels.

Accurate Financial Reporting: Integration ensures that Inventory data is accurately reflected in financial reports.

Remember, integrating these systems streamlines processes, reduces manual reconciliation efforts, and enhances overall business performance.

That’s it for today.

I hope this helps.

Malla Reddy Gurram(@UK365GUY)
#365blogpostsin365days

Share this:

{Do you know} Integrate Dynamics 365 Field Service with Business Central

Hello Everyone,

Today I am going to share my thoughts on Integration of Dynamics 365 Field Service with Dynamics 365 Business Central.

Let’s get’s started.

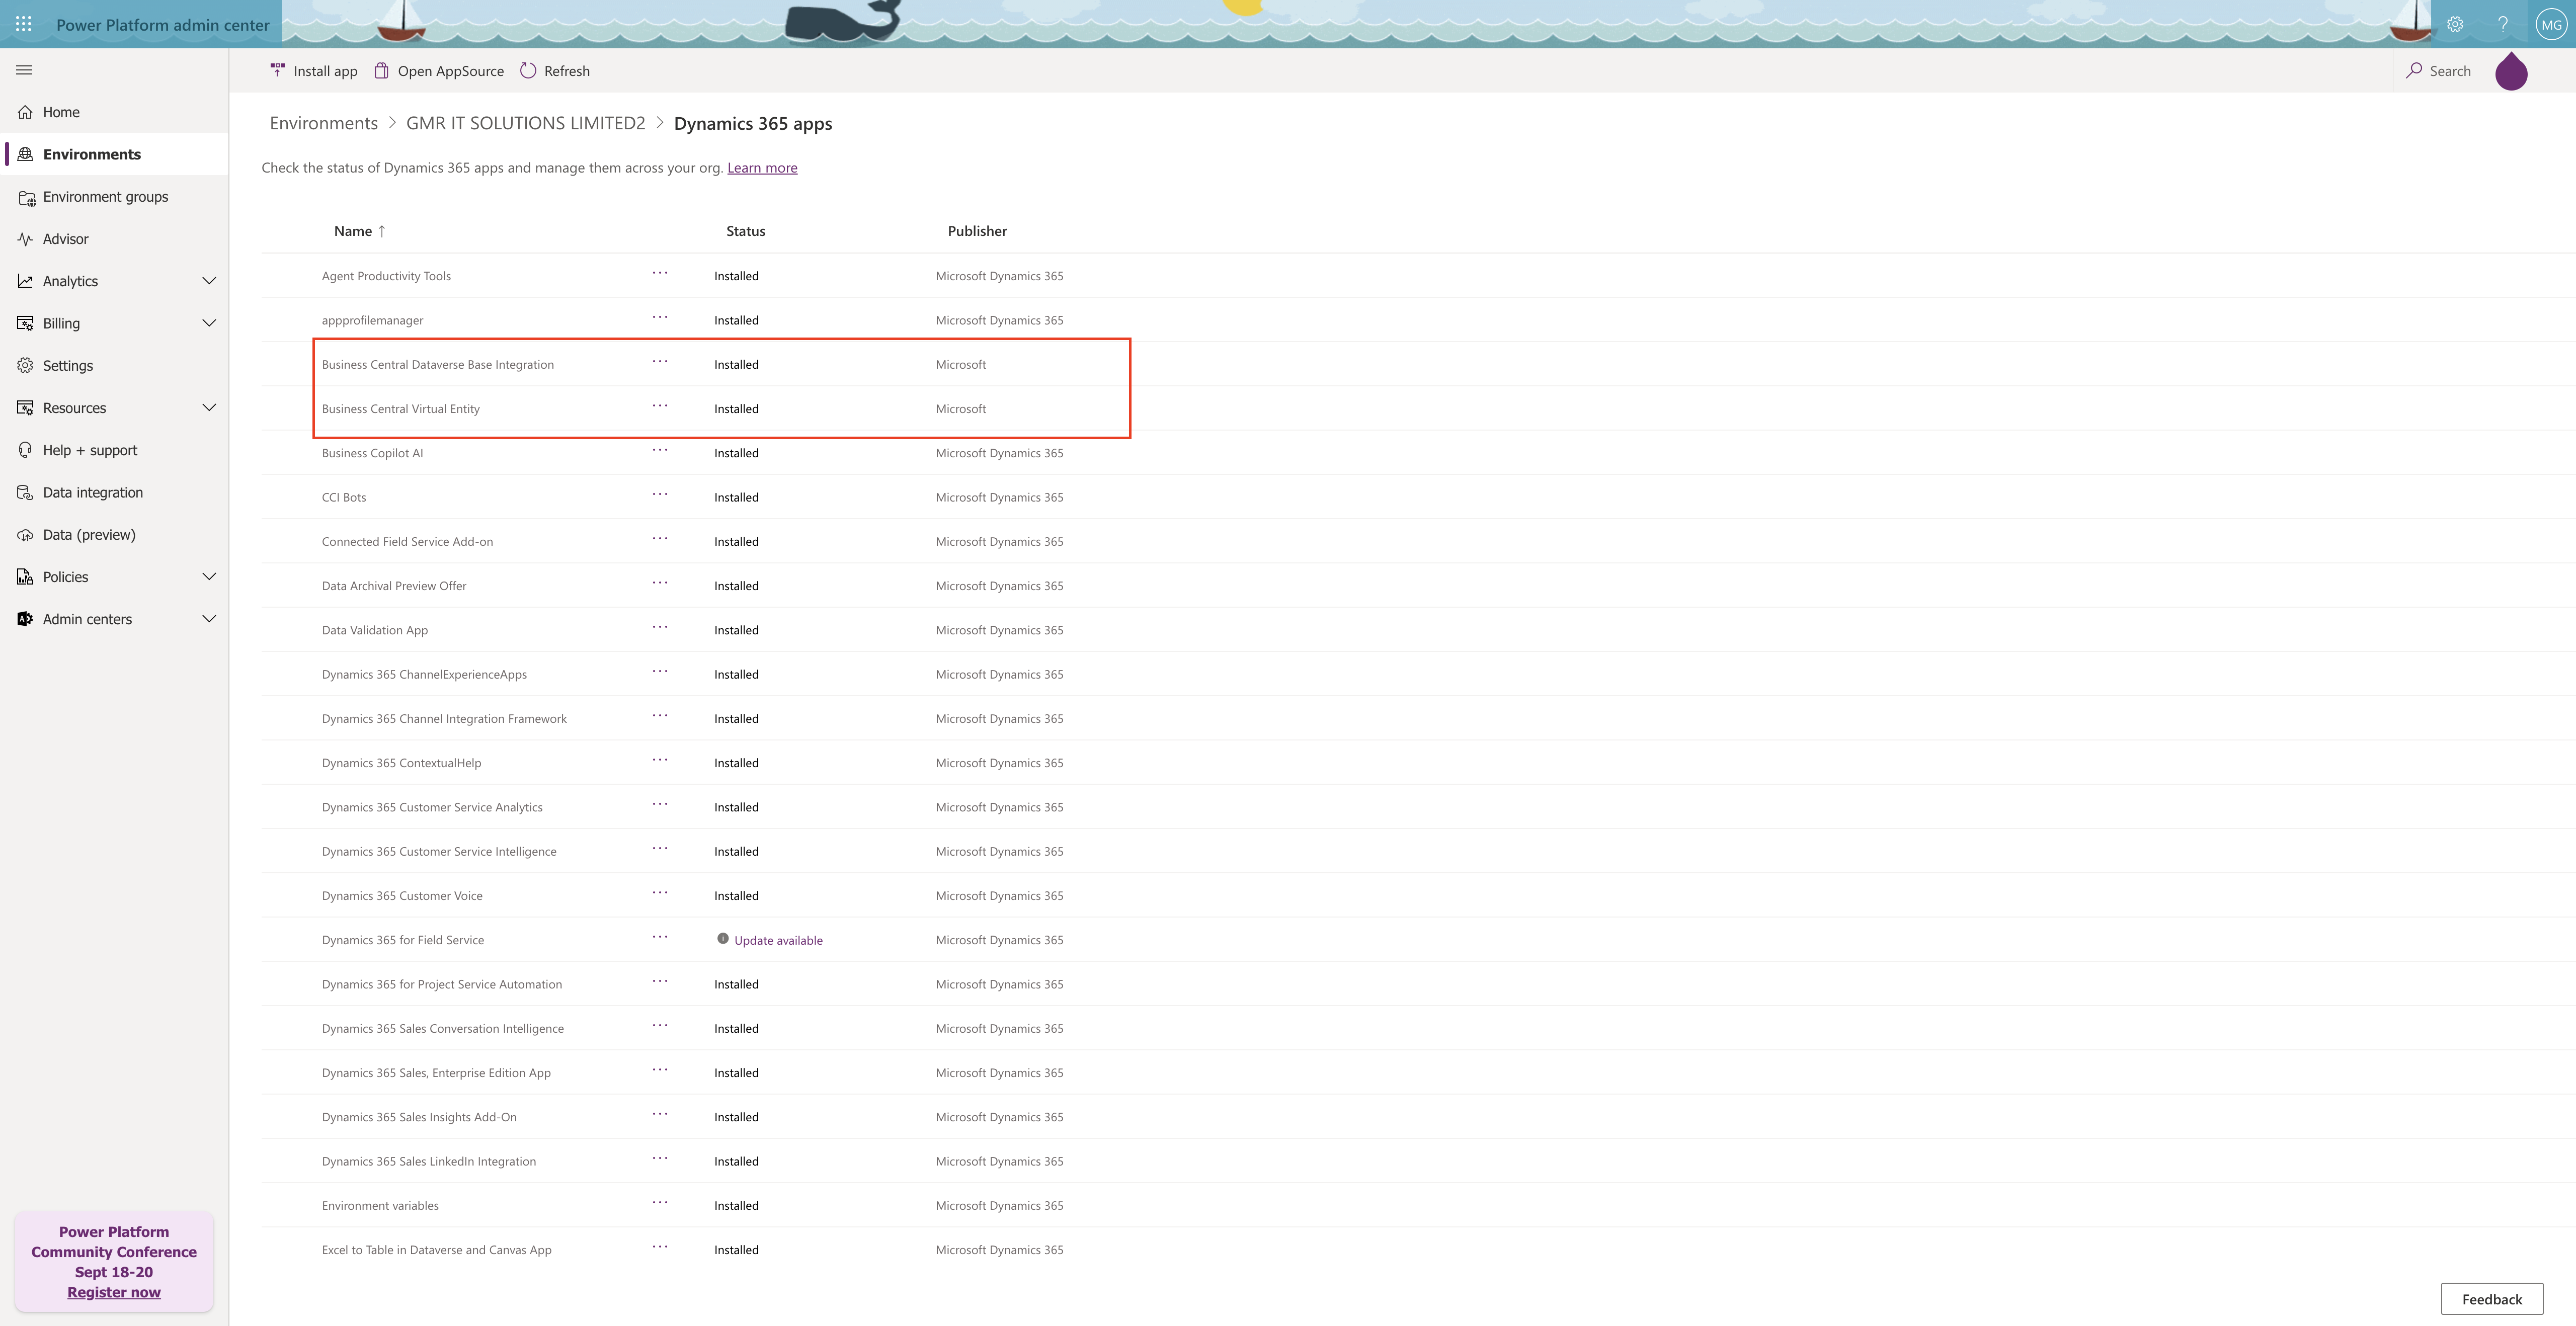
To integrate Dynamics 365 Field Service with Business Central, follow these steps:

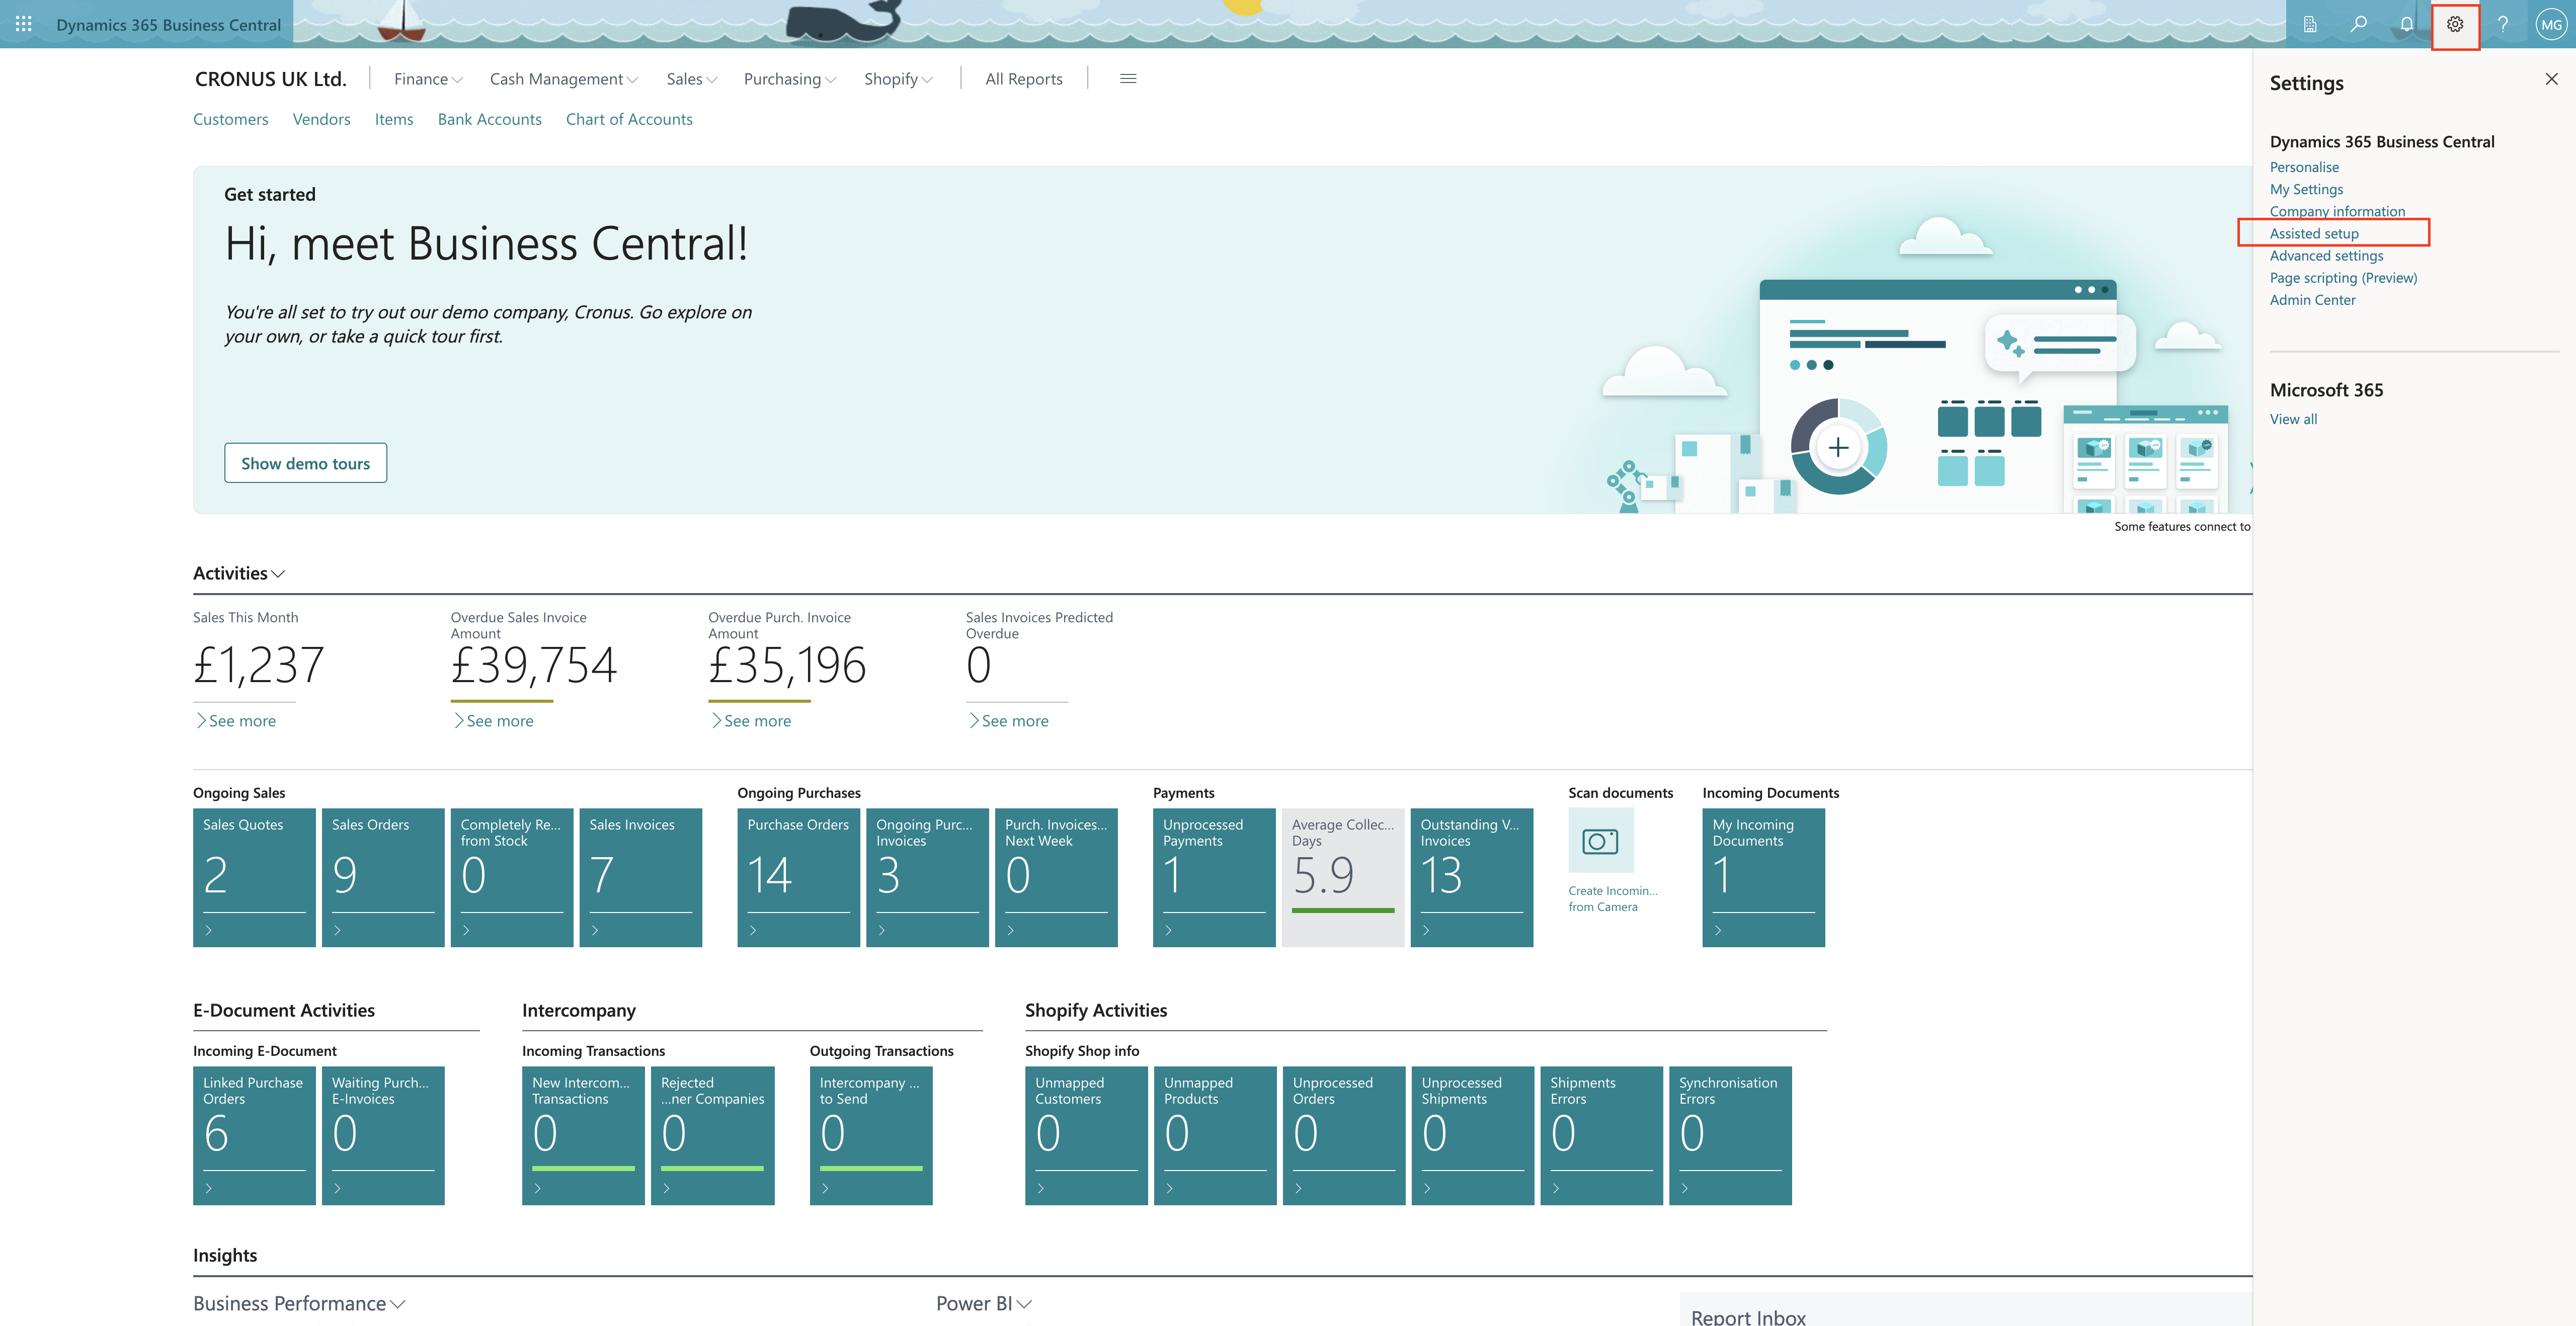
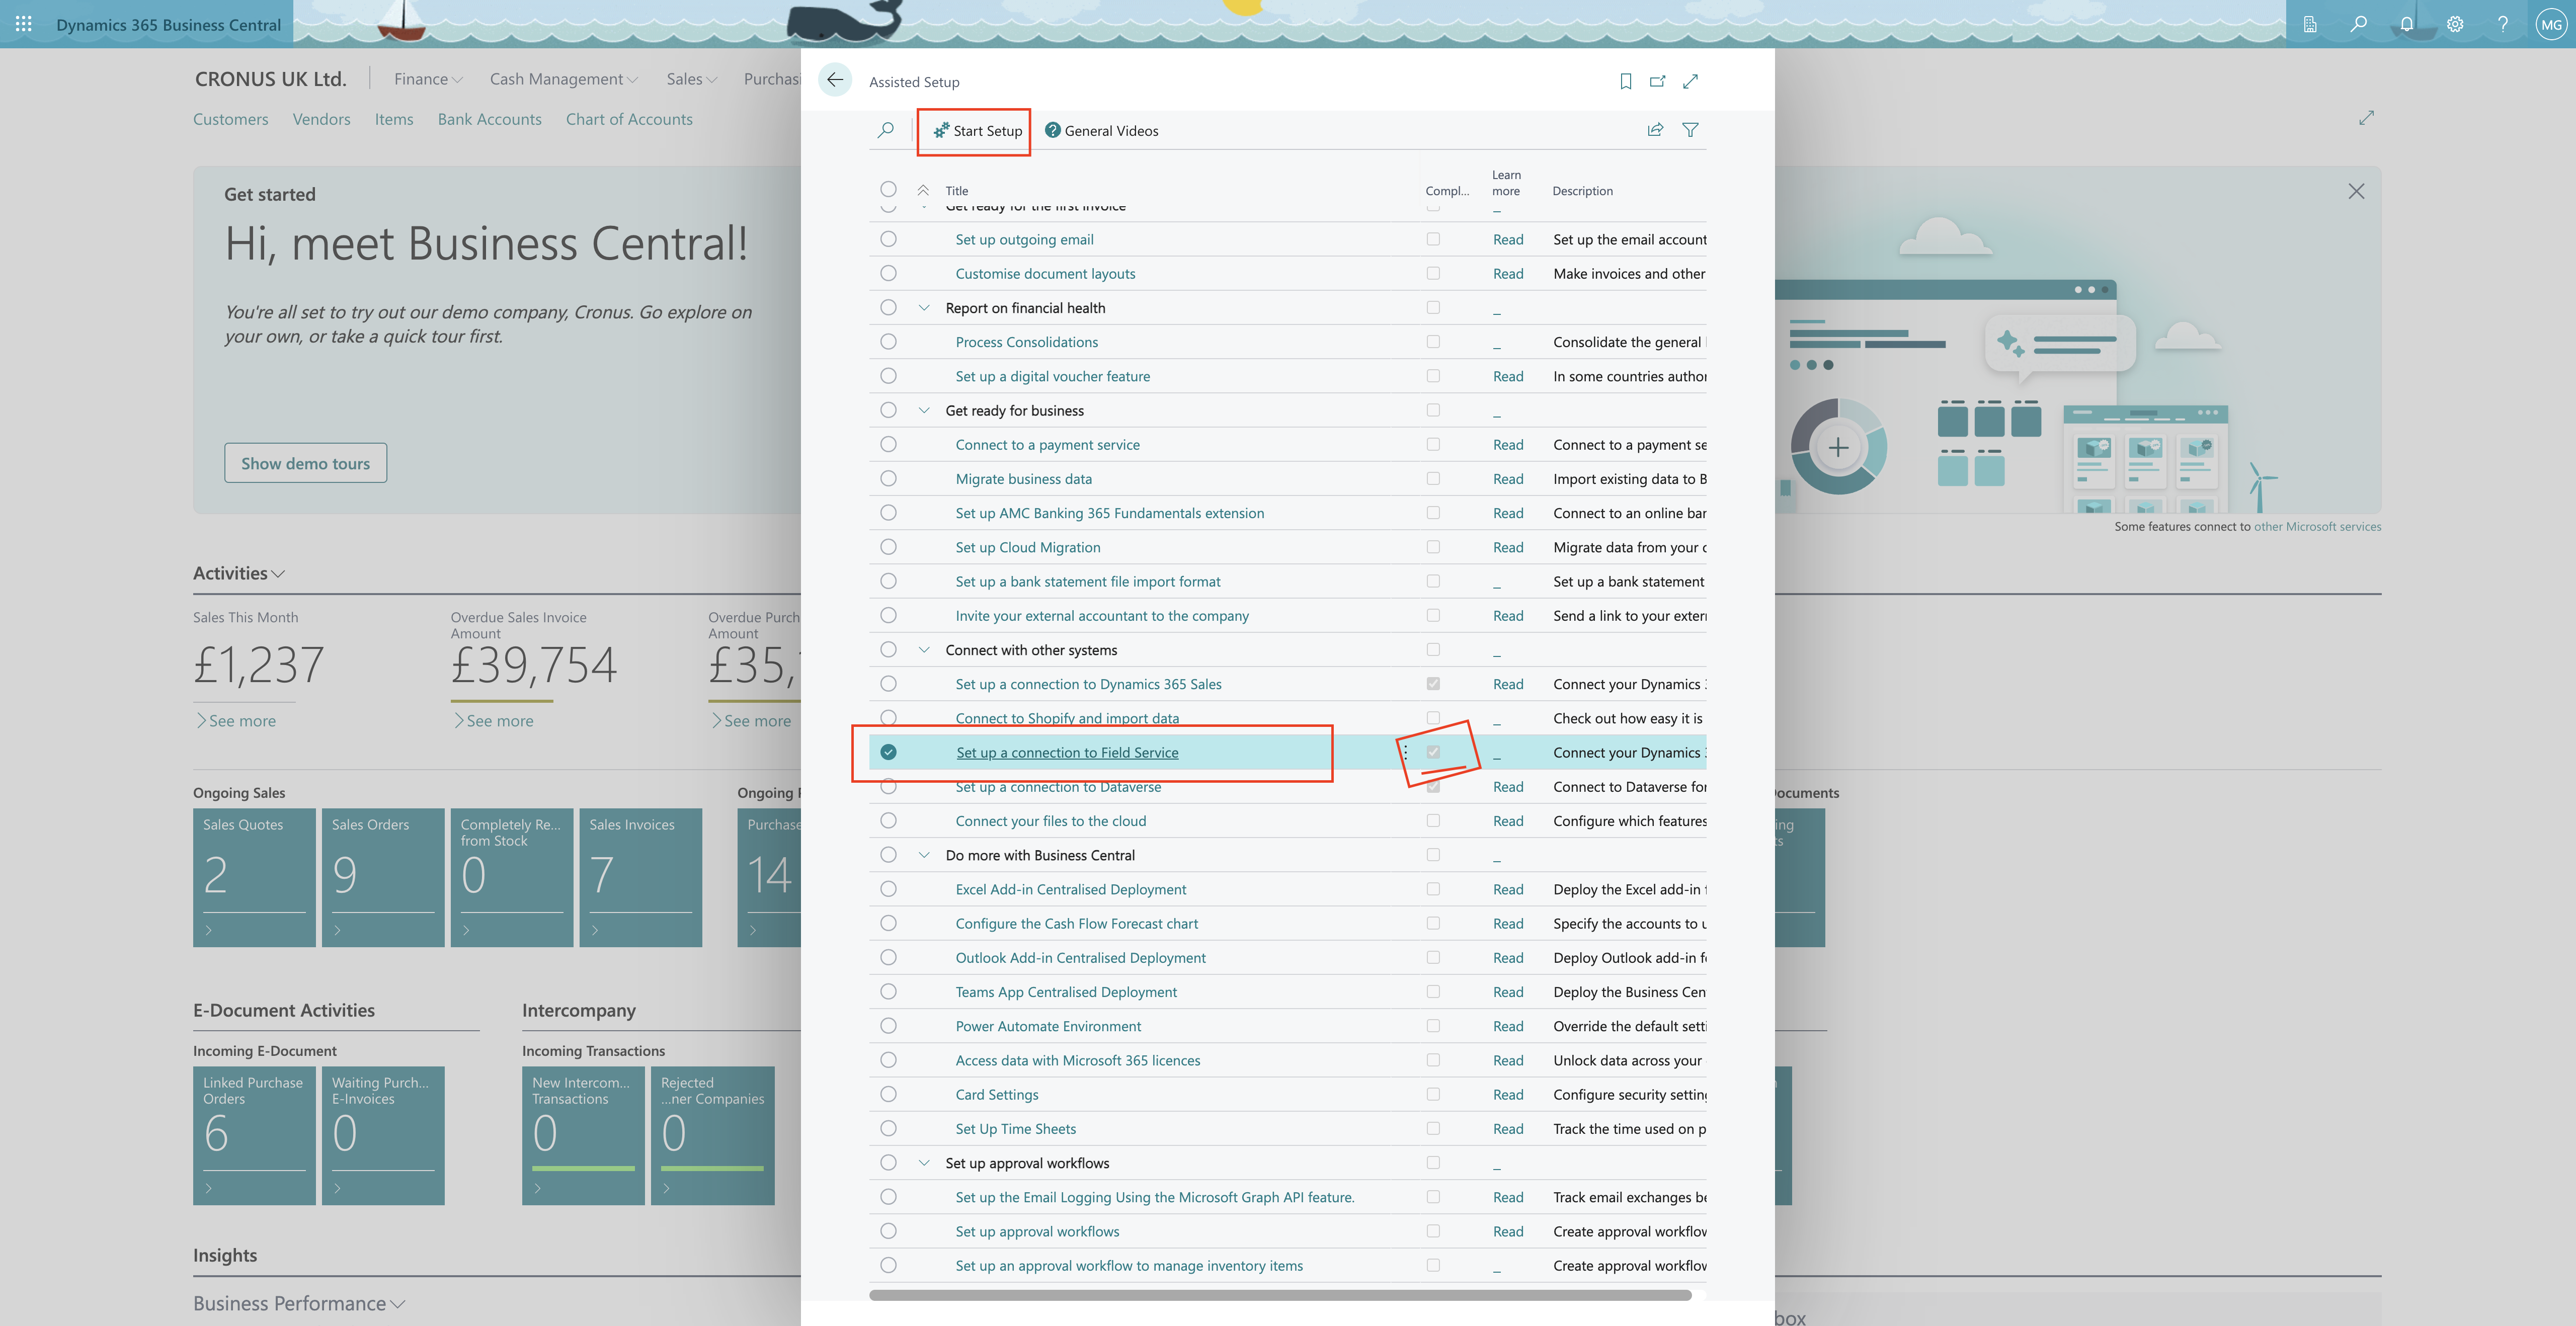
1. In Business Central, go to the Assisted Setup page.

2. Choose Set up integration to Dynamics 365 Field Service.

3. Run the assisted setup guide.

4. Import the Dynamics 365 Field Service Solution.

5. Enable the Dynamics 365 Field Service Connection.

This integration streamlines service operations, allowing you to create and manage work orders in Field Service, track service tasks, assign resources, and capture consumption details. Once work orders are completed, data seamlessly transfers to Business Central for further processing, including invoicing and fulfillment.

It’s a unified and efficient workflow that eliminates manual data entry and improves financial management!.

That’s it for today.

I hope this helps.

Malla Reddy Gurram(@UK365GUY)
#365blogpostsin365days

Share this:

{Do you know} Manage postal codes globally on Dynamics 365 Field Service

Hello Everyone,

Today I am going to share my thoughts on managing postal codes globally on Dynamics 365 Field Service.

Let’s get’s started.

Managing postal codes globally in Dynamics 365 Field Service is crucial for efficient service operation’s.

Here’s how you can achieve this:

1. Global Postal Code Support:

Organisations can now handle service areas with identical postal code across different countries.

To set this up, add a country code to your postal code table. This territory will automatically match based on both the country code and postal code.

2. Configuration Steps:

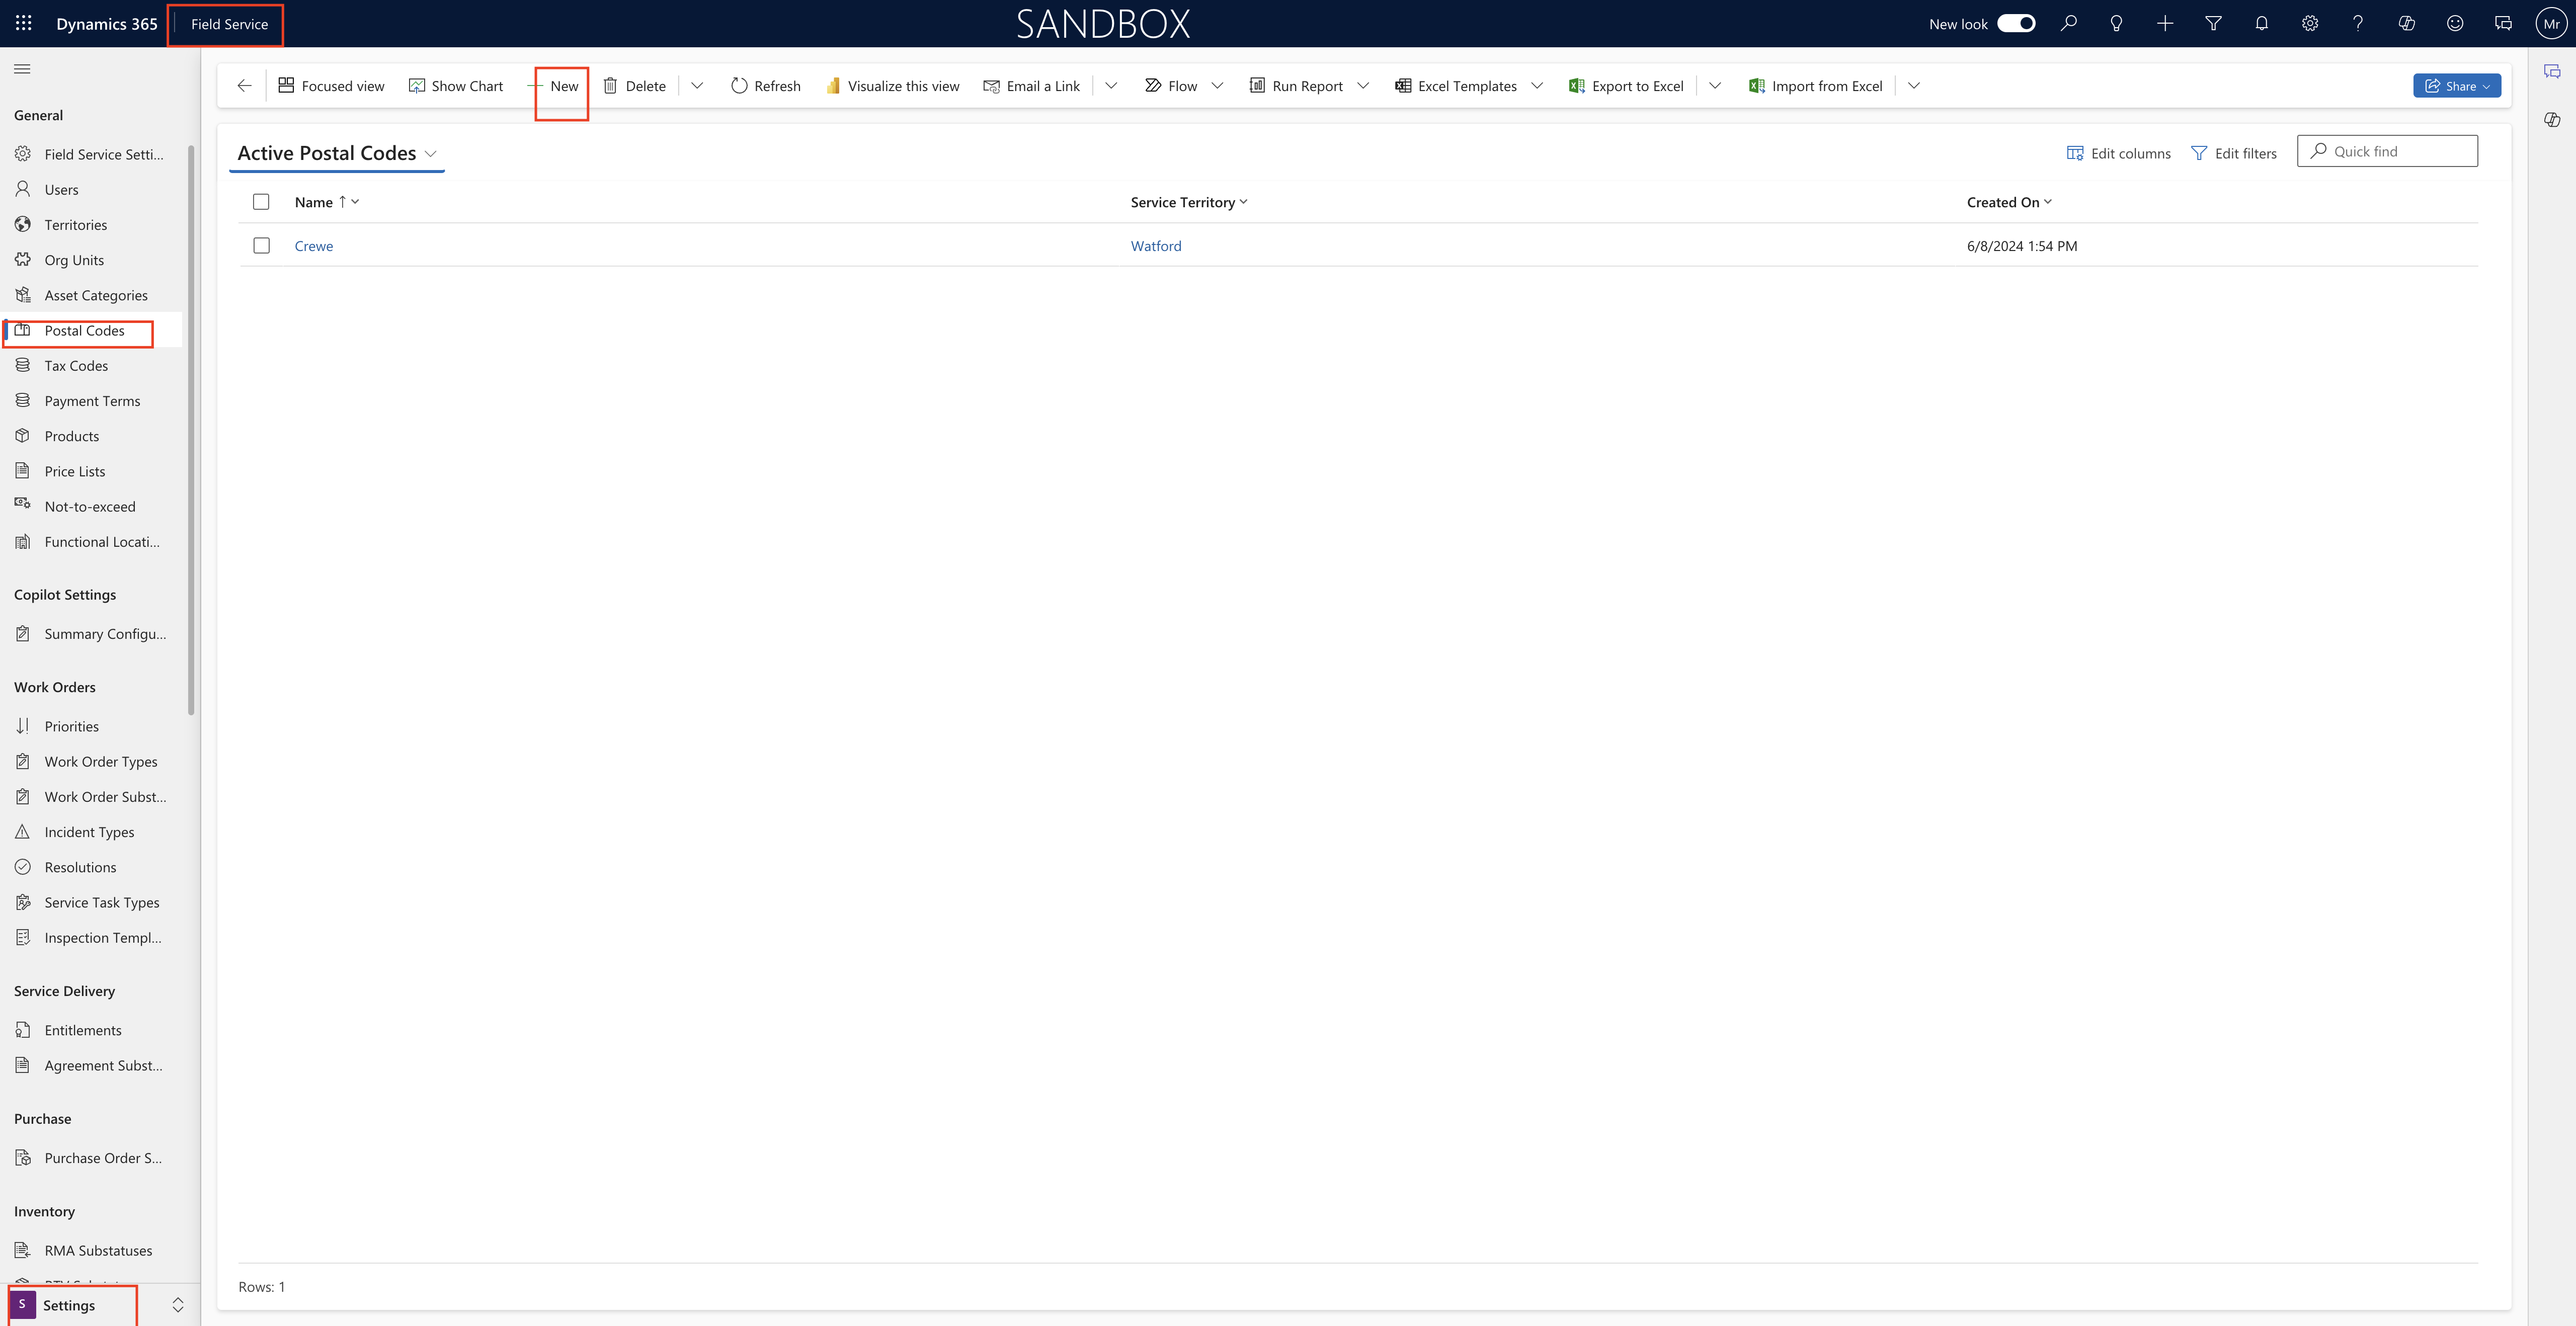
In Dynamics 365 Field Service, open the Settings area.

Navigate to the General section and select Postal Codes.

Choose the postal code you want to modify and edit the record. You can also bulk edit muliple records if needed.

Don’t forget to save your changes.

By appending country codes to the postal codes of your service territory.you’ll improve global support and streamline operations.

That’s it for today.

I hope this helps.

Malla Reddy Gurram(@UK365GUY)
#365blogpostsin365days
Share this:

{Do you know} Get automatic prompts from Copilot on Dynamics 365 Customer Service

Hello Everyone,

Today I am going to share my thoughts on the Dynamics 365 Customer Service getting automatic prompts from Copilot.

Let’s get’s started.

Copilot in Dynamics 365 Customer Service Provides real-time assistance to customer service agents.

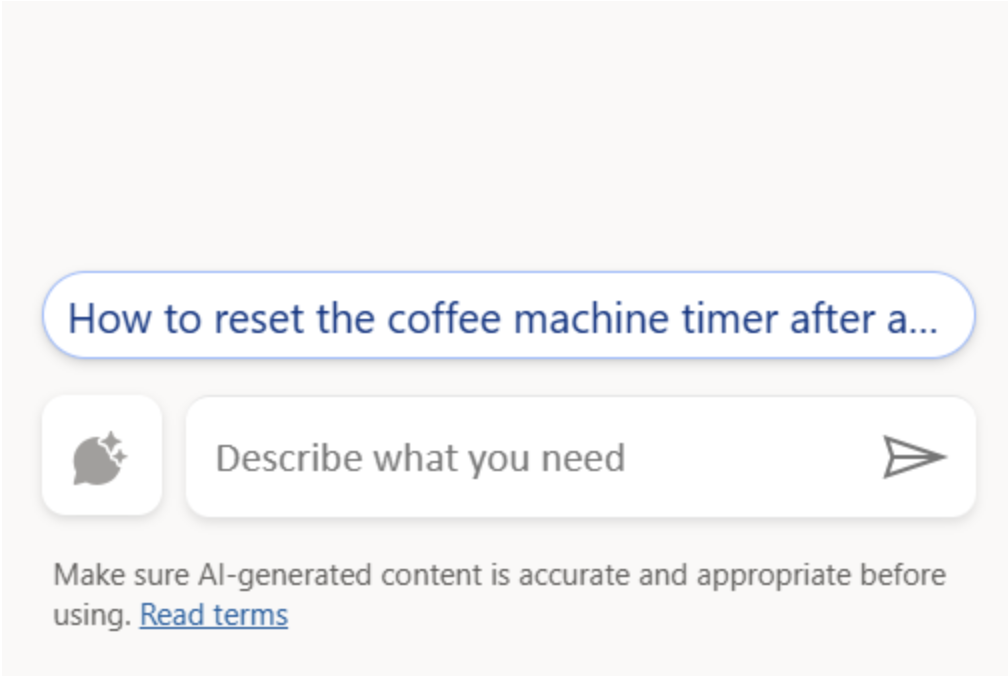
One of its features is automatic prompts. When enabled in the Customer Service admin center, these prompts give contextual suggestions to agents based on the active case or customer conversation context.

This helps agent quickly ask questions and get help, ultimately reducing handle times and improving agent and customer satisfaction.

If you’re interested in enabling personal quick replies, you can enable this feature from customer service admin center, automatic prompts give contextual suggestions to agents on what they can do next based on the active case or customer conversation context.

This makes it easier for customer service agents to quickly ask questions and get help.

That’s it for today.

I hope this helps.

Malla Reddy Gurram(@UK365GUY)
#365blogpostsin365days
Share this: