Menu Close

Tag: #365blogpostsin365days

{How to} add canvas app to Microsoft Teams

Hello Everyone,

Today i am going to show how to add your canvas app to Microsoft Teams.

Lets gets started.

Login into www.make.powerapps.com

Click on the apps and then select the app you want to add to Microsoft Teams, click on “…” you will see the add to teams.
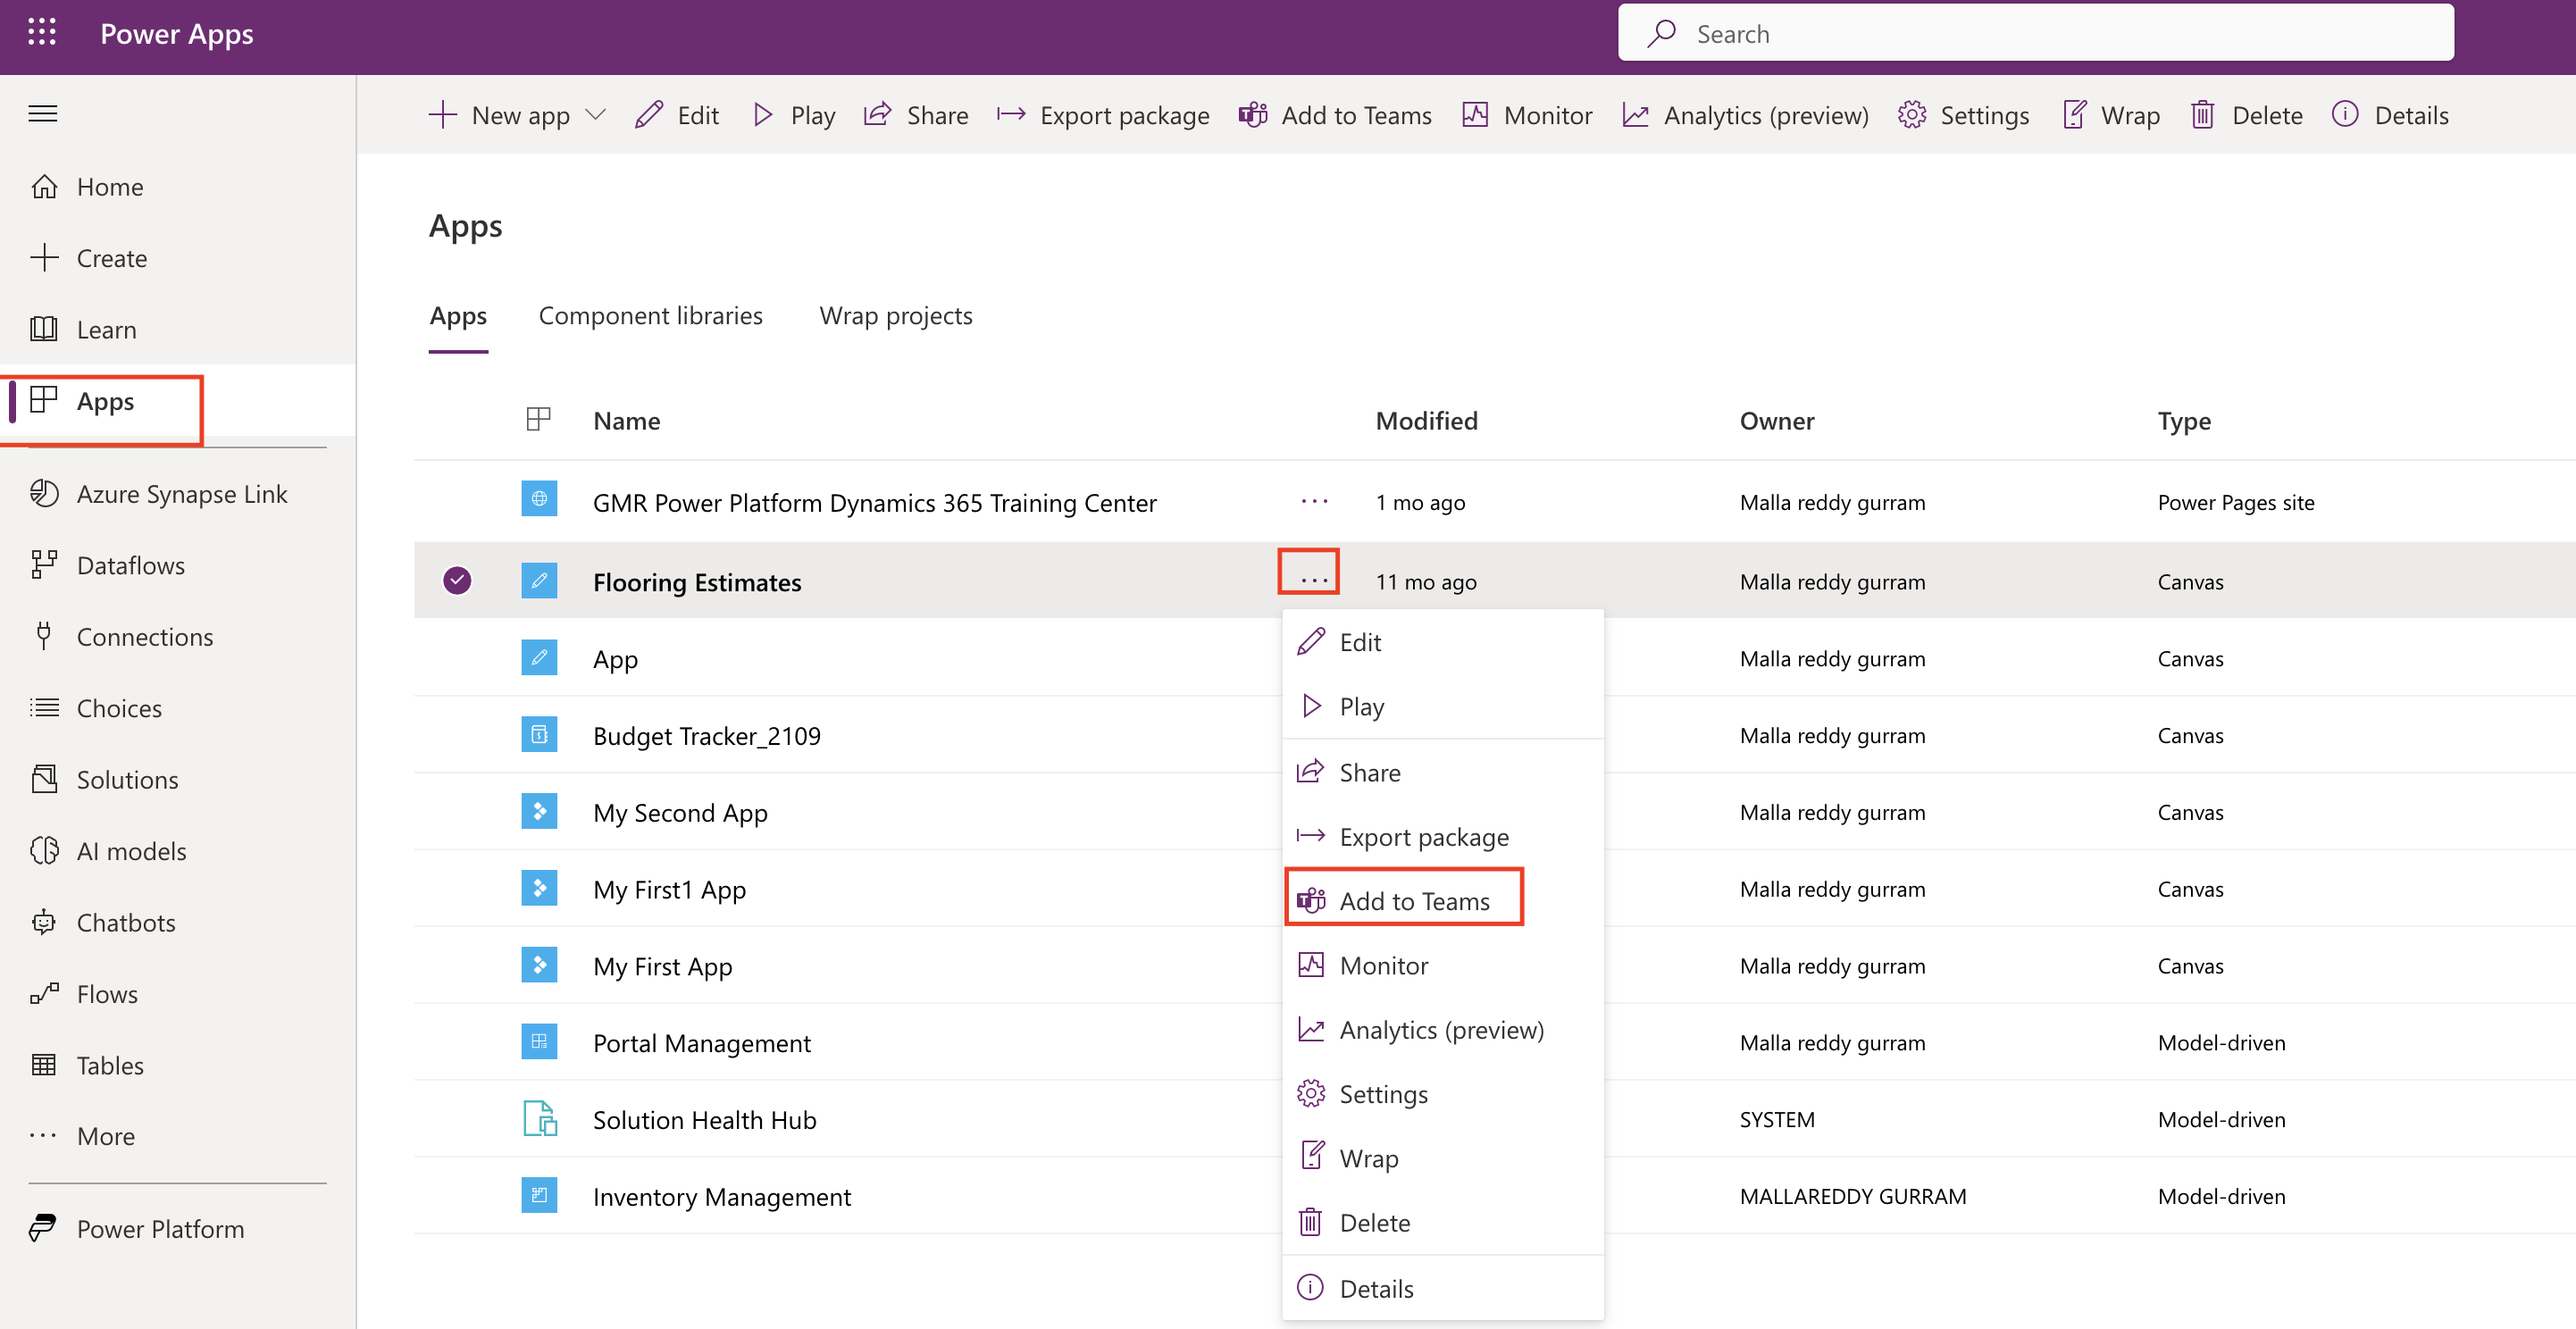
Click on the add to teams..
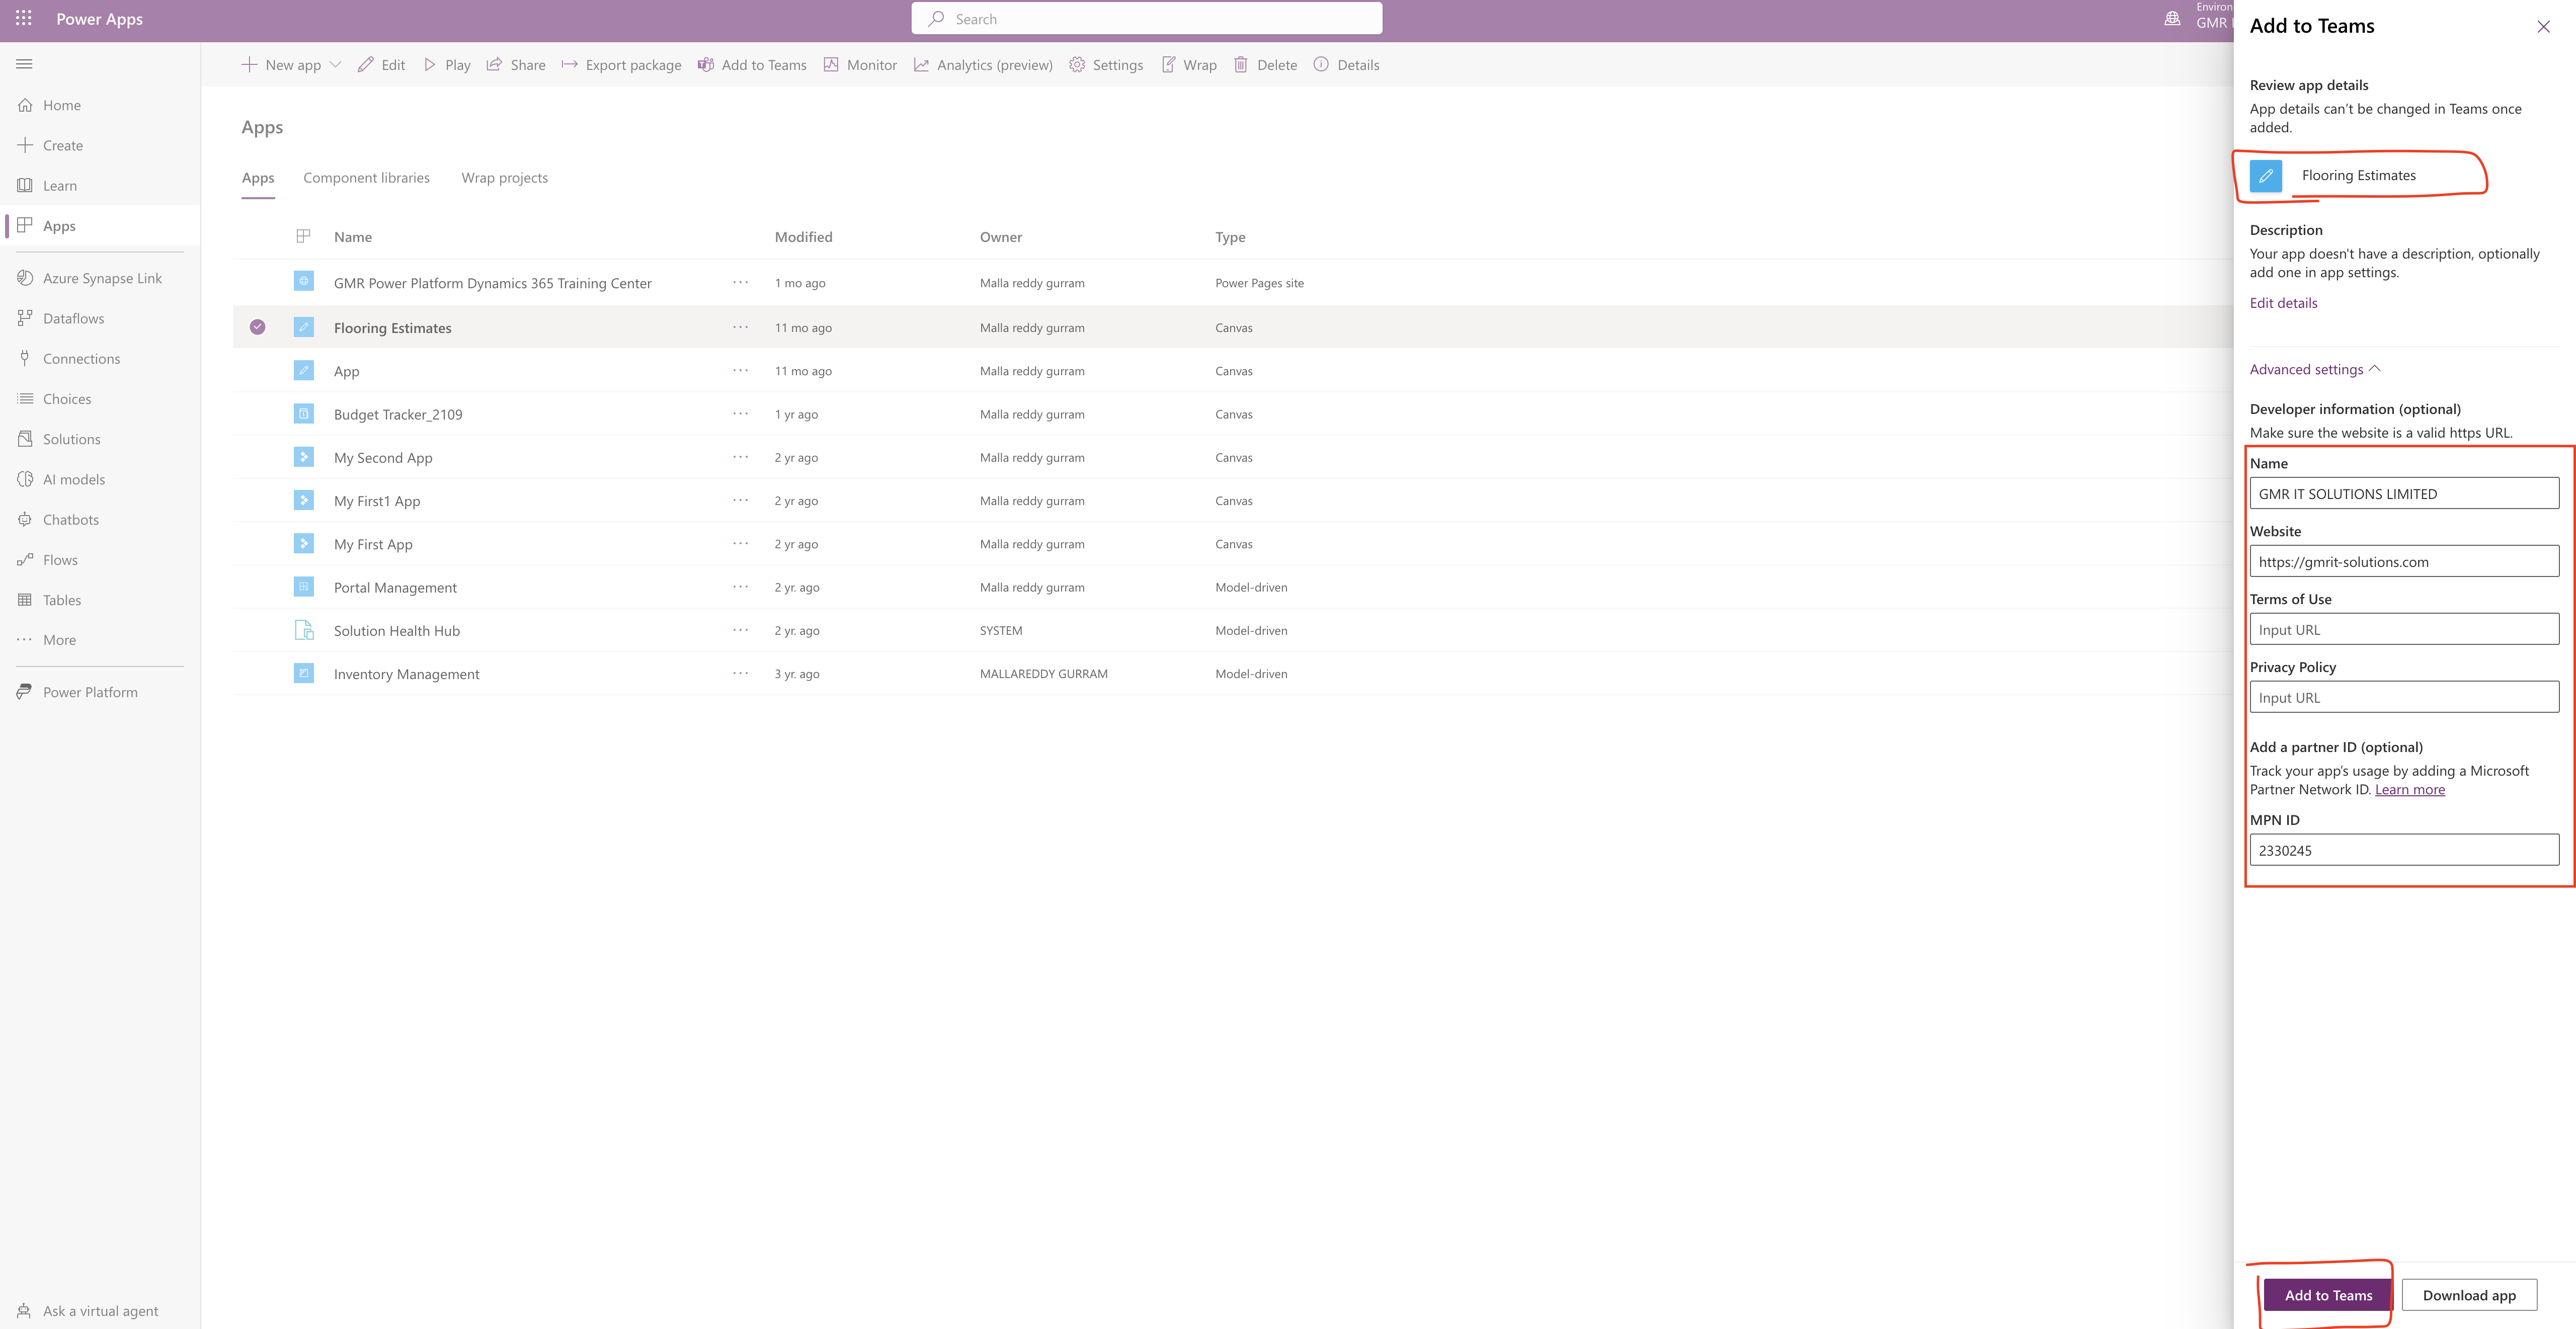
Then your App will appear on Microsoft Teams and click add:
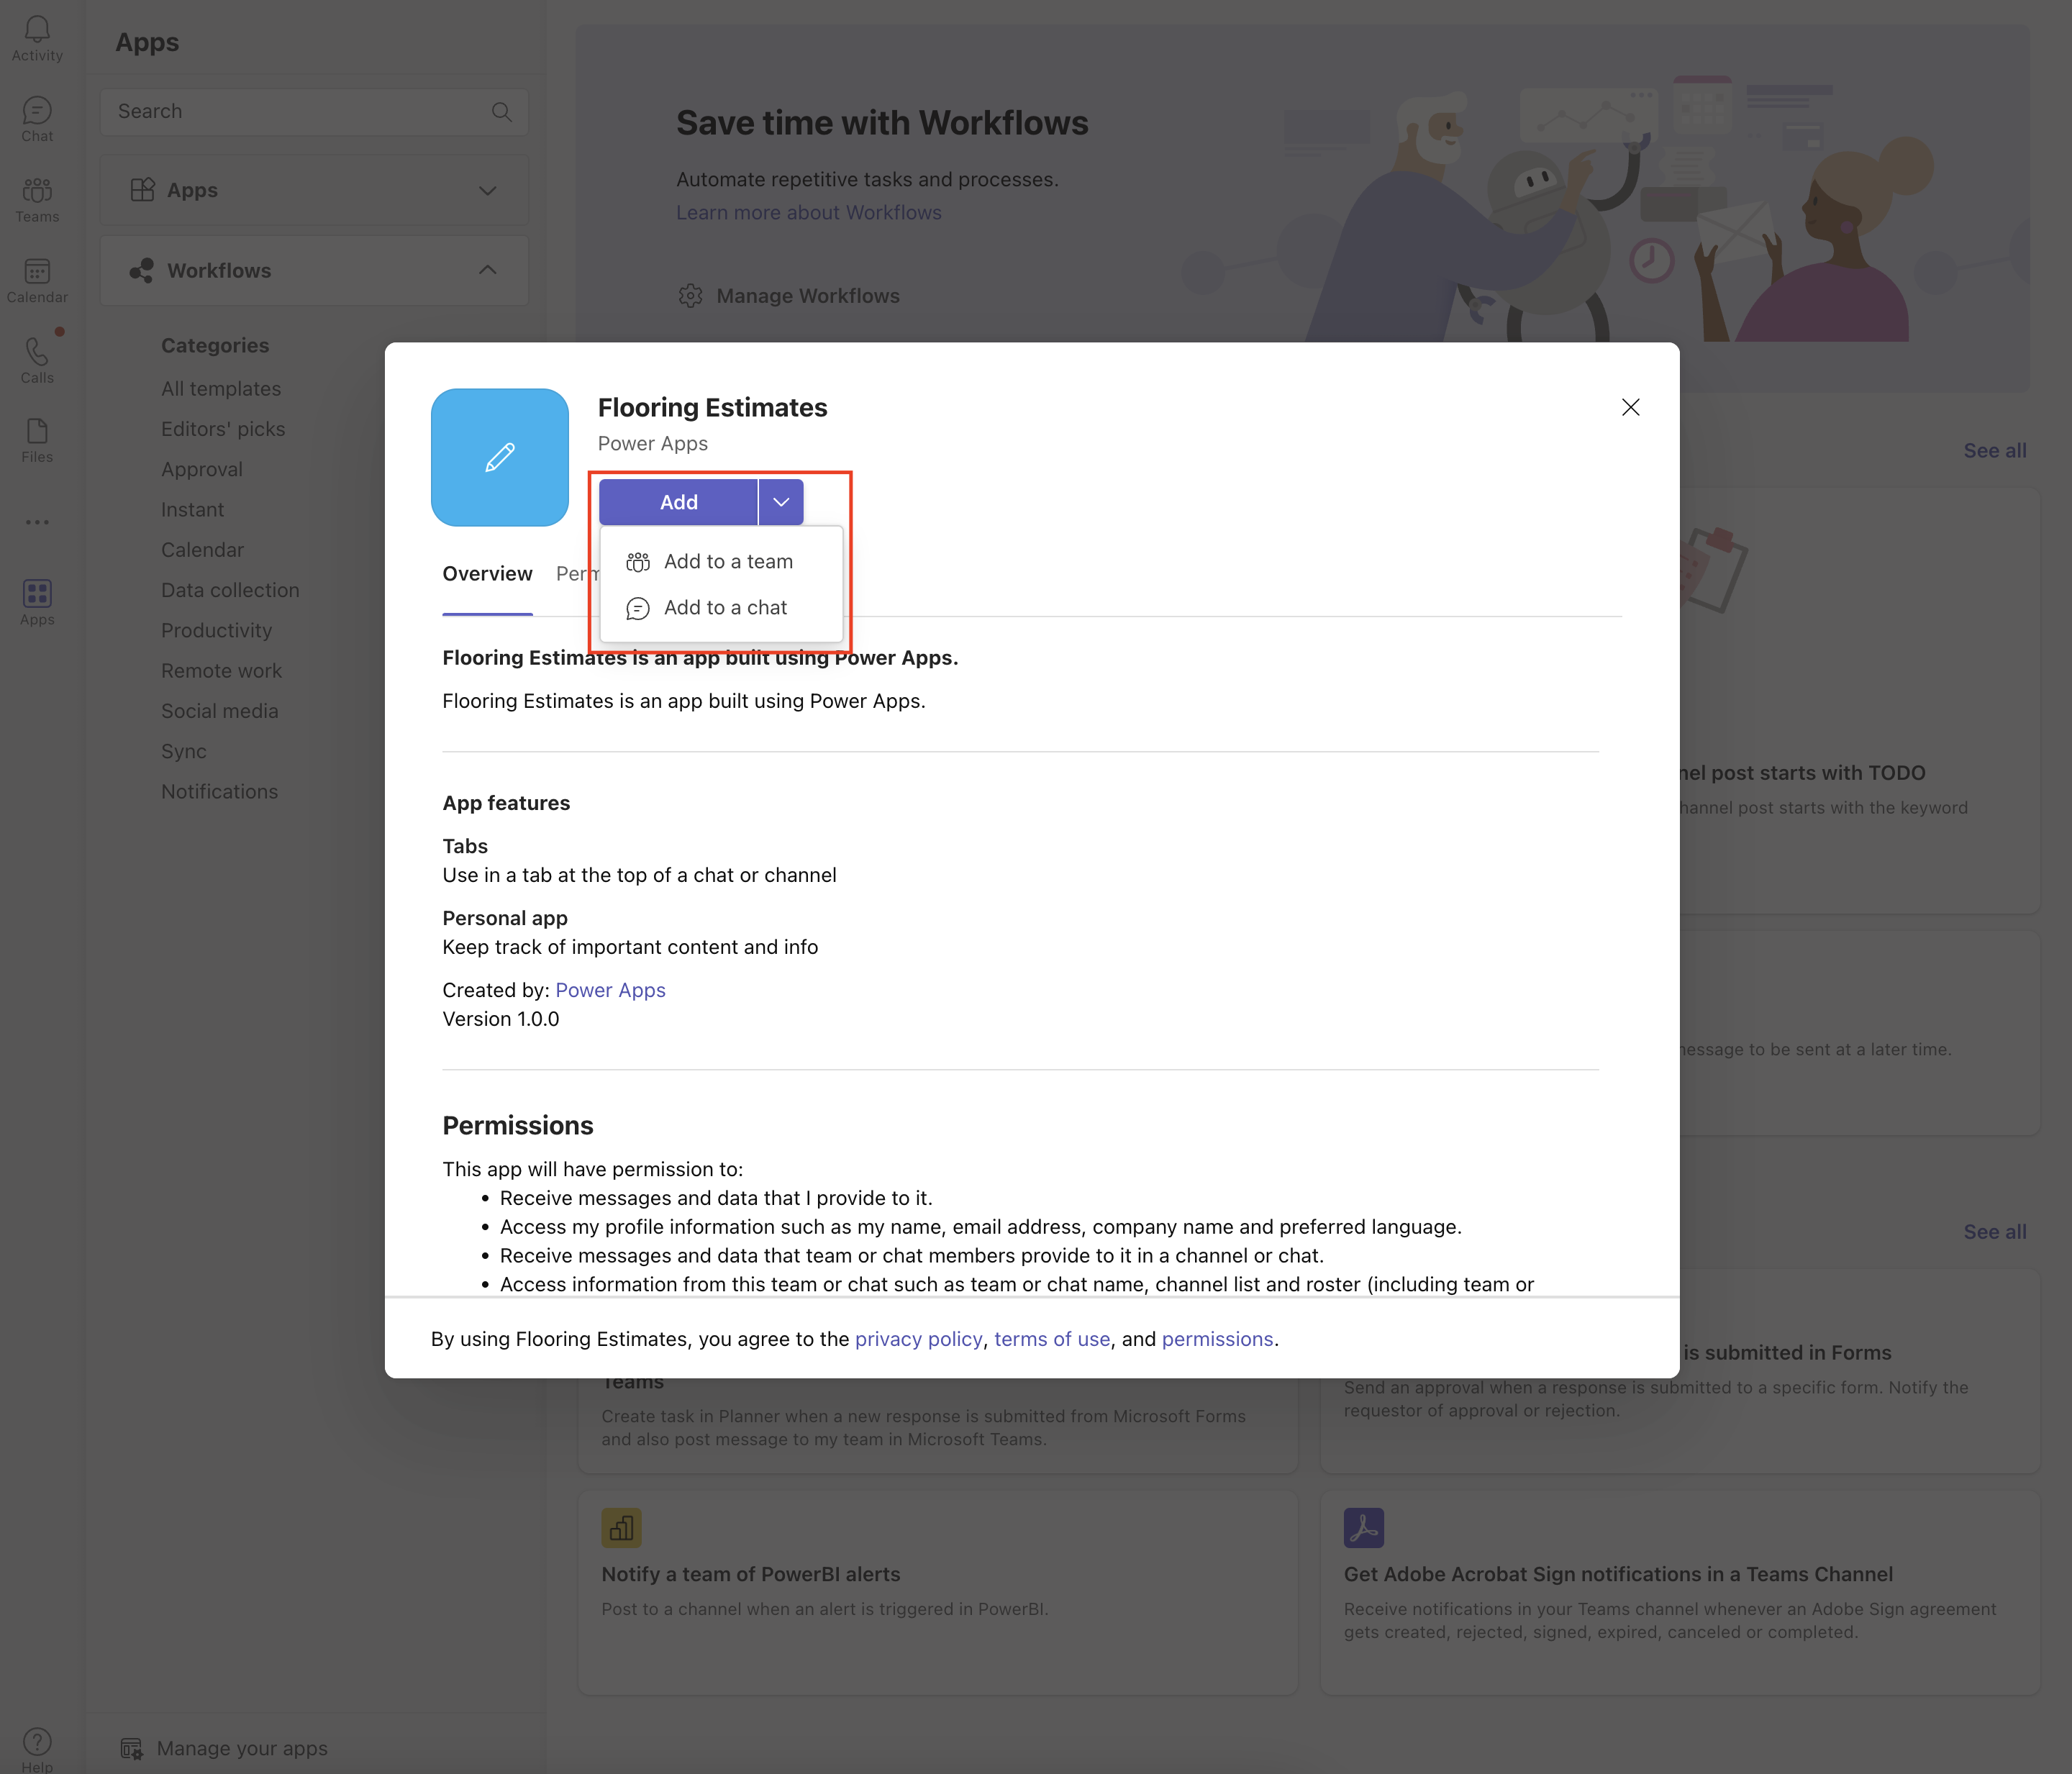
You can add either to your teams channel or chat.
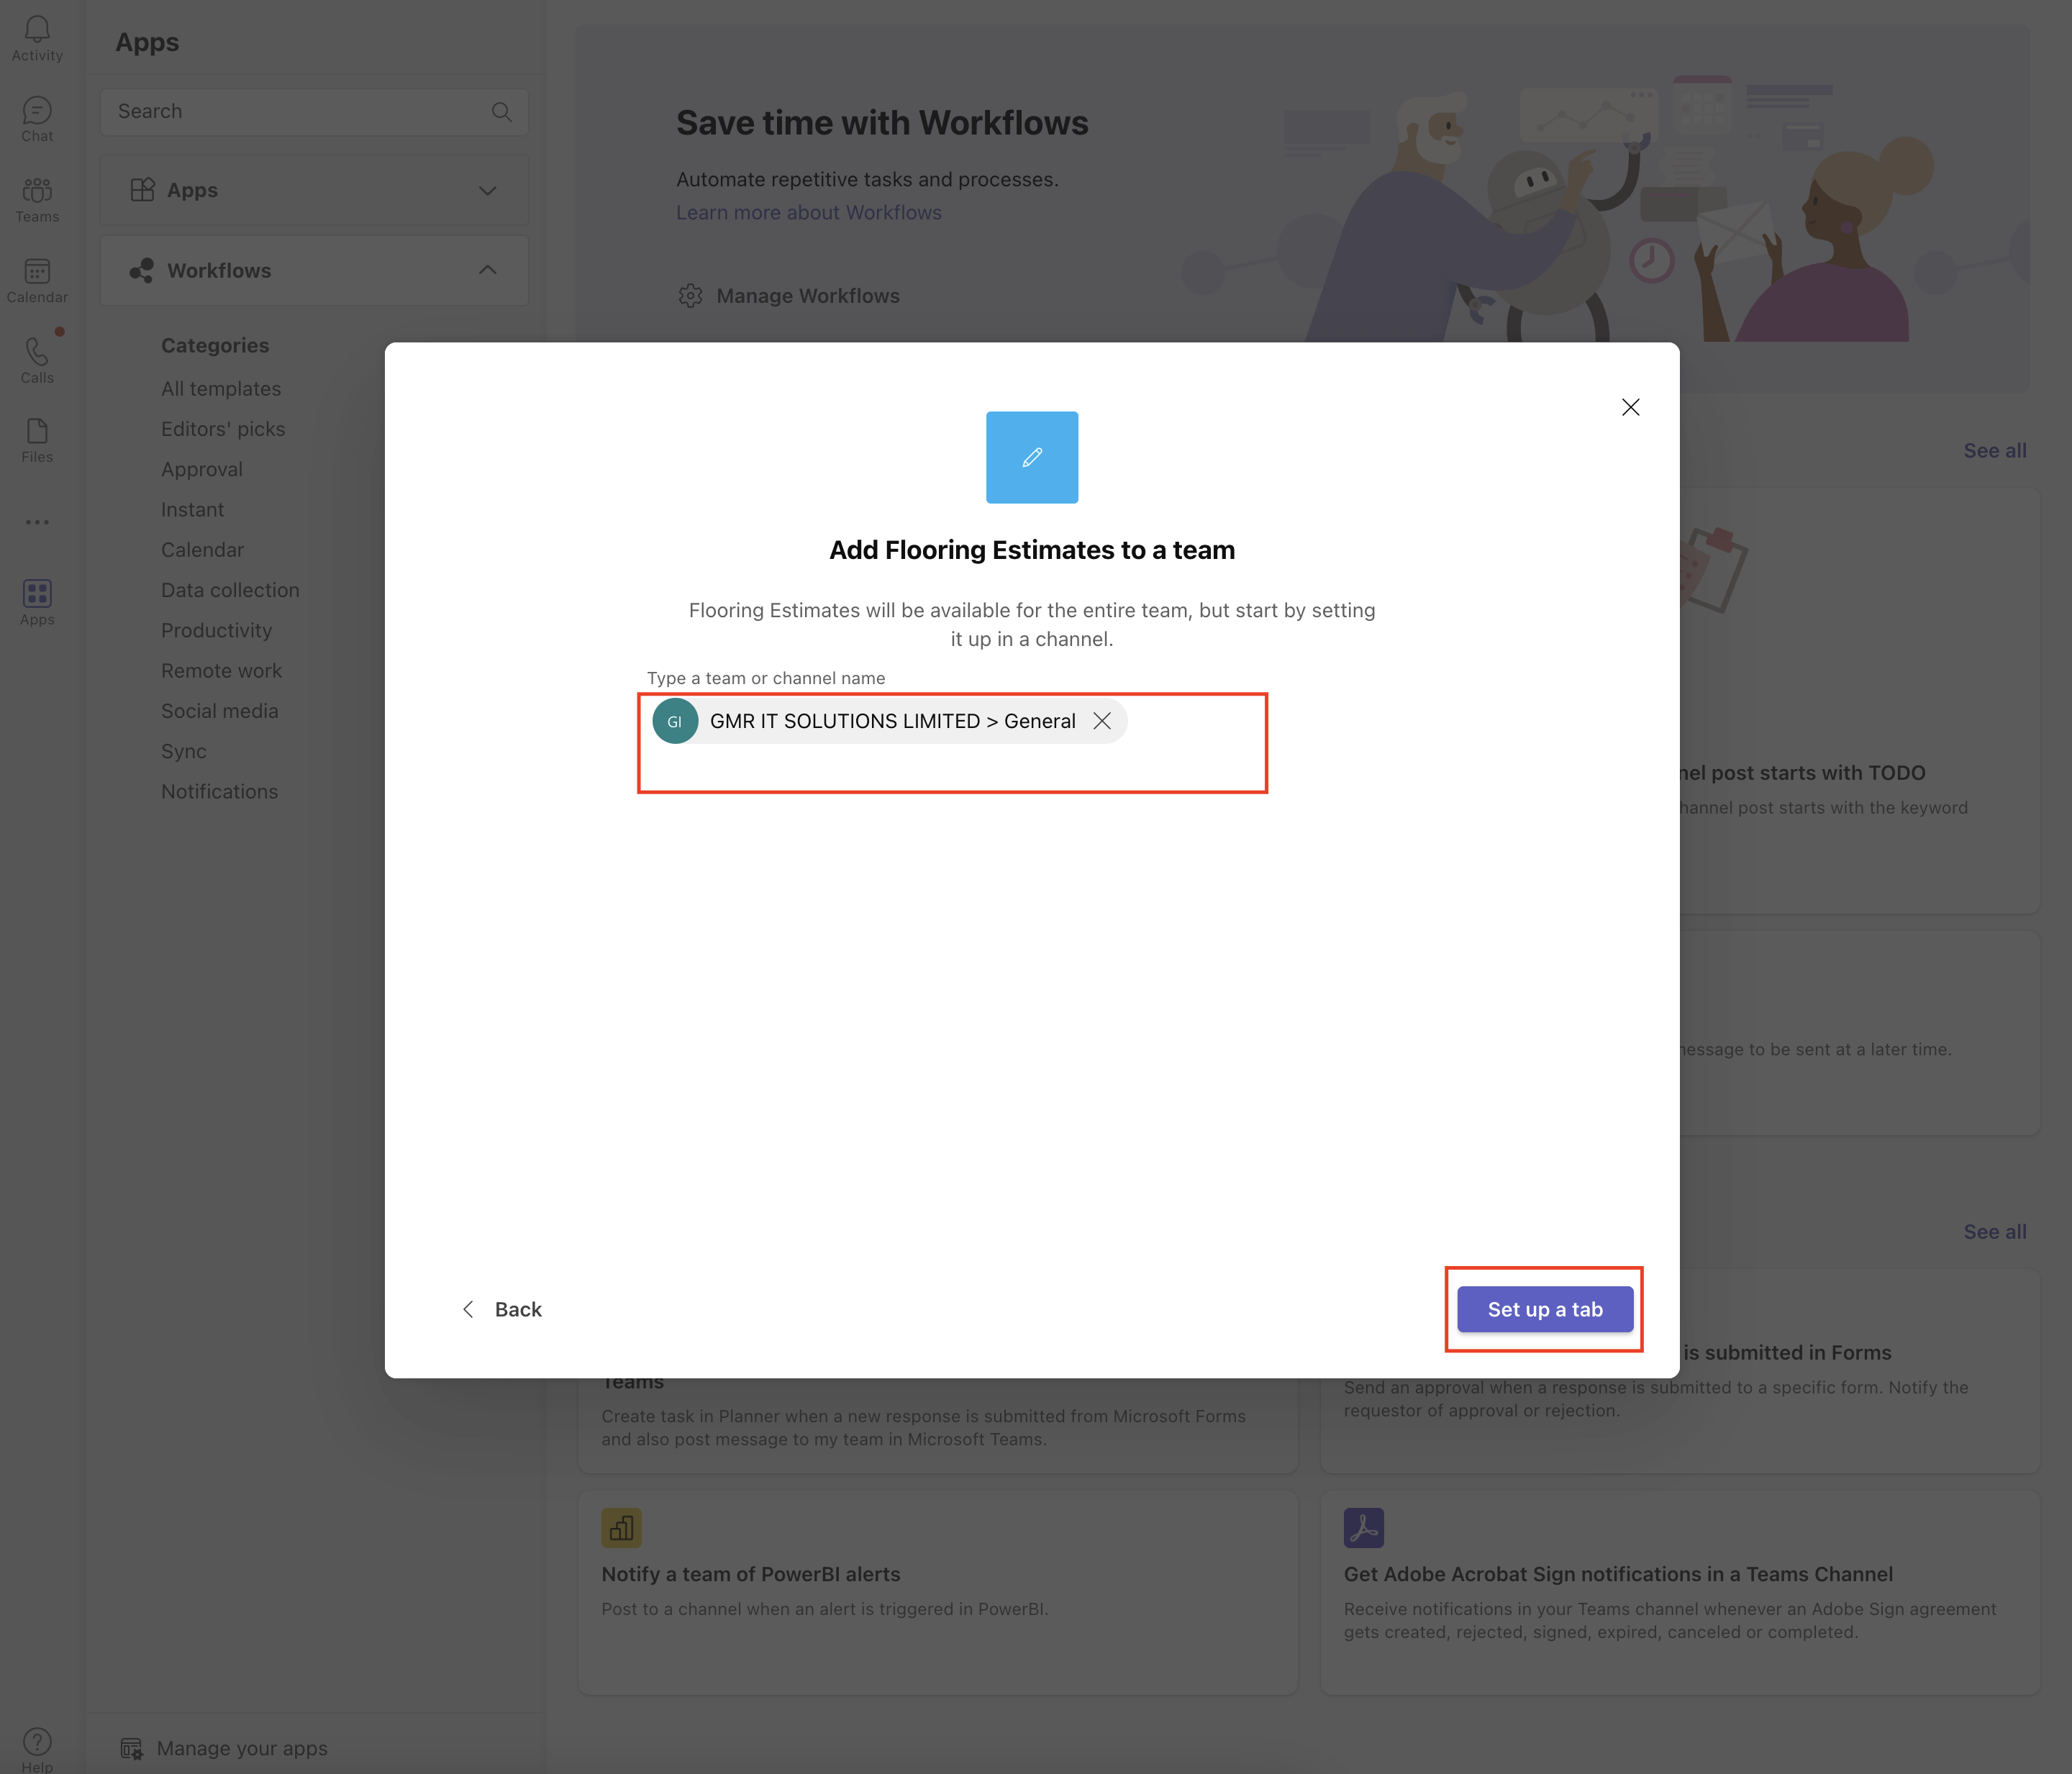
As an example i have selected as add to the teams and in order to create a tab, you need to select the organisation and click on “set up tab”.
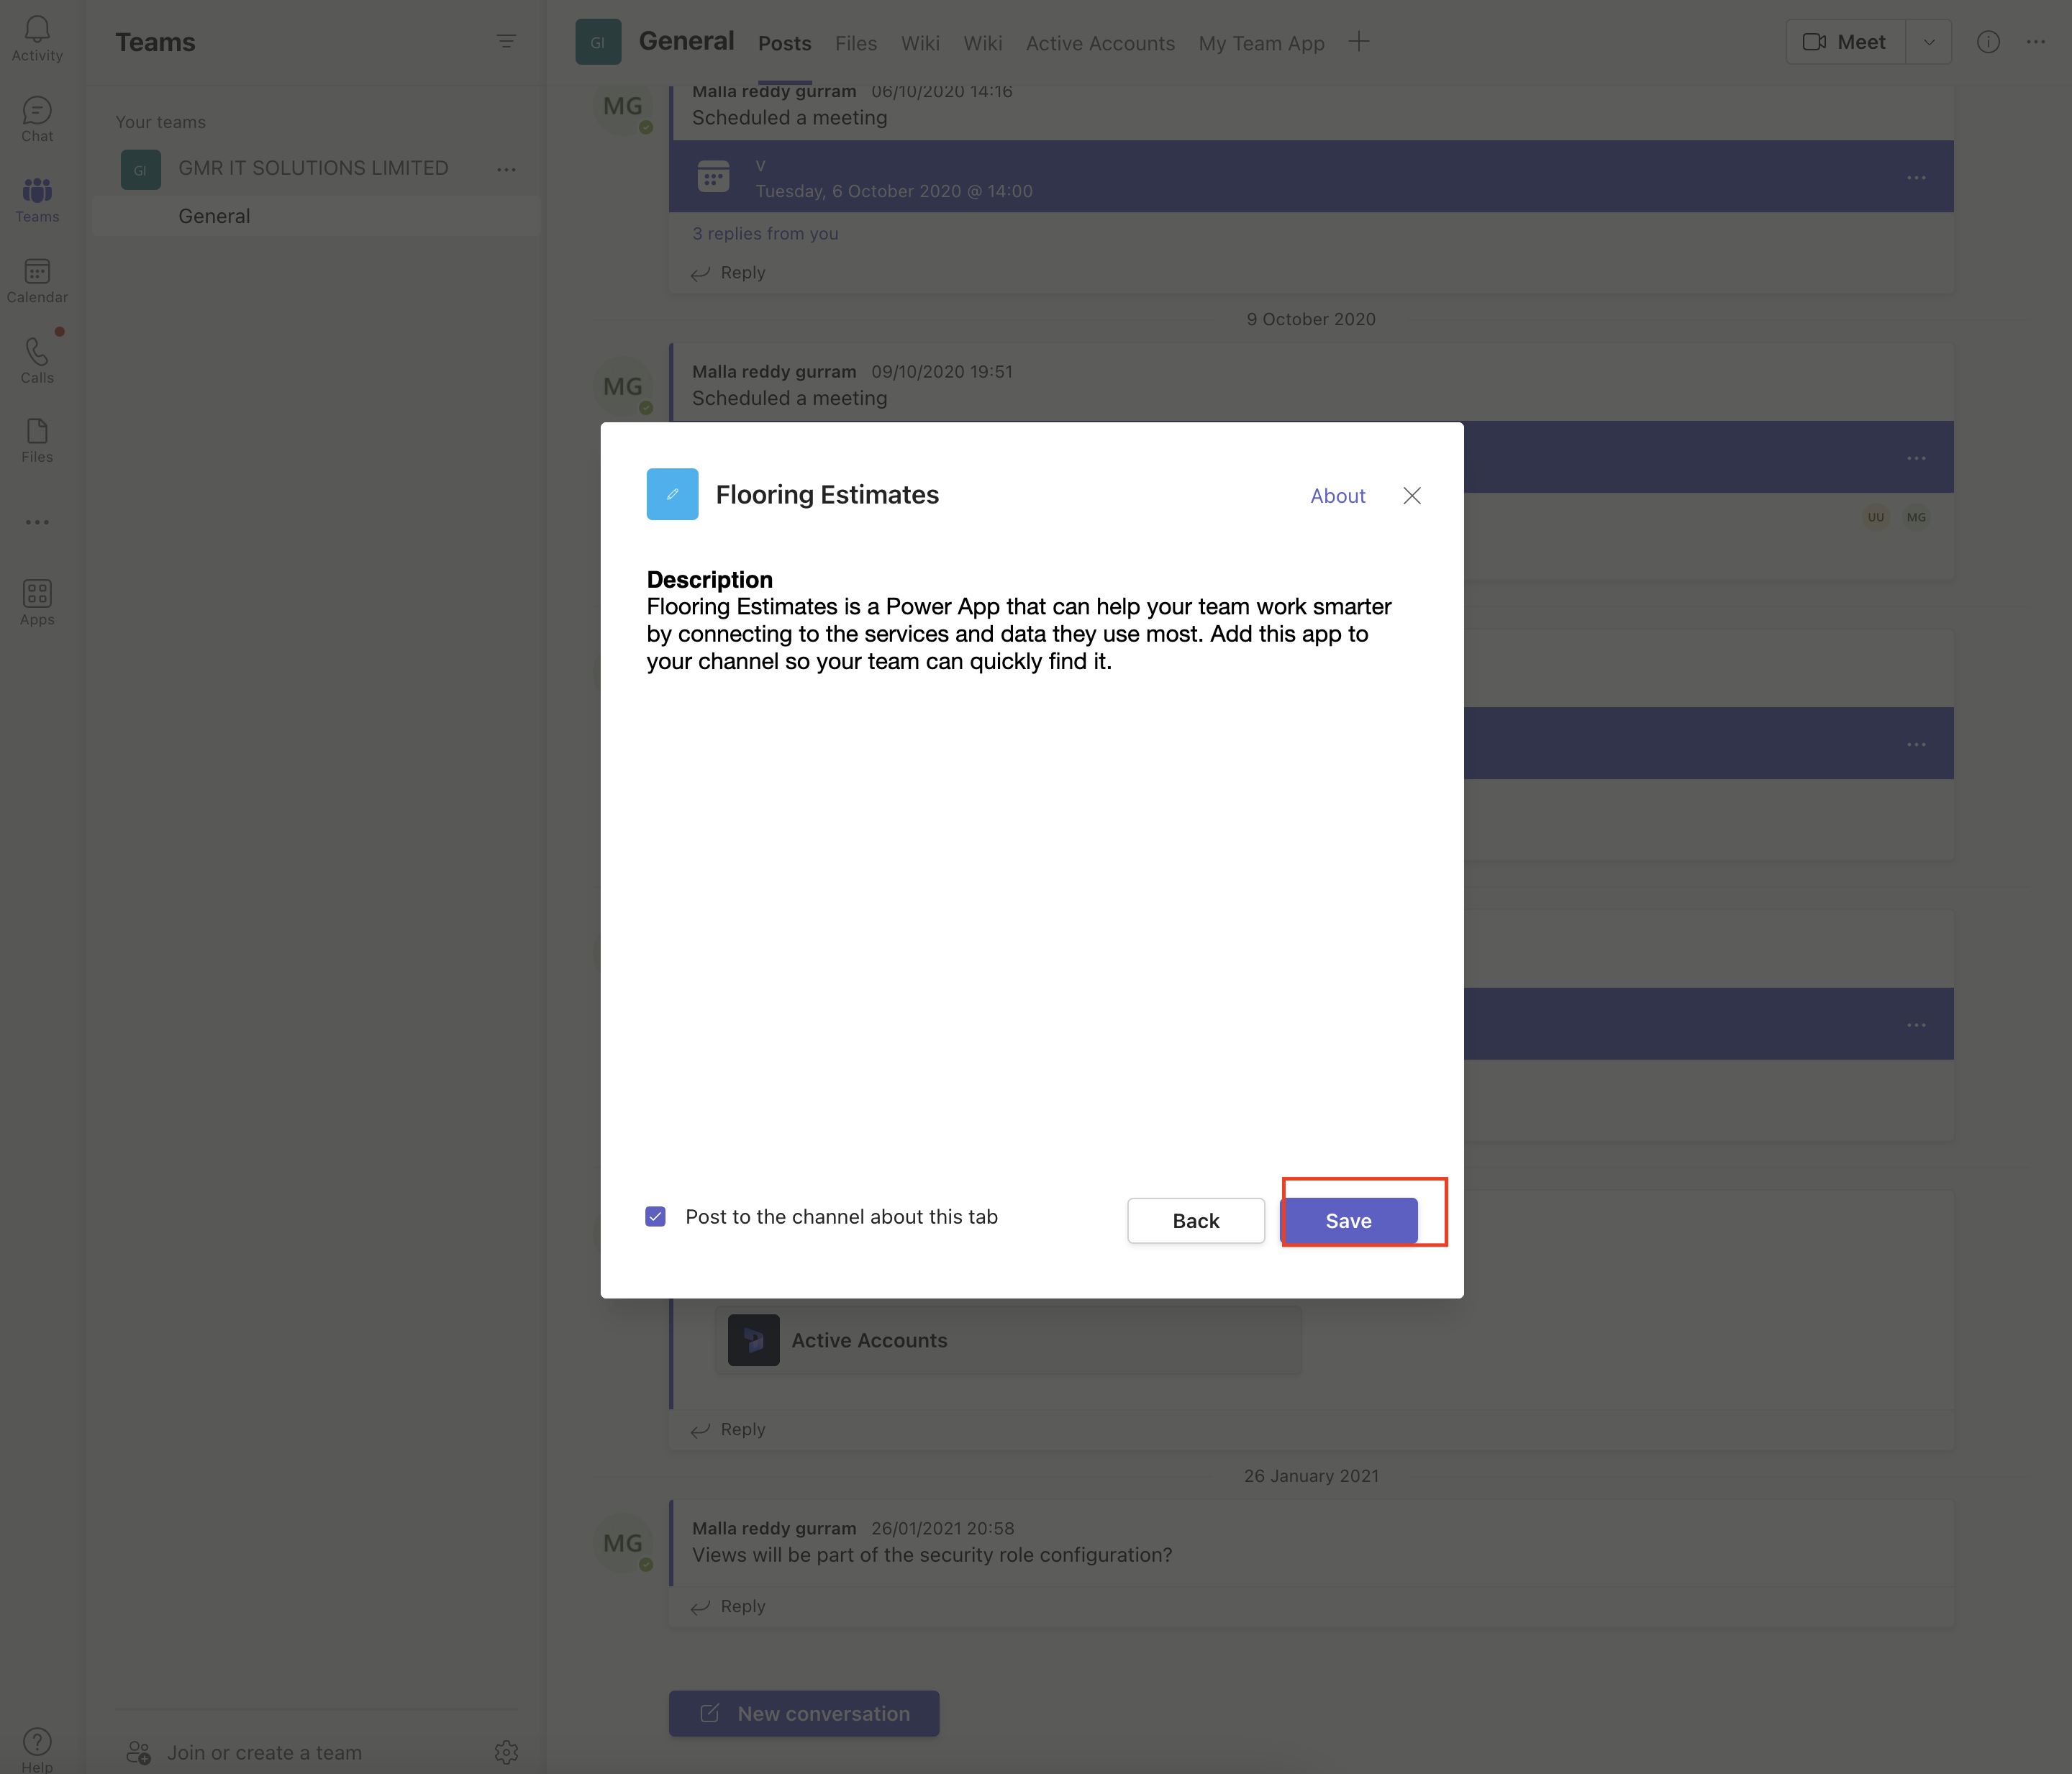
Then new pop up will appear and click on the save button.
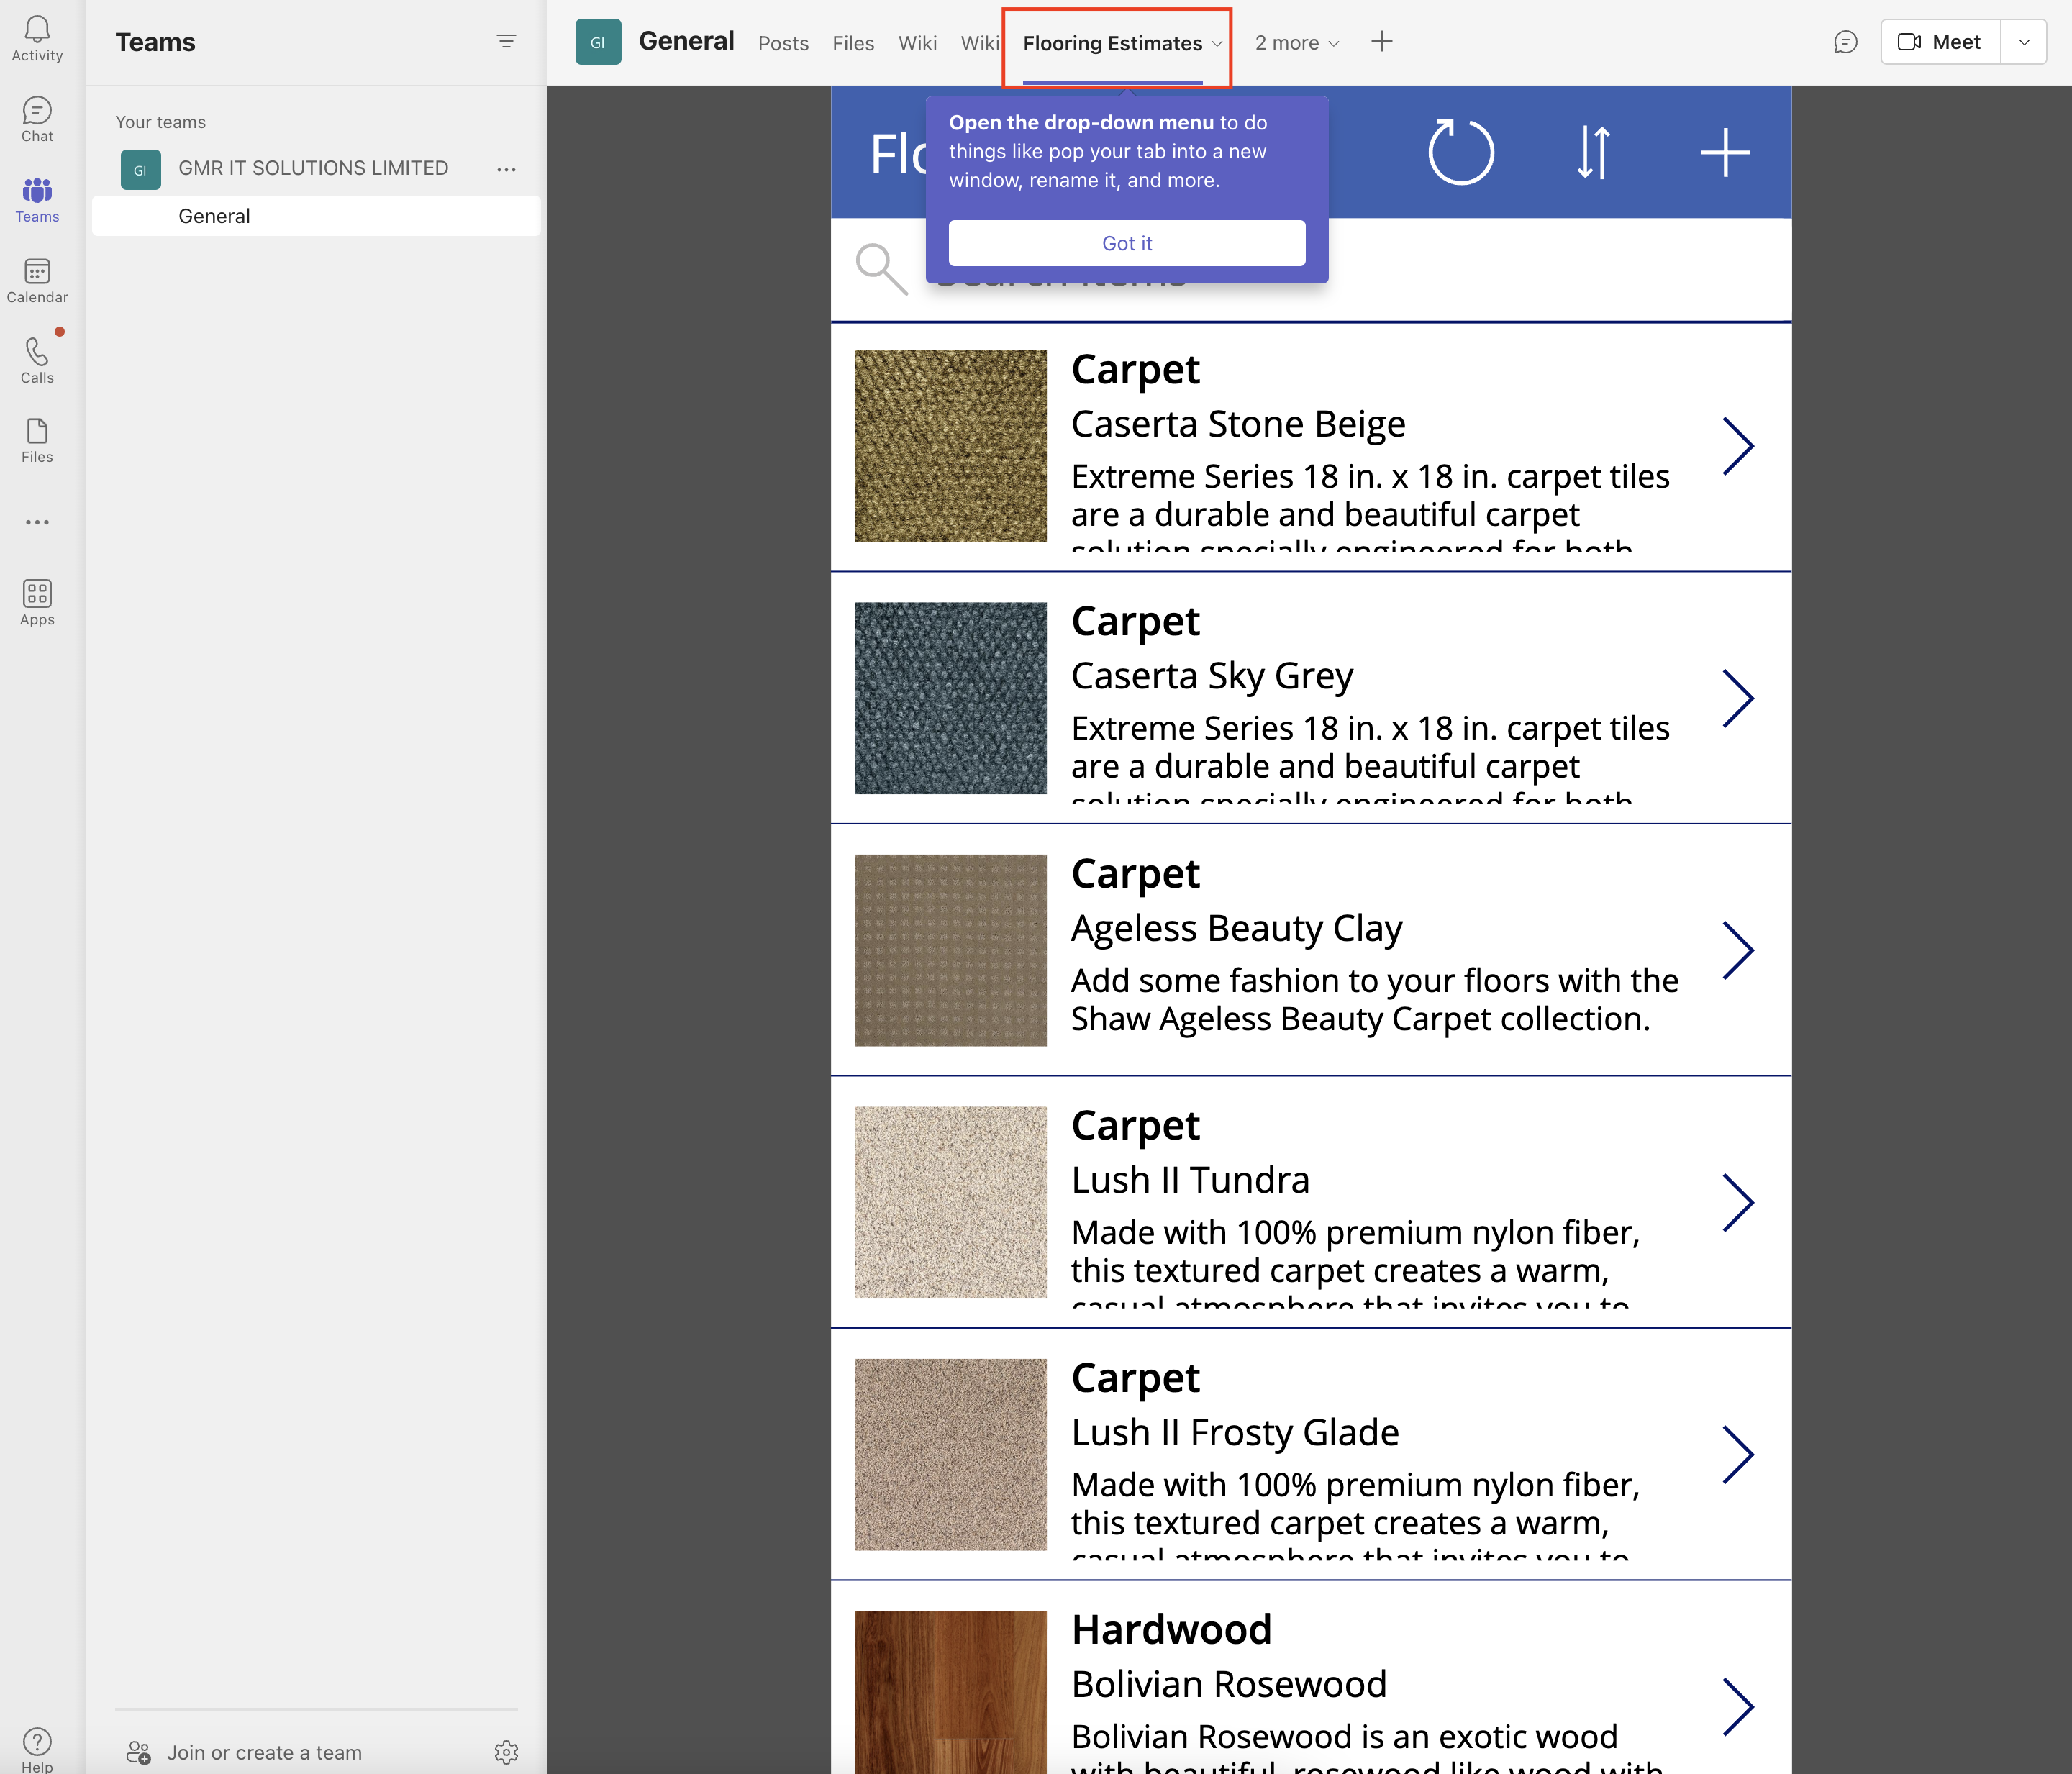
New tab “Floor Estimates” will appear on the Microsoft Teams channel.

That’s it for today.

I hope this helps.

Malla Reddy(@uk365guy)
#365BlogPostsin365Days

Share this:

How to wrap a canvas app to distribute on IoS Andriod or google playstore

Hello Everyone,

Today i am going to show how to share your canvas app on IoS Andriod or Google Play Store.

Lets gets started.

Where do you see this “WRAP” on canvas app?

Login into www.make.powerapps.com

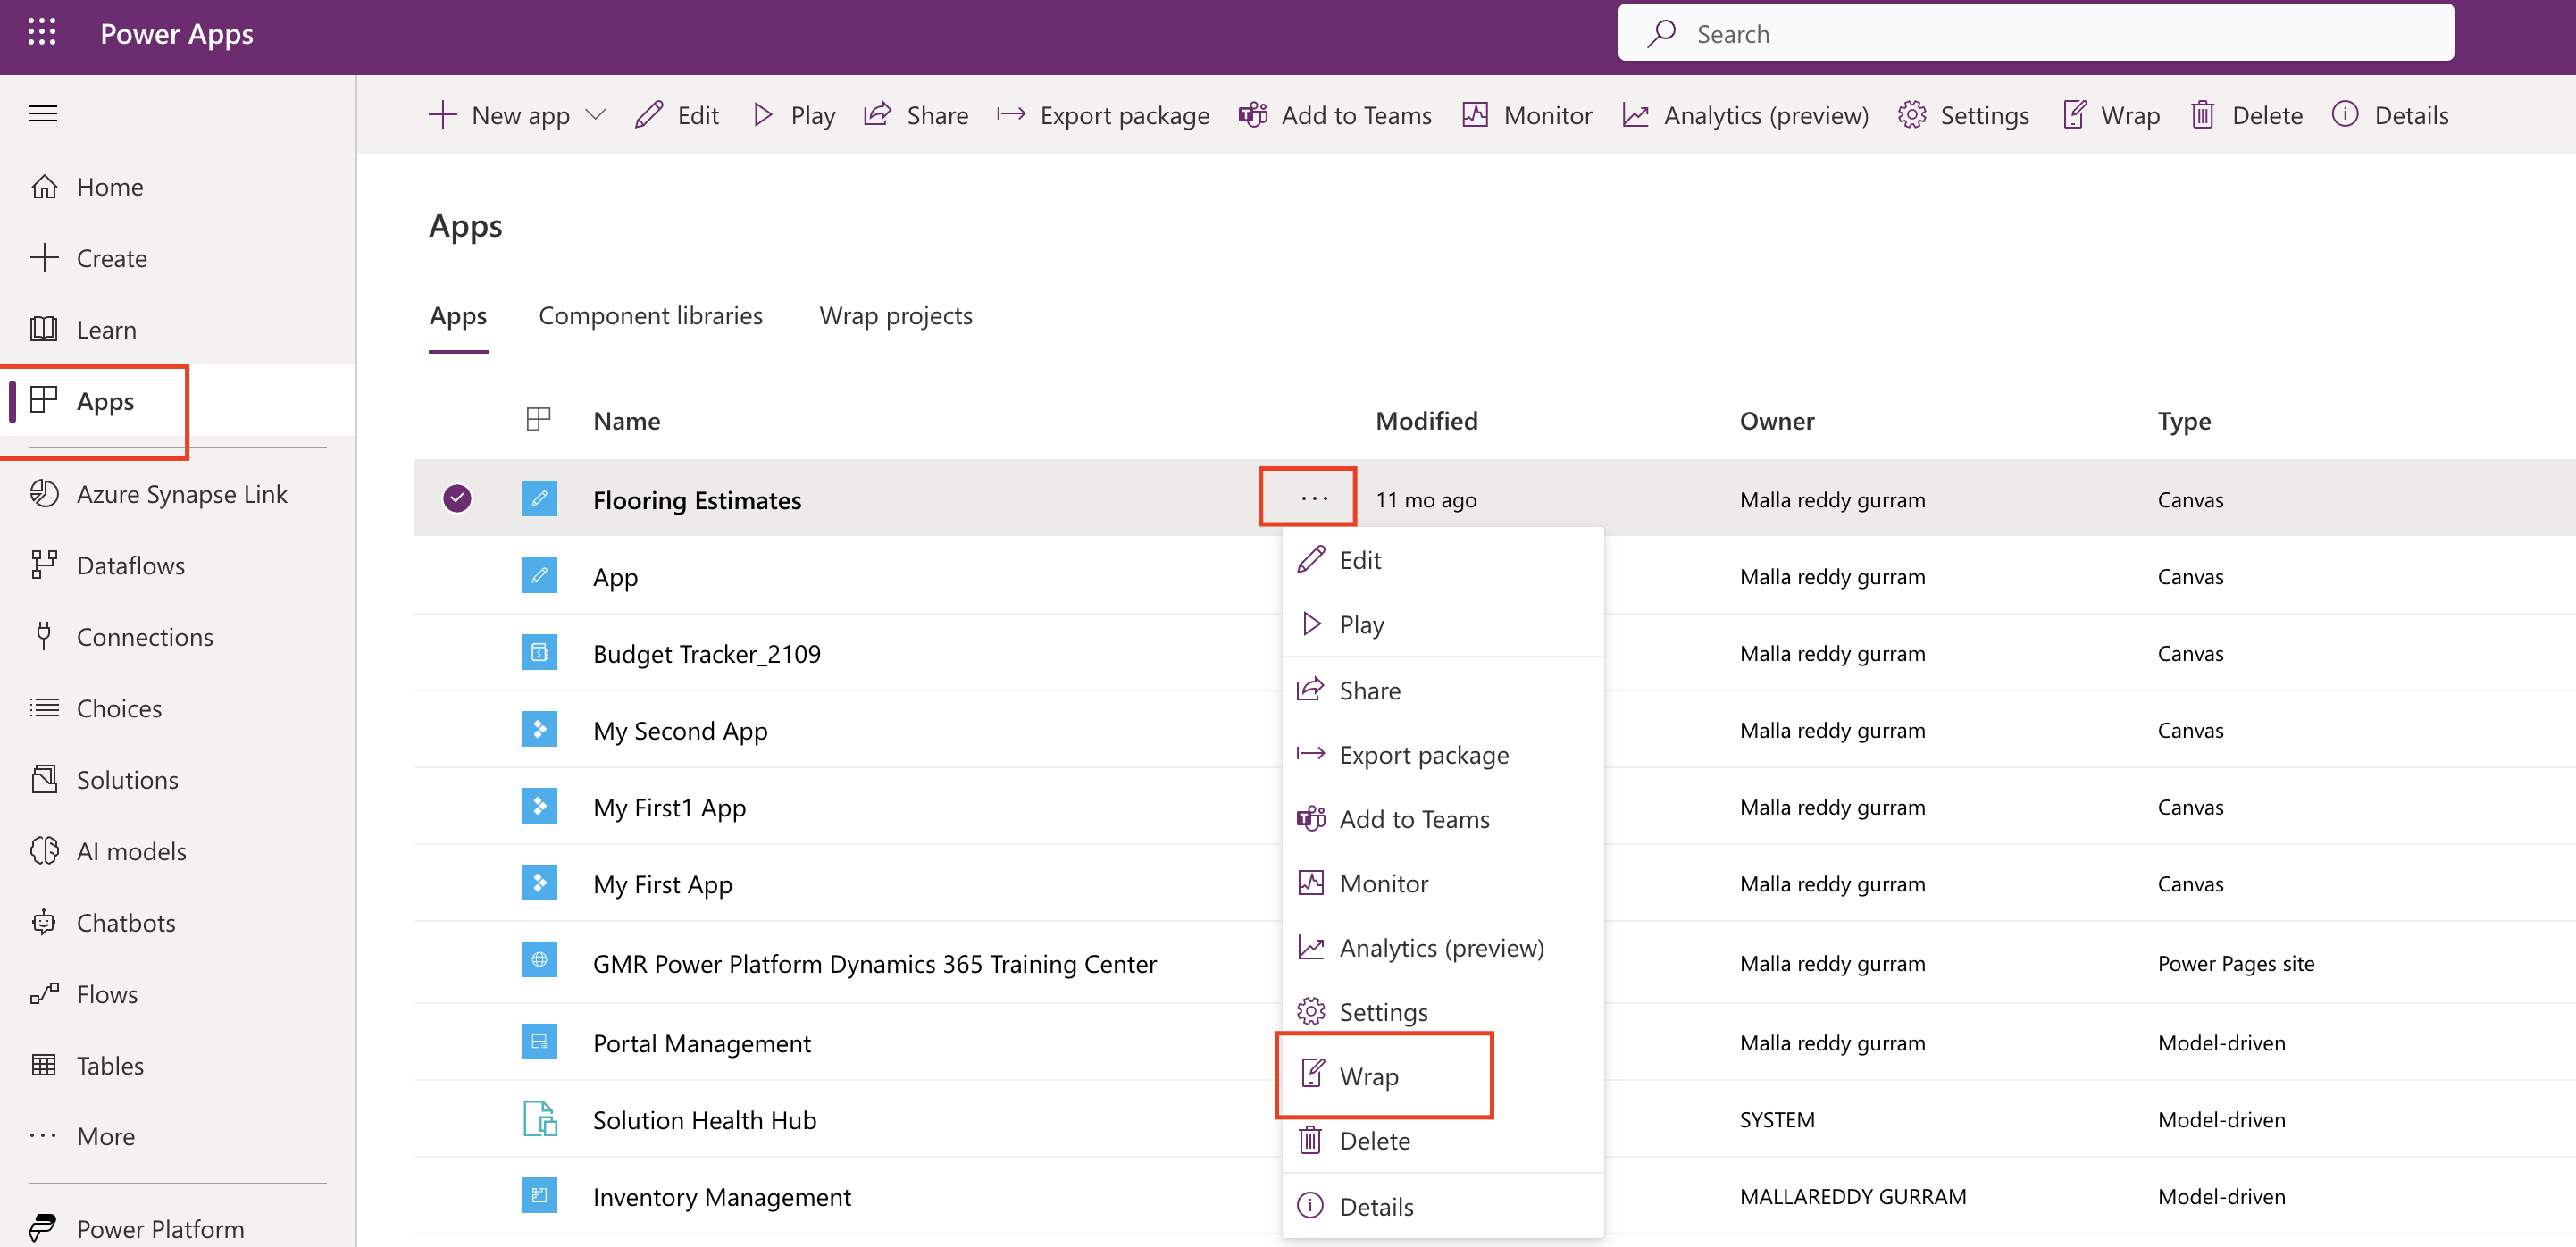
Click on App and if you have created canvas app before then you can see on the middle screen see below screen shot and select the “…” then you will see the WRAP.

What the WRAP Feature does?

It packages one or more canvas apps as a single native mobile app package using step by step wizard.

It lets power app create native mobile versions of your canvas apps as custom branded andriod and iOS Mobile apps.

You can distribute such wrapped native mobile apps to the end users through Microsoft Intune, Microsoft App Center, Google Play or Apple Business Manager or other native distribution methods.

How to wrap a canvas app and what are prerequisites and step by step guide here

Thats it for today.

I hope this helps.
Malla Reddy(@UK365GUY)
#365BlogsPostsin365Days

Share this:

How to activate an Dynamics 365 Environment which is Inactive and about to be deleted by Microsoft

Hello Everyone,

Today i am going to show how to activate the environment which is inactive and about to be deleted.

Lets gets started.

Login into www.admin.powerplatform.microsoft.com

Go to the environments..

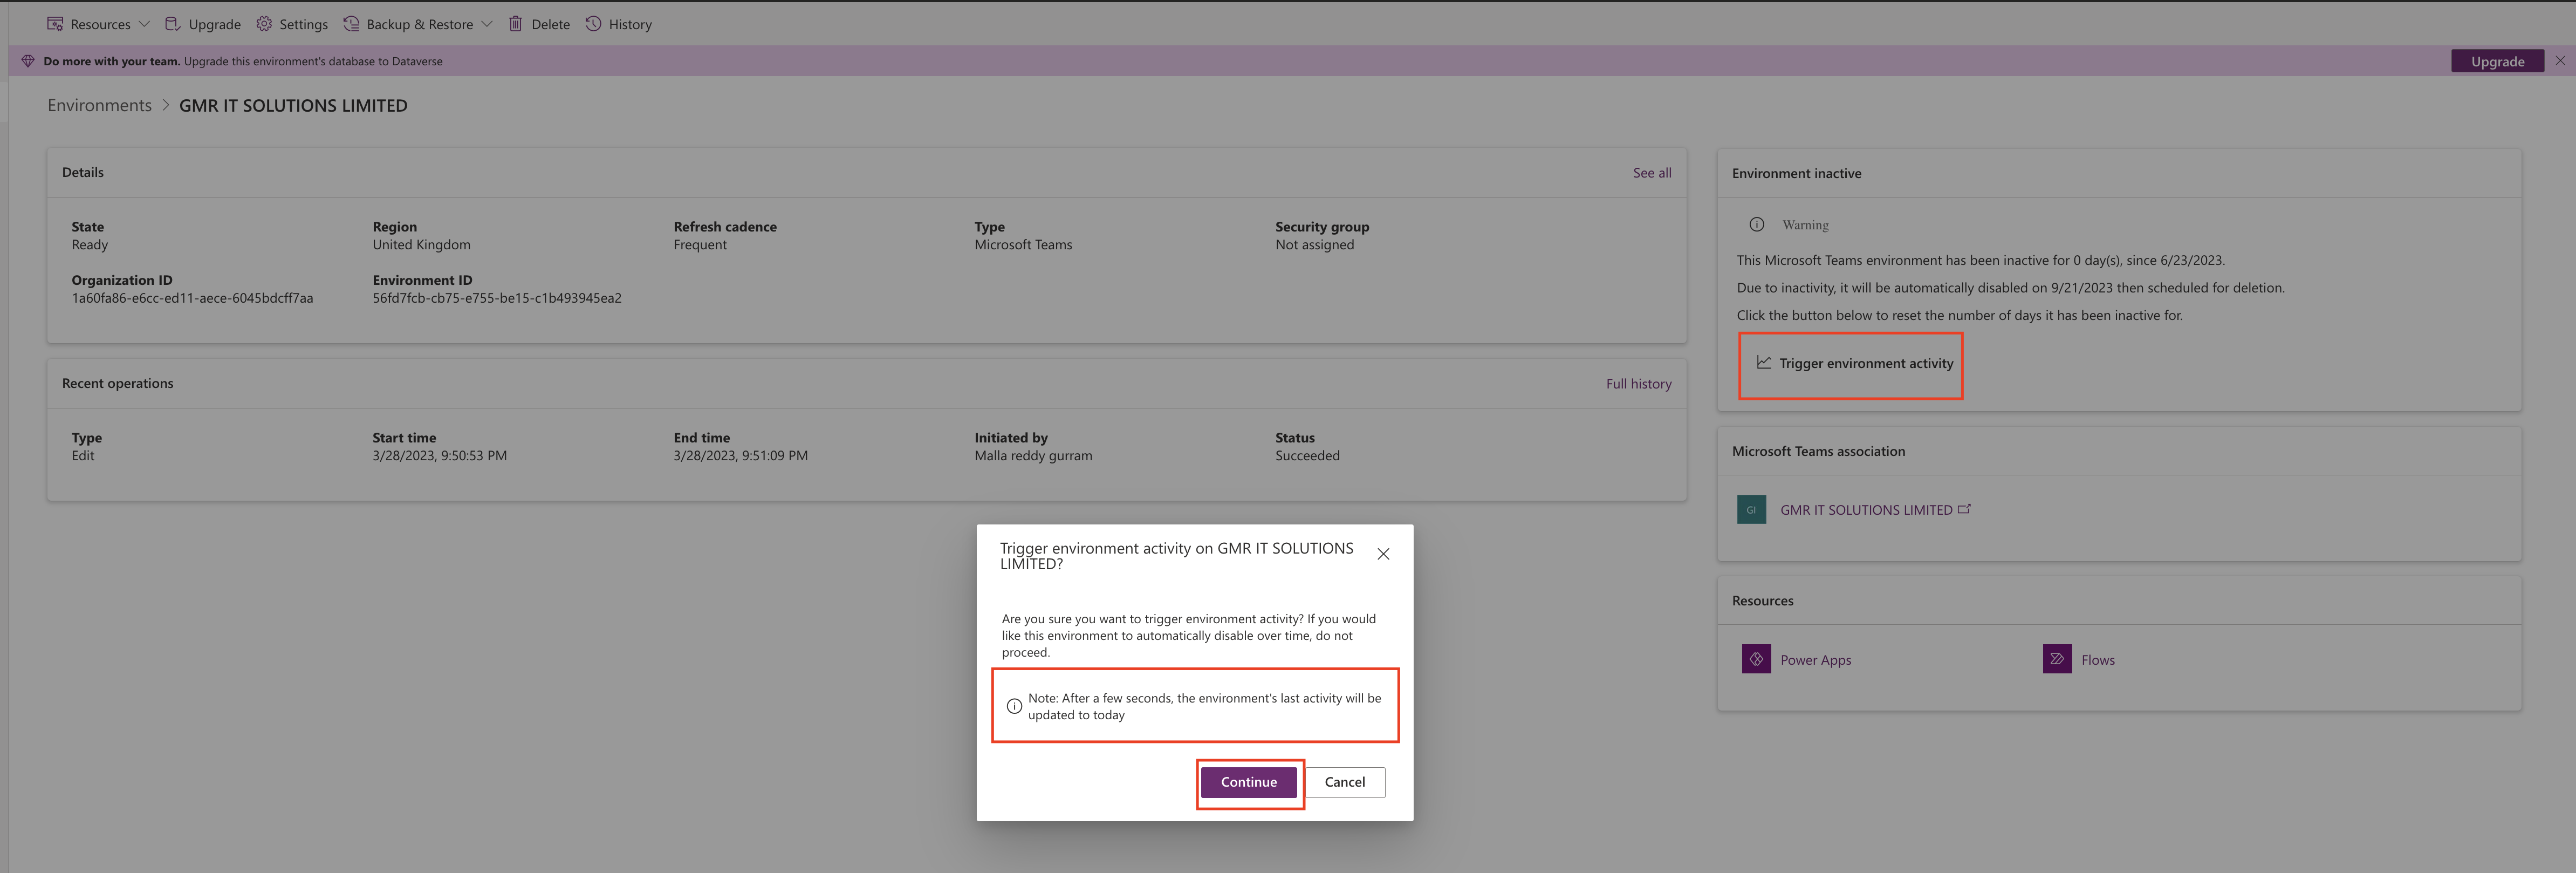
You will see this message “Environment Inactive”. Because of no activity.

Environment inactive. which has not been used for while so microsoft disable this environment and later deletes completely.

How to activate this environment ?

As you can see from the above screenshot the “Trigger environment activity”, Then the environment will be activated.

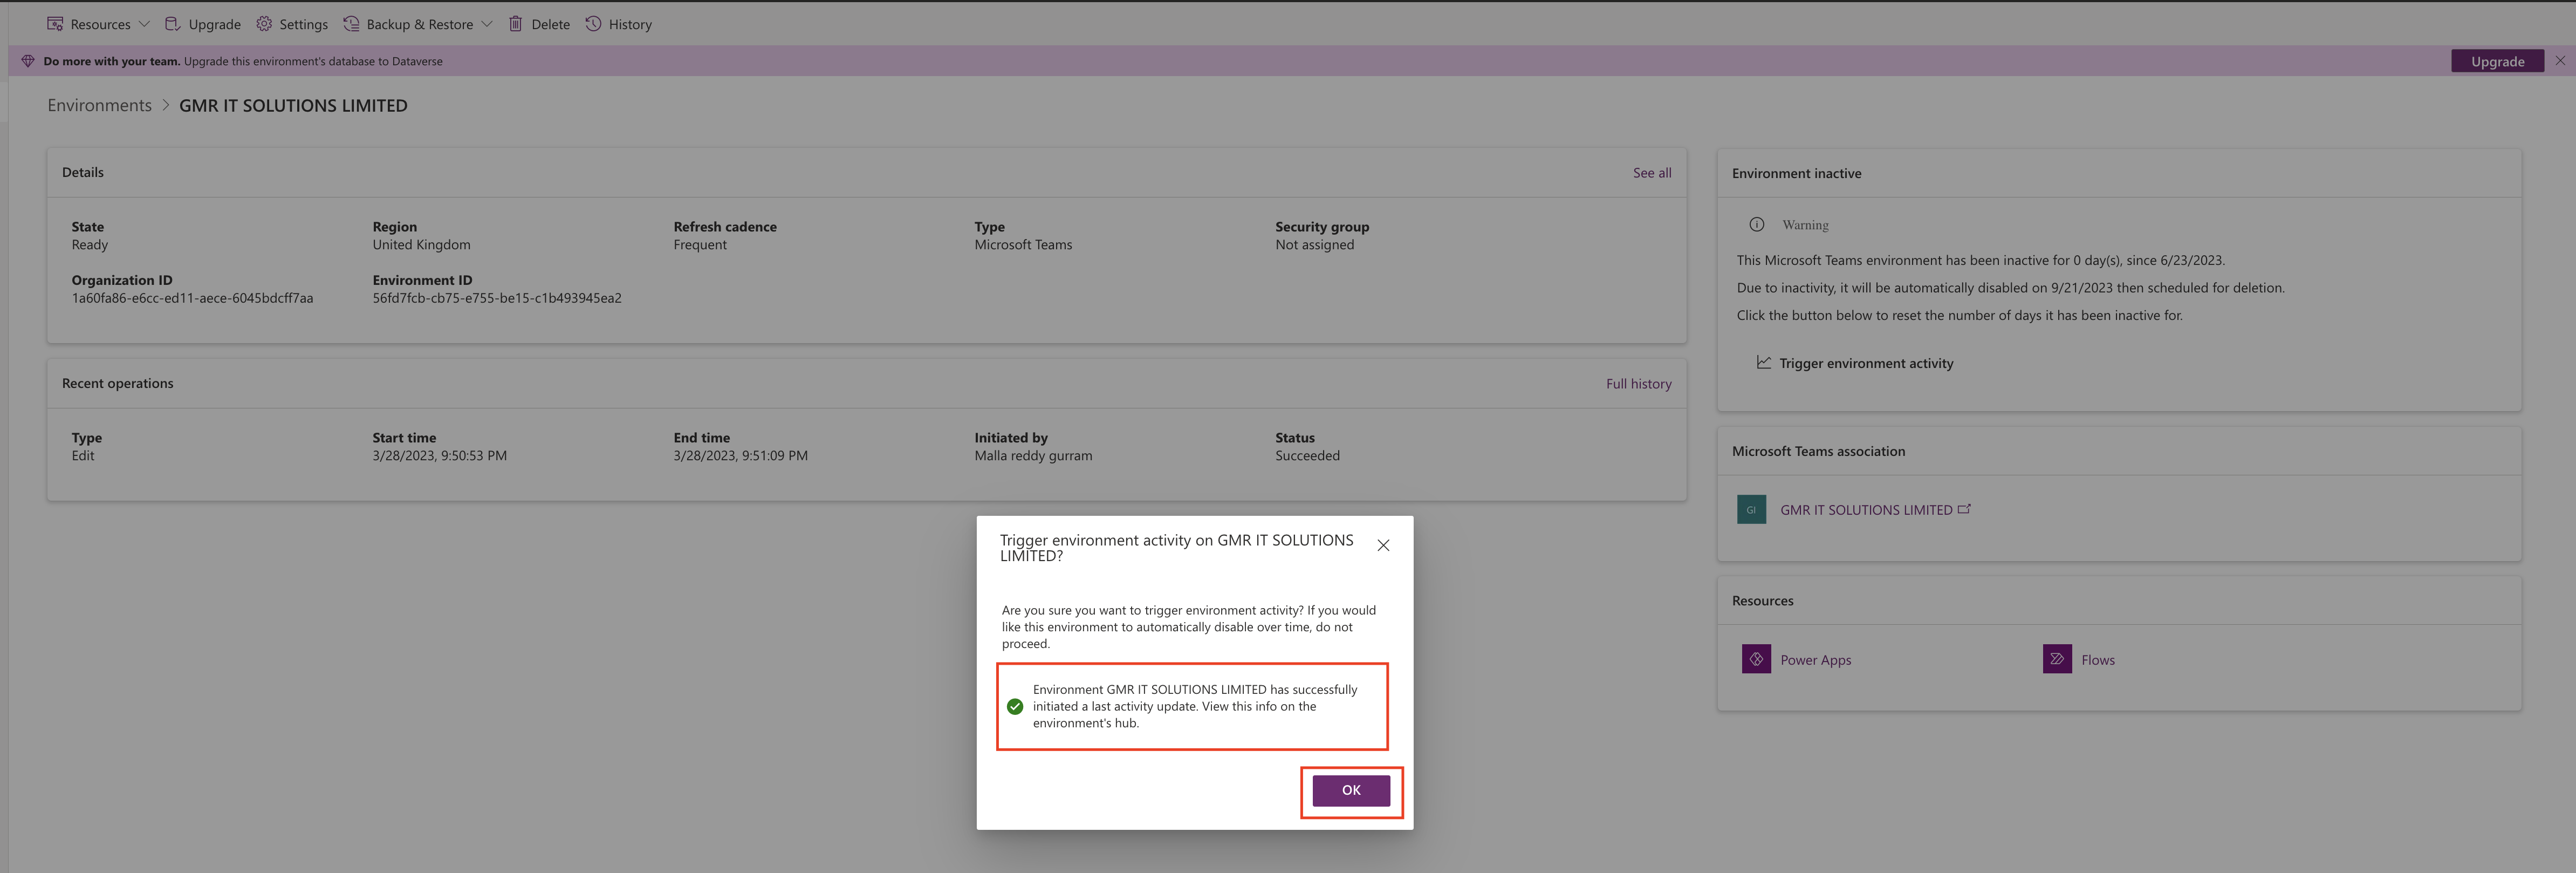
Click on the continue button.

After a few seconds, the environment’s last activity will be updated to today.

Then your environment will be come active.

Thats it for today.

I hope this helps.

Malla Reddy(@UK365GUY)
#365BlogPostsin365Days

Share this:

How to create Dashboard with simple clicks from maker portal

Hello Everyone,

Today i am going to show how to create a Dashboard quickly from maker portal.

Part 11 series.

Lets gets started.

Login into www.make.powerapps.com

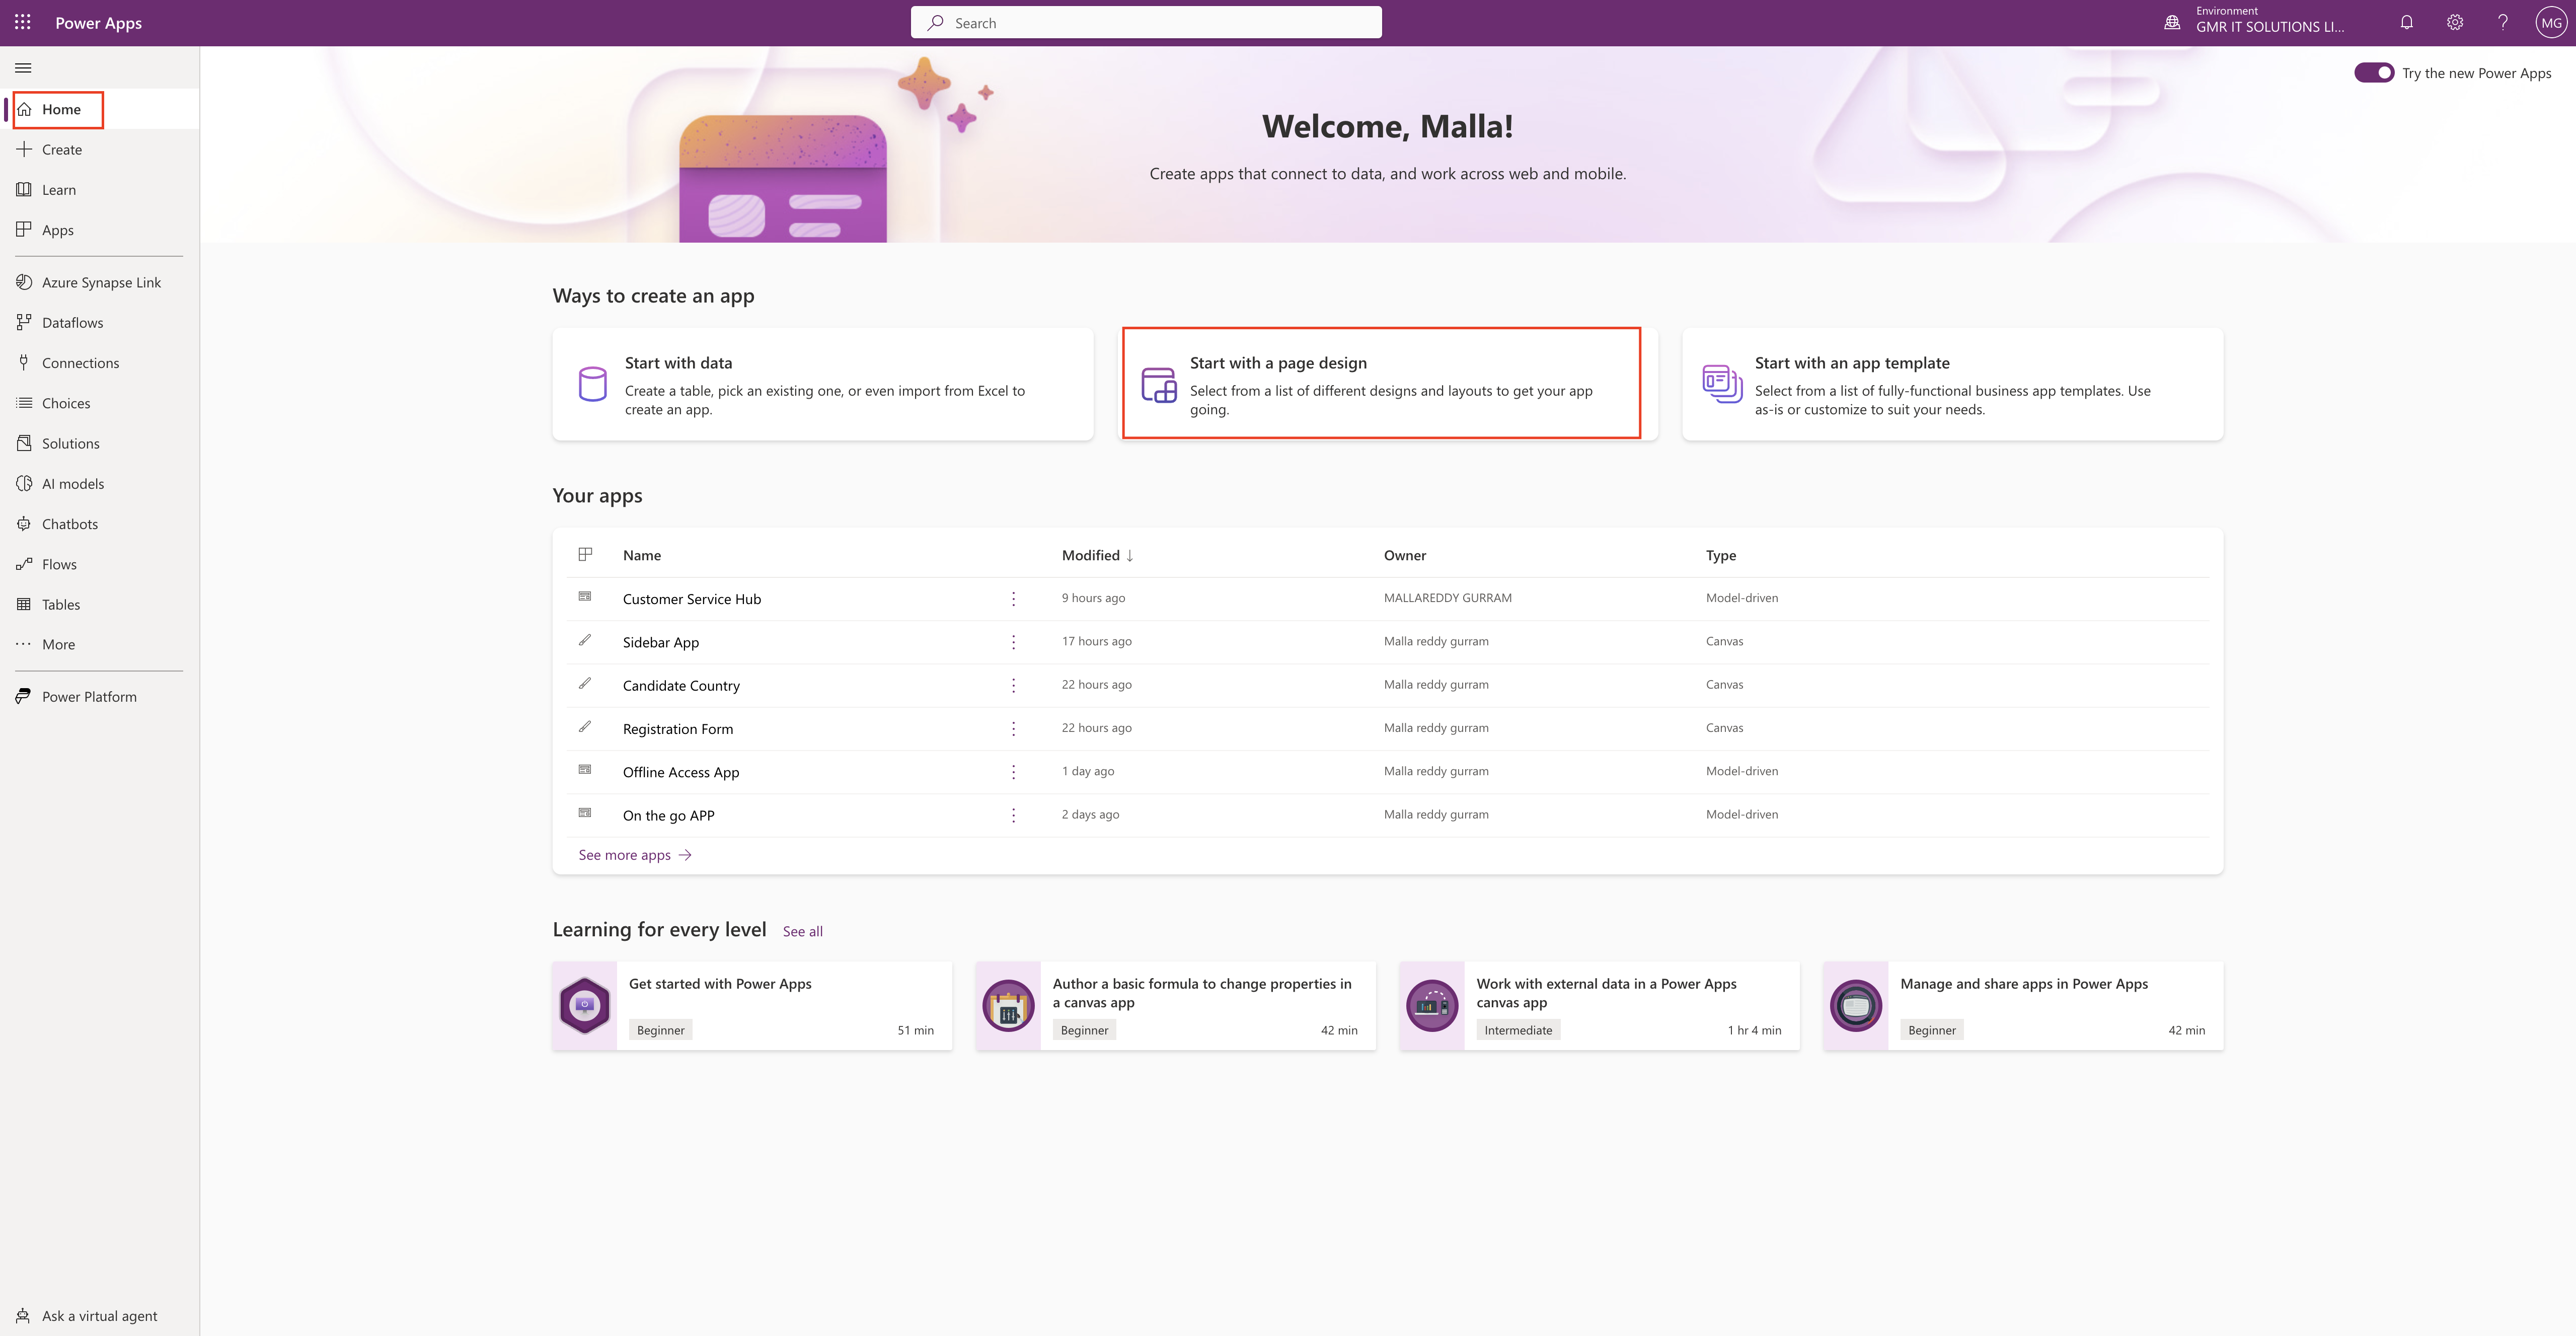
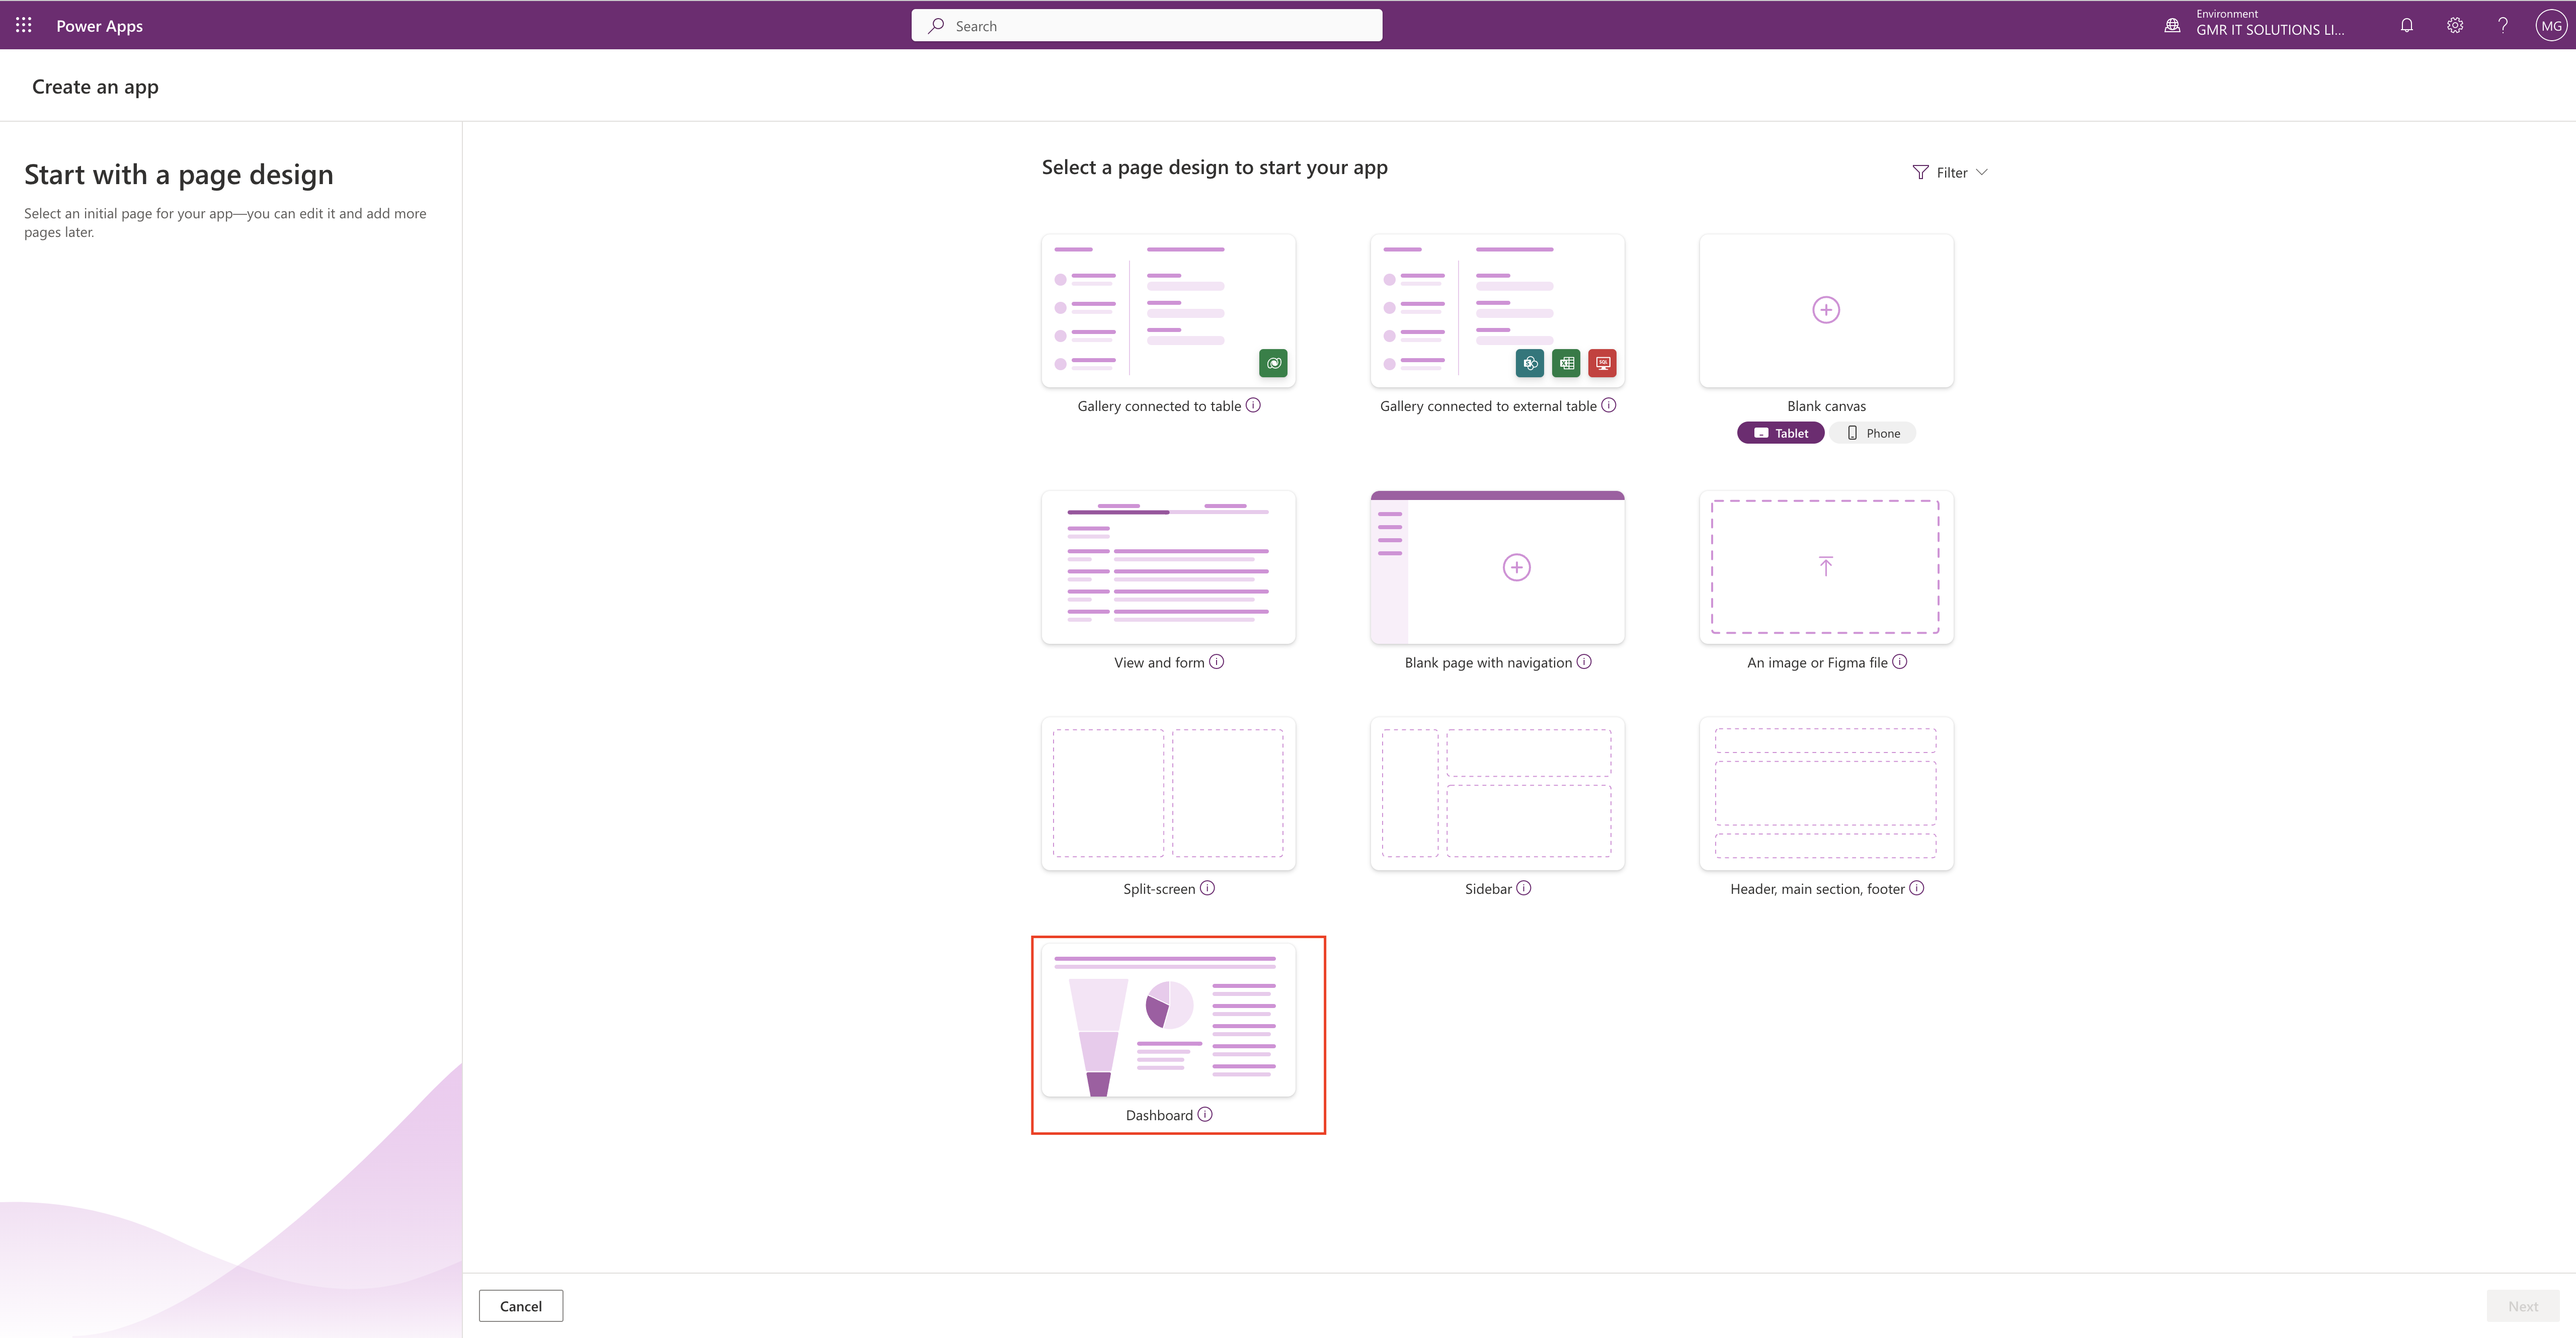
Click on the Start with a page design.

On next screen click on the Dashboard(refer to the above screenshot)

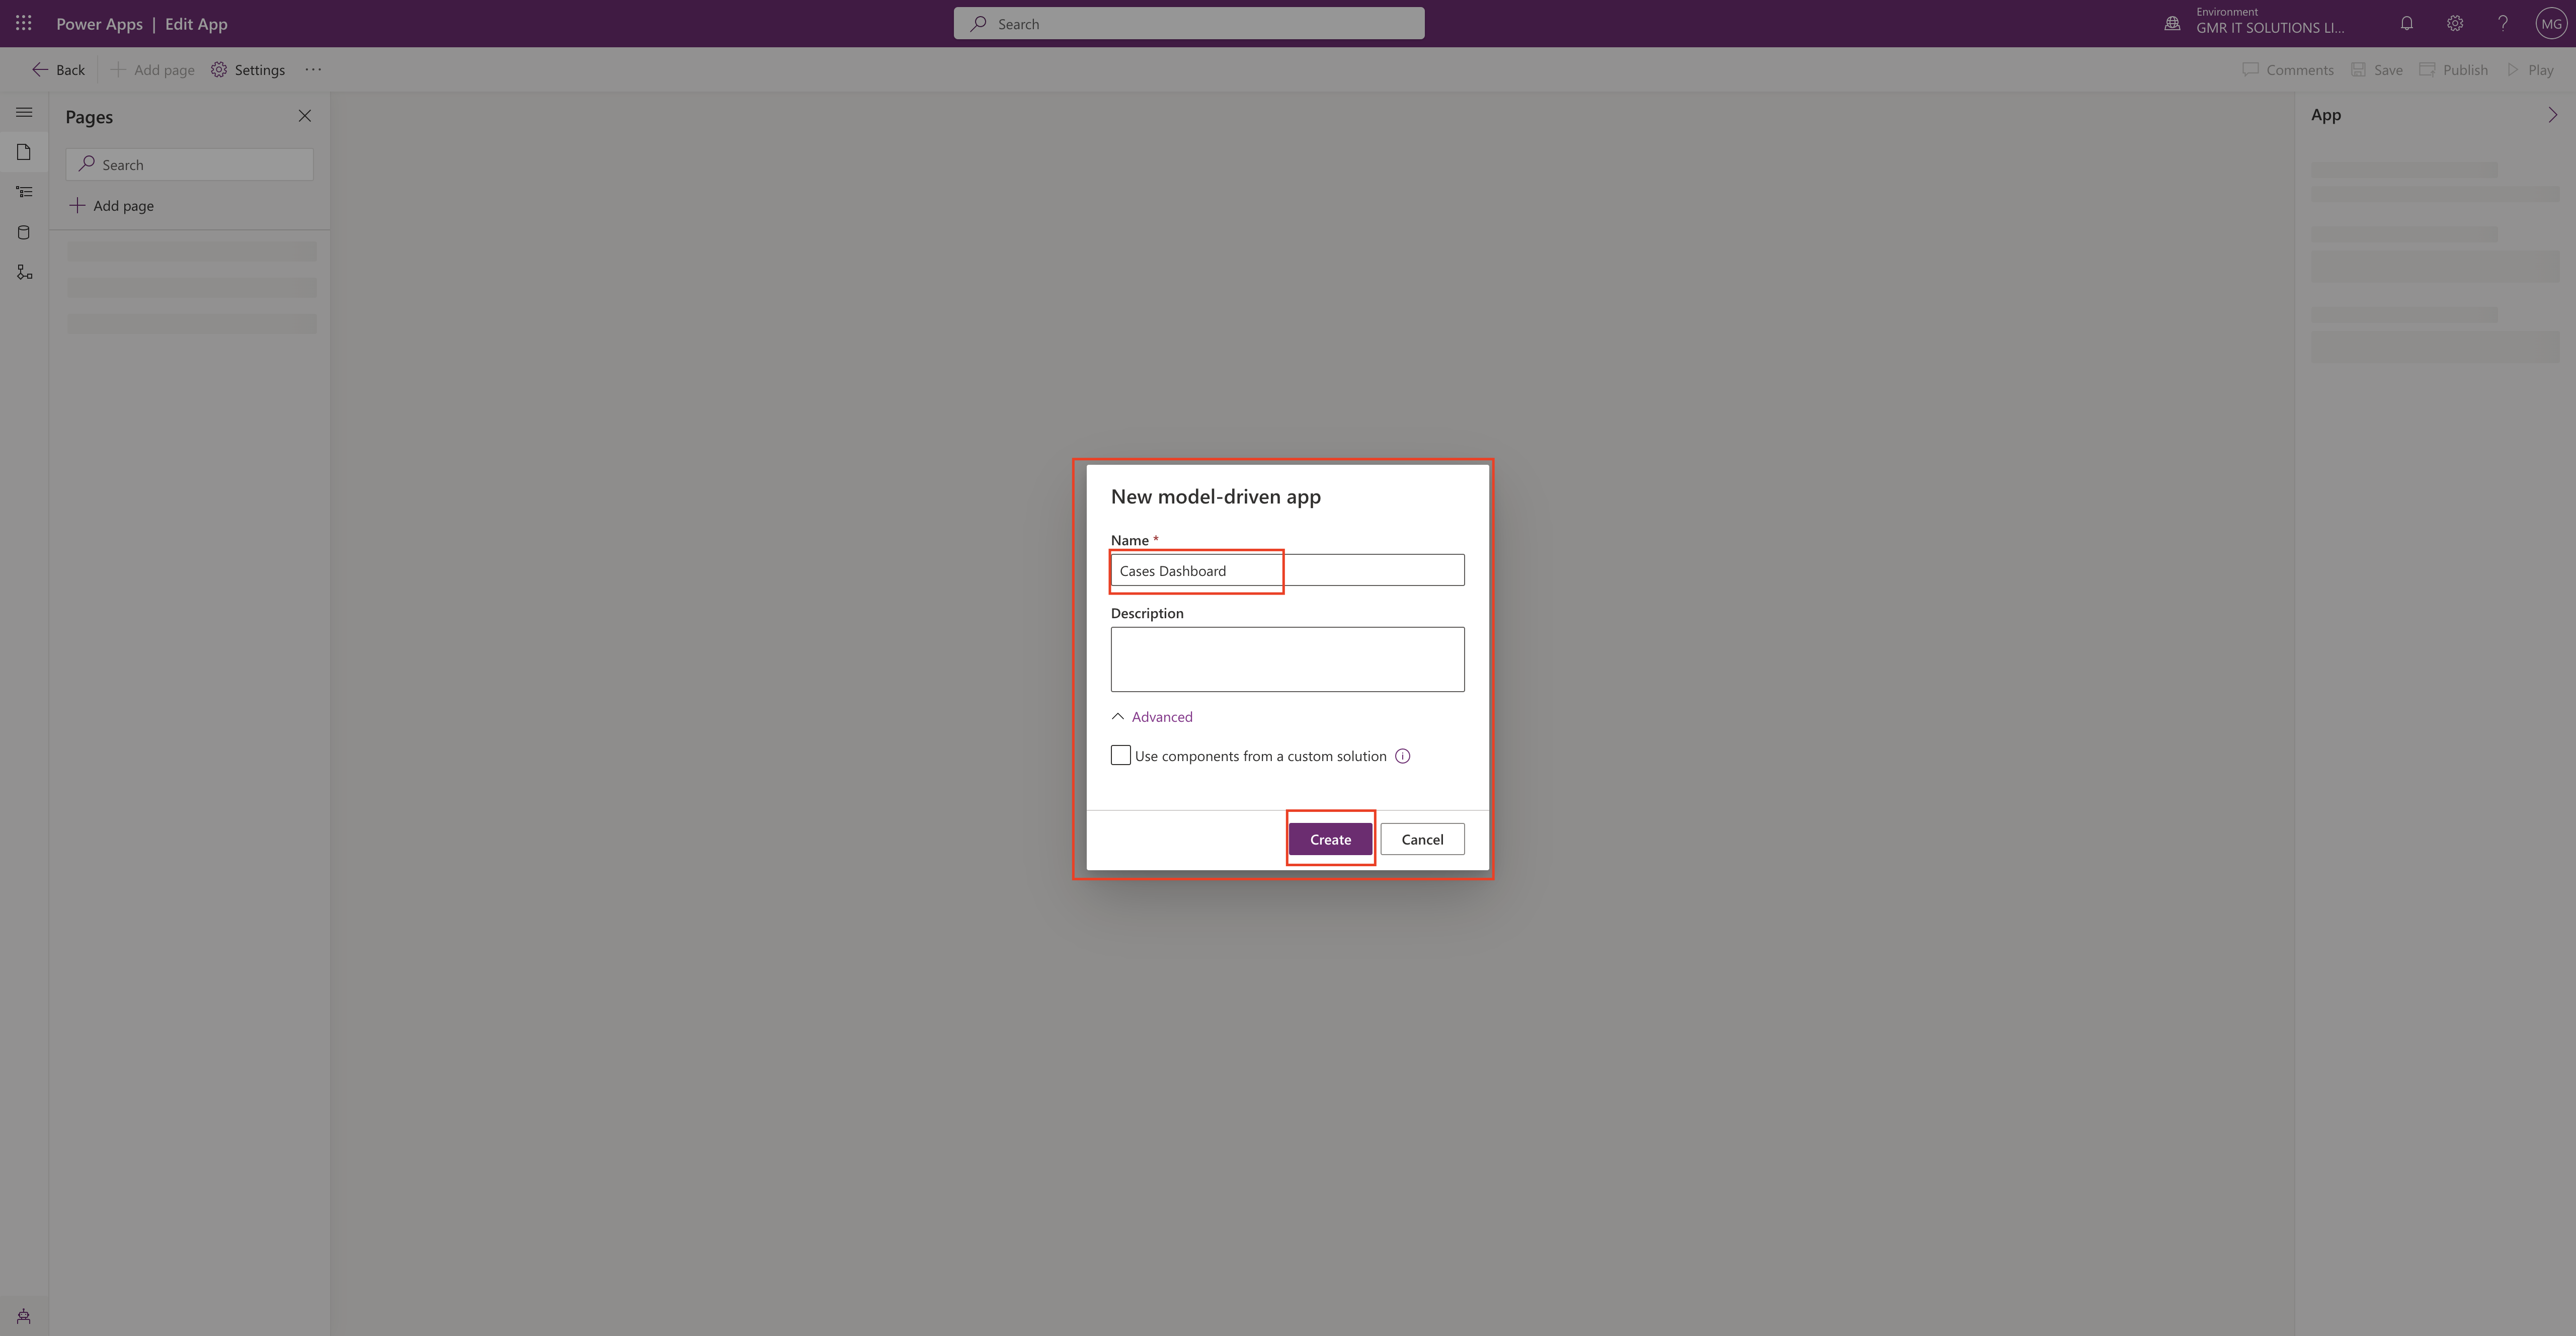
Give it a name for the dashboard(refer to the above screenshot).

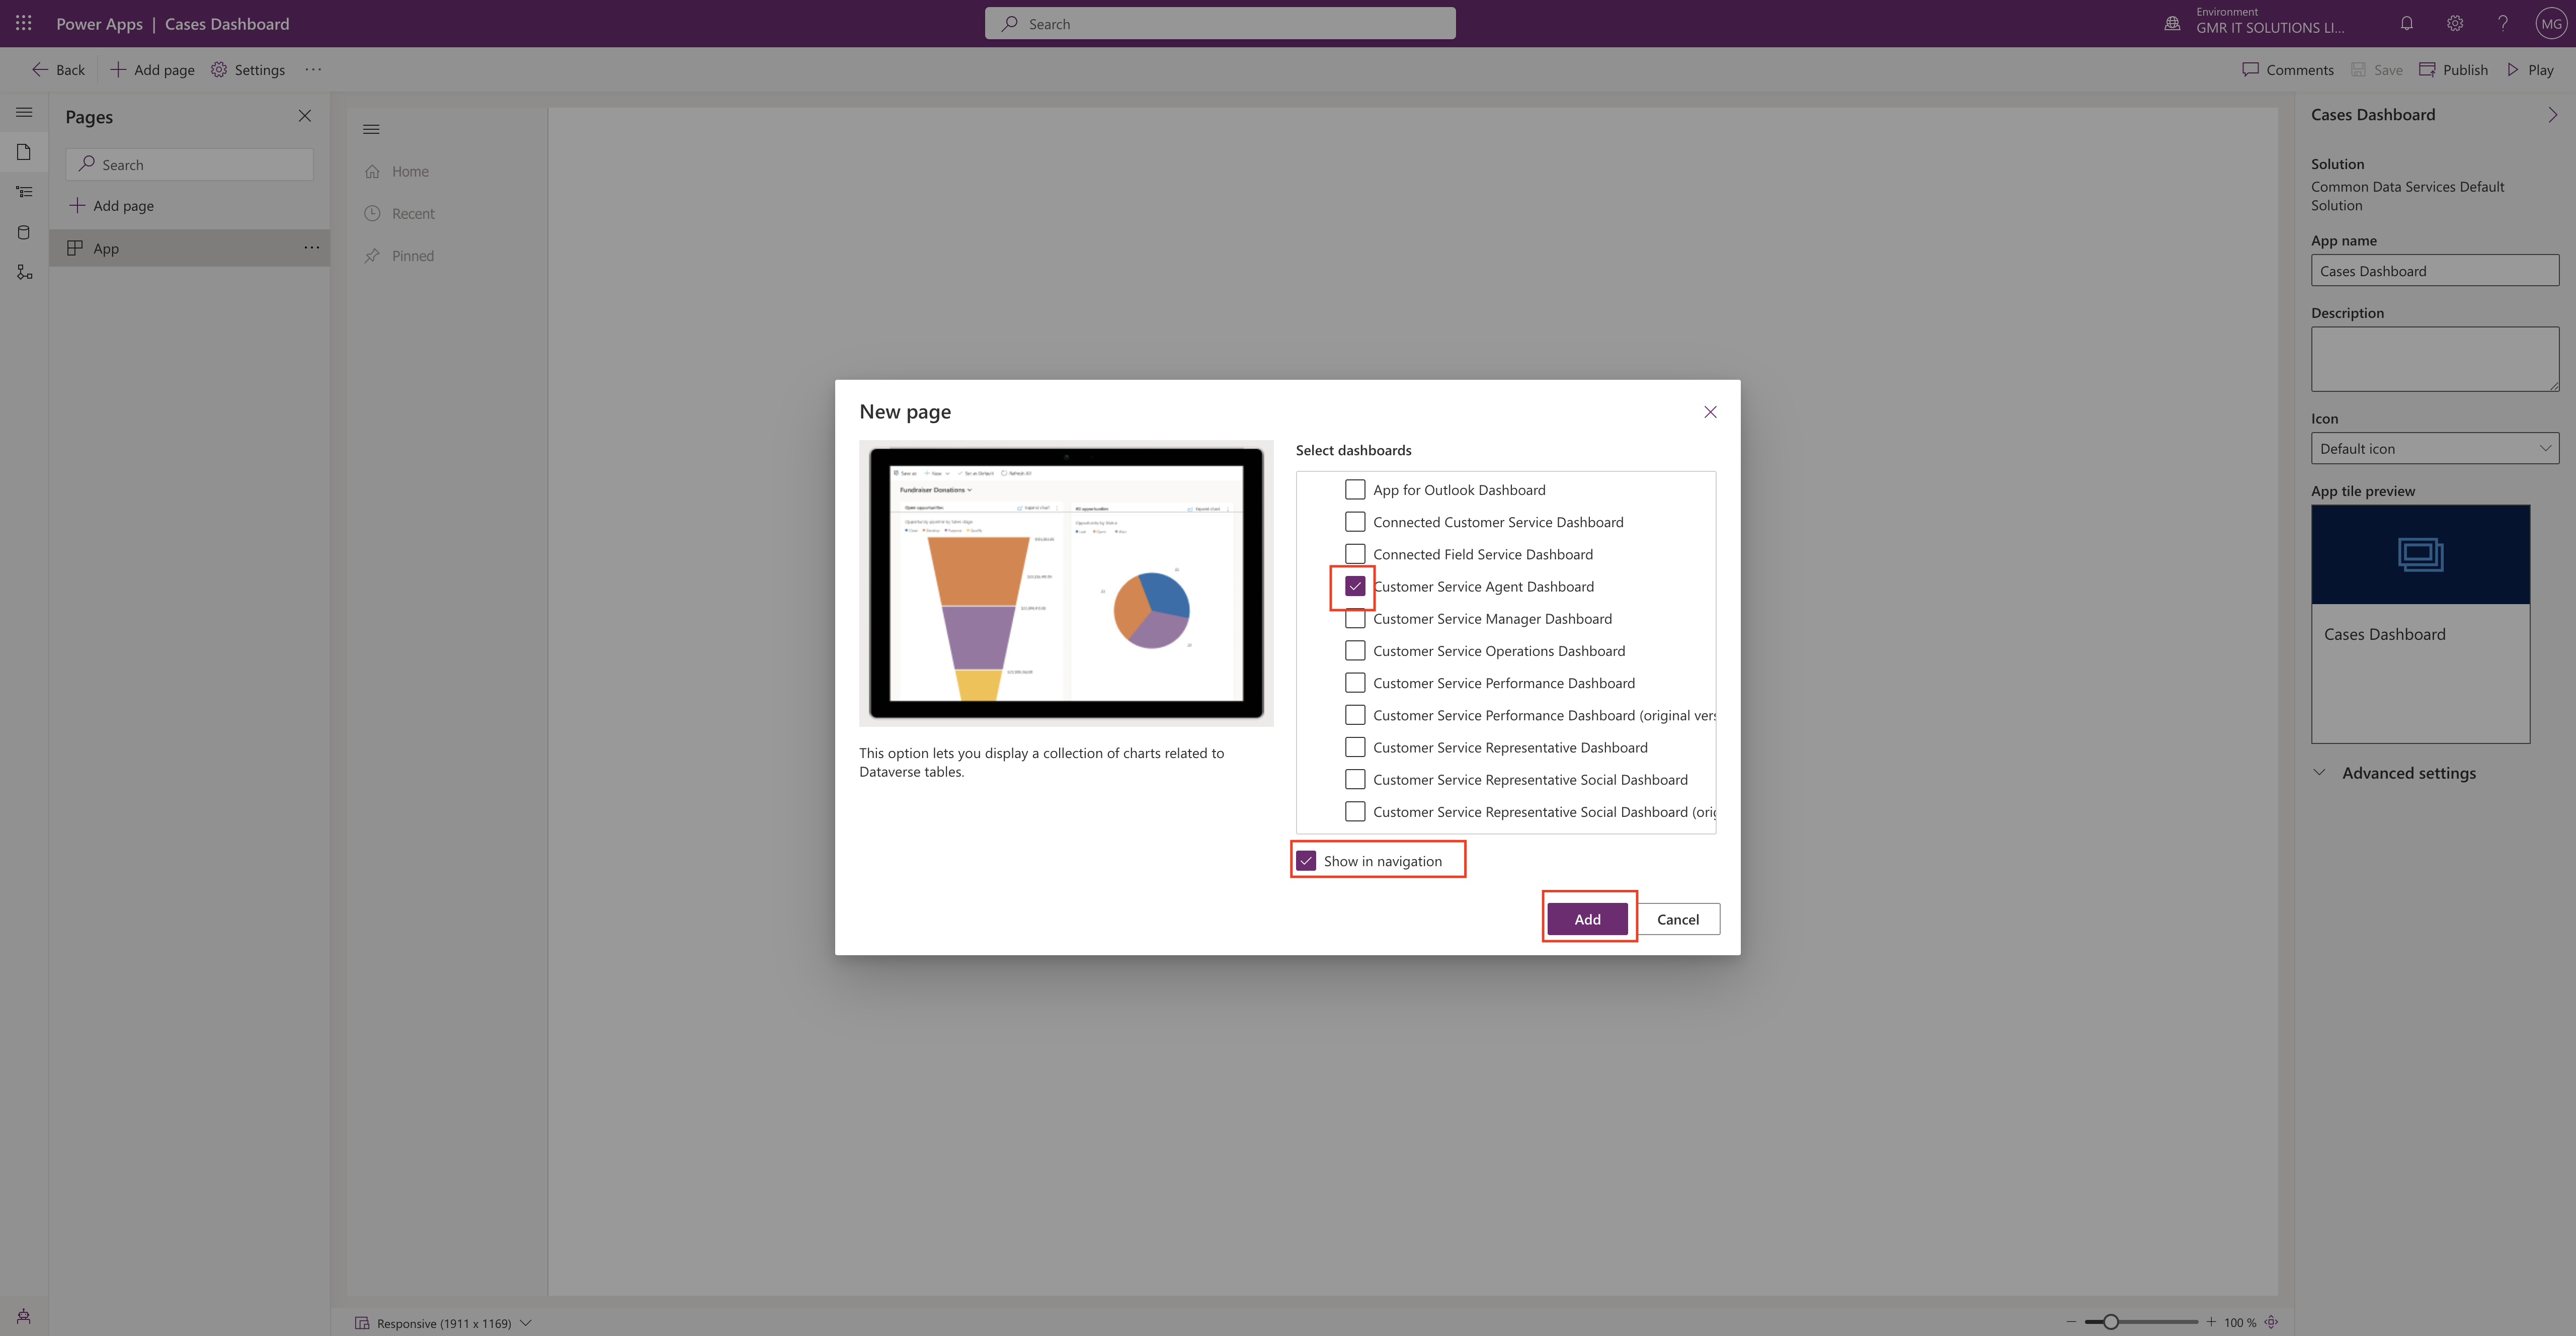
New screen will appear and select the dashboard view from the list and add to the navigation pane check box too.(refer to the above screen shot).

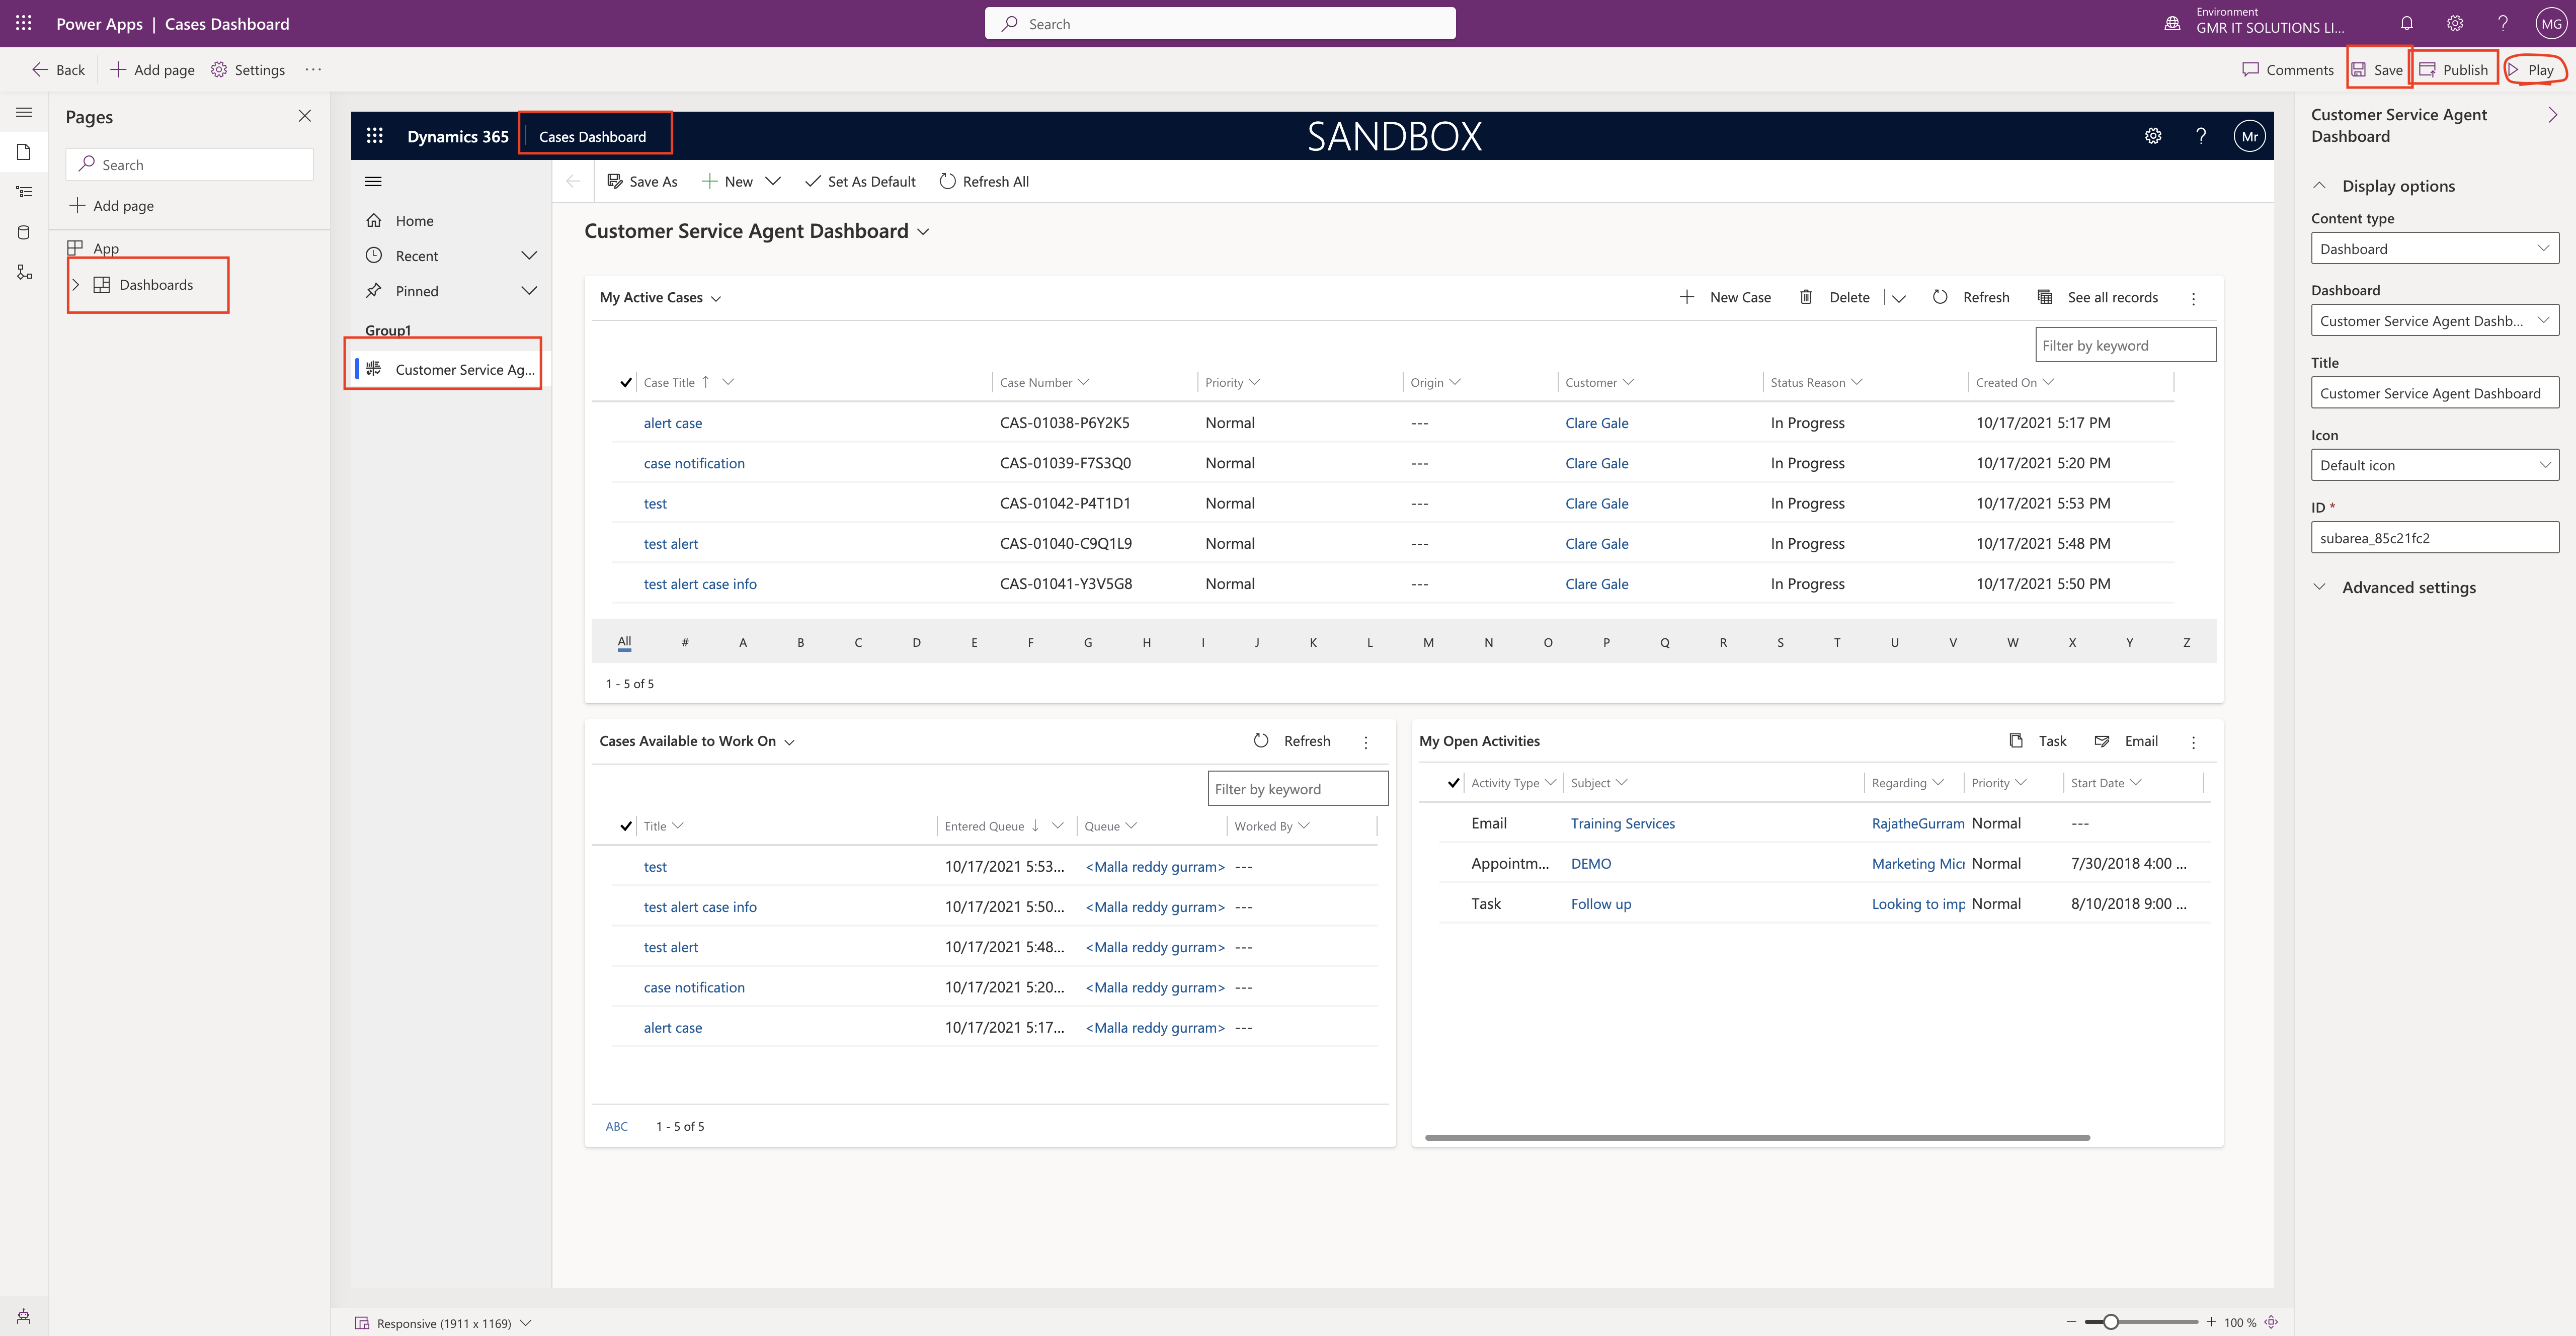
Dasboard is added the model driven app and save and play and publish your app with very few clicks(refer to the above screenshot).

Thats it for today.

I hope this helps

Malla Reddy(@UK365GUY)
#365BlogPostsin365Days

Share this:

How to create Header, main section, footer canvas app more quickly from Maker Portal

Hello Everyone,

Today i am going to show how to create a canvas app with Header, main section and footer more quickly.

Part 10 Series.

Lets gets started.

Login into www.make.powerapps.com

Click on the “Start with a page design”

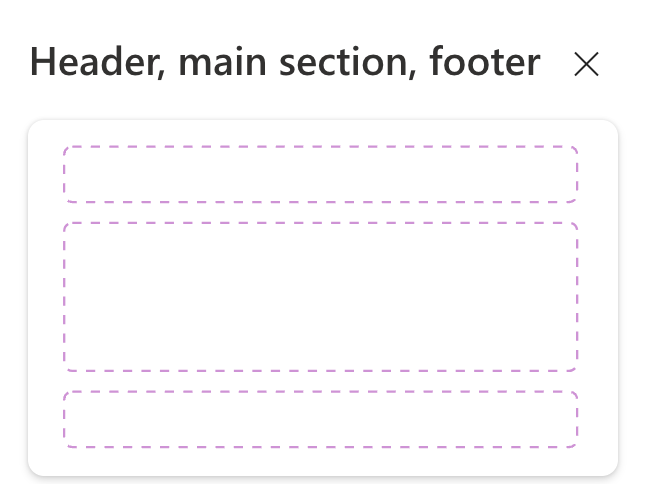
Then new screen will be displayed, click on Header, main section, footer.

We can add the content and the page adapts to different screen sizes.

This Page has:

1. A fixed-height header on top.
2. A fixed-height footer at the bottom.
3. A main section that fills the rest of the screen height.

Select this option if once created, connect the app to Dataverse, SQL, SharePoint etc…

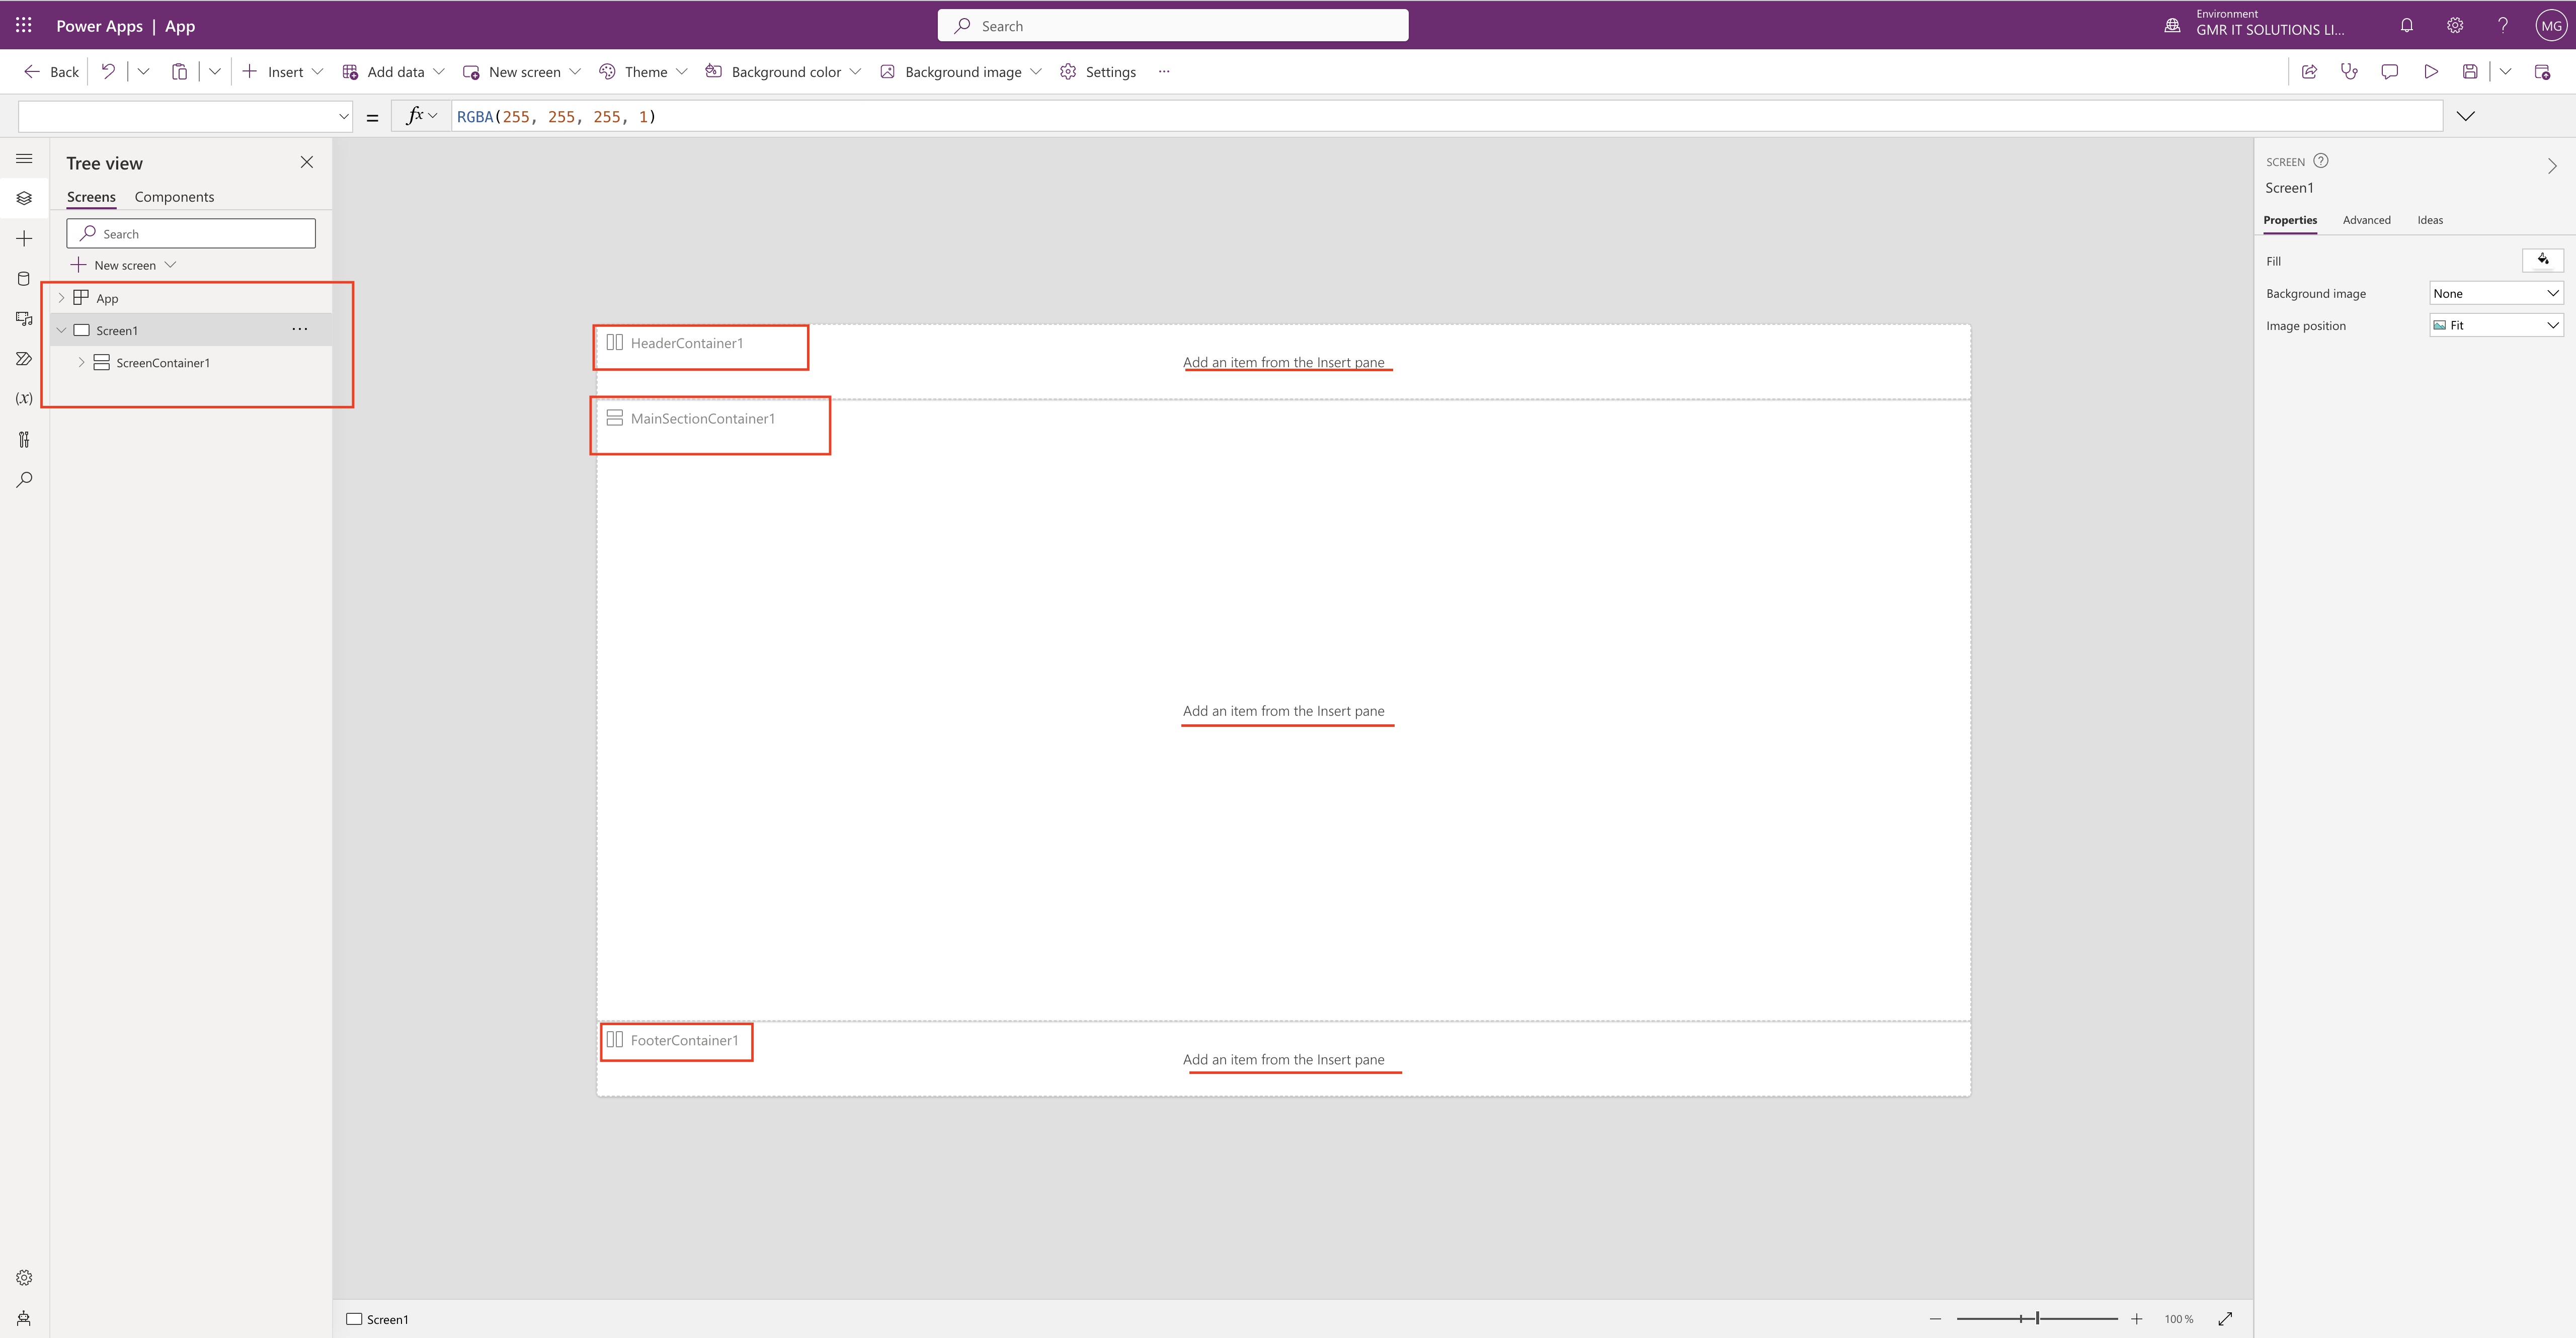
New screen with Header, Main Screen and Footer will be displayed inside the canvas app.

Now its time to add the item from the insert pane or you can add a gallery and add datasource to populate the data.

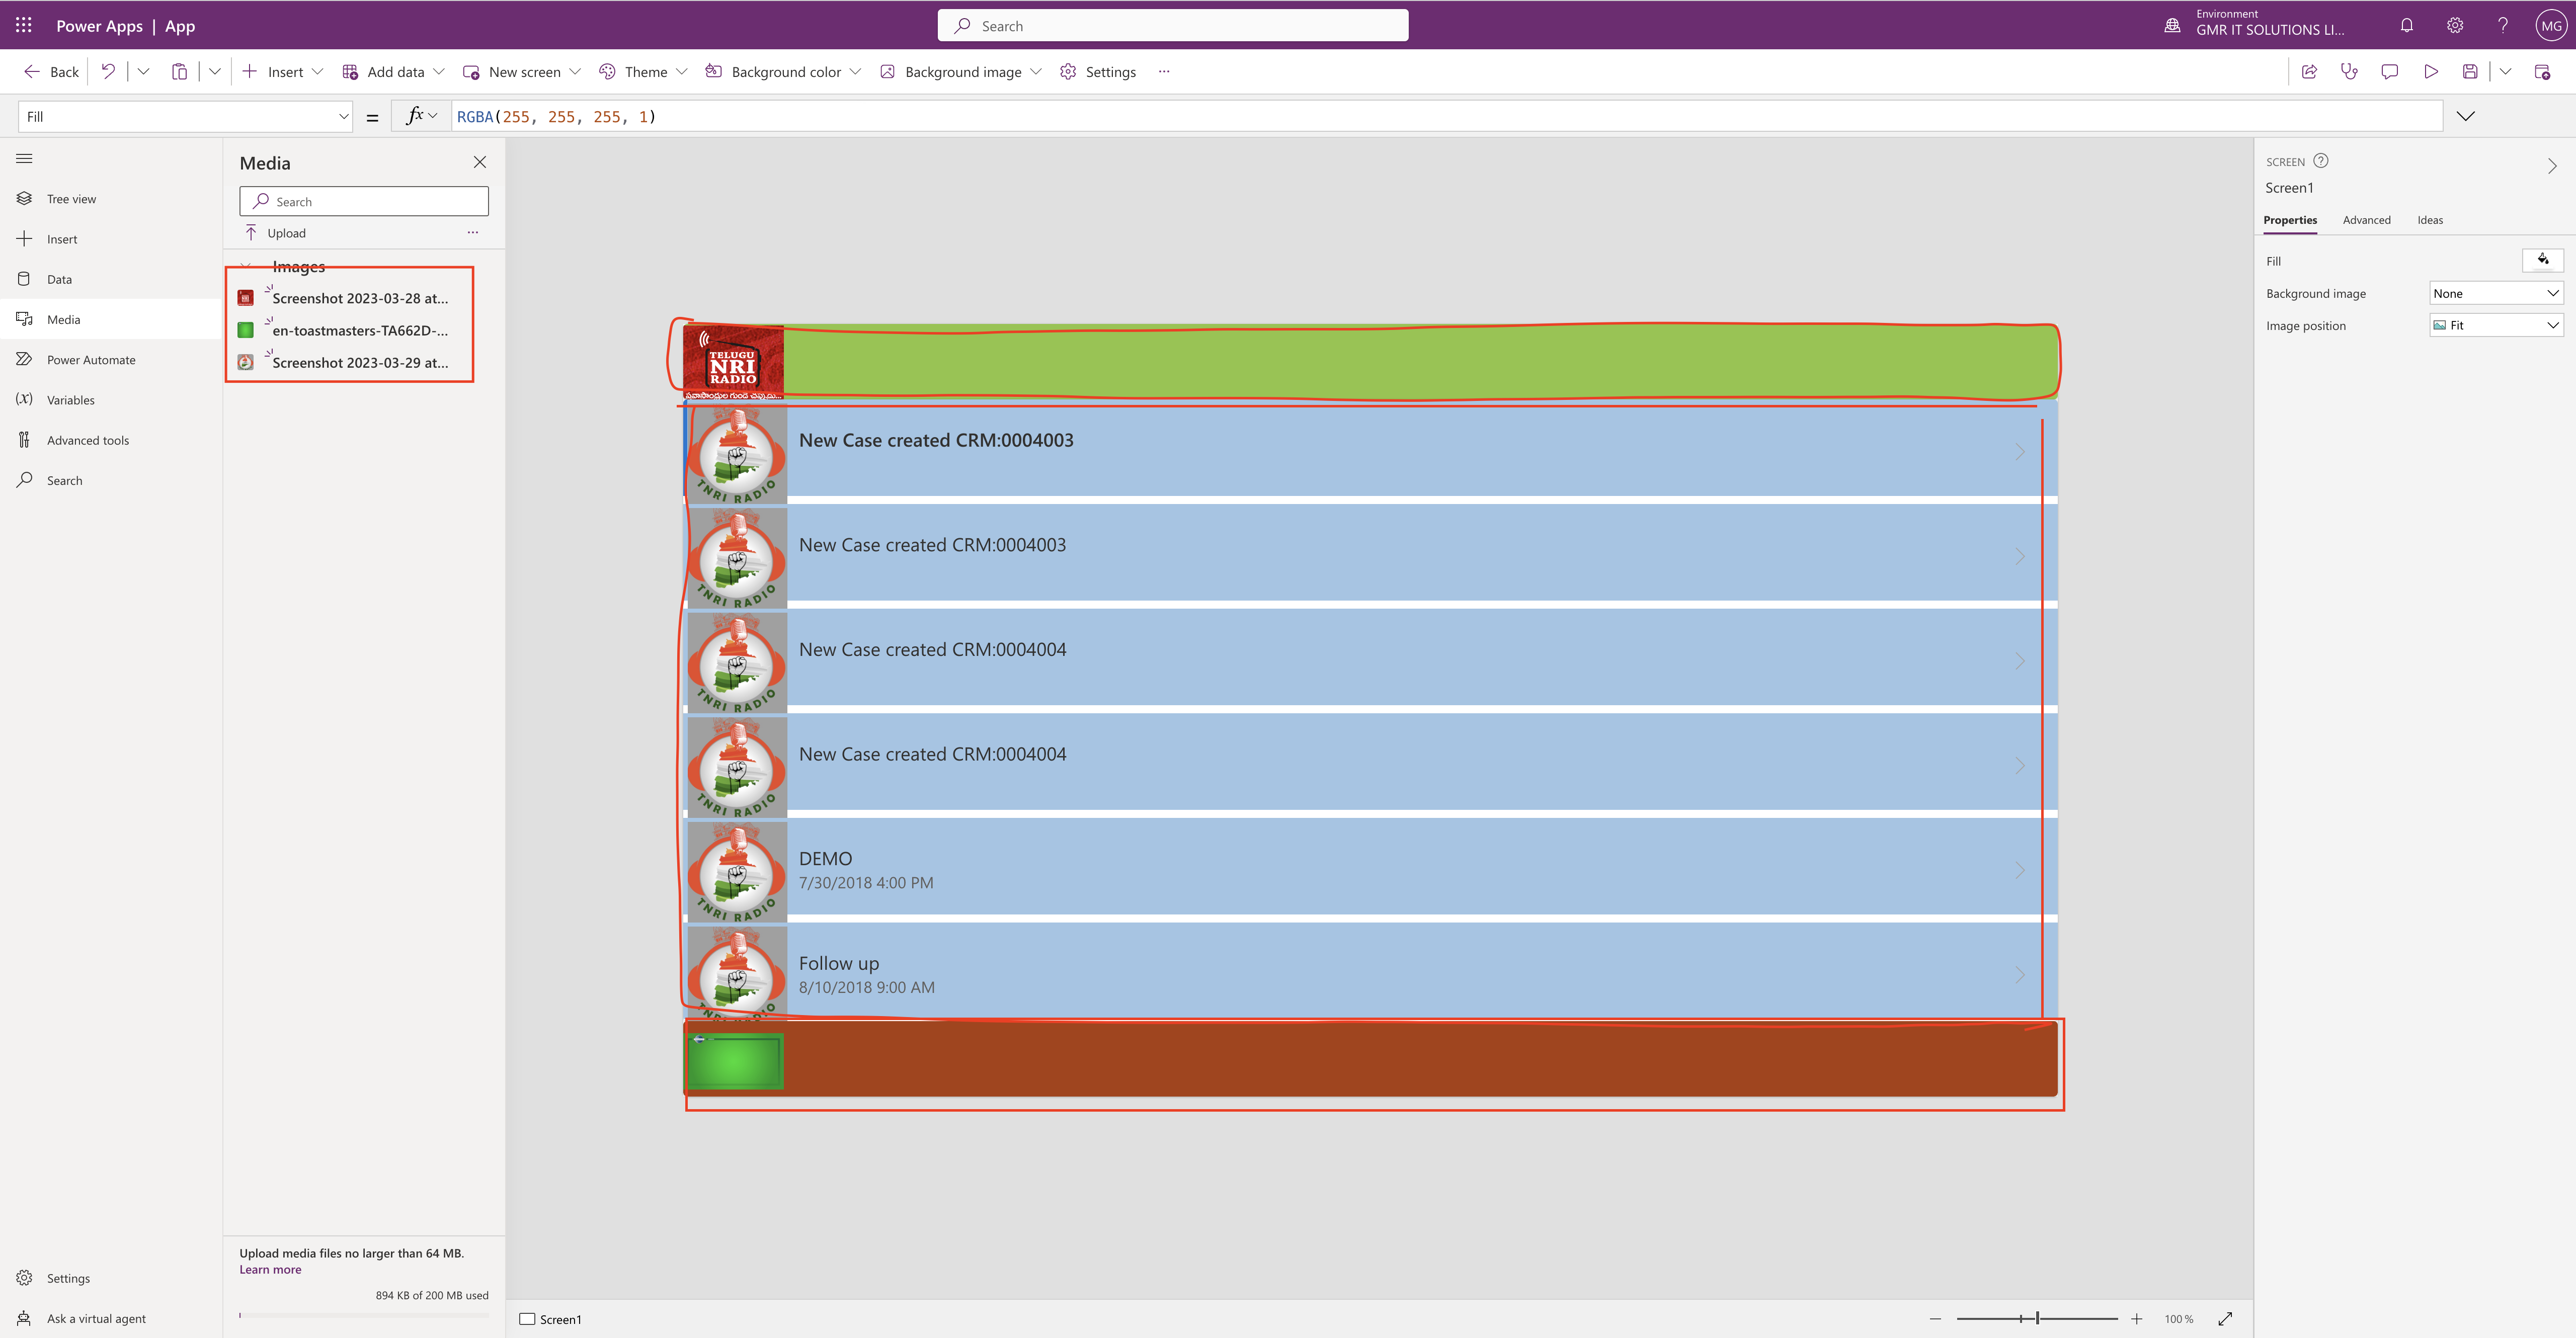
You can also add image to the header, add background colour and footer accordingly.

I have designed the canvas app using header, main section and footer with very few click adding the datasource to the main section and image on header and footer with background colour.

Thats it for today.

I hope this helps
Malla Reddy(@UK365GUY)
#365BlogPostsin365Days

Share this: