Menu Close

Tag: #Dataverse

{How to request } Power Apps License from Organisation Admins

Hello Everyone,

Today i am going to show how to request Power Apps Premium License from Organisation Admin.

Let’s gets started.

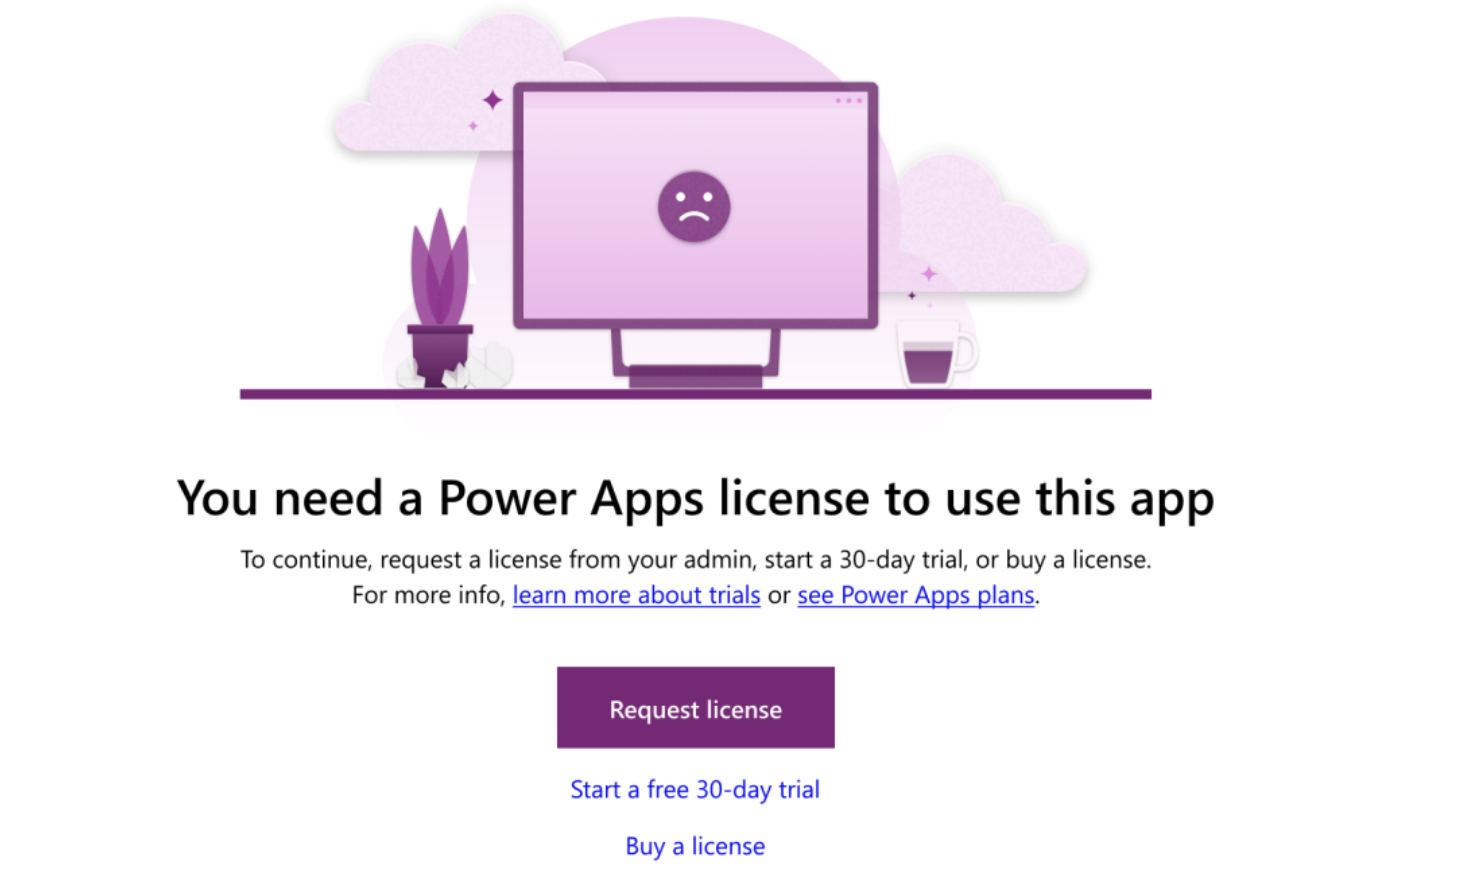
Suppose you have been shared a Power App and when you run it, you will be prompted that you need a license.

It will prompt to “Request a license” or you can trial 30 days for free.

Once the request is submitted for license a confirmation message will appear at the top of the page saying the request was sucessfully sent to their admin.

User can also request a license while on trial from the top banner of the screen of the power apps screen.

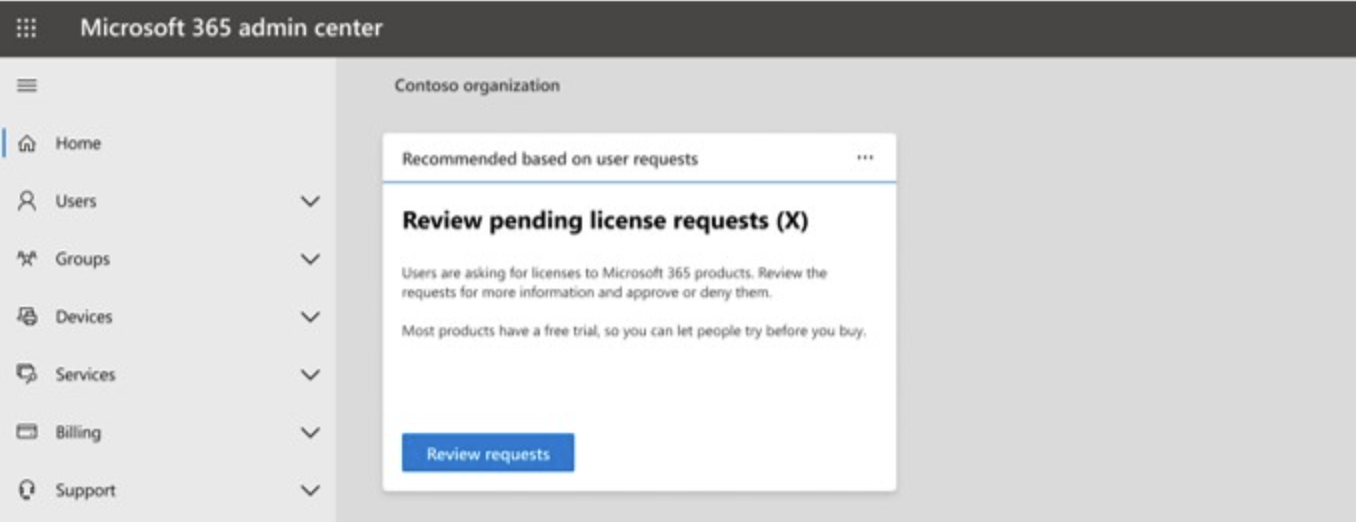
So Admin will be notified of all incoming licensing requests on the Microsoft 365 Home Page.

The admin will check whether to approve or reject the Power Apps Requests at once and include a message for their users.

All Admins can continue to user custom license request process and configure the proper settings in Microsoft 365 Admin Center.

For more information about license request and settings visit here

Thats it for today.

I hope this helps.
Malla Reddy(@UK365GUY)
#365BlogPostsin365Days

Share this:

How to collaborate Dynamics 365 team members with Microsoft Teams collaboration and chat

Hello Everyone,

Today i am going to show how to collaborate Microsoft Dynamics 365 with Microsoft Teams collaboration and chat.

What are the advantages of the Microsoft Teams collaboration and chat?

Let’s gets started.

Login into PPAC

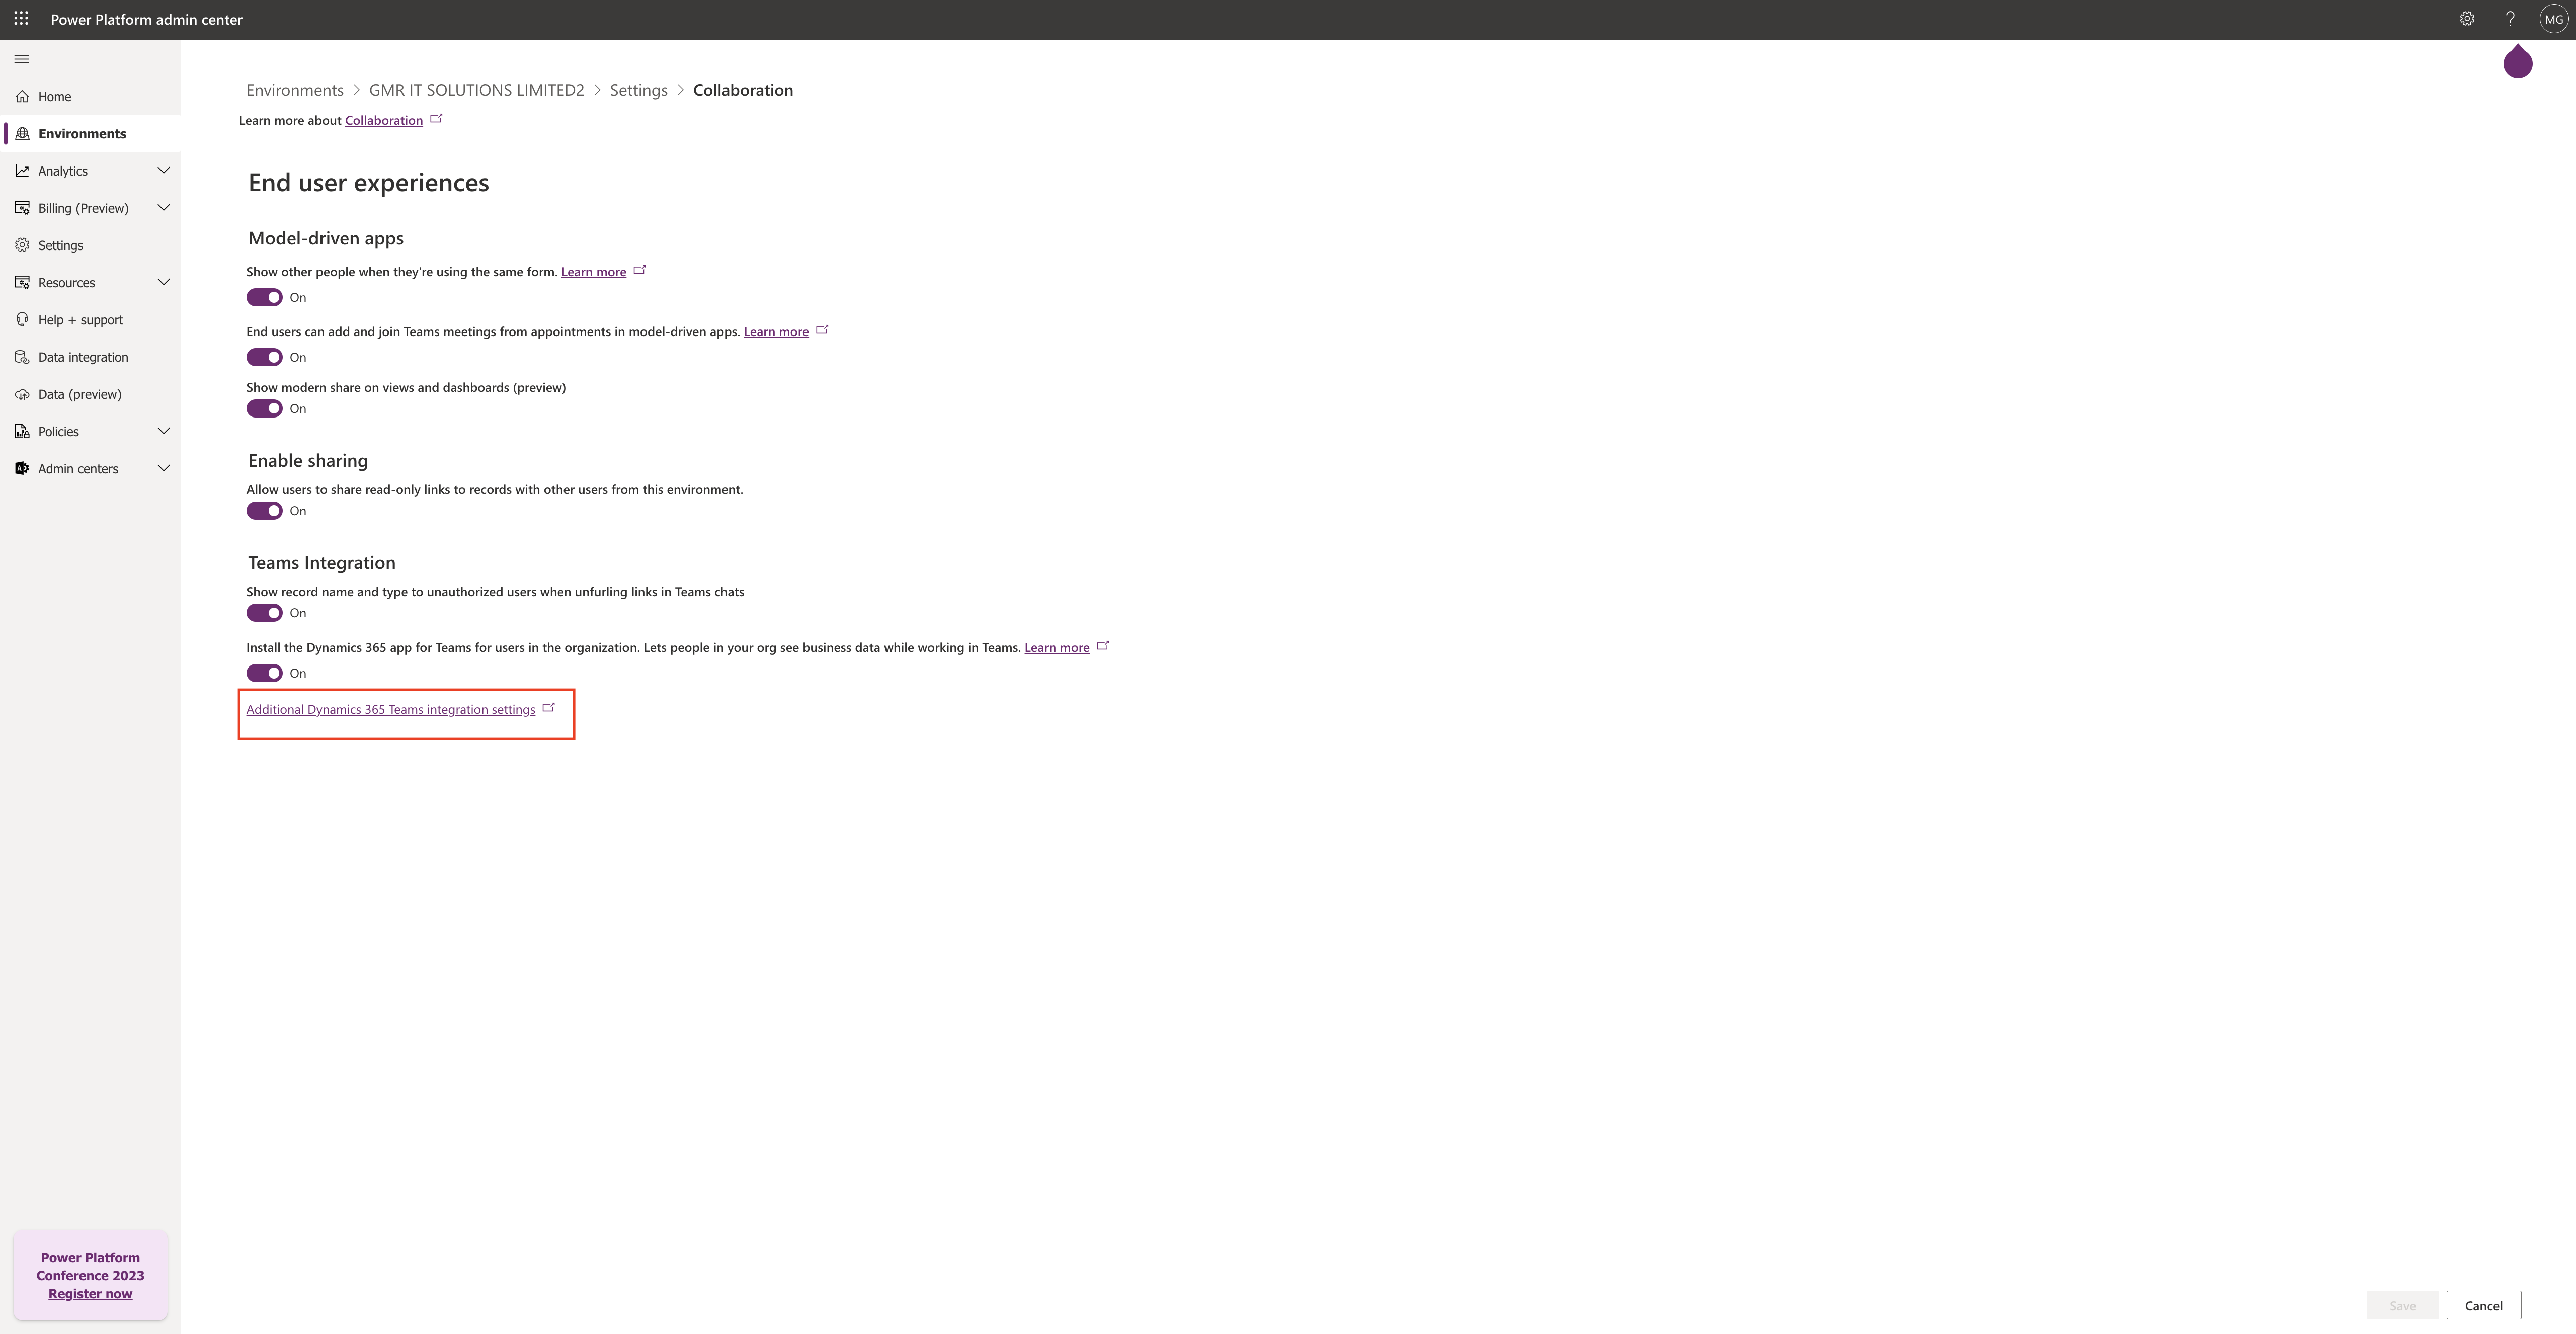
Select the environment and click on settings, click on “Collaborate Settings”.

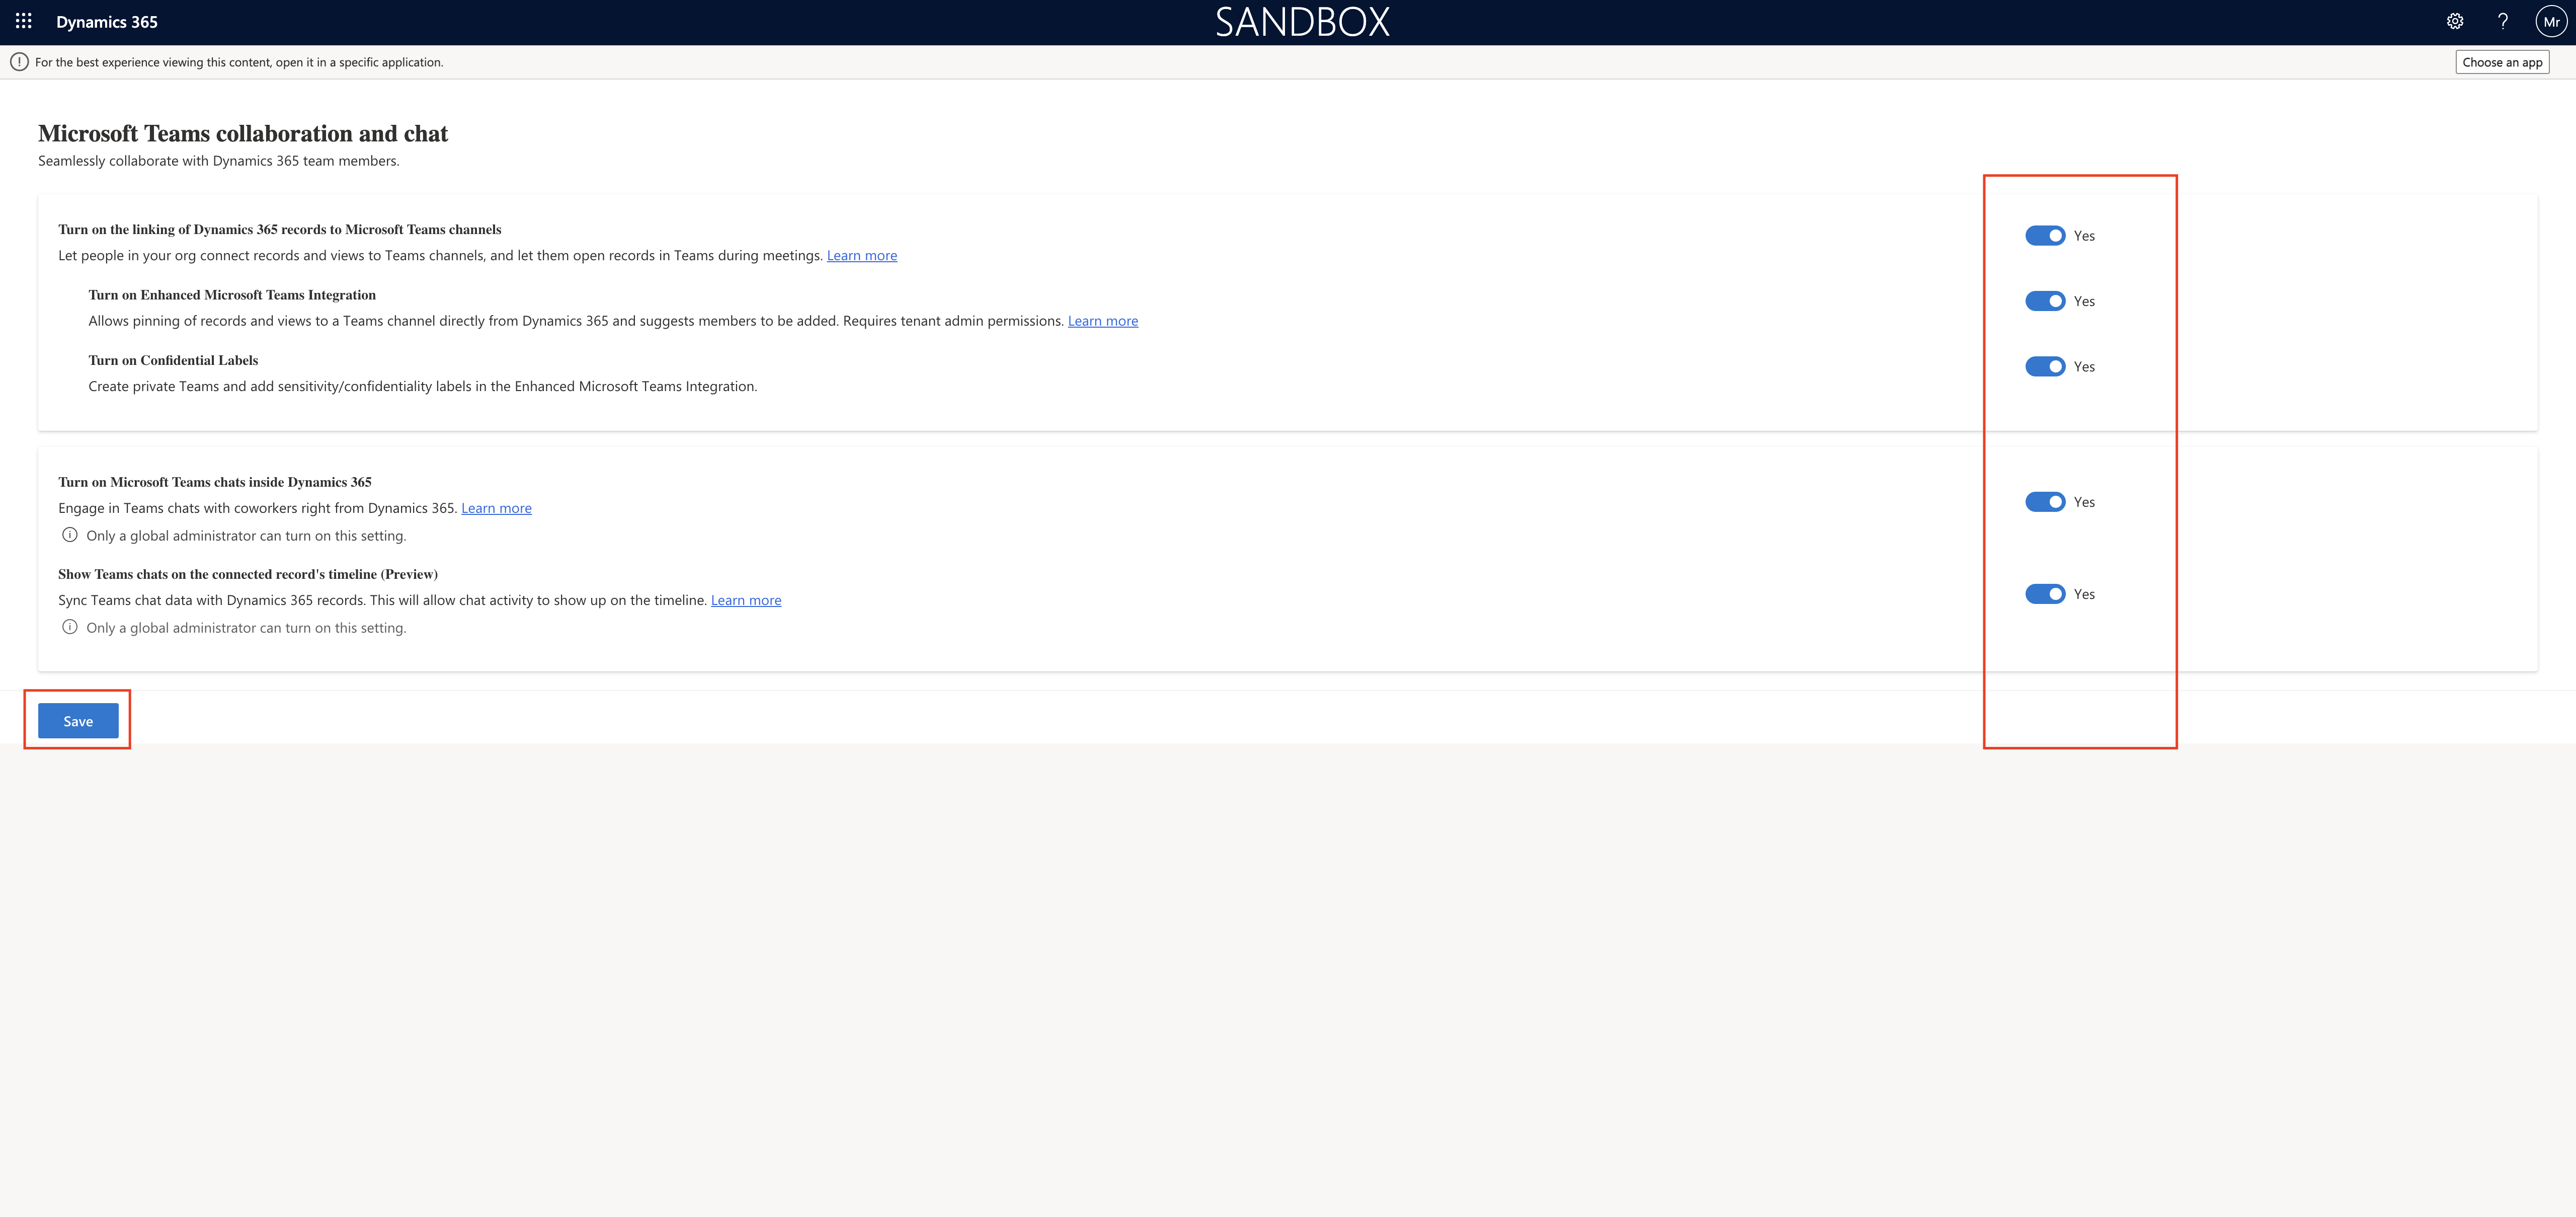
Microsoft Teams collaboration and chat settings:

1. Turn on the linking of Dynamics 365 records to Microsoft Teams channels: Lets people in your org connect records and views to Teams channels, and let them open records in Teams during meetings = YES

2. Turn on Enhanced Microsoft Teams Integration: Allows pinning of records and views to a Teams Channel directly from Dynamics 365 and suggests members to be added. Requires tenant admin permissions = YES.

3. Turn on Confidential Labels: Create private Teams and add sensitivity/confidentiality labels in the Enhanced Microsoft Teams Integration = YES

4. Turn on Microsoft Teams chats inside Dynamics 365: Engage in Teams chats with coworkers right from Dynamics 365 = YES
Only a global administrator can turn on this settings.

5.Show Teams chats on the connected record’s timeline(Preview)

Sync Teams chat data with Dynamics 365 records. This will allow activity to show up on the timeline = YES

Only a global administrator can turn on this setting.

Then SAVE the settings.

Thats it for today.

I hope this helps
Malla Reddy(@UK365GUY)
#365BlogPostsin365Days

Share this:

How to enable collaboration setting from Power Platform Admin Center

Hello Everyone,

Today i am going to show how to enable collaboration from Power Platform Admin Center.

Let’s get’s started.

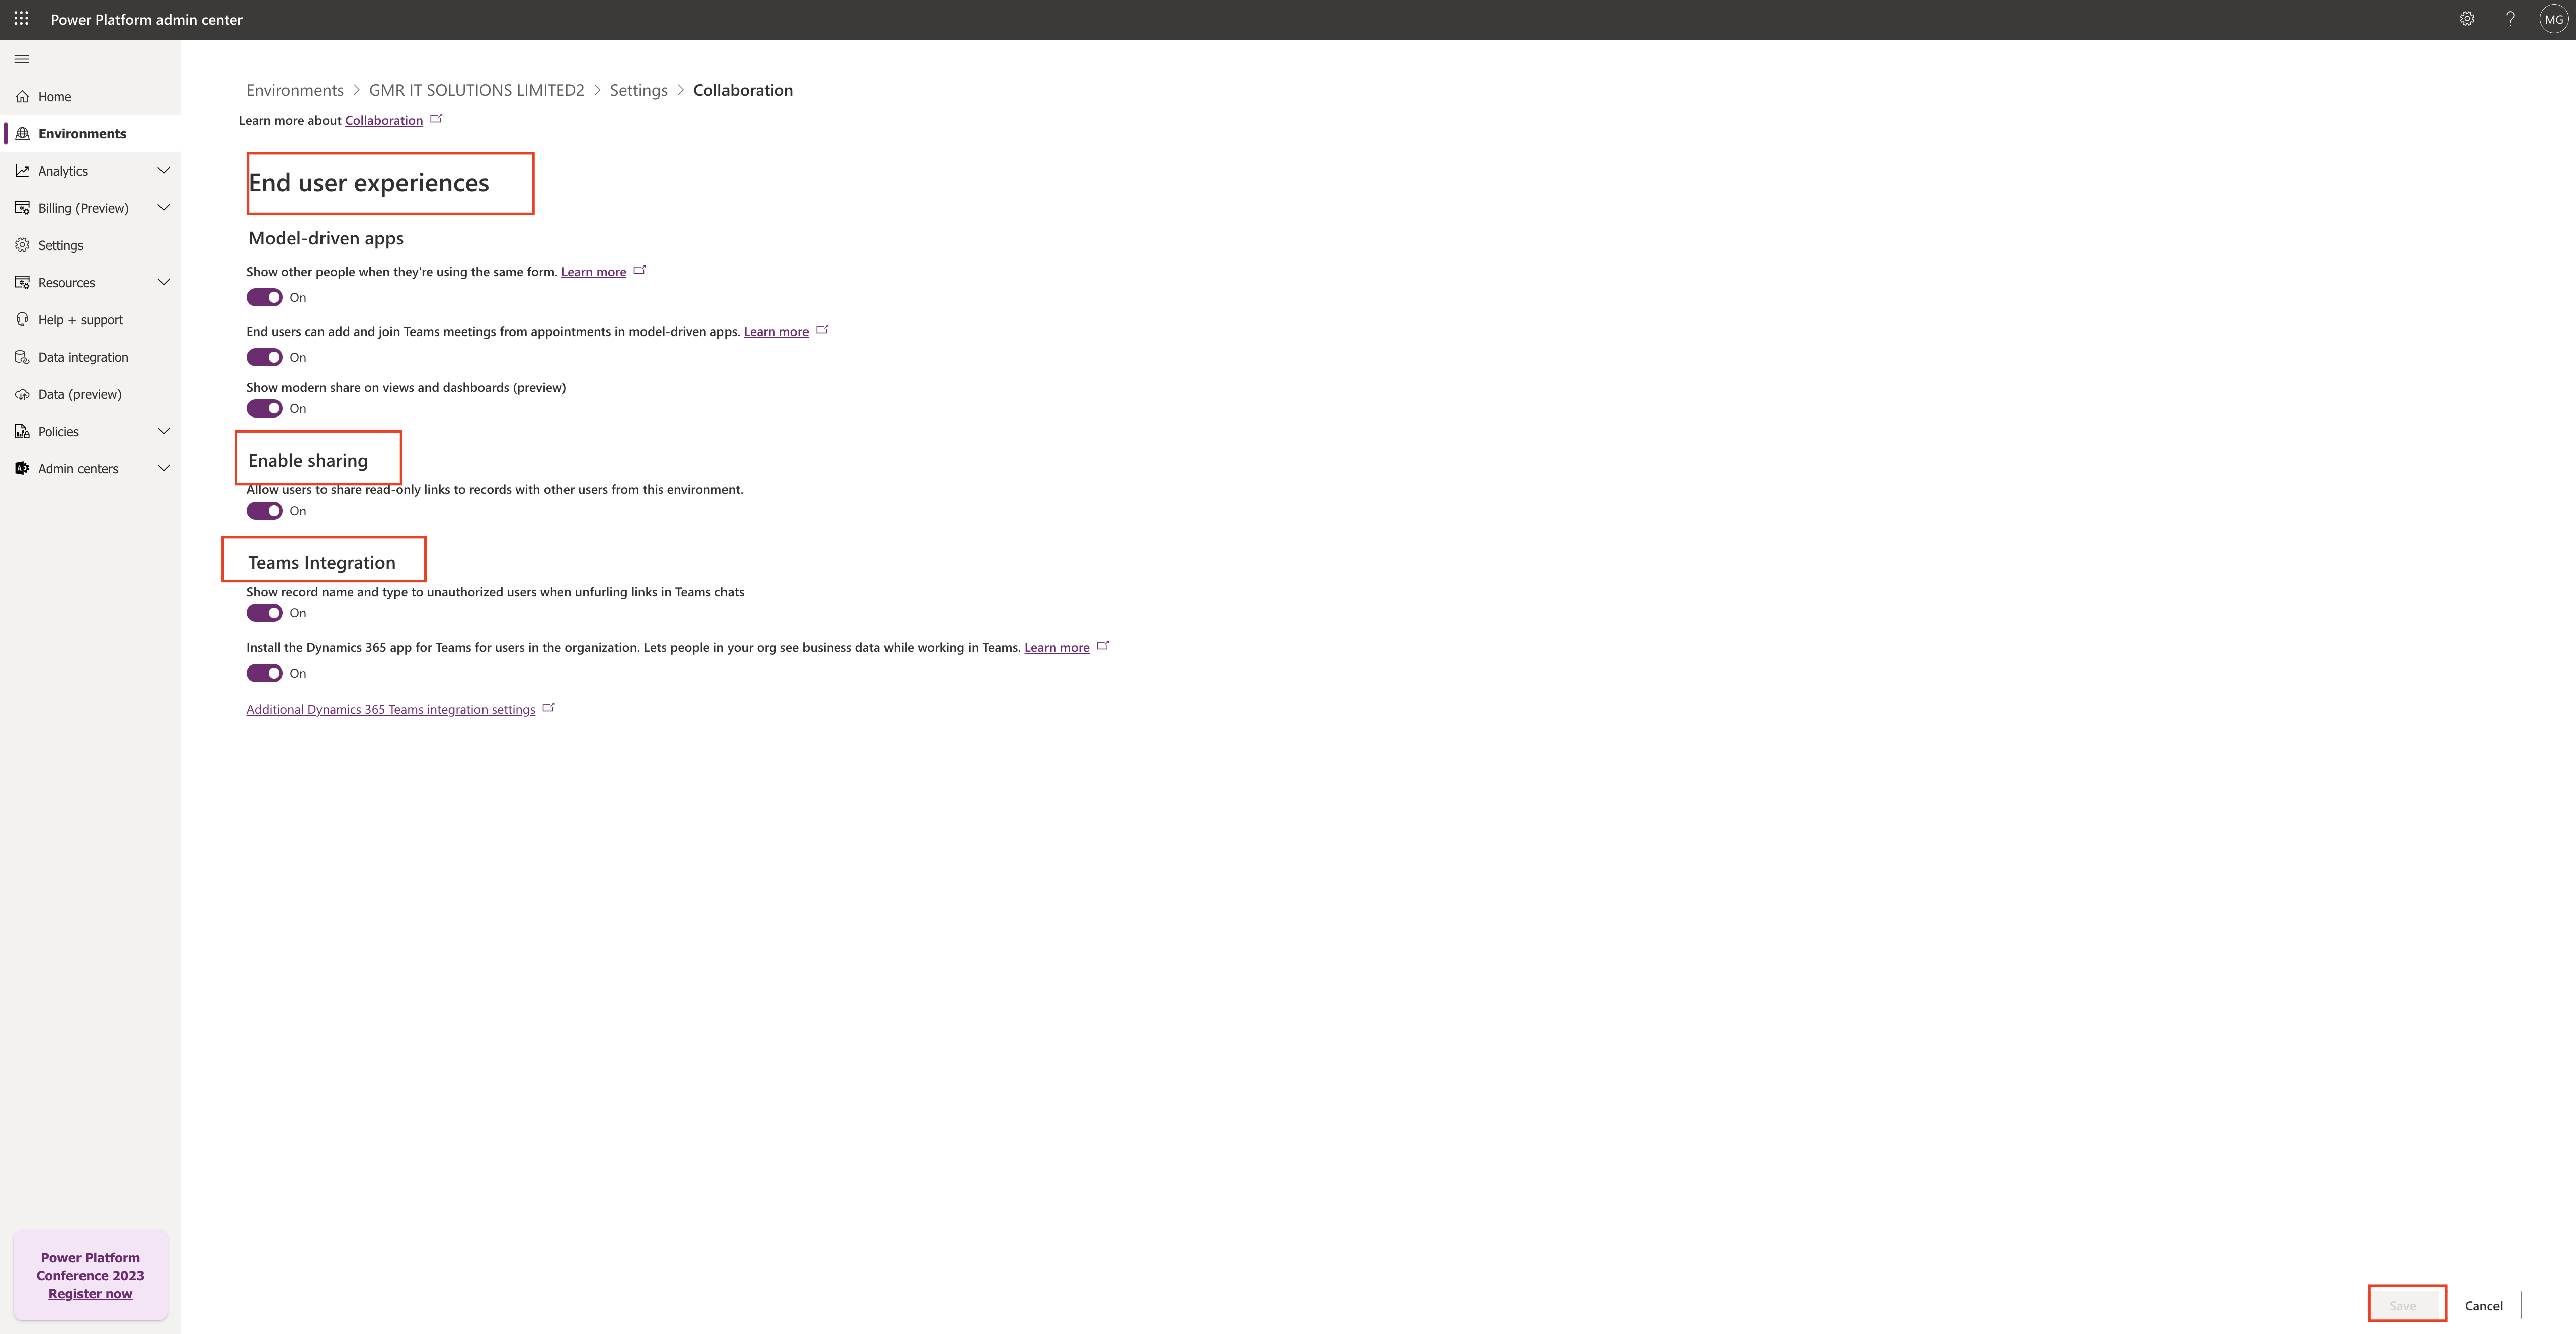
To give greater User Experience using collaboration settings the Model Driven Apps, Enable Sharing, Teams Integration.

Login into PPAC

Select the environment you want to apply the collaboration settings.

Model Driven Apps:

1. Show other people when they are using the same form = ON

With this setting users can see the other users when they are using same form.

2. End users can add and join Team meetings from appointments in model driven apps = ON

Users can join teams meetings directly from the appointments area of the model driven app.

3. Show modern share on views and dashboards(preview)

This setting allow users to see modern share options on views and dashboards.

Enable Sharing:

1. Allows users to share read only links to records with other users from this environment = ON

Now with this settings users can share the records for read only access with link share option.

Teams Integration:

1. Show record name and type to unauthorized users when unfurling links in Teams Chats = ON

With this settings when an unauthorised users see the record shared by end users on teams chat then they should be able to see the record name and type.

2. Install the Dynamics 365 apps for teams for users in the organisation. lets people in your org see business data while working in teams = ON

With this settings users can see data from Teams if the Dynamics 365 app for teams installed.

Thats it for today.

I hope this helps
Malla Reddy(@UK365GUY)
#365BlogPostsin365Days

Share this:

How to enable Chatbot control and add Power Virtual Agent chatbot to your canvas app

Hello Everyone,

Today i am going to show how to enable and add the chat bot to your canvas app.

Lets gets started.

Login into www.make.powerapps.com

Open existing canvas app and click on settings and enable the chatbot component(see below screenshot)
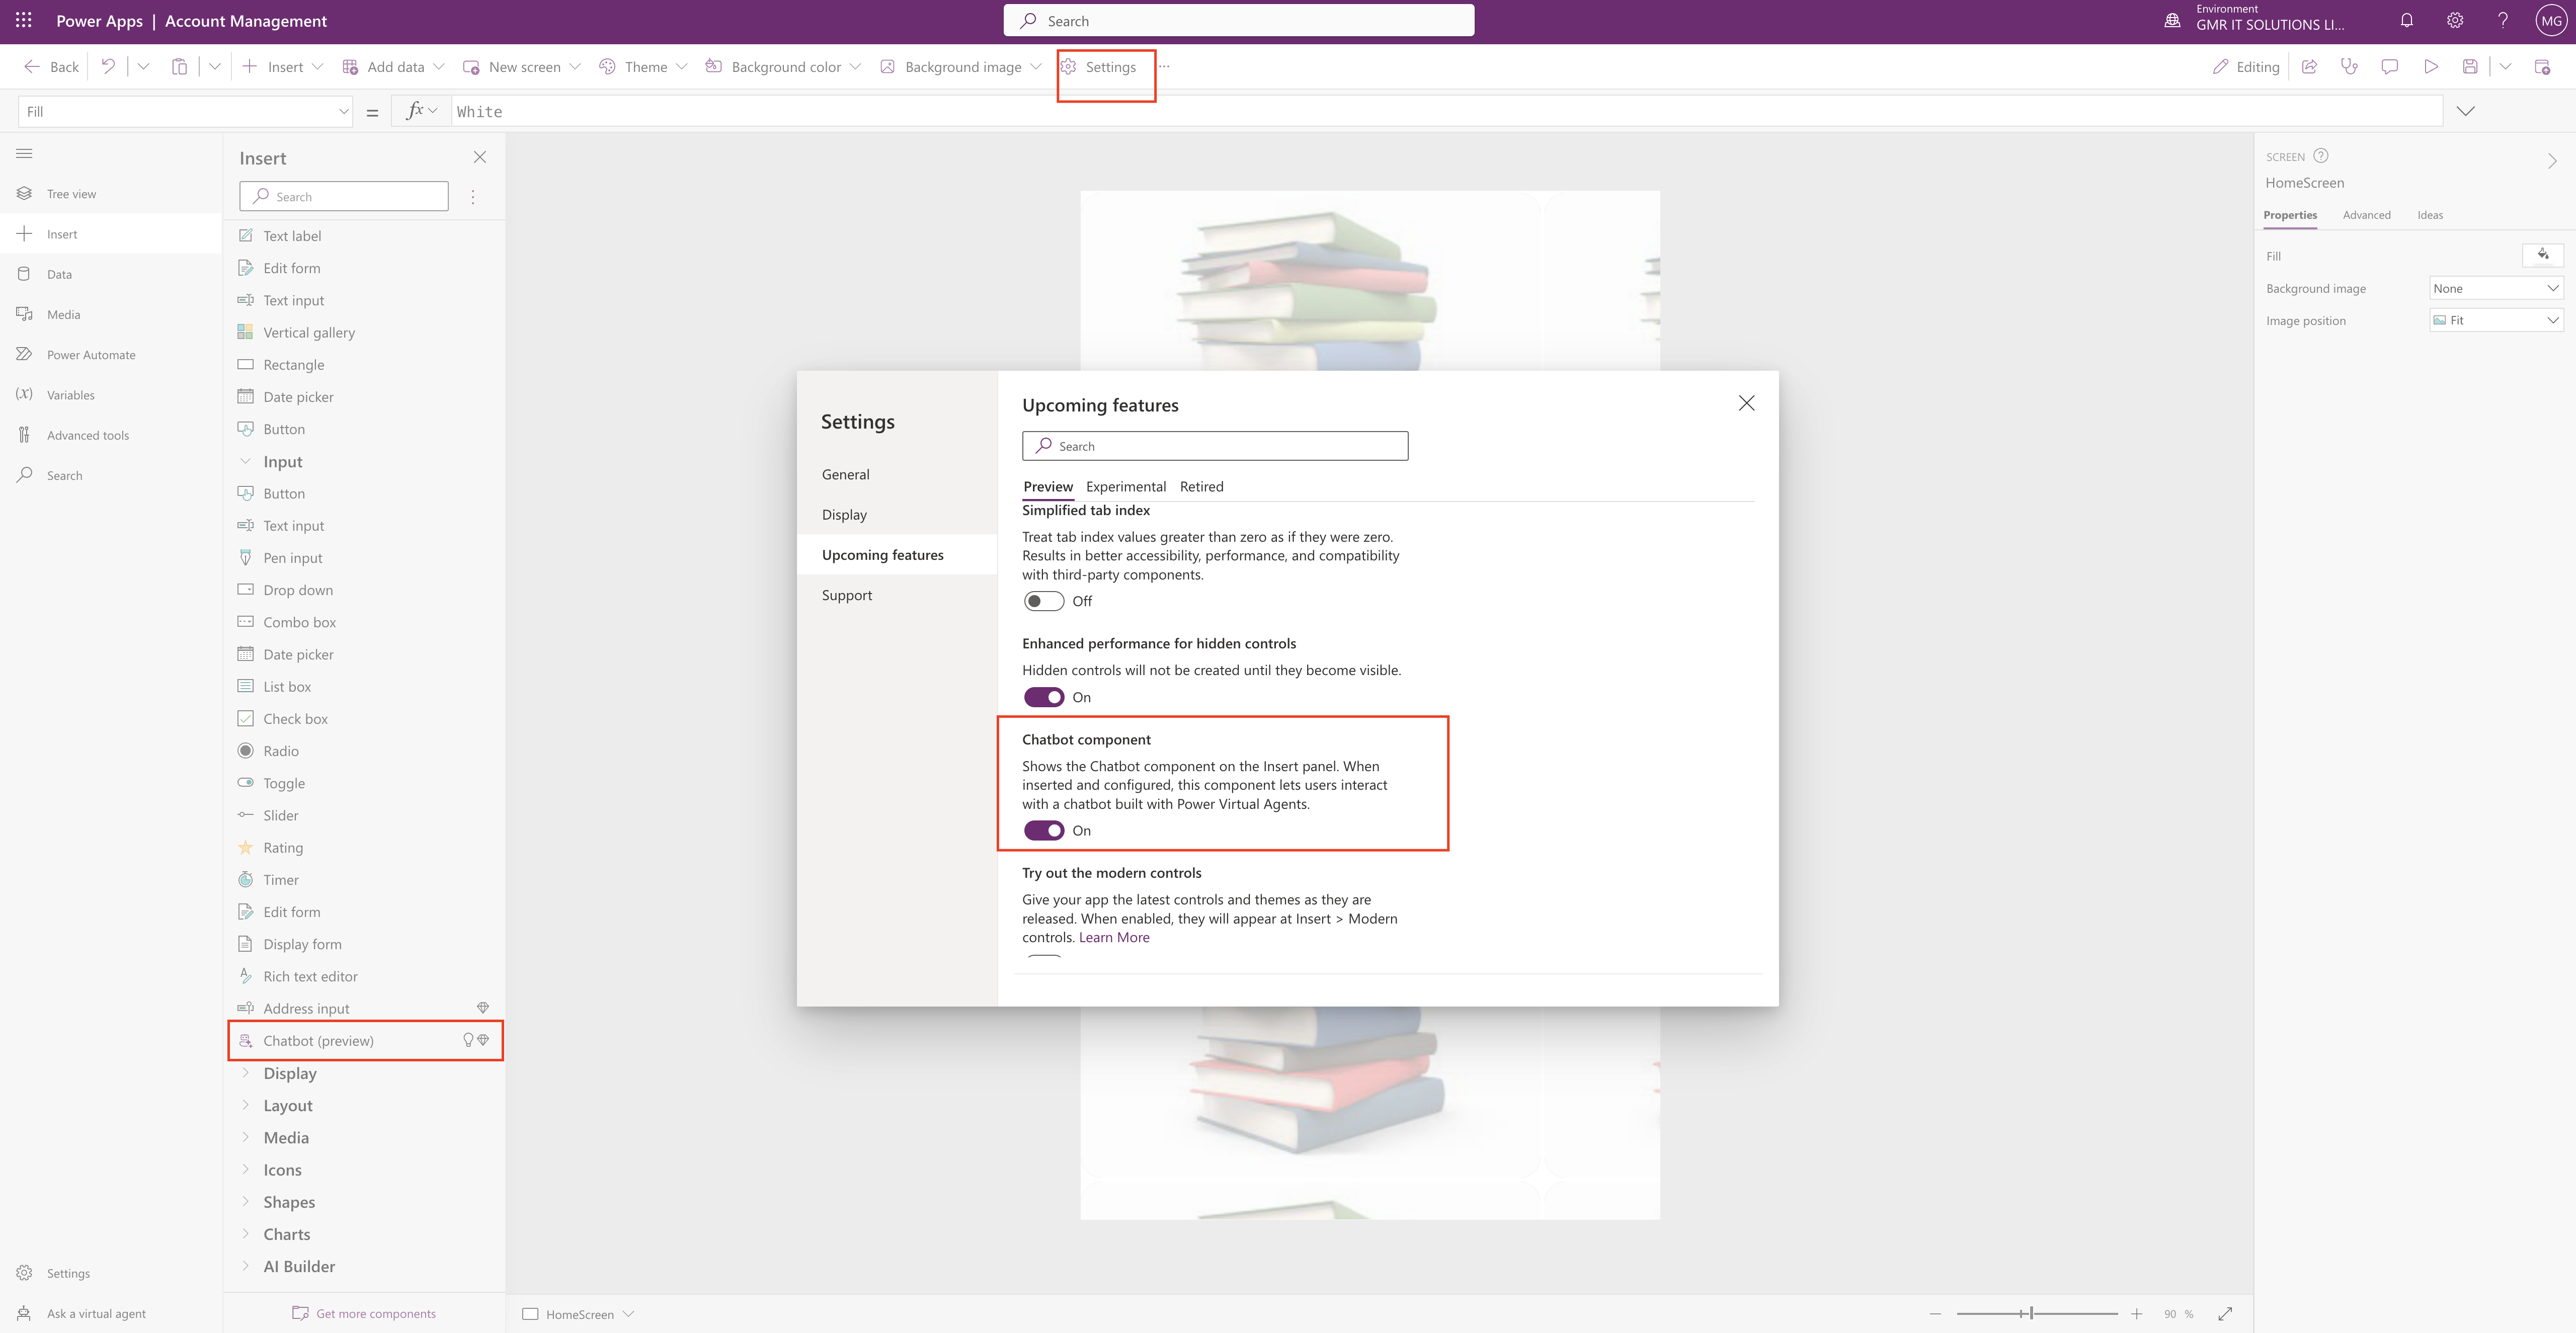
As soon as chatbot component enabled the chatbot input control appear on the INPUT area on the left hand side of the canvas app.

By adding the Chatbot to your canvas apps and embed a published Power Virtual Agent Chatbot to assist your end users with a variety of requests. Providing simple answers to common questions to resolving issues requiring complex conversations.

We can use an AI or AI boosted conversations bot:

1. With AI chatbots, you can create an extended tree of answers to support your users,

2. With AI boosted conversations Power Virtual Agents bot your bot can have higher ability to respond to the user by using a number of prompts or generating a response based on provided “fallback” website which you set. The fallback website can include internal documents or publicly available websites.

You can design the Chatbot by giving it a name, change the size of the control window and position it anywhere on the screen.
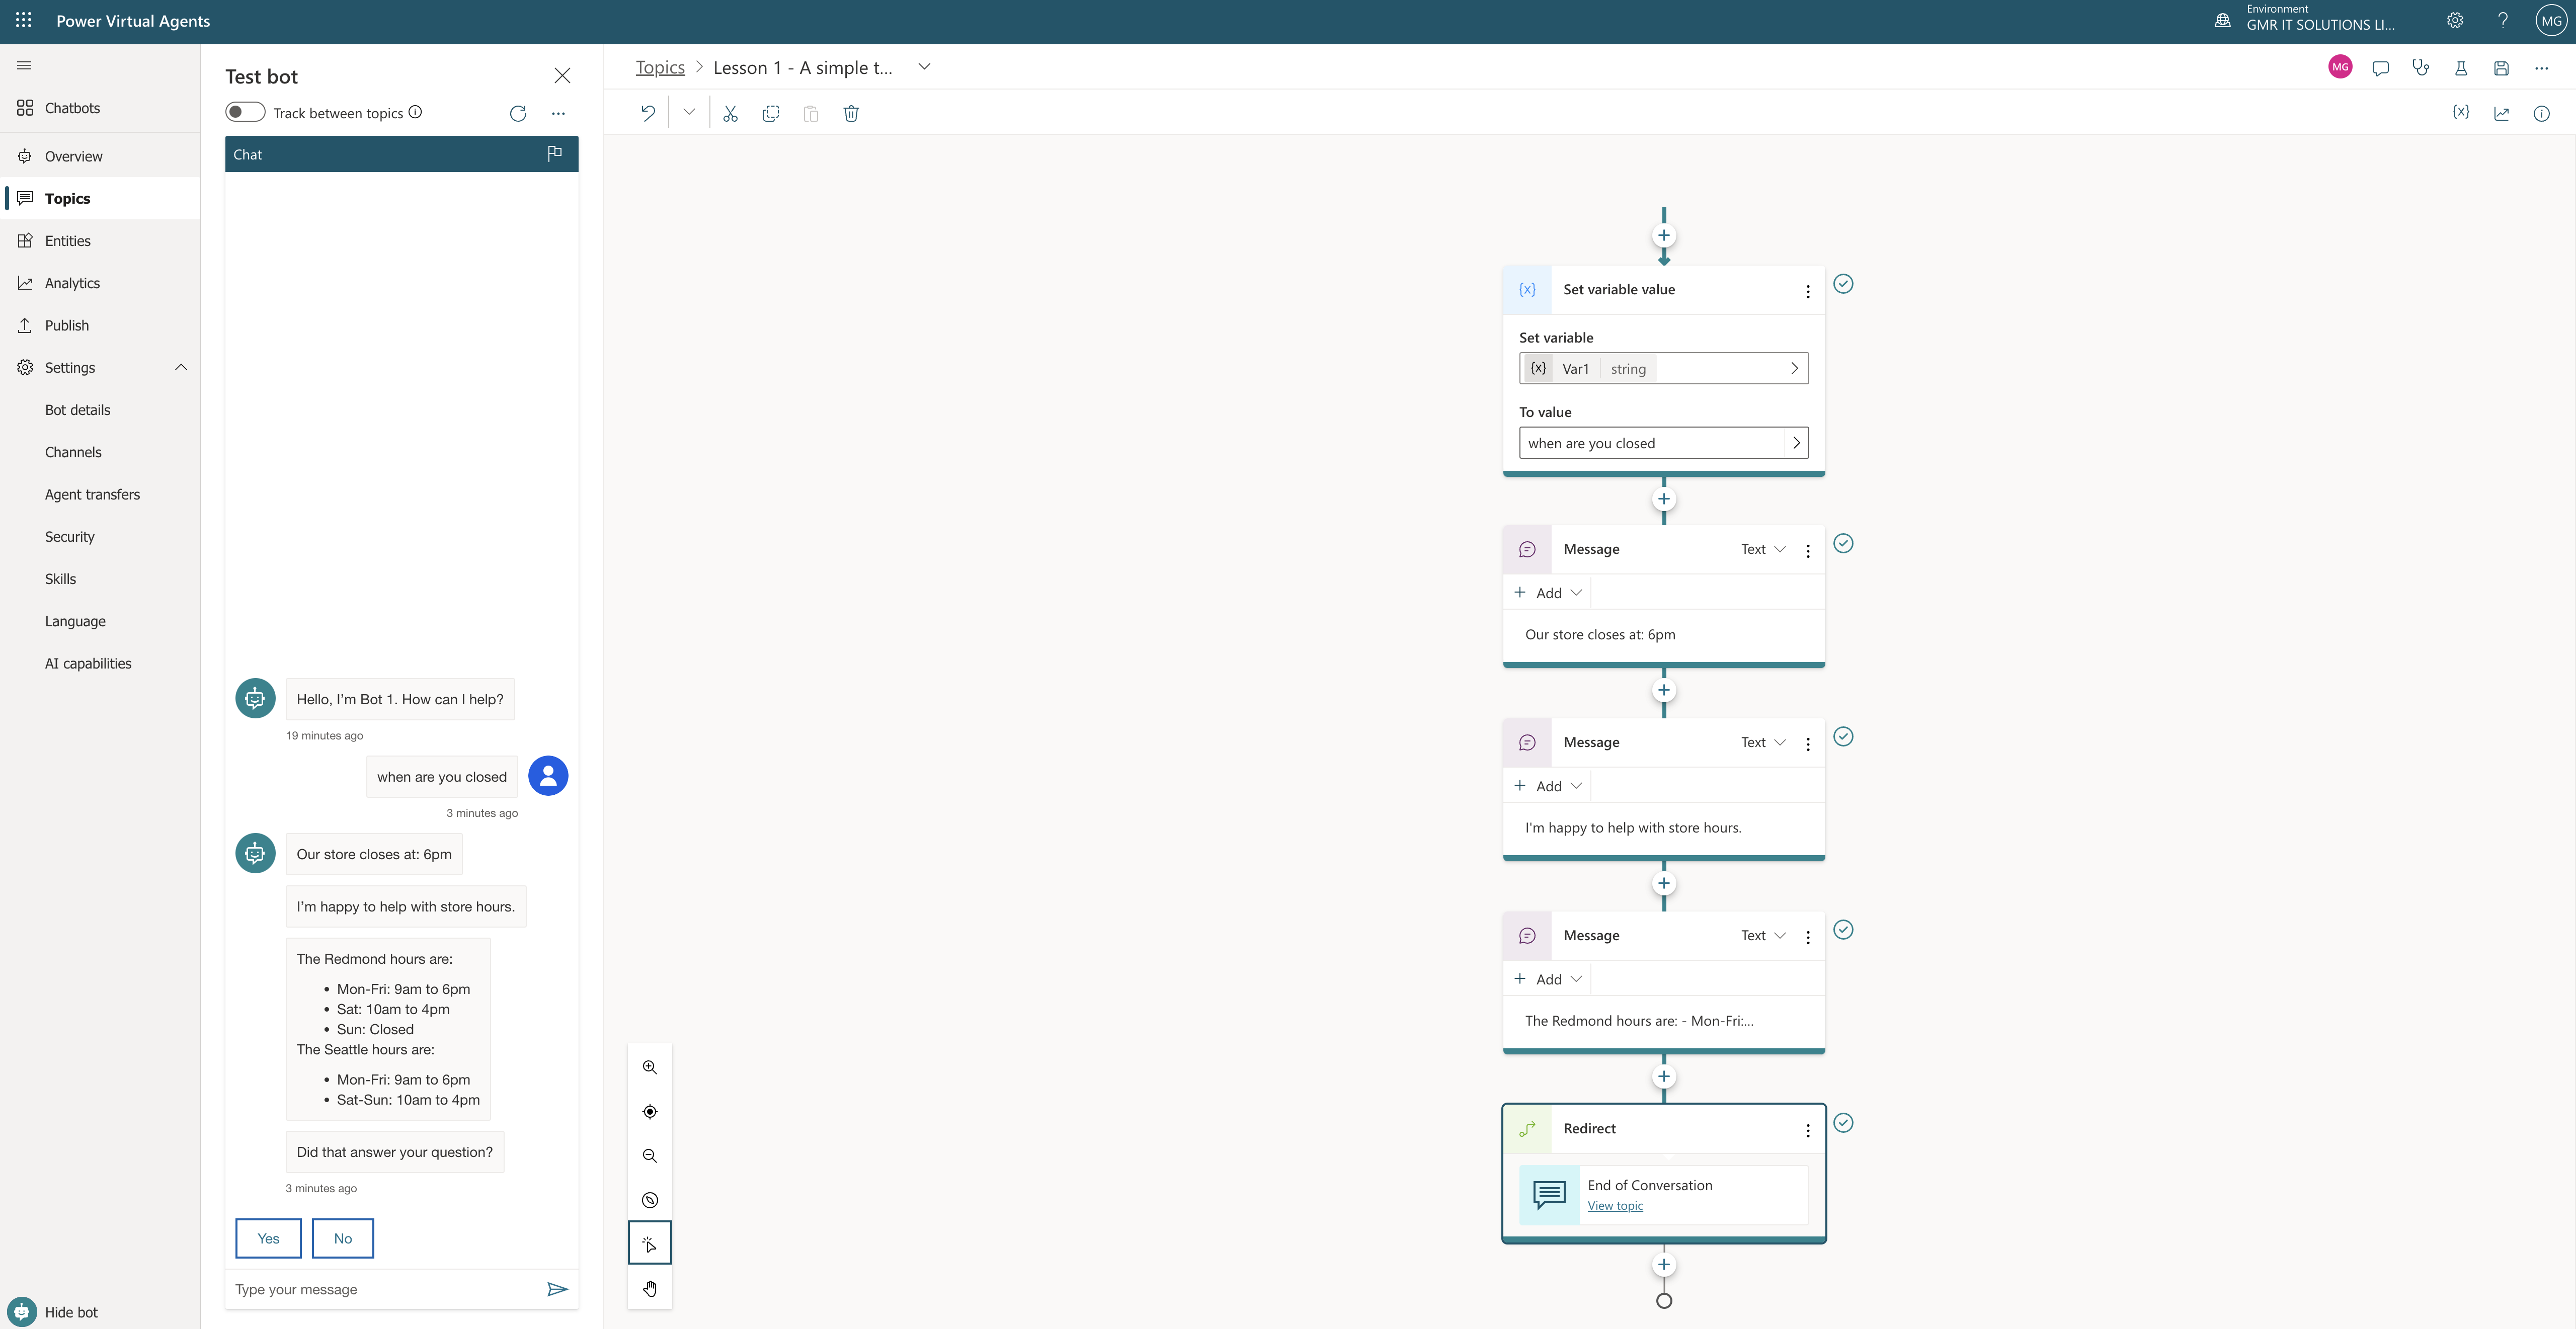
Note: This feature is still in preview and it is powered by Azure OpenAI Service

Prerequisties:

AI Copilot Overview

To add chatbot control, need to create and publish a bot on Power Virtual Agent web app. you can create any bot such as a AI bot or a new generative AI enriched PVA.

Bot Schema Name:

To add the Chatbot, you need to schema name of the bot to add to the chatbot control properties in Power apps studio.
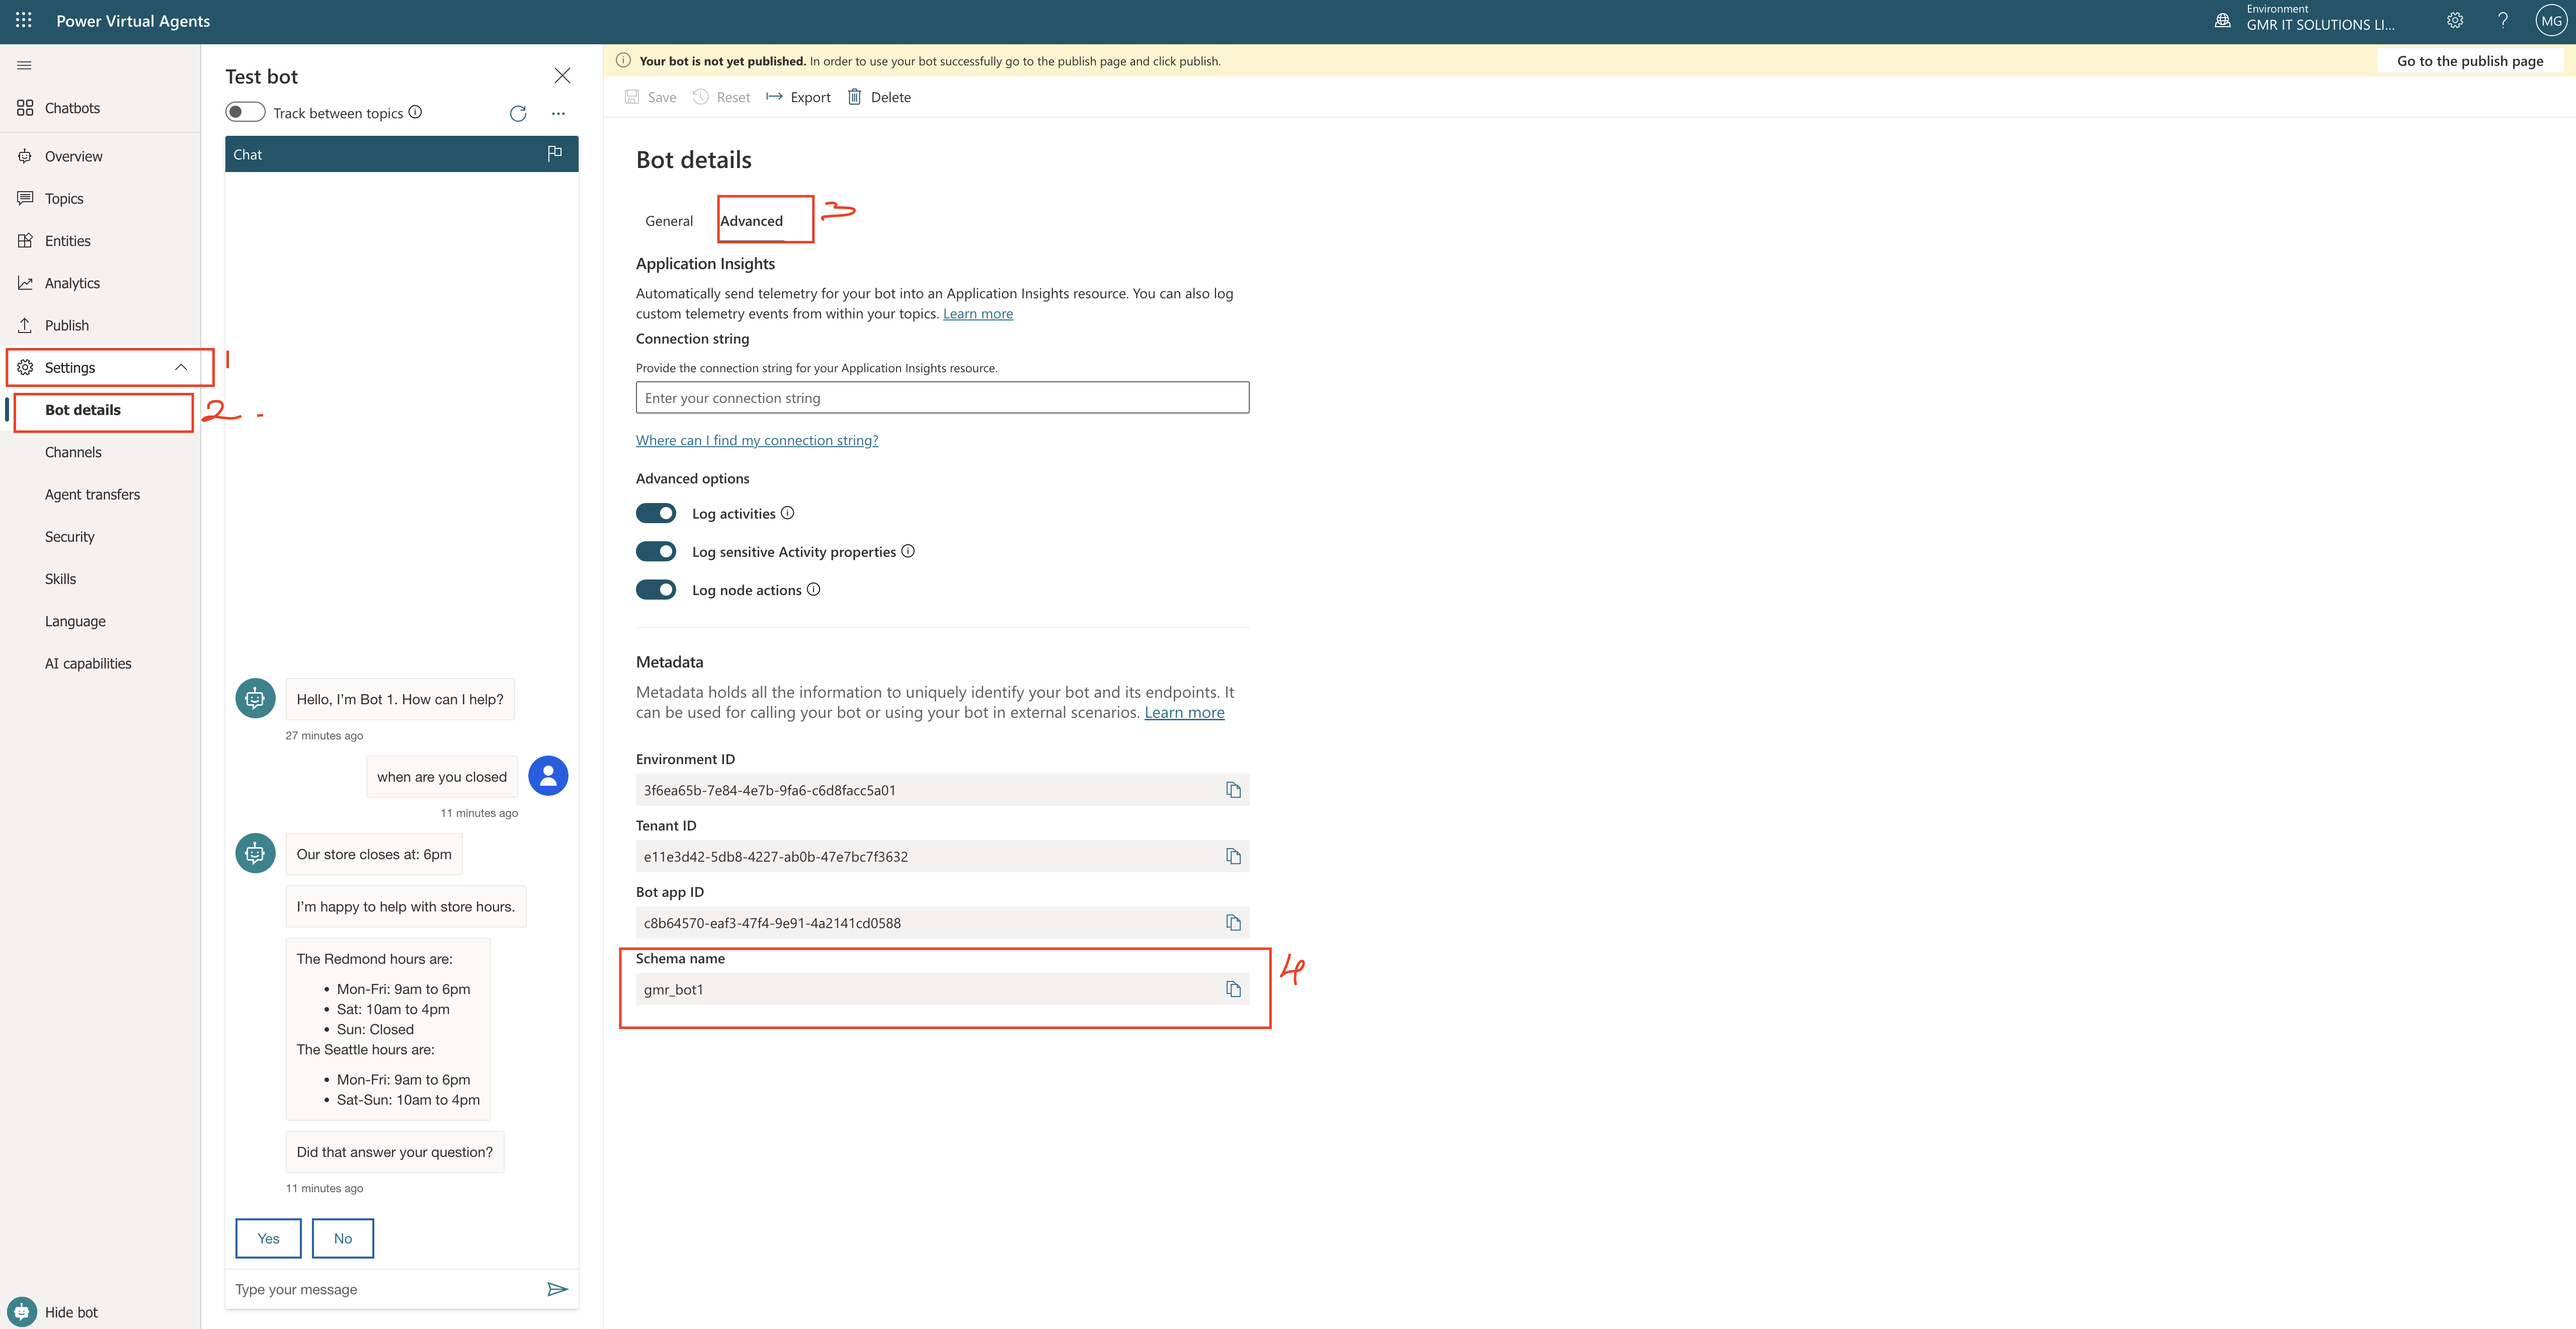
1. Login to Power Virtual Agent.
2. Go to settings
3. Bot details
4. Advanced : Copy Schema Name: gmr_bot1

Turn on the chatbot control:

Open the canvas app and click on editing.

1. Setting > Upcoming Features

2. Preview tab set the toggle for Chatbot component to On.

Add the Chatbot Control to the Bot.

Canvas app open and editing mode.

1. Select the Insert

2. Expand input menu an then select the Chatbot(Preview), drag and drop on your canvas app screen.

3. Enter the schema name of your bot into the control.
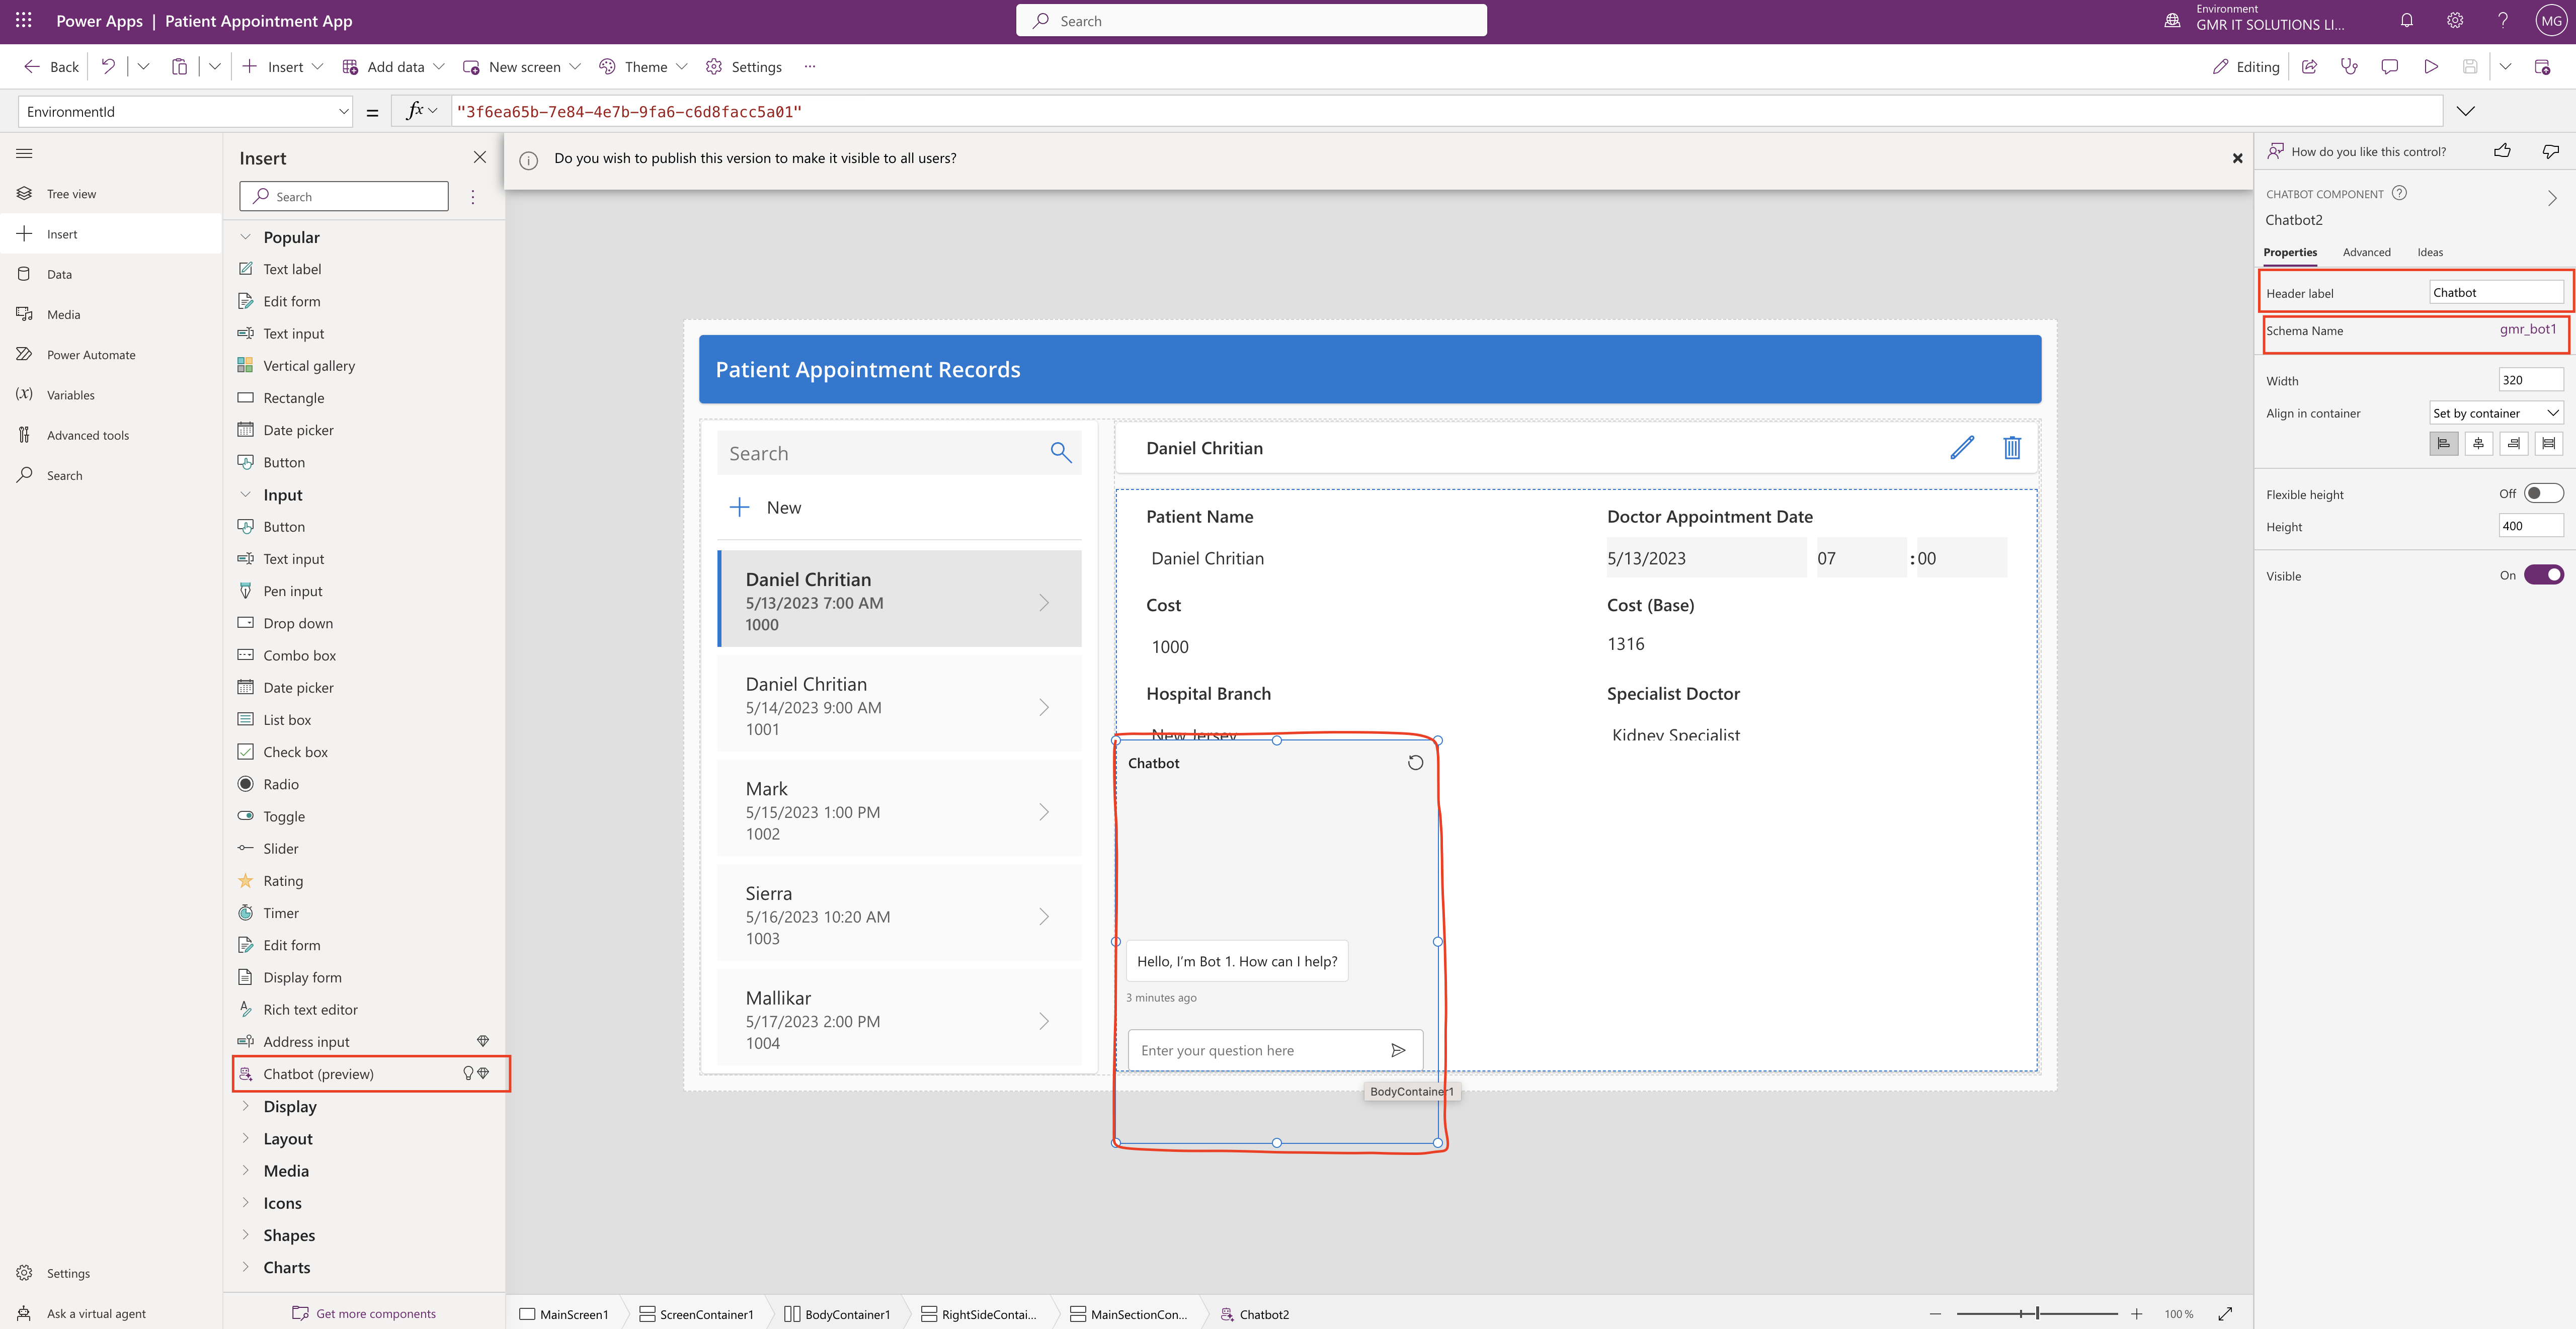
Important Properties:

Schema Name: the schema name must be entered to connect to your published Power Virtual Agent bot to your canvas app.

Header Label: this is the label shown to the app users, if the label is entered it will be defaulted to chatbot.

You can reposition by adjusting and sizes.
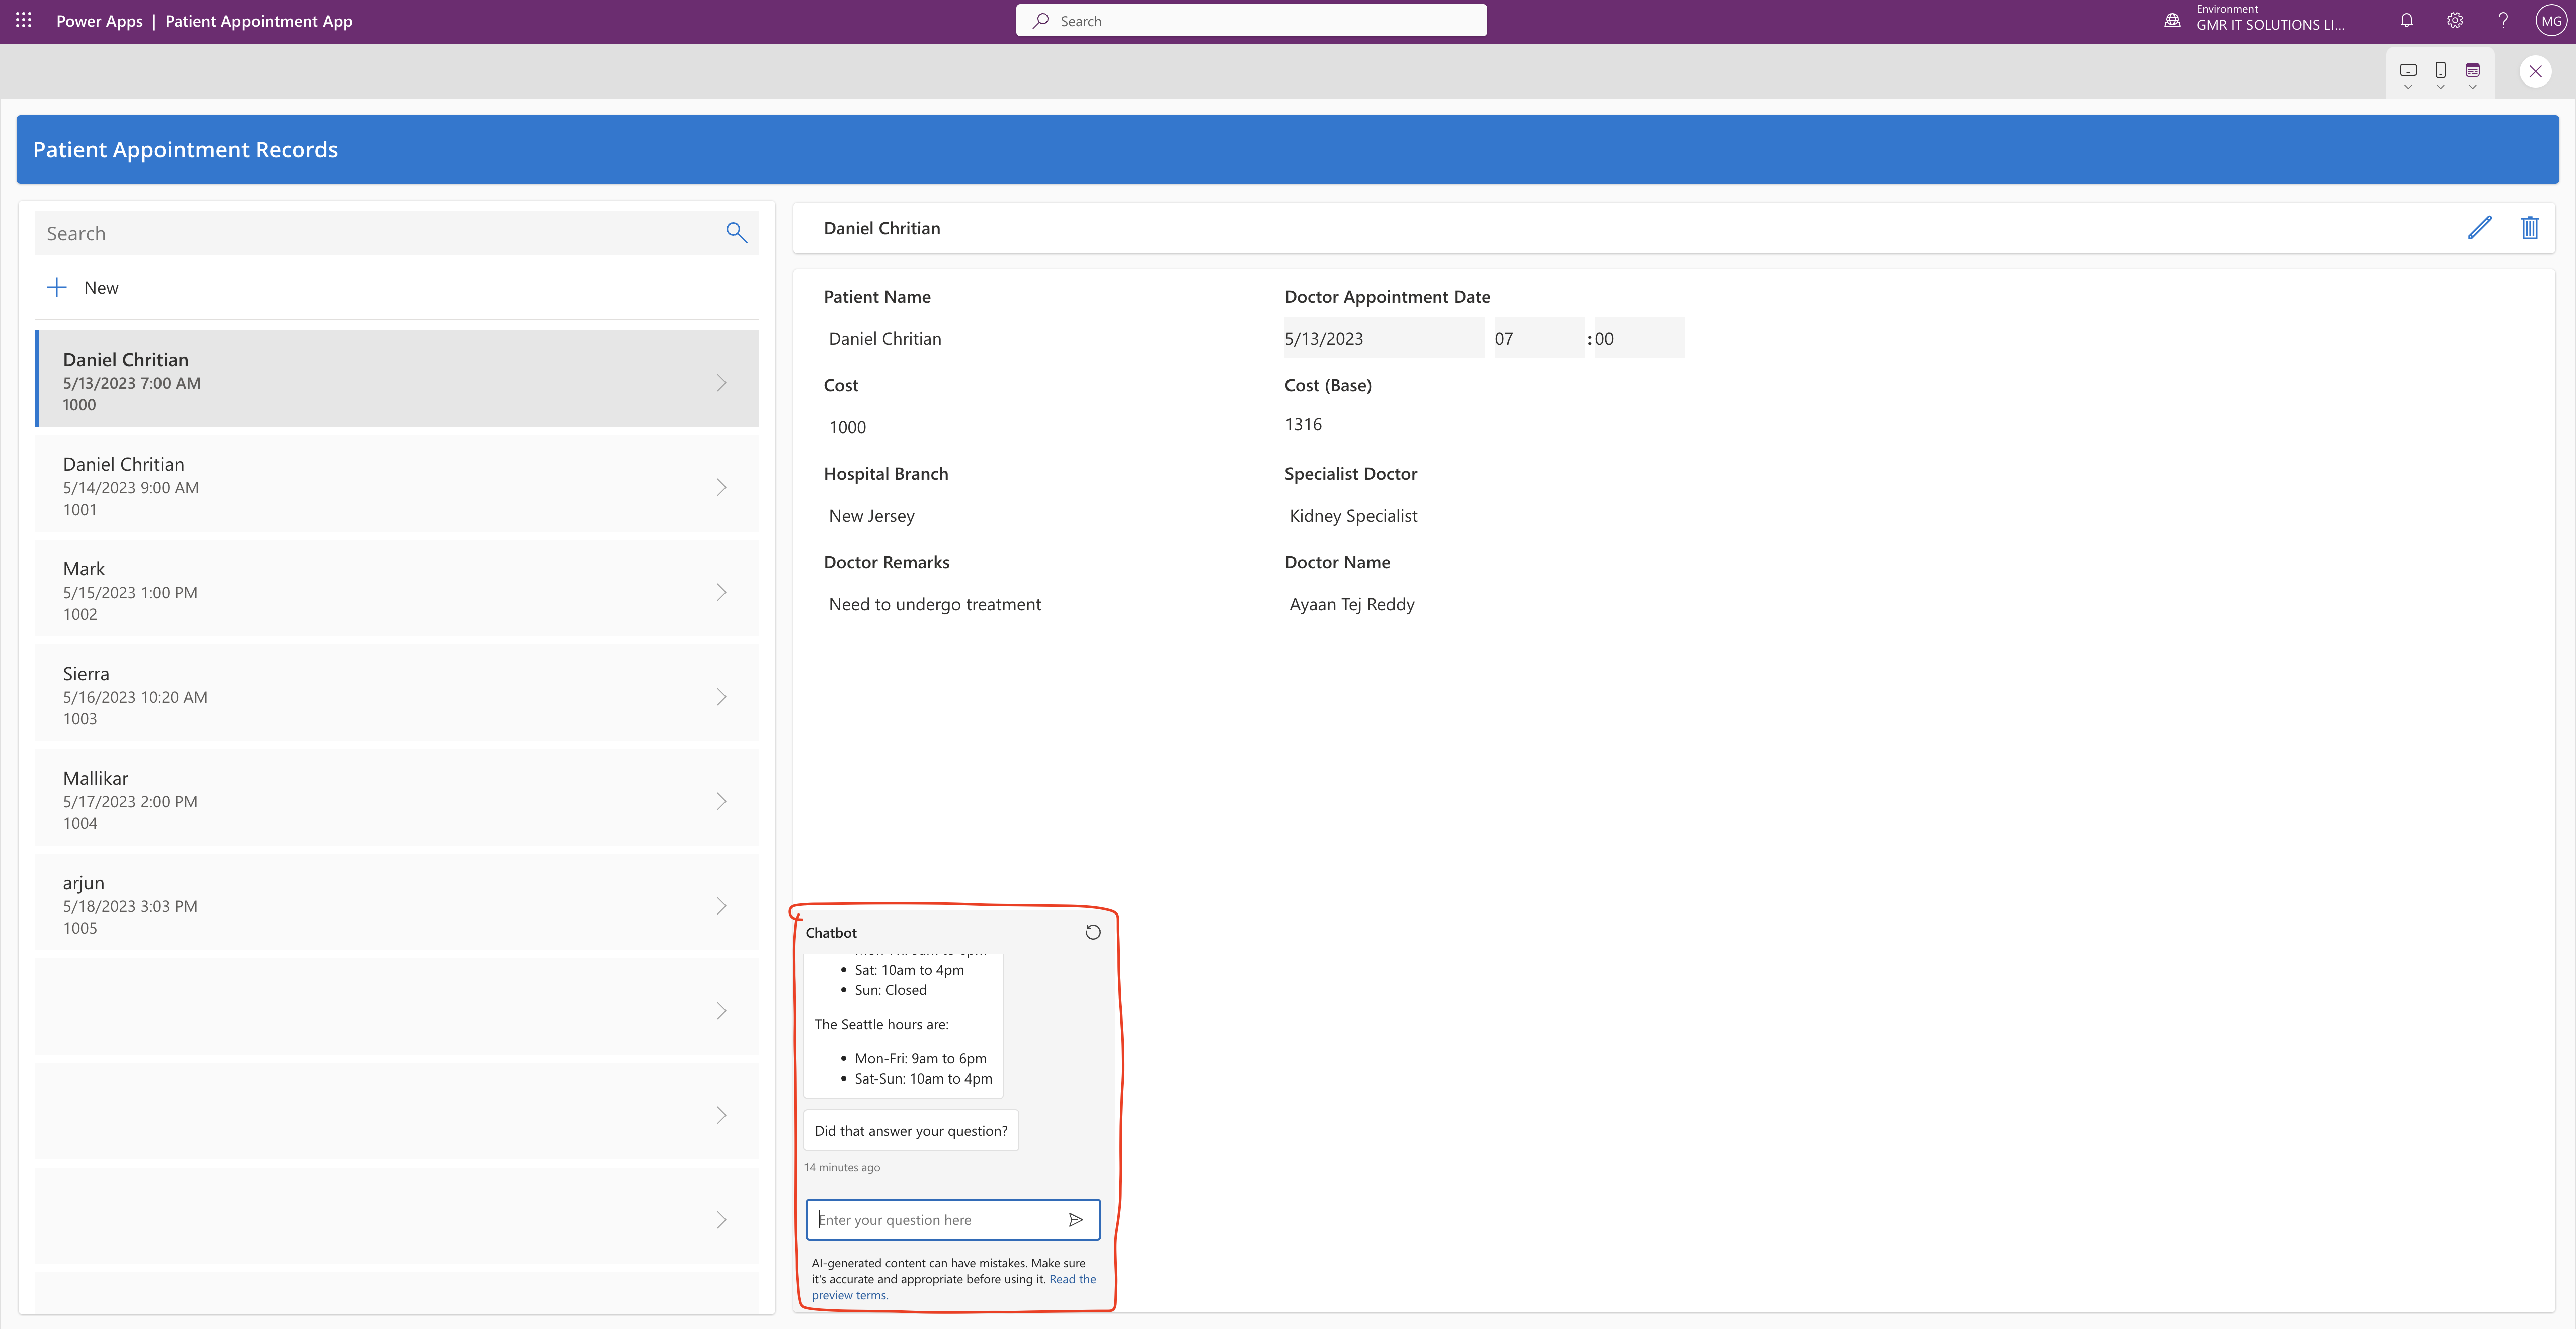
Only limitation is you can embed a bot with no user authentication.

That’s it for today.

I hope this helps
Malla Reddy(@UK365GUY)
#365BlogPostsin365Days
Share this:

Power Apps for Windows desktop

Hello Everyone,

Today i am going to show new feature on Power Apps for Windows.

Lets gets started.

Turn on your windows desktop.

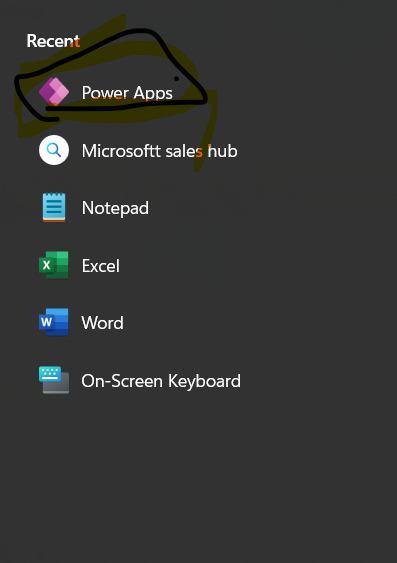
Now you can download the Power Apps from windows appstore as well as Sales Hub.

How do you do that?

Just search for Power Apps and download and then you can pin it to your task bar.

Next time you can access power apps from the task bar directly.

That’s it for today.

I hope this helps.
Malla Reddy(@UK365GUY)
#365BlogPostsin365Days
Share this: