Menu Close

Tag: #dynamics365blogs

Productivity tools settings for Dynamics 365 Sales

Hello Everyone,

Today i am going to show how to set the productivity tools settings on Dynamics 365 Sales from App settings.
Let’s get’s started.

Login into Dynamics 365 Sales.
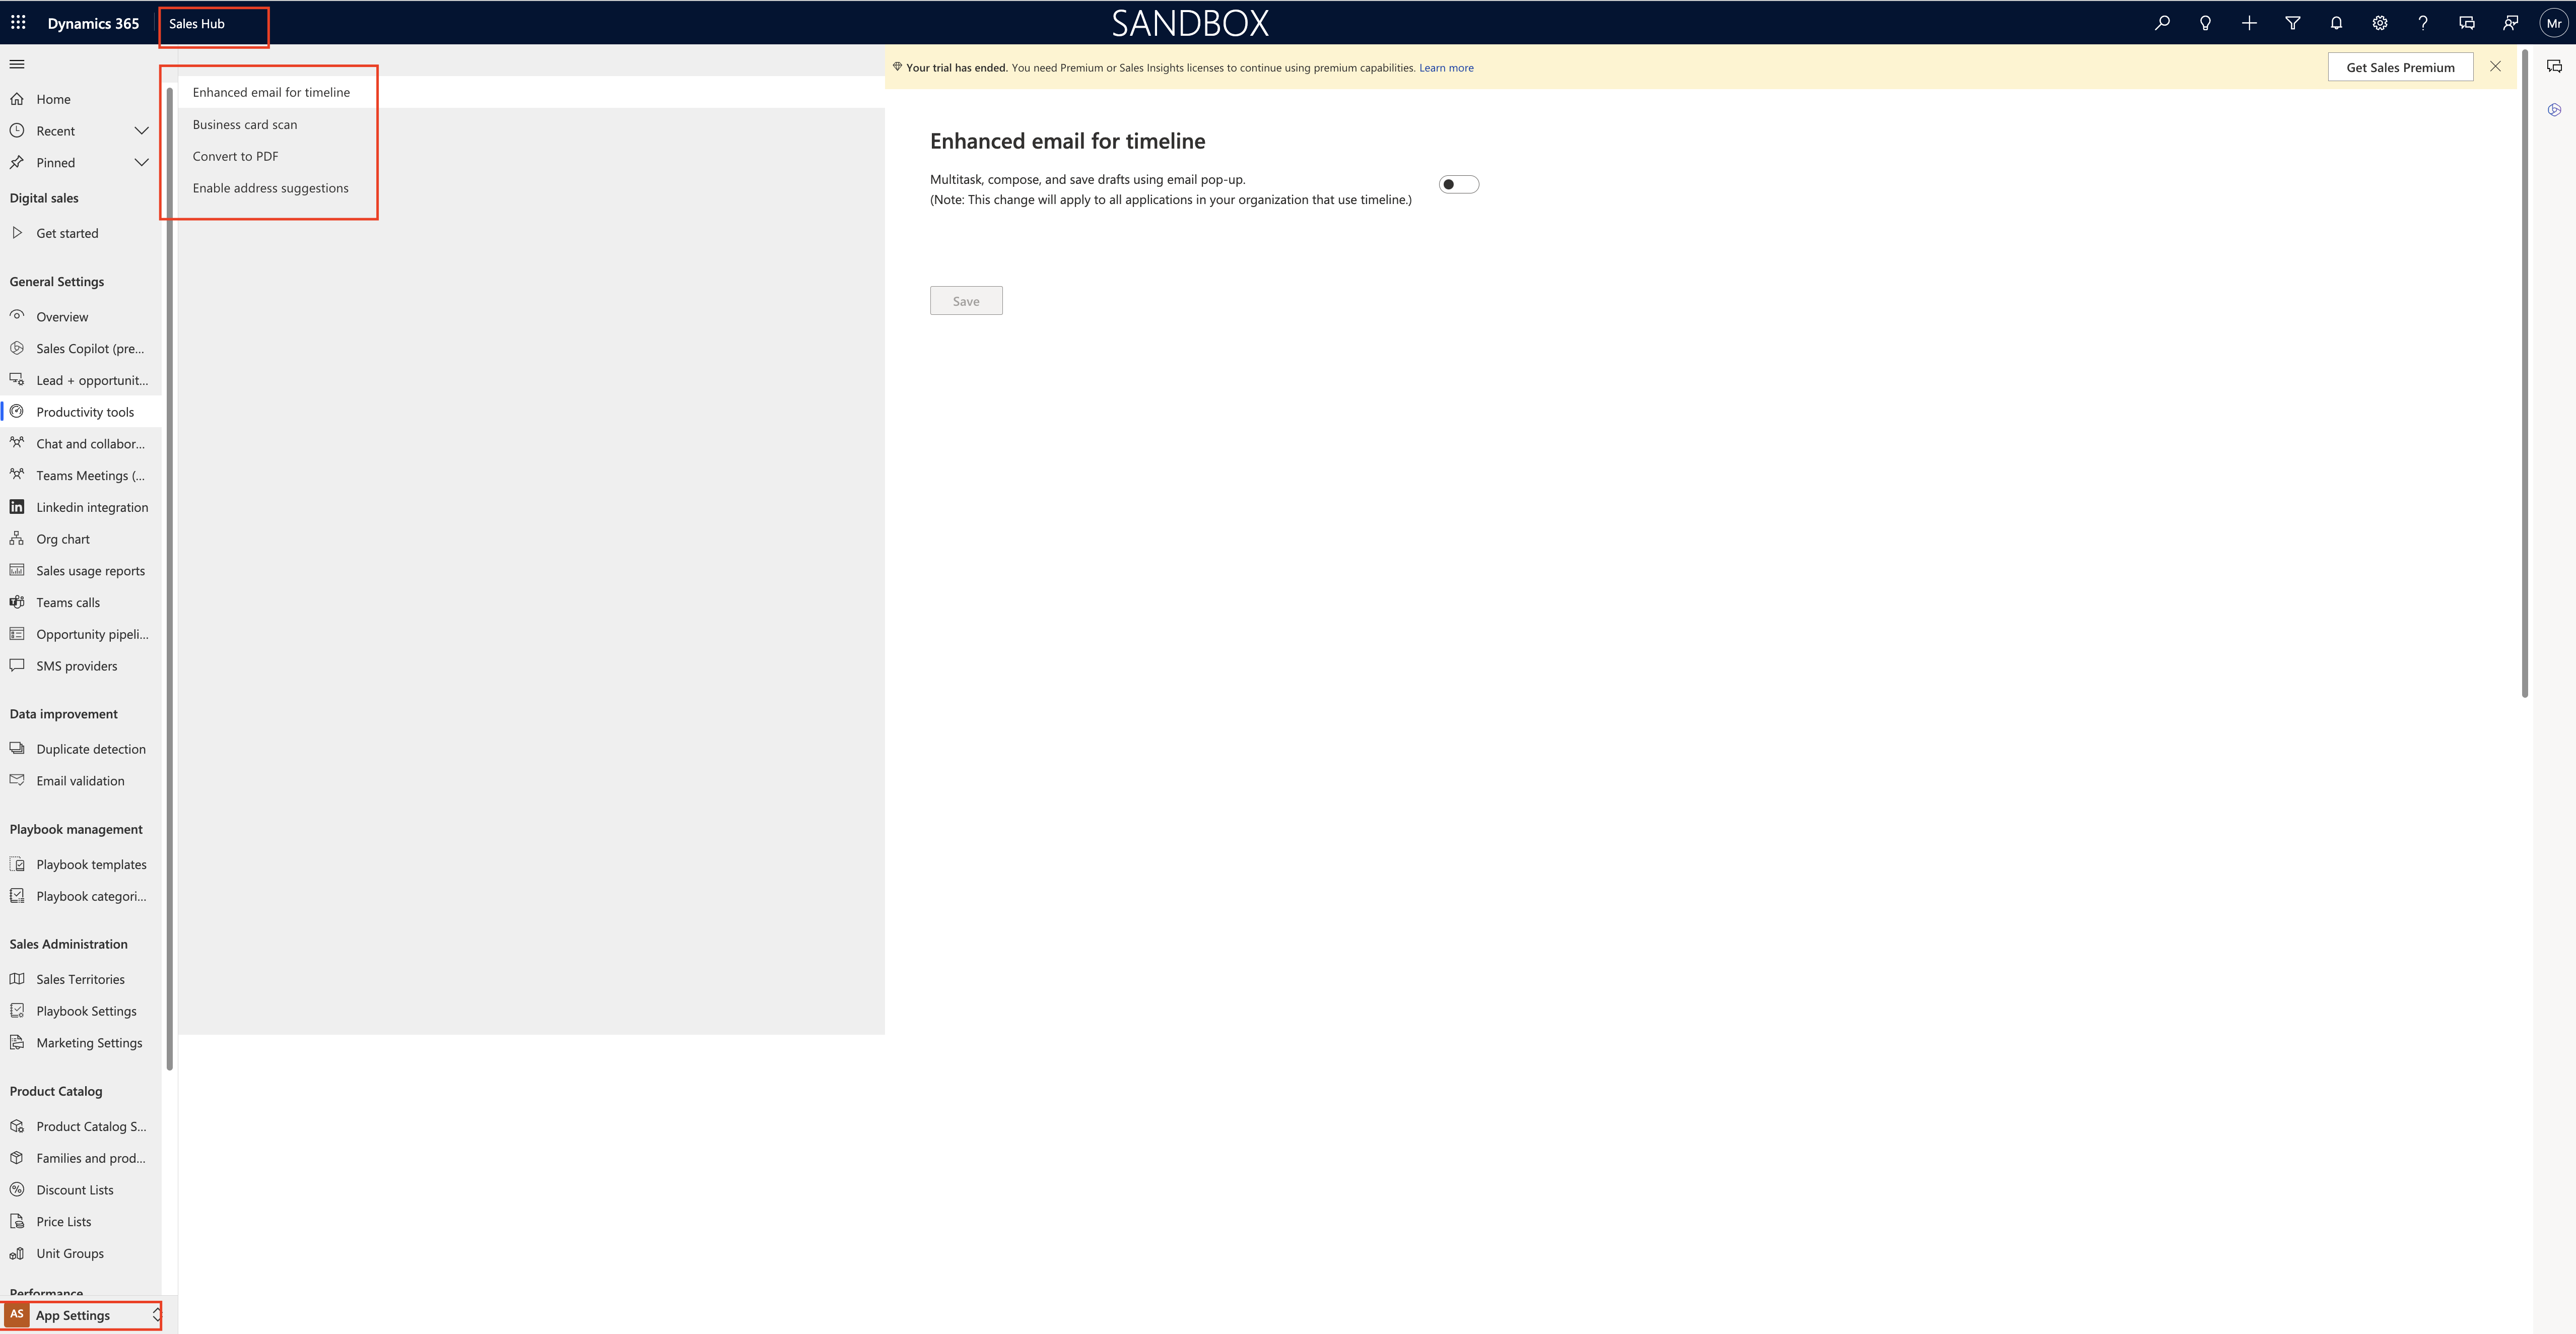
Change the settings from Sales to App Settings.

1. Enhanced email for timeline:

Toggle to ON and SAVE

It will allow Multitask, compose, and save drafts using email pop -up.
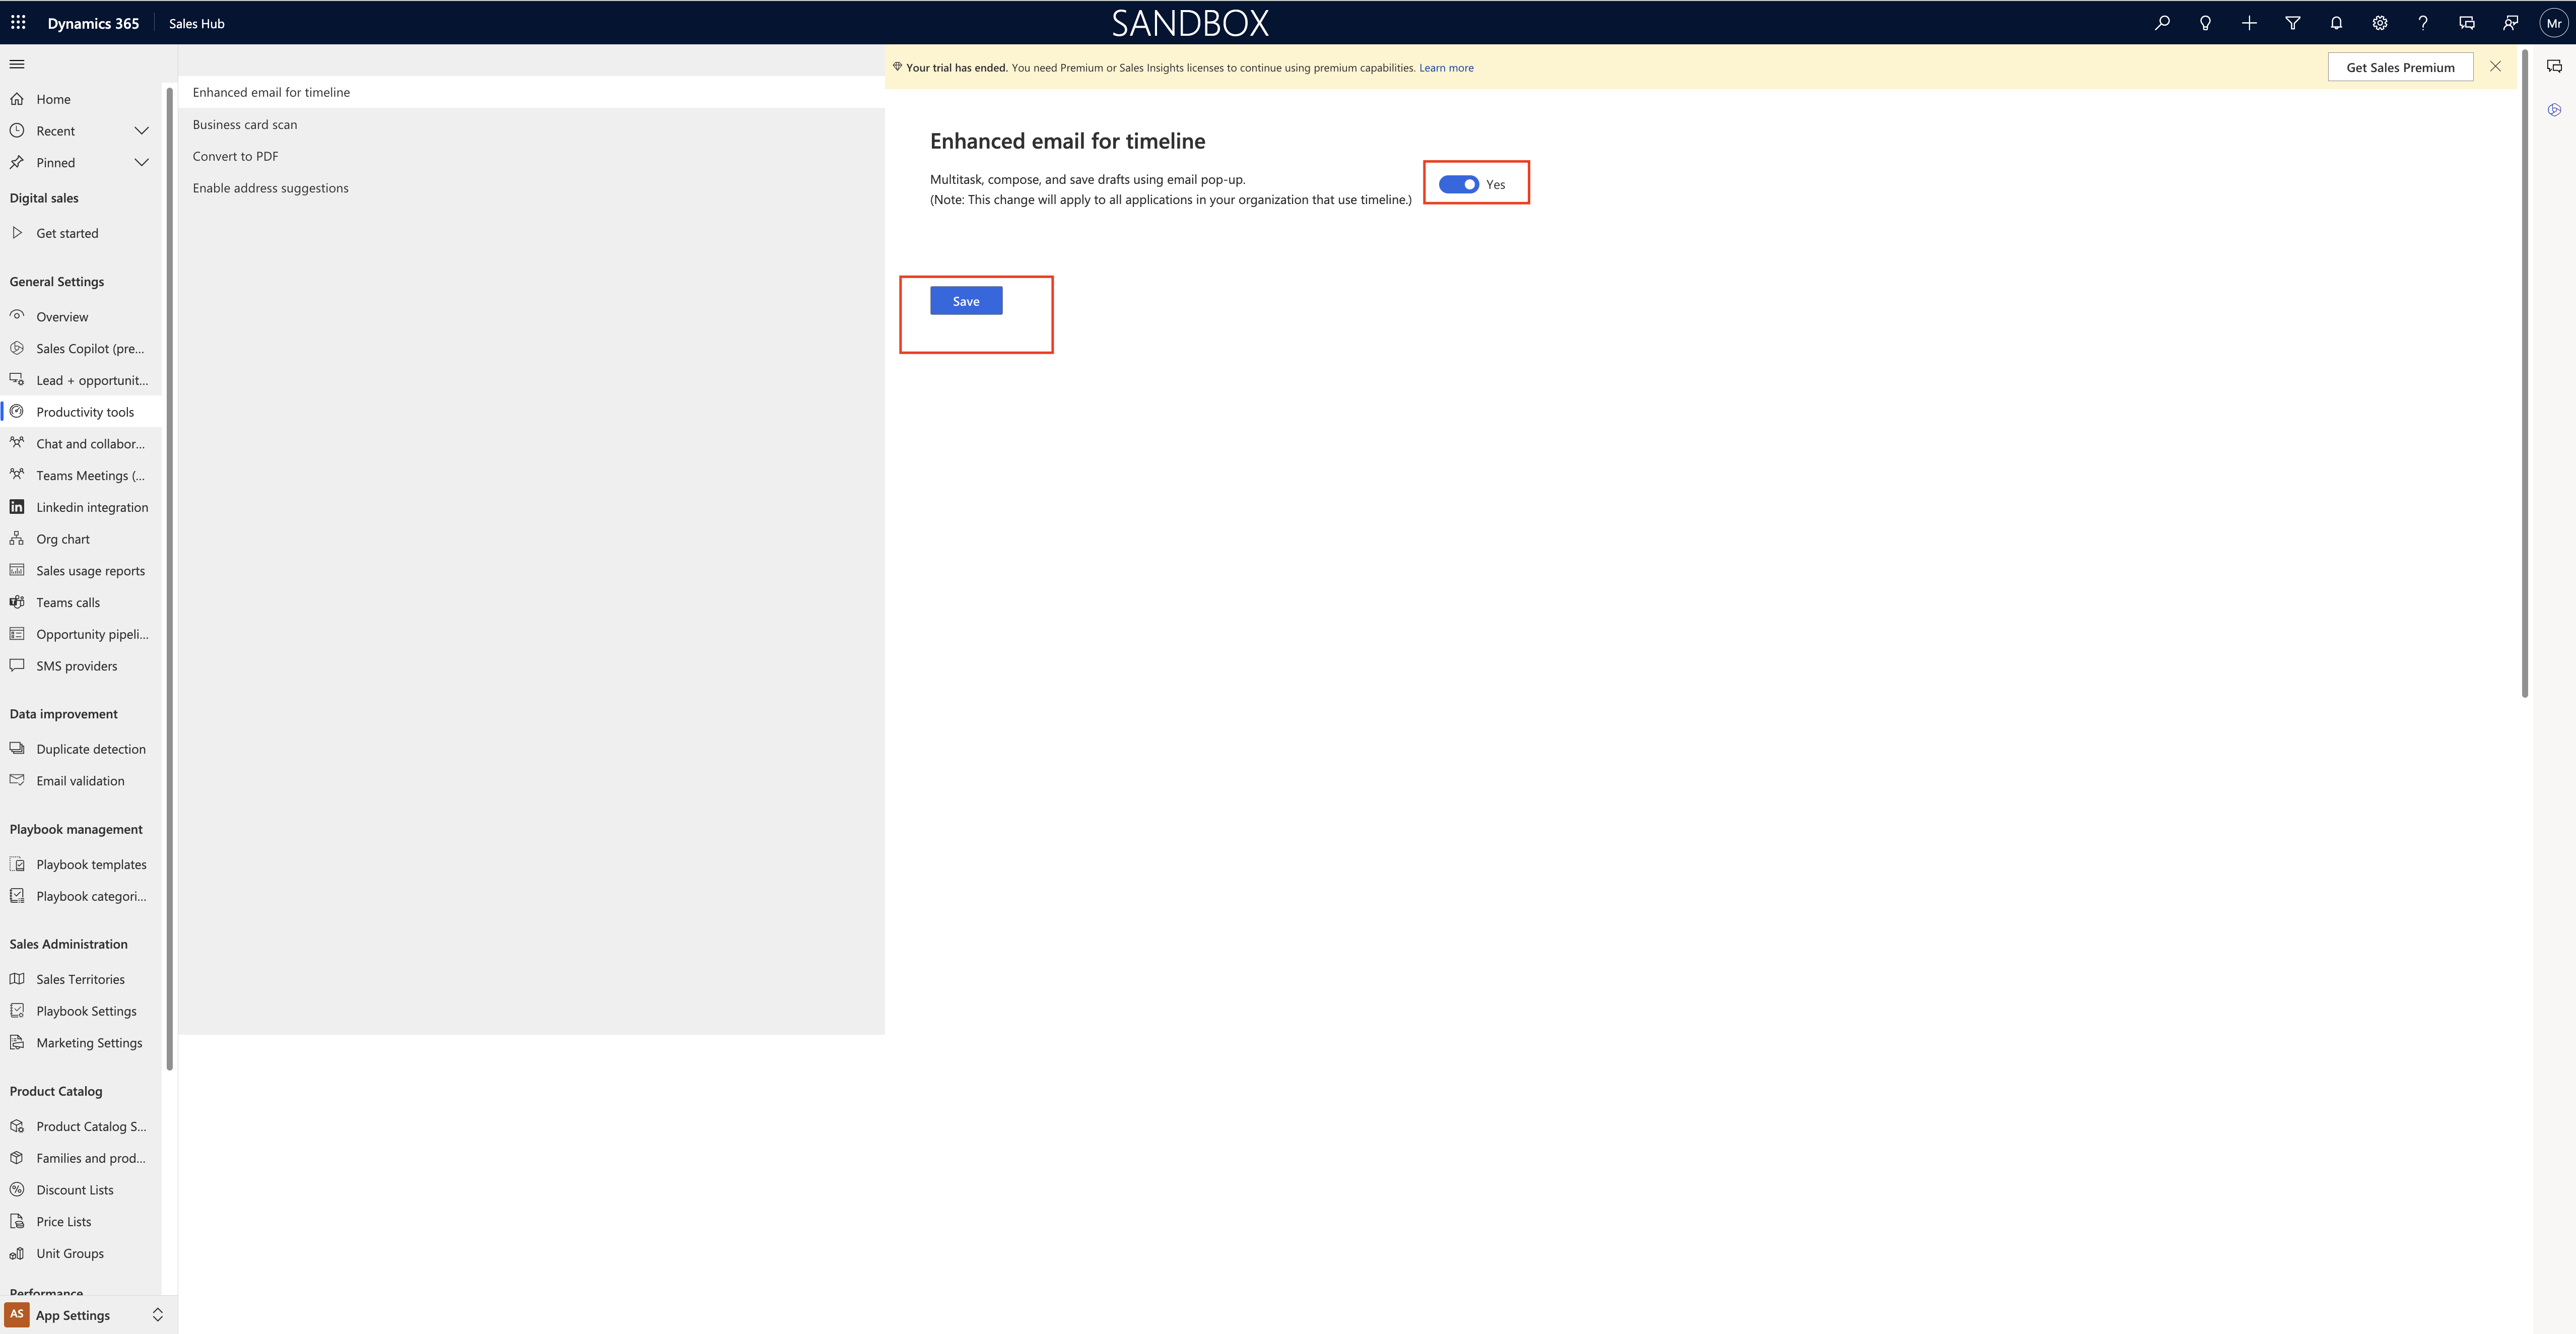
Note: This change will apply to all applications in your organization that use timeline.

2. Business card scan:

Toggle to YES and SAVE.
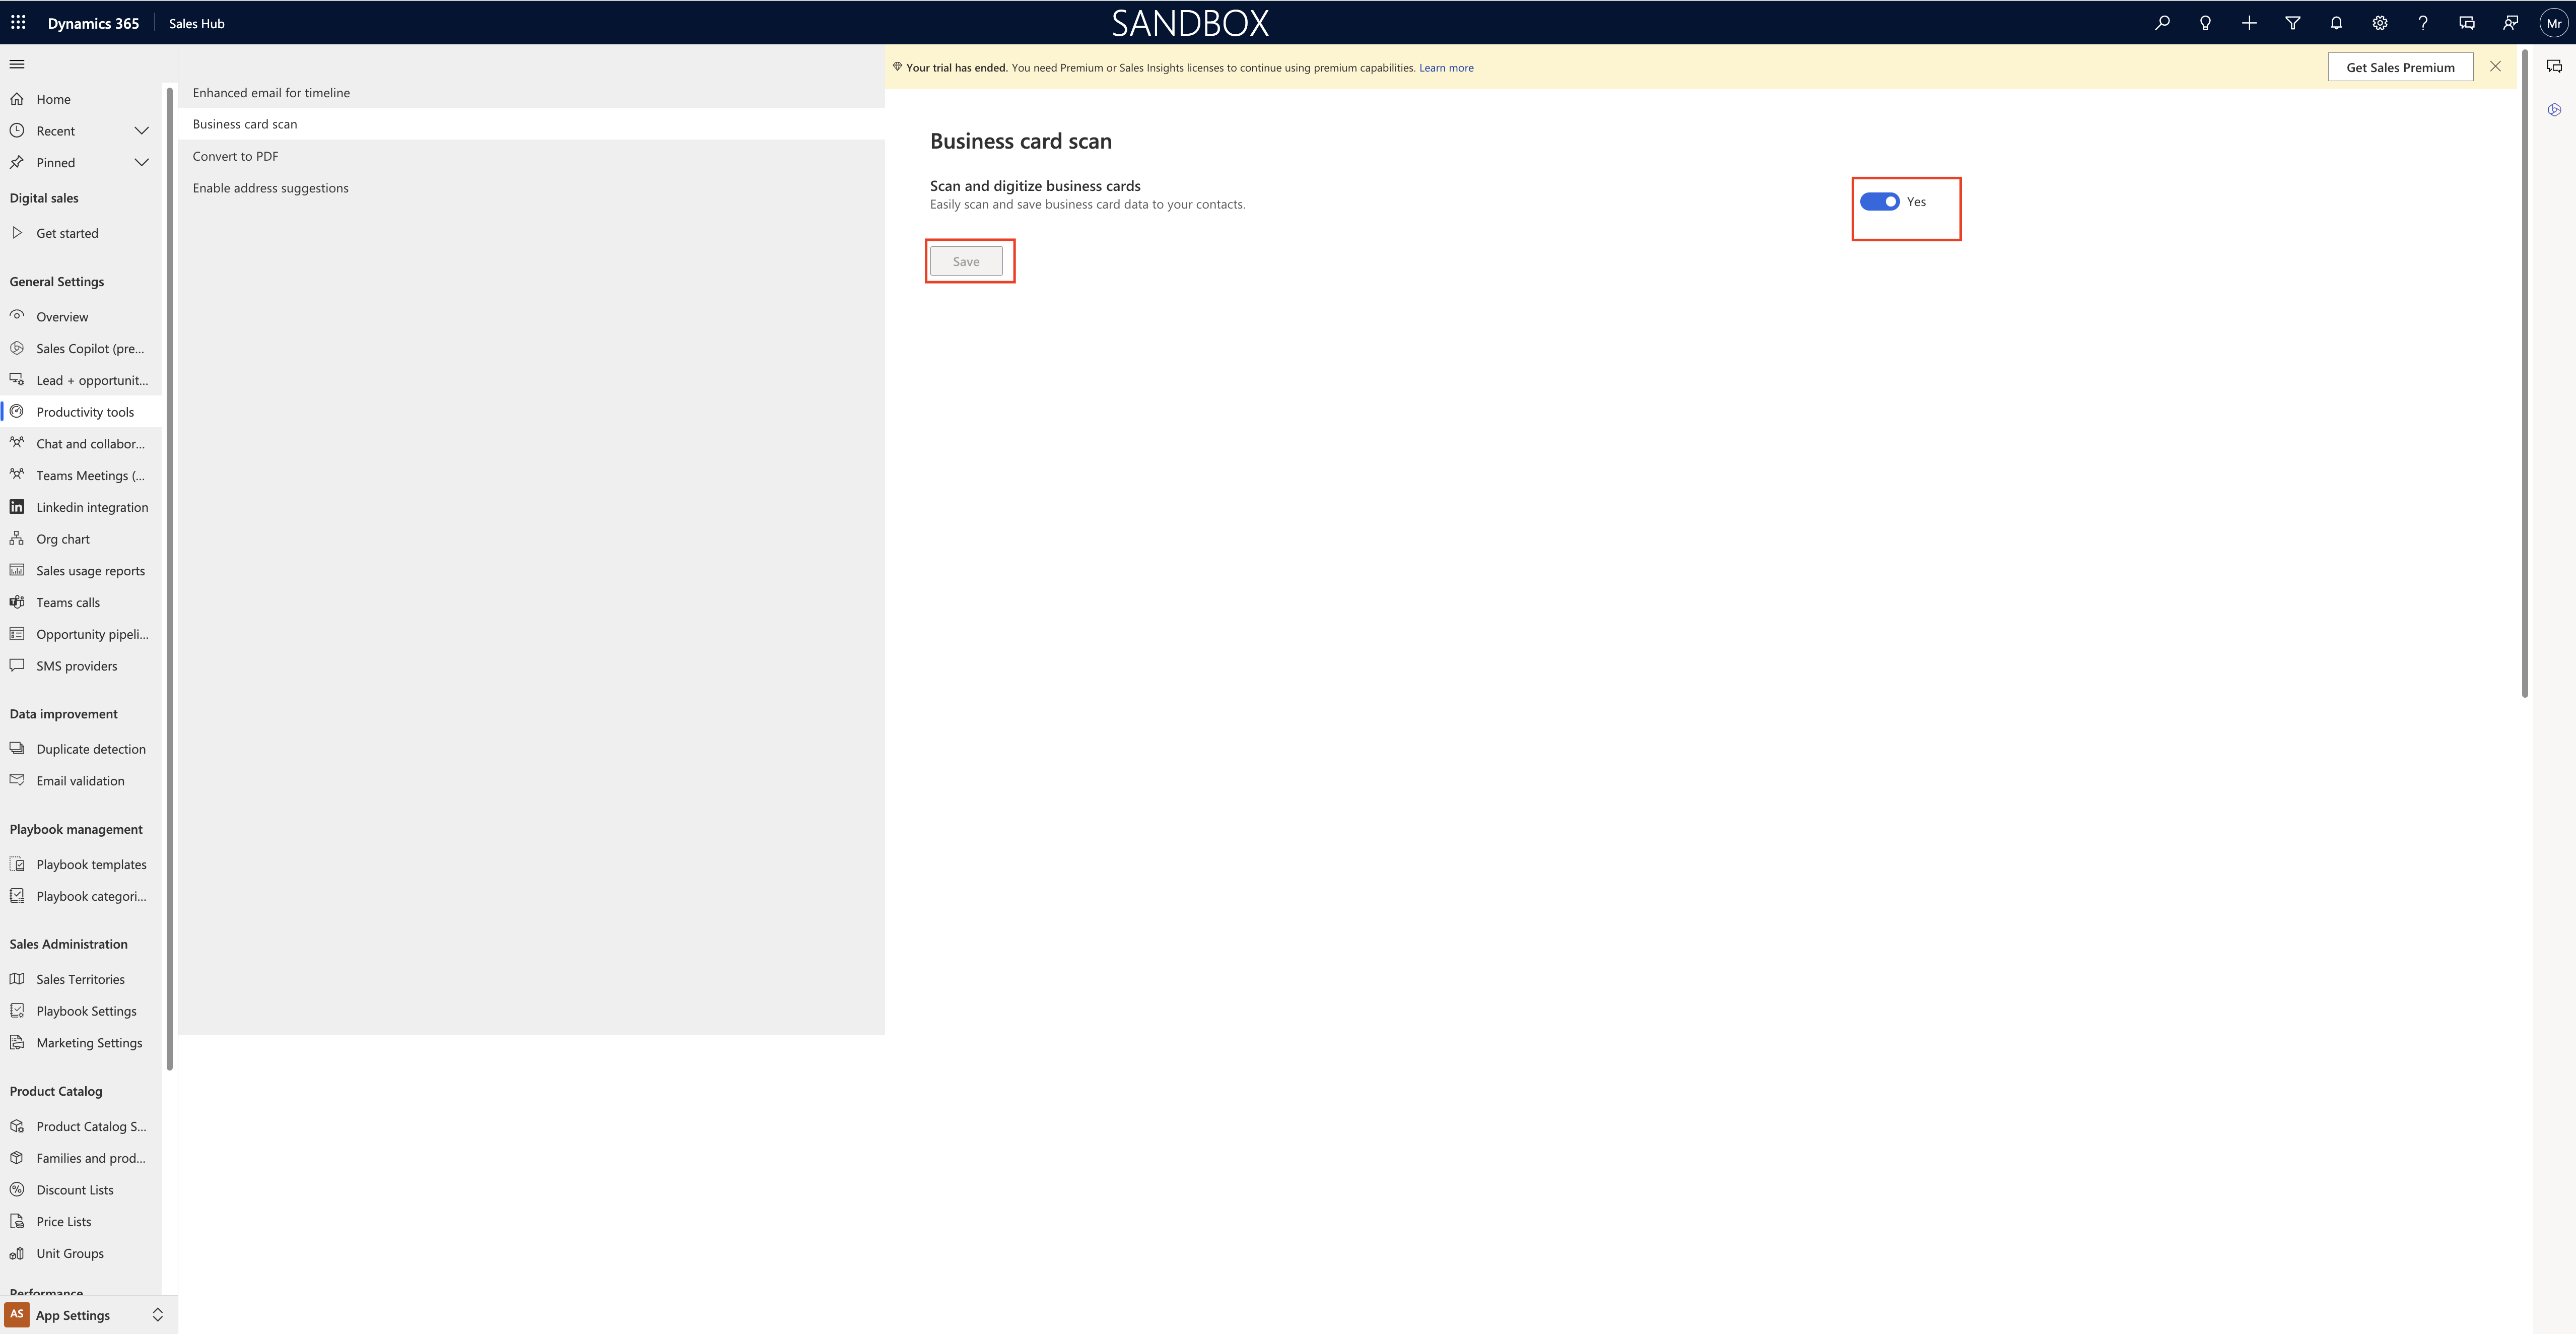
Easily scan and save business card data to your contacts.

3.Convert to PDF:

Easily export record and form data into non-editable PDF files for convenient sharing, printing, or viewing outside Dynamics 365 Sales. Set which record types may be converted.
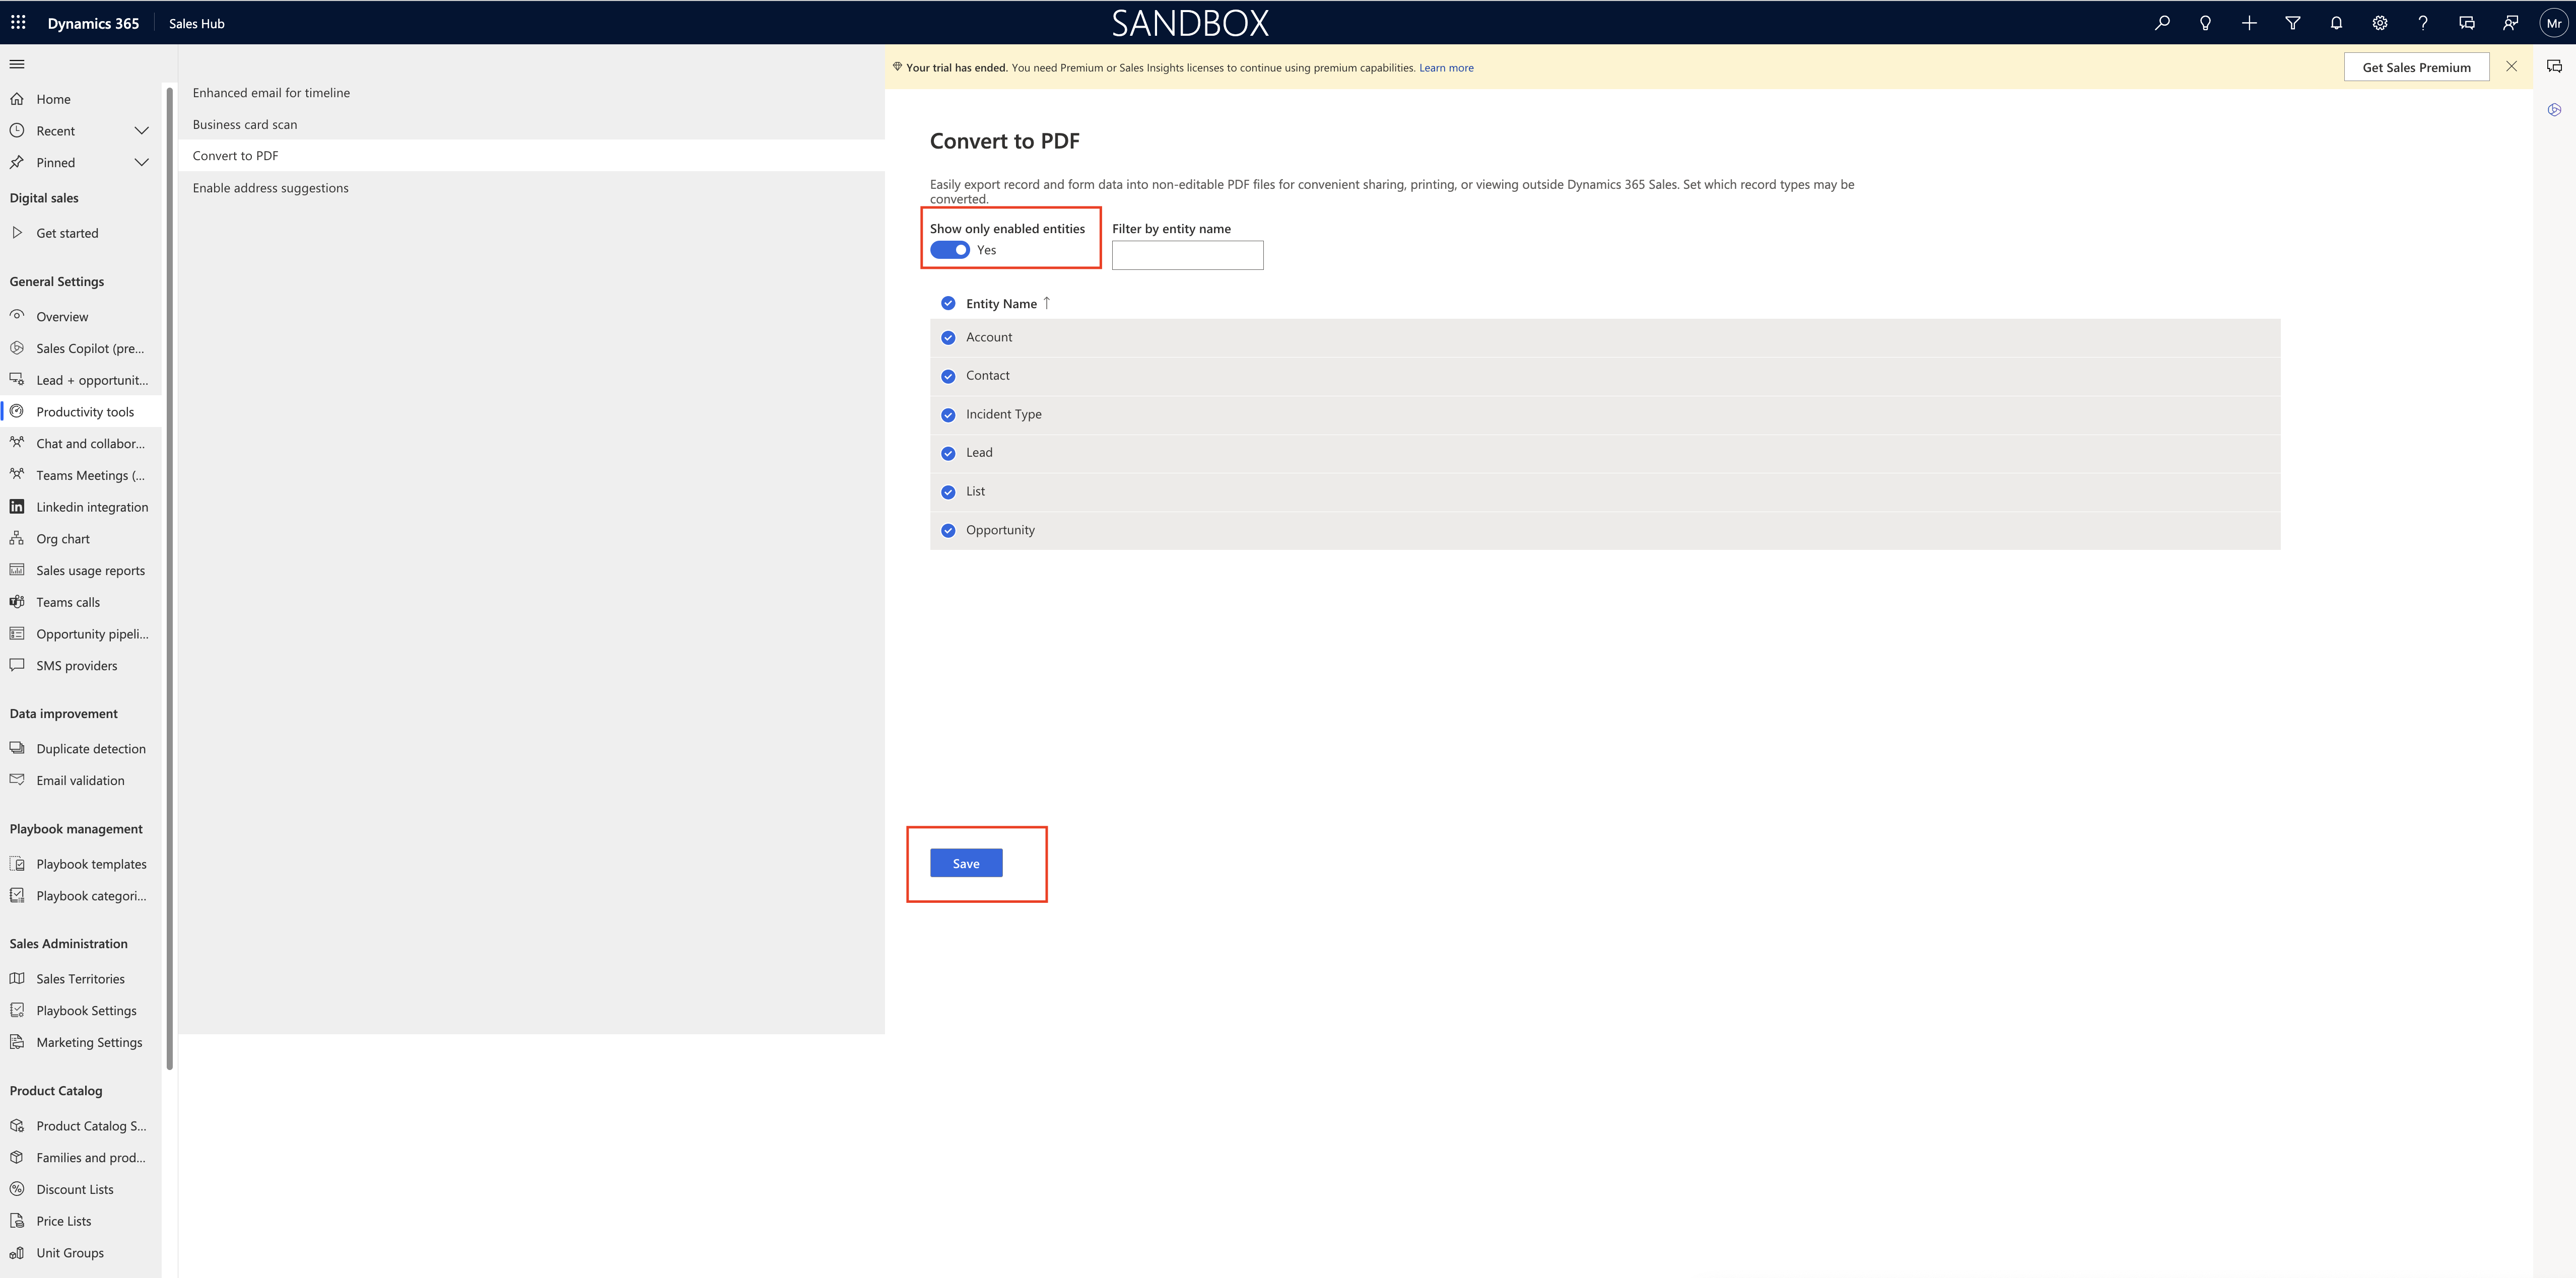
By default all tables will be included to export view but you can show only enabled entities to YES and also Filter by entity name too, you can select which tables needs to be included by clicking radio buttons.

Note: First you need to select the tables which you want to include in the export record and form data into an non editable PDF files and select the

4. Enable address suggestions:

If enabled then address suggestions will be displayed when editing the address on the account, contact or lead form.
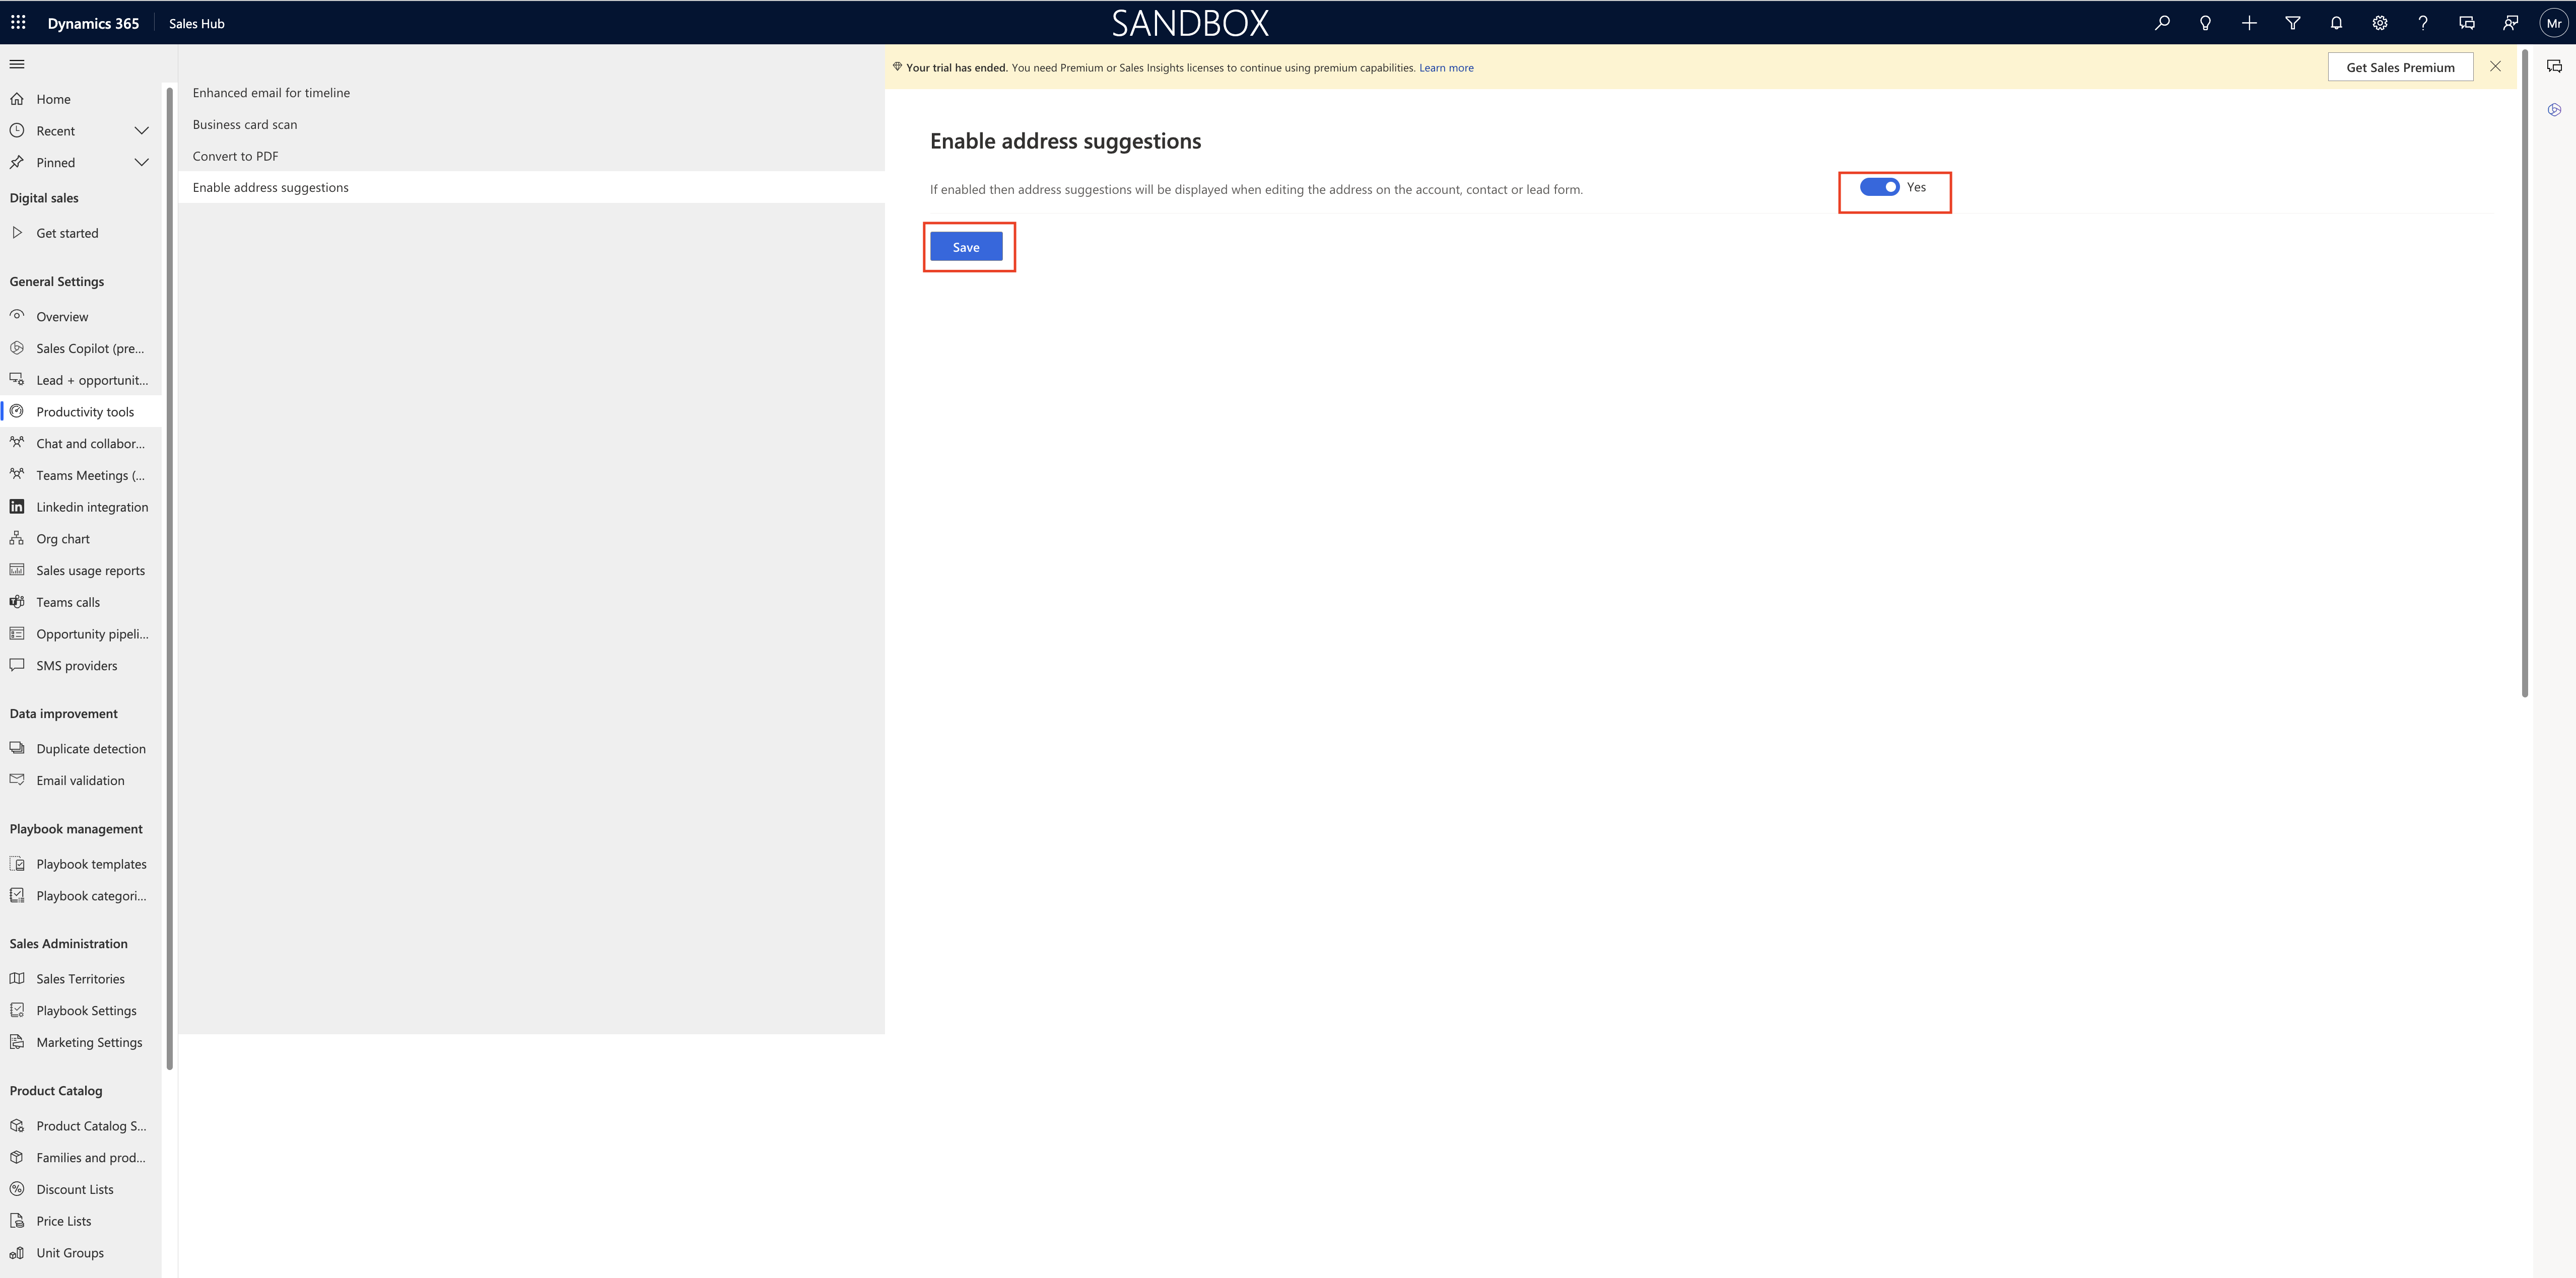
Toggle to YES and SAVE

That’s it for today.

I hope this helps.

Malla Reddy Gurram(@UK365GUY)
#365BlogPostsin365Days

Share this:

{Do you know} How to add Power App to Microsoft Teams as a tab.

Hello Everyone,

Today i am going to show how to add Power App to your Microsoft Teams.

Let’s get’s started.

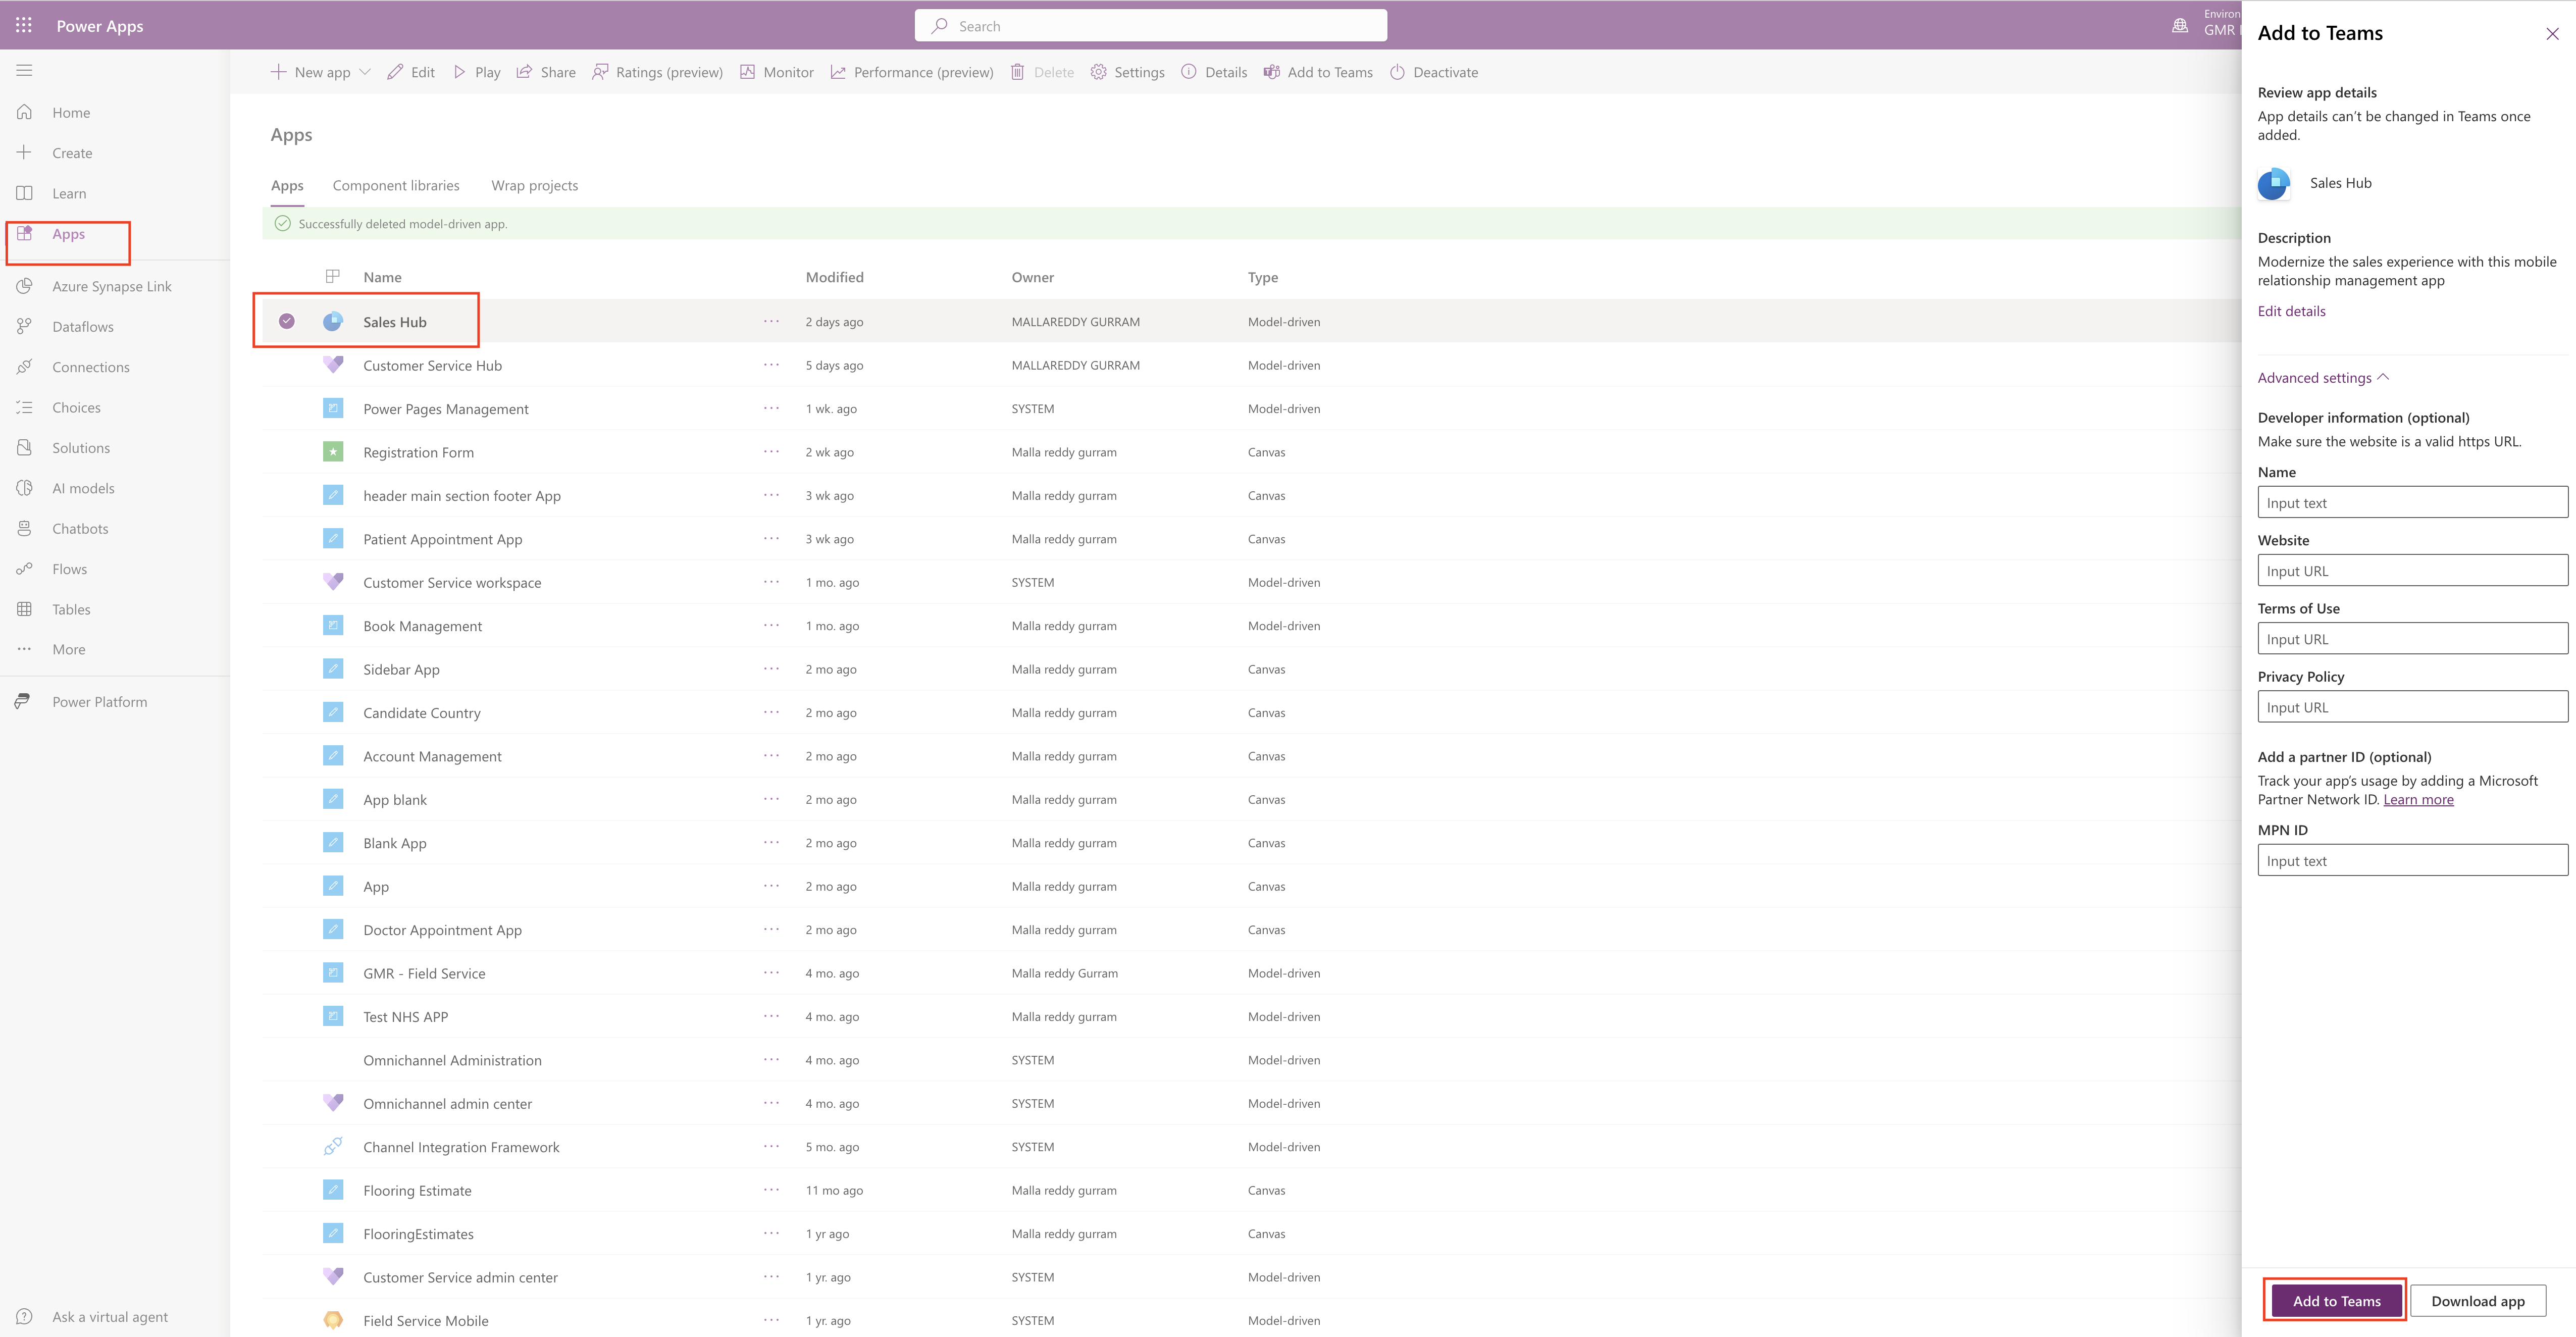
Suppose your Sales teams always use Dynamics 365 Sales for day to day work, and “Adding the Power App to Teams” will give a chance for your sales team to work from Microsoft Teams instead of logging into Dynamics 365 Sales Hub.

Login into www.make.powerapps.com

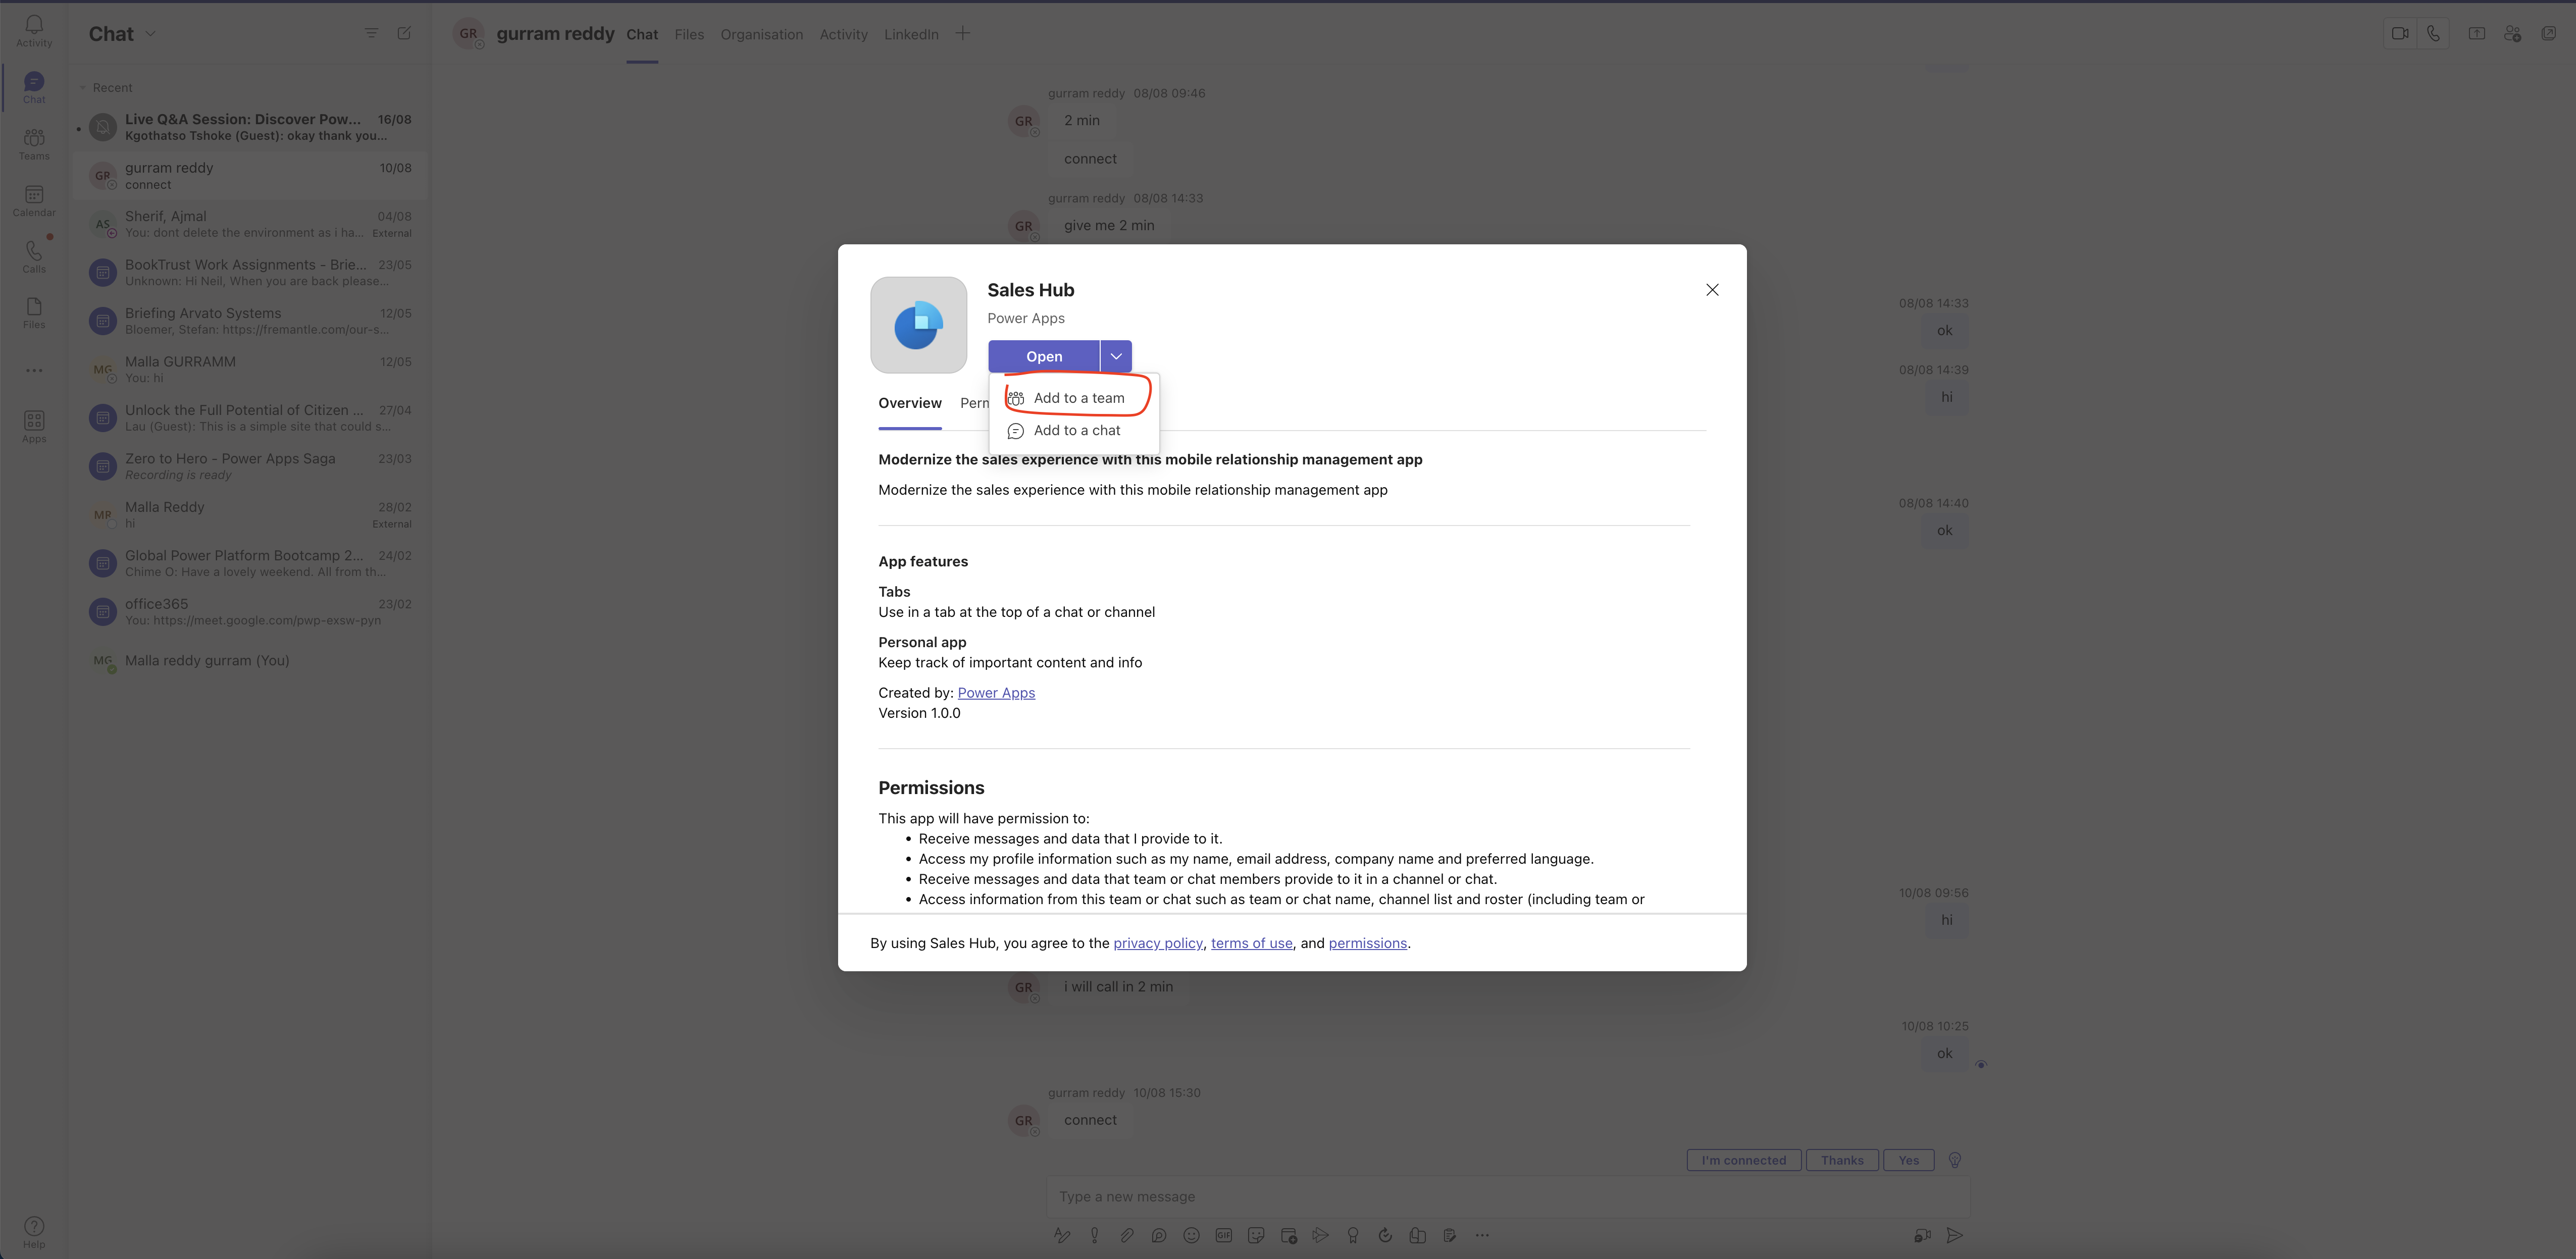
Select the model driven app and click on “Add to teams”.

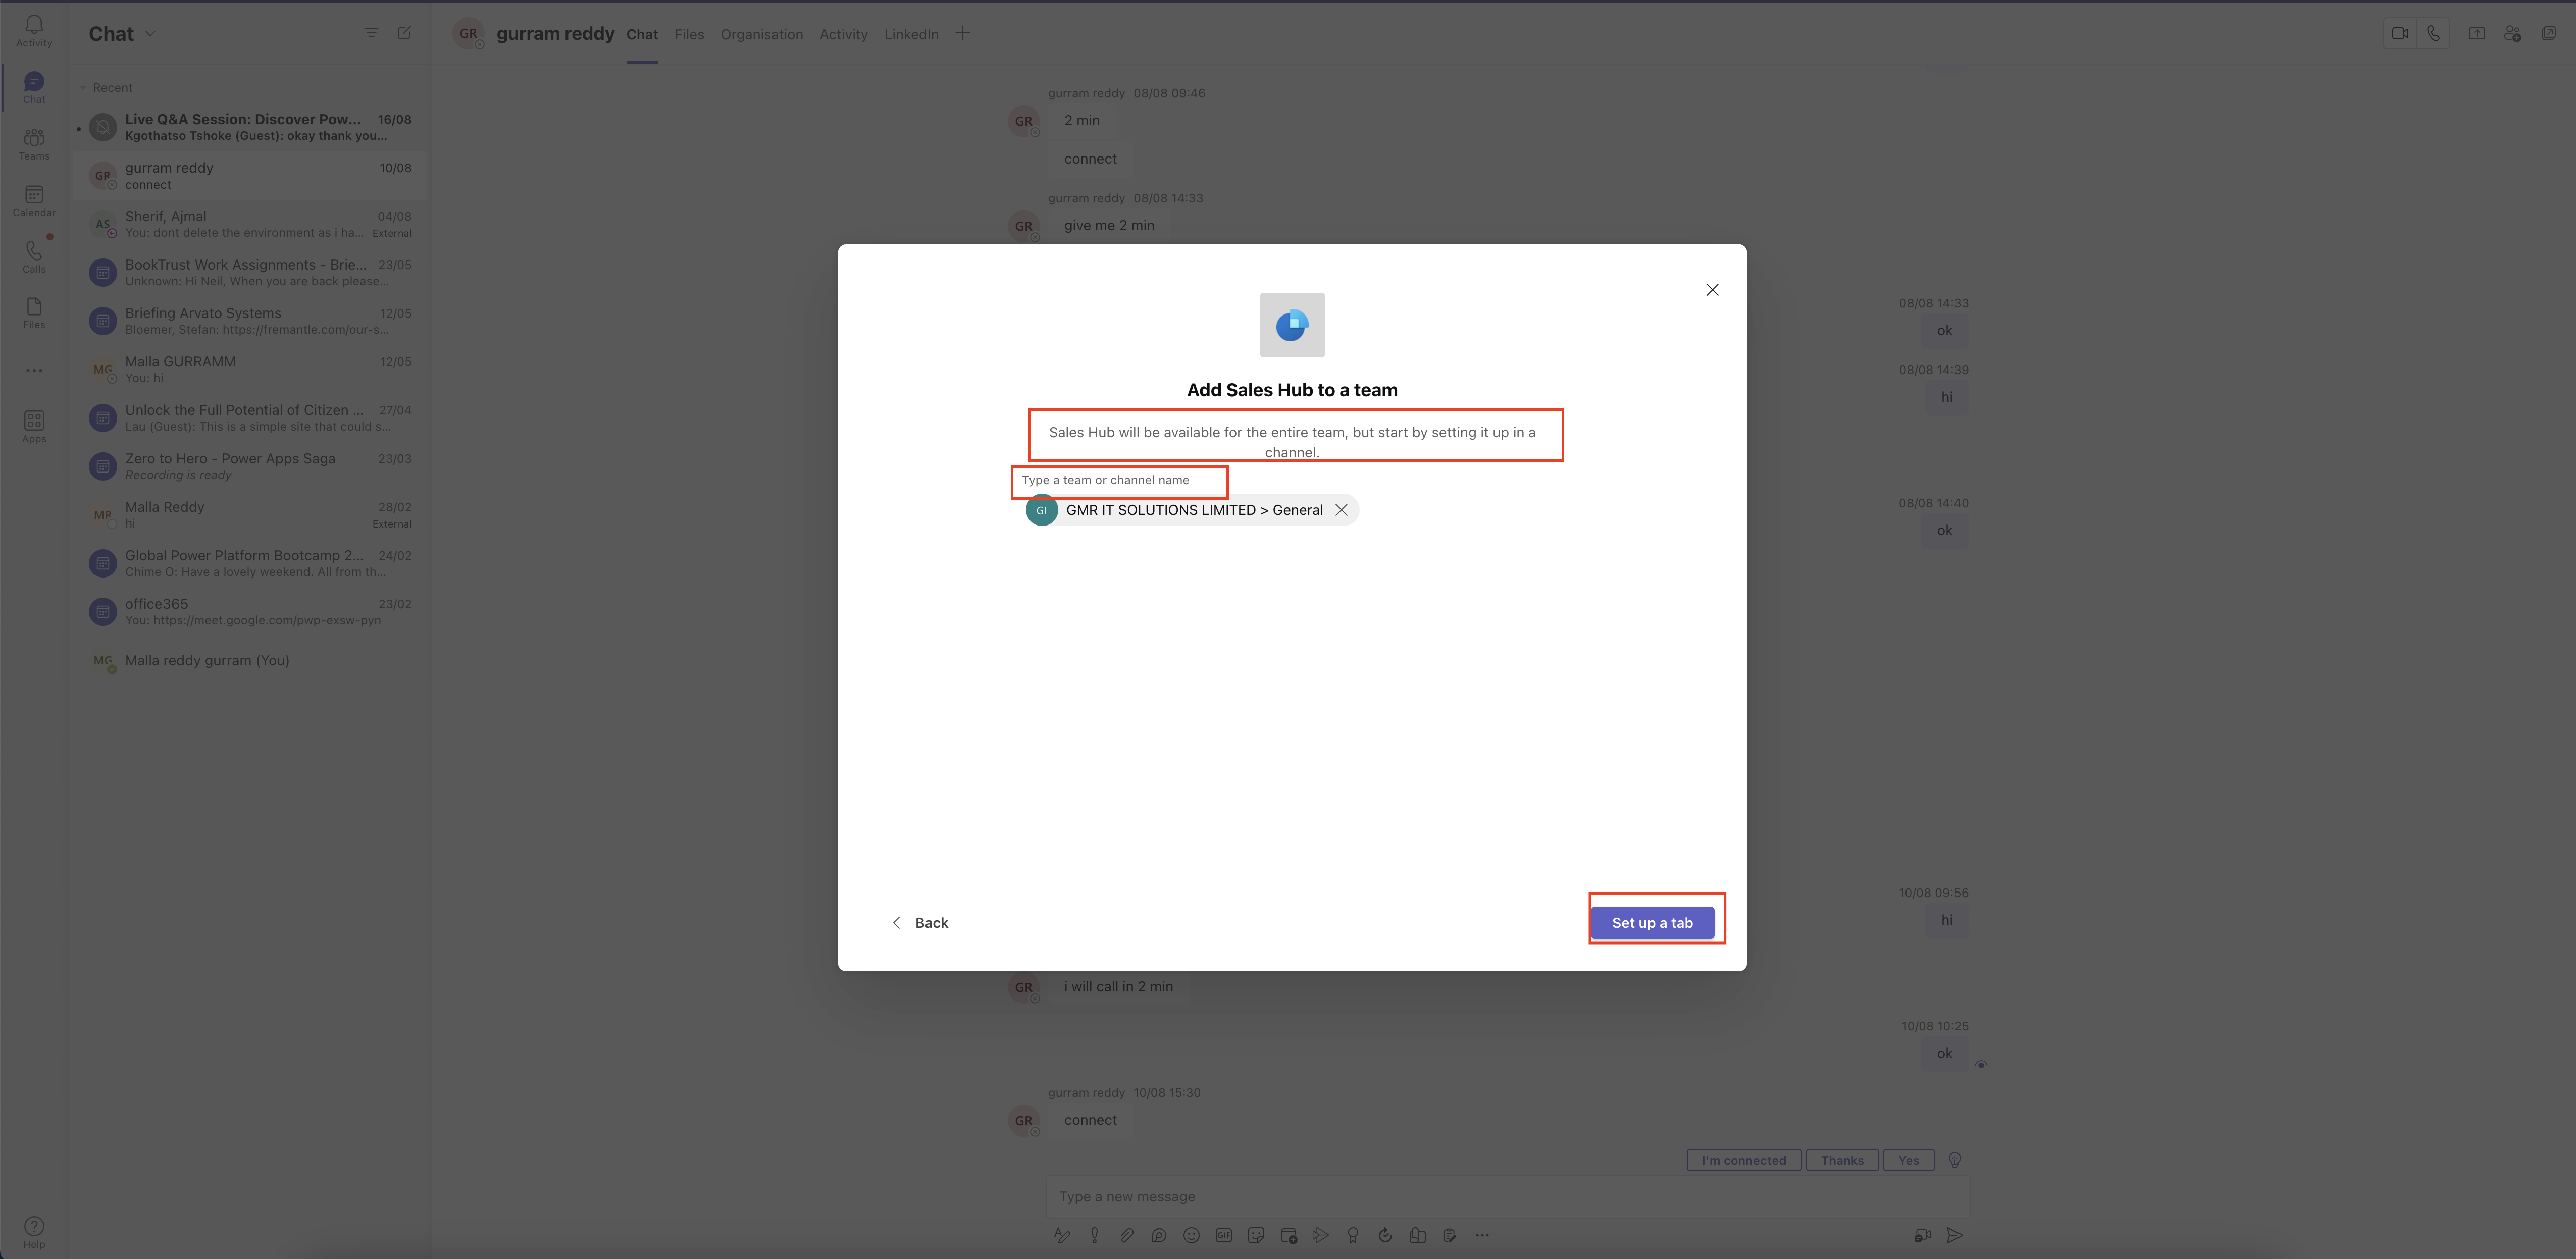
Microsoft Teams will be opened and then select the team or channel to show this sales hub, so that it will show to your entire team as tab.

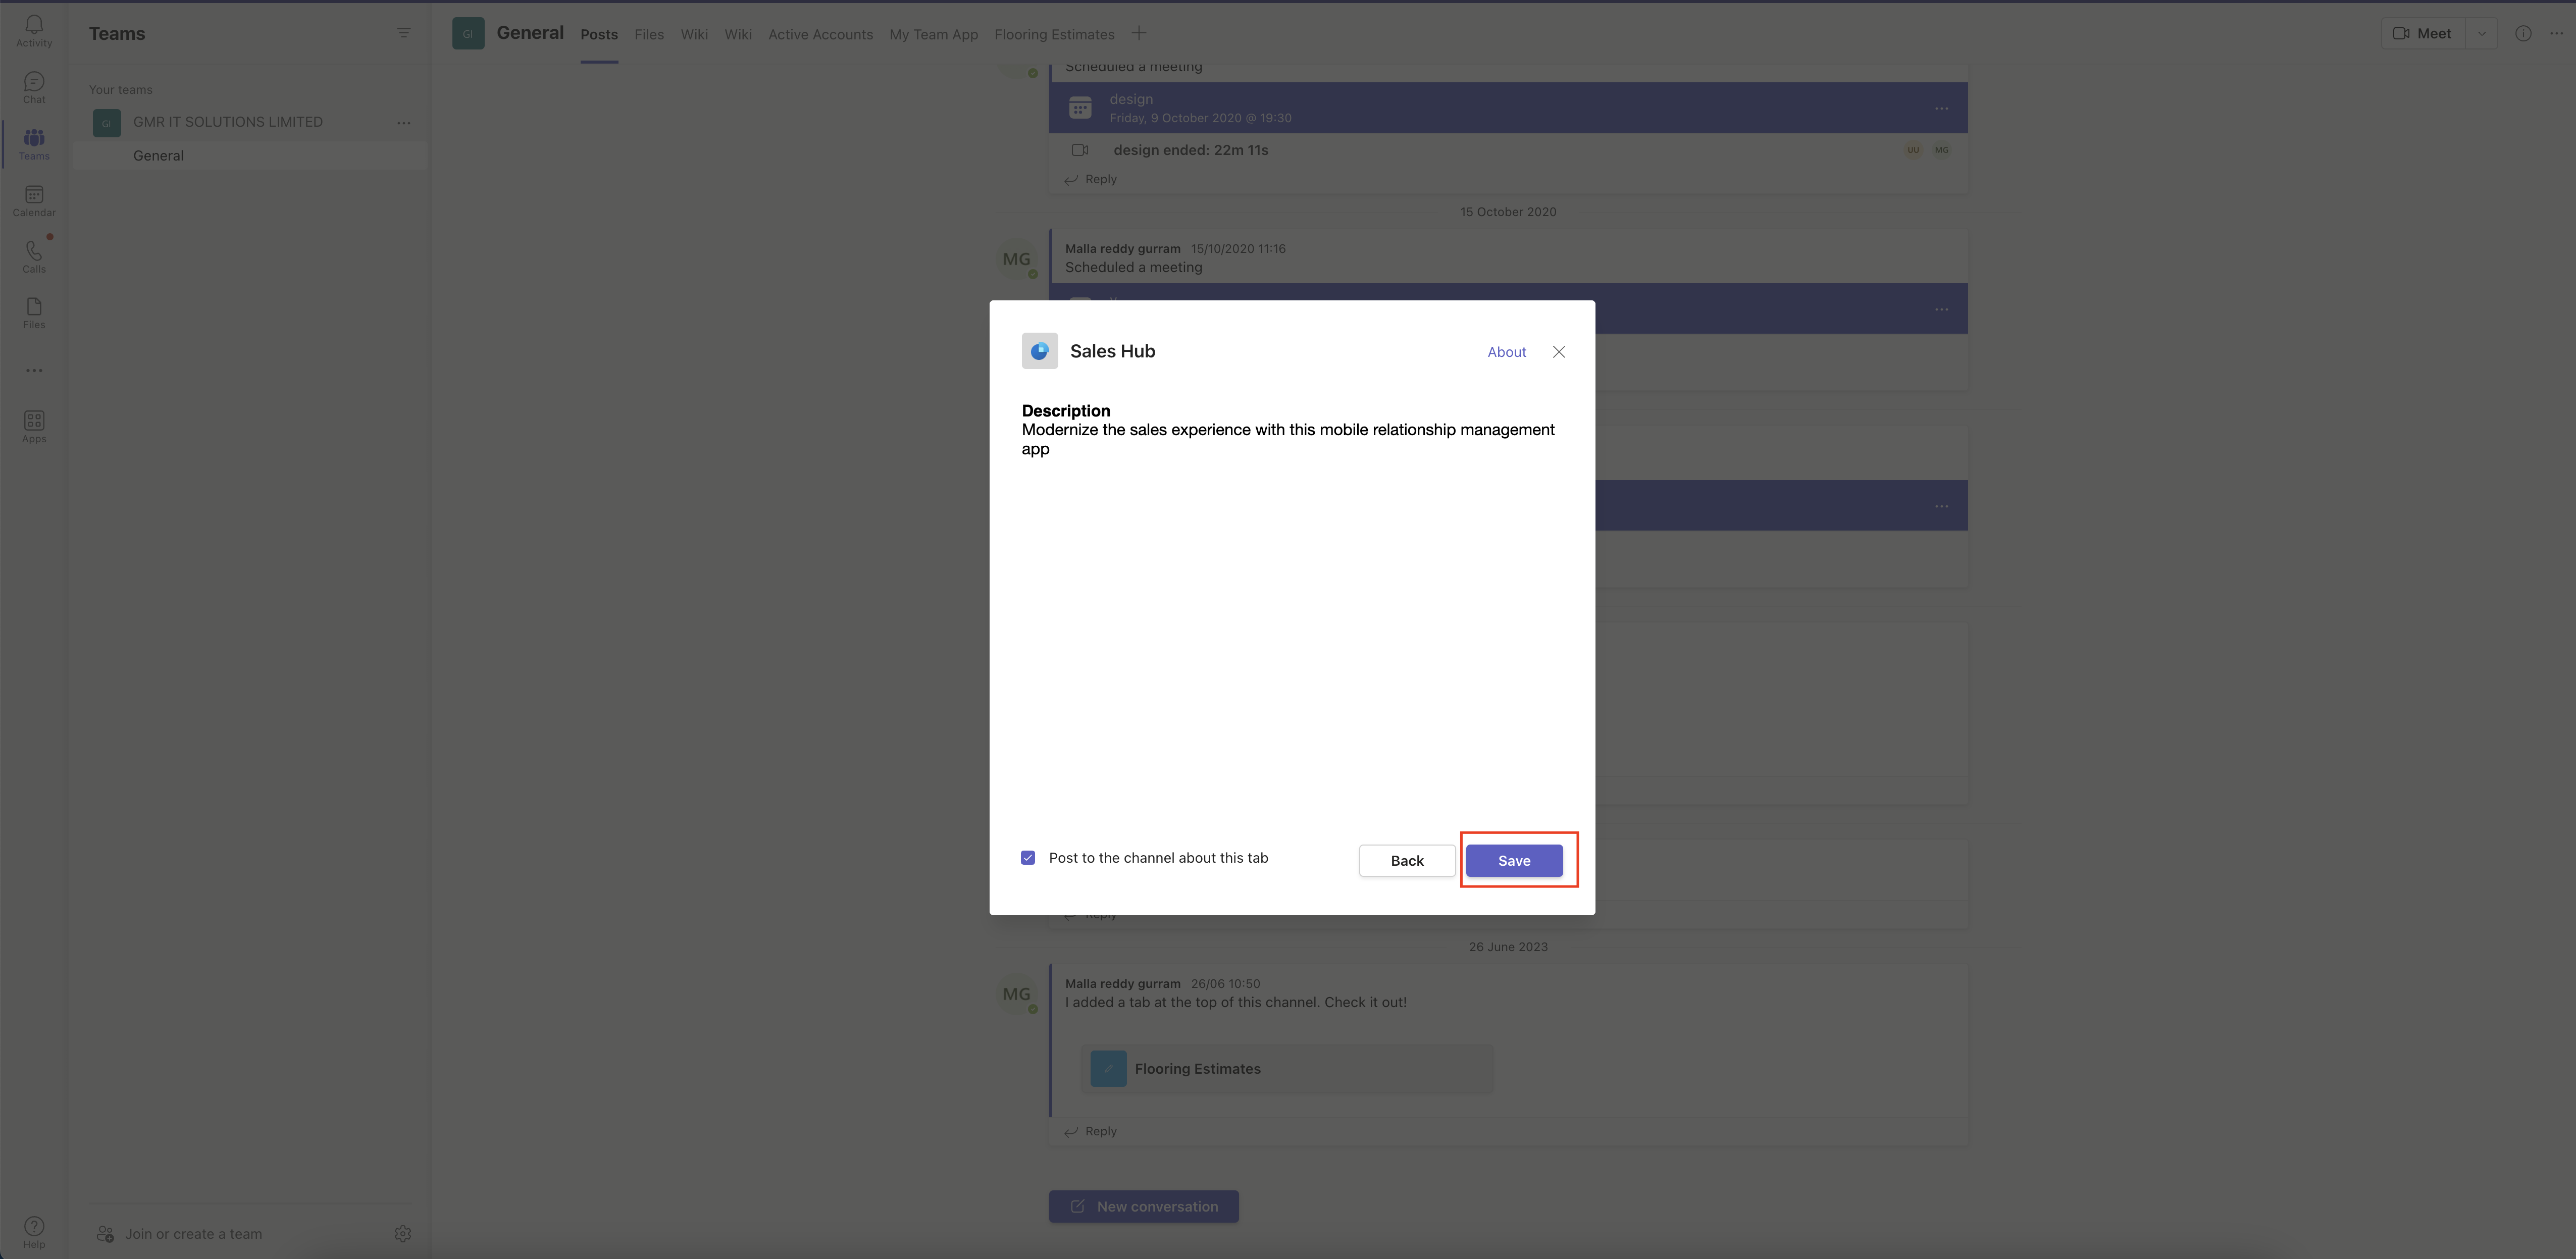
Tab will be created and save it.

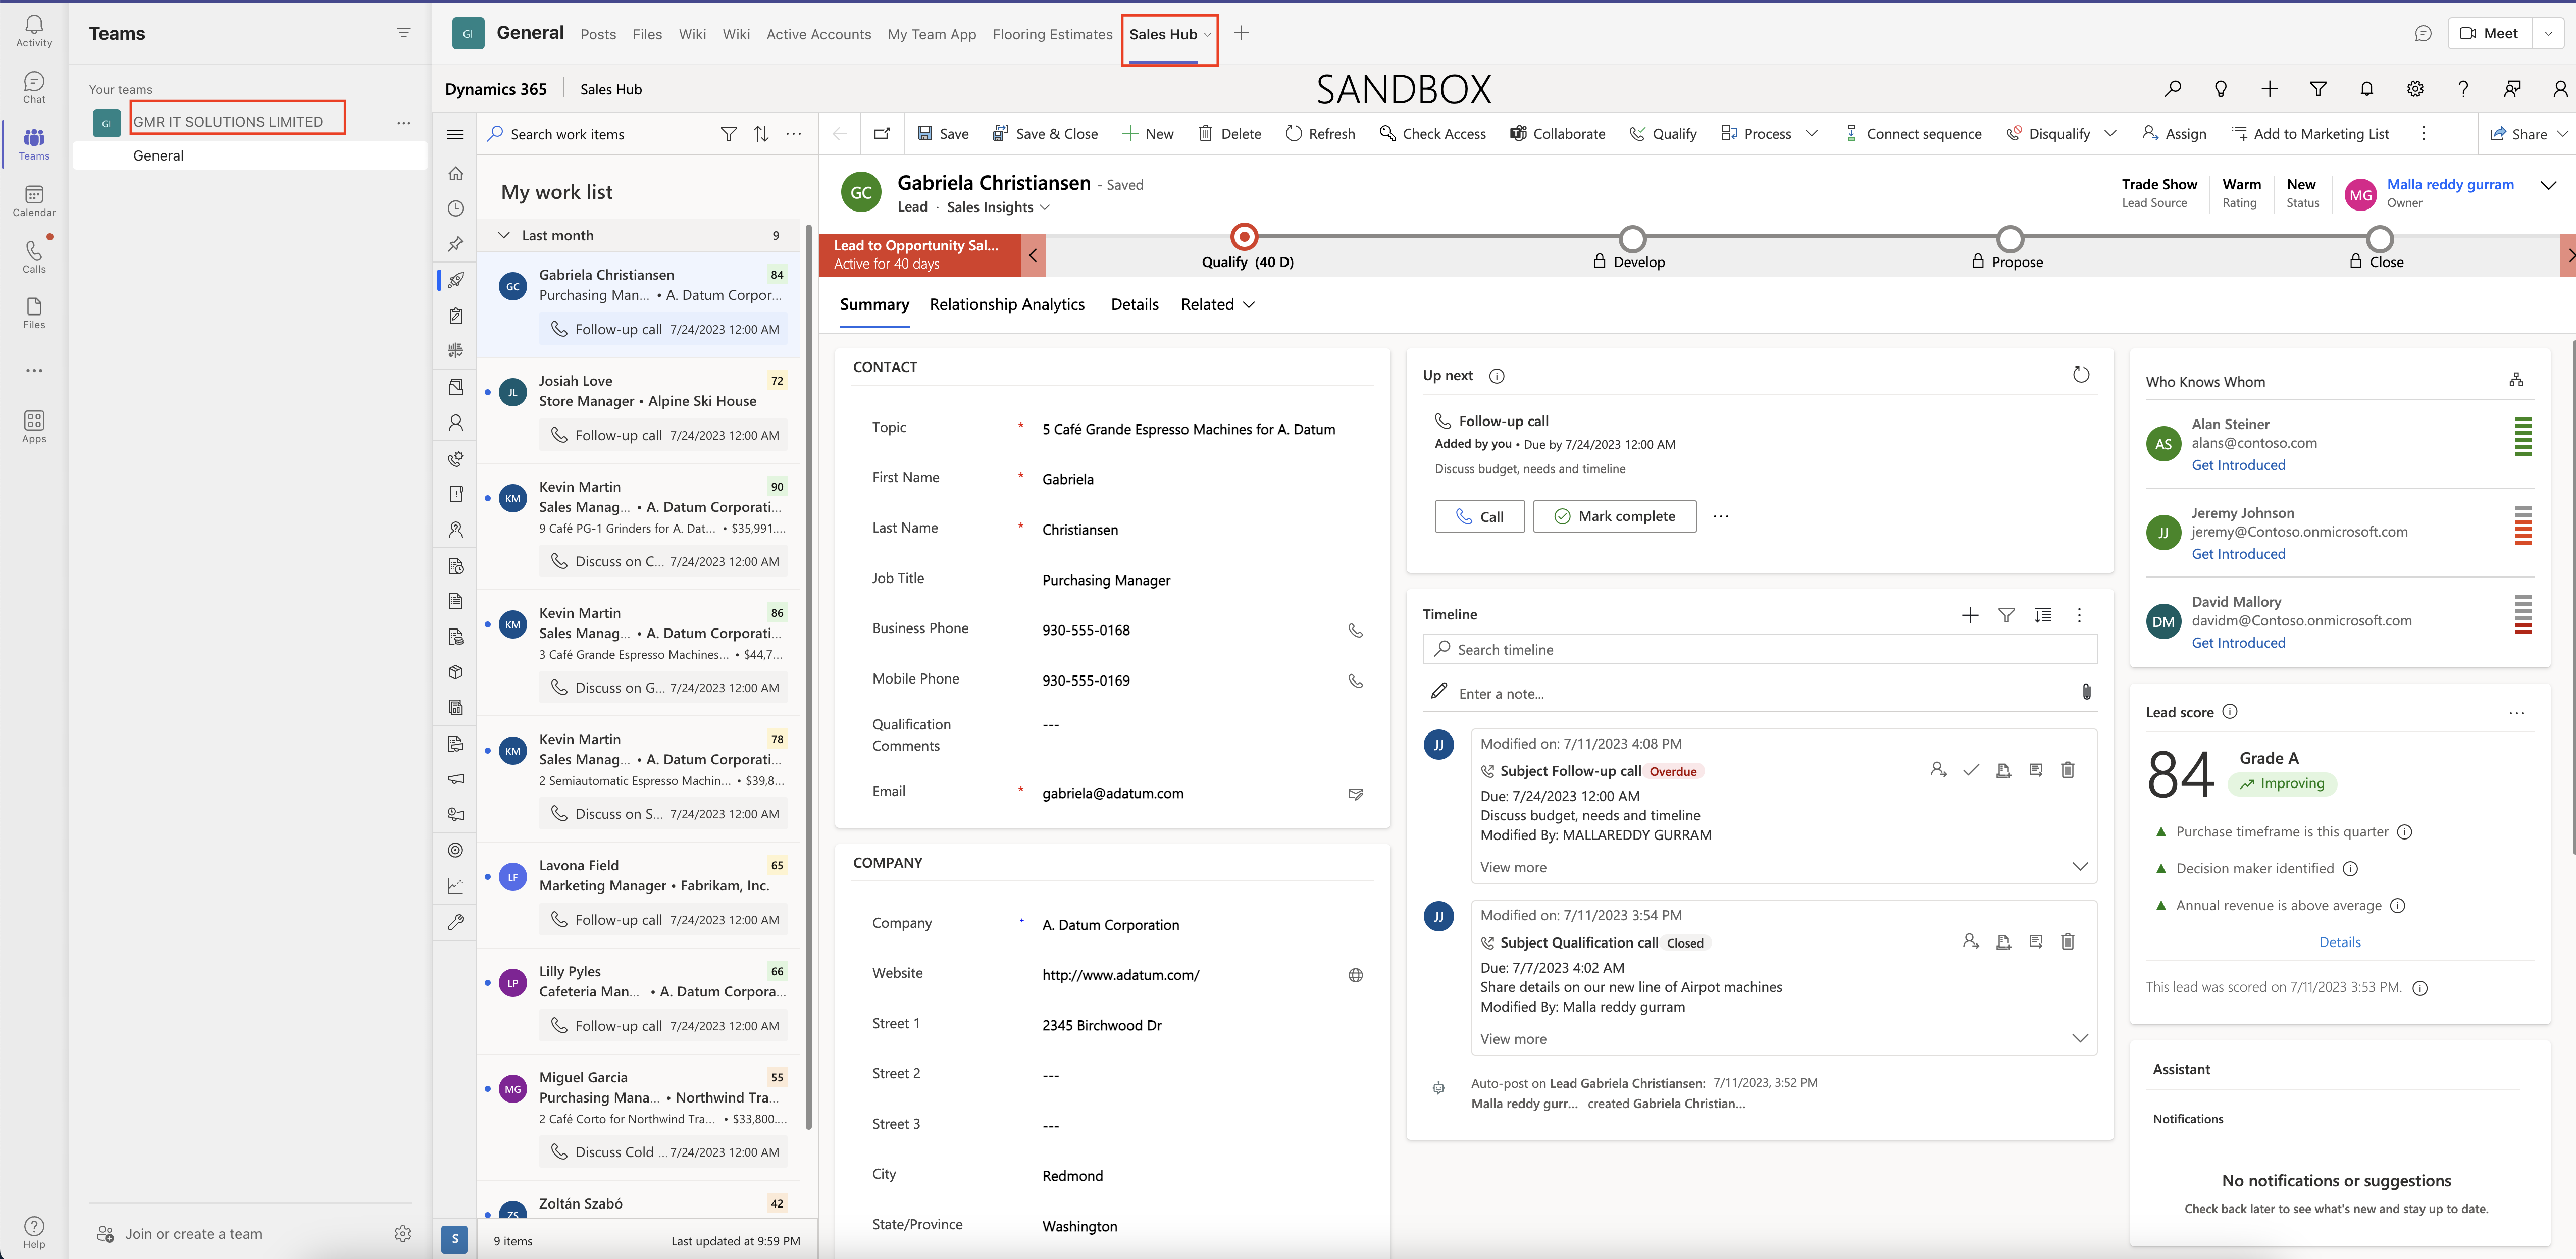
Finally Sales Hub is added as a tab for your sales teams, see below.

That’s it for today.

I hope this helps.
Malla Reddy Gurram(@UK365GUY)
#365BlogPostsin365Days
Share this:

{How to} enable Power BI Service to generate report to visualize data in a view on Model Driven App

Hello Everyone,

Today i am going to show how to enable Power BI Service to generate report to visualize data in a view on Model Driven App.

Let’s get’s started.

You can create reports in the Power BI Service using the data that’s in a view of your model driven app.

So Power BI automatically generates the visuals for you, so you can start exploring the data with just a few clicks.

How to enable it ?

Login into www.make.powerapps.com

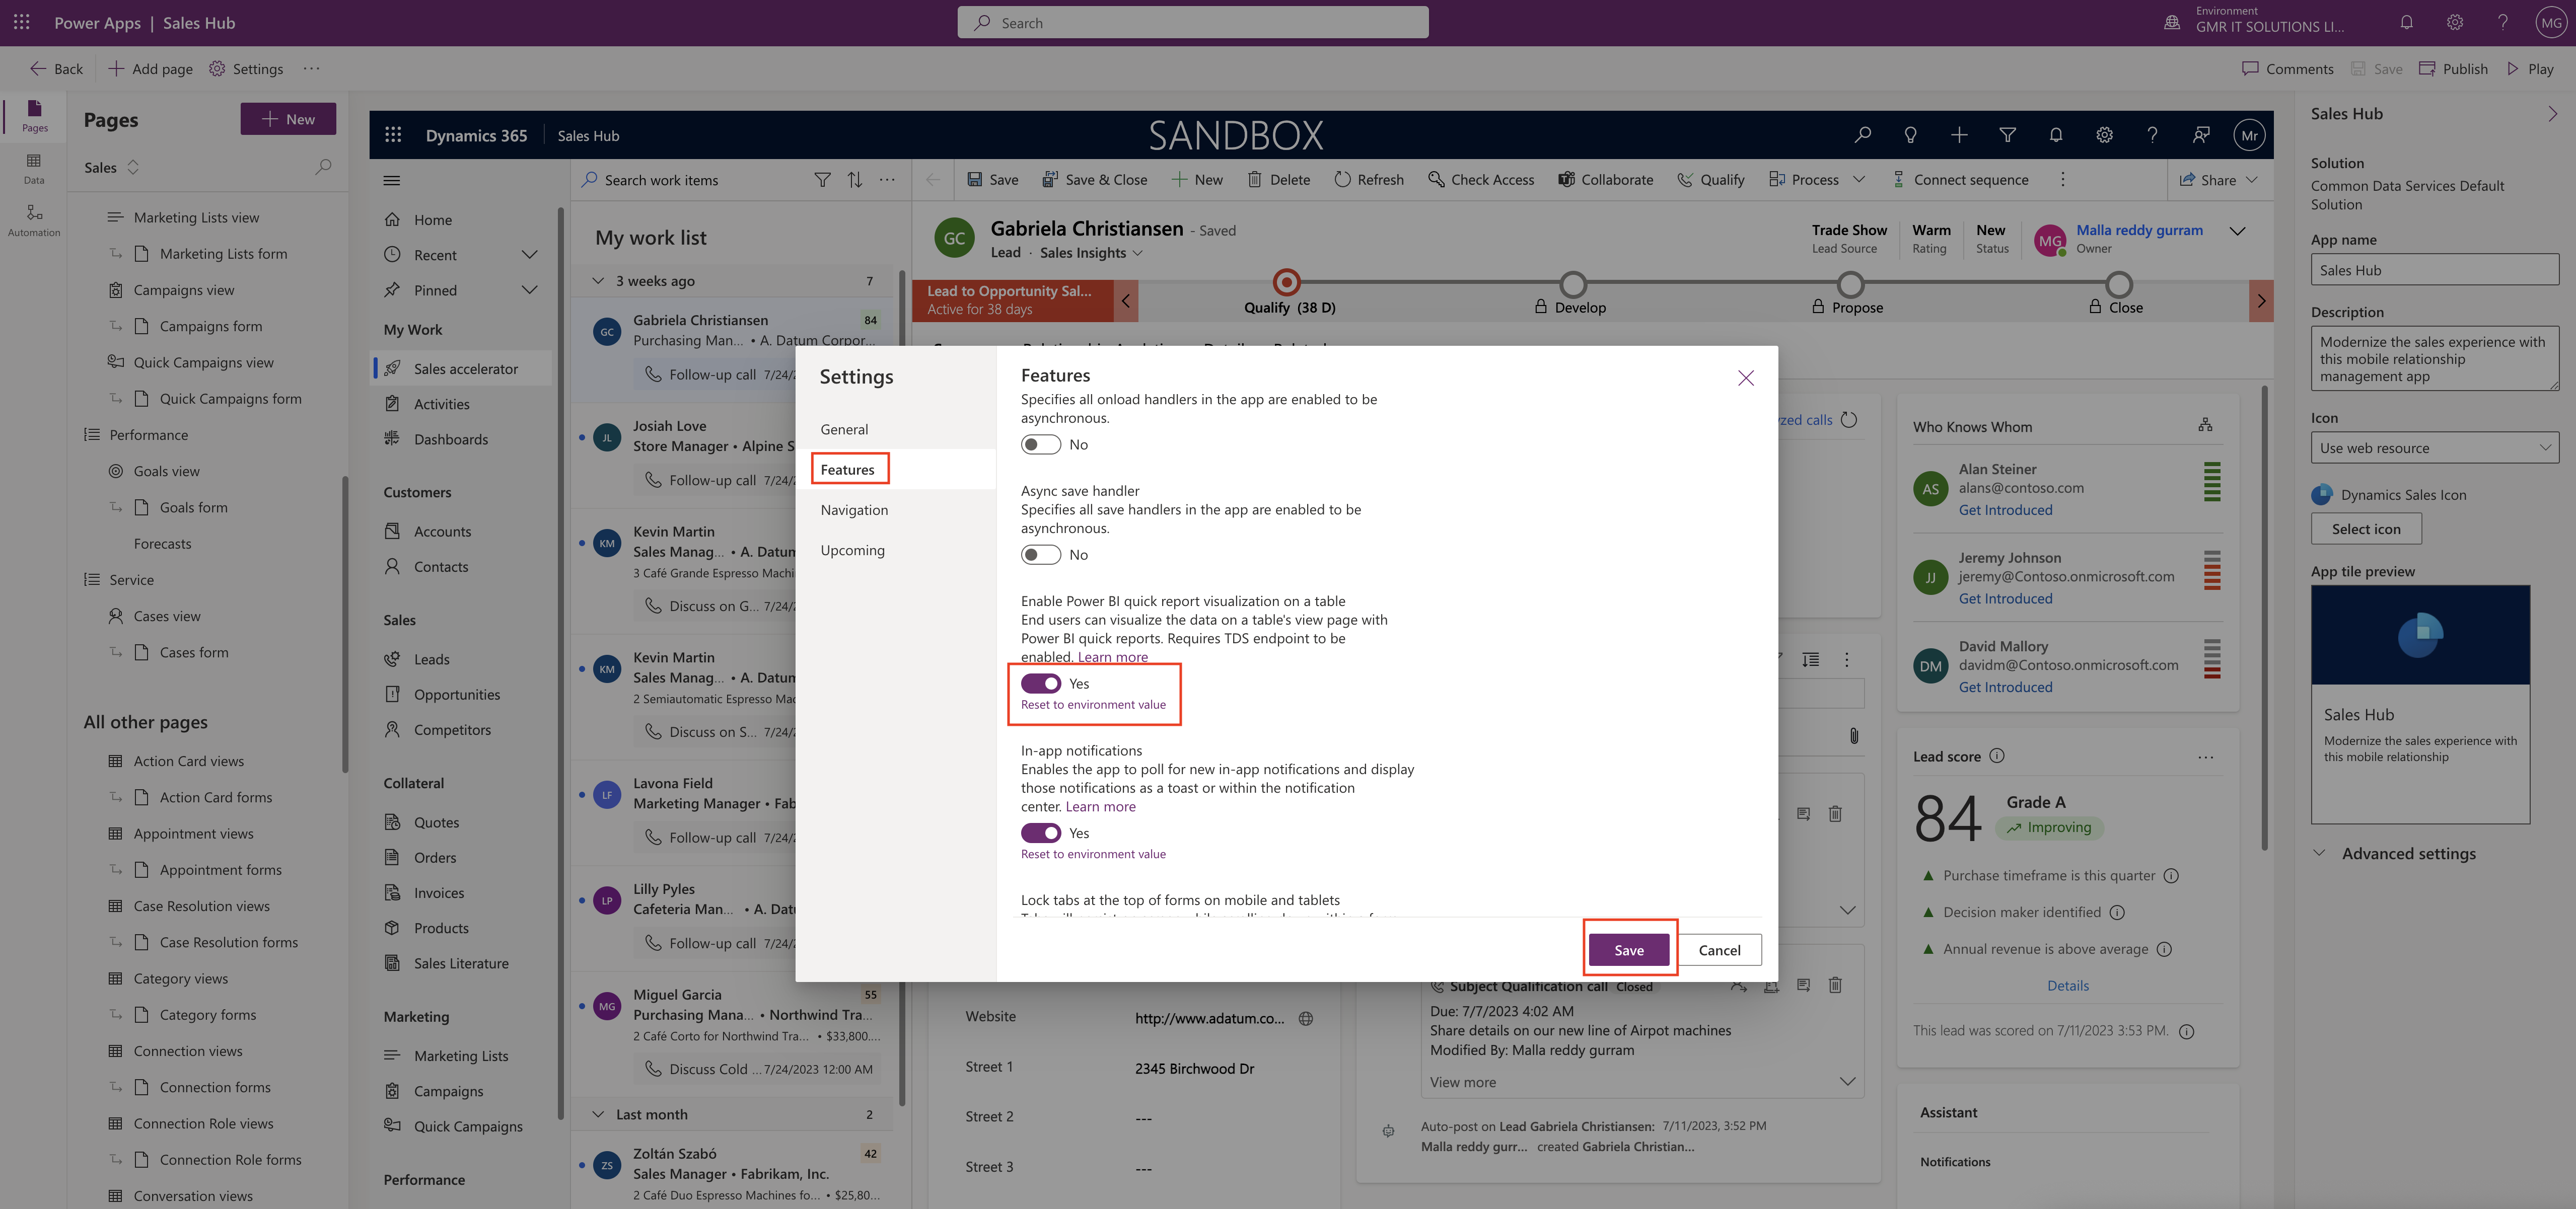
Select the Model Driven App and edit it.

Turn on the “Enable Power BI quick report visualization on a table.

What it does is End users can visualize the data on a table’s view page with Power BI quick reports TDS endpoint to be enabled.

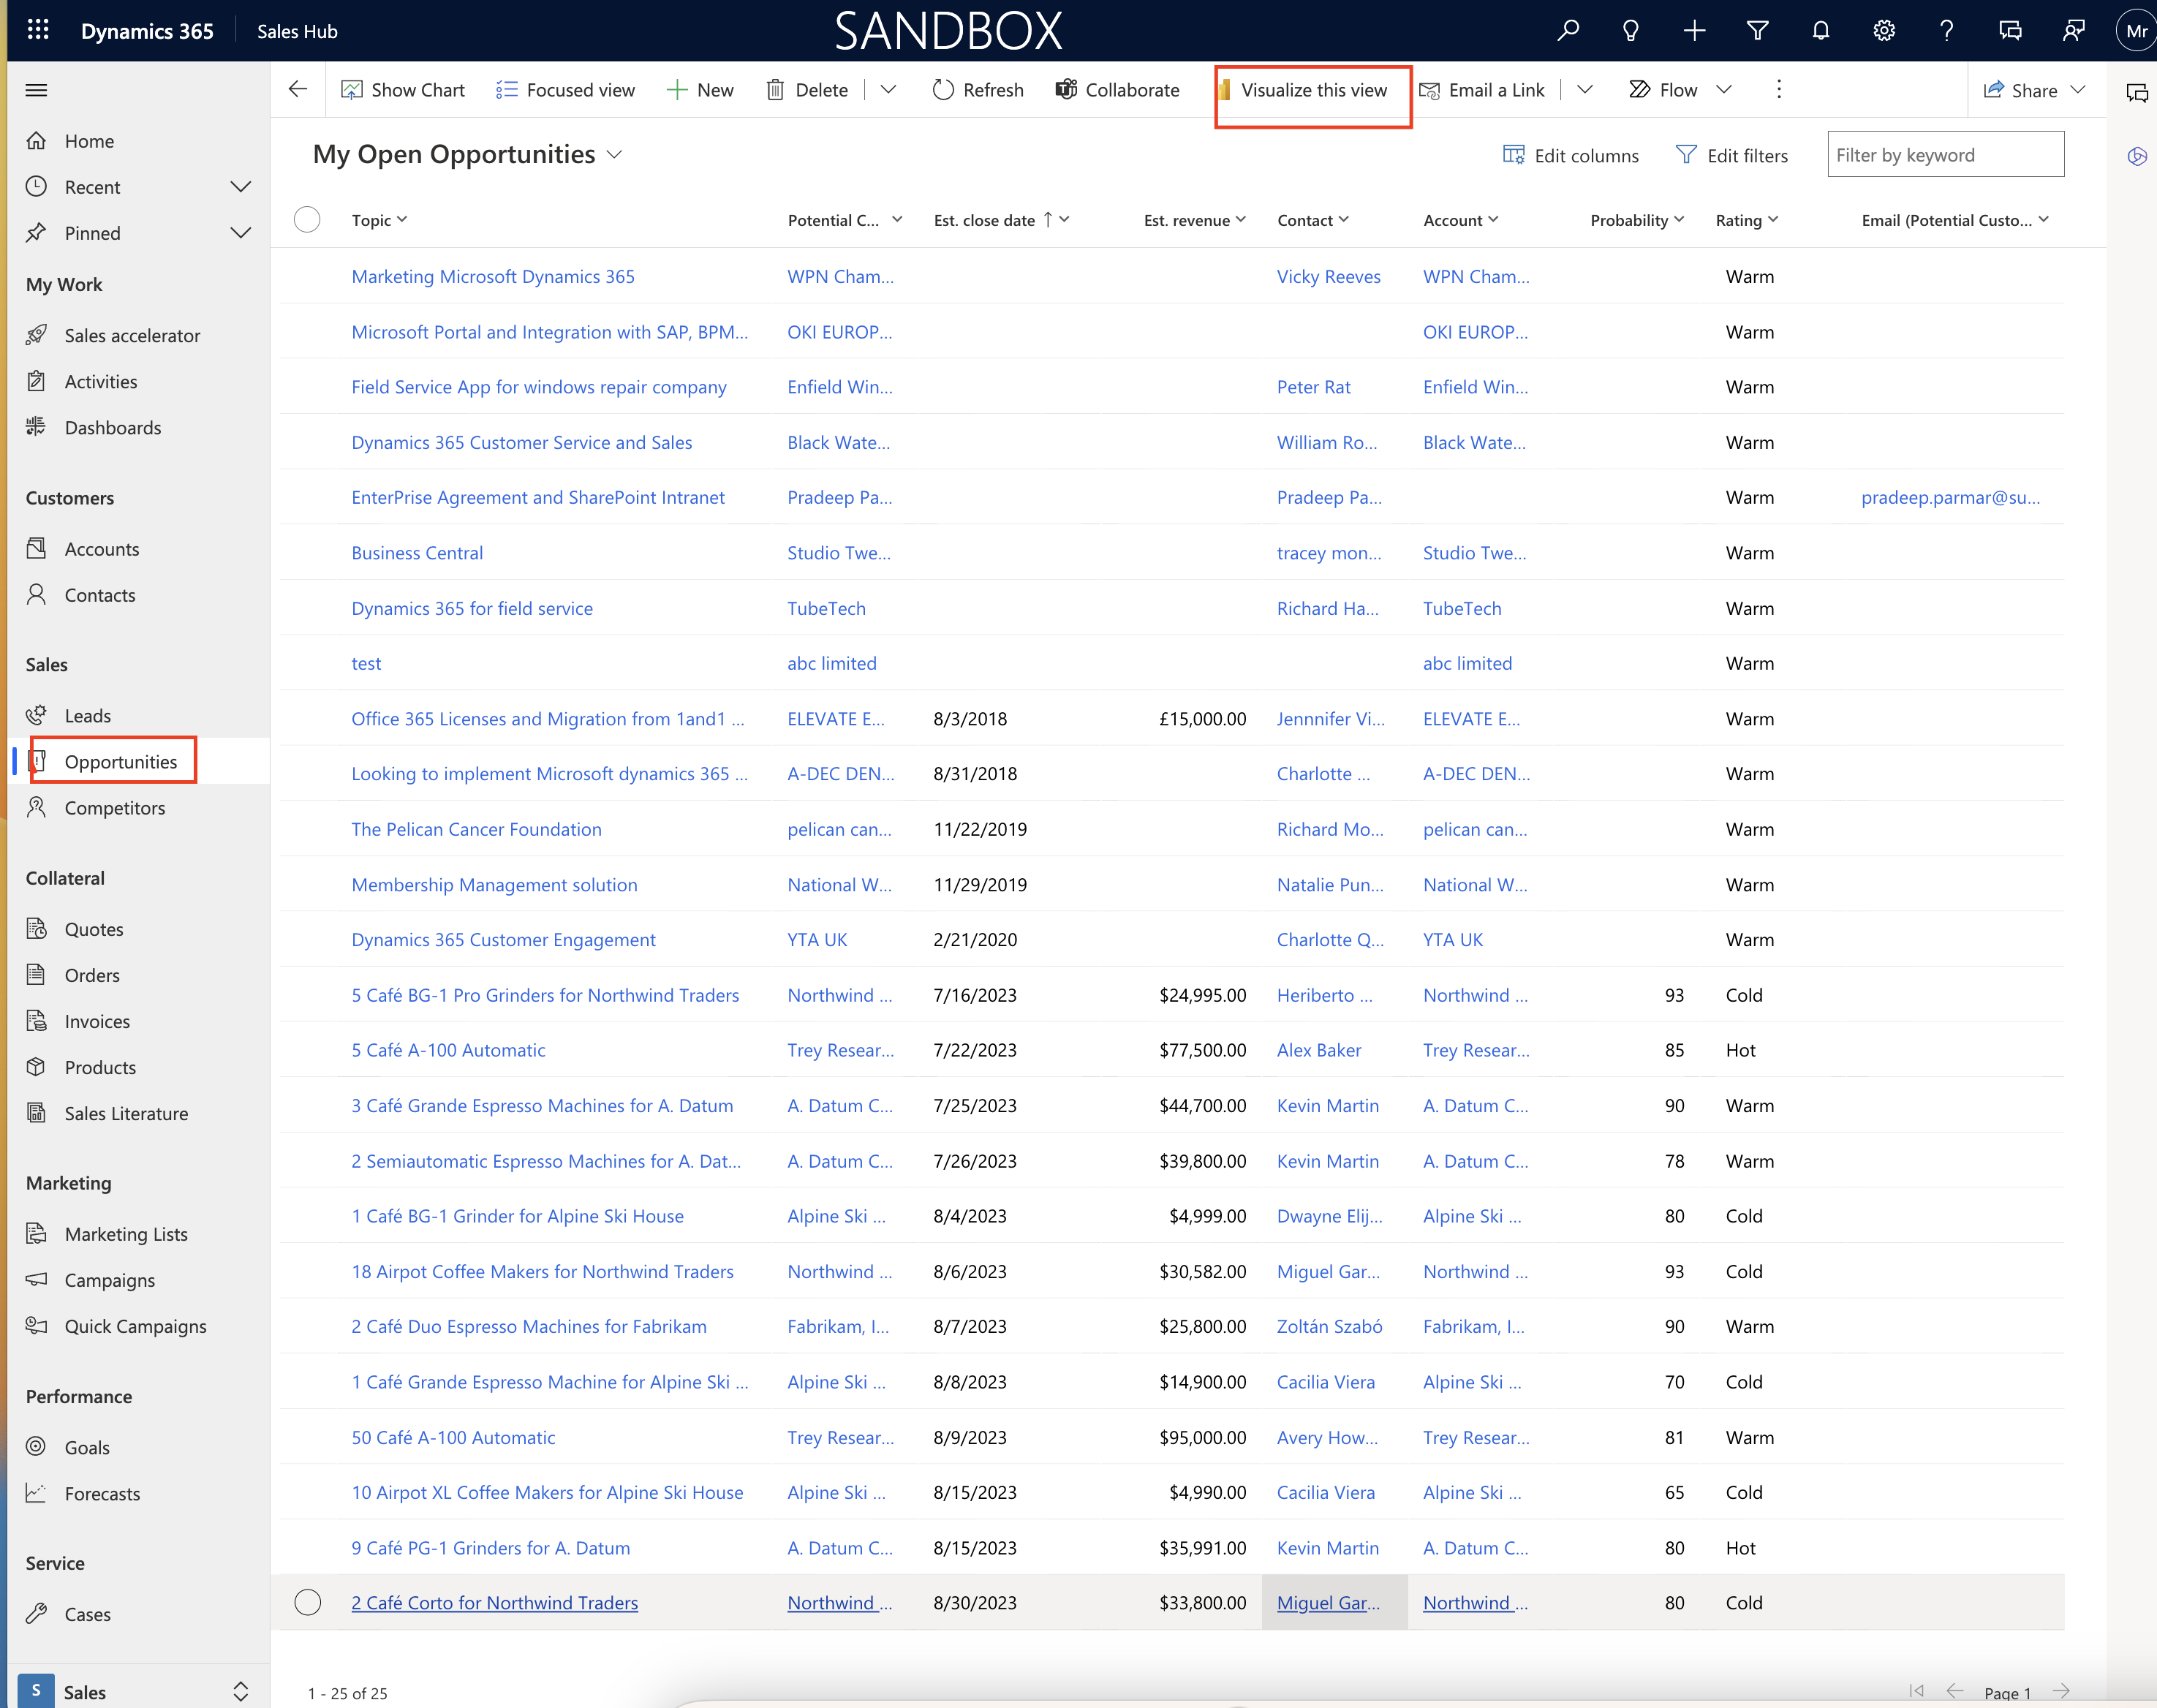
Once enabled you can login into Sales Hub Model Driven App and go to the Opportunities and click on the Visualize this view.

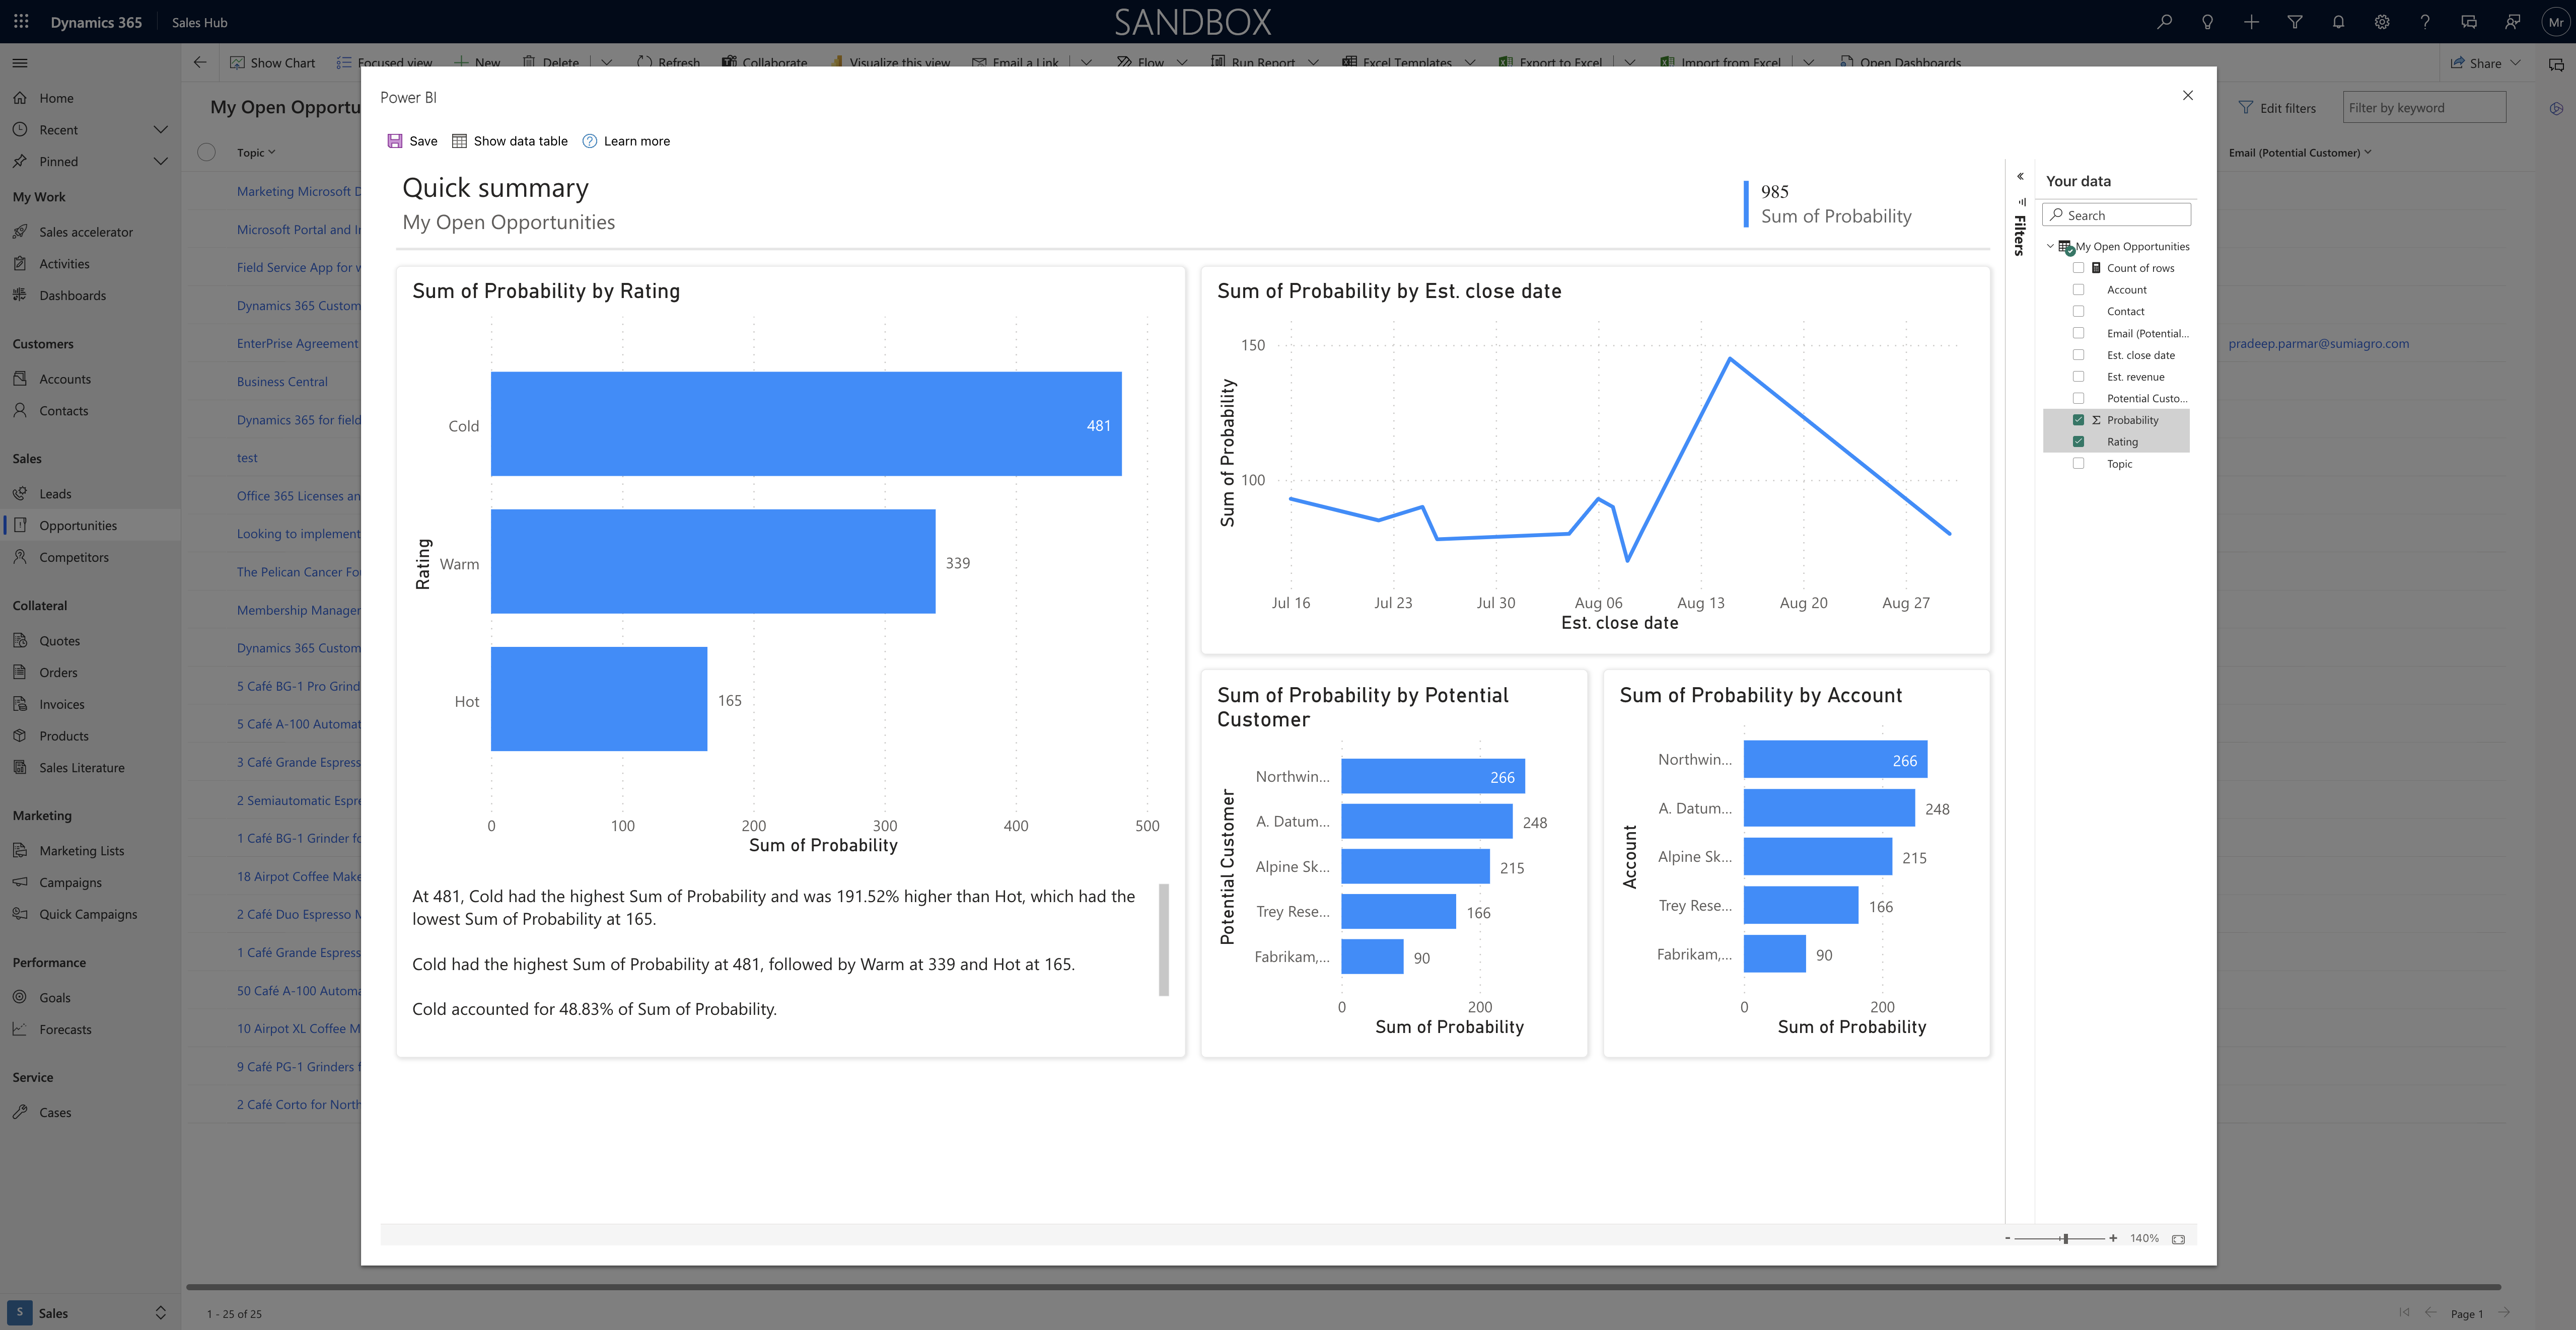
As soon as you click on the visualize this view a new window will pop up with Power BI report, that is the filters acting on the view are automatically applied to the Power BI visualization. A subset of columns that are part of the view are used to auto generate the Power BI visuals.

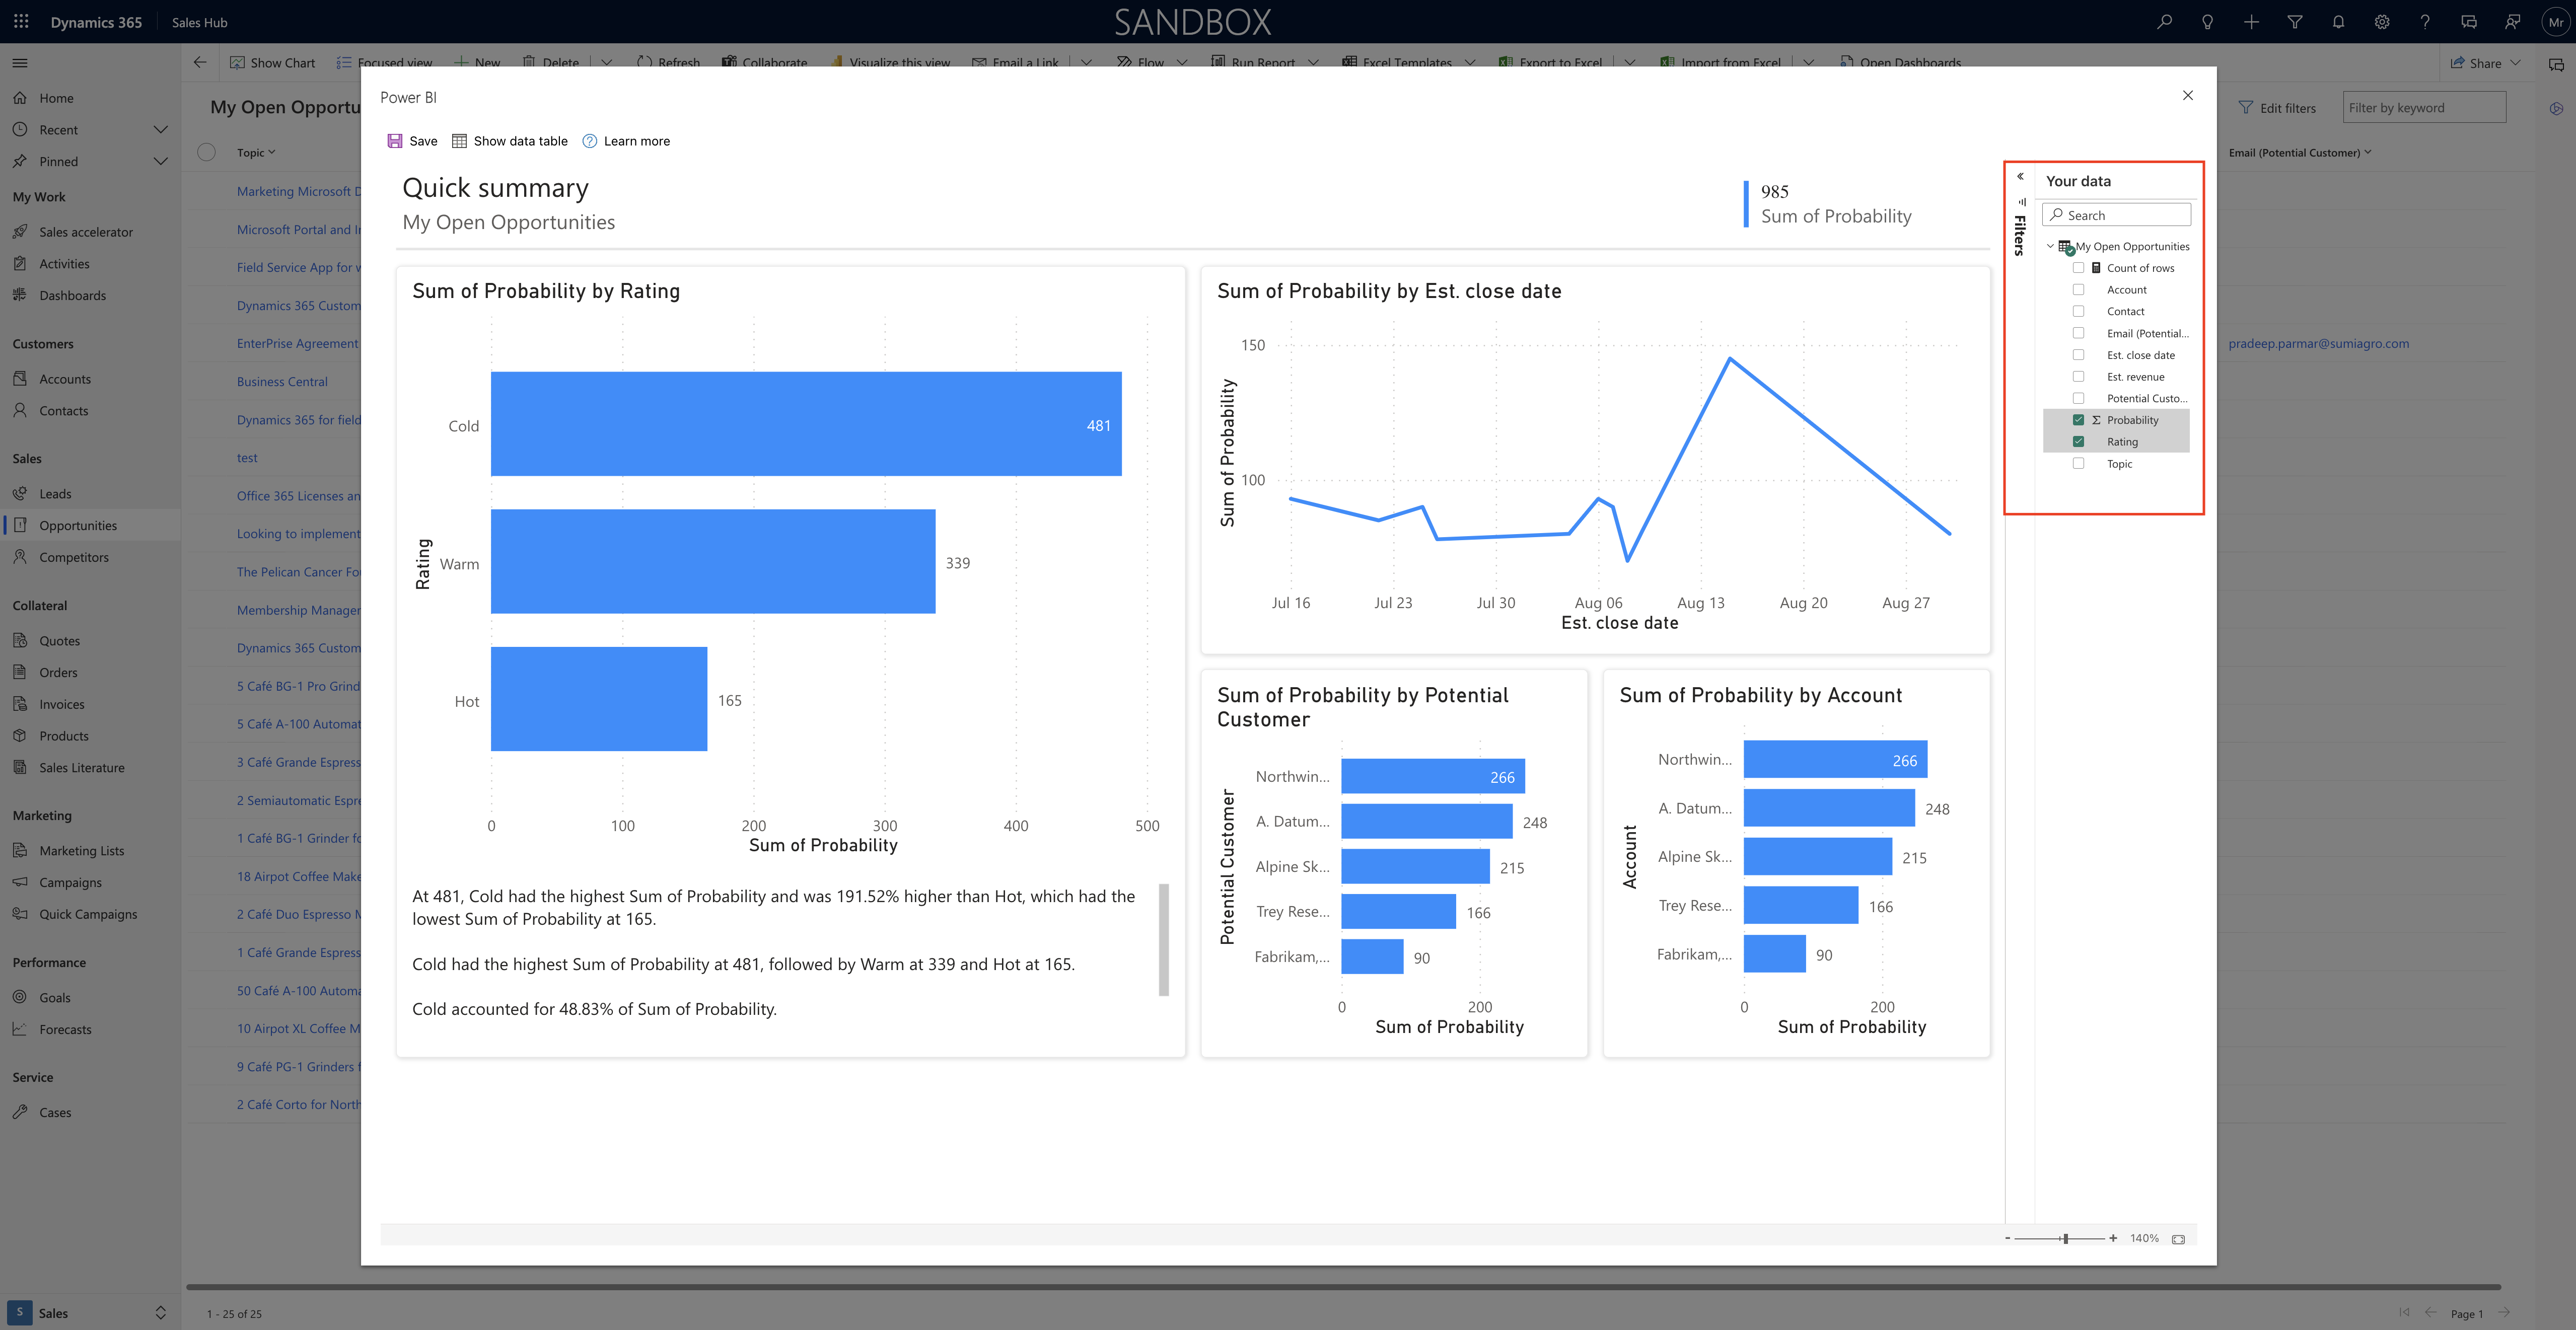
Also the full set of view columns are available in the Power BI report to be used to change the data you see in the report.

License required?

Any user can use the Visialize this view feature to explore the data in a view, but to use the full edit experience, publish reports or access reports that others have published or delete reports, you need a Power BI Pro License.

Some issues and limitations:

1. When you first start to use the Visualize the data in a view, creating the dataset and report can take some time. we’re working to improve this performance experience.

2. Columns are indicated by their logical names rather than the display name. Microsoft is currently working to display names in the Power BI report.

3. This feature isn’t supported for guest users in a tenant.

That’s it for today.

I hope this helps
Malla Reddy Gurram(@UK365GUY)
#365BlogPostsin365Days
Share this:

{How to} view detailed Power Platform request usage information in the Power Platform admin center

Hello Everyone,

Today i am going to show how to generate report for detailed view from Power Platform usage information in the Power Platform admin center(Preview)

Let’s get’s started.

Suppose you want to view the consumption of power platform requests for licensed users, non-licensed users, and per flow licensed flow runs.

How do you do that?

Login into Power Platform Admin Center

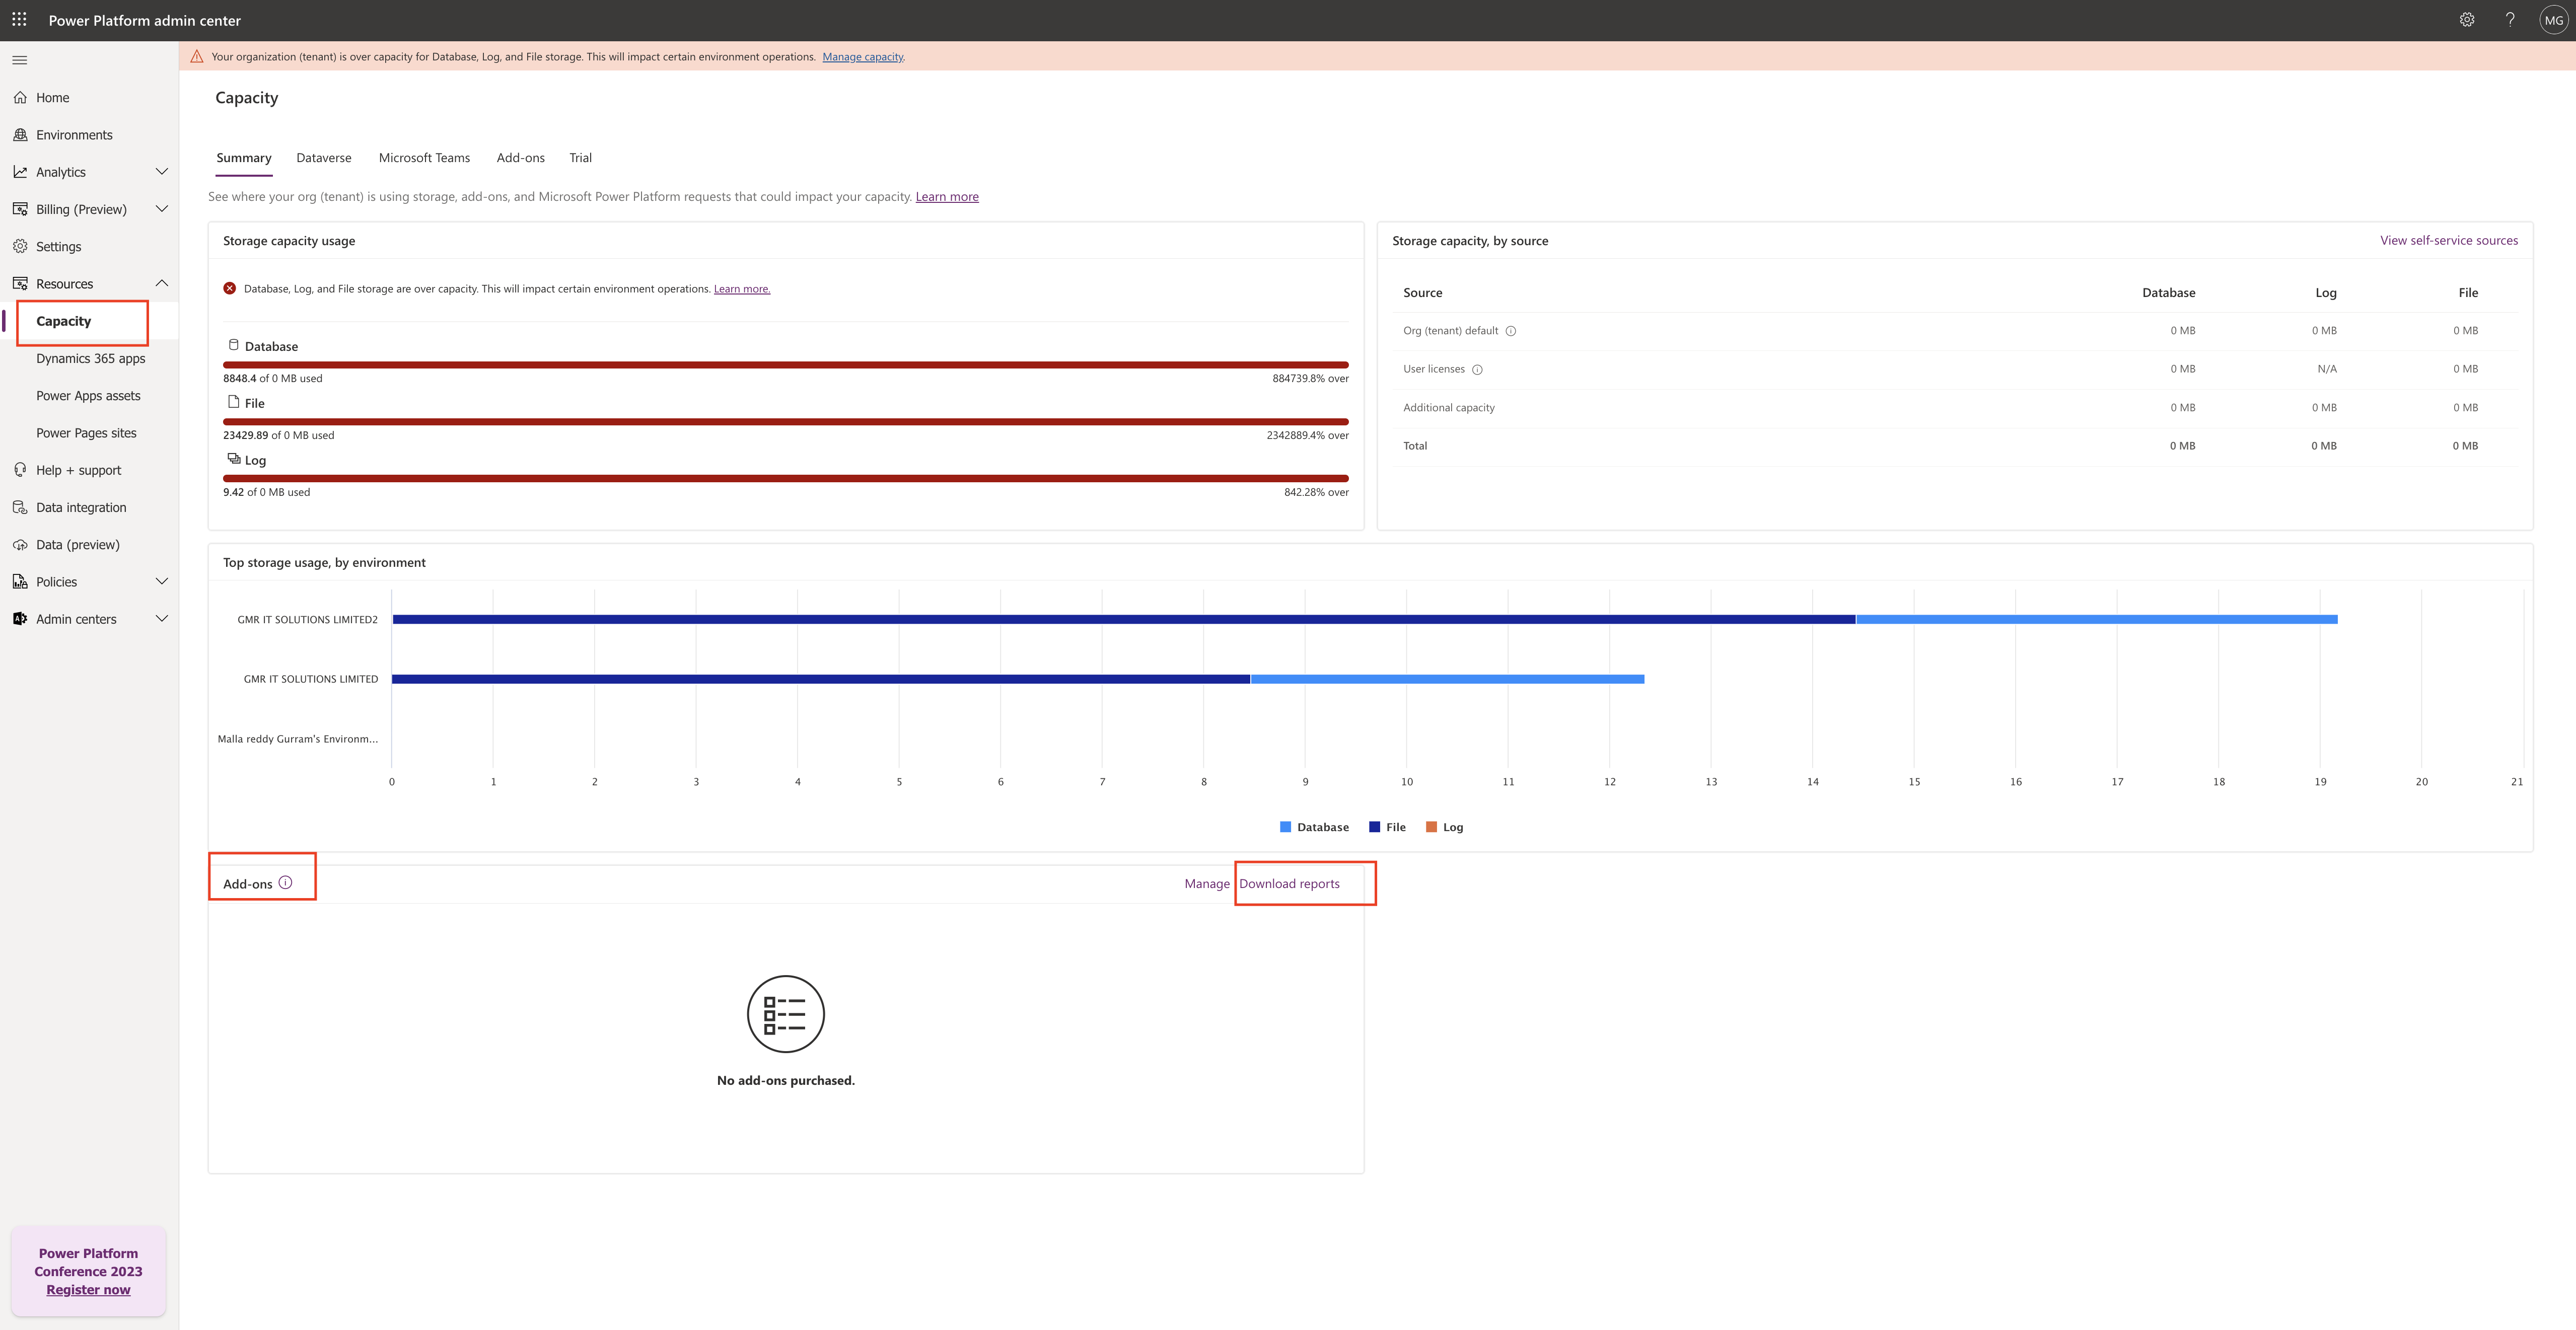
Select the Capacity from the left hand side navigation pane.

On the summary tab, select Download reports in the Add-ons section.

Click on download report and a new screen will be displayed.

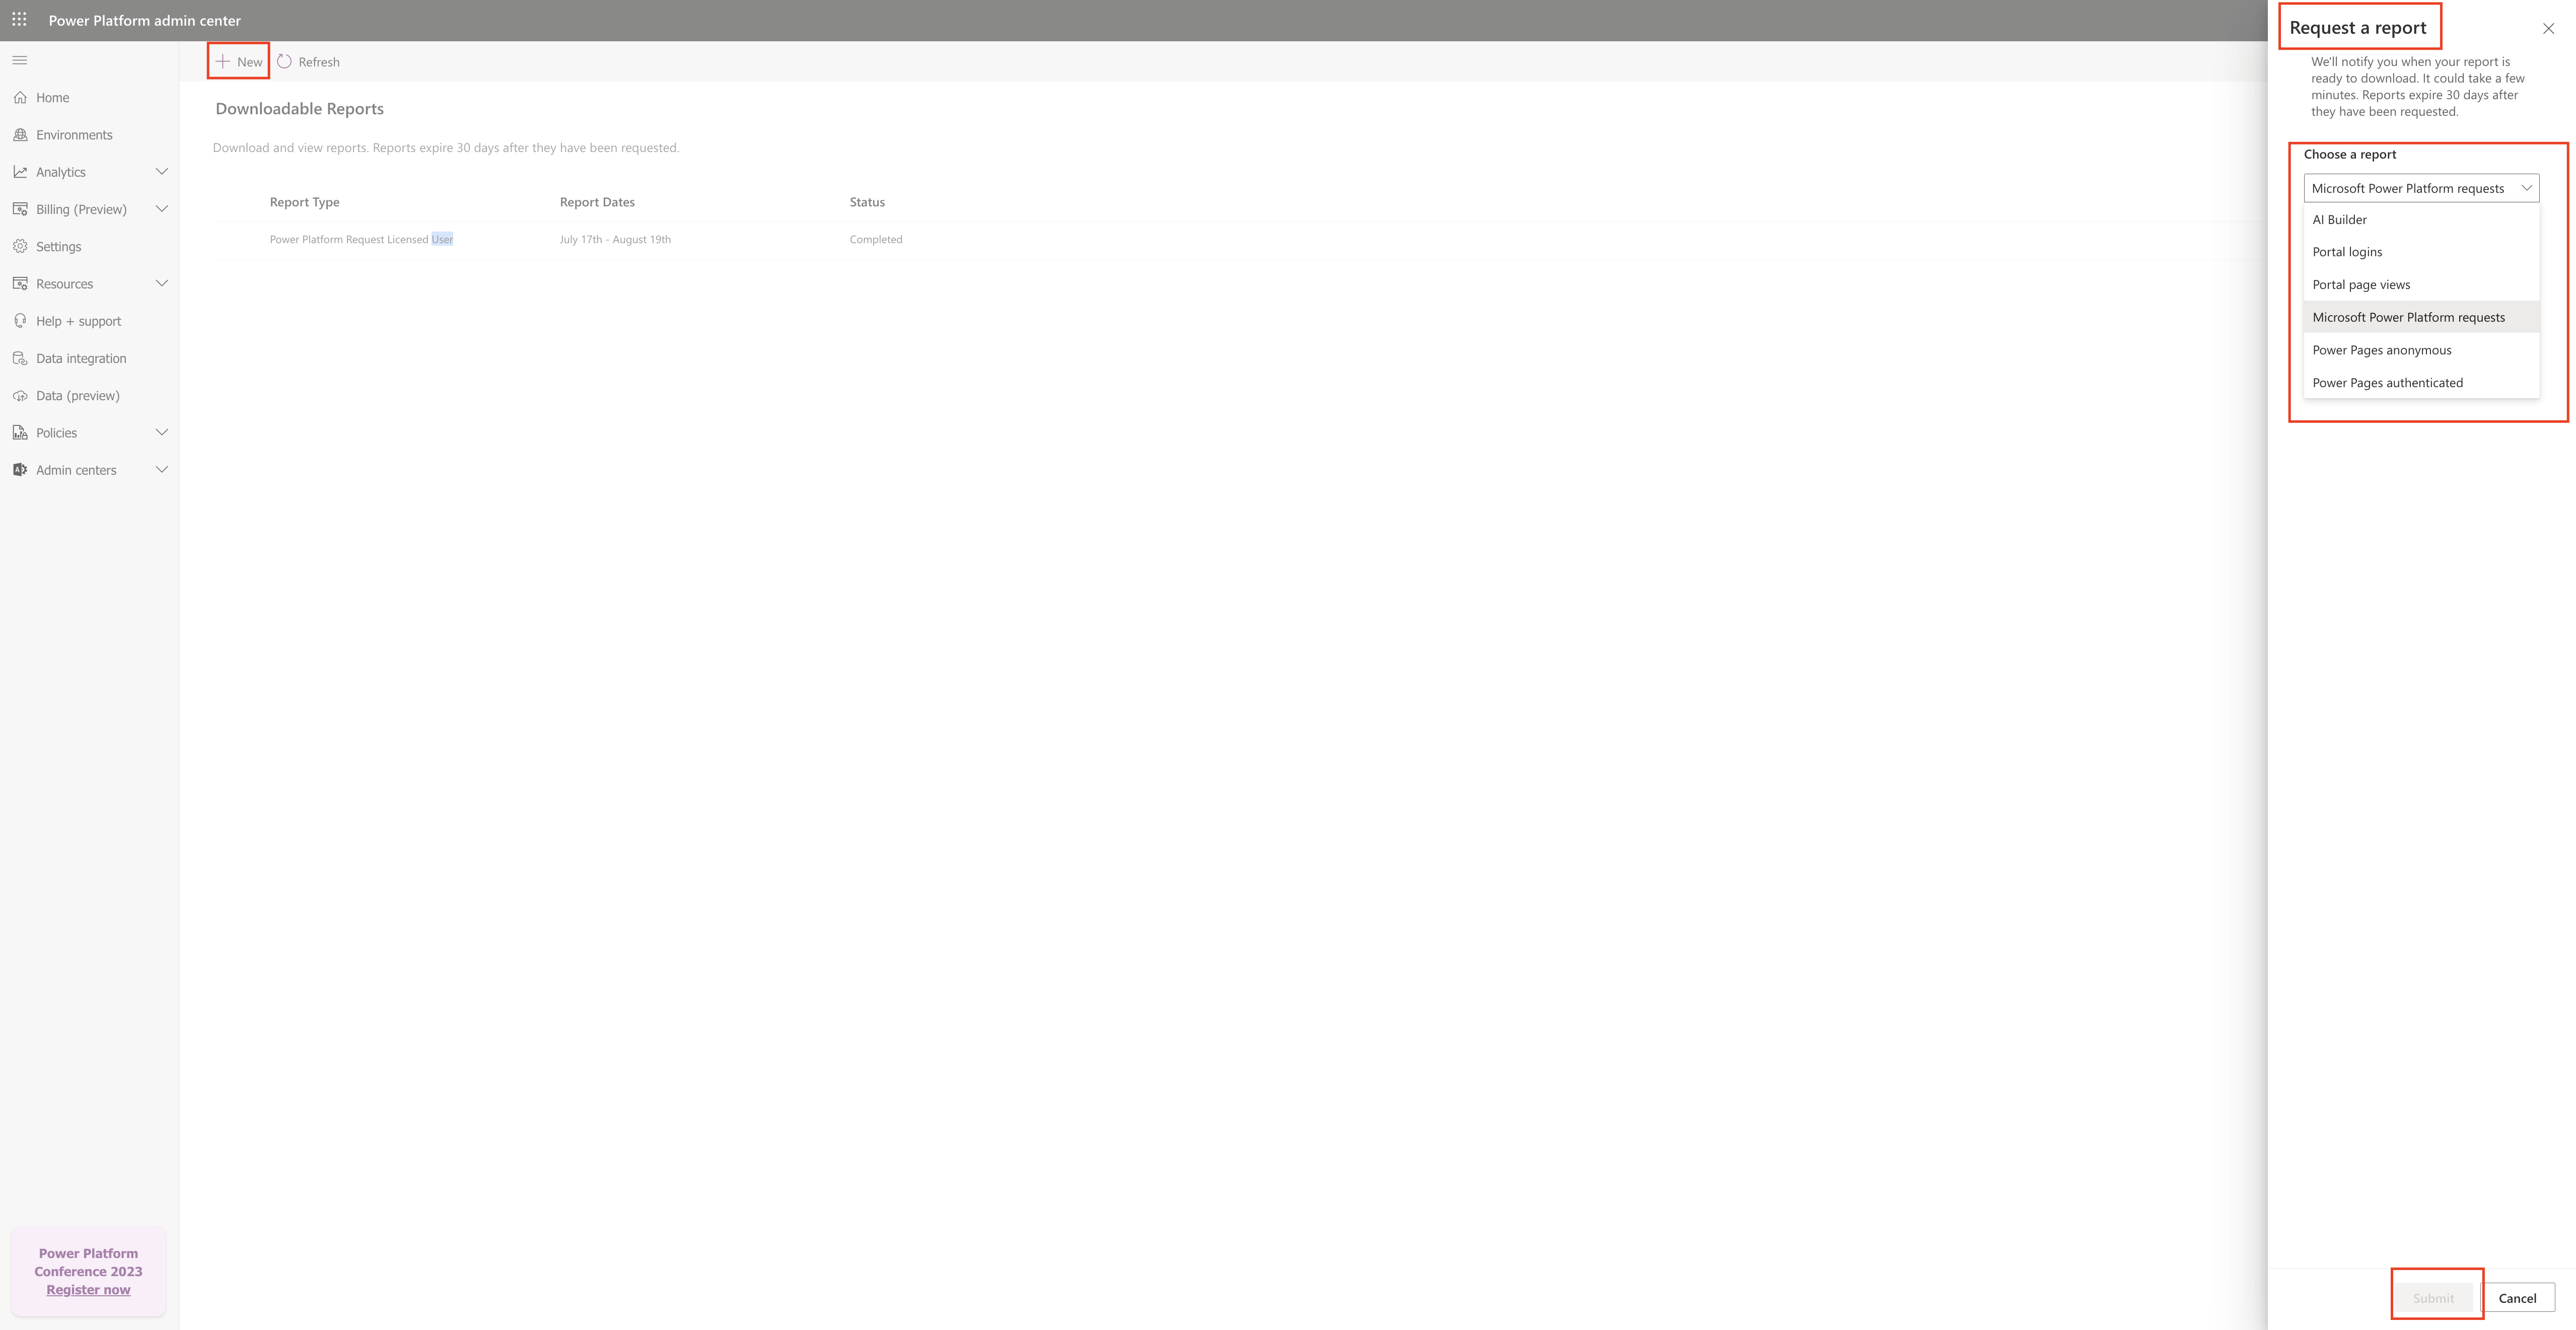
Click on the new button on the menu and new screen will popup on the right hand side and select the report you want to view like “Microsoft Power Platform Requests” and submit the report to be downloaded.

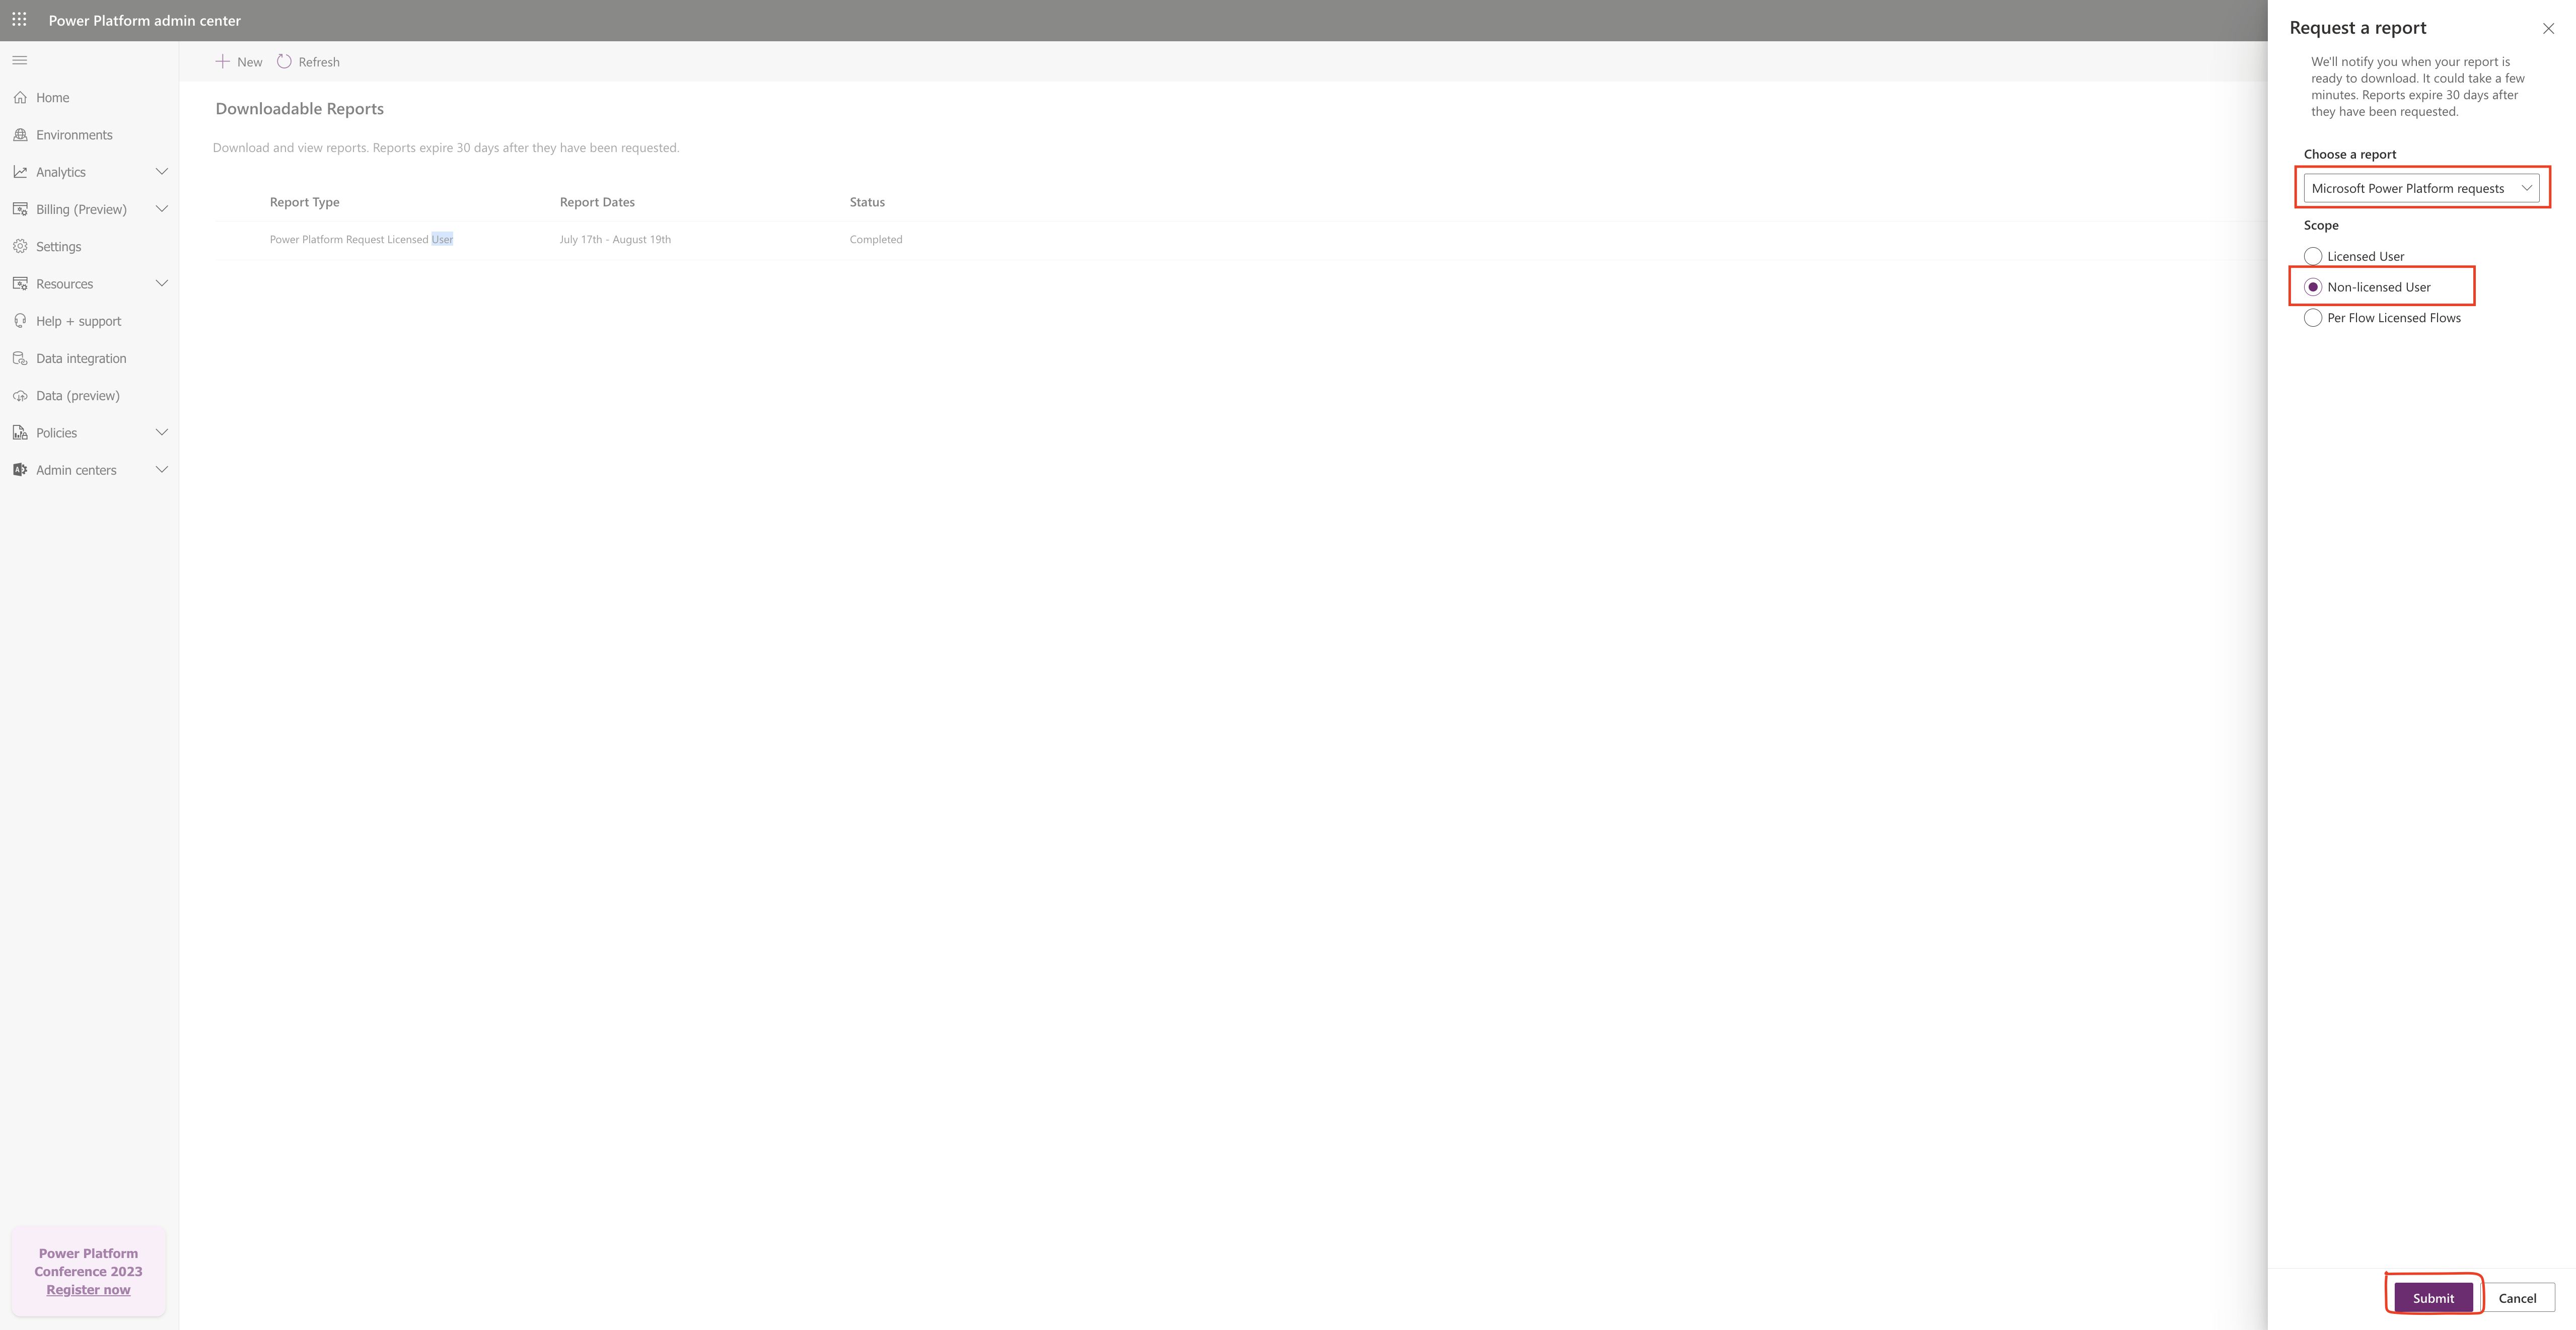
When you select the Microsoft Power Platform Requests then you need to select the scope:

1. Licensed User

2. Non-Licensed User

3. Per Flow Licensed Flows.

Here in this example i have selected the Non – Licensed Users requests and click on submit.

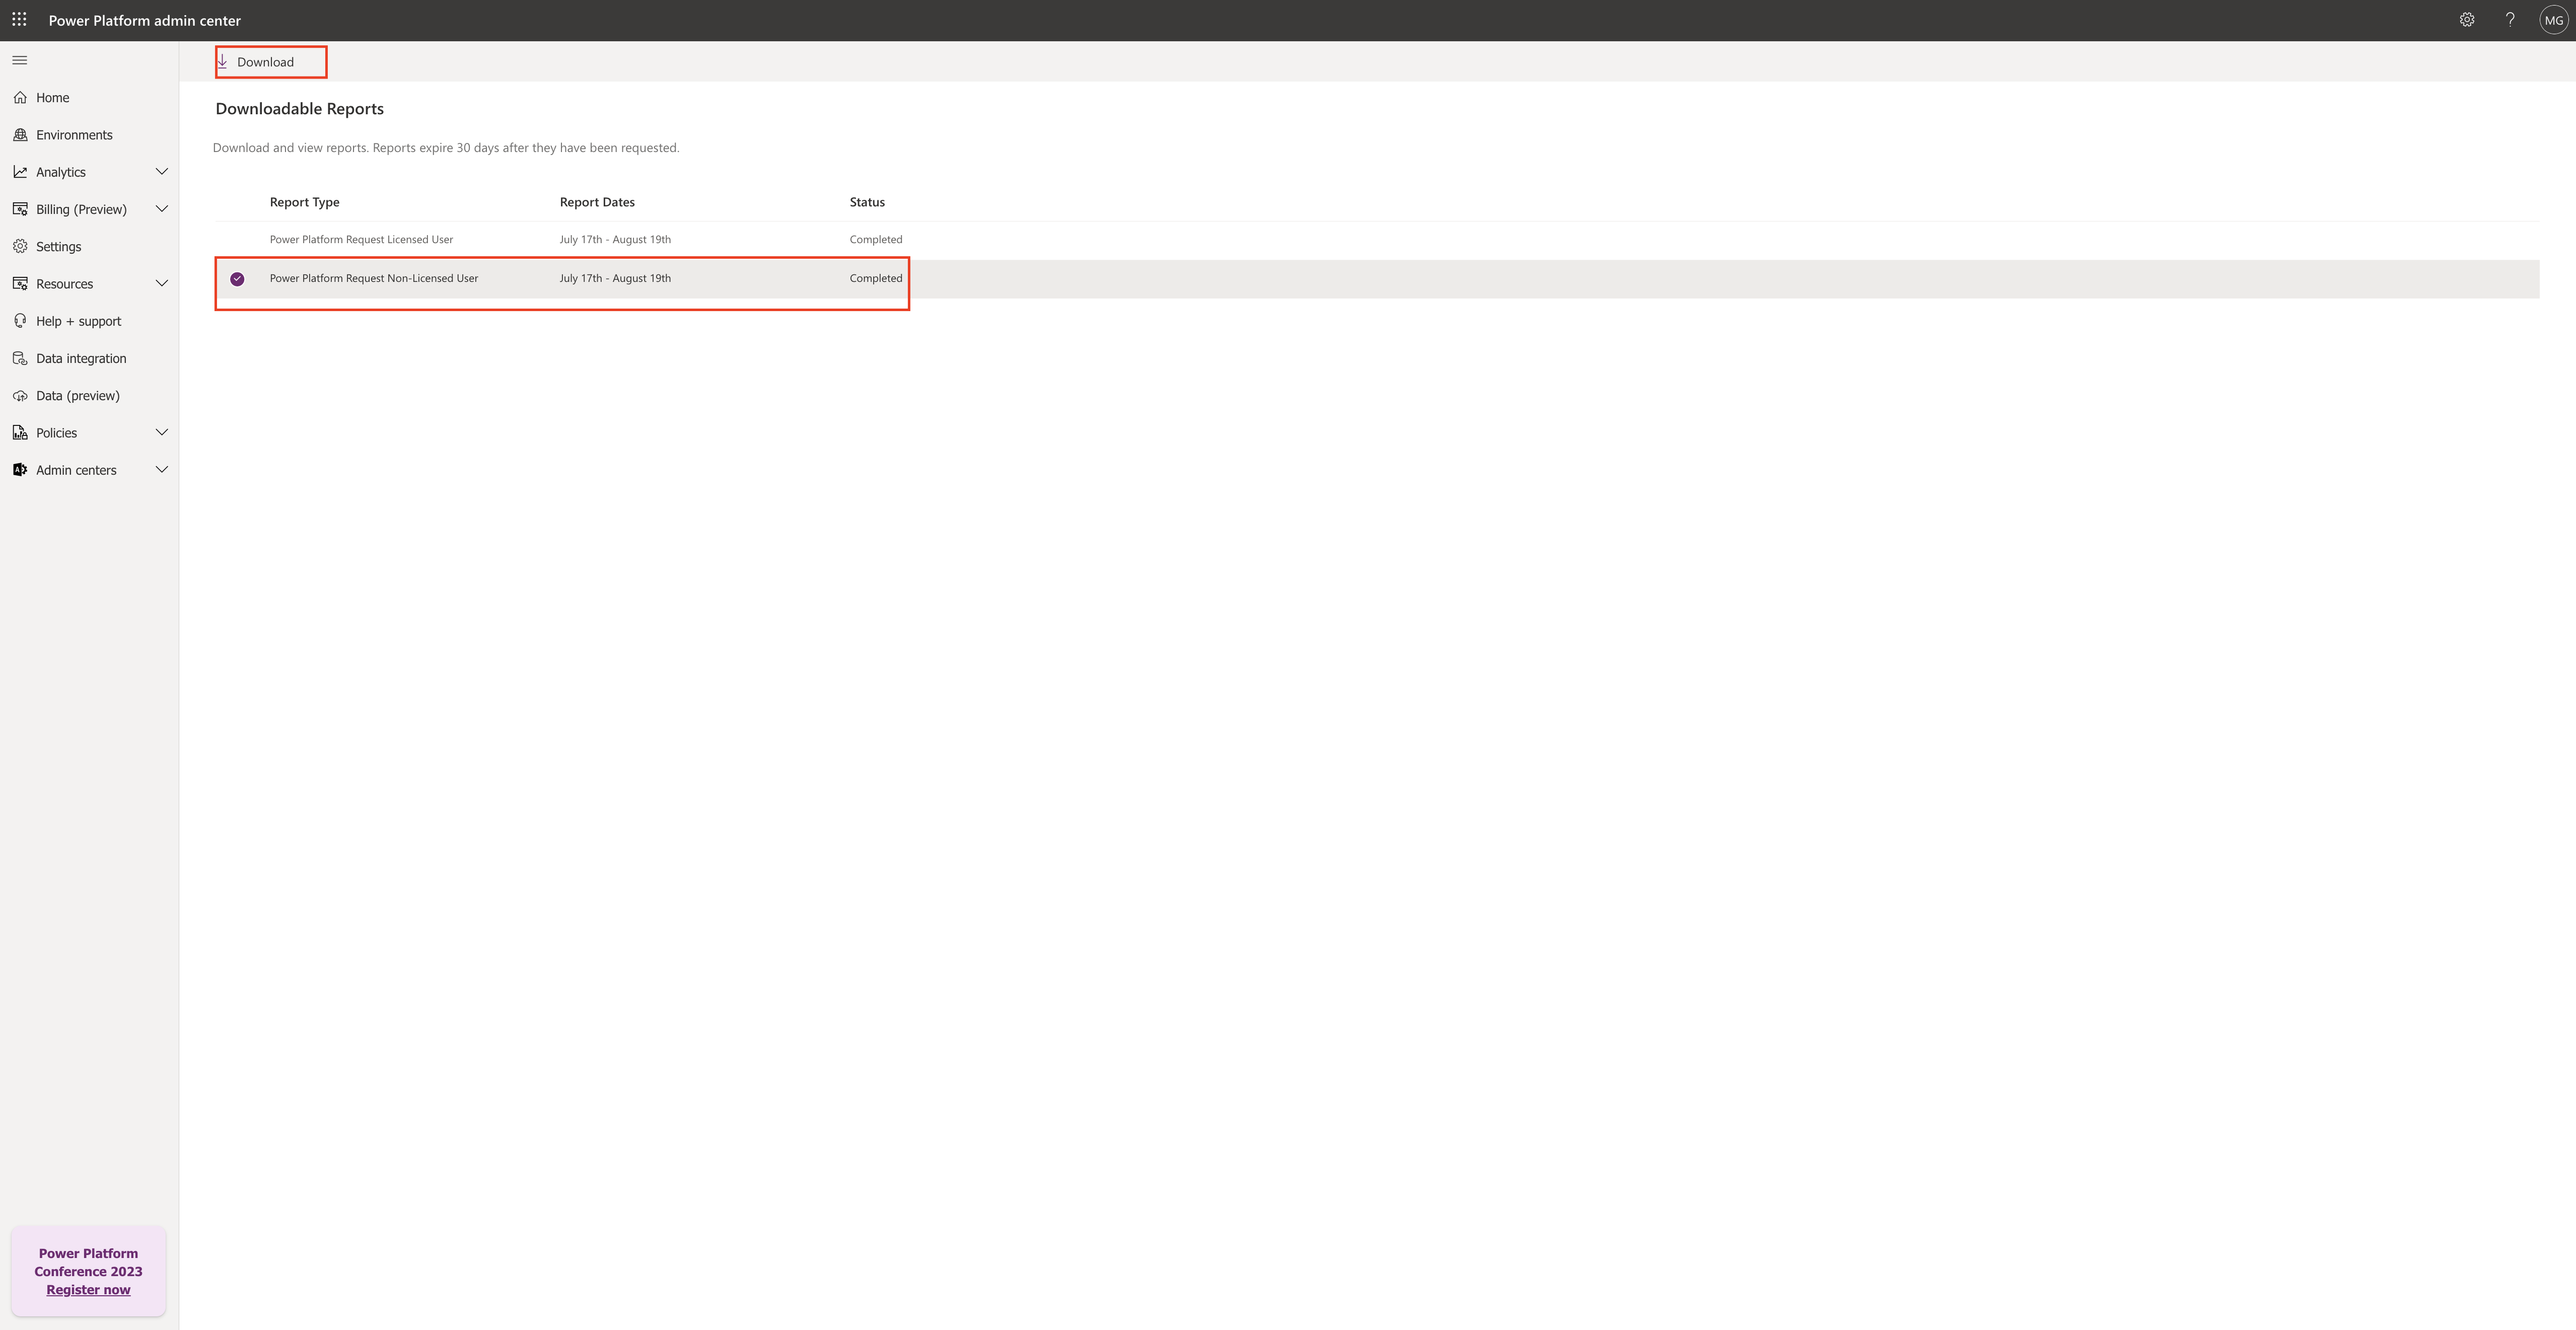
Once the execution completes then select the request and click on Download .

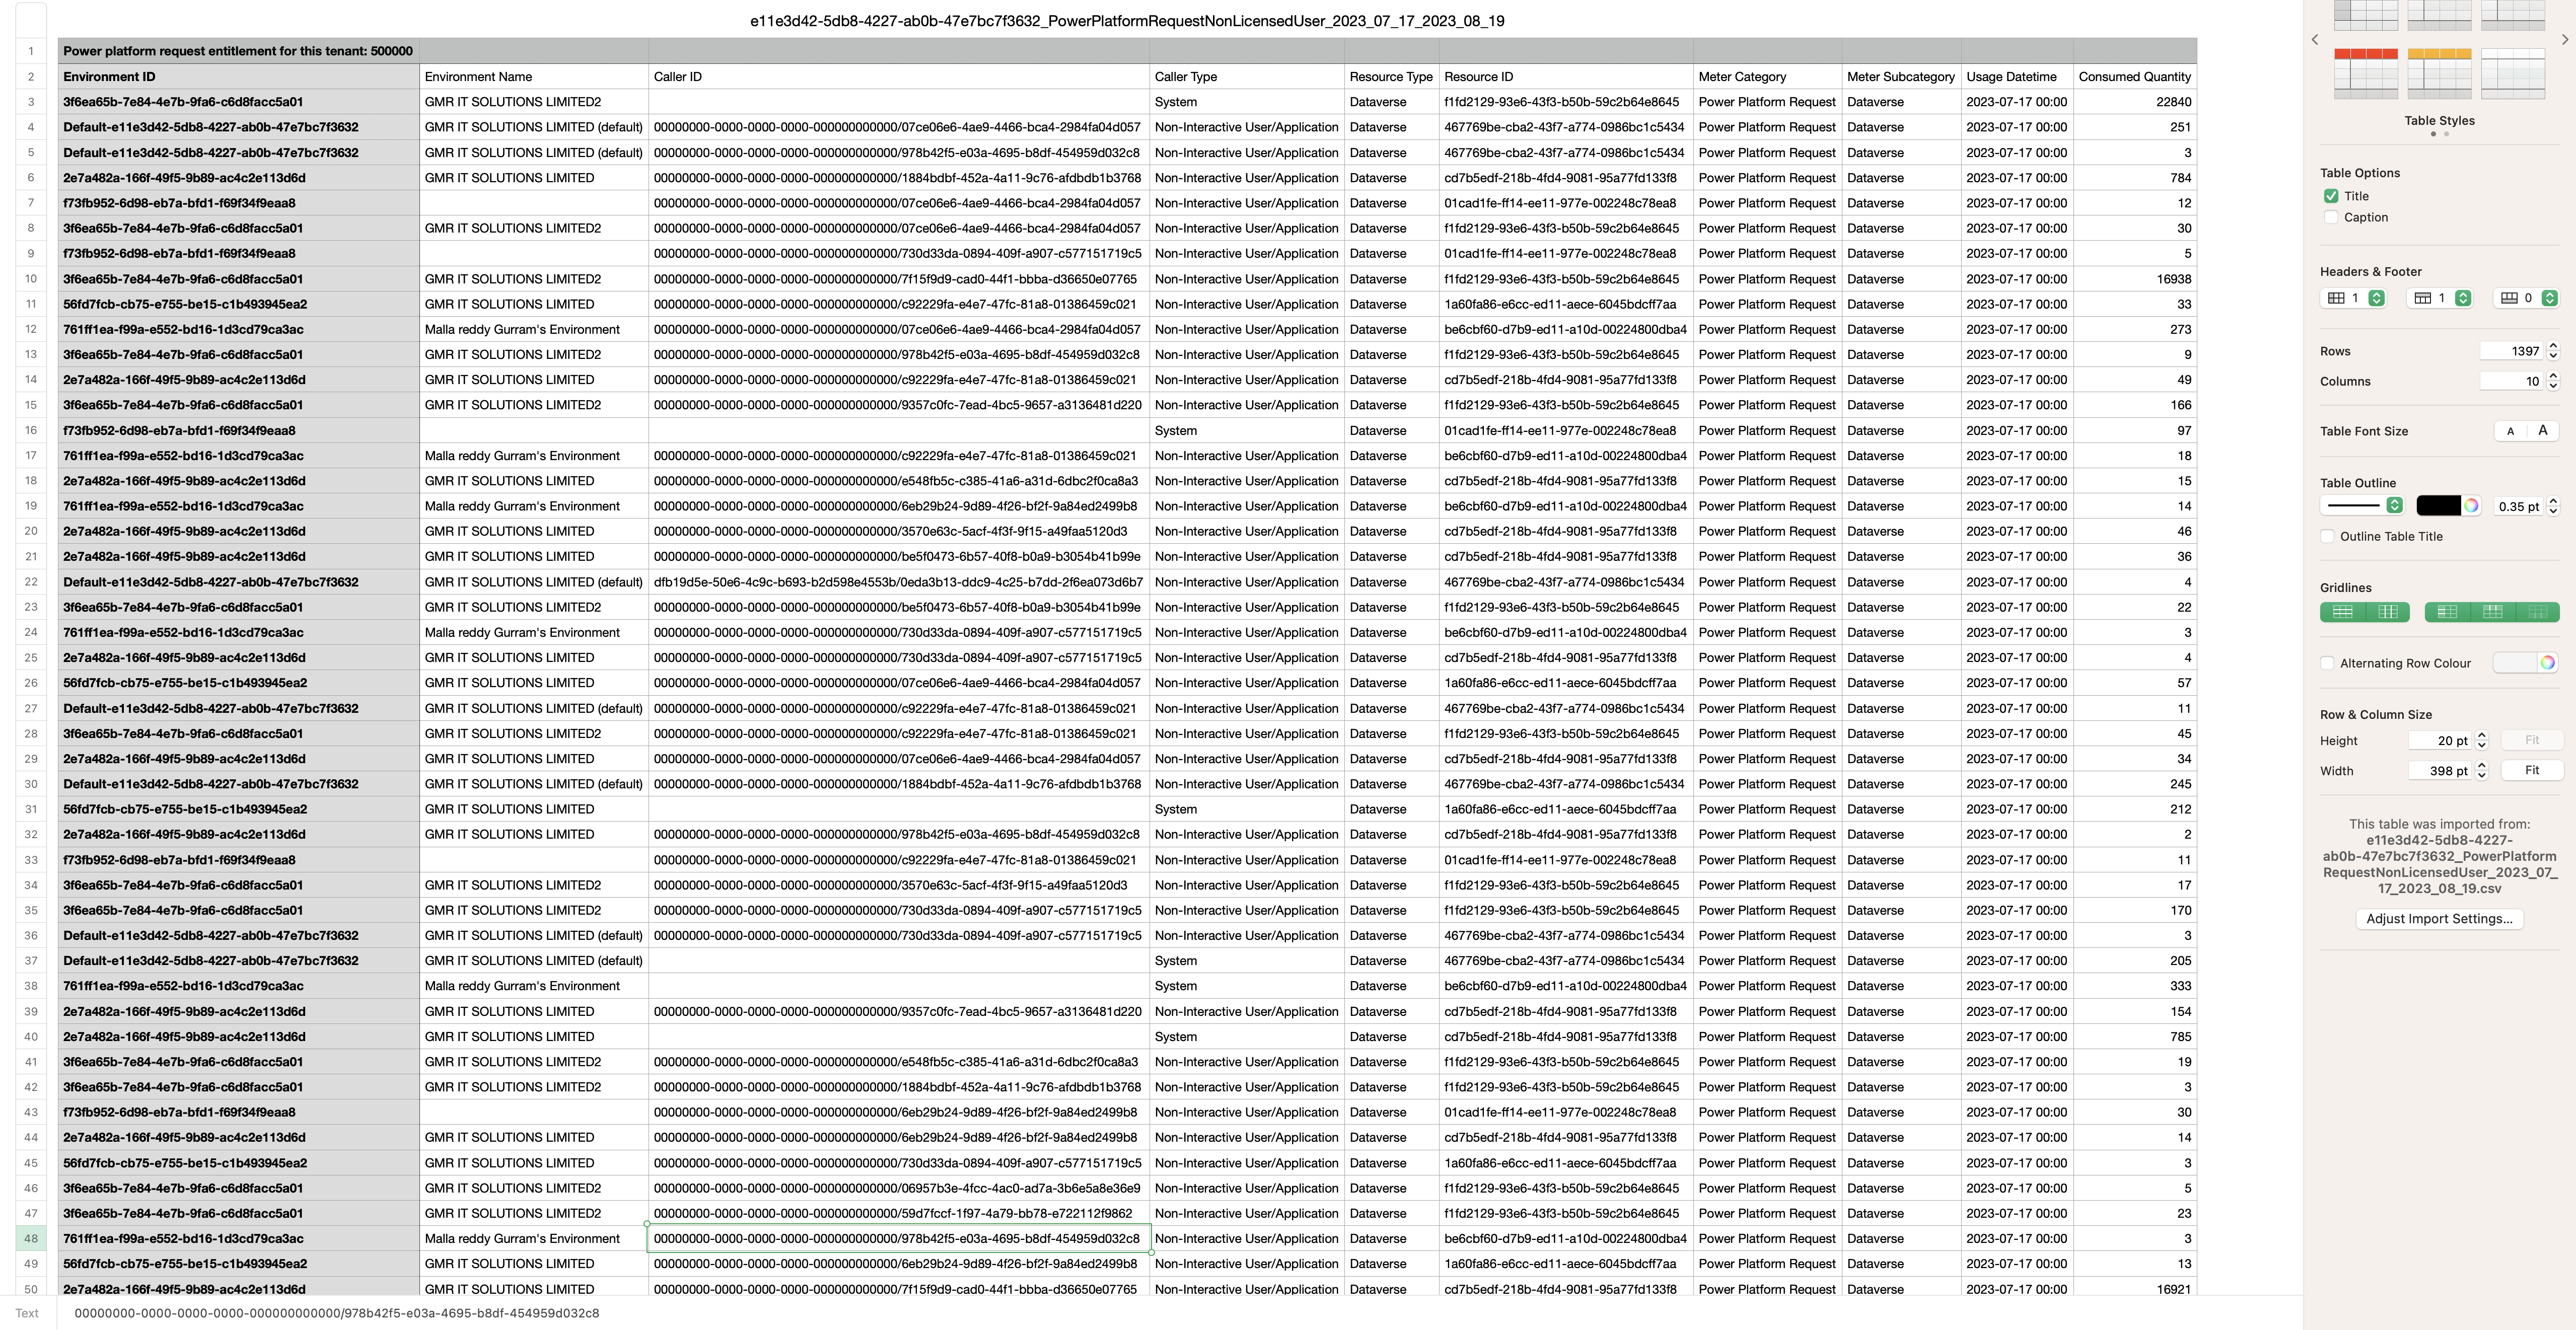
Here you can see the detailed report of non-licensed users

Similarly you can generate the report for:

AI Builder, Portal Logins, Portal page views, Power page anonymous, Power pages authenticated.

That’s it for today.

I hope this helps
Malla Reddy(@UK365GUY)
#365BlogPostsin365Days

Share this:

{How to } Add a table to the Quick Create on Application Ribbon Global Home Page in Dynamics 365

Hello Everyone,

Today i am going to share how to add a table to Quick Create on Application Ribbon Global Home Page in Dynamics 365 Sales App.

Let’s get’s started.

Suppose you have requirement to add a table to Quick Create on Application Ribbon Global Home Page, Where do you enable this feature on a table?

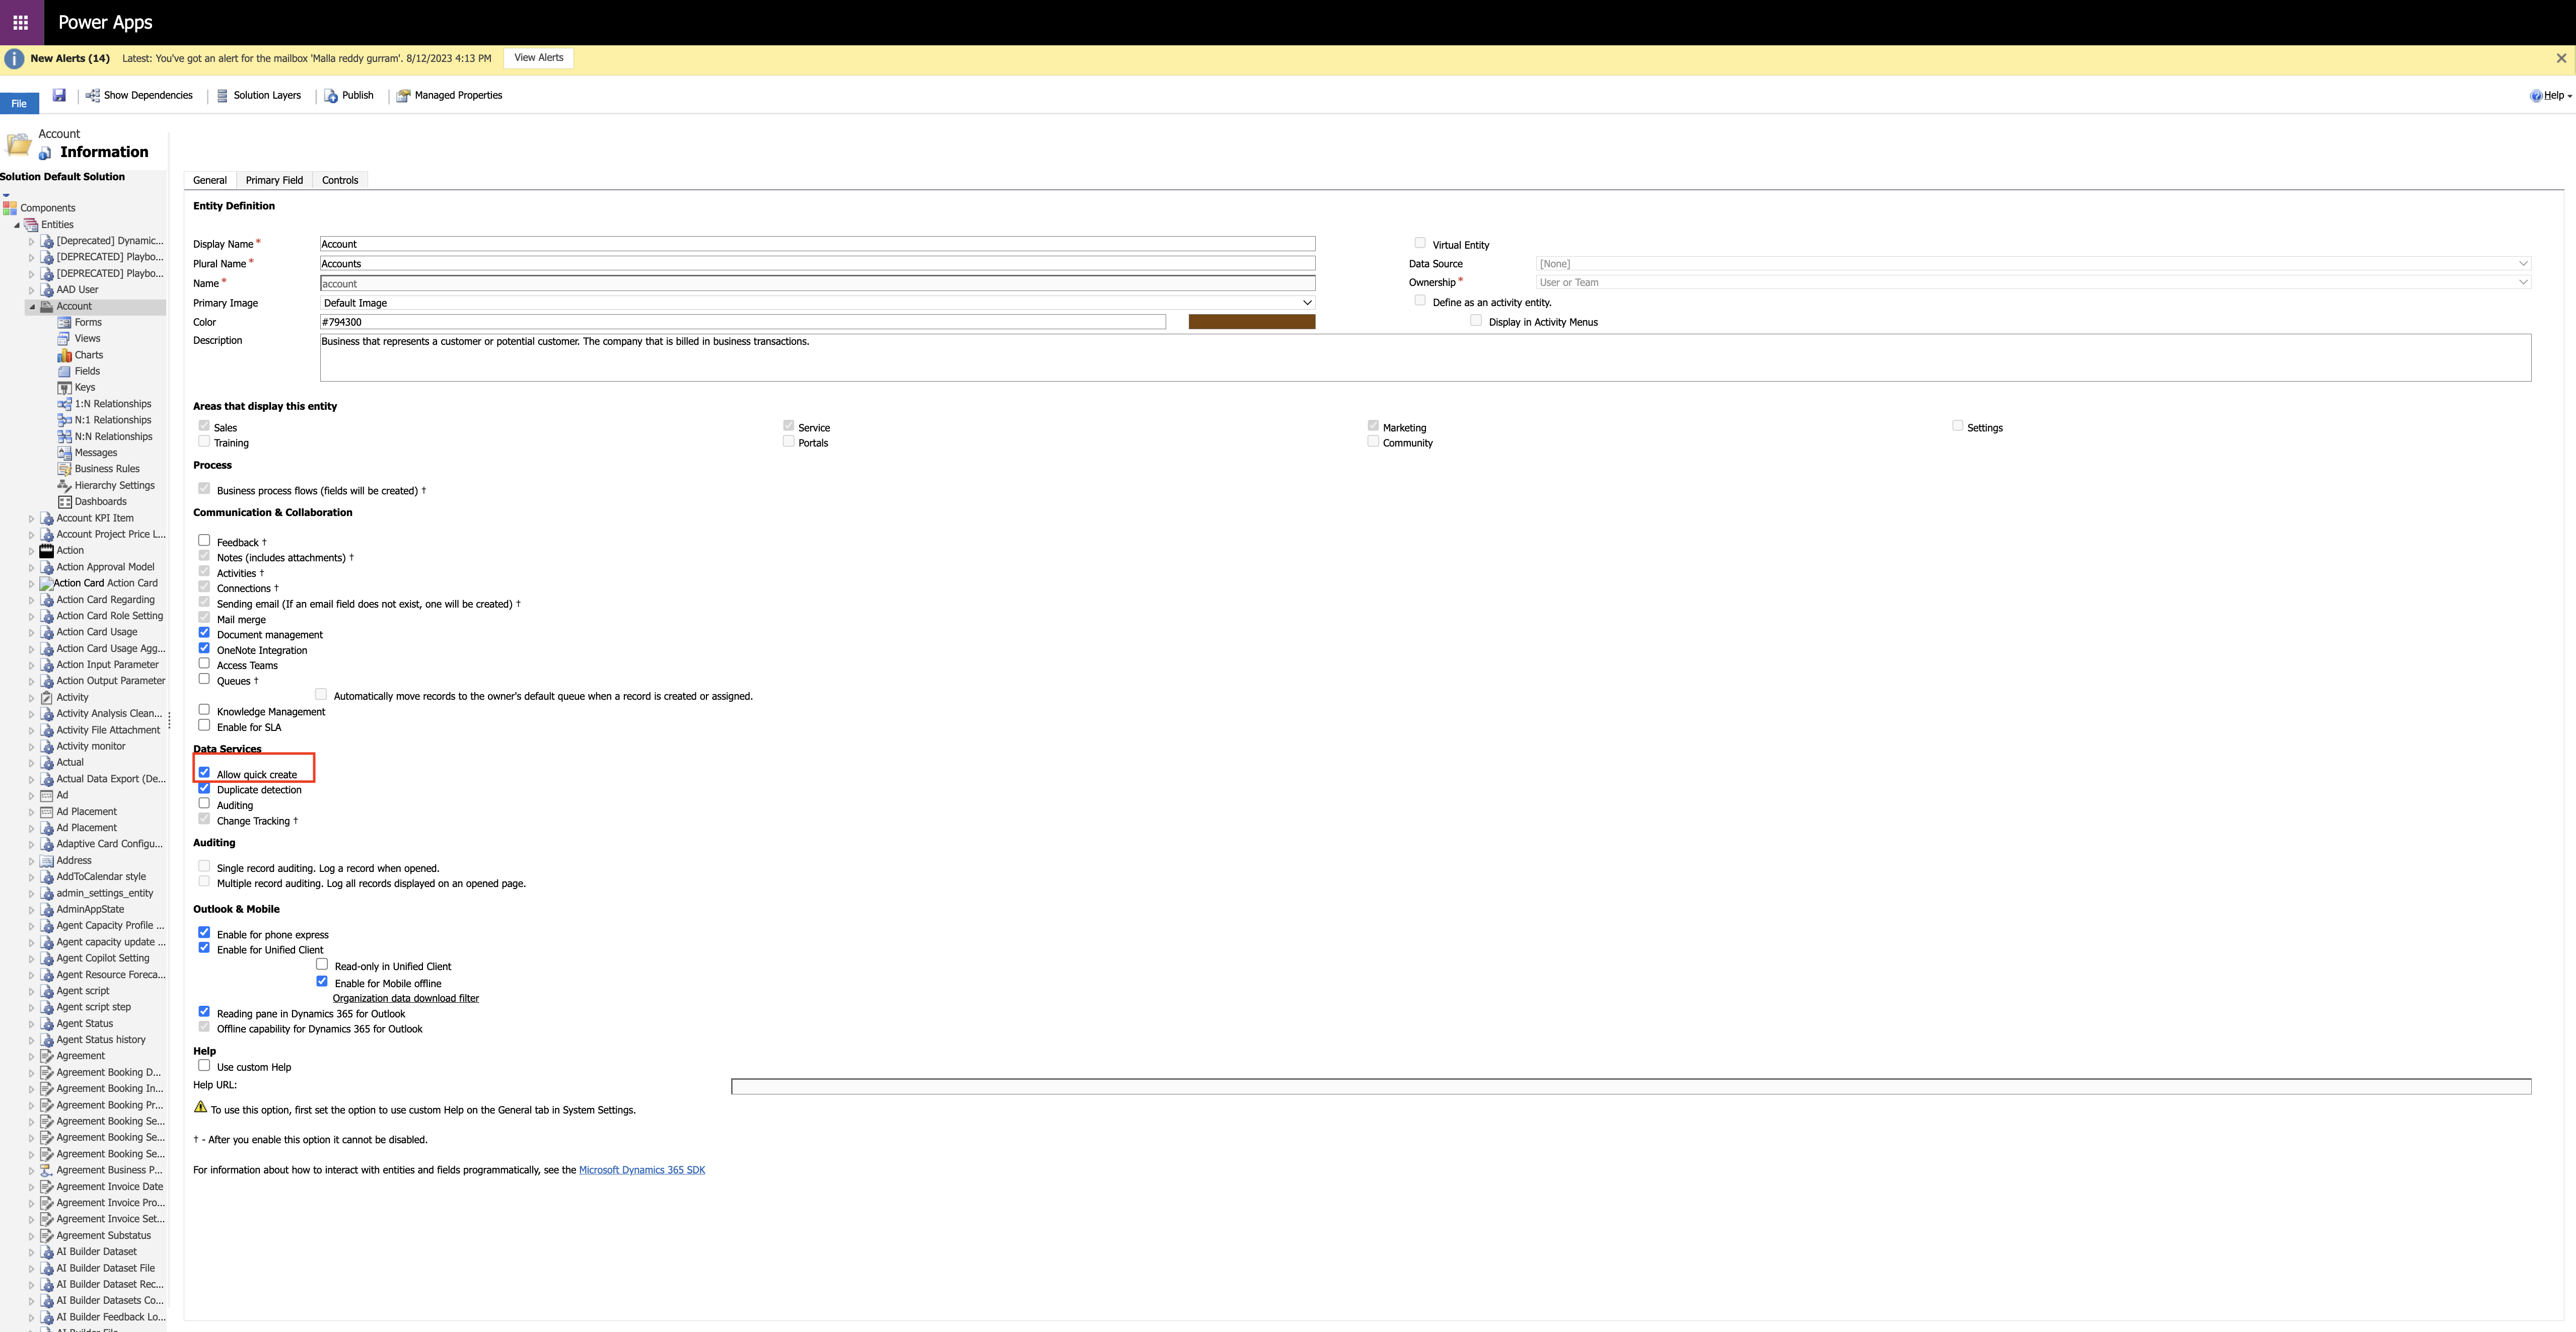
When you are creating a table you have an option to check the box for Allow Quick Create.

Once you check the box then save and publish the changes…

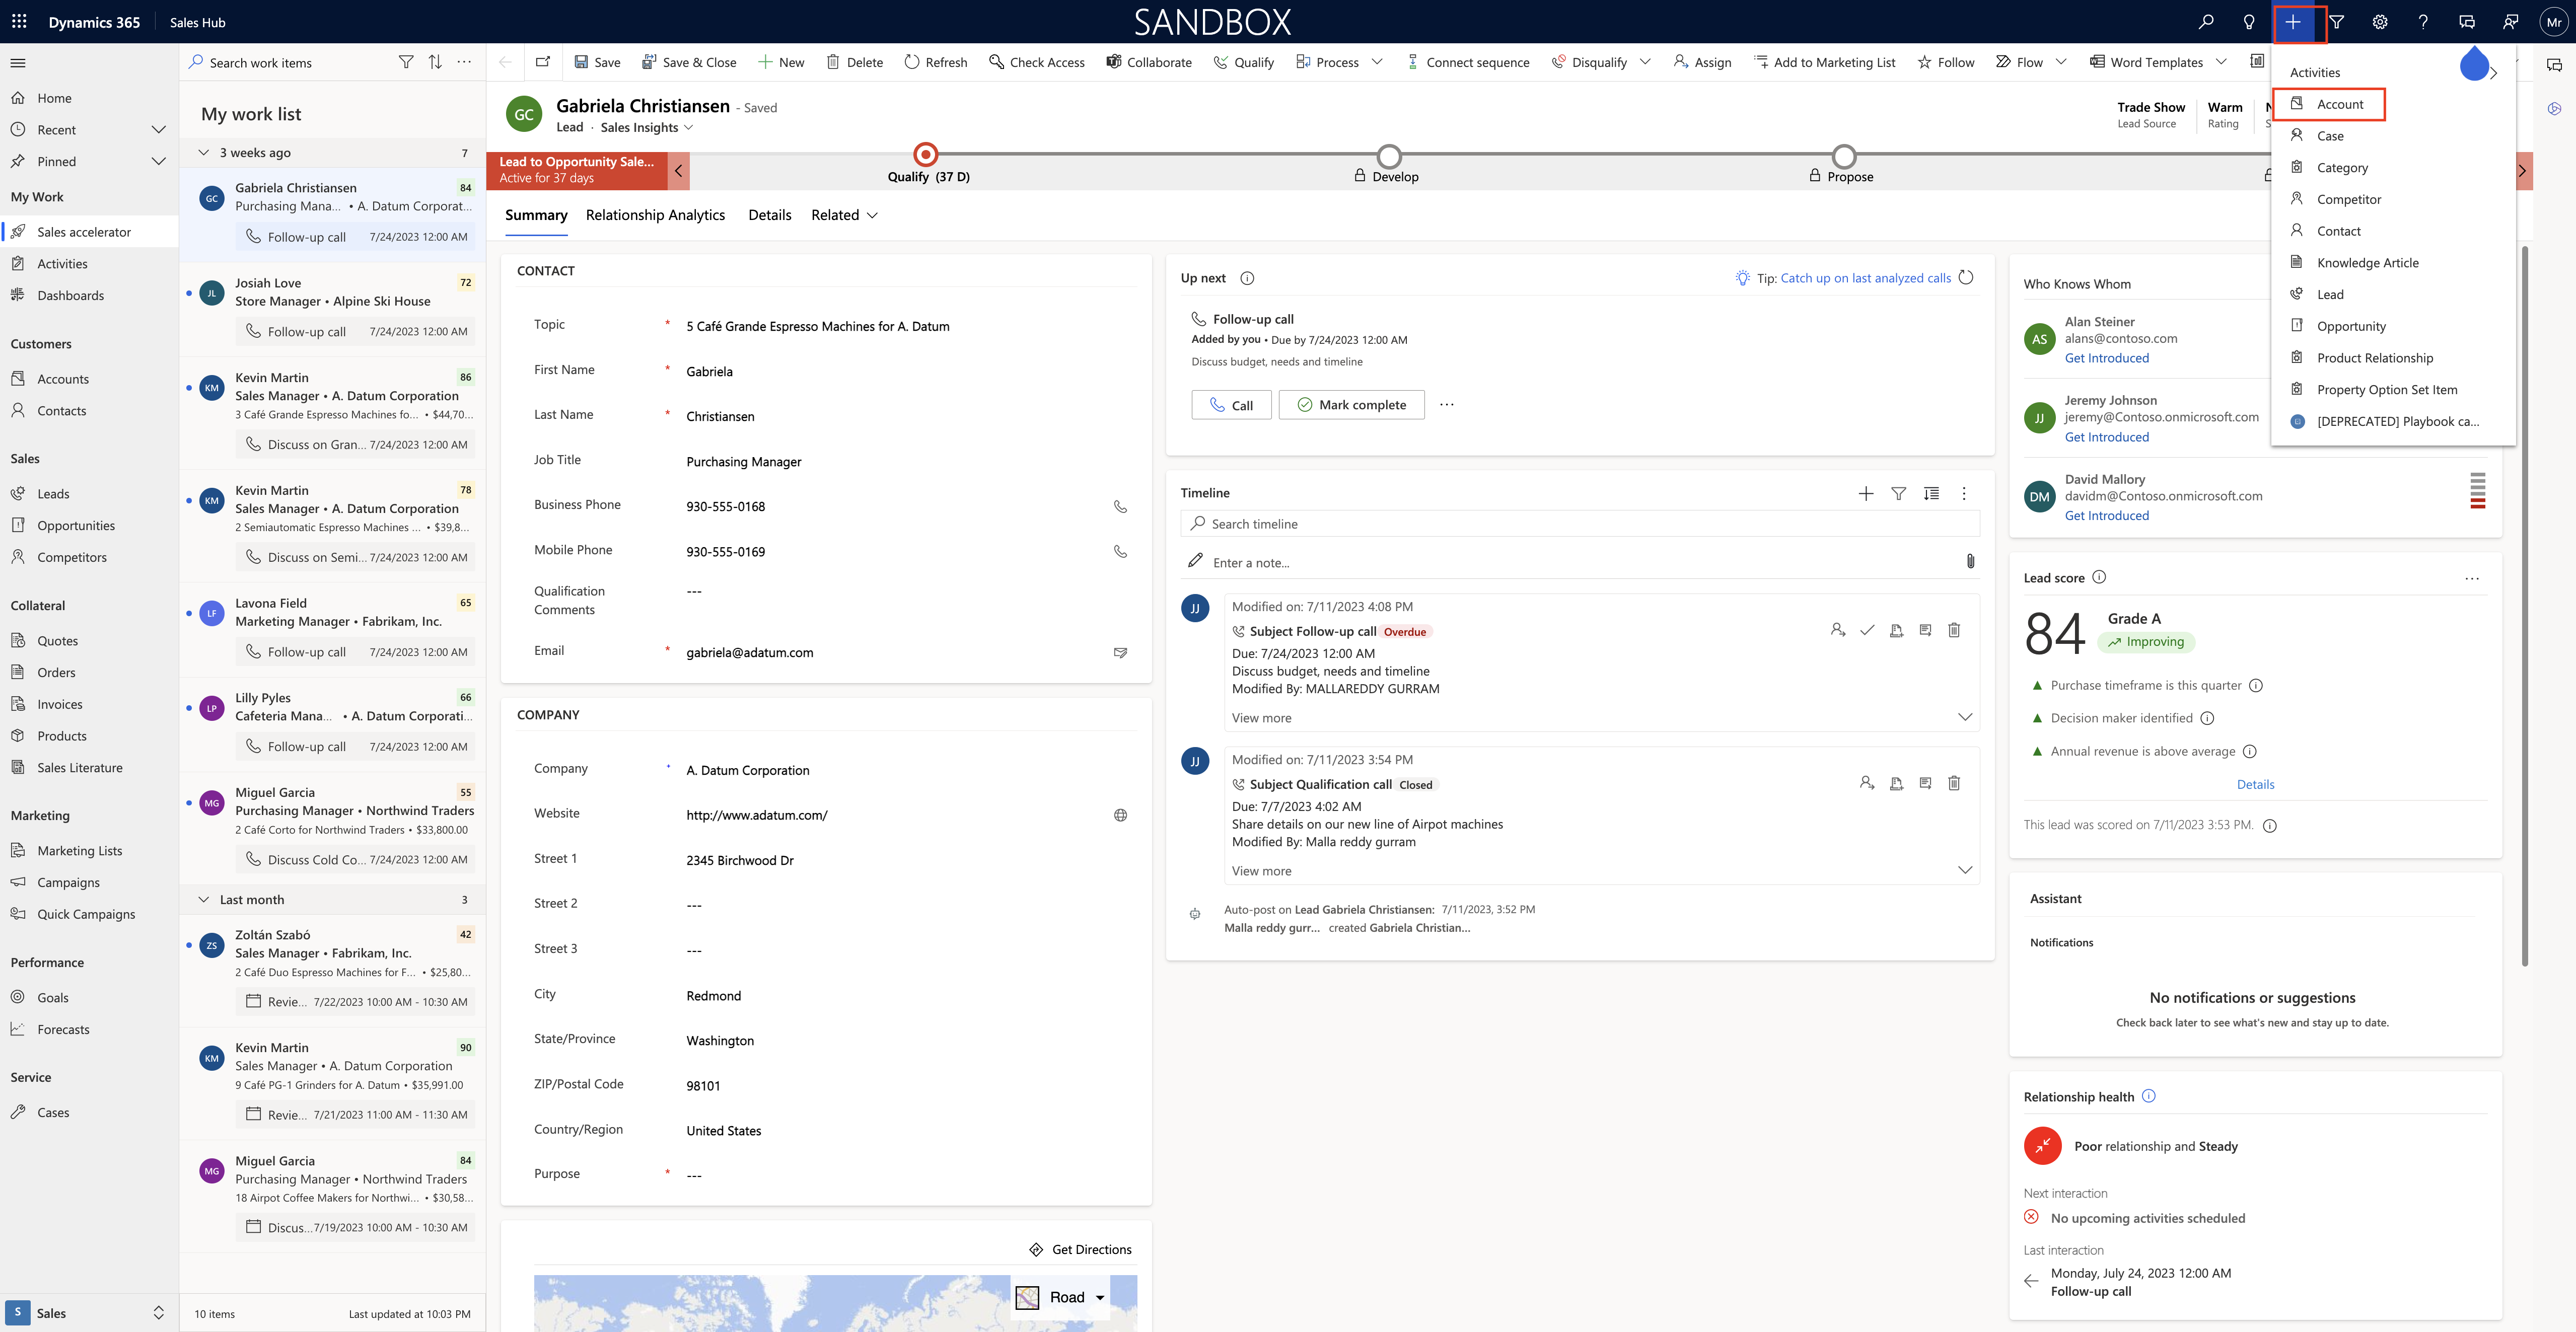
Also check on the site map to add the Quick Create Account checked.

It will automatically appear on the Application Ribbon in Dynamics 365 Sales Global Home Page.

That’s it for today.

I hope this helps
Malla Reddy Gurram(@UK365GUY)
#365BlogPostsin365Days
Share this: