Hello Everyone,
Today I am going to share my thoughts on use workflows on calendar events in Teams and Outlook.
Let’s get’s started.
Certainly! You can use workflows on calendar events in Microsoft Teams and Outlook to automate repetitive tasks and processes. This feature which is part of the Microsoft Power Automate platform, allows you to create flows that can be triggered at the start or end of a meeting.
For example:
Here’s how you can set up and use the workflows:
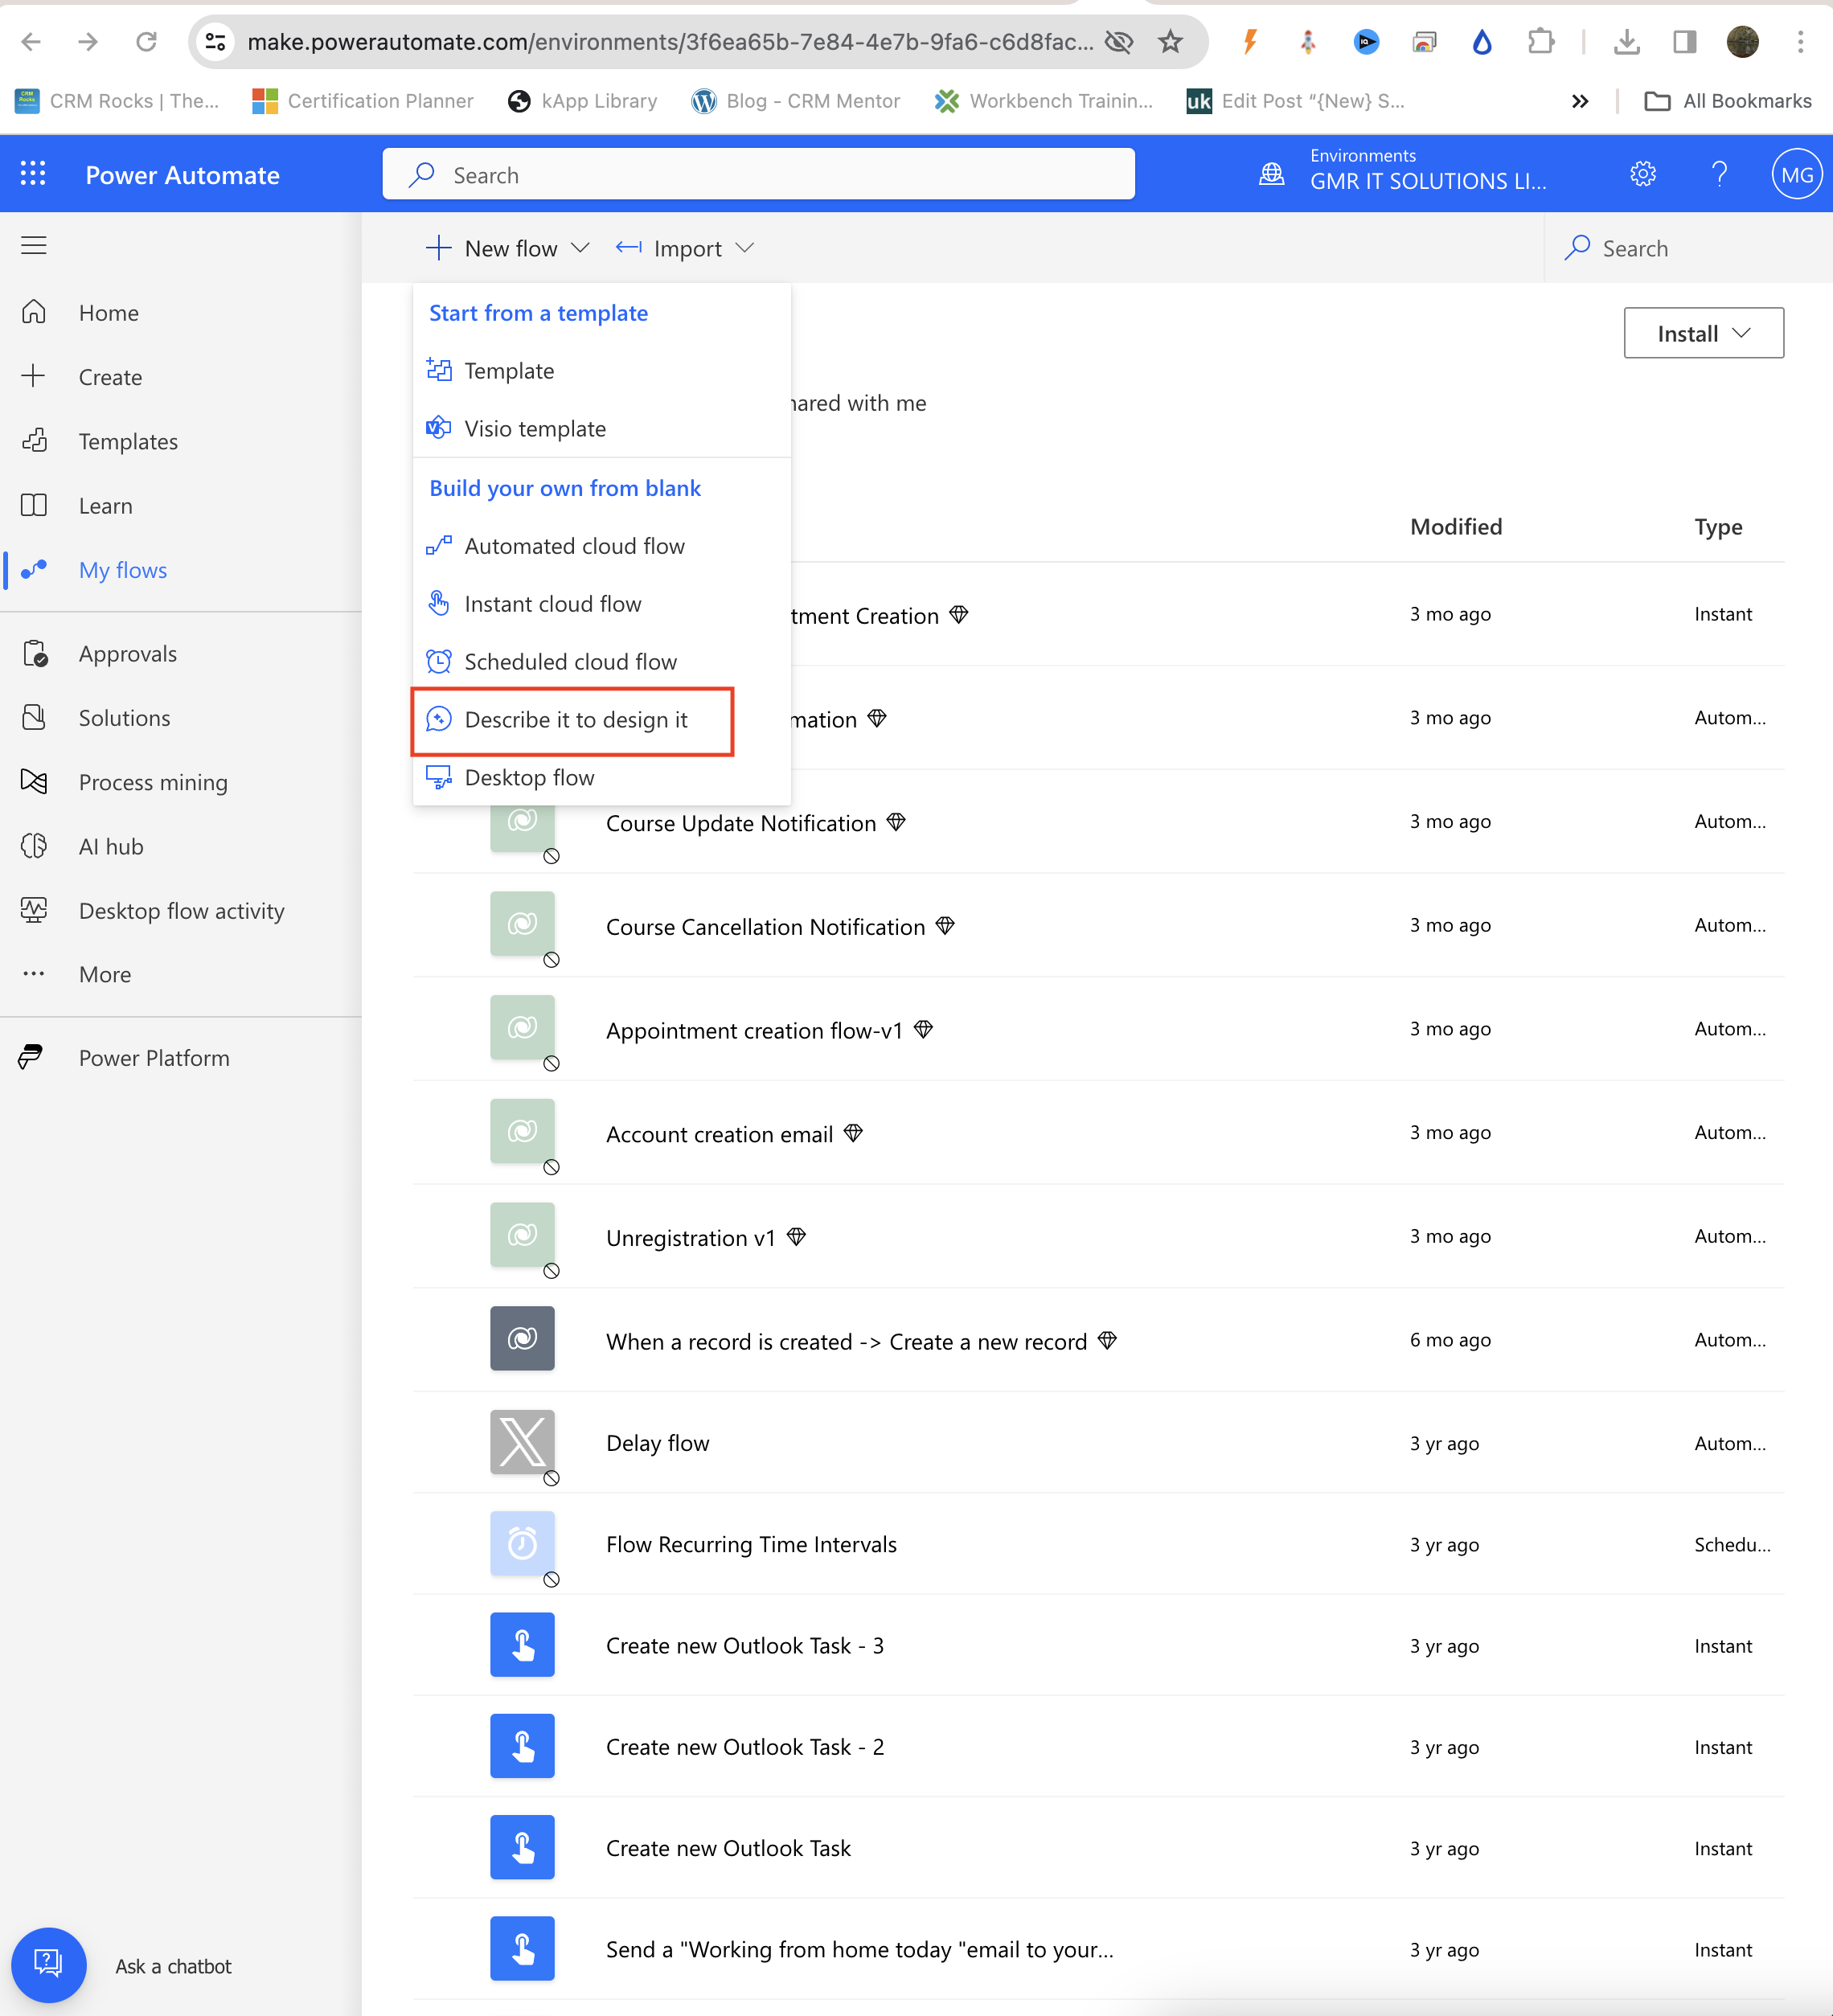
1. Select Apps from the left side of the Teams.
2. Scroll and select Workflows from the navigation on the left.
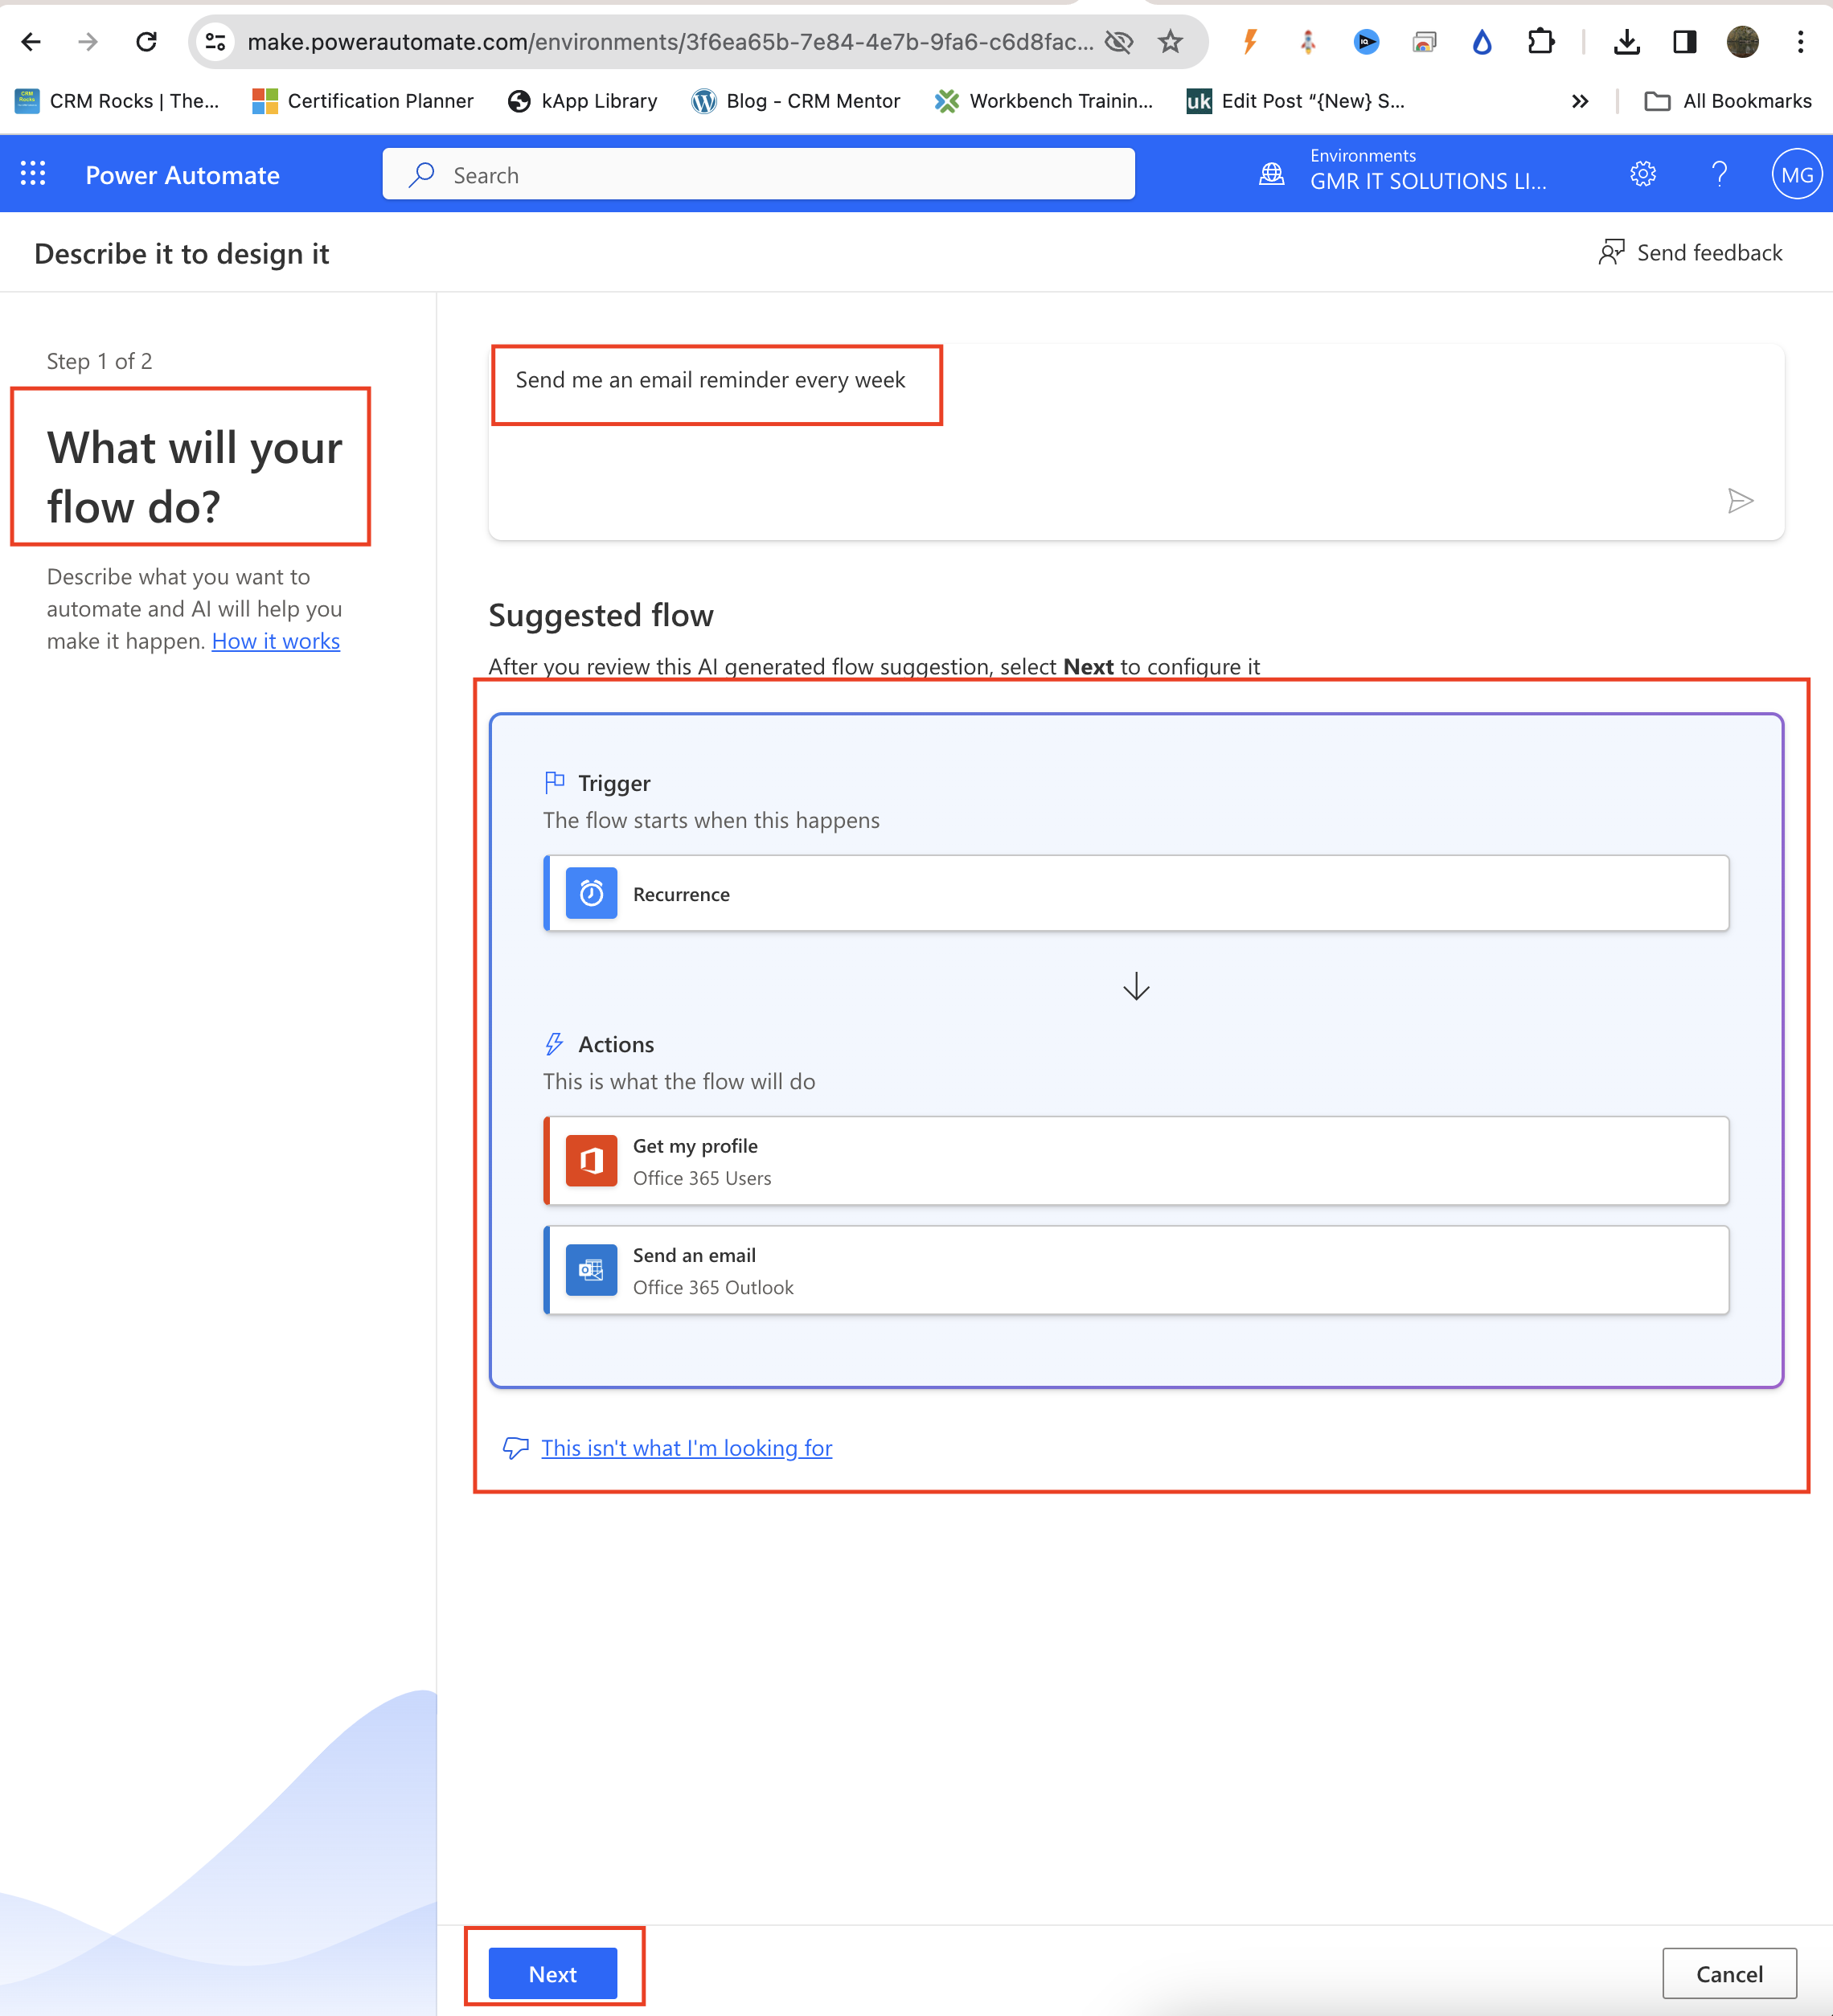
3. Choose a workflow that fits your needs.
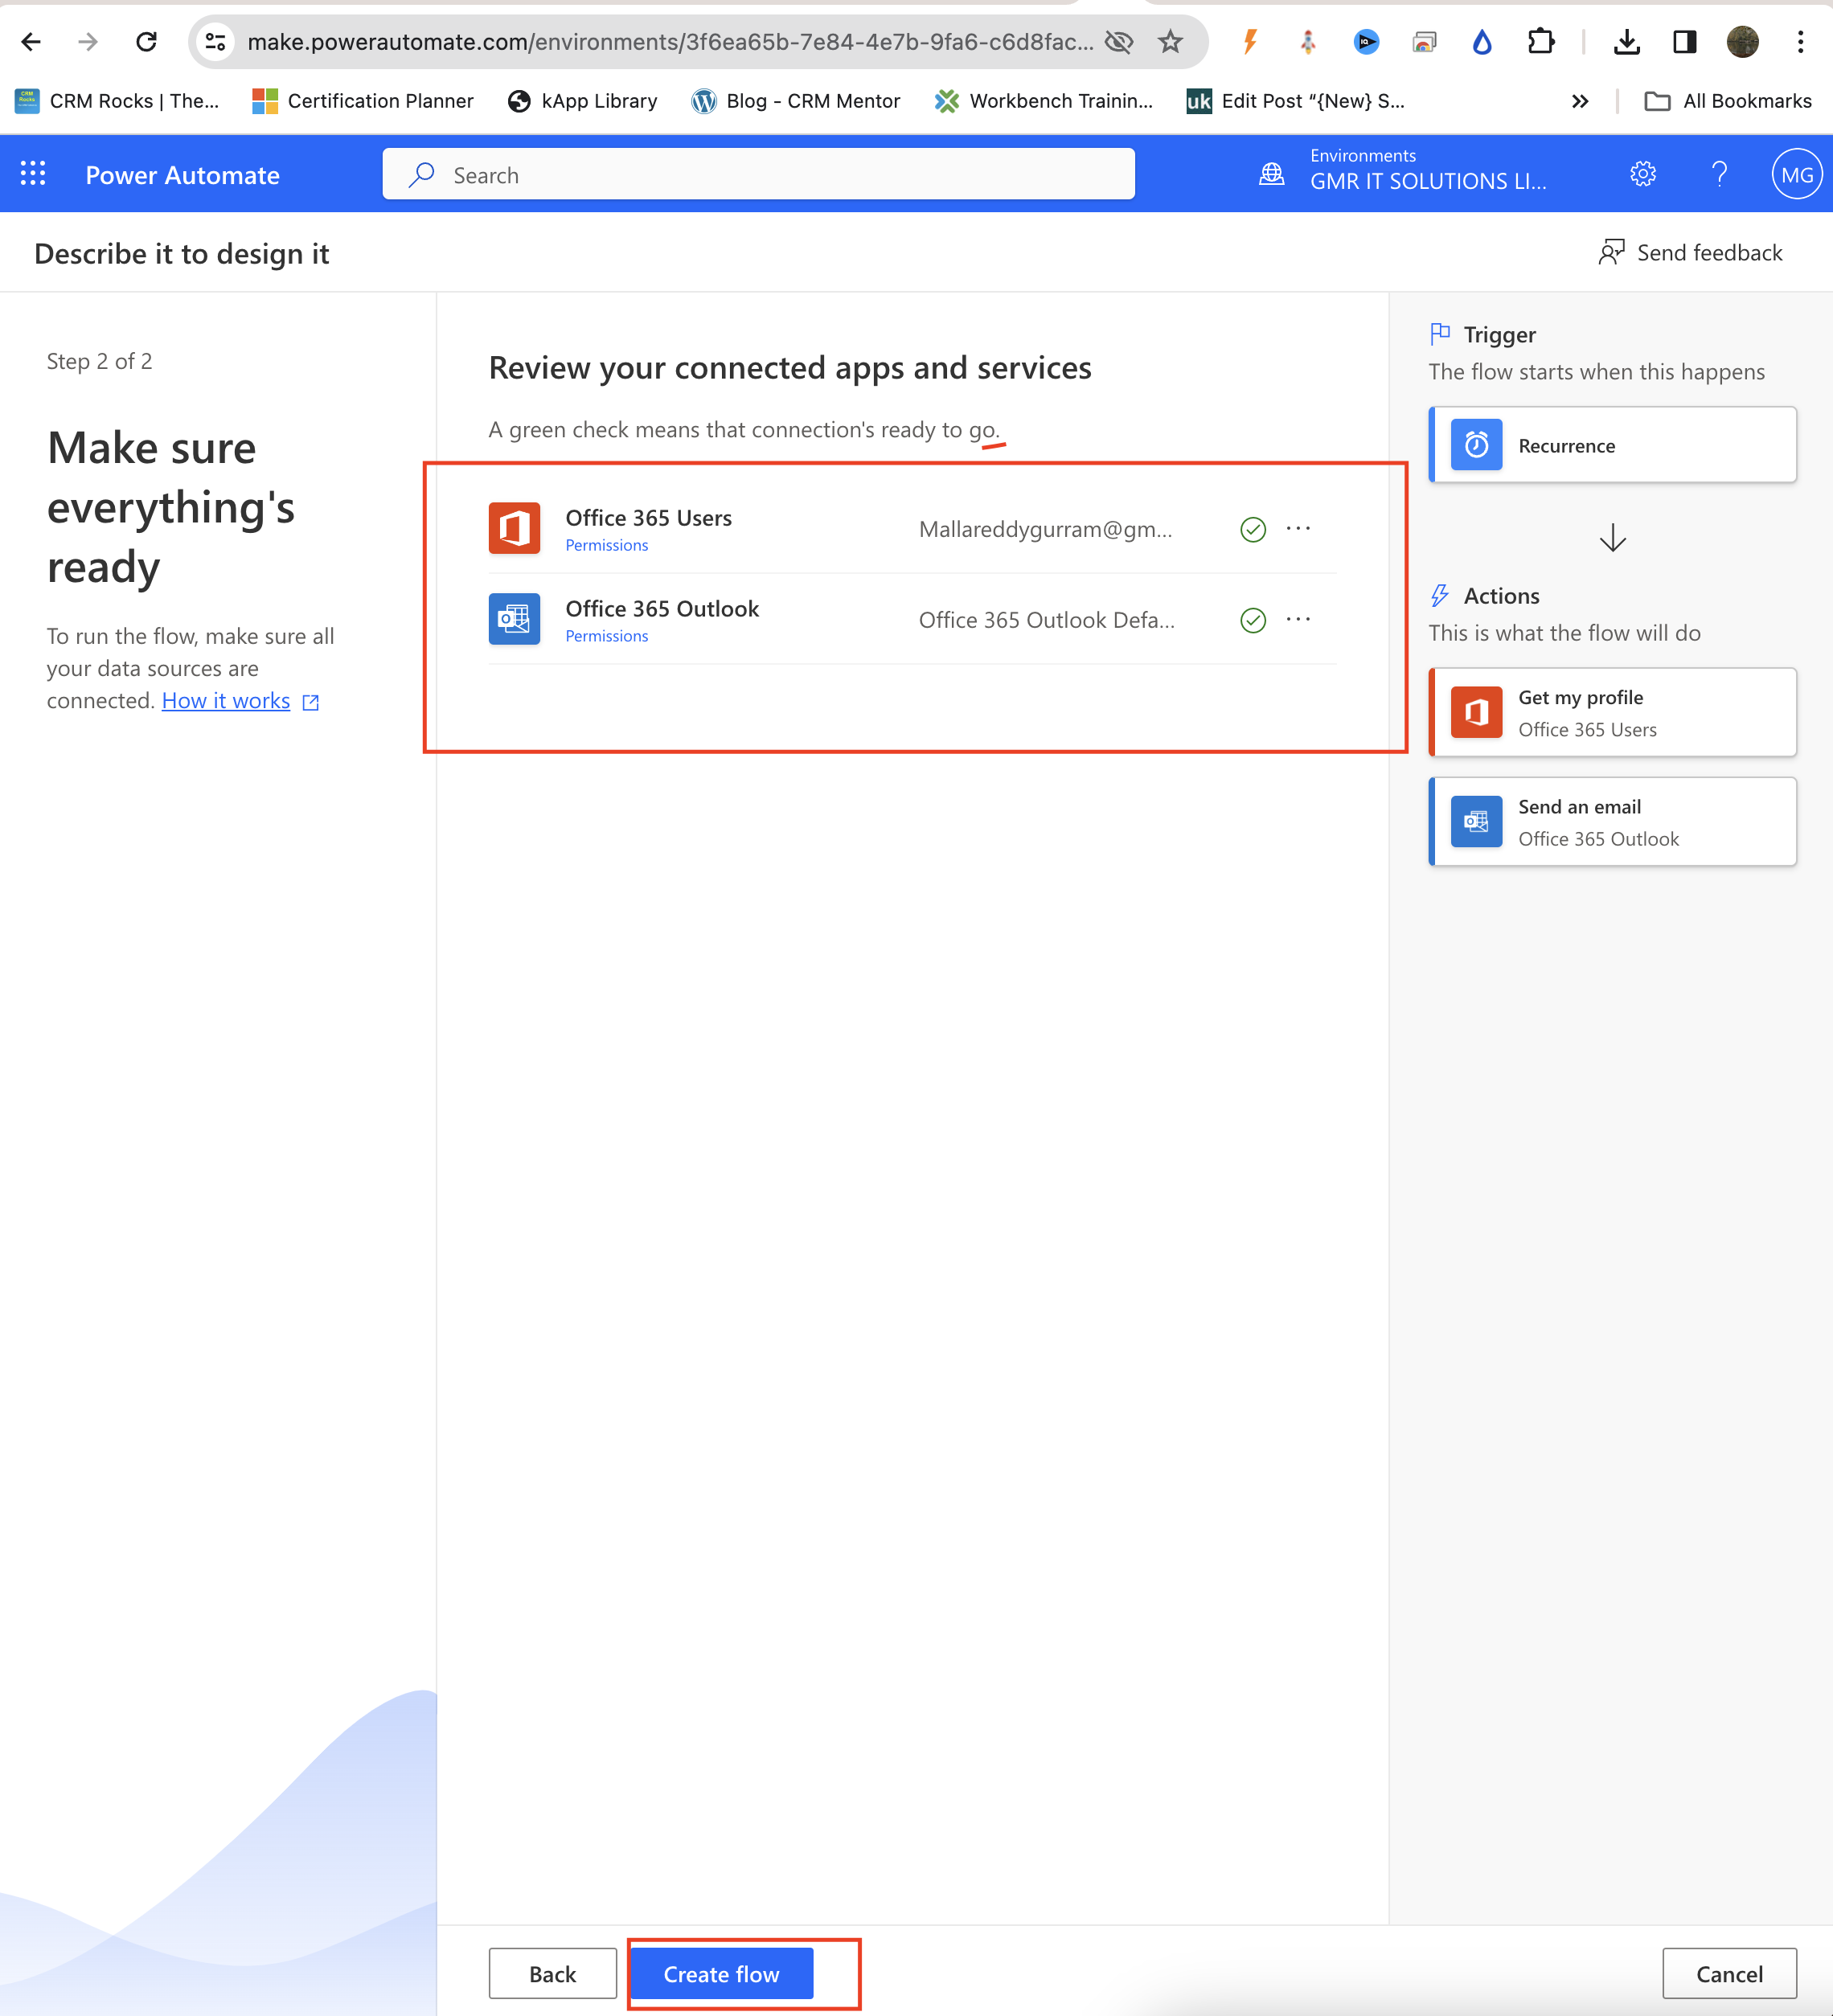
4. Follow the prompts to set it up.
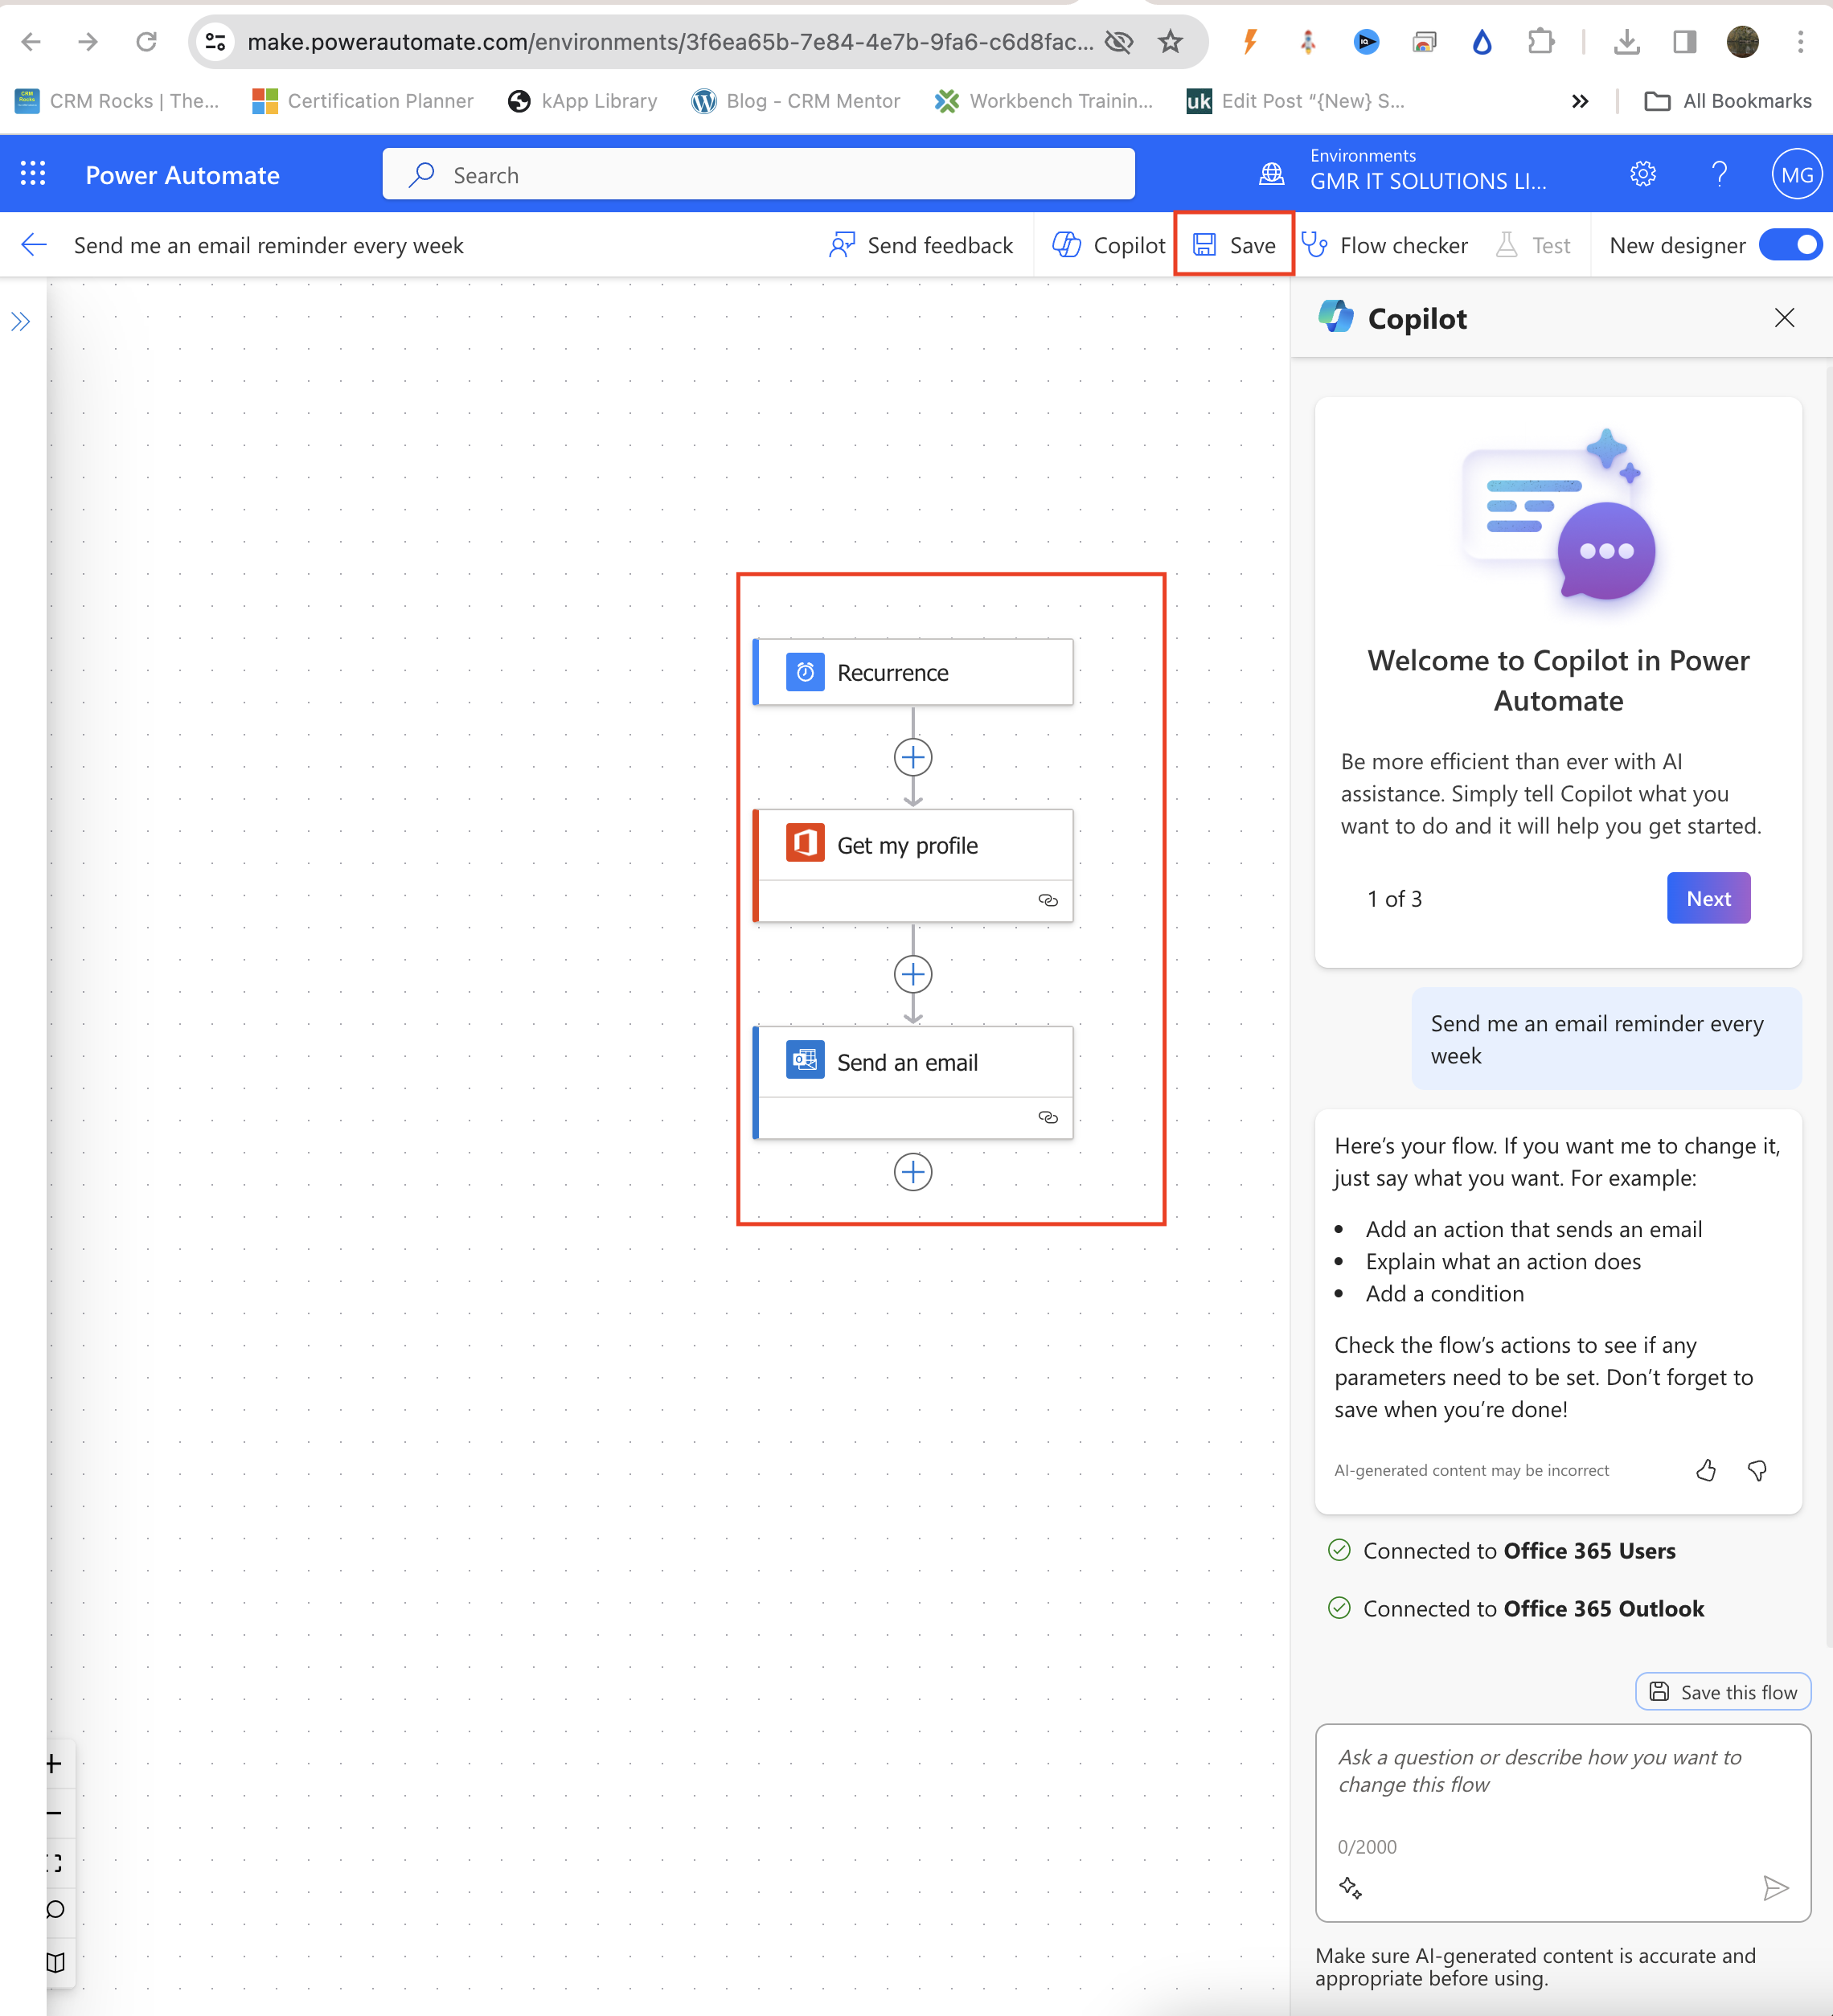
Once added, the workflow will run automatically based on the triggers you’ve configured. For instance, you could have a workflow that notifies a channel when a Planner task changes status or starts an approval process when a SharePoint list is modified.
This functionality is expected to be generally available in August 2024. It is designed to boost productivity by automating tasks related to calendar events, saving you time and effort.
That’s it for today.
I hope this helps.
Malla Reddy Gurram(@UK365GUY)
#365blogpostsin365days