Menu Close

Tag: #uk365guy

{How to} Timeline Highlights help users quickly access actionable record updates on Dynamics 365 Customer Service

Hello Everyone,

Today I am going to share my thoughts on the timeline highlights help users quickly access actionable record updates on Dynamics 365 Customer Service.

Let’s get’s started.

Timeline Highlights in Dynamics 365 Customer Service provide a concise view of significant record updates.

These highlights allow users to quickly access relevant information without sifting through lengthy records.

Here’s how they work:
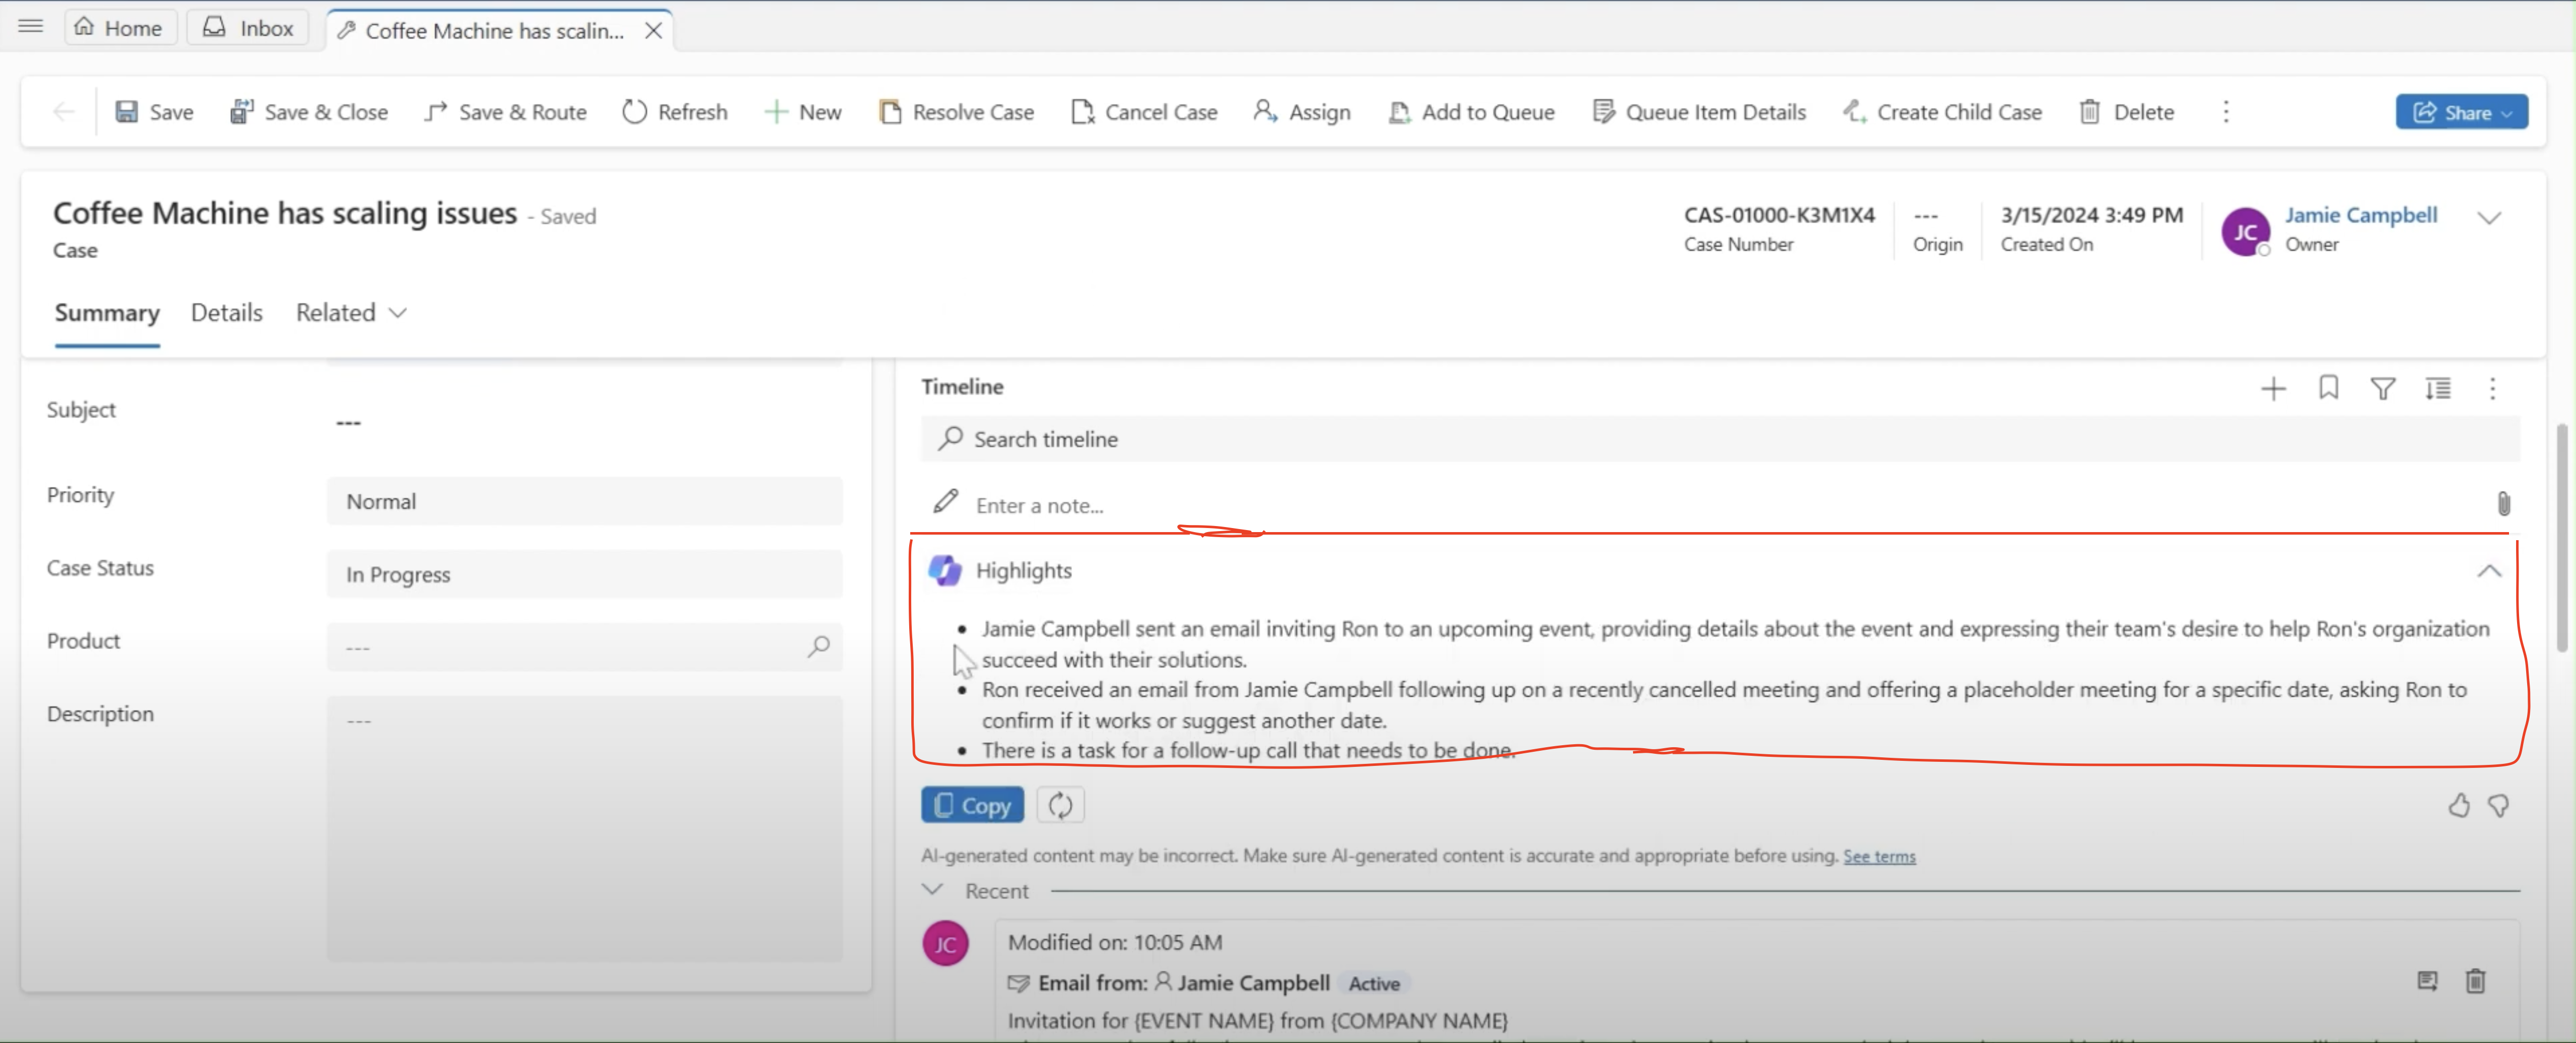
Key Events: Timeline Highlights display key events such as status changes notes, emails and appointments related to the record.

Visual Indicators: Each highlight is accompanied by visual cues, making it easy to identify critical updates.

Actionable Links: Users can click on a highlight to dive deeper into the associated details.

In summary, Timeline Highlights enhance efficiency by presenting essential updates at a glance.

That’s it for today.

I hope this helps.

Malla Reddy Gurram(@UK365GUY)
#365blogpostsin365days

Share this:

{How to} Read Copilot Responses on the UI incrementally on Dynamics 365 Customer Service

Hello Everyone,

Today I am going to share my thoughts on the Read Copilot responses on the UI incrementally on Dynamics 365 Customer Service.

Let’s get’s started.

To read Copilot responses incrementally within the Dynamics 365 Customer Service UI, follow these steps:

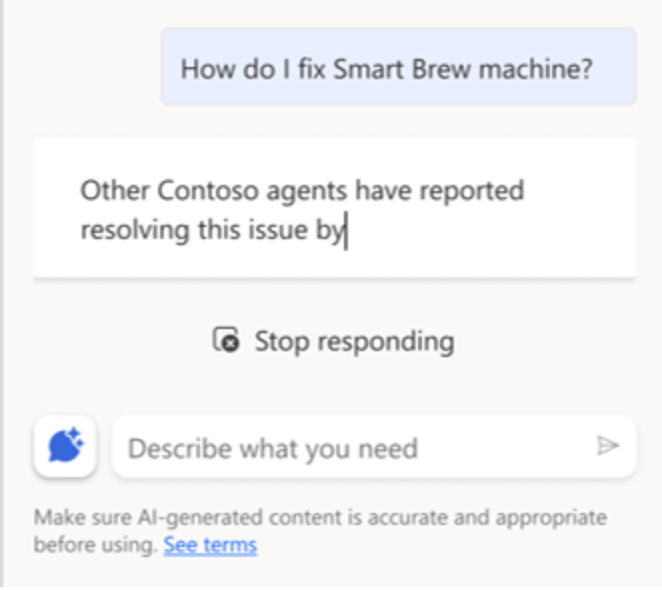
Customer Service Agents have to wait for Copilot to generate the entire response before they can start reading it, saving them time.

When agents use Copilot features such as write an email response and ask a question, including multi turn questions.

They can read the generated responses on the UI incrementally without having to wait for the entire response to be generated.

Agents can also choose to stop Copilot from generating a response and start fresh.

That’s it for today.

I hope this helps.

Malla Reddy Gurram(@UK365GUY)
#365blogpostsin365Days

Share this:

{How to} Draft emails using Copilot in email editor on Dynamics 365 Customer Service

Hello Everyone,

Today I am going to share my thoughts on the drafting emails using Copilot in email editor on Dynamics 365 Customer Service.

Let’s get’s started.

To draft email using Copilot in the email editor within Dynamics 365 Customer Service, follow these steps:

1. Open Dynamics 365 Customer Service: Log in to your Dynamics 365 Account.

2. Navigate to the Email Editor: Go to the relevant record(Such as a case or contact) where you want to draft an email.

3. Click on “Email” : In the record’s toolbar, click on the Email button to open the email editor.

4. Compose Your Email: Start typing your email content. As you write, Copilot will assist you by suggesting relevant phrases, improving grammar and providing context-aware recommendations.

5. Review and Send: Once your email is drafted, review it for accuracy and completeness. Then, click the “Send” button to send the email.

Remember that Copilot can help you create well-written and effective emails by offering suggestions and enhancing your writing.

That’s it for today.

I hope this helps.

Malla Reddy Gurram(@UK365GUY)
#365Blogpostsin365Days

Share this:

{How to} Get relevant results with filters for Copilot Dynamics 365 Customer Service

Hello Everyone,

Today I am going to share my thoughts on get relevant results with filters for Copilot Dynamics 365 Customer Service.

Let’s get’s started.

Certainly! To get relevant with filters for Copilot in Dynamics 365 Customer Service, follow these steps:

1. Open Copilot Report: To view the Copilot report, Open Customer Service historical analytics and select the Copilot tab. You can use filters to focus on the information that’s important to you:

Duration: Filters the data by the selected value of day, week or month.

Time zone: Filters the data for the selected time zone.

2. Apply Filters: To apply a filter within Copilot, perform the following steps:

Select Filters on the Copilot pane.

The Select filters menu appears.

Choose the required options or search for a filter option.

Select Apply.

Filtering results based on knowledge articles for the appropriate business lines or customer information ensures that Copilot generates relevant and precise responses, boosting agent productivity.

By filtering content sources, you can also make sure that Copilot responses are appropriate to the
agent’s questions and avoid mixing responses across different sources types, reducing the probability of displaying incorrect information.

That’s it for today.

I hope this helps.

Malla Reddy Gurram(@UK365GUY)
#365blogpostsin365days

Share this:

{How to} Microsoft Teams Integrate with Dynamics 365 Customer Service across different Microsoft Tenants

Hello Everyone,

Today I am going to share my thoughts on integrating Microsoft Teams with Dynamics 365 Customer Service across different Microsoft Tenants.

Let’s get’s started.

Yes, it is possible to integrate Microsoft Teams with Dynamics 365 Customer Service across different Microsoft Tenants. Here are the steps to achieve this:

1. Guest Access in Teams:

Ensure that guest access in enabled in the Teams settings of both tenants.

Add users from the external tenant as guests in your Teams channels.

2. App Permissions:

In Dynamics 365, configure app permissions for the external tenant.

Use the Application User concept to allow cross-tenant access.

3. Configure Collaboration:

Set up collaboration features (chat, calls, meetings) between users in different tenants.

Test the integration thoroughly to ensure seamless communication.

Remember to follow best practices for security and governance when integrating across tenants.

That’s it for today.

I hope this helps.

Malla Reddy Gurram(@UK365GUY)
#365blogpostsin365days
Share this: