Menu Close

Tag: #uk365guy

{How to} enable Optimizing Ranks in Dynamics 365 Sales for Insight cards

Hello Everyone,

Today i am going to share how to enable Optimizing ranks in Dynamics 365 Sales for insights cards to show on the form.

Let’s gets started.

What is Optimize Ranking: Optimizing ranking option in Assistant allows you to optimize the ranking of cards that are important and promotes those cards to display at the top.

You can define rules up to 4 rules in the ranking section, based on tables such as Account, Leads, and Opportunity.

Note: Cards are given priority based on the order you define in the settings.

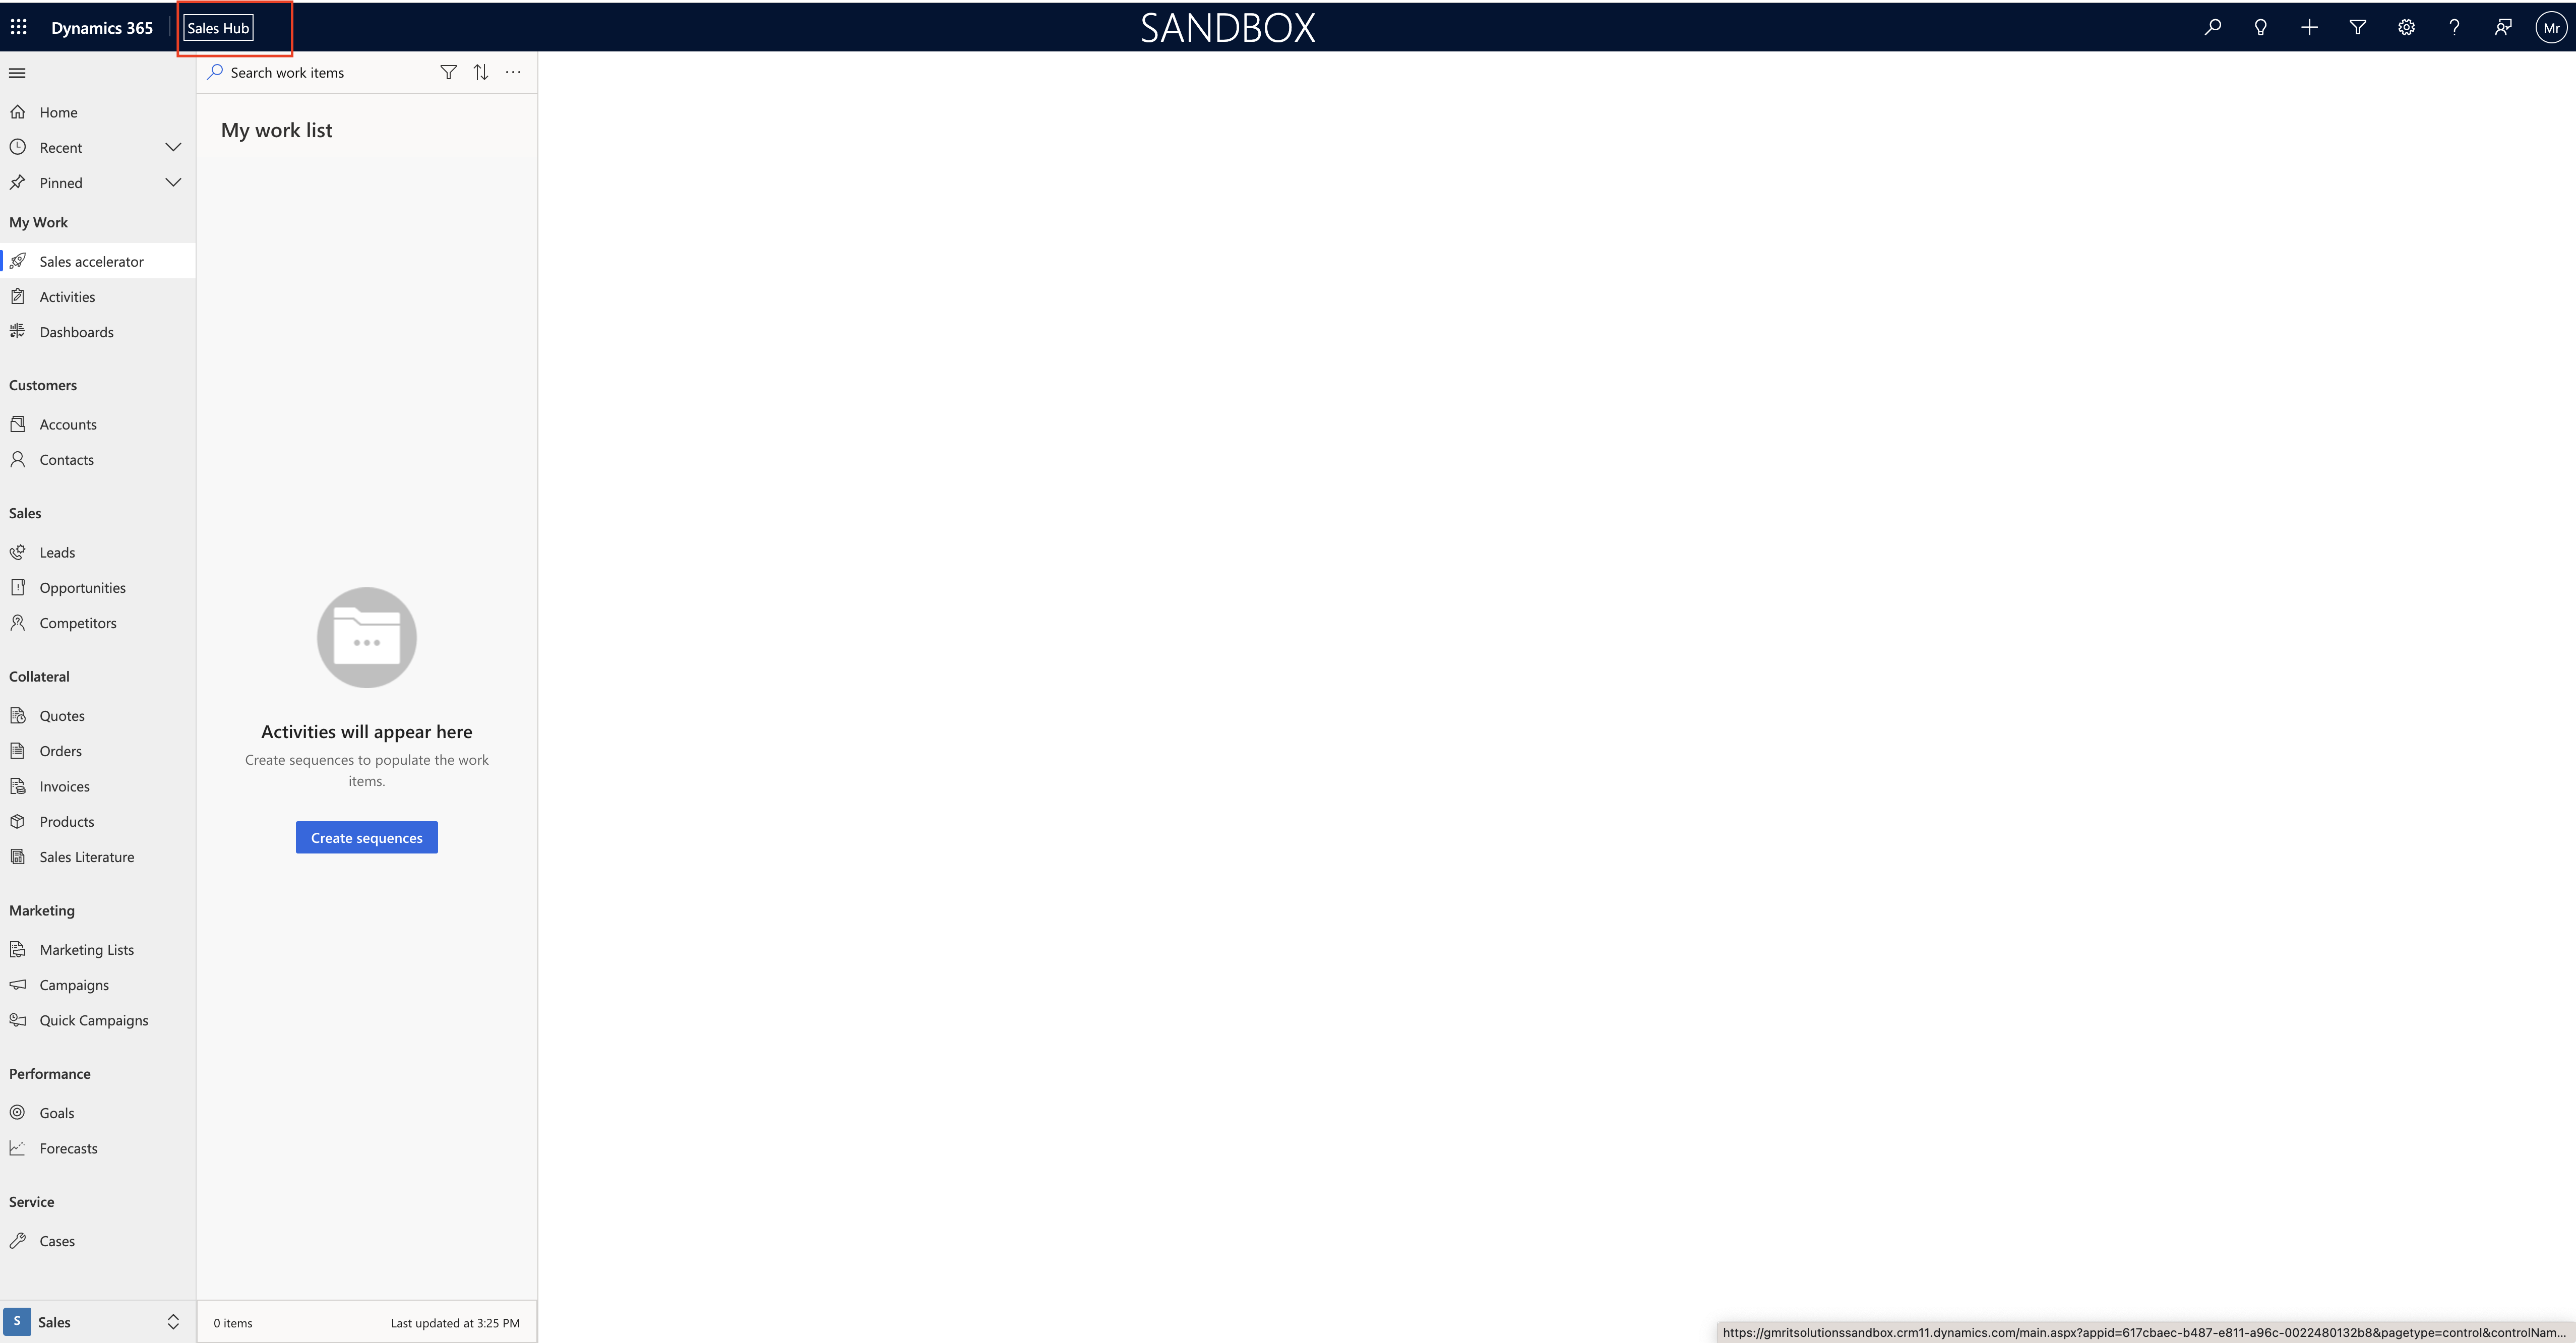
Login into Dynamics 365 Sales.

Go to “sales insights settings” see below screenshot.
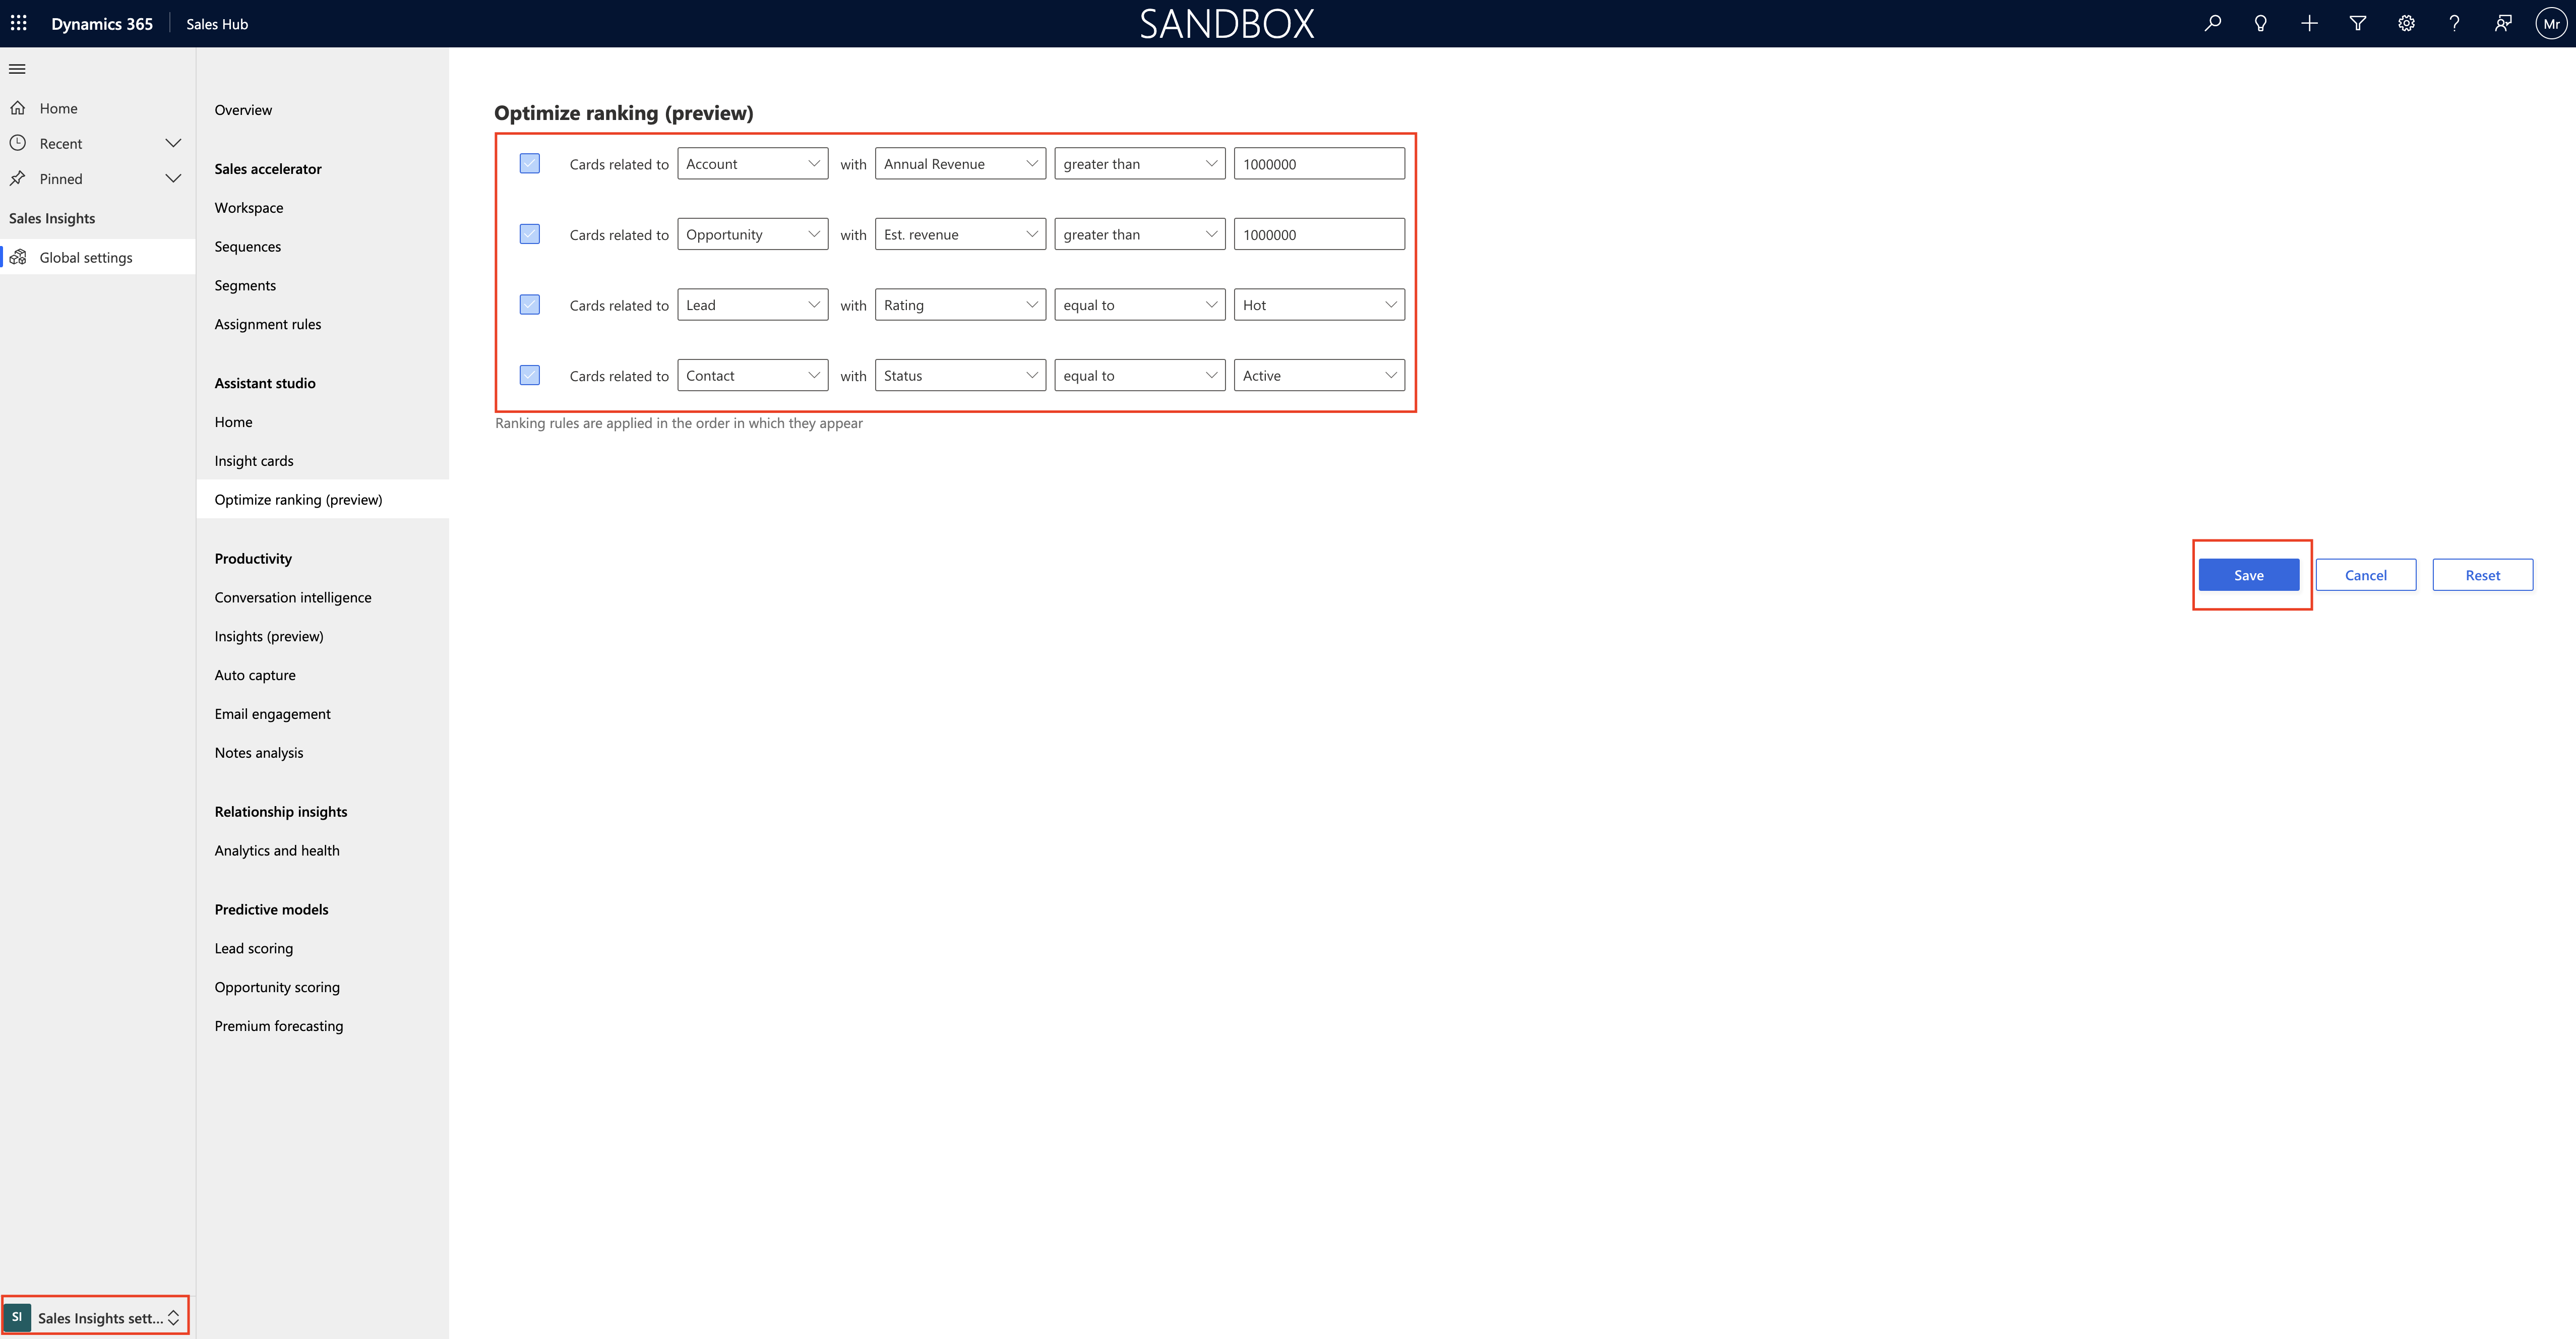
Configure the conditions that should apply to the insight cards to show related data at the top of the cards.

Finally save the changes and ranking rules have been created, processed and applied to the cards in your organization.

Note: If you dont see these settings in your app means

1. You don’t have necessary license or role.

2. Your administrator hasn’t turned on the feature.

3. Your organisation using custom model driven app, so you need to check with system administrator about the sales hub or sales professional app.

That’t it for today.

I hope this helps
Malla Reddy(@UK365GUY)
#365BlogPostsin365Days

Share this:

{How to } Create Insight Cards in Dynamics 365 Sales

Hello Everyone,

Today i am going to share how to create Insight Cards in Dynamics 365 Sales.

Let’s gets started.

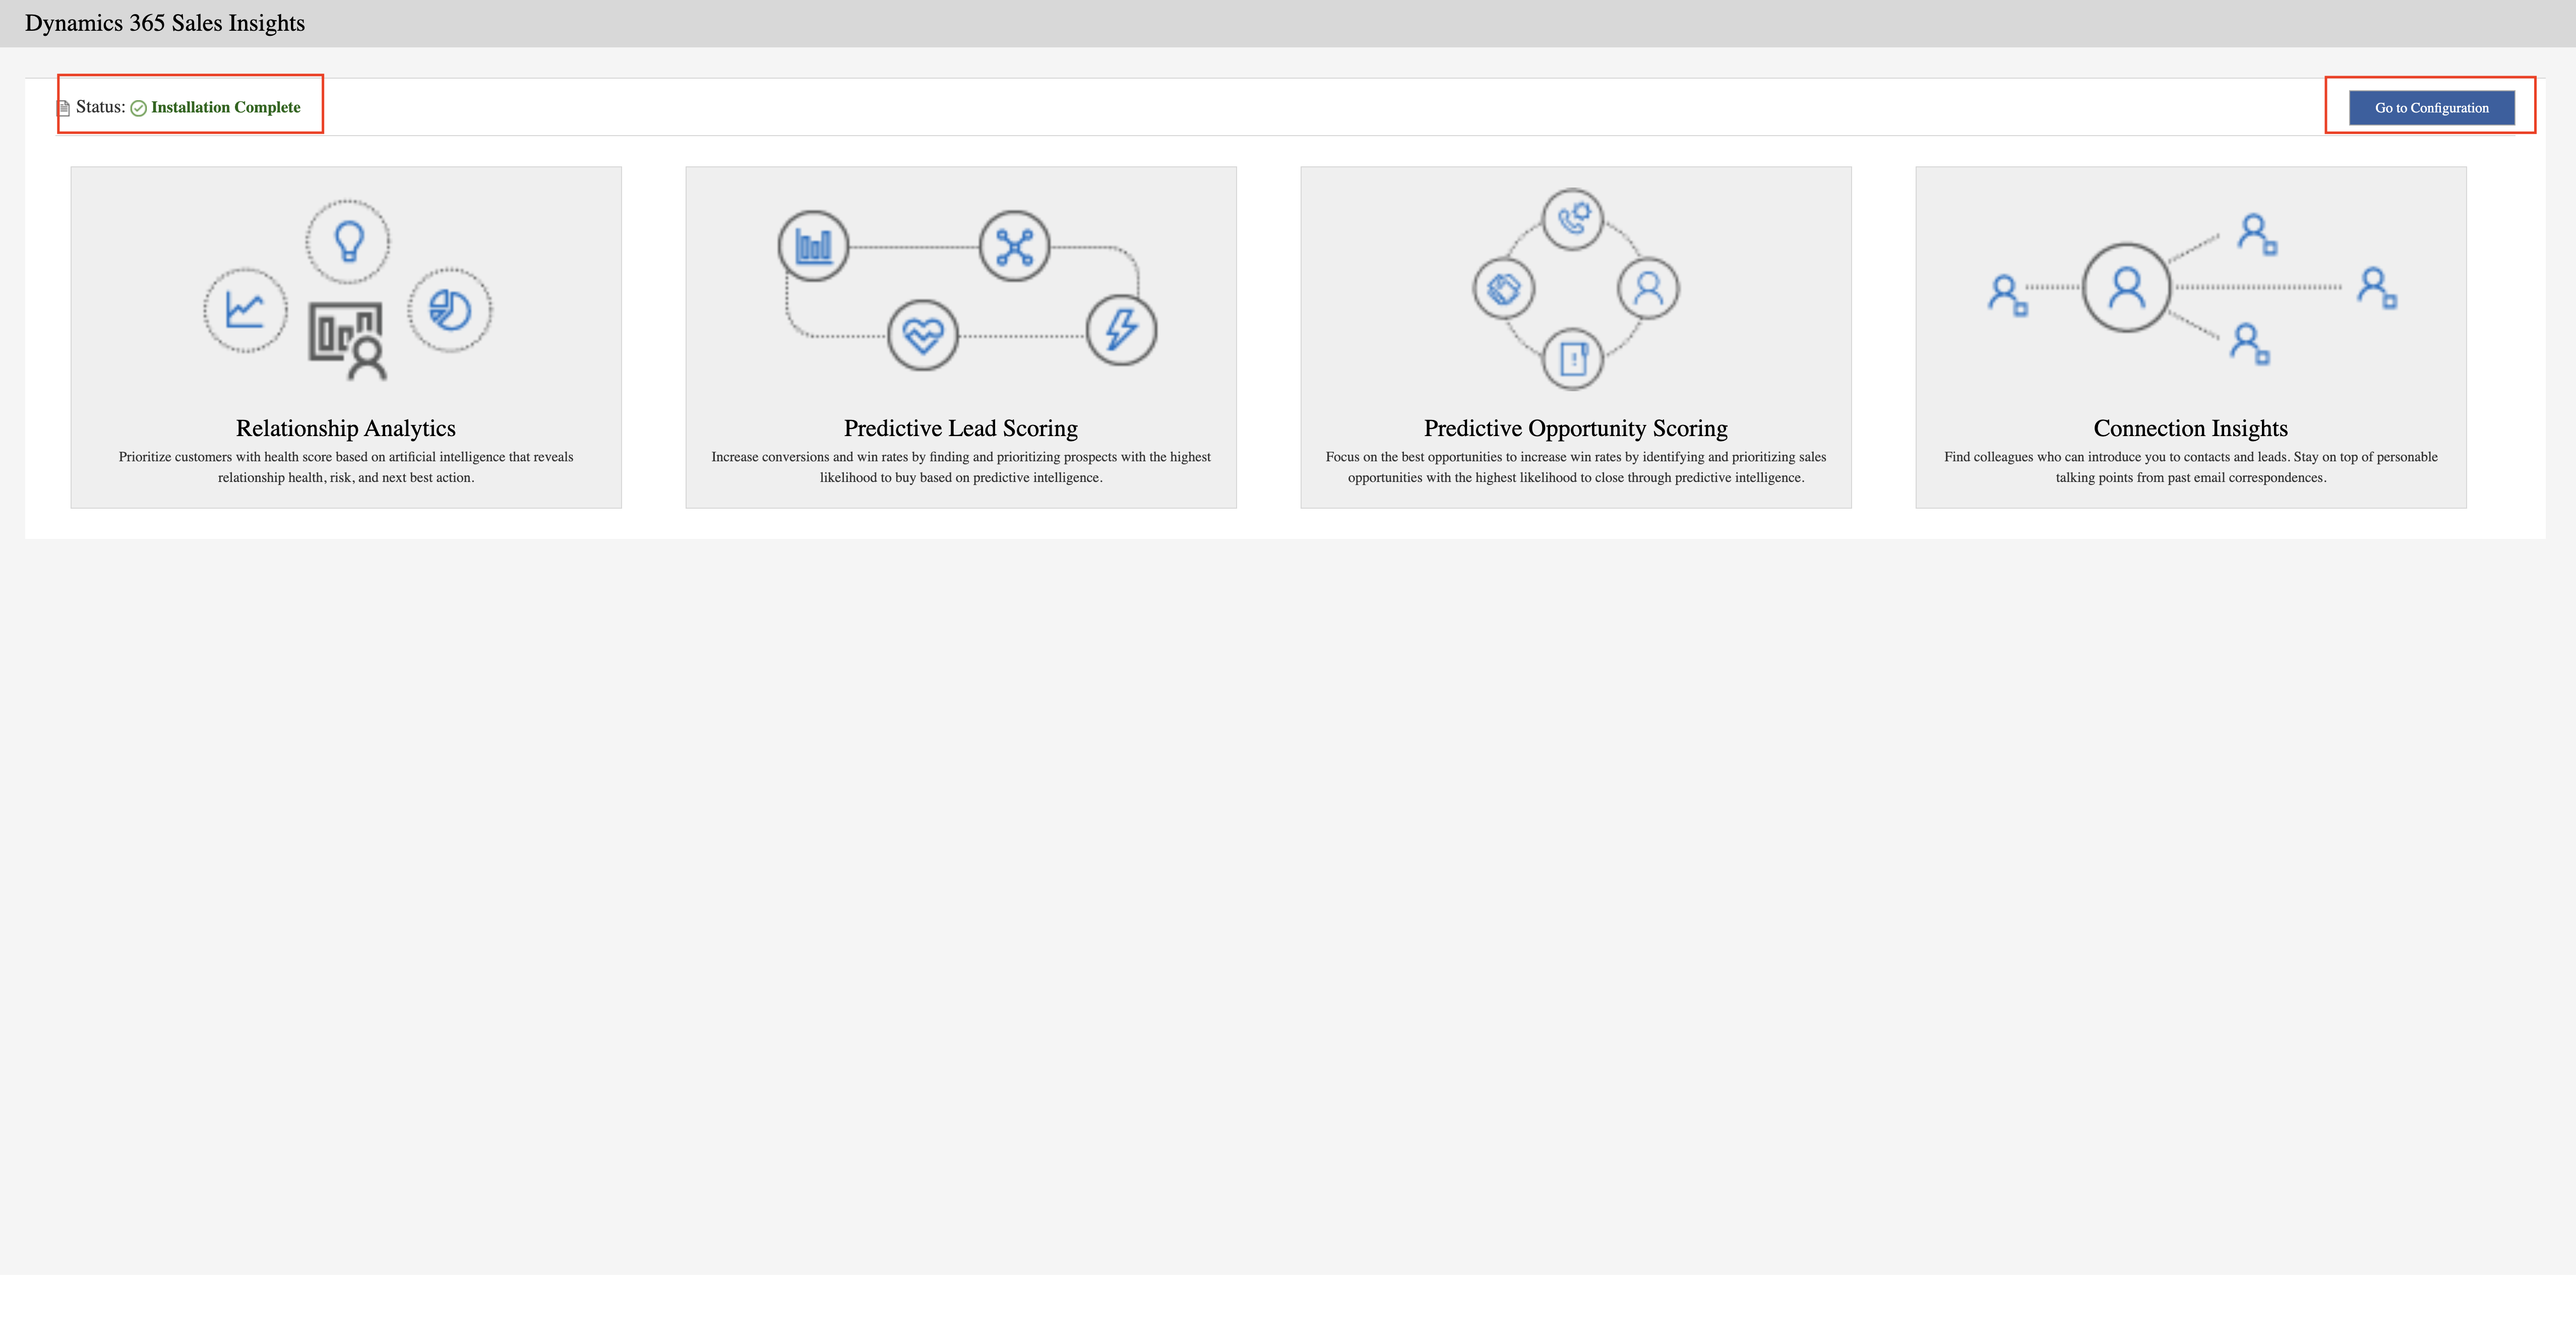
Login into Dynamics 365 Sales and change the settings to “Sales Insights Settings”.

Click on Insights Cards underneath the Assistant Studio.

What is the purpose of the sales insight cards ?

To manage, customize and create new insights cards for your team.

License and Security role:

License: Dynamics 365 Sales Premium

Security role: System Adminstrator or Sales Manager.

Note: Microsoft Power Automate is installed if you want to create custom insights cards with the assistant studio.

Custom Insight Card is installed in the list of insights cards in Assistant Studio only after a card is generated based on the defined flow.

For example: You defined a flow to display a card when an Opportuntiy is created with an estimated value above £5000. When an Opportunity is created for the for the first time in the organisation with the estimated value of £6000, the card is generated and will be available in the list of insight cards in Assistant Studio.

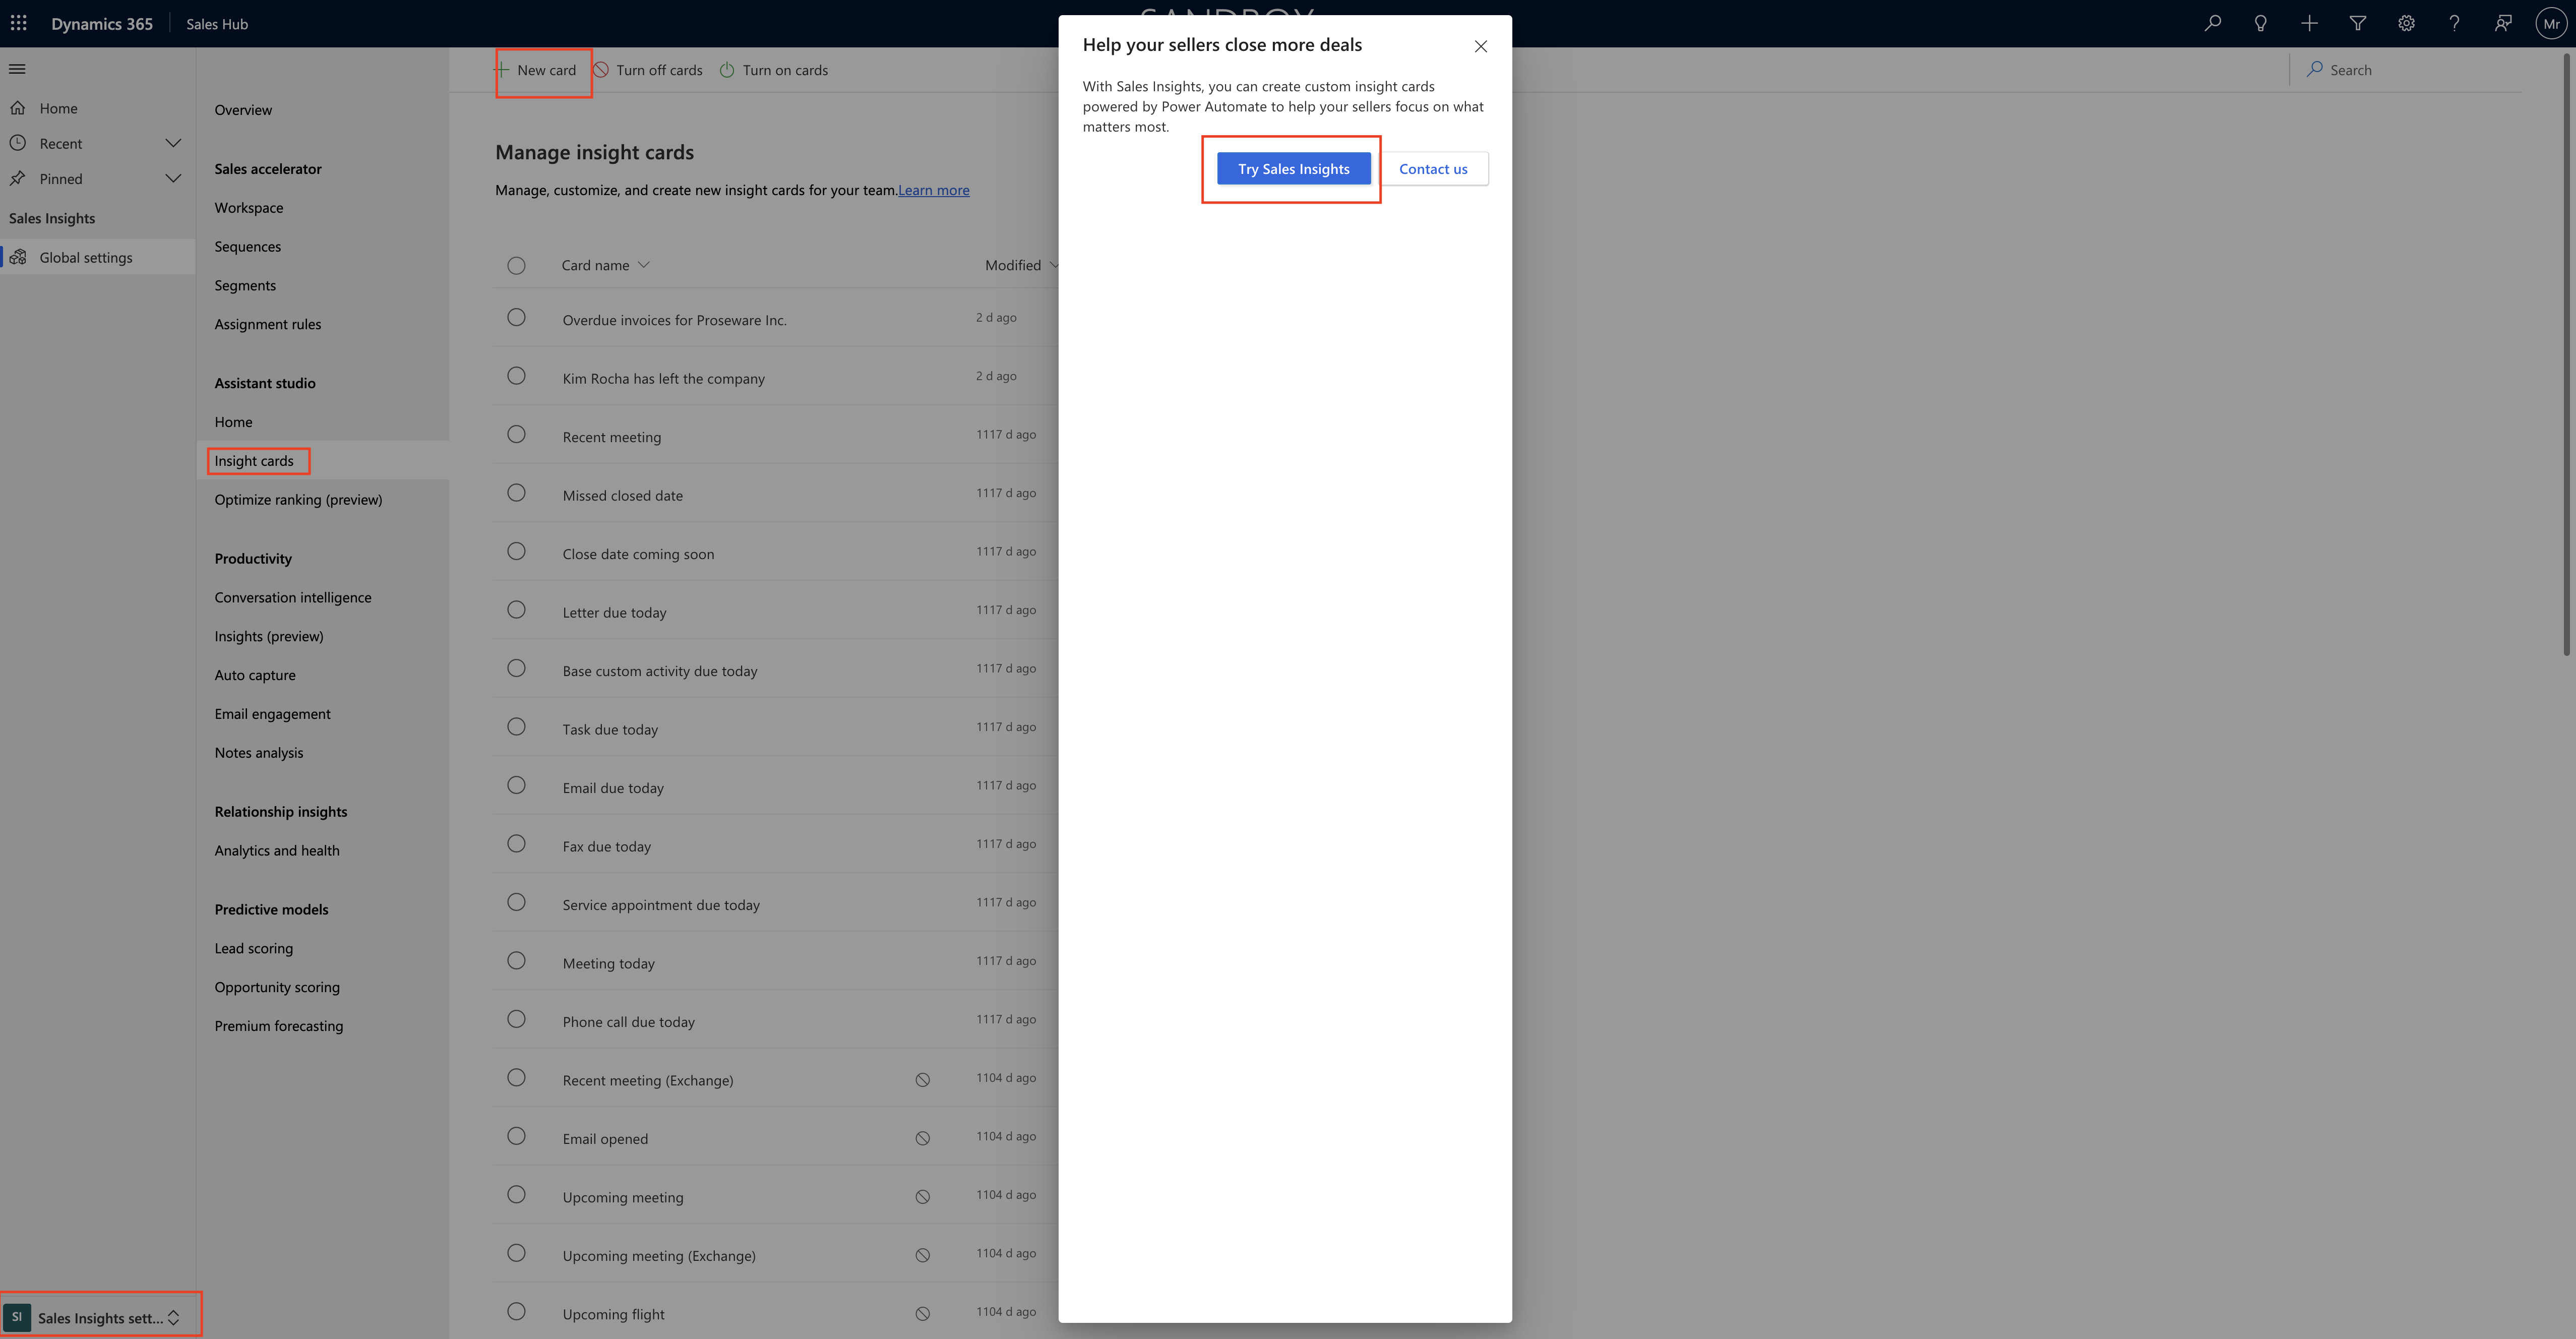
When you click on the create insight cards then new screen will be displayed with a Status = Installation Complete.

Dynamics 365 Sales Insights can be used for the following:

1. Relationship Analytics: Prioritize customers with health score based on artificial intelligence that reveals relationship health, risk, and next best action.

2. Predictive Lead Scoring: Increase conversions and win rates by finding and prioritizing prospects with the highest likelihood to buy based on predictive intelligence.

3. Predictive Opportunity Scoring: Focus on the best opportunities to increase win rates by identifying and prioritizing sales opportunities with the highest likelihood to close through predictive intelligence.

4. Connection Insights: Find collegaues who can introduce you to contacts and leads, Stay on top of personable talking points from past email correspondences.

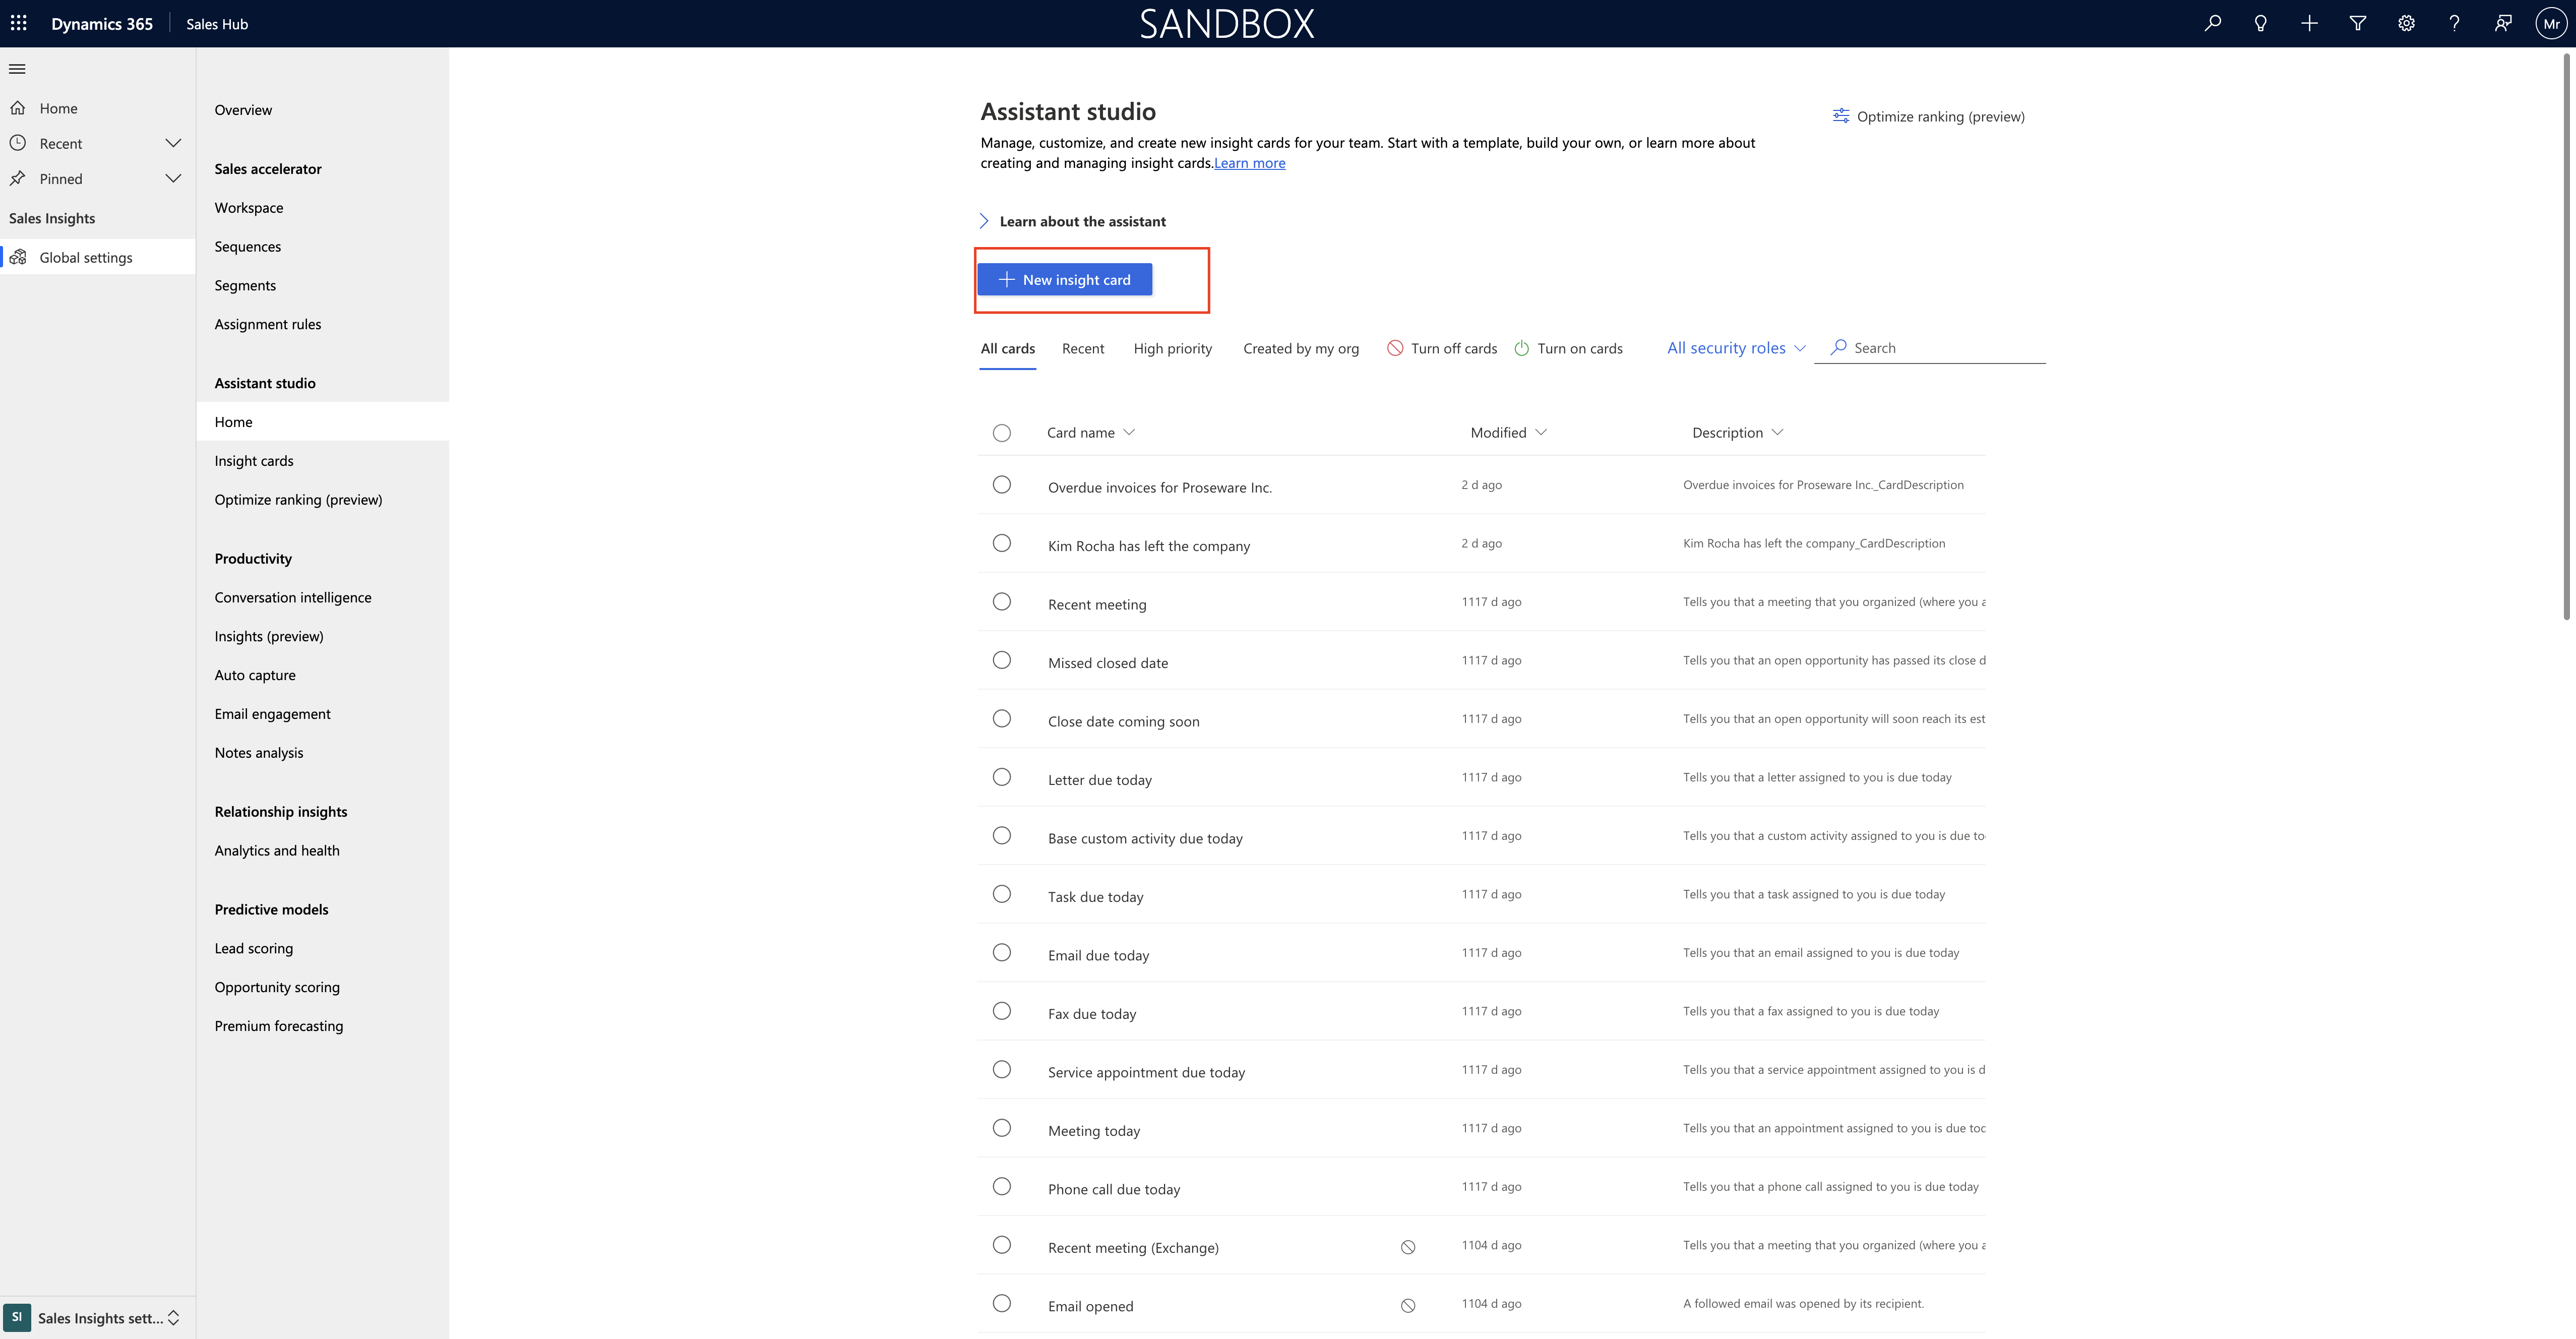
Then you can start creating Insight Cards.

That’s it for today.

I hope this helps.
Malla Reddy(@UK365GUY)
#365BlogPostsin365Days
Share this:

How to set up Sales accelerator workspace in Dynamics 365 Sales.

Hello Everyone,

Today i am going to share how to set up sales accelerators in Dynamics 365 Sales.

Let’s get’s started.

Login into Dynamics 365 Sales

What is the purpose of the sales accelerator ?

Sales Accelerator empower your sellers to effectively engage with customers using sales accelerator.

Sellers can already use the workspace for manual activities.

Recommendation to set up sales accelerator workspace to:

Manage permissions: Control who gets access to the workspace by choosing desired security roles.

Use sequences: Create timed sequences of activities to guide sellers on how to best approach their customers.

Customize workspace: Create filters, choose which record types should populate sellers work lists, and do more customizations.

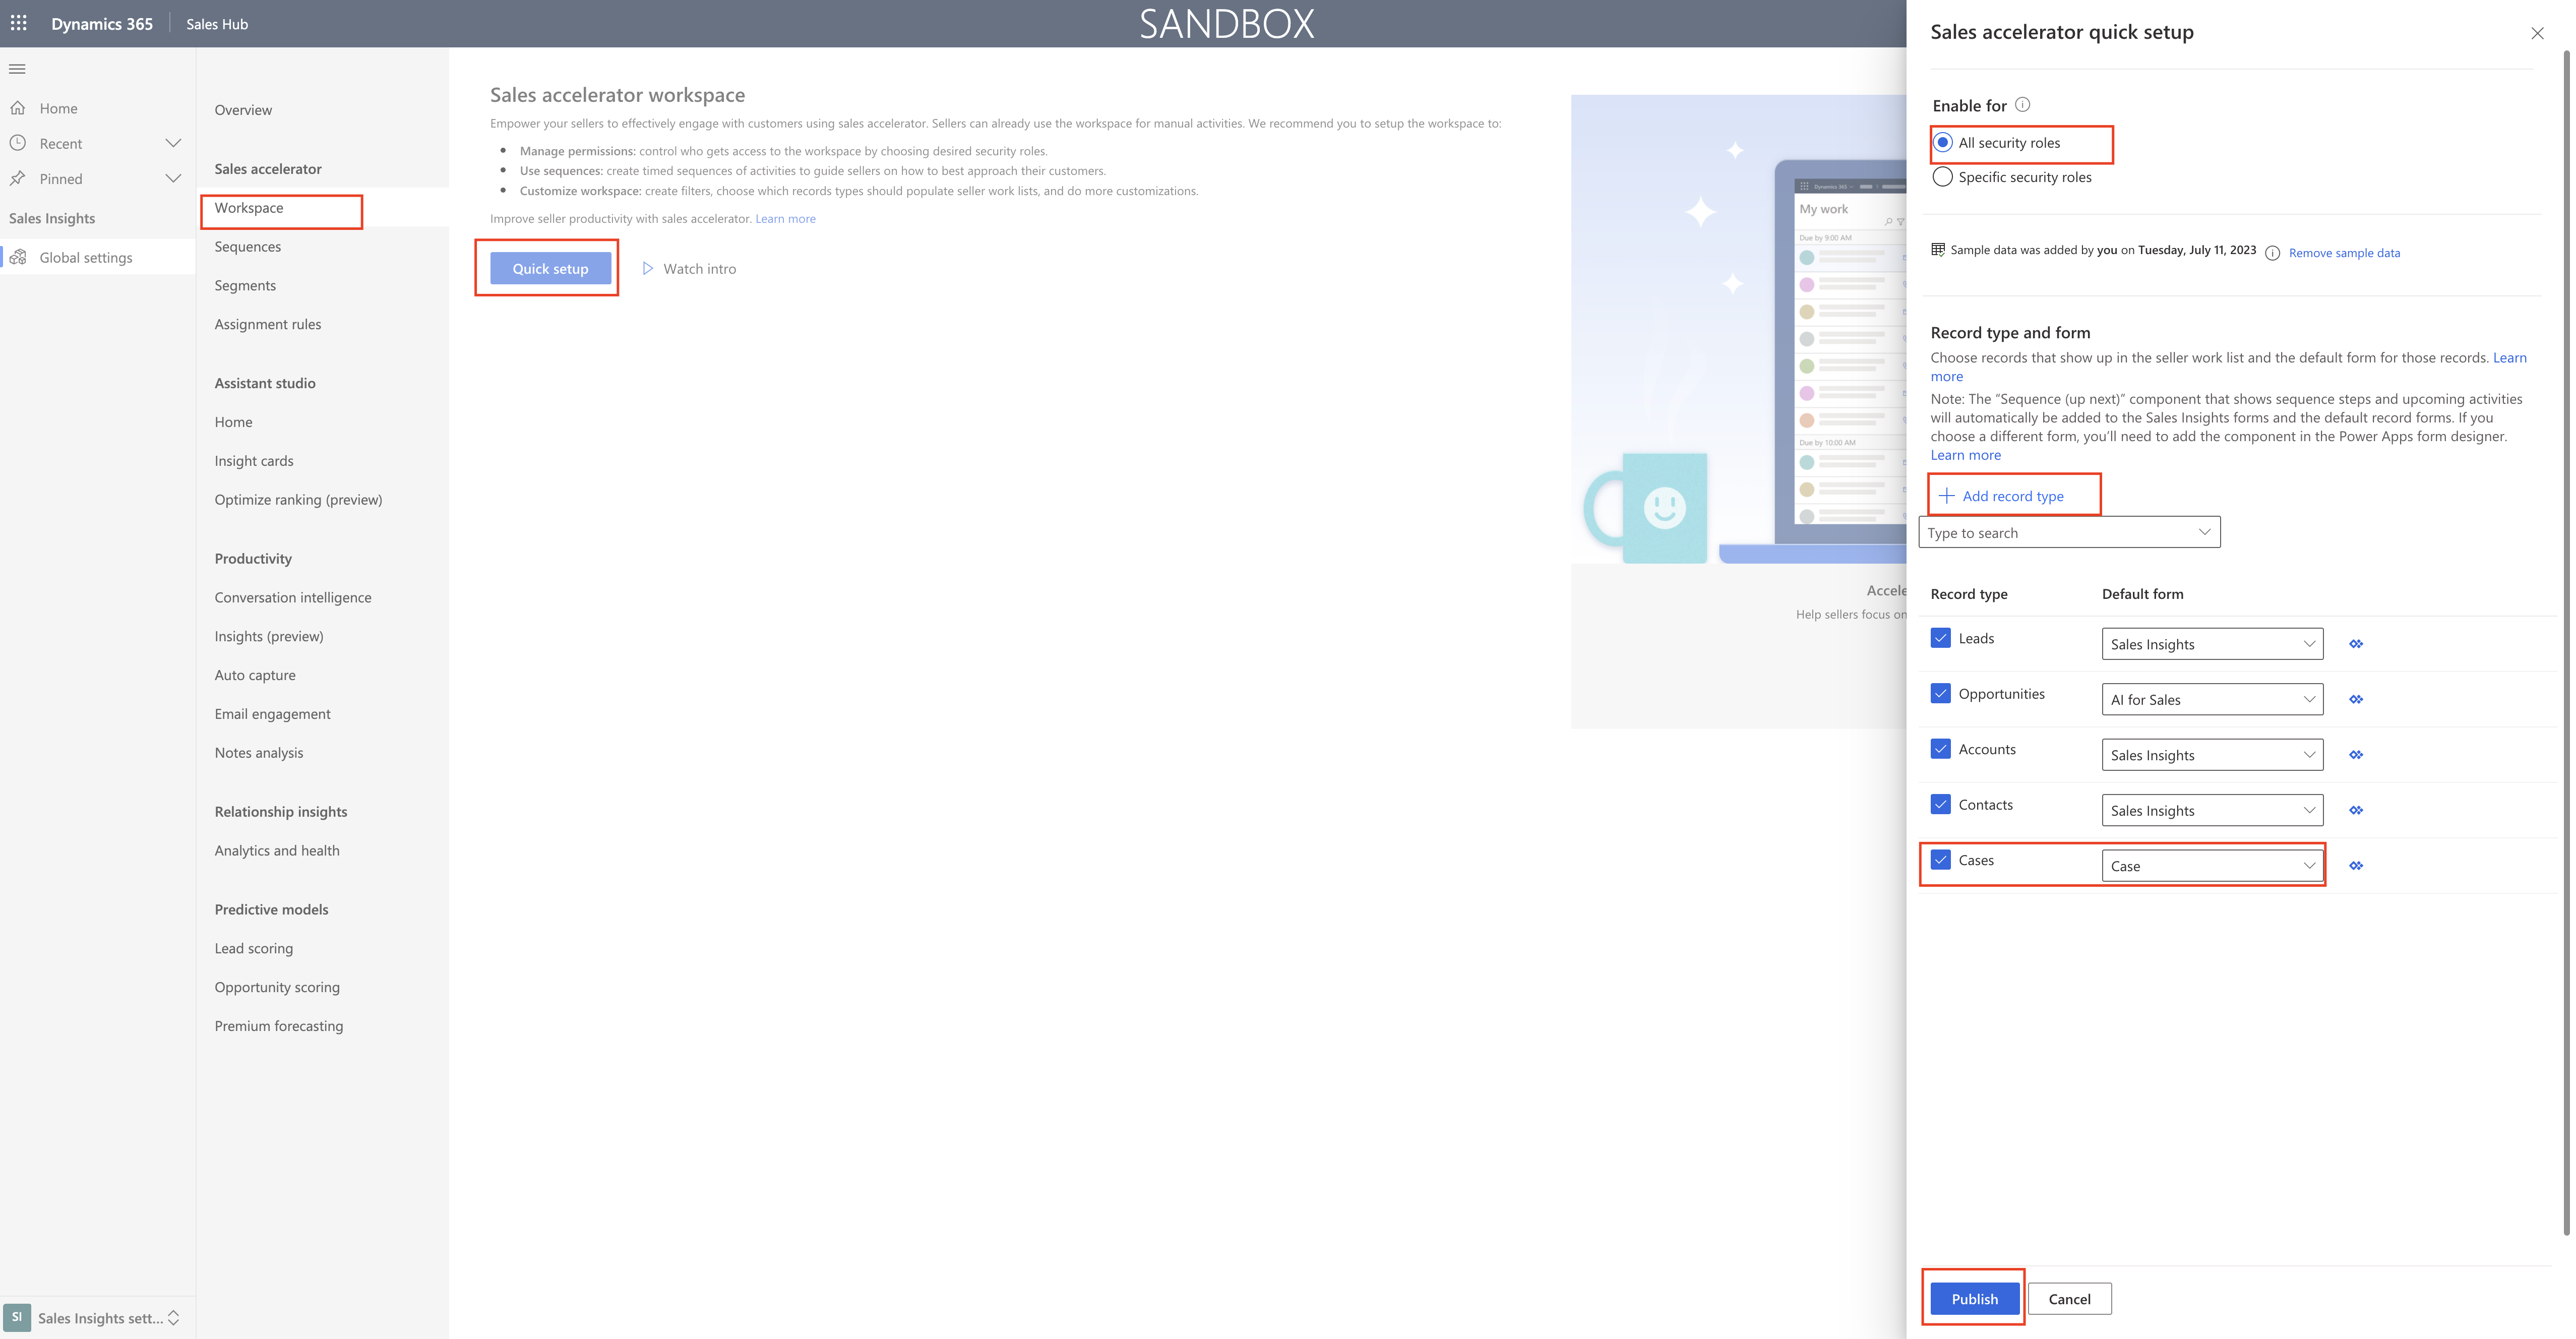
Change the settings to “Sales Insights Settings” on the left bottom cornor.

Click on the Workspace under the Sales accelerator.

Click on the Quick setup and you will get the window on the right hand side of the screen and enable for “all security roles”.

You can also select the record type and form then click on Publish.

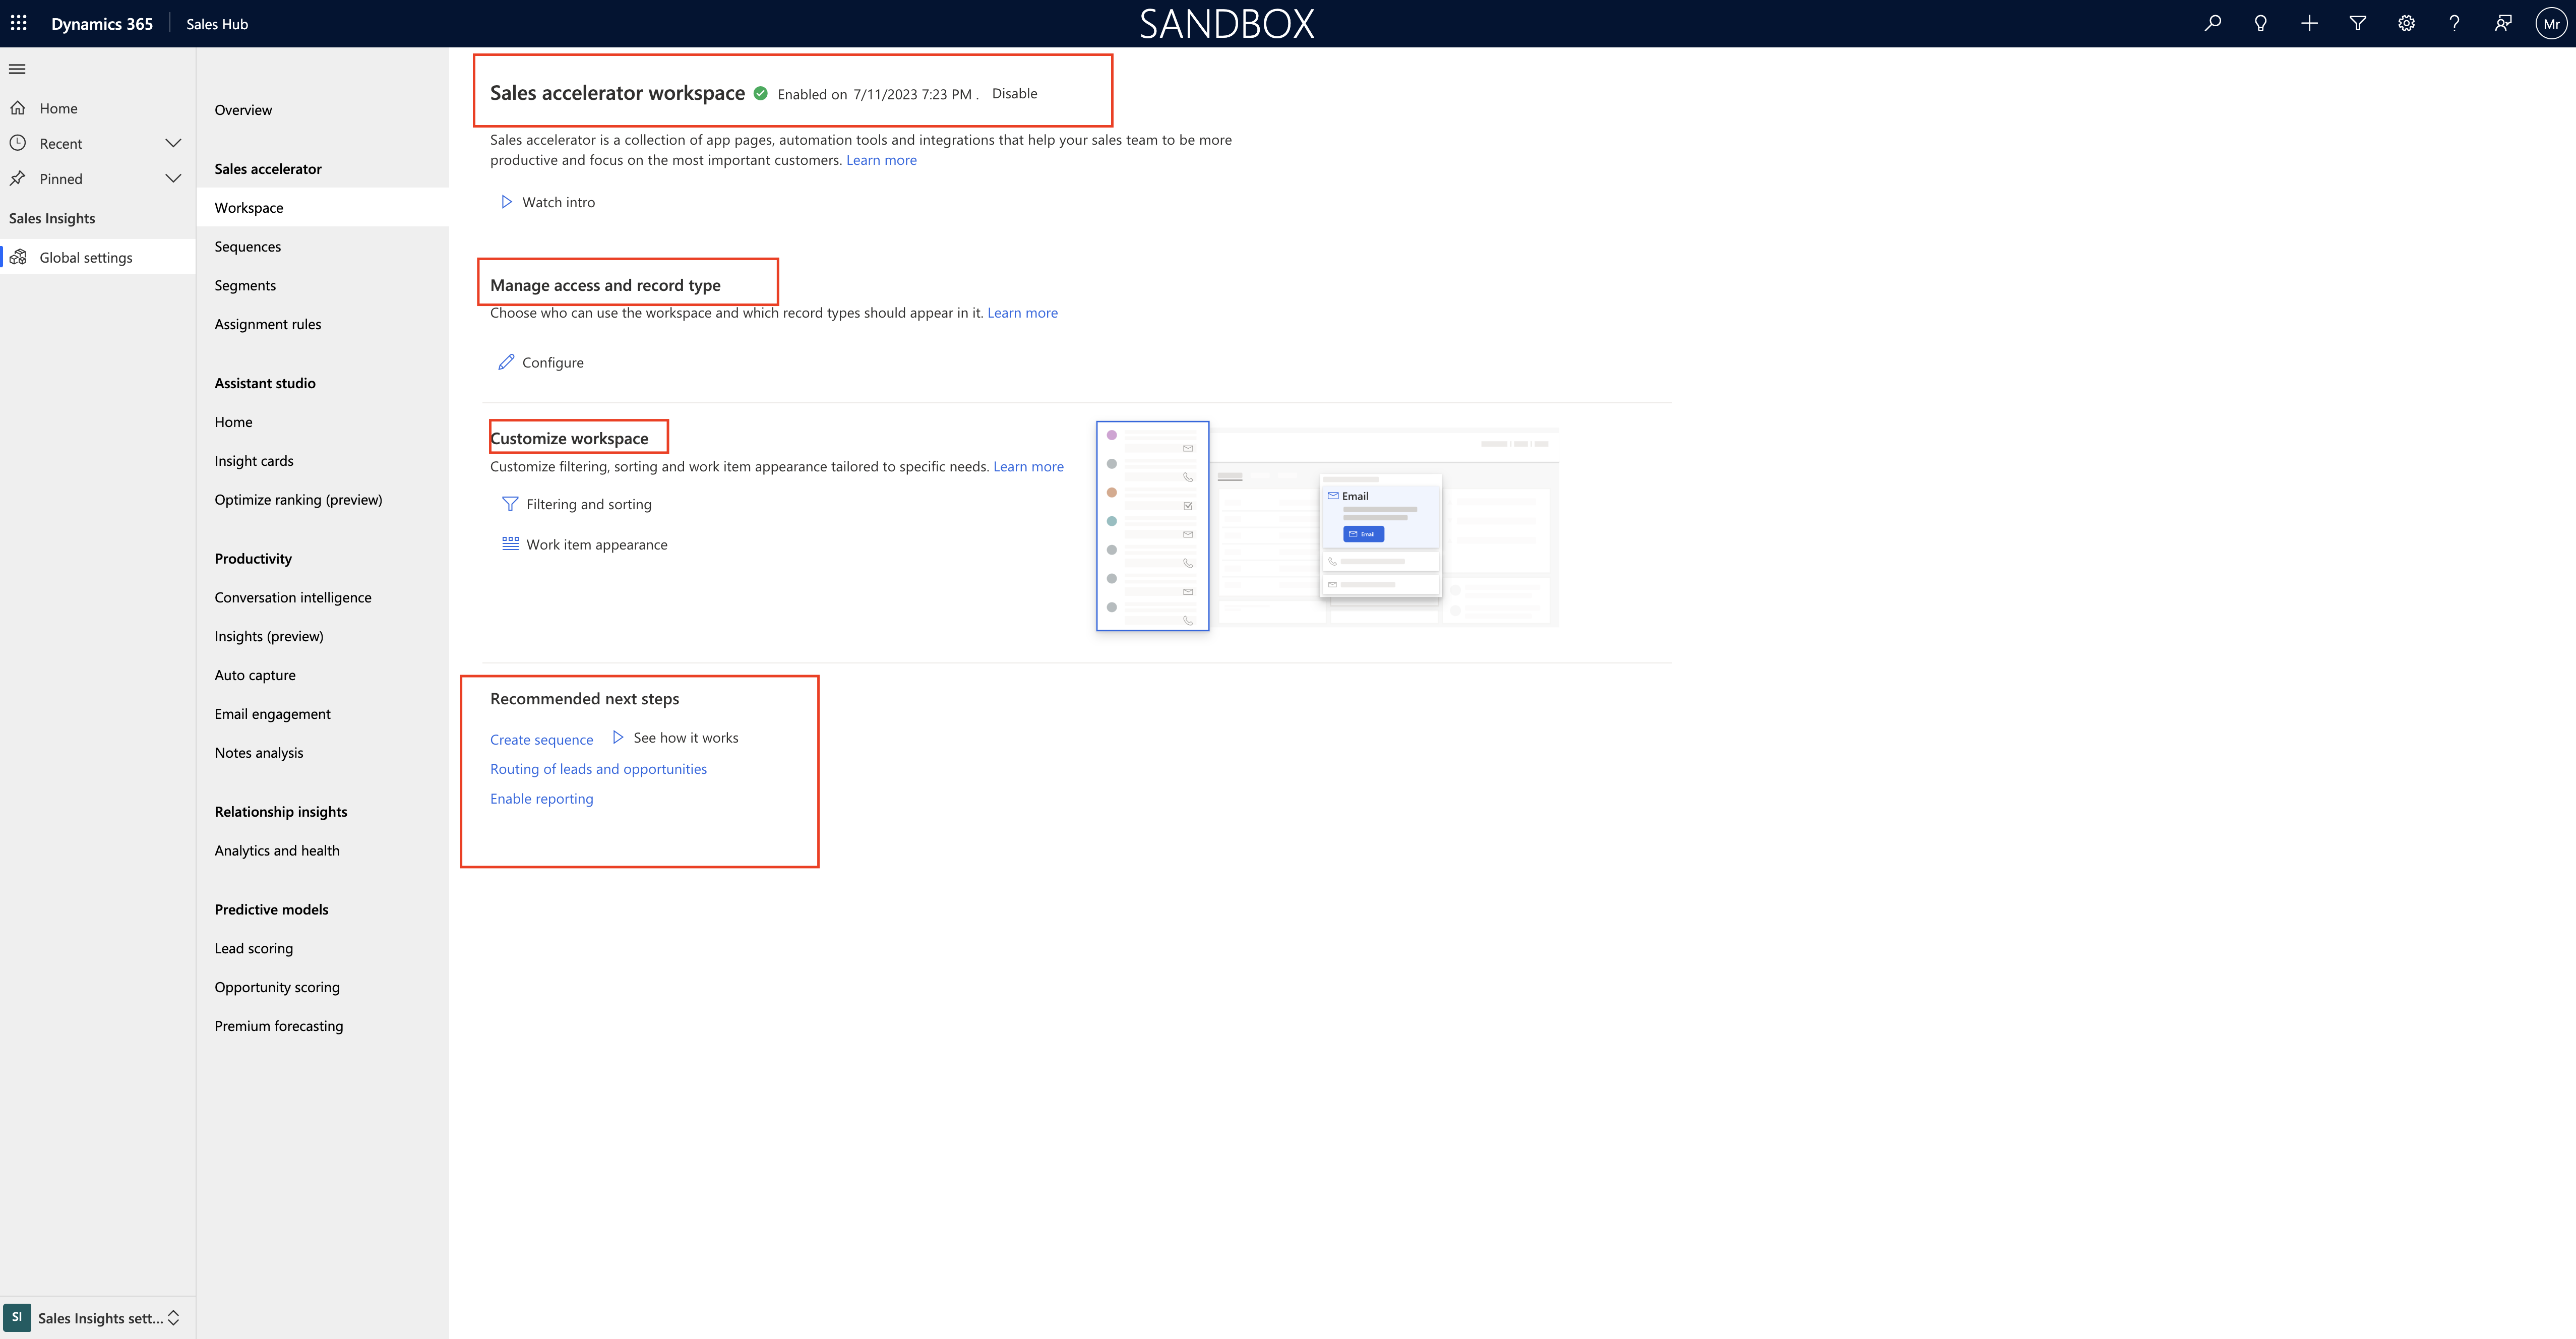
Sales accelerator workspace enabled.

You can manage access and record type but we already selected all security roles so just ignore it in this example.

customize workspace like filtering and sorting, work item appearance as you can see below screenshot.

Recommended next steps:

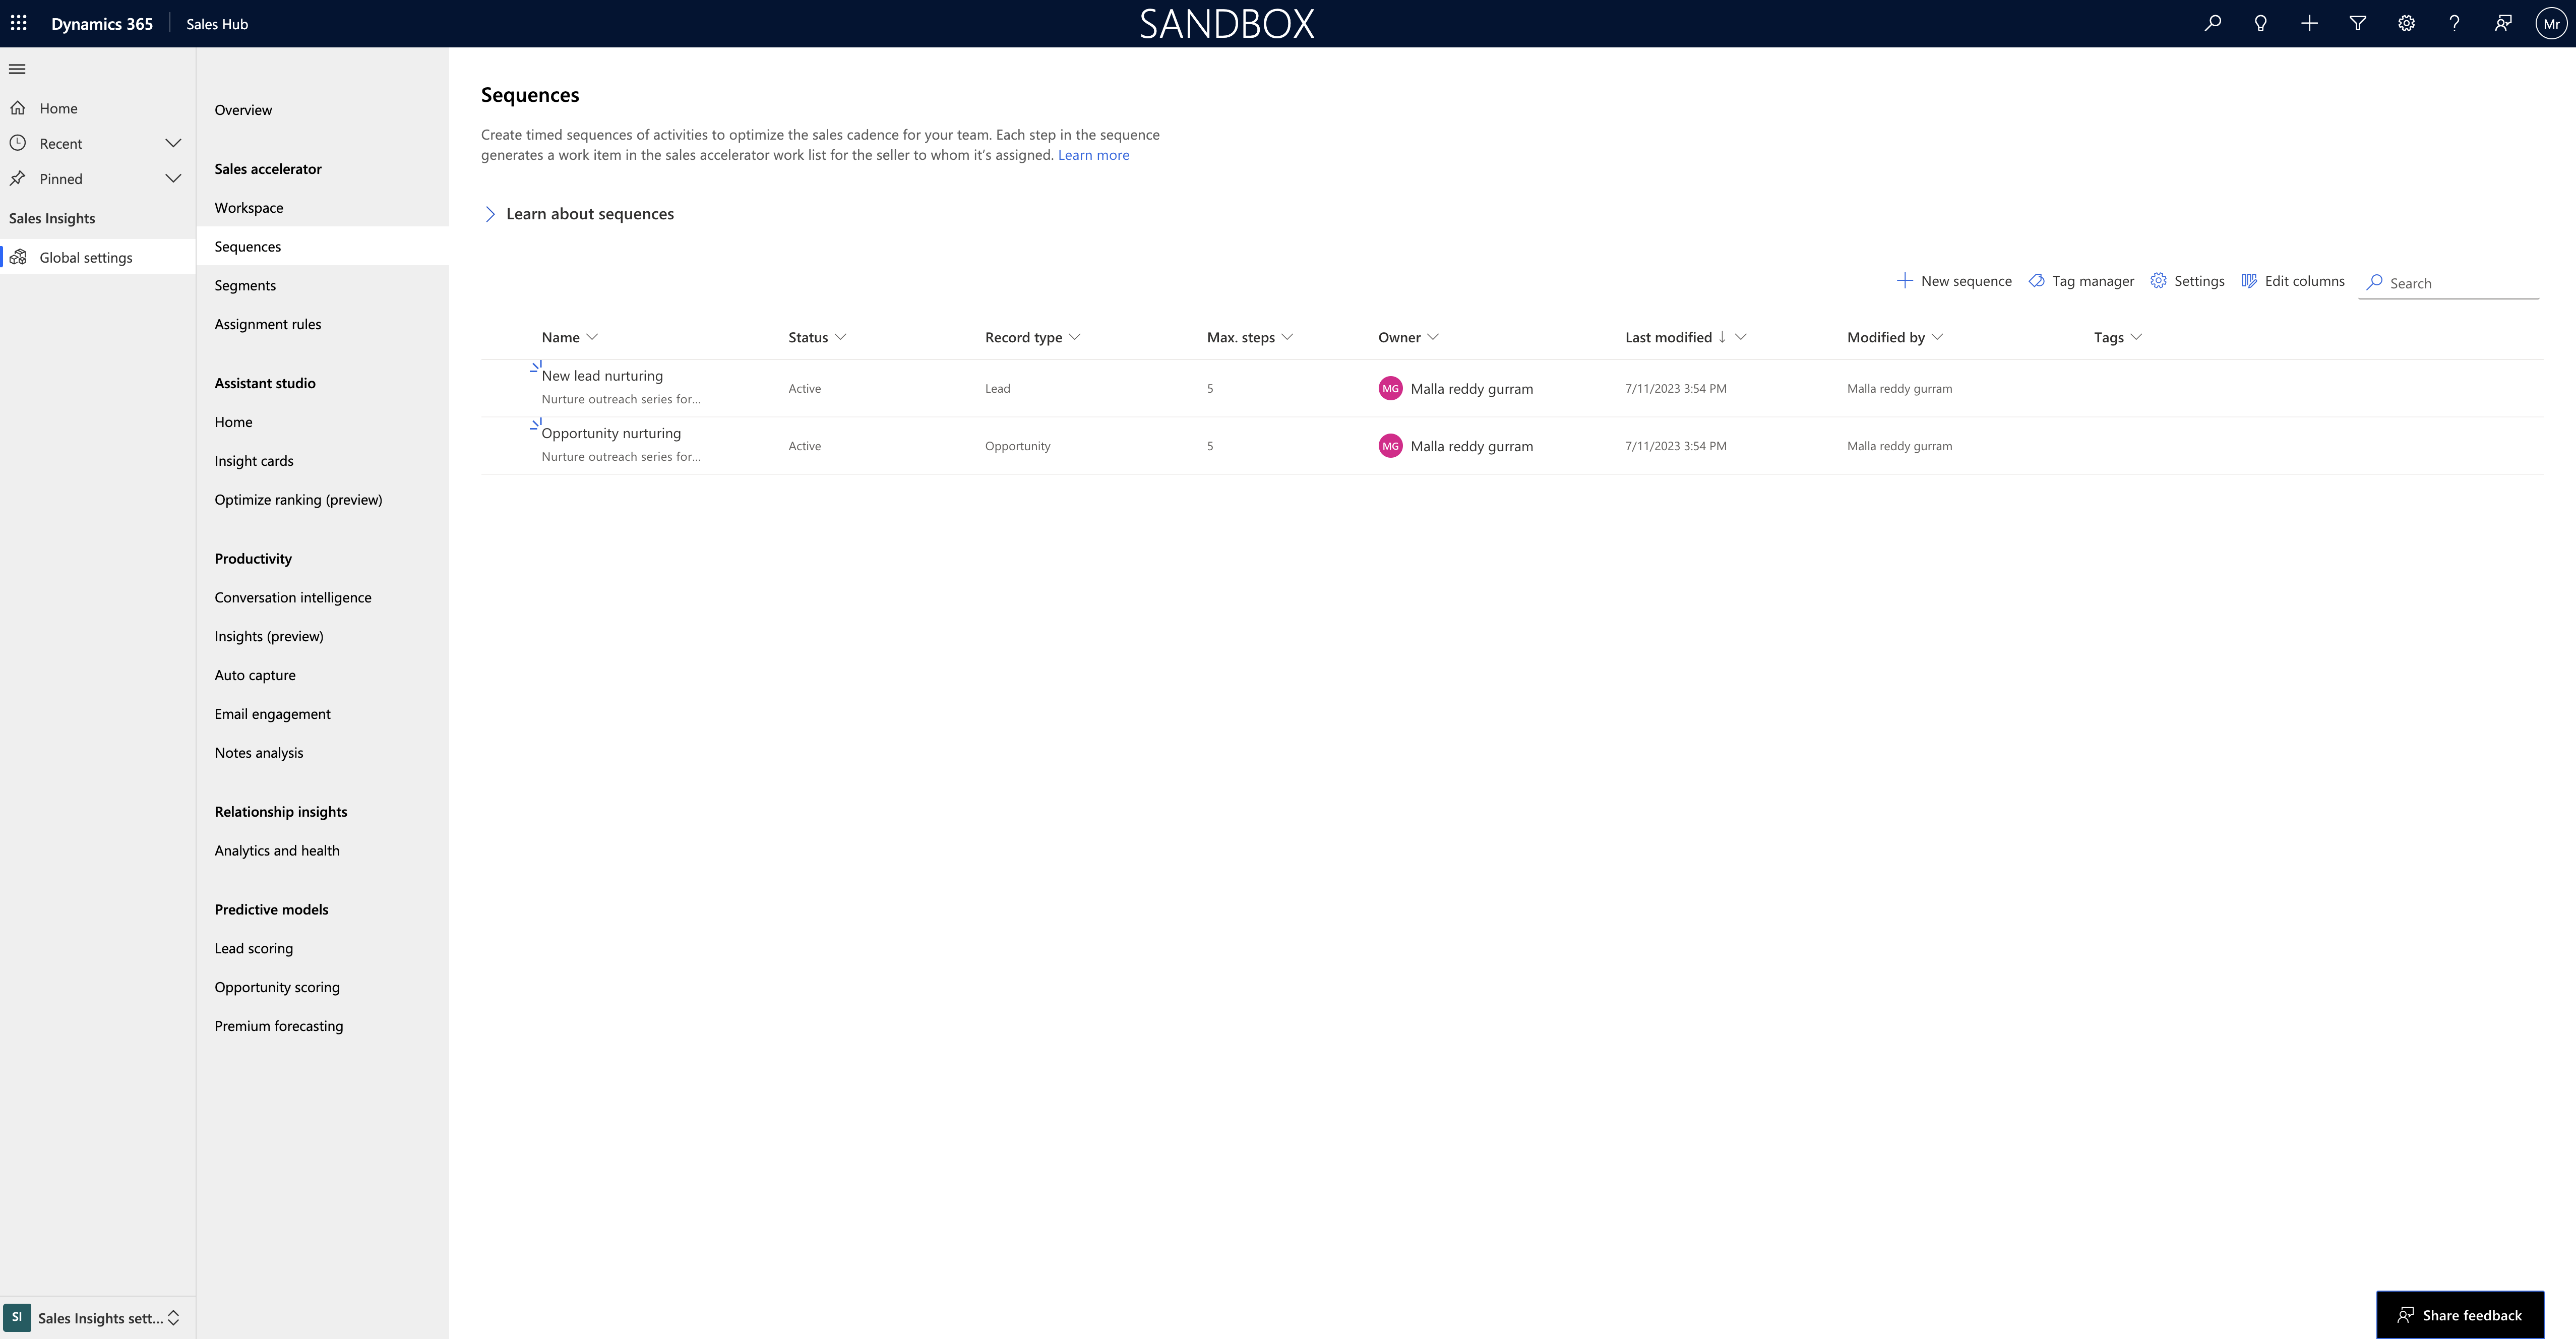
Create a sequence :

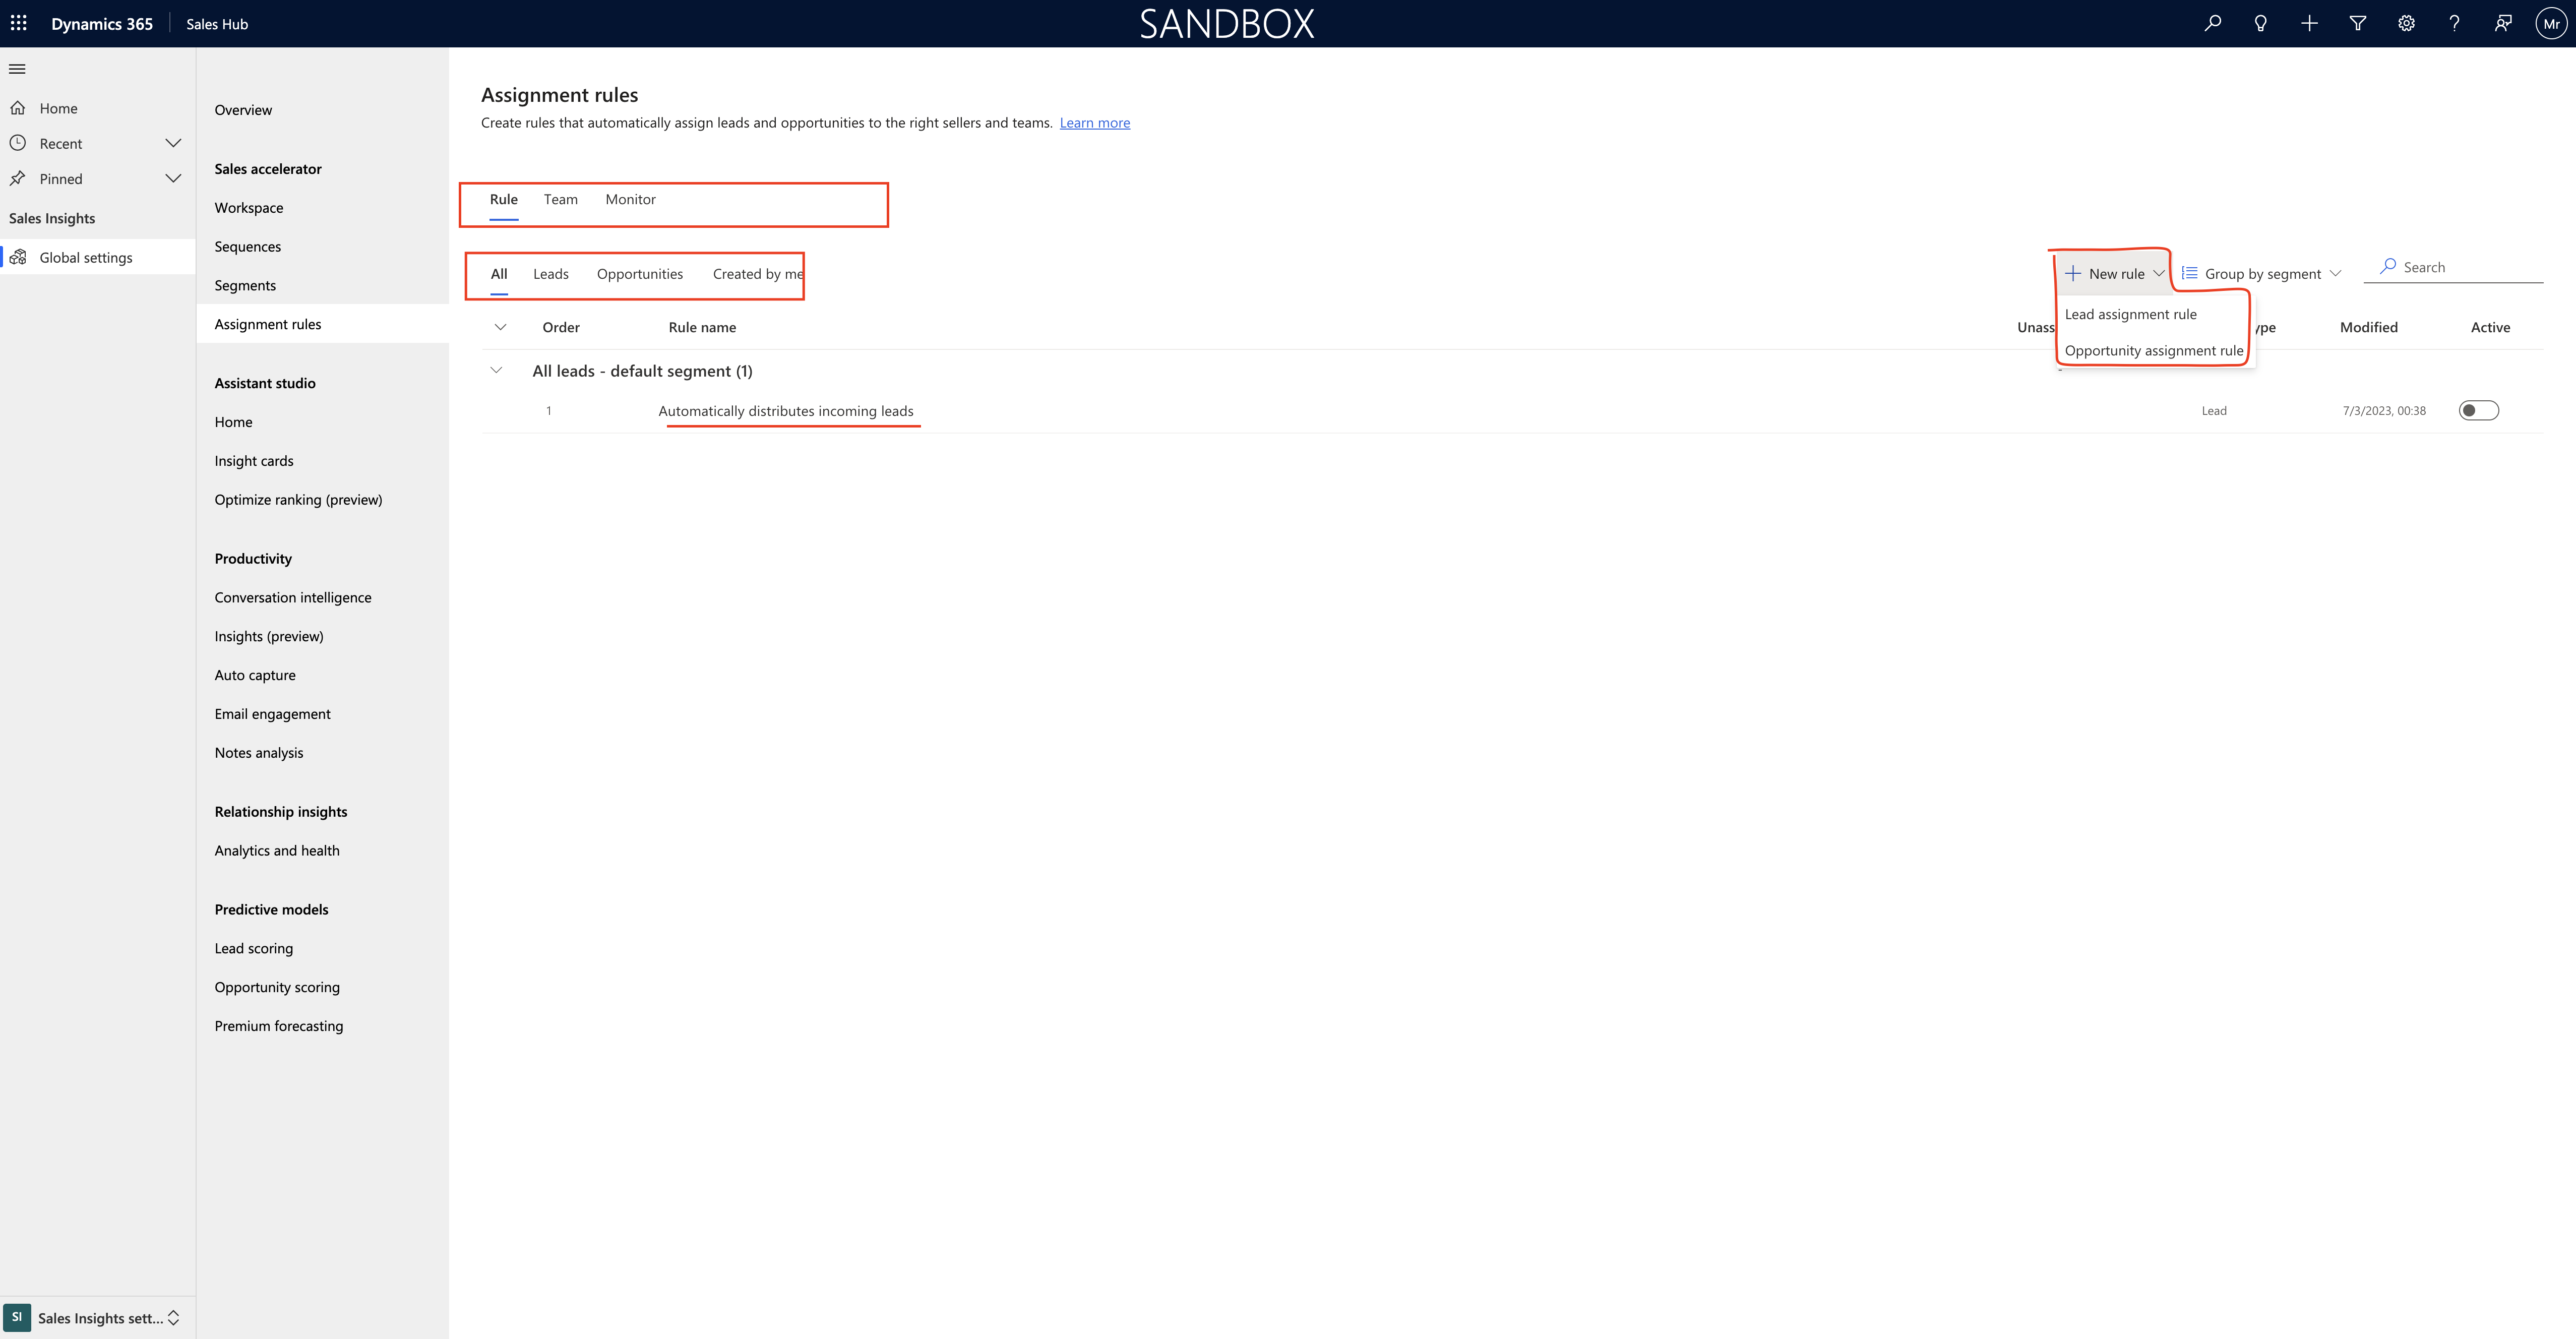
Assignment rules: Create rules that automatically assign leads and opportunities to the right sellers and teams.

Sequence reporting: Sales accelerator reports includes:

1. Seller availability : Allow sellers to set their availability so sequence steps will become relevant only when assigned sellers are available.

2. Sequence activties : Choose whether you want to pre-create linked activities in sellers timeline for upcoming sequence steps. if pre-create is off, linked activity is created on click of sequence step action.

3.Sequence reporting:

4.Phone number priority

After the sequence settings configured click save.

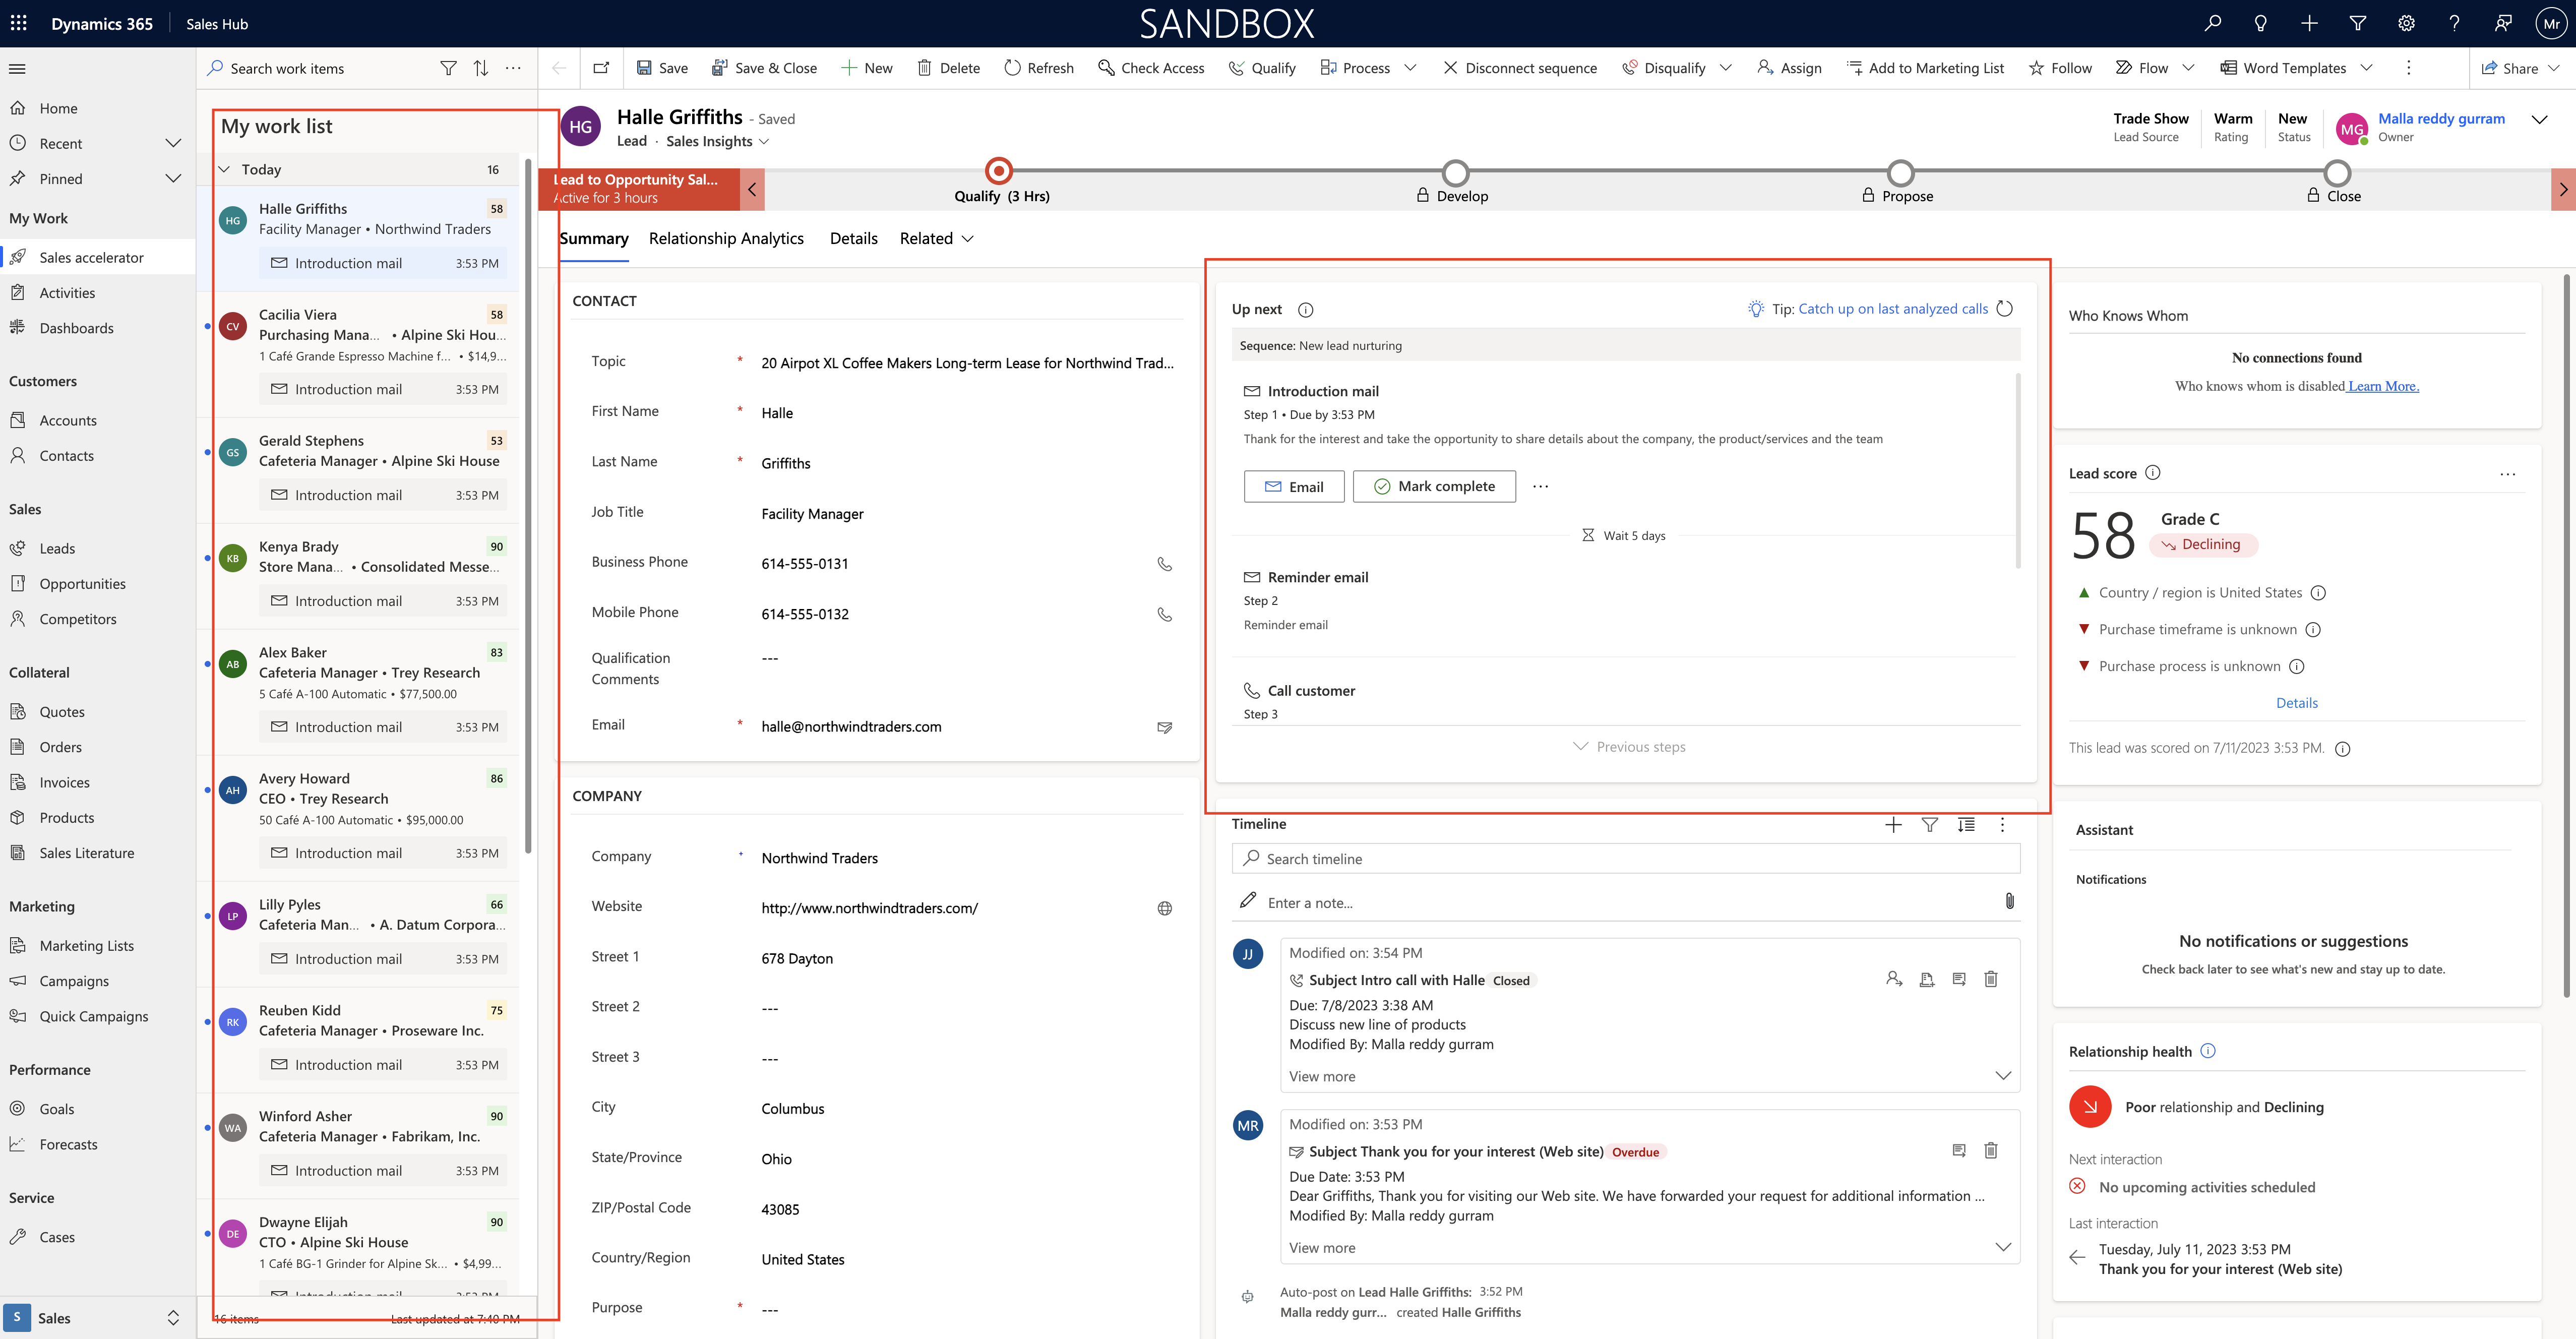
Finally the sales accelerator looks like below screenshot

That’s it for today.

I hope this helps.

Malla Reddy(@UK365GUY)
#365BlogPostsin365Days
Share this:

How to create and activate a segment in Dynamics 365 Sales

Hello Everyone,

Today i am going to share how to create and activate segment in Dynamics 365 Sales.

Let’s get’s started.

What is segment?

Create a condition to get group of records, by defining different conditions for each segment. Once a segment is activated and a record satifies the conditions that are defined in the segment, the record becomes a member of the segment.

Login into Dynamics 365 Sales – Model Driven App.

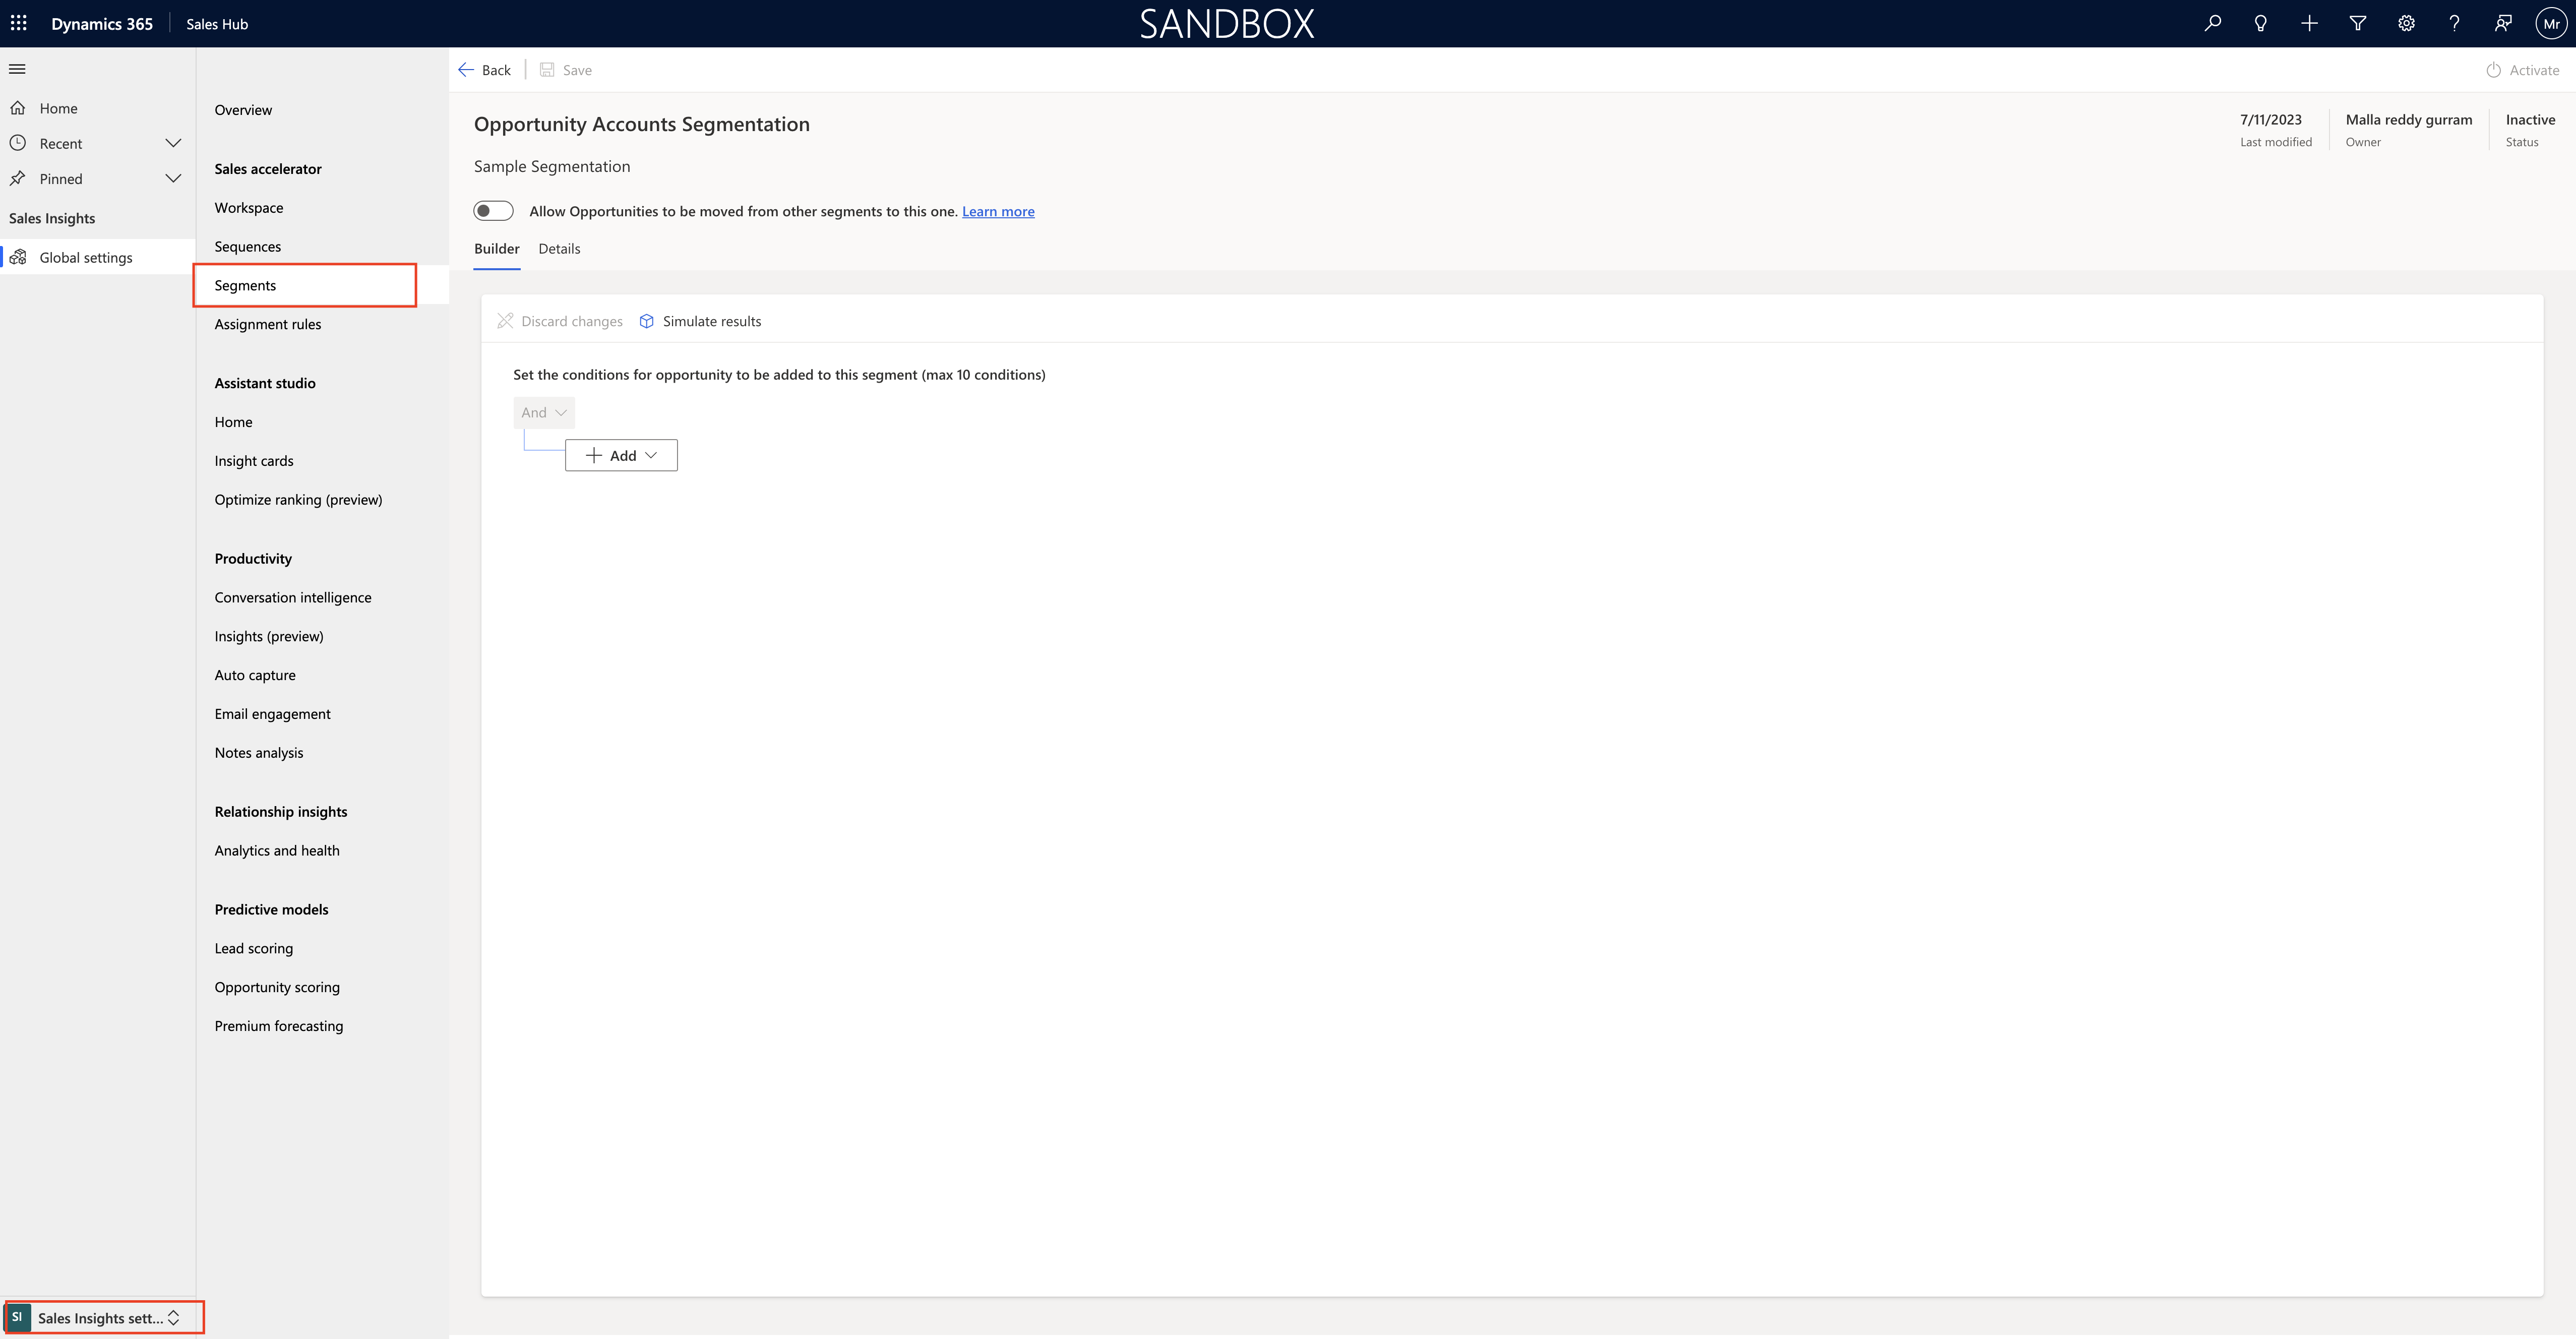
Then change the settings to sales insights settings and click on the Segments underneath Sales Accelerator

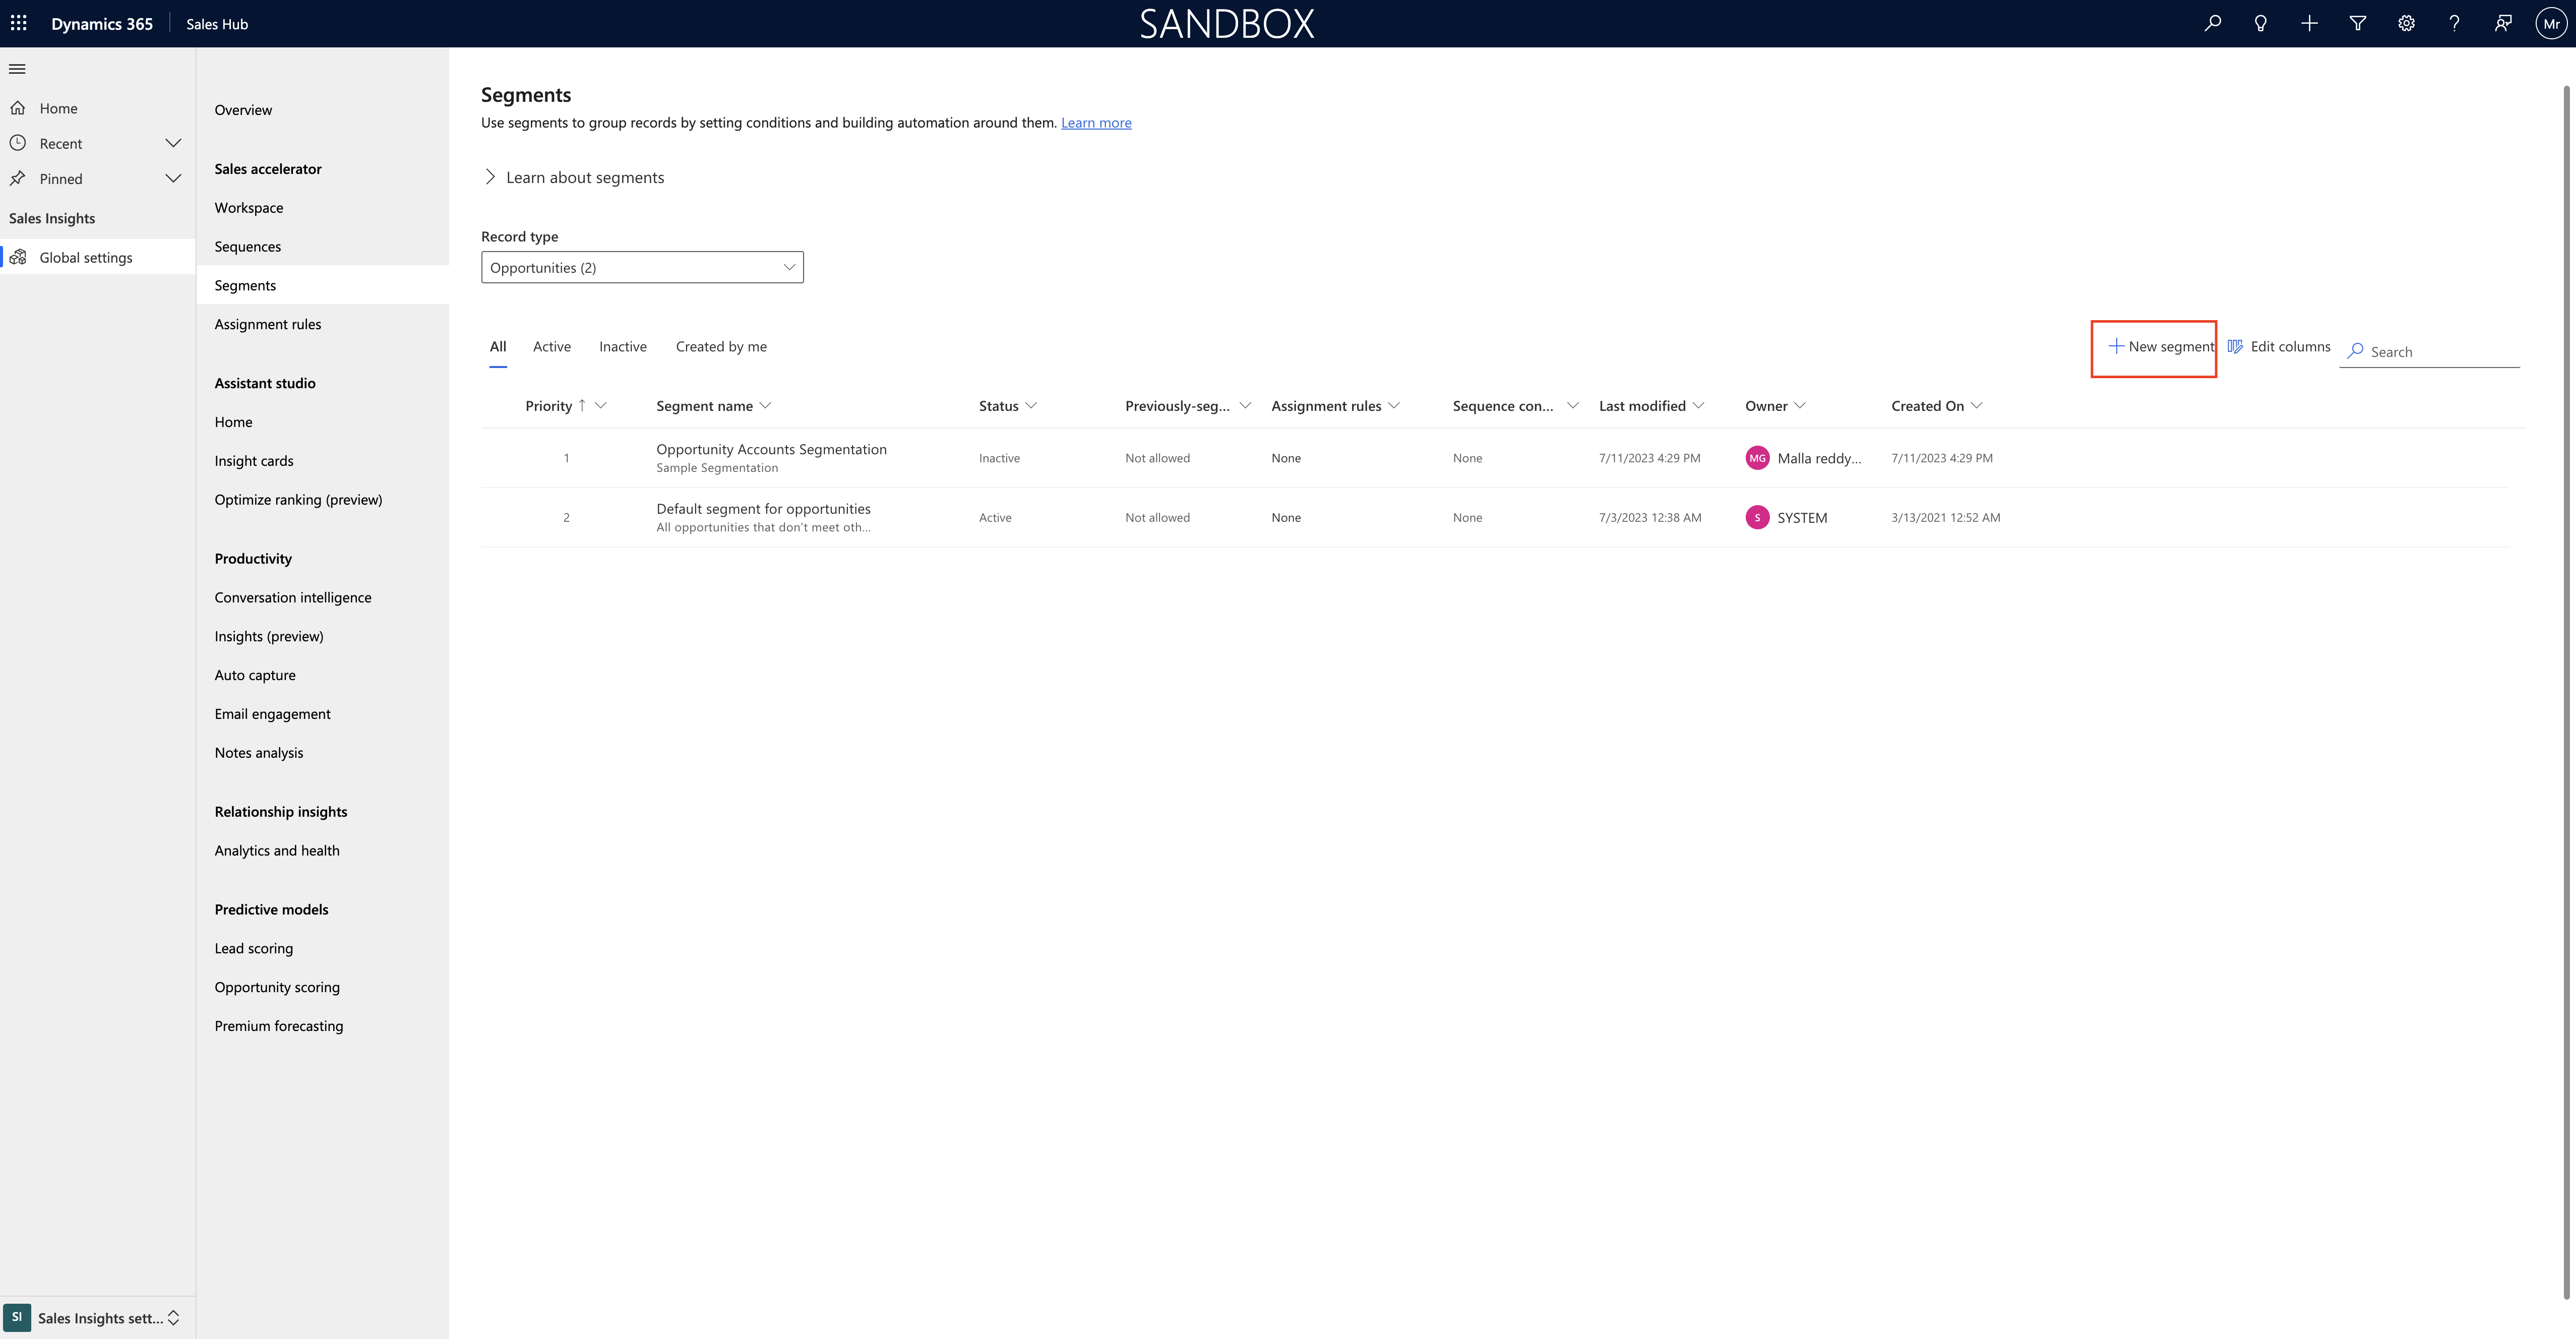
Choose the Record type as Opportunity or Leas and Create a New Segment

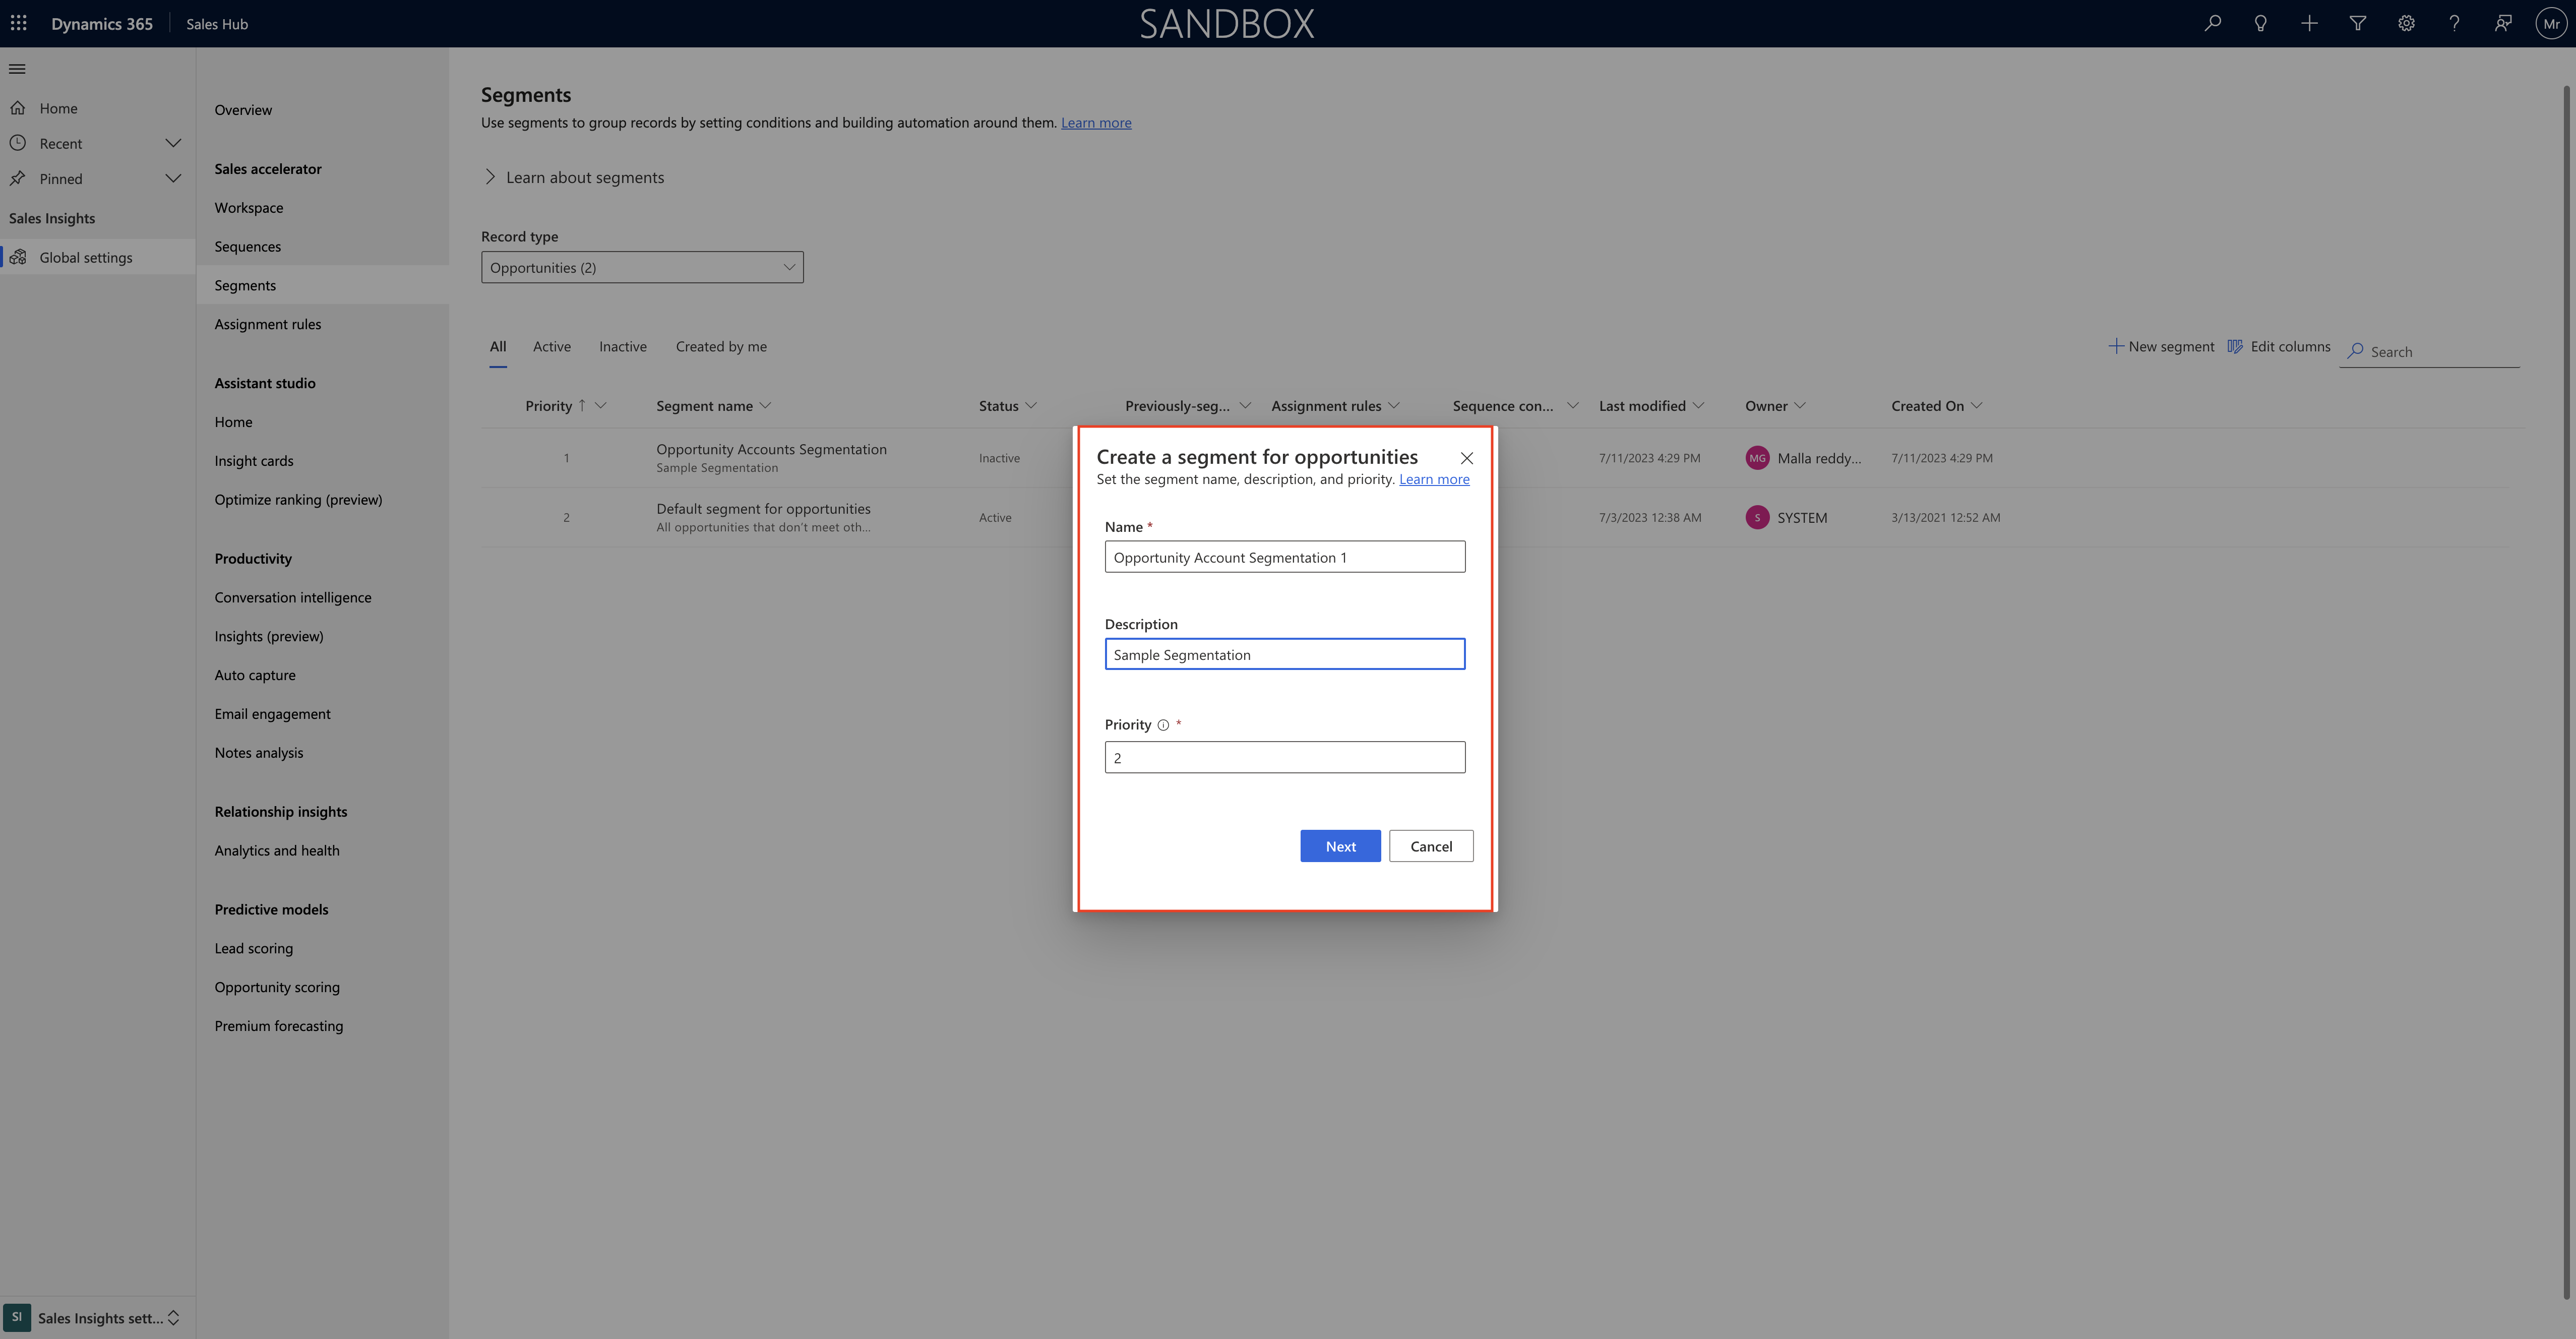
Create a segment for Opportunities:

Name, Description, Priority.

Then check the Allow Opportunities to be moved from other segments to this one and check the box of Update seller assignments as well.

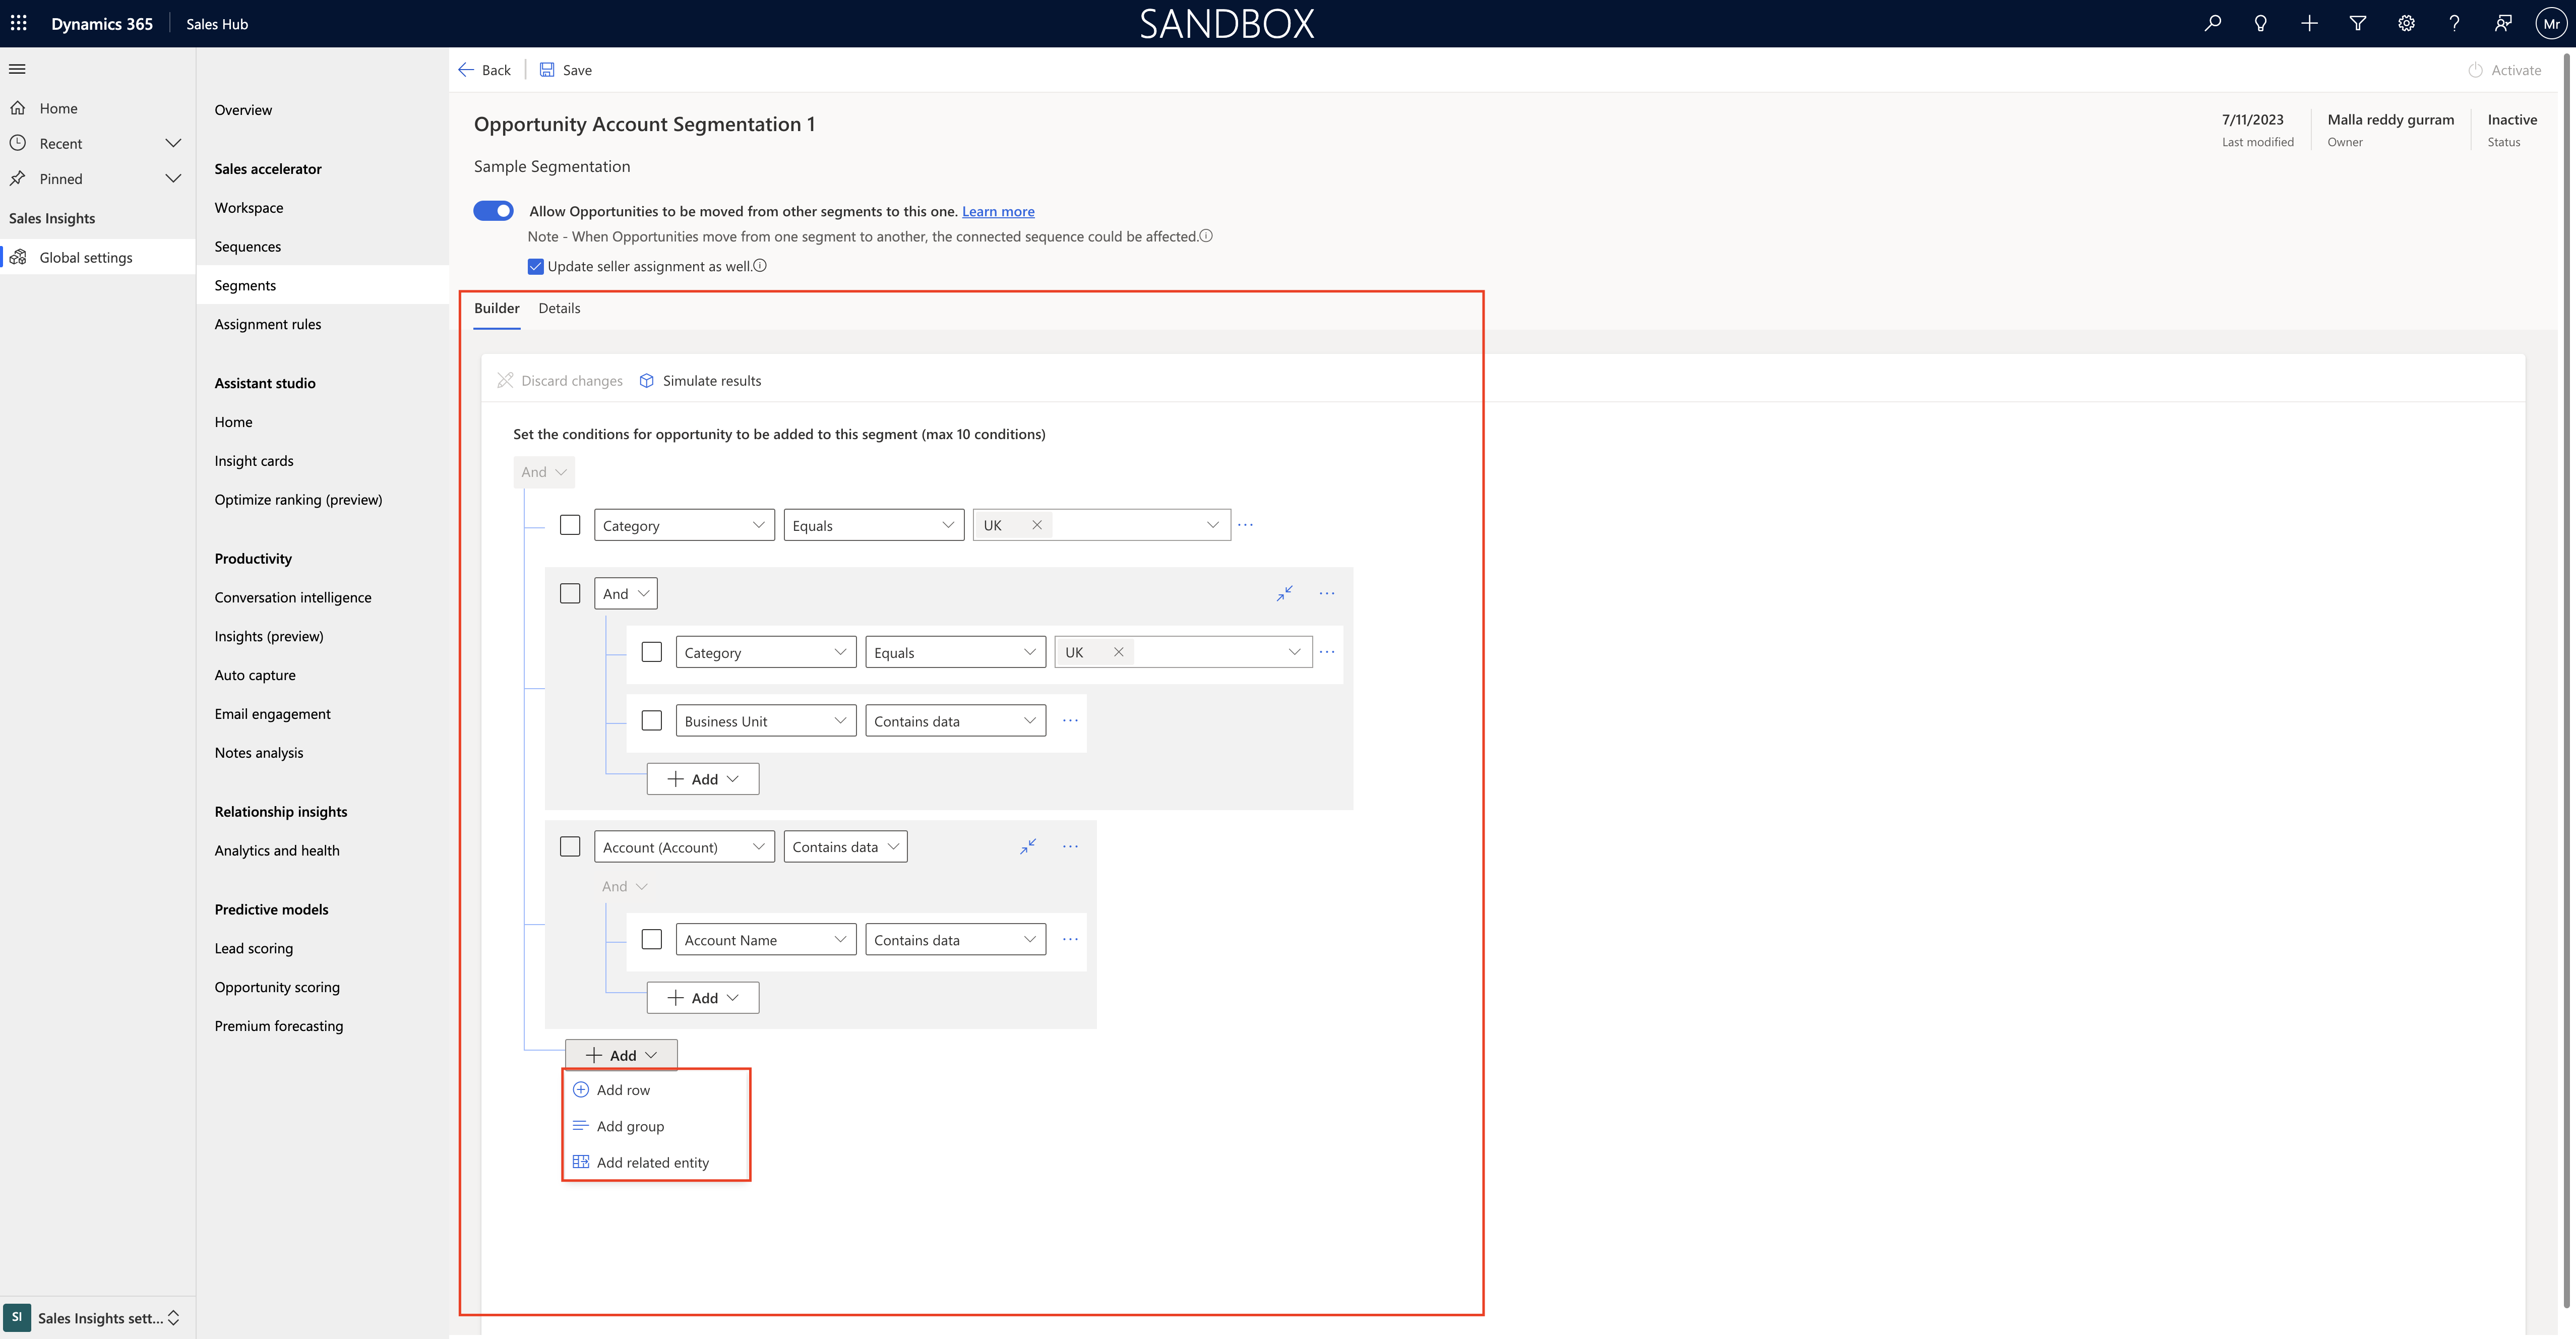
Start creating segmentation using ADD ROW, ADD GROUP, ADD RELATED ENTITY

Add row: you can add row conditon, add group or add related entity based on the segmentation condition you would like to see.

Note: you can only have 10 conditions per segment.

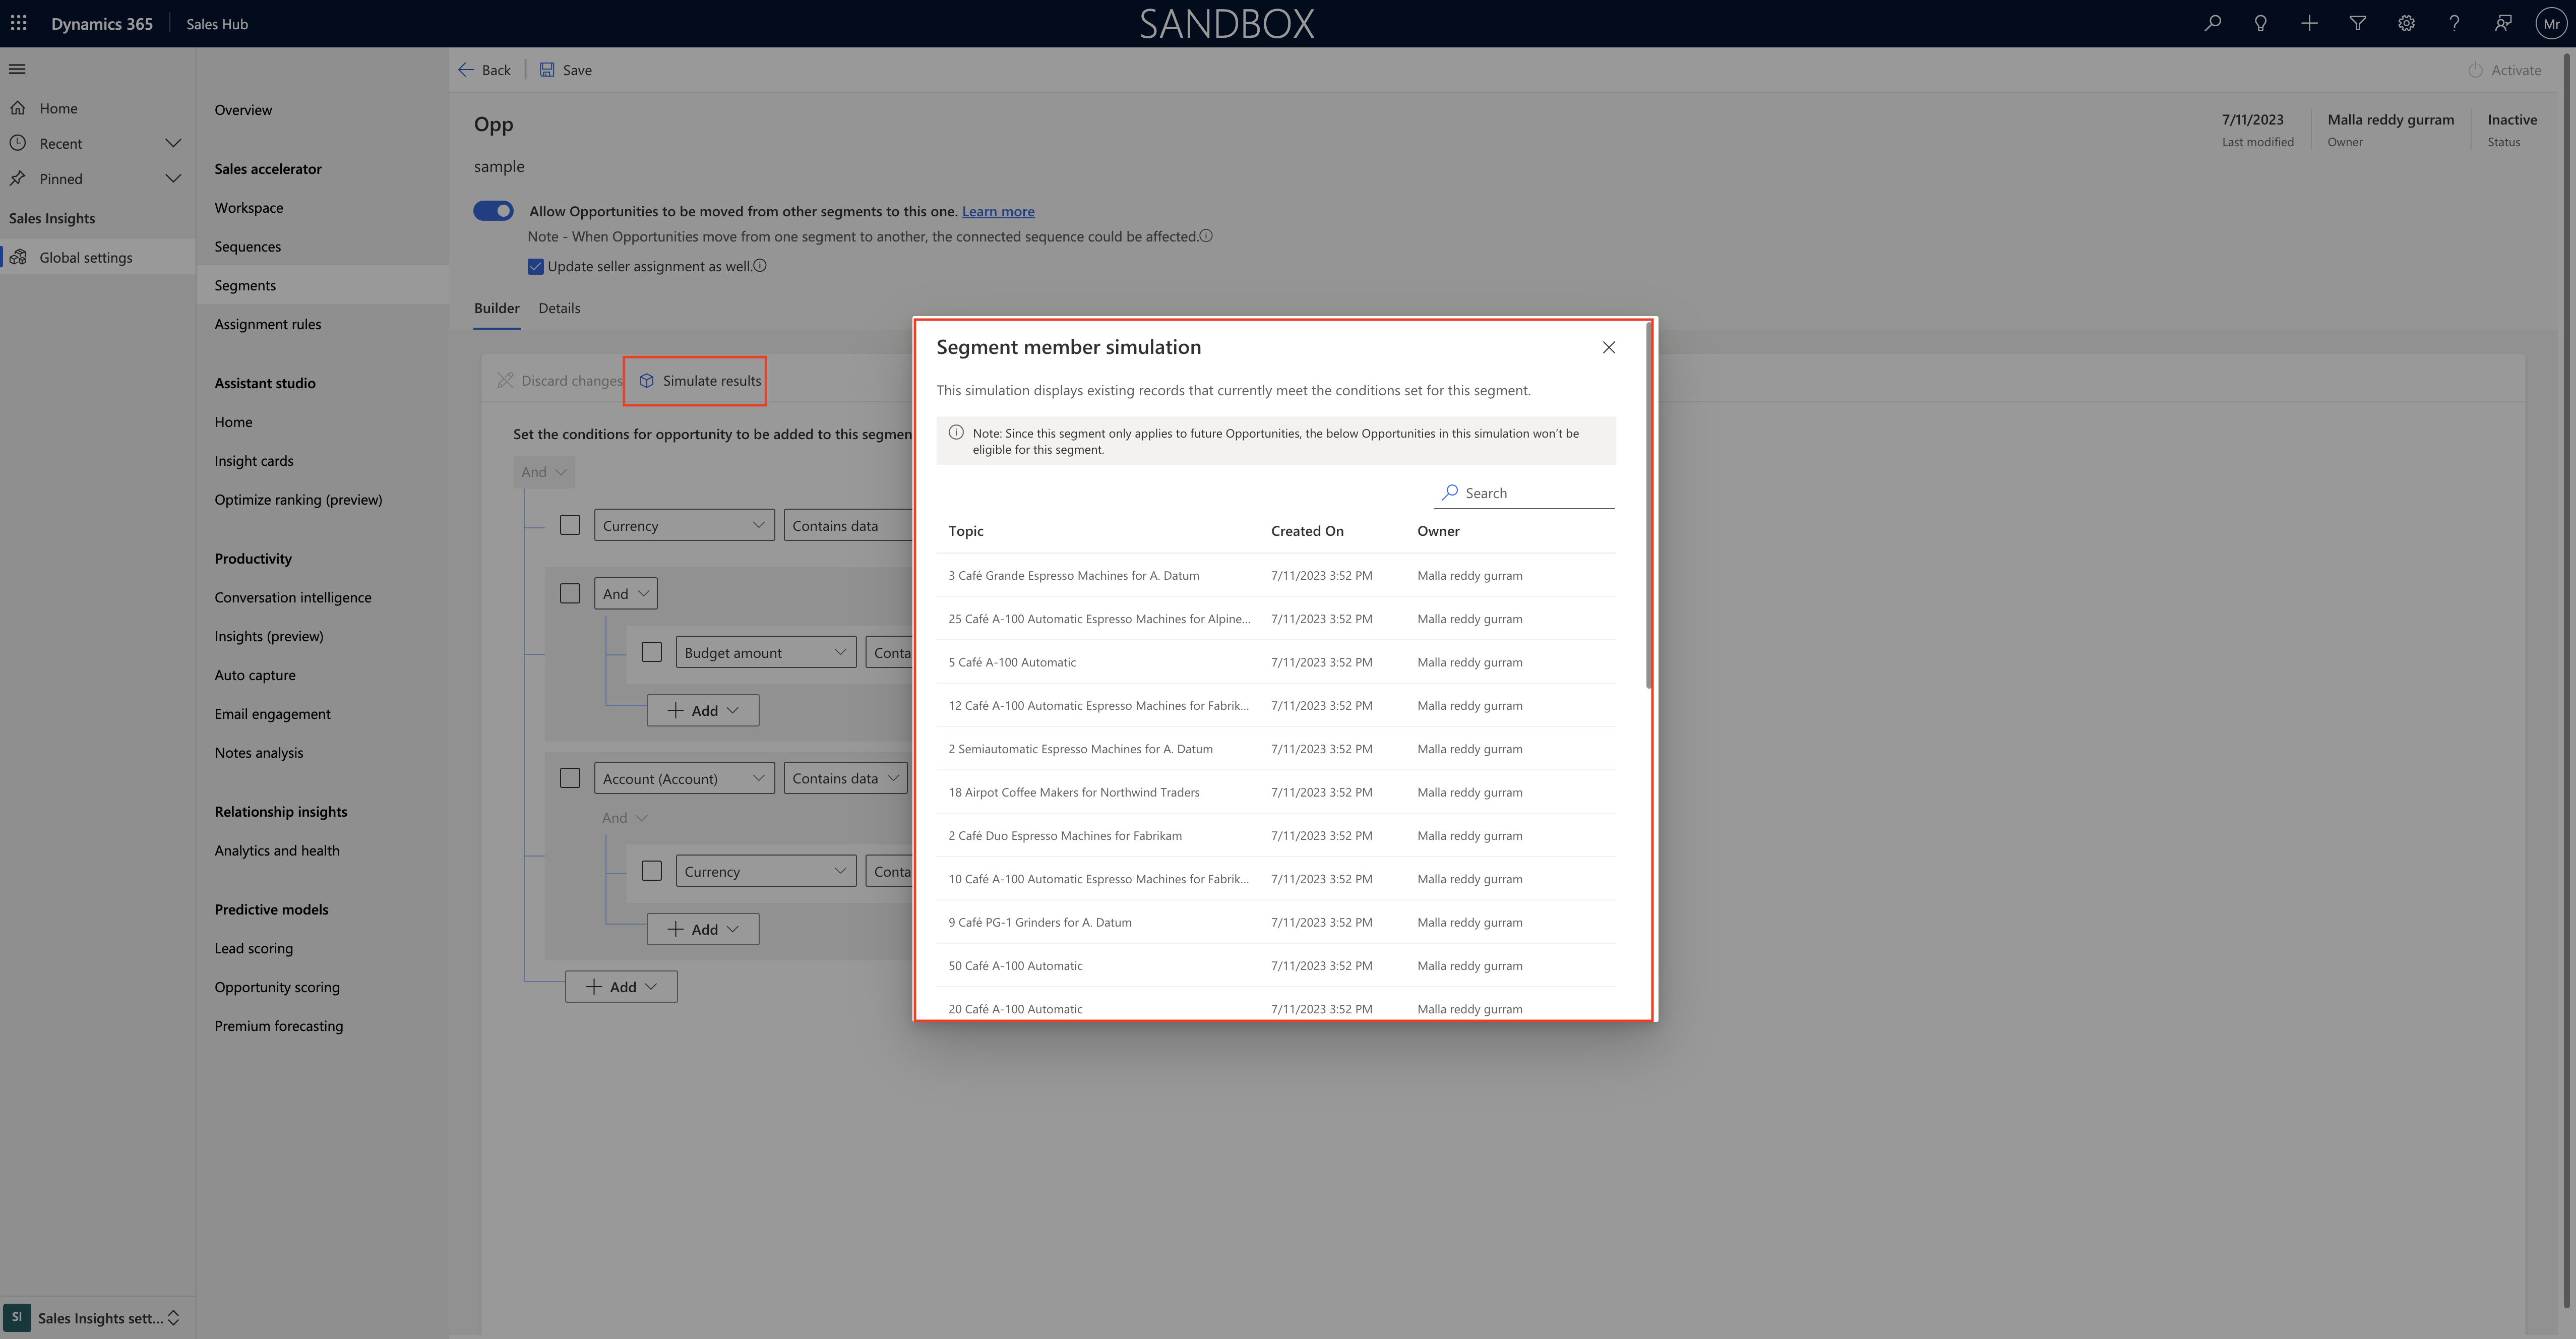
When you set up conditions and you can check whether there is data available for your conditions by clicking on Simulate results.

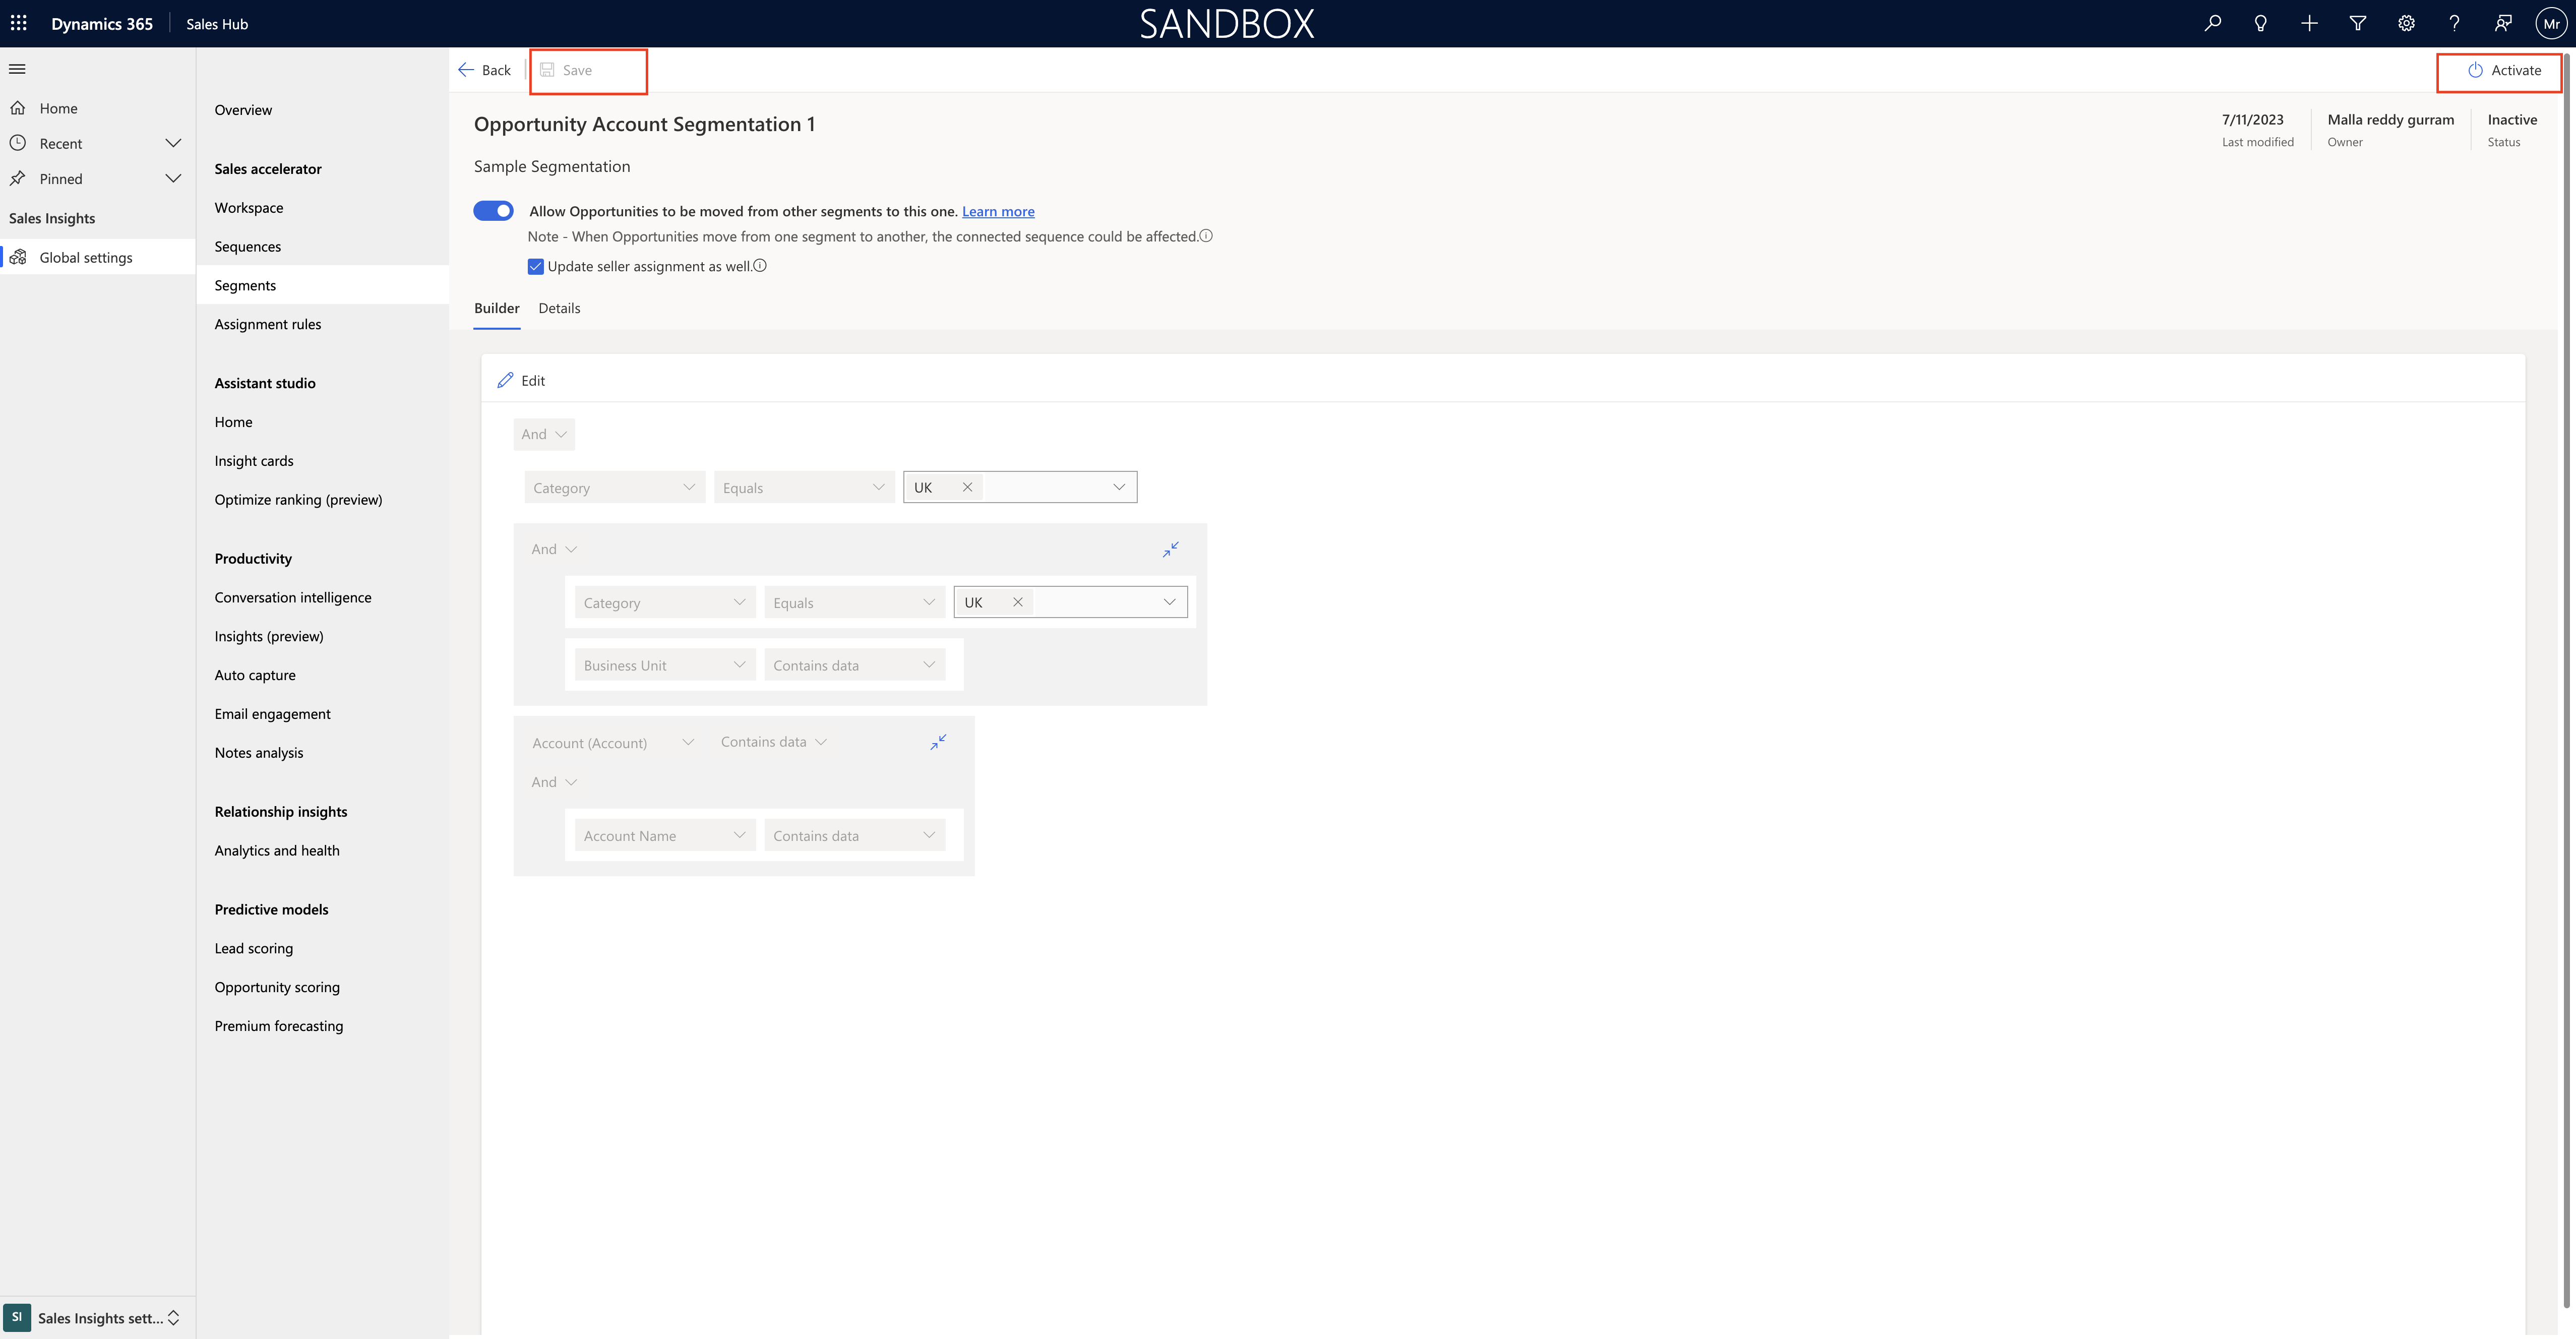
Once you finish the segmentation condition click SAVE and Activate the segment.

Once segment activated and your filter starting working for you.

Thats it for today.

I hope this helps
Malla Reddy(@UK365GUY)
#365BlogPostsin365Days
Share this:

New all in one place for Dynamics 365 Community forums user groups.

Hello Everyone,

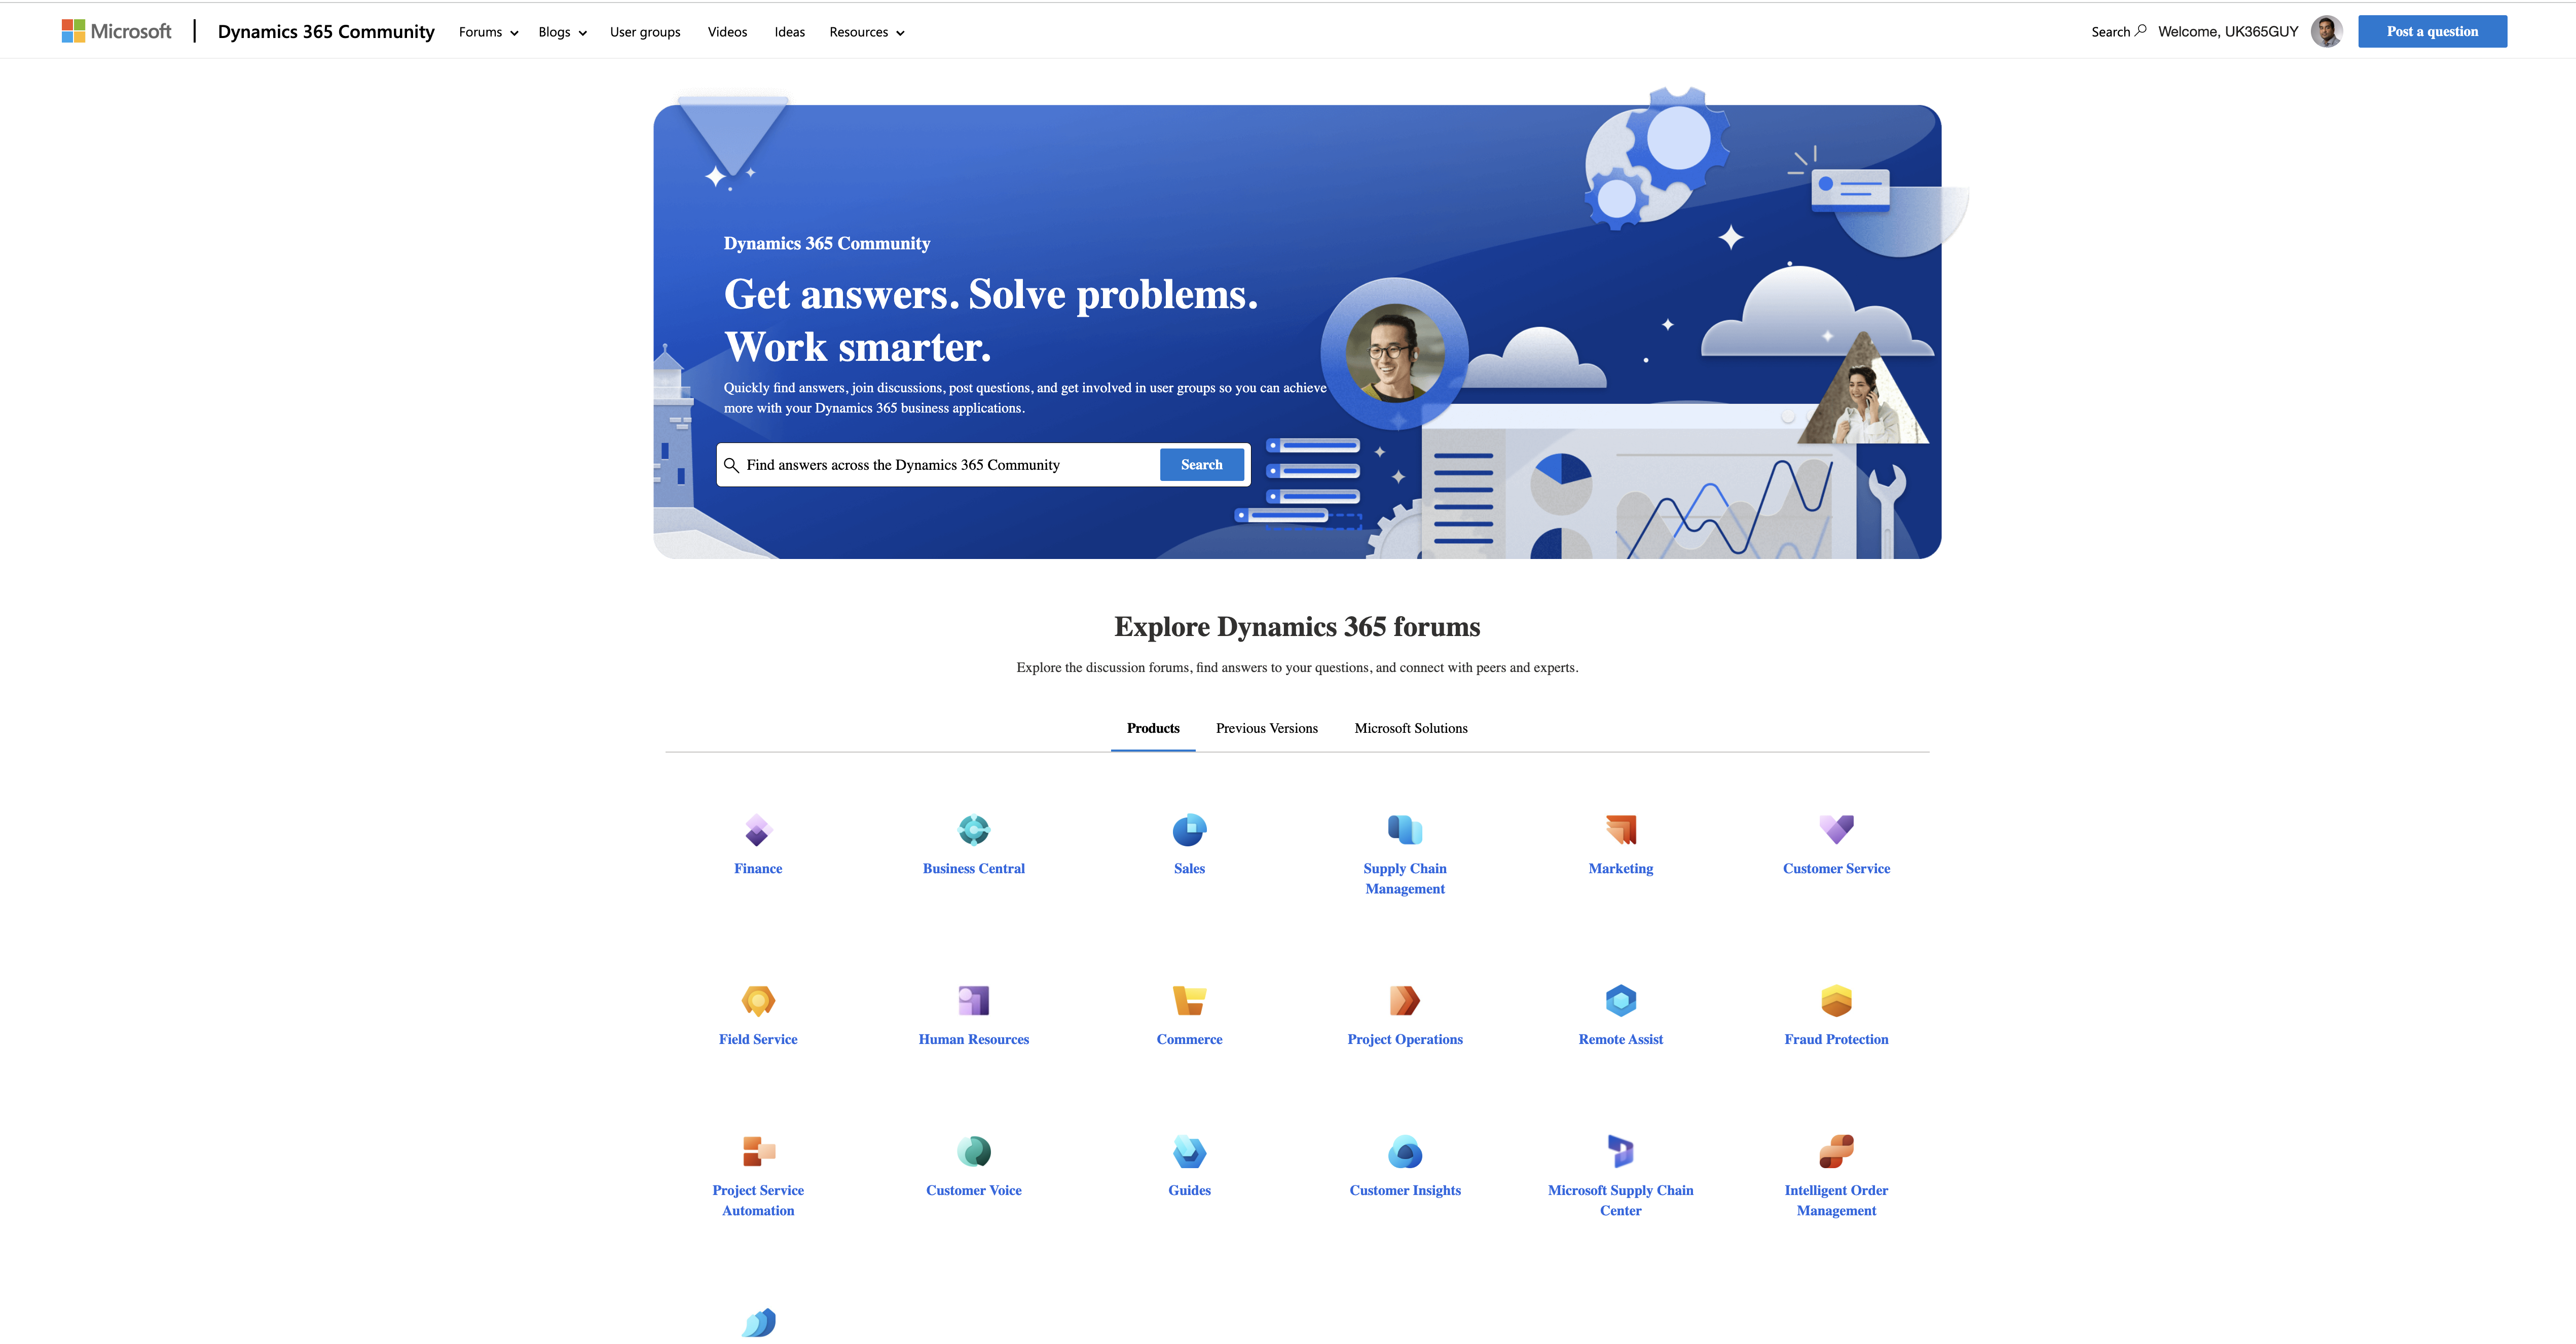
Today i am going to share Microsoft Dynamics 365 Community Modern UI for all your questions, blogs in one place.

Let’s get’s started.

“Get answers, Solve Problems, Work smarter”

Visit the https://community.dynamics.com/

You can explore Dyamics 365 forums, find answers to your questions and connect with community experts and peers.

Get involved in user groups, so you can achieve more with your Dynamics 365 business applications.

That’s it for today.

I hope this helps
Malla Reddy(@UK365GUY)
#365BlogPostsin365Days
Share this: