Menu Close

Tag: #365blogpostsin365days

{Do you know} How to refine email content in running journeys on dynamics 365 customer insights

Hello Everyone,

I hope everyone is well.

I took a month break after continous 365 days blog posts for a year.

Starting again:

Today I am going to share my thoughts on how to refine email content in running journeys on dynamics 365 customer insights.

Let’s get’s started.

You can refine email content in running journeys on Dynamics 365 Customer Insights without interrupting the customer experience or creating a new version.

Here are some key features and steps to help you:
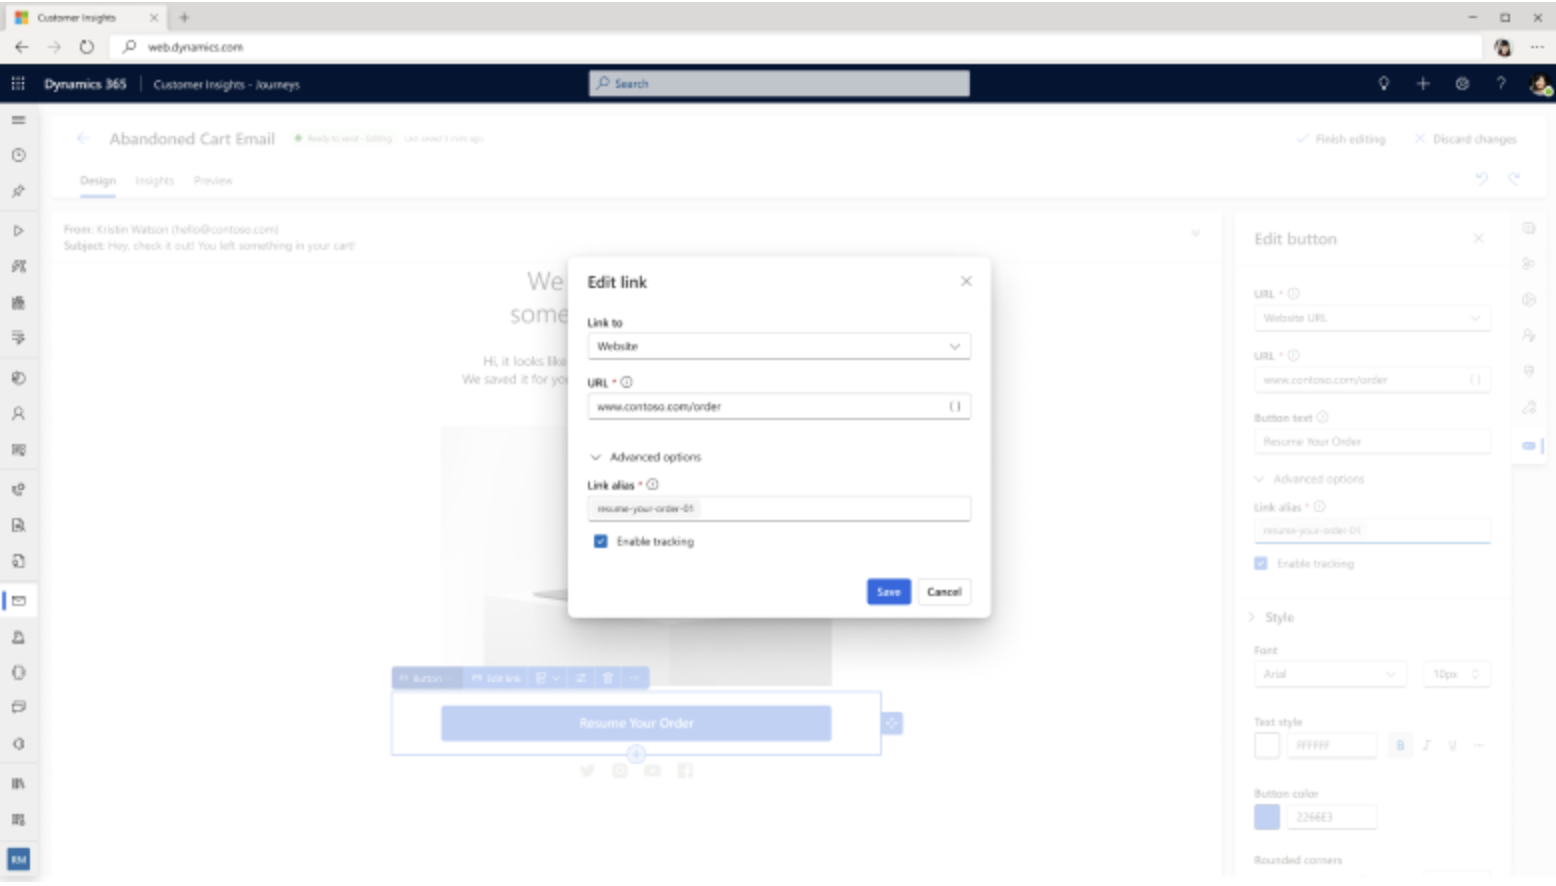
1. Seamless Editing: You can easily edit the content, layout. links, buttons or dynamic elements in your email messages while the journeys is running.

2. Personalization: Use the email editor to add personalized data dynamically. This can include information unique to each recipient, enhancing engagement.

3. Link Management: Track the performance of your edited links and compare them to the original to optimize engagement and conversion rates.

4. Rich Media: Add feature rich links to documents, videos, surveys events and more directly from the asset library.

That’s it for today.

I hope this helps.

Malla Reddy Gurram(@UK365GUY)
#365blogpostsin365days

Share this:

{Do you know} Support sellers with Copilot for Sales mobile experiences in Teams

Hello Everyone,

Today I am going to share my thoughts on supporting sellers with Copilot for Sales mobile experiences in Teams.

Let’s get’s started.

Certainly! Microsoft Copilot for Sales in an AI assistant designed specifically for sellers. When using the Microsoft Teams mobile app, sellers can benefit from core experiences that keep them connected and efficient while on the go.

Here are some key features:

1. Message Extension: Sellers can search CRM records and share information with colleagues directly in chat messages.

2. Personal App Experiences: Quick links to essential documentation and admin settings are available for easy access.

3. Sales Personal Assistant: Copilot provides recommendations, minimizes data entry and persoanlizes engagements to help close deals faster with higher win rates.

That’s it for today.

I hope this helps.

Malla Reddy Gurram(@UK365GUY)
#365blogpostsin365days

Share this:

{Do you know} Select instead of type email addresses in Outlook and Teams.

Hello Everyone,

Today I am going to share my thoughts on select instead of type email addresses in Outlook and Teams.

Let’s get’s started.

Microsoft is introducing a new feature that allows you to select instead of type email addresses in Outlook and Teams.

This feature will enable you to choose from email suggestions as you type in the “To” field, making the process more efficient and user-friendly. It’s set to reach general availability on August 5th, 2024.

If you’re experiencing issues with the teams add-in for Outlook not using your preferred email address for sending invites, you might want to check the default email settings in both Outlook and Teams.

Ensure that your work emails it set as the default in Outlook and that it’s also selected as the default scheduling account in Teams settings.

If the probelm persists, it could be beneficial to contact Microsoft Support for further assistance.

That’s it for today.

I hope this helps.

Malla Reddy Gurram(@UK365GUY)
#365blogpostsin365days
Share this:

{How to} Connect Copilot Studio Voice IVR from Dynamics 365 Omnichannel

Hello Everyone,

Today I am going to share my thoughts on the Copilot Studio Voice IVR connect to Dynamics 365 Omnichannel.

Let’s get’s started.

Suppose you have a requirement for a call center to use Dynamics 365 Customer Service Omnichannel and organisation receive phone calls through toll free number and you would like to route those calls from Copilot Studio IVR and further transfer those calls into Omnichannel to answer the calls by customer service agents.

Prerequisites:

You will need:

1. Office 365 – License
2. Dynamics 365 Customer Service – License
3. Dynamics 365 Customer Service Digital Messaging and Voice Add-in
4. Copilot Studio – License
5. Azure Communication Services – Subscription and Phone number
6. Copilot Studio and Dynamics 365 Omnichannel should be in same Microsoft 365 Tenant

To connect Copilot Studio’s Voice IVR to Dynamics 365 Omnichannel, follow these steps:

1. Configure the BOT:

In the Copilot Studio, open the bot you want to integrate.
Navigate to settings > Customer Engagement Hub > Omnichannel.
Select Connect to link your bot with Omnichannel.

2. Enable Voice:

In the Omnichannel section, ensure the Enable voice option is selected.
Configure the bot to handle voice interactions, including speech recognition and DTMF inputs.

3. Agent Transfers:

Go to Manage > Agent Transfers in Copilot Studio.
Select Omnichannel and enable it to allow seamless handoff to live agents.

4. Test and Deploy:

Test the integration to ensure everything works as expected.
Deploy the bot to handle customer calls through the voice IVR.

For detailed information visit Microsoft Docs: here

That’s it for today.

I hope this helps.
Malla Reddy Gurram(@UK365GUY)
#365blogpostsin365days

Share this:

{Do you know} Use Azure Key Vault credentials in flow connections

Hello Everyone,

Today I am going to share my thoughts on Use Azure Key Vault credentials in flow connections.

Let’s get’s started.

You can use Azure Key Vault Credentials in your flow connections to enhance security and streamline credentials management. Here’s a brief overview of how it works:

1. Credentials Storage: Store your credentials as secrets in Azure Key Vault. This centralizes your credentials management and ensures they are securely stored.

2. Integration with Power Automate: Use the new Credentials page in Power Automate to create, edit, and share login credentials. These credentials can be used in desktop flow connections, allowing your flows to run on windows machines using the latest credentials retrieved at runtime.

3. Password Rotation: When the credentials in Azure Key Vault are updated, the connections using them are automatically updated as well. This means your desktop flows will continue to run smoothly even if the administrator changes the password.

To get started, you’ll need to configure Azure Key Vault and set up the credentials in Power Automate.

That’s it for today.

I hope this helps.

Malla Reddy Gurram(@UK365GUY)
#365blogpostsin365days

Share this: