Menu Close

Tag: #365blogpostsin365days

{How to} enable Microsoft Teams Collaboration and chat from Dynamics 365 Sales App

Hello Everyone,

Today I am going to show how to enable microsoft teams collaboration and chat from Dynamics 365 Sales App.

Let’s get’s started.

Login into Dynamics 365 Sales App.

Change the settings to “APP SETTINGS”.

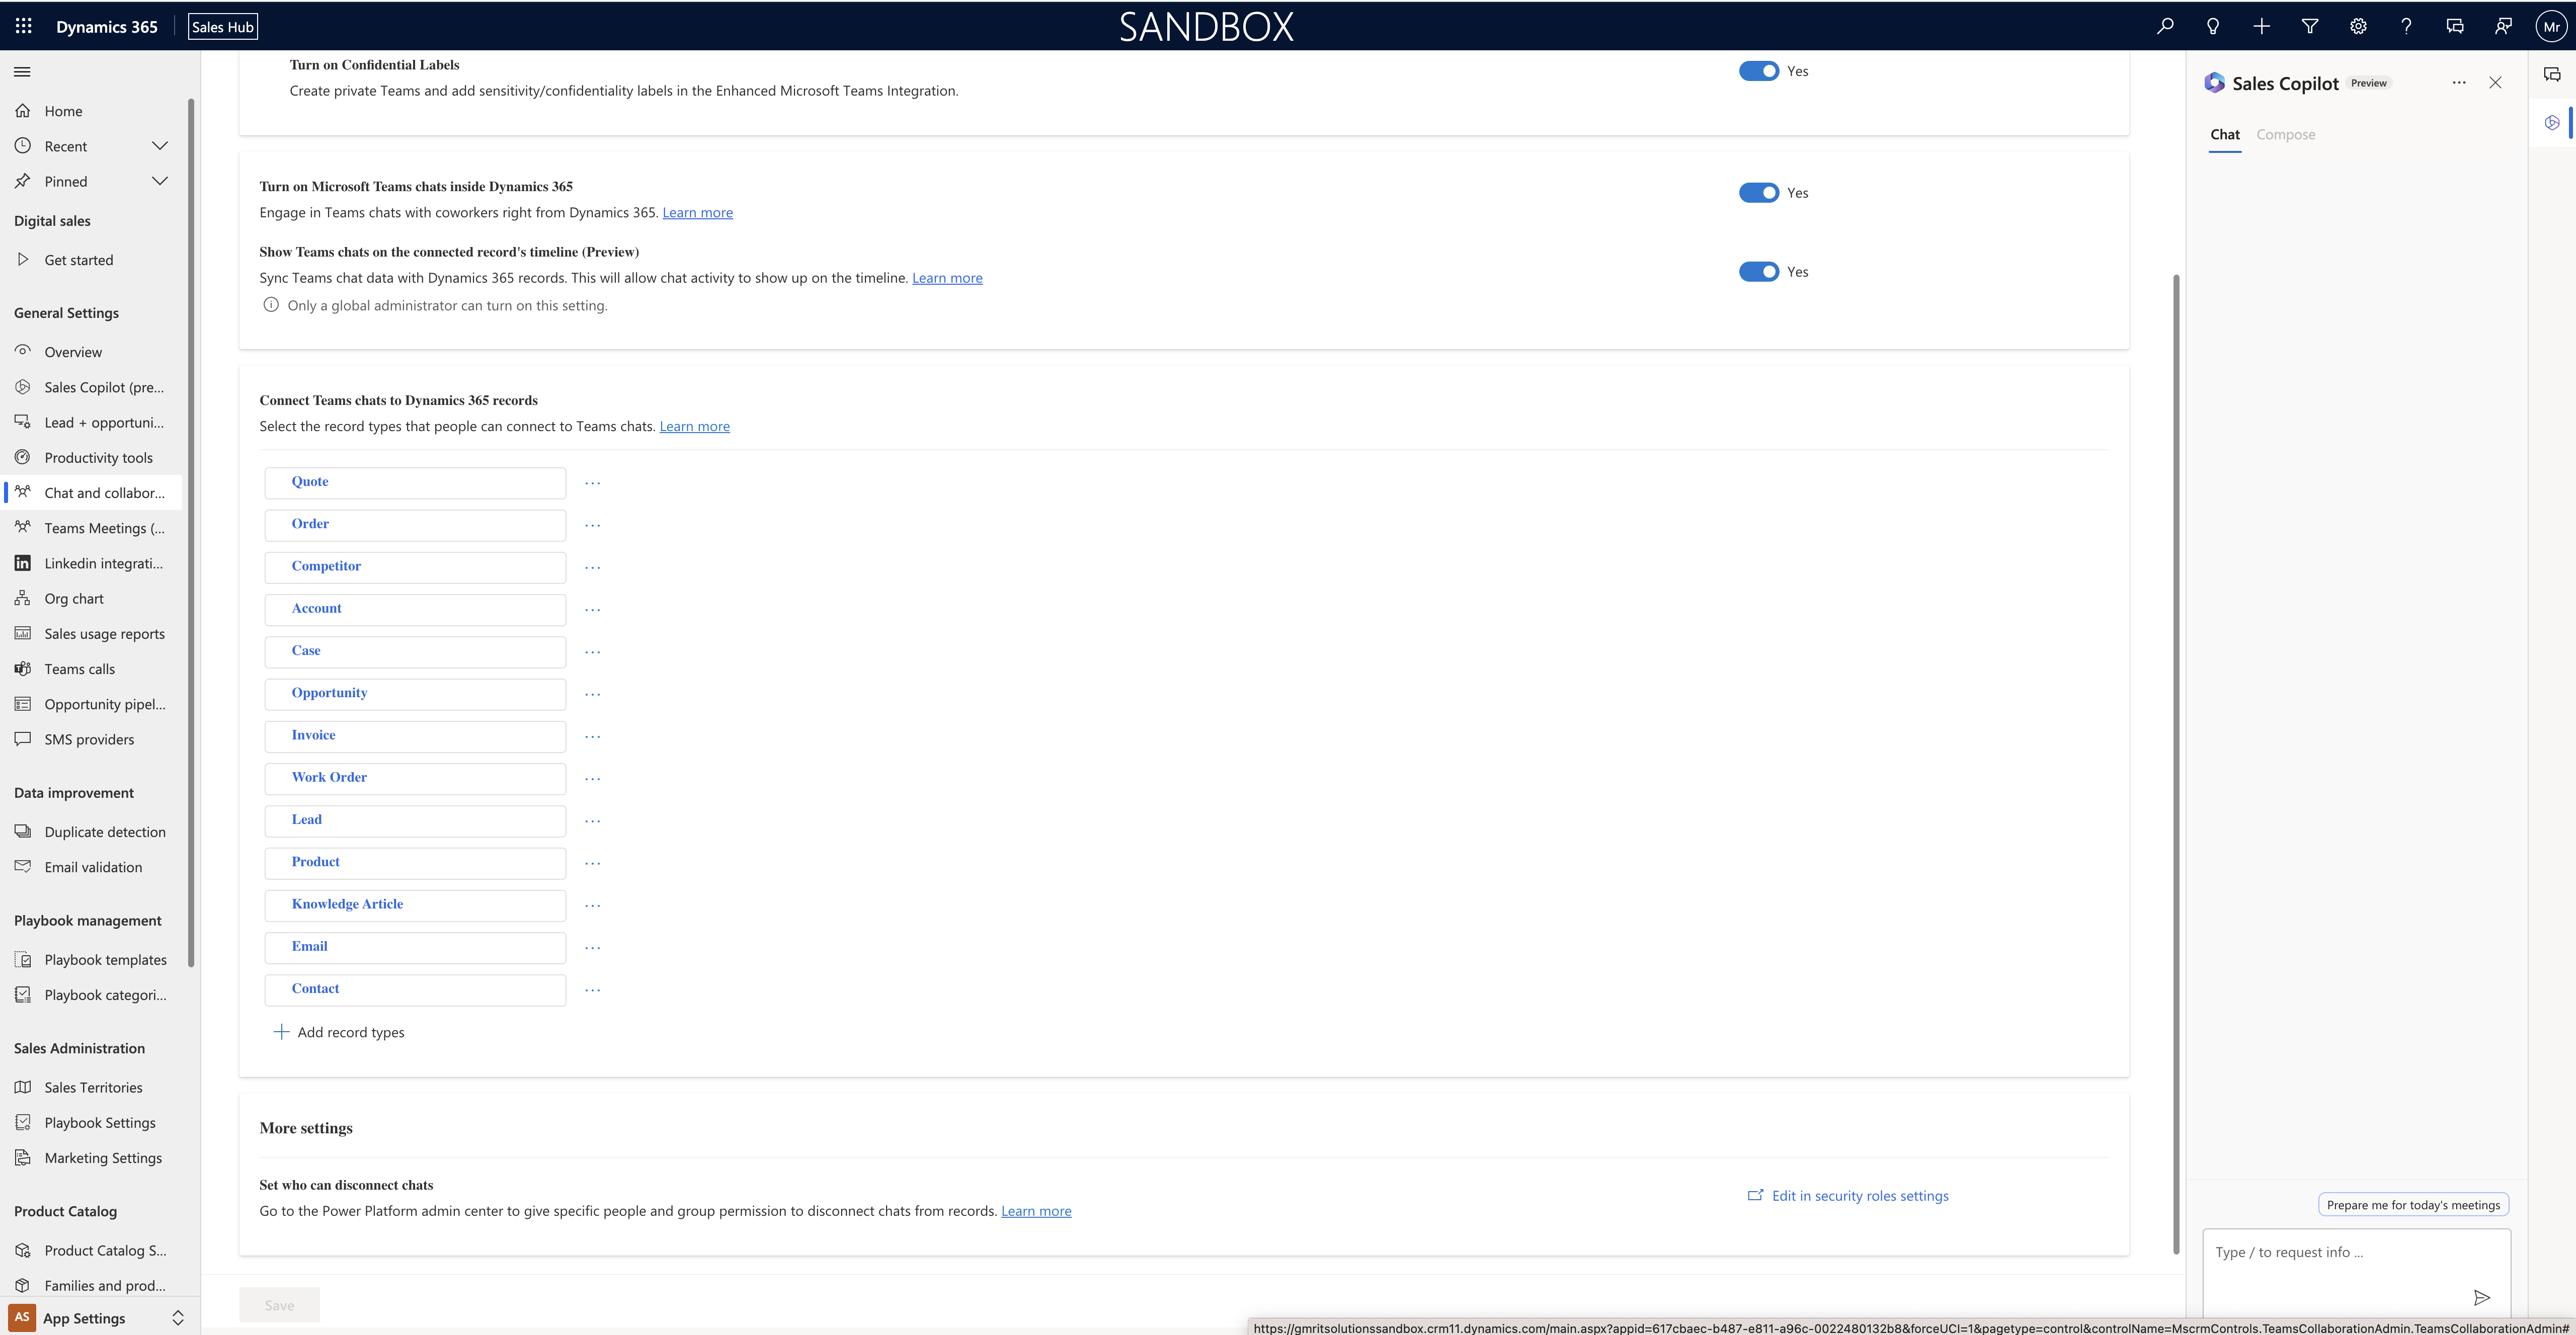
Click on the “Chat and collaboration”

Microsoft Teams collaboration and chat – seamlessly collaborate with Dynamics 365 Teams members.

Some of the settings here you need to enable, lets see what they are ?
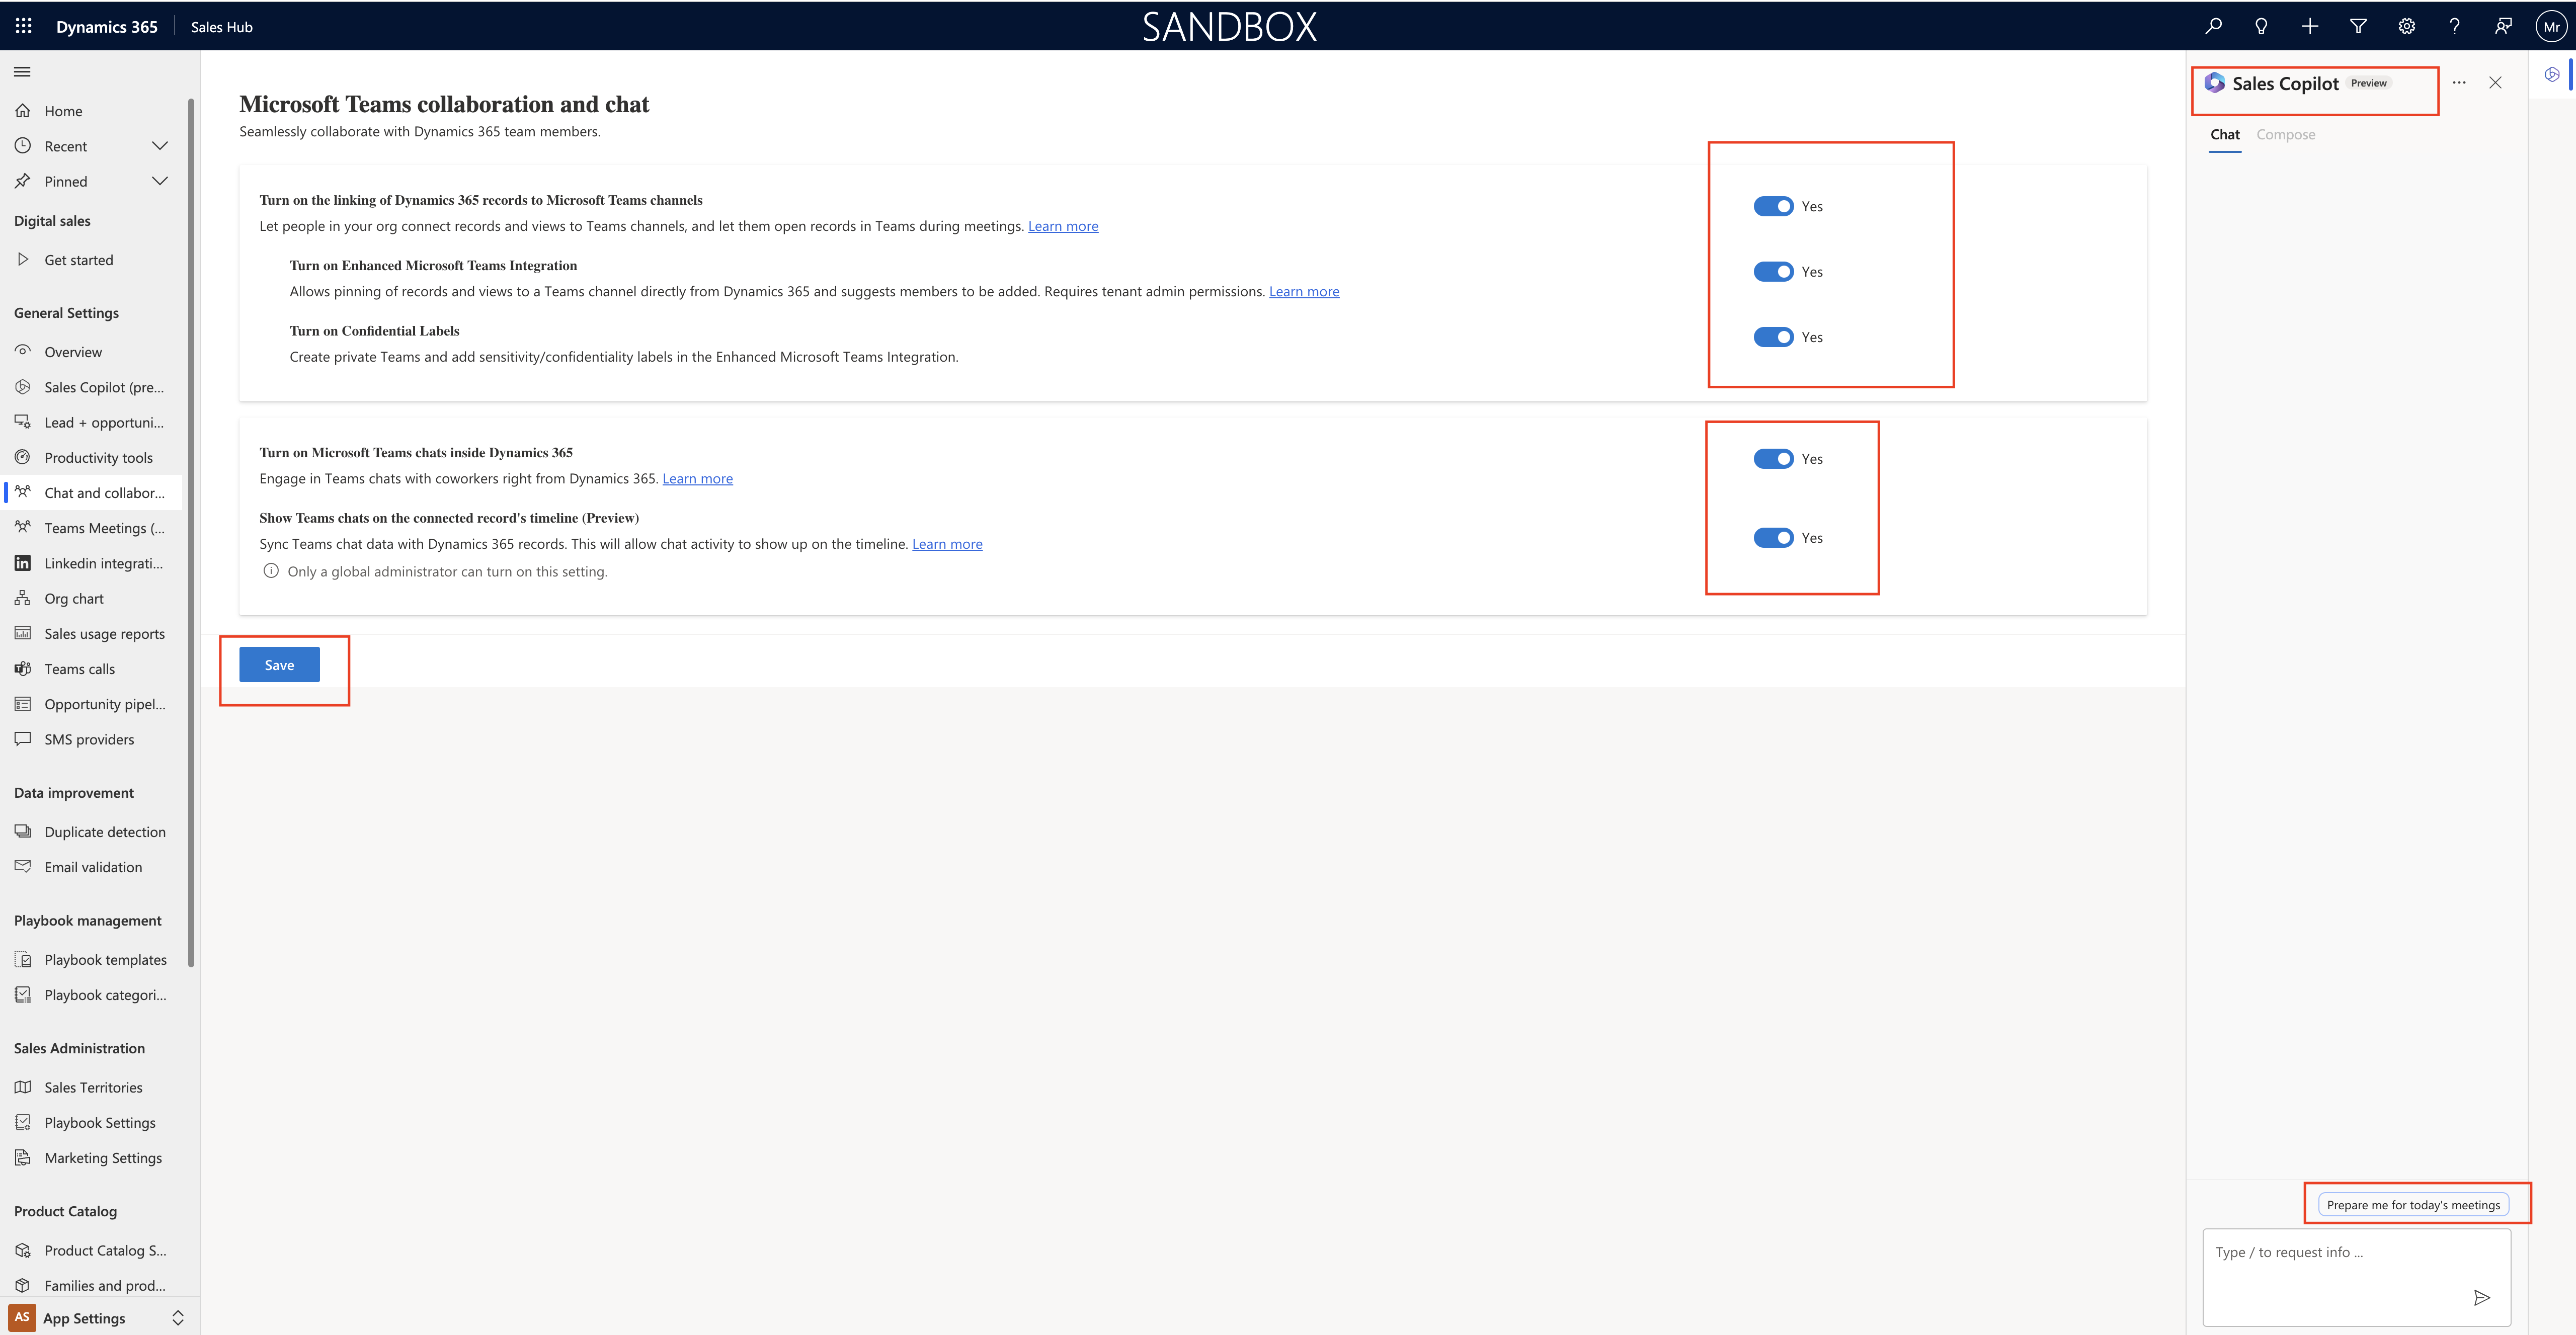
Turn on the linking of Dynamics 365 records to Microsoft Teams channels – Lets people in your org connect records and views to Teams channels, and let them open records in teams during meetings.

Turn on Enhanced Microsoft Teams Integration – Allows pinning of records and views to a teams channel directly from Dynamics 365 and suggests members to be added. Requires tenant admin permissions. When this settings turned on – tenant admin show approve or allow for this integration.

Turn on Confidential Labels – Create private Teams and add sensitivity/confidentiality labels in the Enhanced Microsoft Teams Integration.

Turn on Microsoft Teams chats inside Dynamics 365 – Engage in Teams chats with coworkers right from Dynamics 365 = ON.

Show Teams chats on the connected records timeline(Preview). – Sync Teams chat data with Dynamics 365 records. This will allow chat activity to show up on the timeline.

Note: Only a global administrator can turn on this settings.

Finally SAVE.

You can also enable Sales Copilot (preview) which allows to you to prepare for the upcoming meetings, just type in the questions you will get response appropriately if sales copilot is enabled on this Sales App.

Final settings will be like this below screenshot.
That’s it for today.

I hope this helps.
Malla Reddy(@UK365GUY)
#365BlogPostsin365Days

Share this:

{How to } enable Sales Copilot settings in Dynamics 365 Sales App

Hello Everyone,

Today i am going to share how to enable Sales Copilot Settings which is in Preview at the moment.

Lets gets started.

What is Sales Copilot ?

Sales Copilot uses generative AI Technology and info from Dynamics 365 to help sellers in their sales journey.

Login into Dynamics 365 Sales Hub App.

Change the settings to “App Settings”

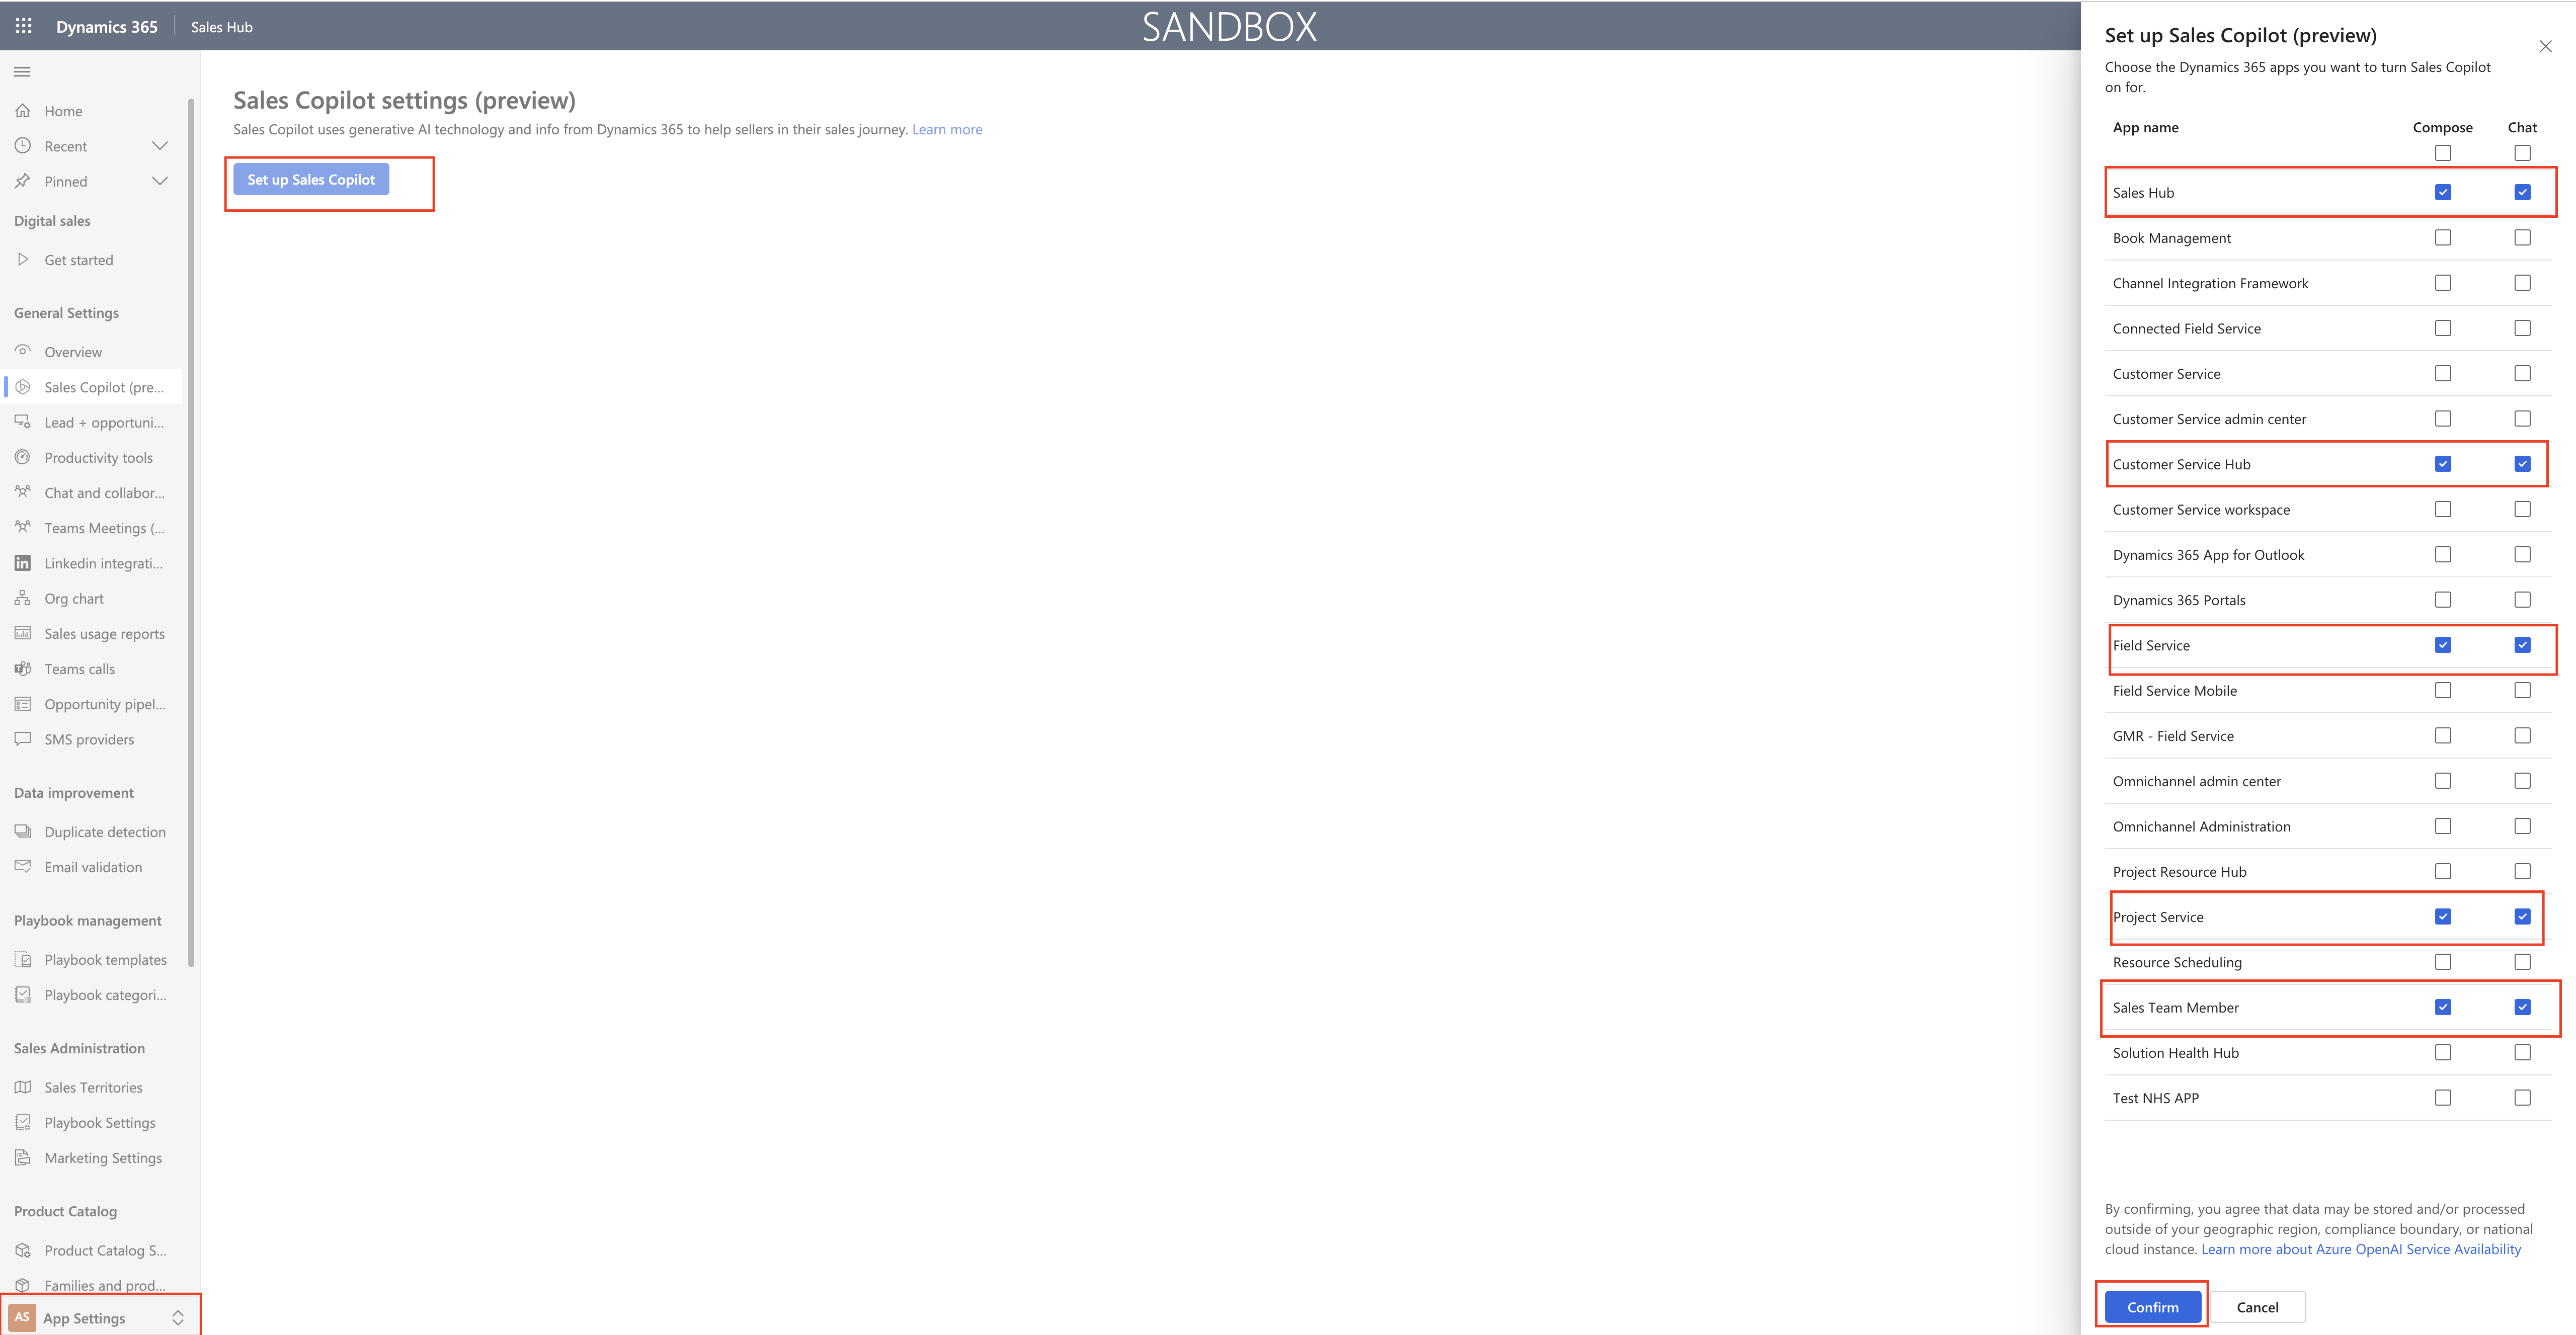
Then Click on the Set up Sales Copilot, new settings will appear on the right hand side and check the sales hub Compose and Chat check boxes to yes.

Finally click CONFIRM.

New Screen will be displayed with:

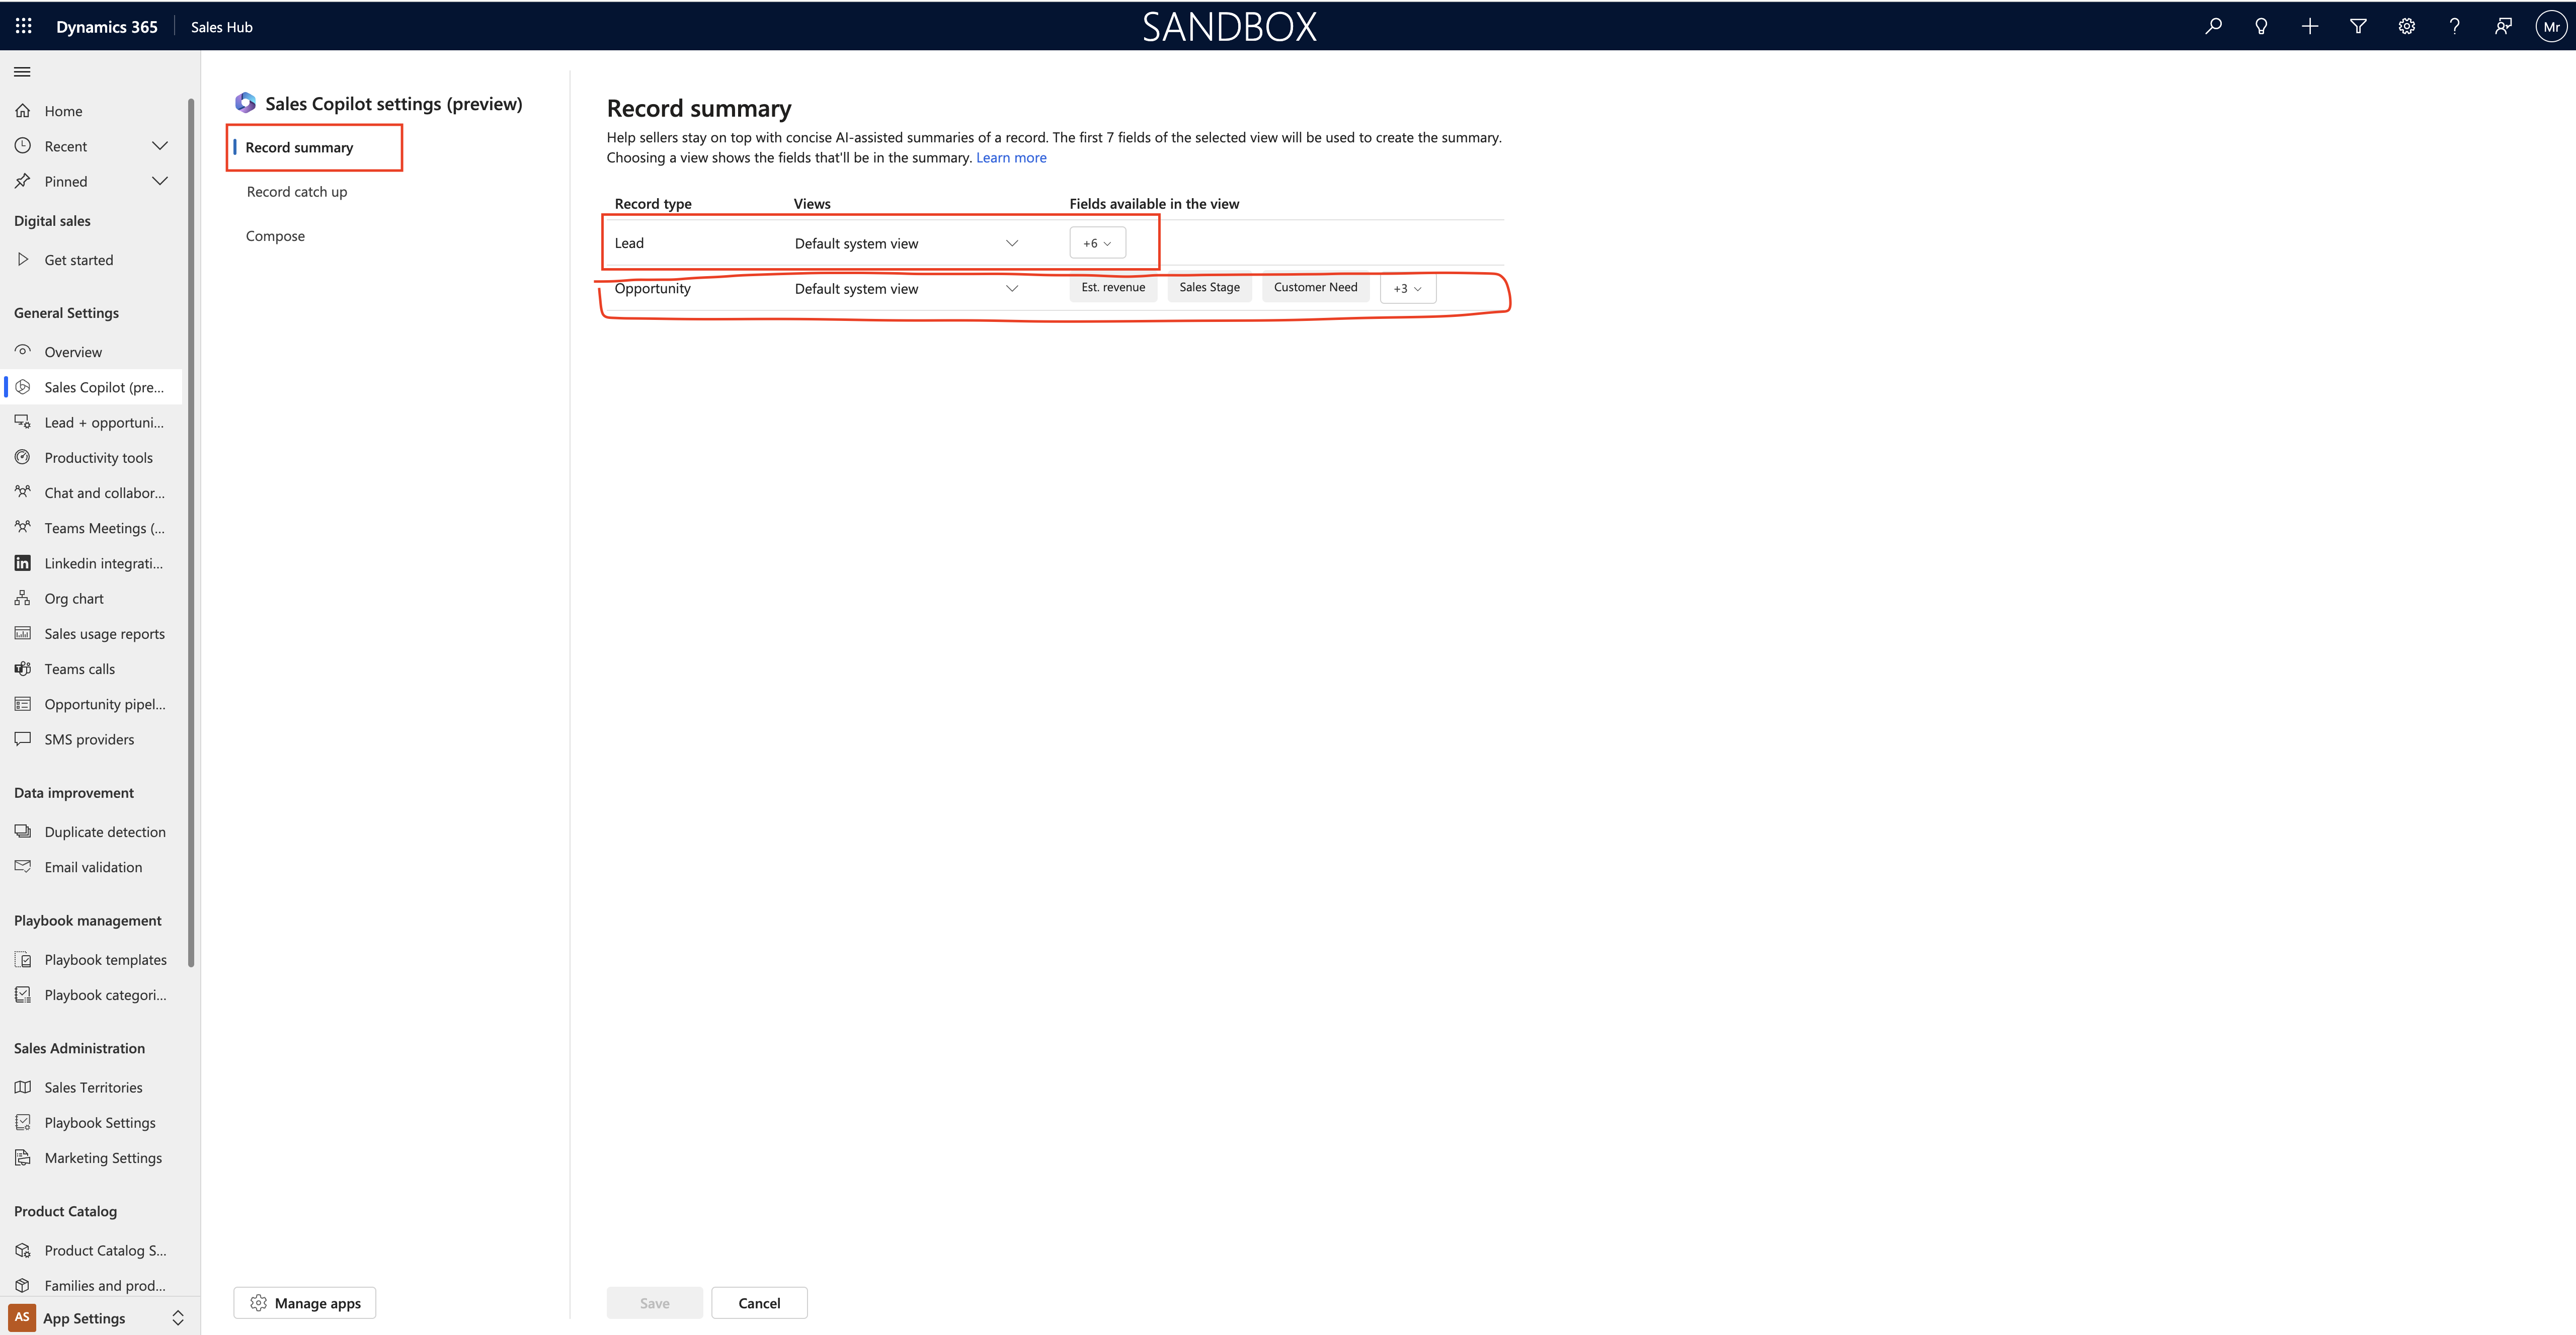
Record Summary: Help sellers stay on top with concise AI- assisted summaries of a record. The first 7 fields of the selected view will be used to create the summary.

Choosing a view shows the fields that’ll be in the summary.

So for example:

Lead – default system view and upto 6 fields available in the view.

Similarly Opportunities also you can est revenue, sales stage, customer needs for Proposed Solution, Account, Contact.

Reccord Catch up:

Help sellers stay on top of all major changes that happened while they are away. The first 10 fields of the selected view will be used to create the catch up, Choosing a view shows that’ll be in the catch up.

Turn audit on = ON.

Catch up will only work if the AUDIT’s is ON. That allows Sales Copilot to summarize activities since a seller last logged in or provide updates on changes made in the past 7 days.

Save changes made.

Compose:

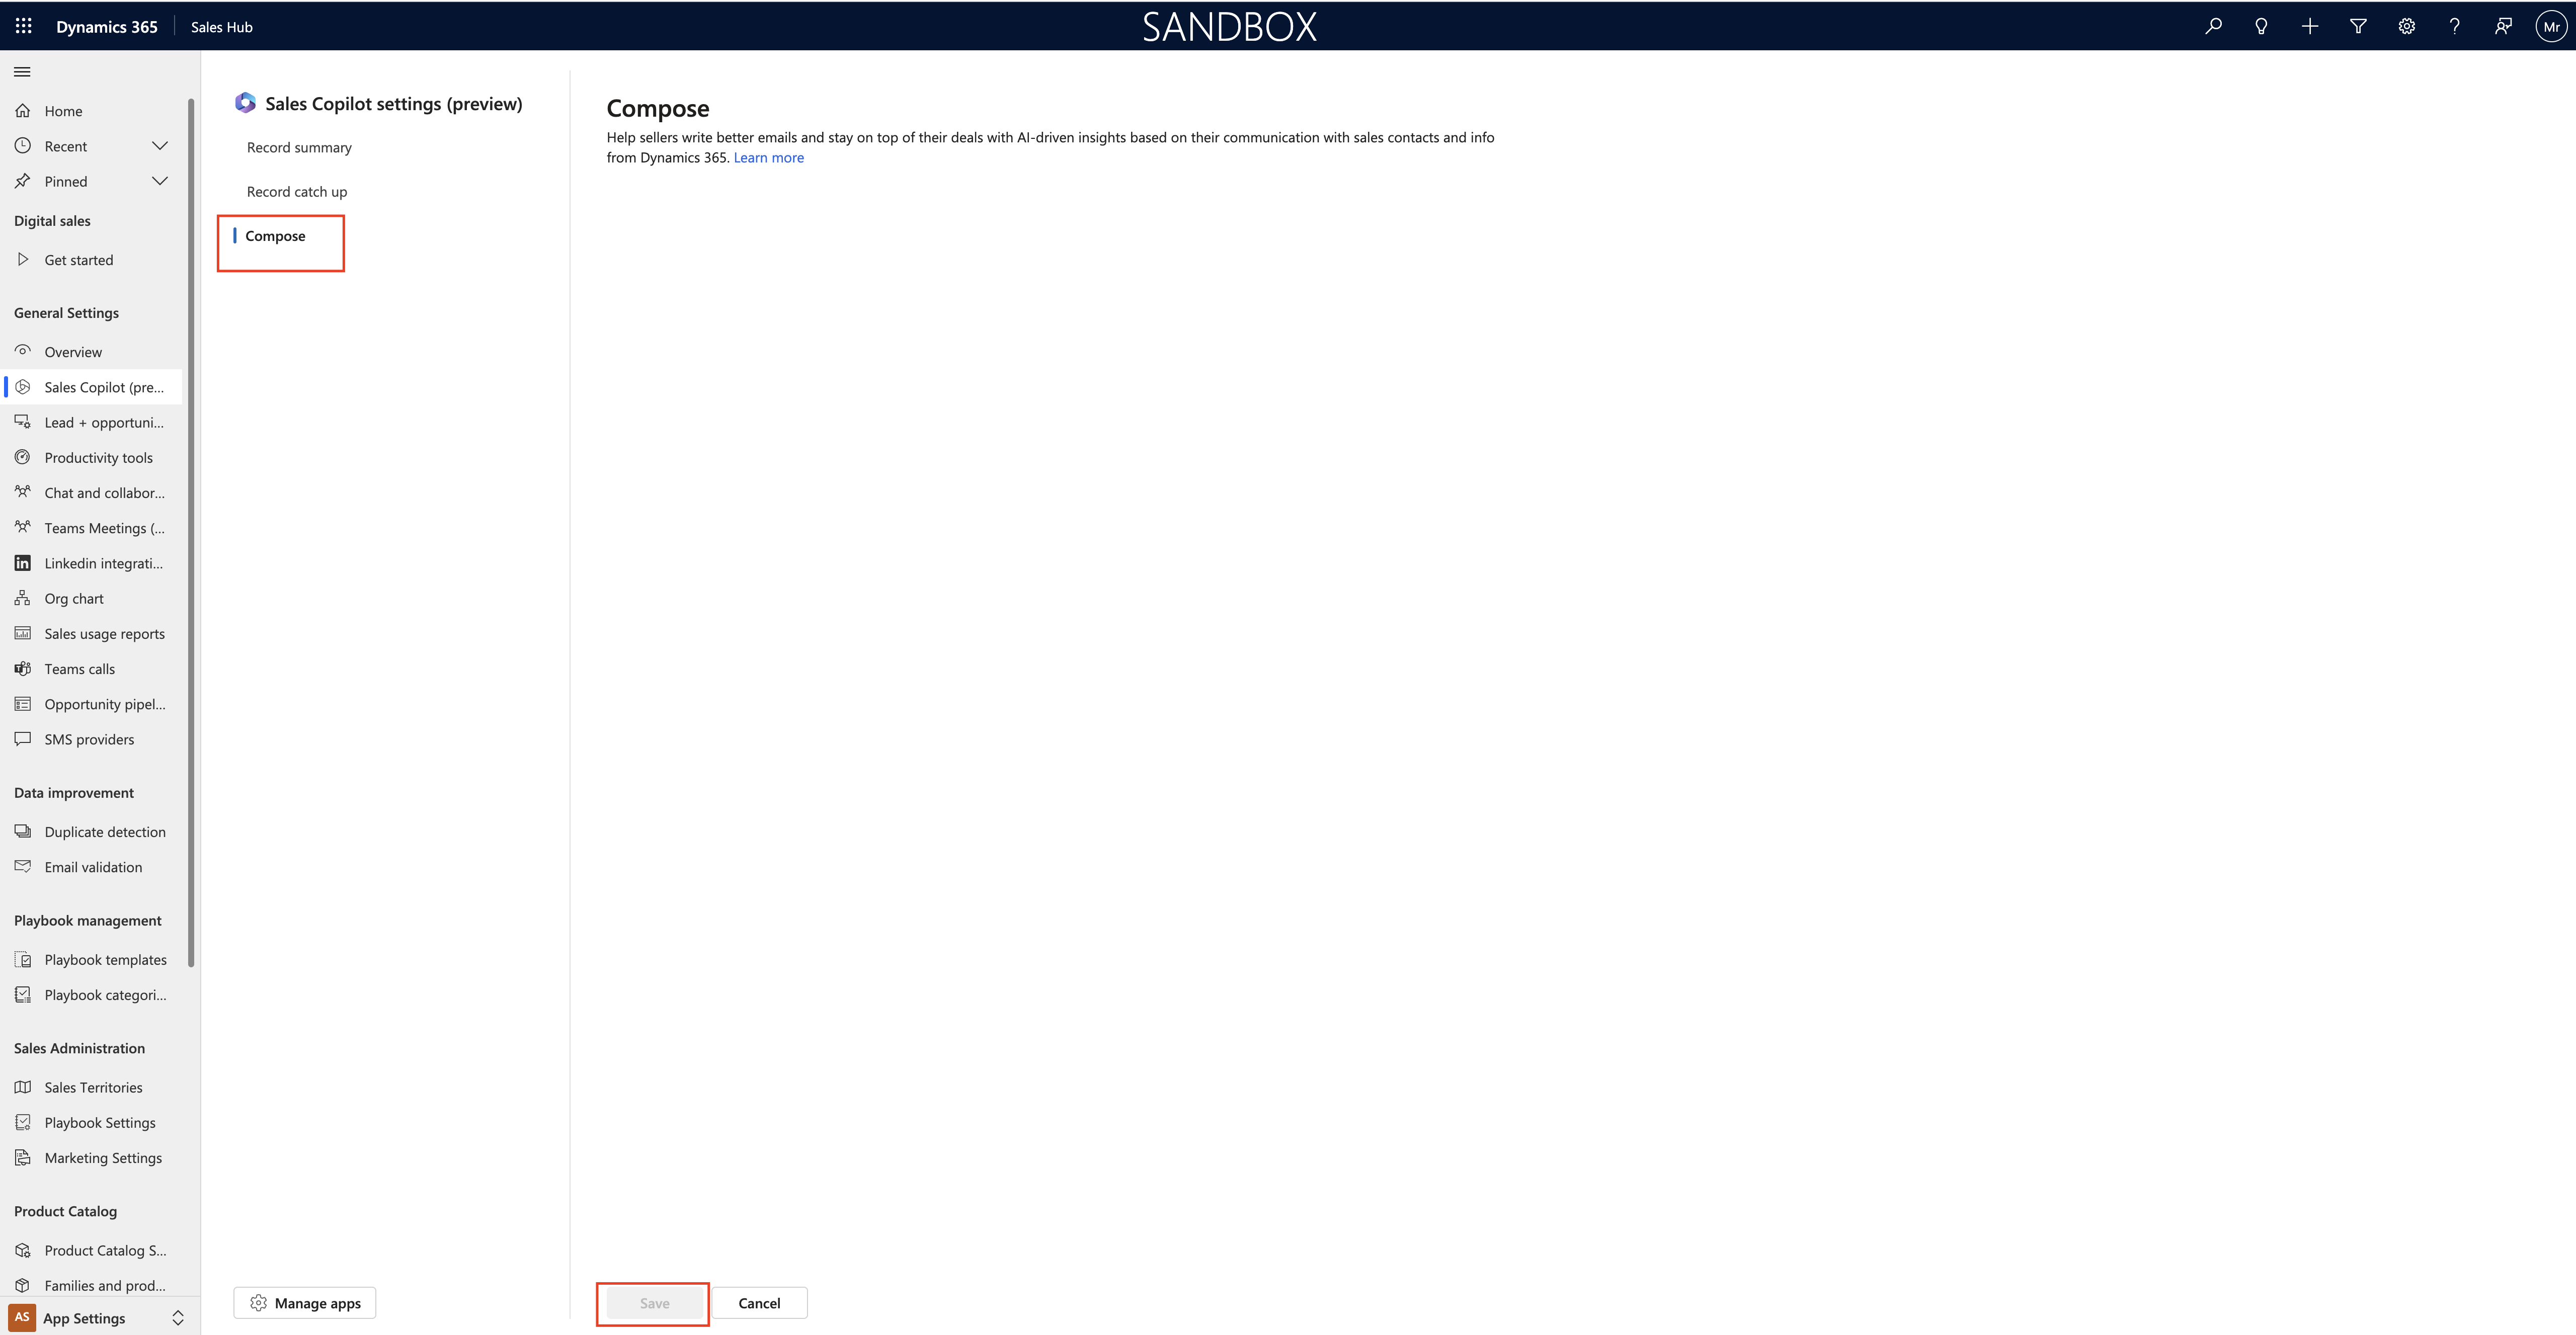
Help sellers write better emails and stay on top of their deals with AI -driven insights based on their communication with sales contacts and info from Dynamics 365.

Thats it for today.

I hope this helps.
Malla Reddy(@UK365GUY)
#365BlogPostsin365Days
Share this:

{How to} enable Optimizing Ranks in Dynamics 365 Sales for Insight cards

Hello Everyone,

Today i am going to share how to enable Optimizing ranks in Dynamics 365 Sales for insights cards to show on the form.

Let’s gets started.

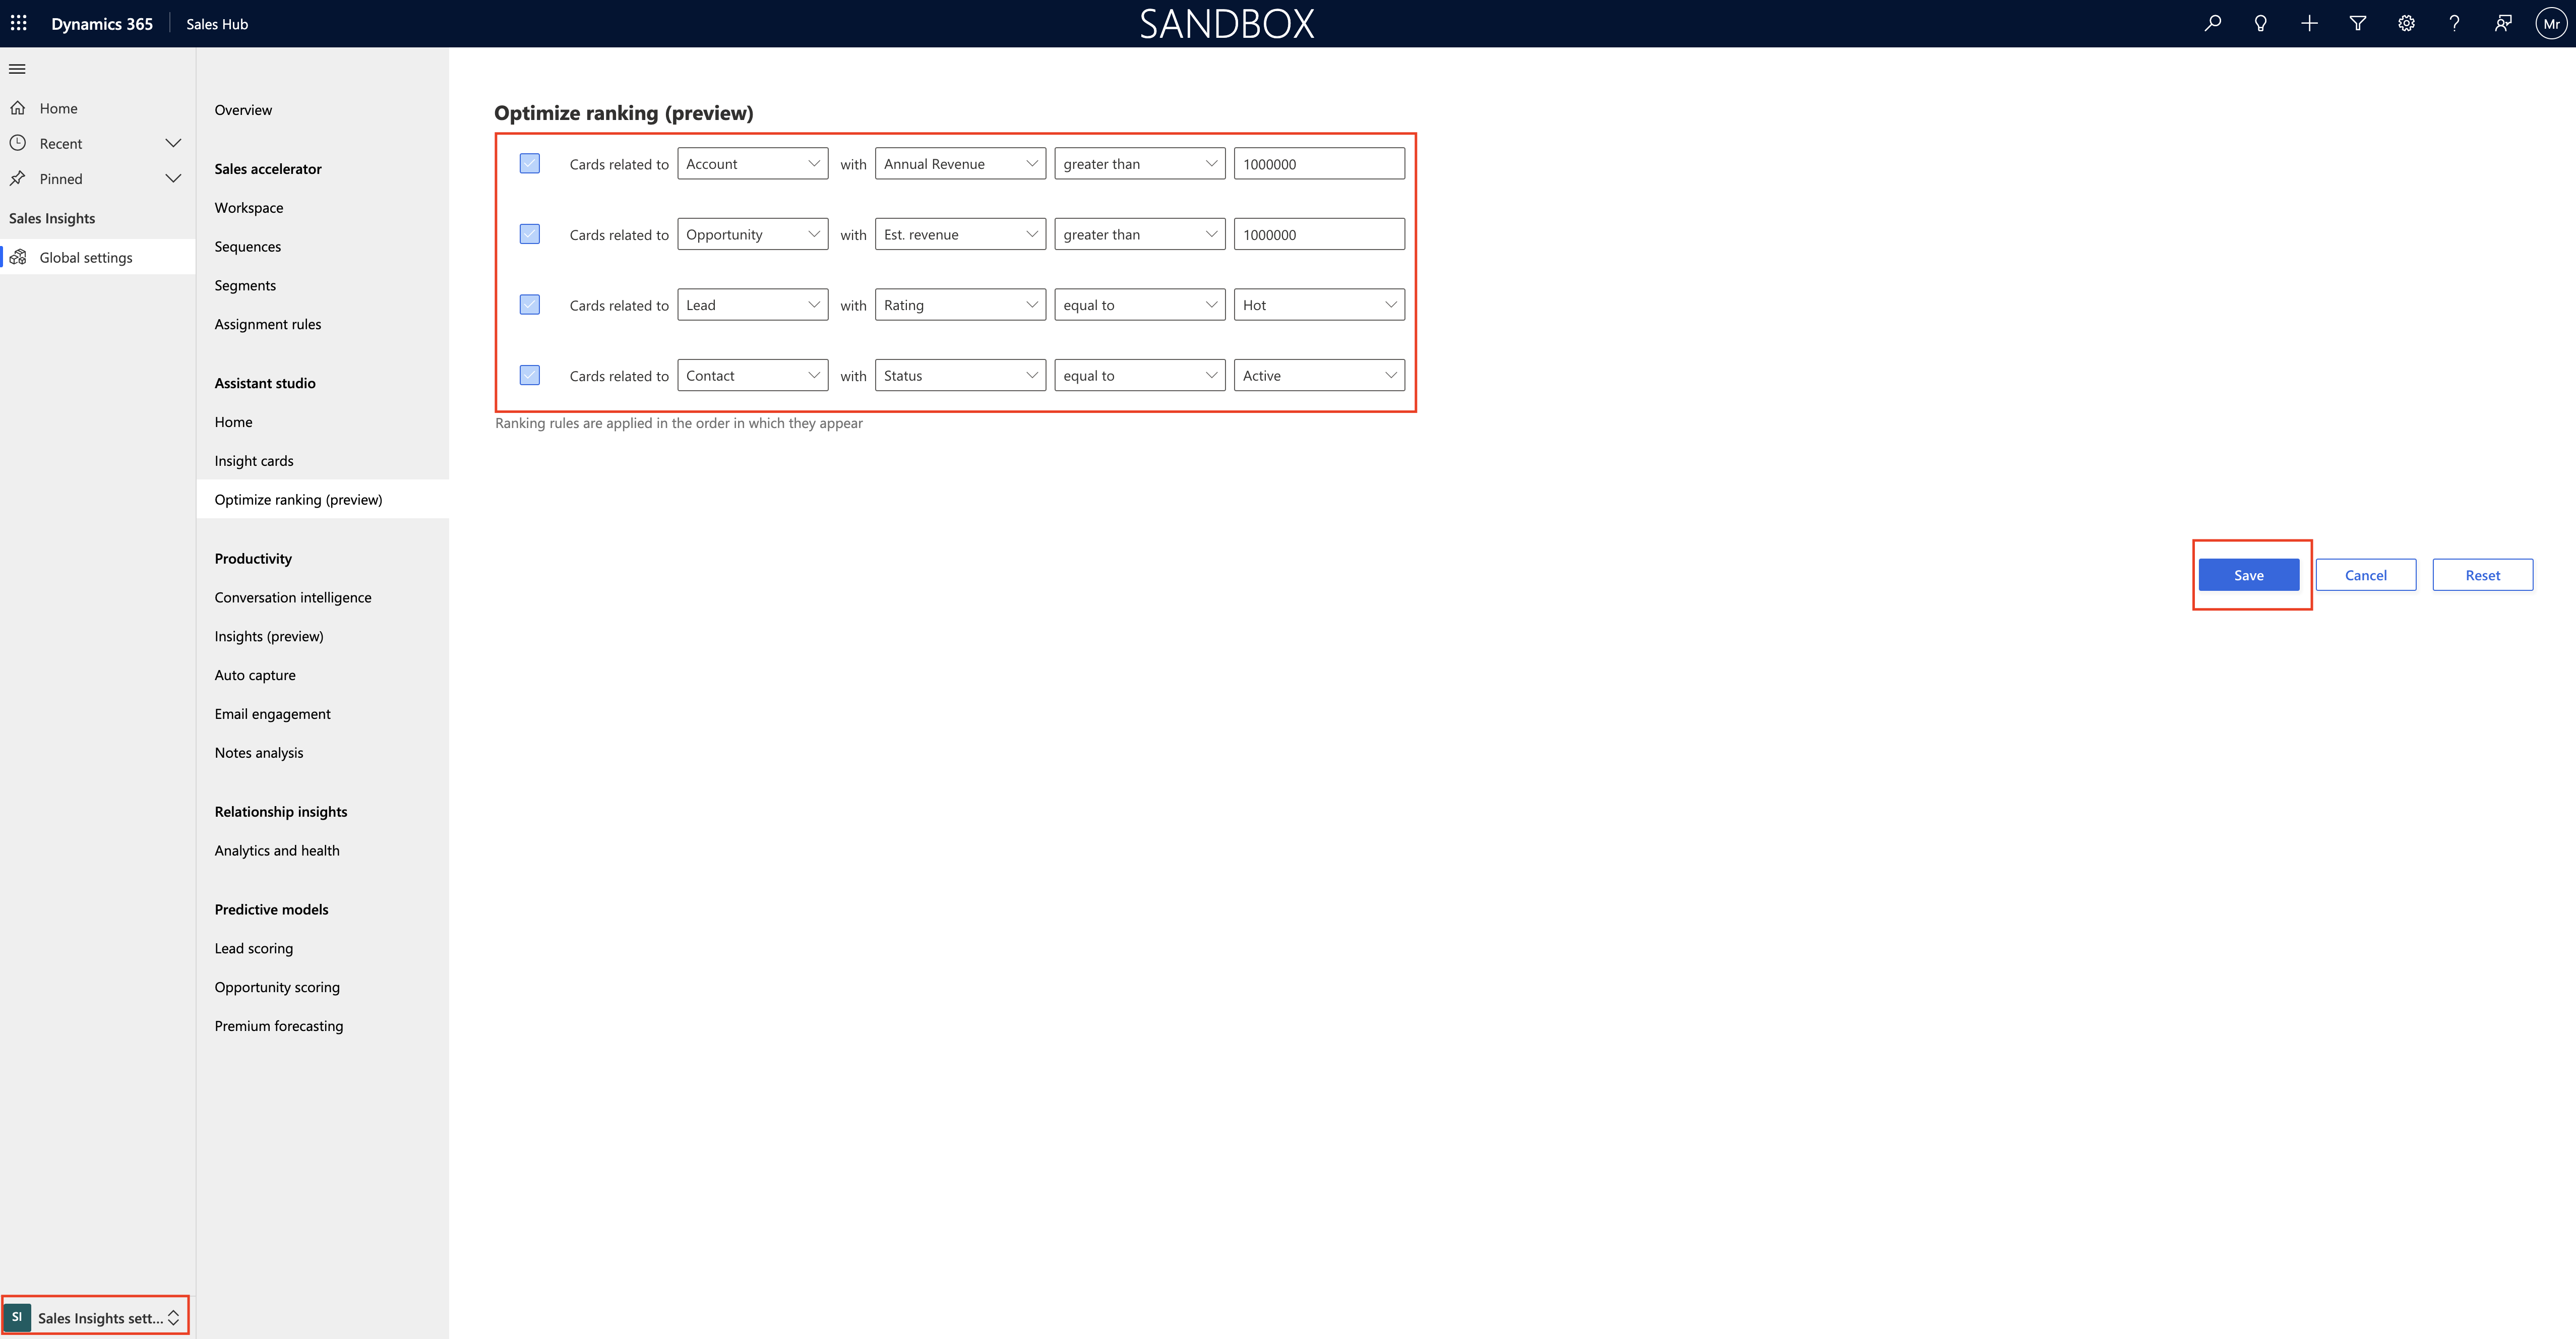
What is Optimize Ranking: Optimizing ranking option in Assistant allows you to optimize the ranking of cards that are important and promotes those cards to display at the top.

You can define rules up to 4 rules in the ranking section, based on tables such as Account, Leads, and Opportunity.

Note: Cards are given priority based on the order you define in the settings.

Login into Dynamics 365 Sales.

Go to “sales insights settings” see below screenshot.

Configure the conditions that should apply to the insight cards to show related data at the top of the cards.

Finally save the changes and ranking rules have been created, processed and applied to the cards in your organization.

Note: If you dont see these settings in your app means

1. You don’t have necessary license or role.

2. Your administrator hasn’t turned on the feature.

3. Your organisation using custom model driven app, so you need to check with system administrator about the sales hub or sales professional app.

That’t it for today.

I hope this helps
Malla Reddy(@UK365GUY)
#365BlogPostsin365Days
Share this:

{How to } Create Insight Cards in Dynamics 365 Sales

Hello Everyone,

Today i am going to share how to create Insight Cards in Dynamics 365 Sales.

Let’s gets started.

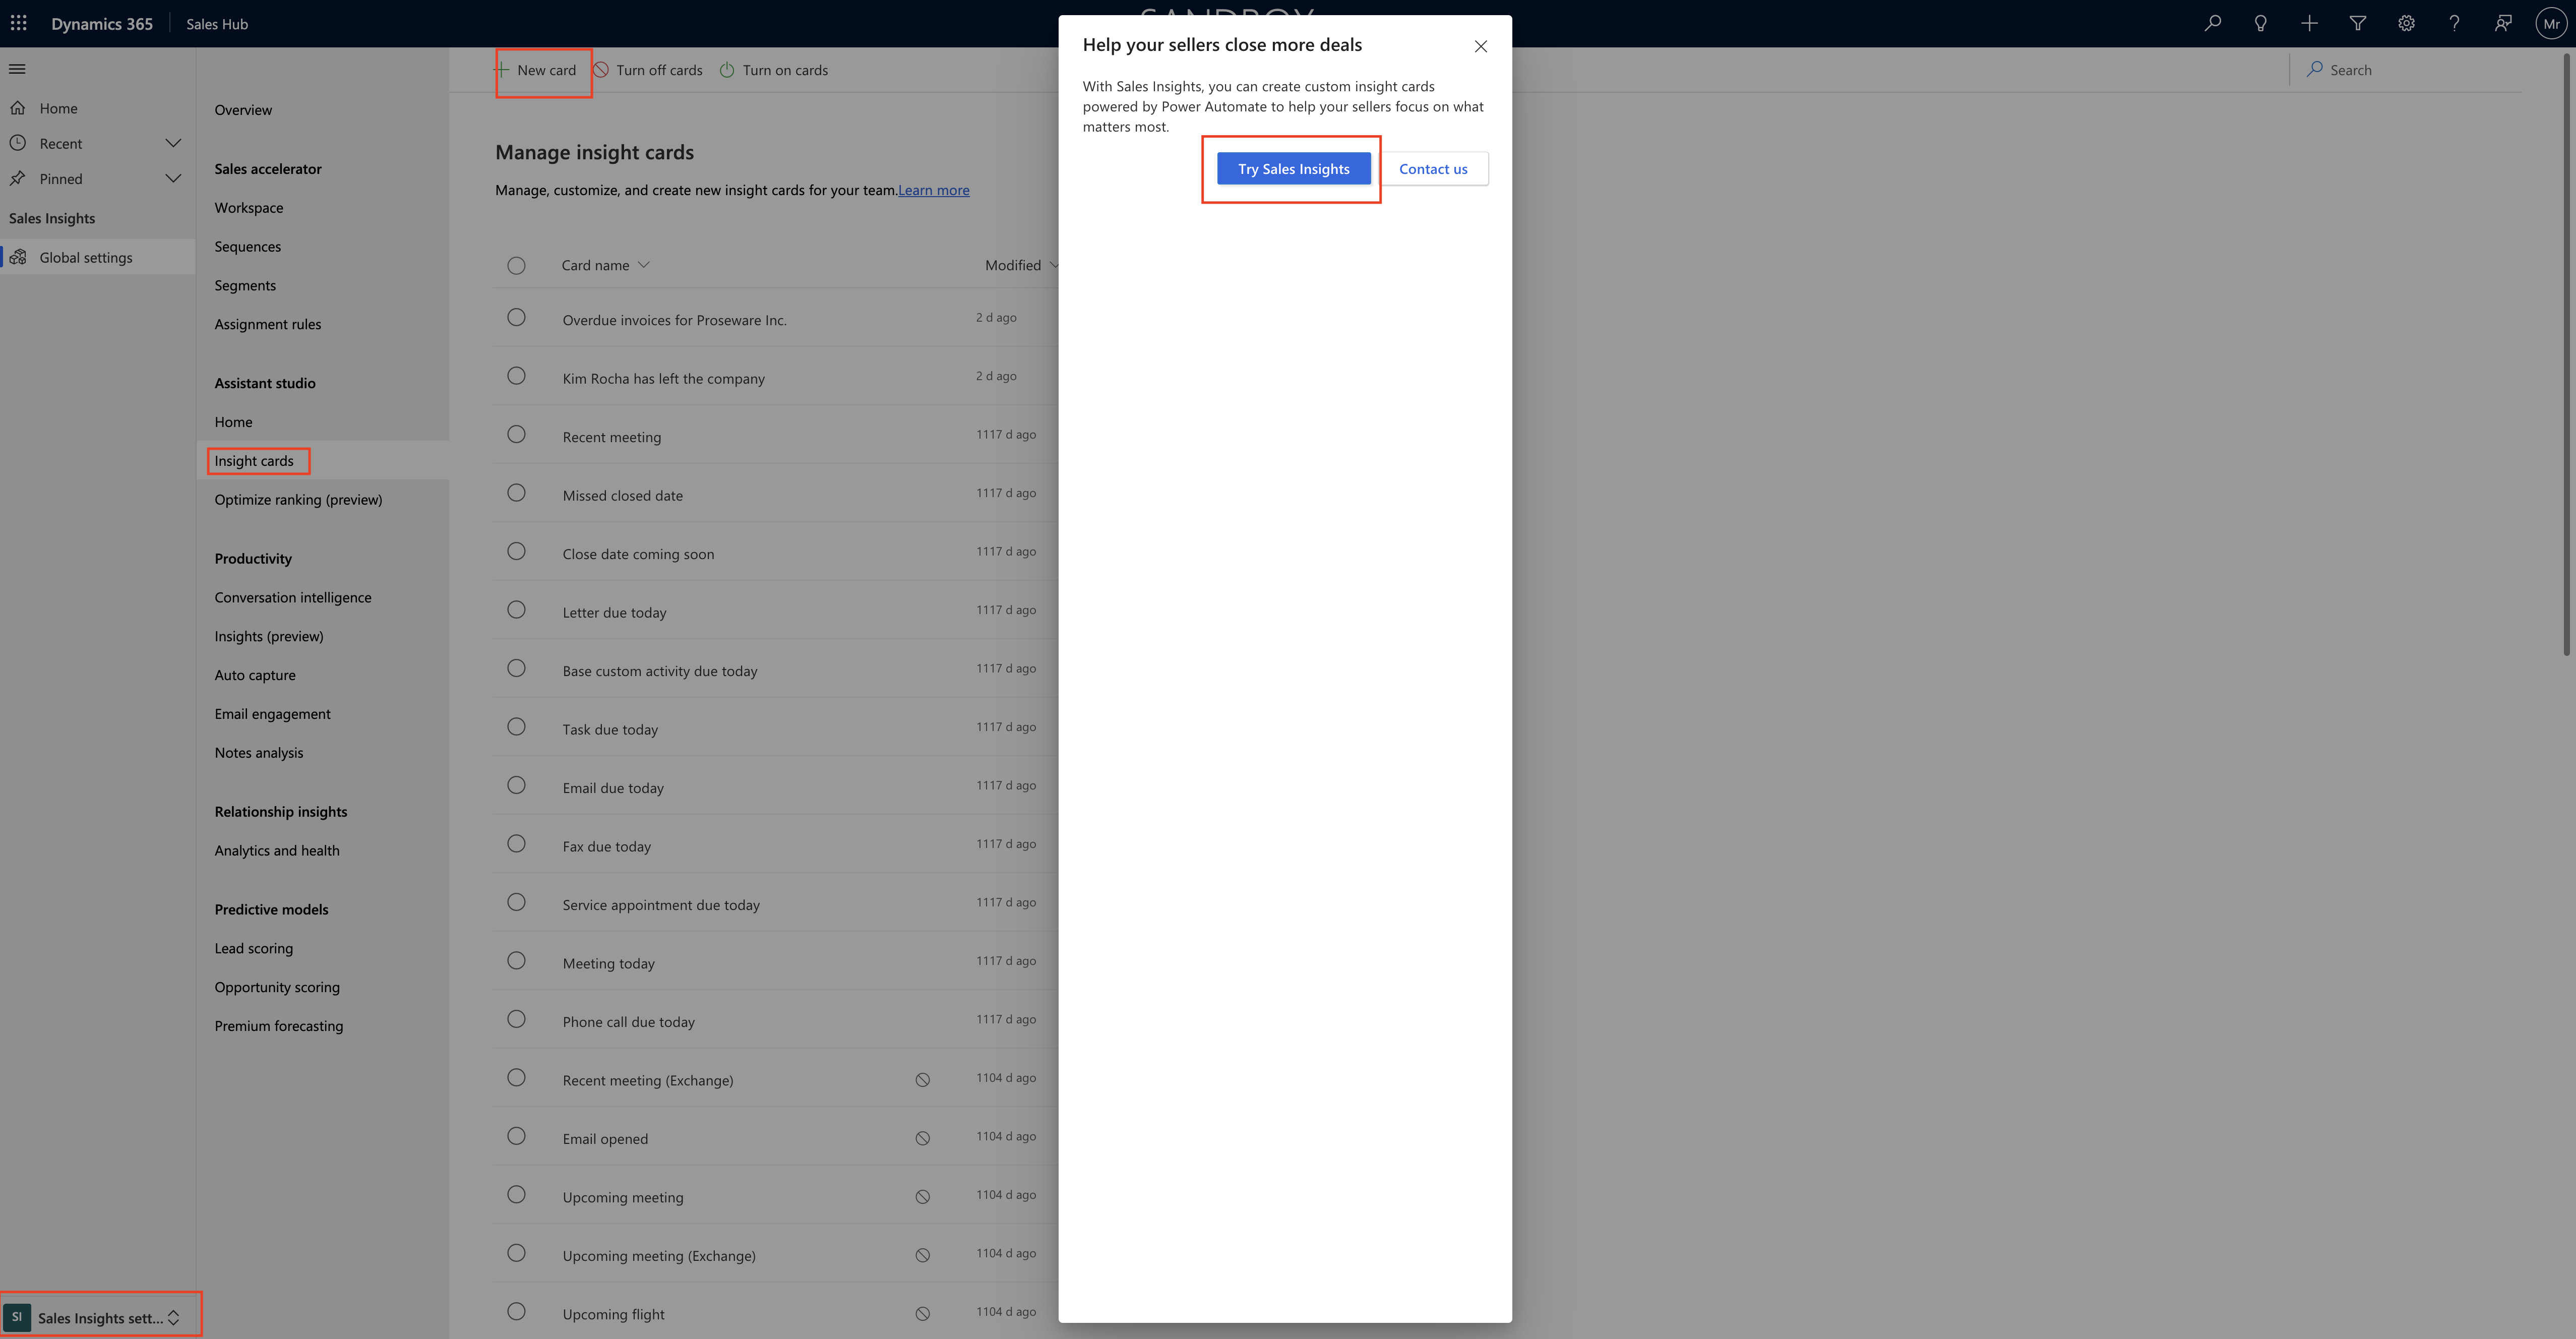
Login into Dynamics 365 Sales and change the settings to “Sales Insights Settings”.

Click on Insights Cards underneath the Assistant Studio.

What is the purpose of the sales insight cards ?

To manage, customize and create new insights cards for your team.

License and Security role:

License: Dynamics 365 Sales Premium

Security role: System Adminstrator or Sales Manager.

Note: Microsoft Power Automate is installed if you want to create custom insights cards with the assistant studio.

Custom Insight Card is installed in the list of insights cards in Assistant Studio only after a card is generated based on the defined flow.

For example: You defined a flow to display a card when an Opportuntiy is created with an estimated value above £5000. When an Opportunity is created for the for the first time in the organisation with the estimated value of £6000, the card is generated and will be available in the list of insight cards in Assistant Studio.

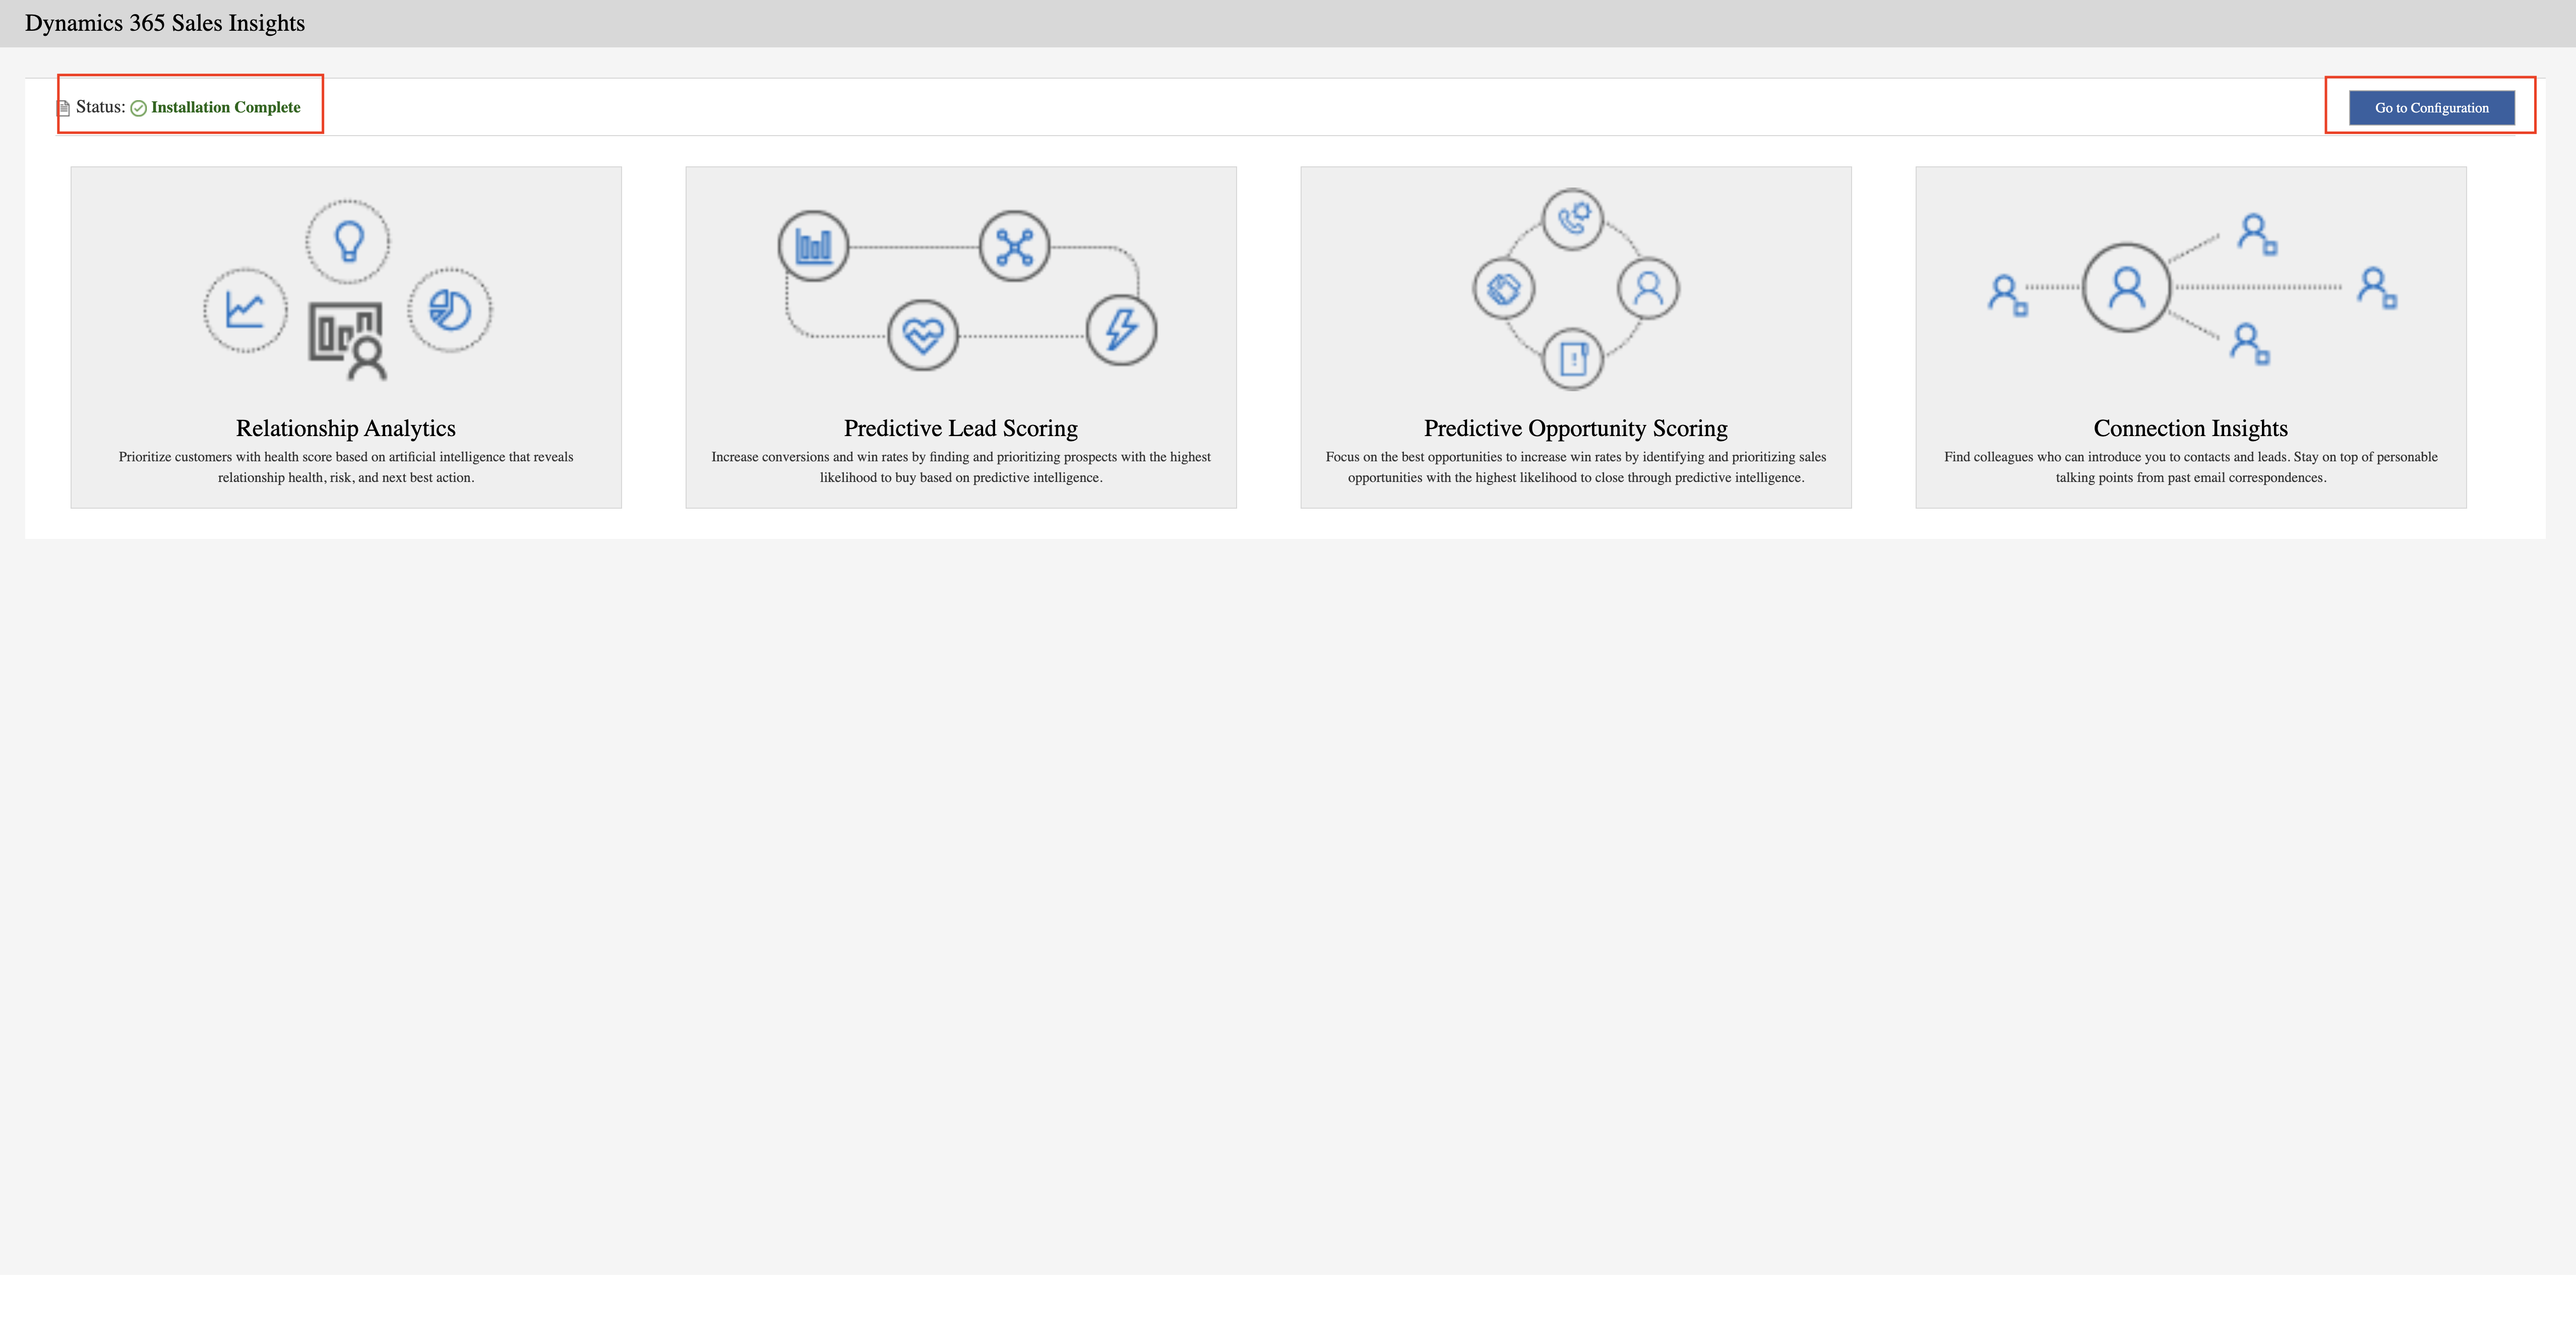
When you click on the create insight cards then new screen will be displayed with a Status = Installation Complete.

Dynamics 365 Sales Insights can be used for the following:

1. Relationship Analytics: Prioritize customers with health score based on artificial intelligence that reveals relationship health, risk, and next best action.

2. Predictive Lead Scoring: Increase conversions and win rates by finding and prioritizing prospects with the highest likelihood to buy based on predictive intelligence.

3. Predictive Opportunity Scoring: Focus on the best opportunities to increase win rates by identifying and prioritizing sales opportunities with the highest likelihood to close through predictive intelligence.

4. Connection Insights: Find collegaues who can introduce you to contacts and leads, Stay on top of personable talking points from past email correspondences.

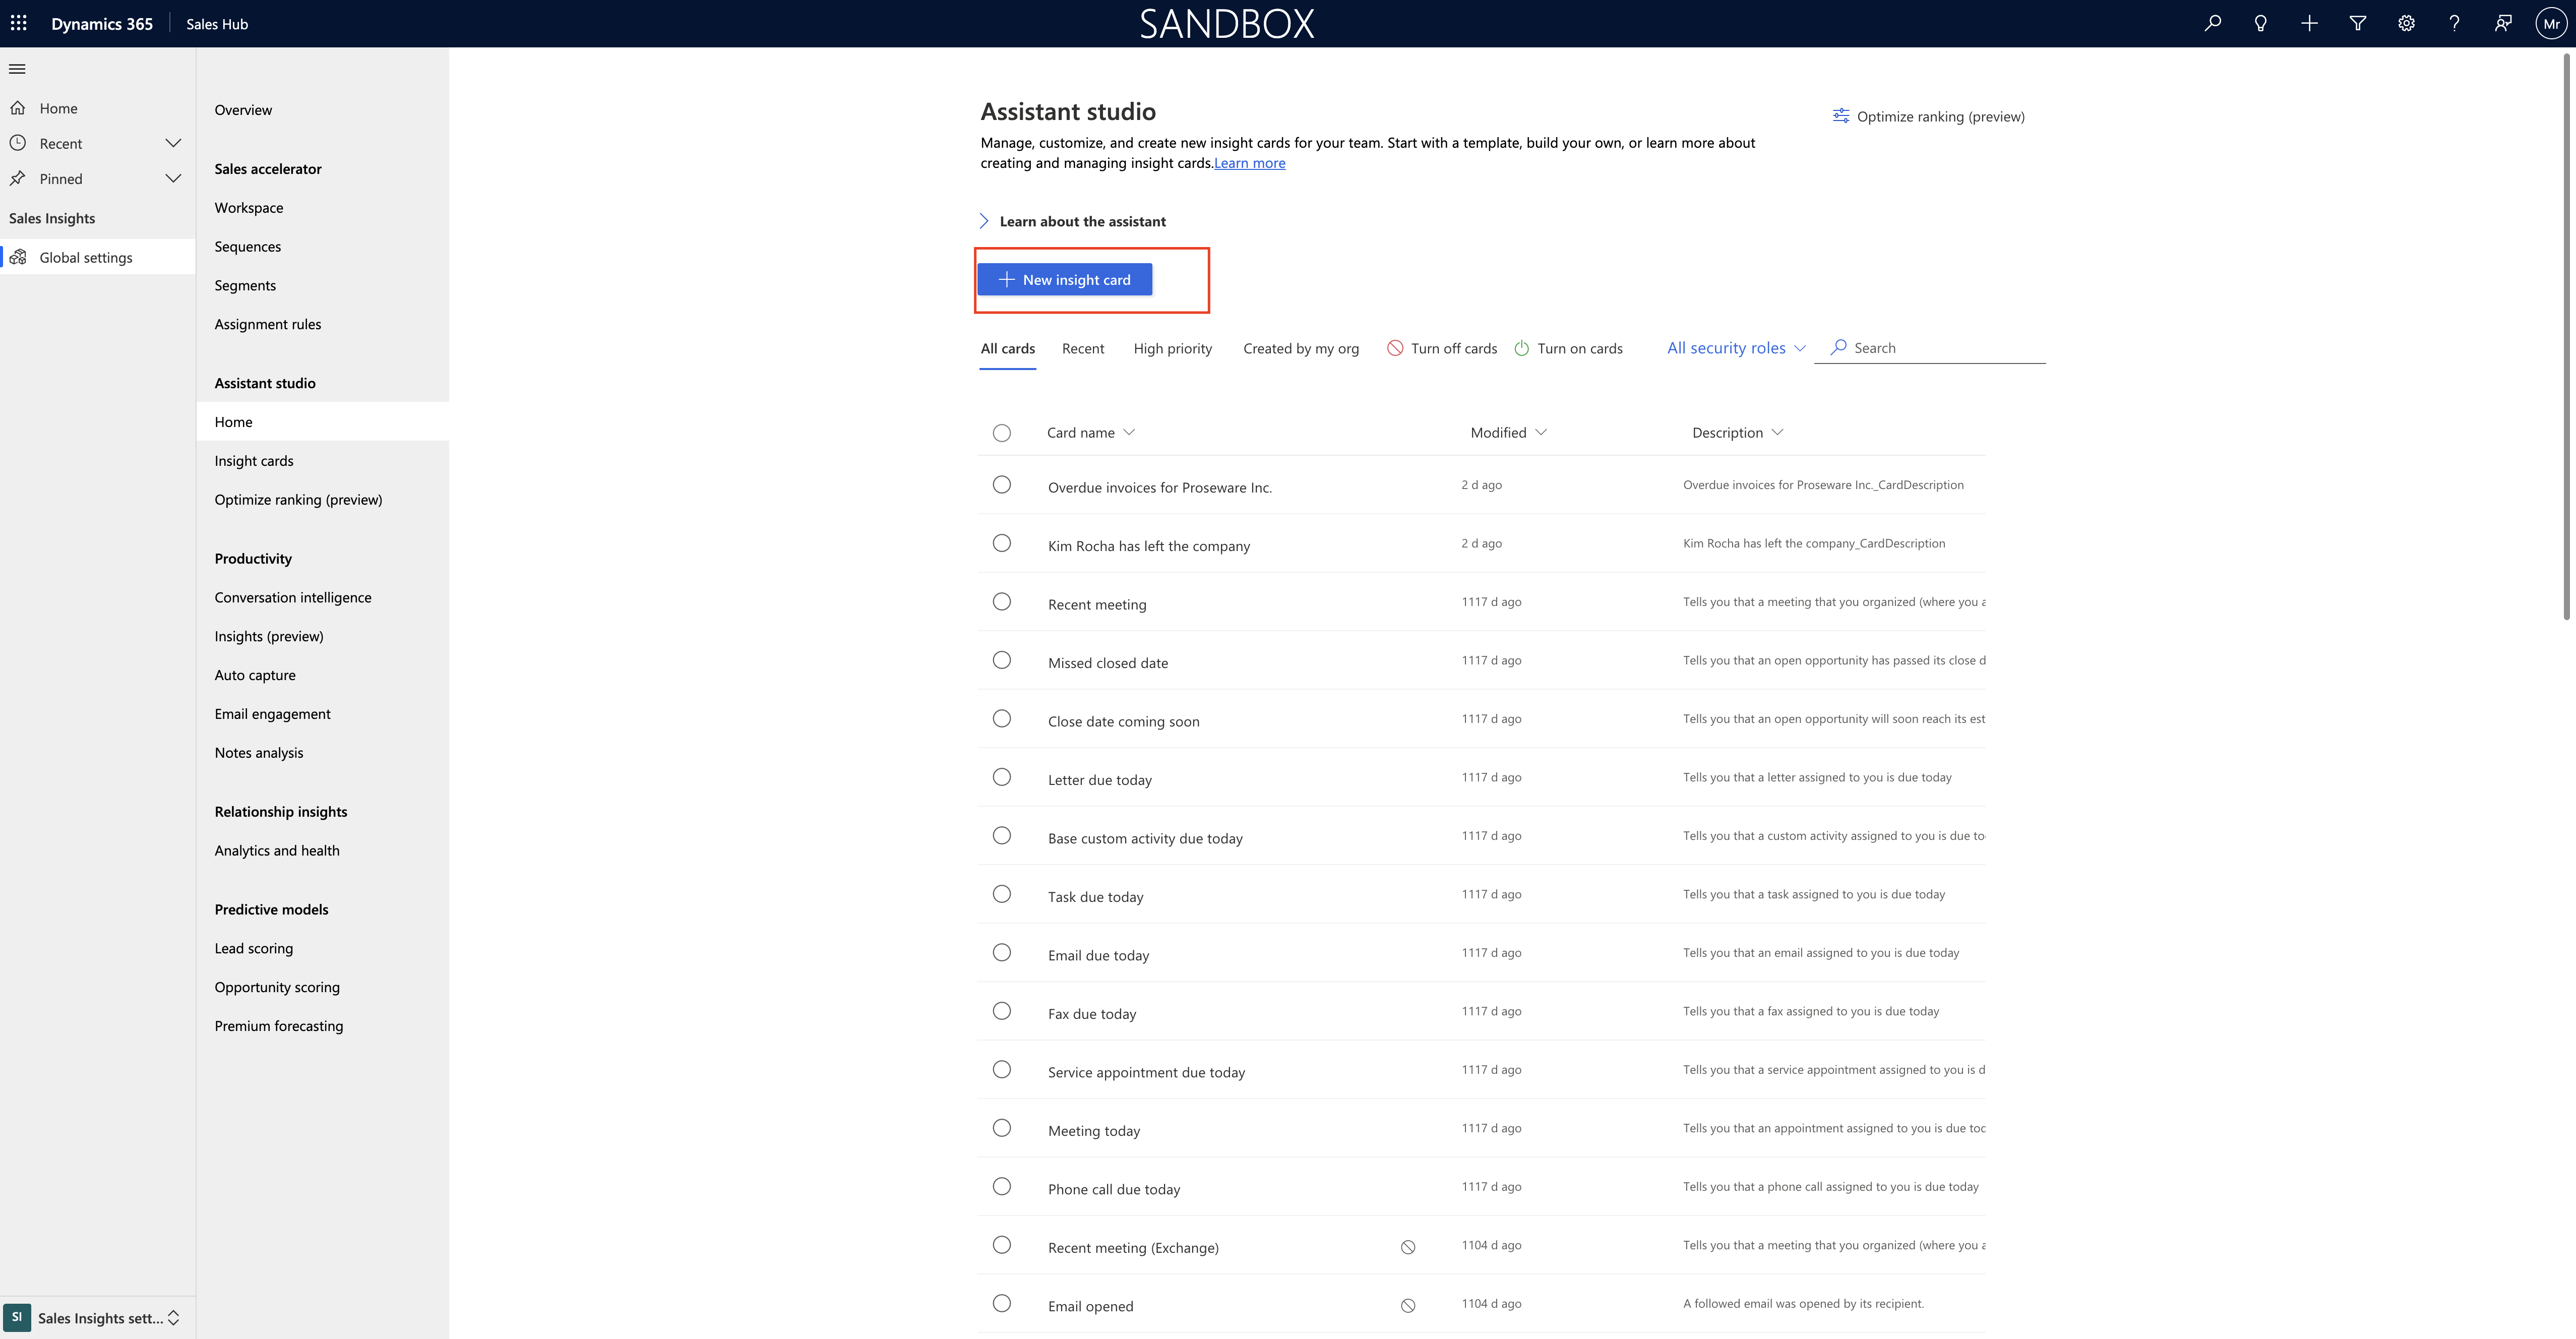
Then you can start creating Insight Cards.

That’s it for today.

I hope this helps.
Malla Reddy(@UK365GUY)
#365BlogPostsin365Days

Share this:

How to create and activate a segment in Dynamics 365 Sales

Hello Everyone,

Today i am going to share how to create and activate segment in Dynamics 365 Sales.

Let’s get’s started.

What is segment?

Create a condition to get group of records, by defining different conditions for each segment. Once a segment is activated and a record satifies the conditions that are defined in the segment, the record becomes a member of the segment.

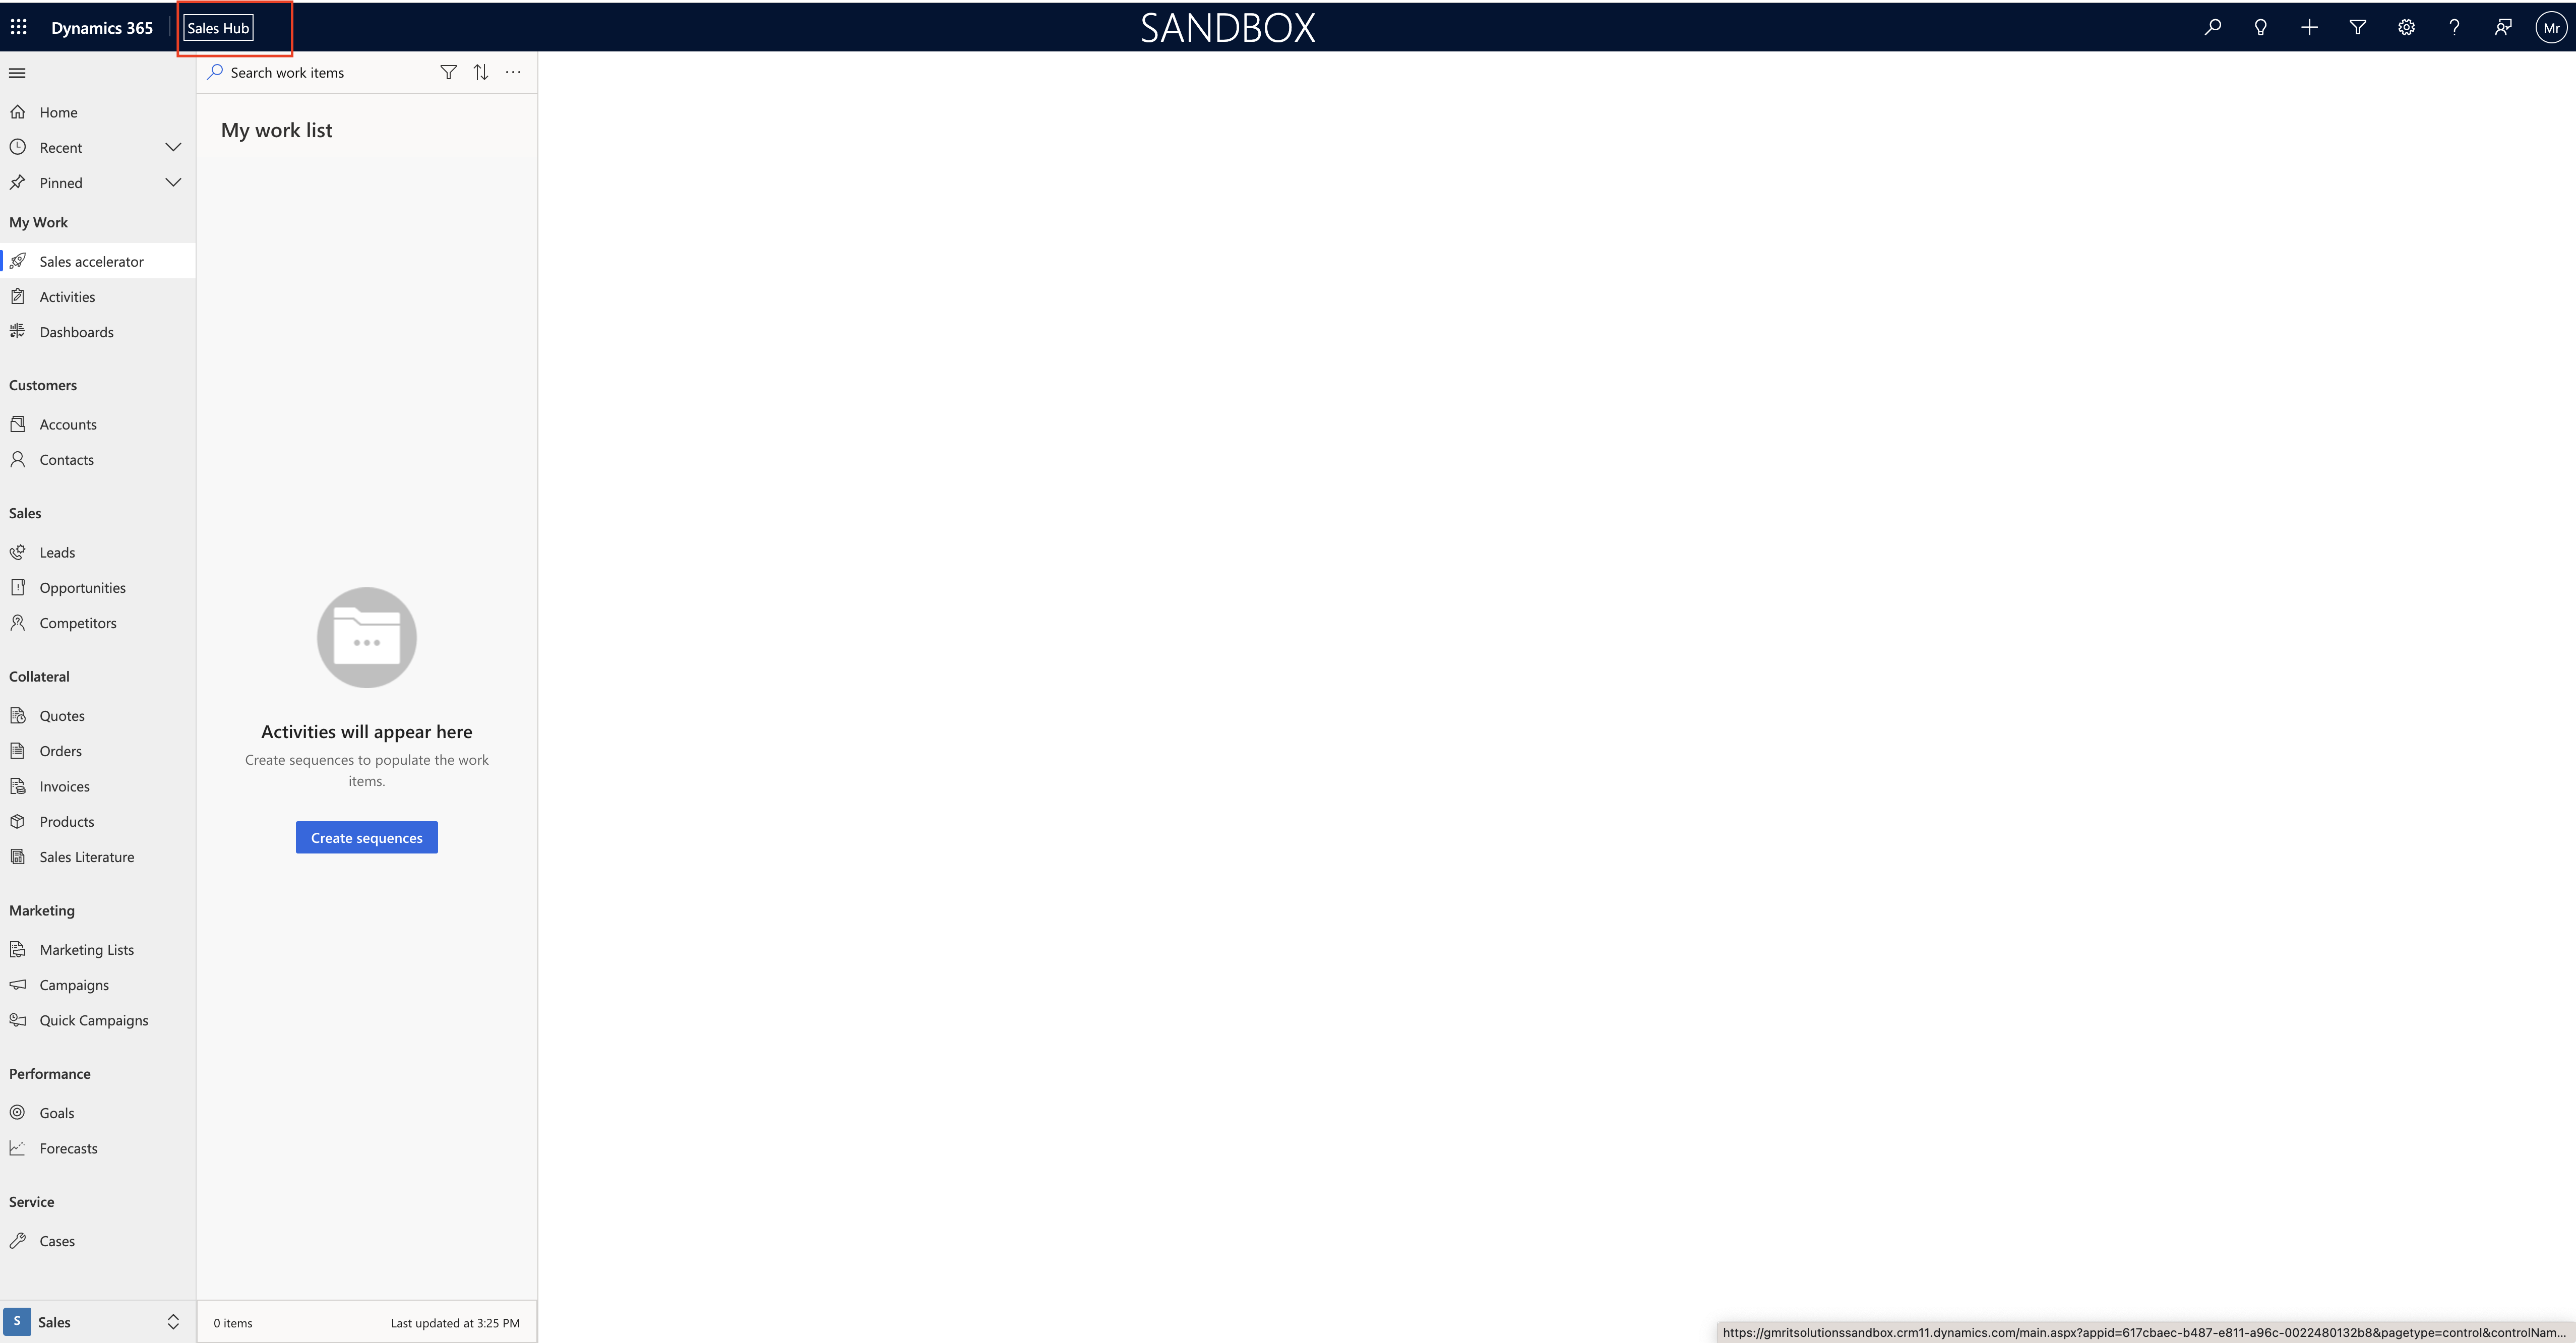
Login into Dynamics 365 Sales – Model Driven App.

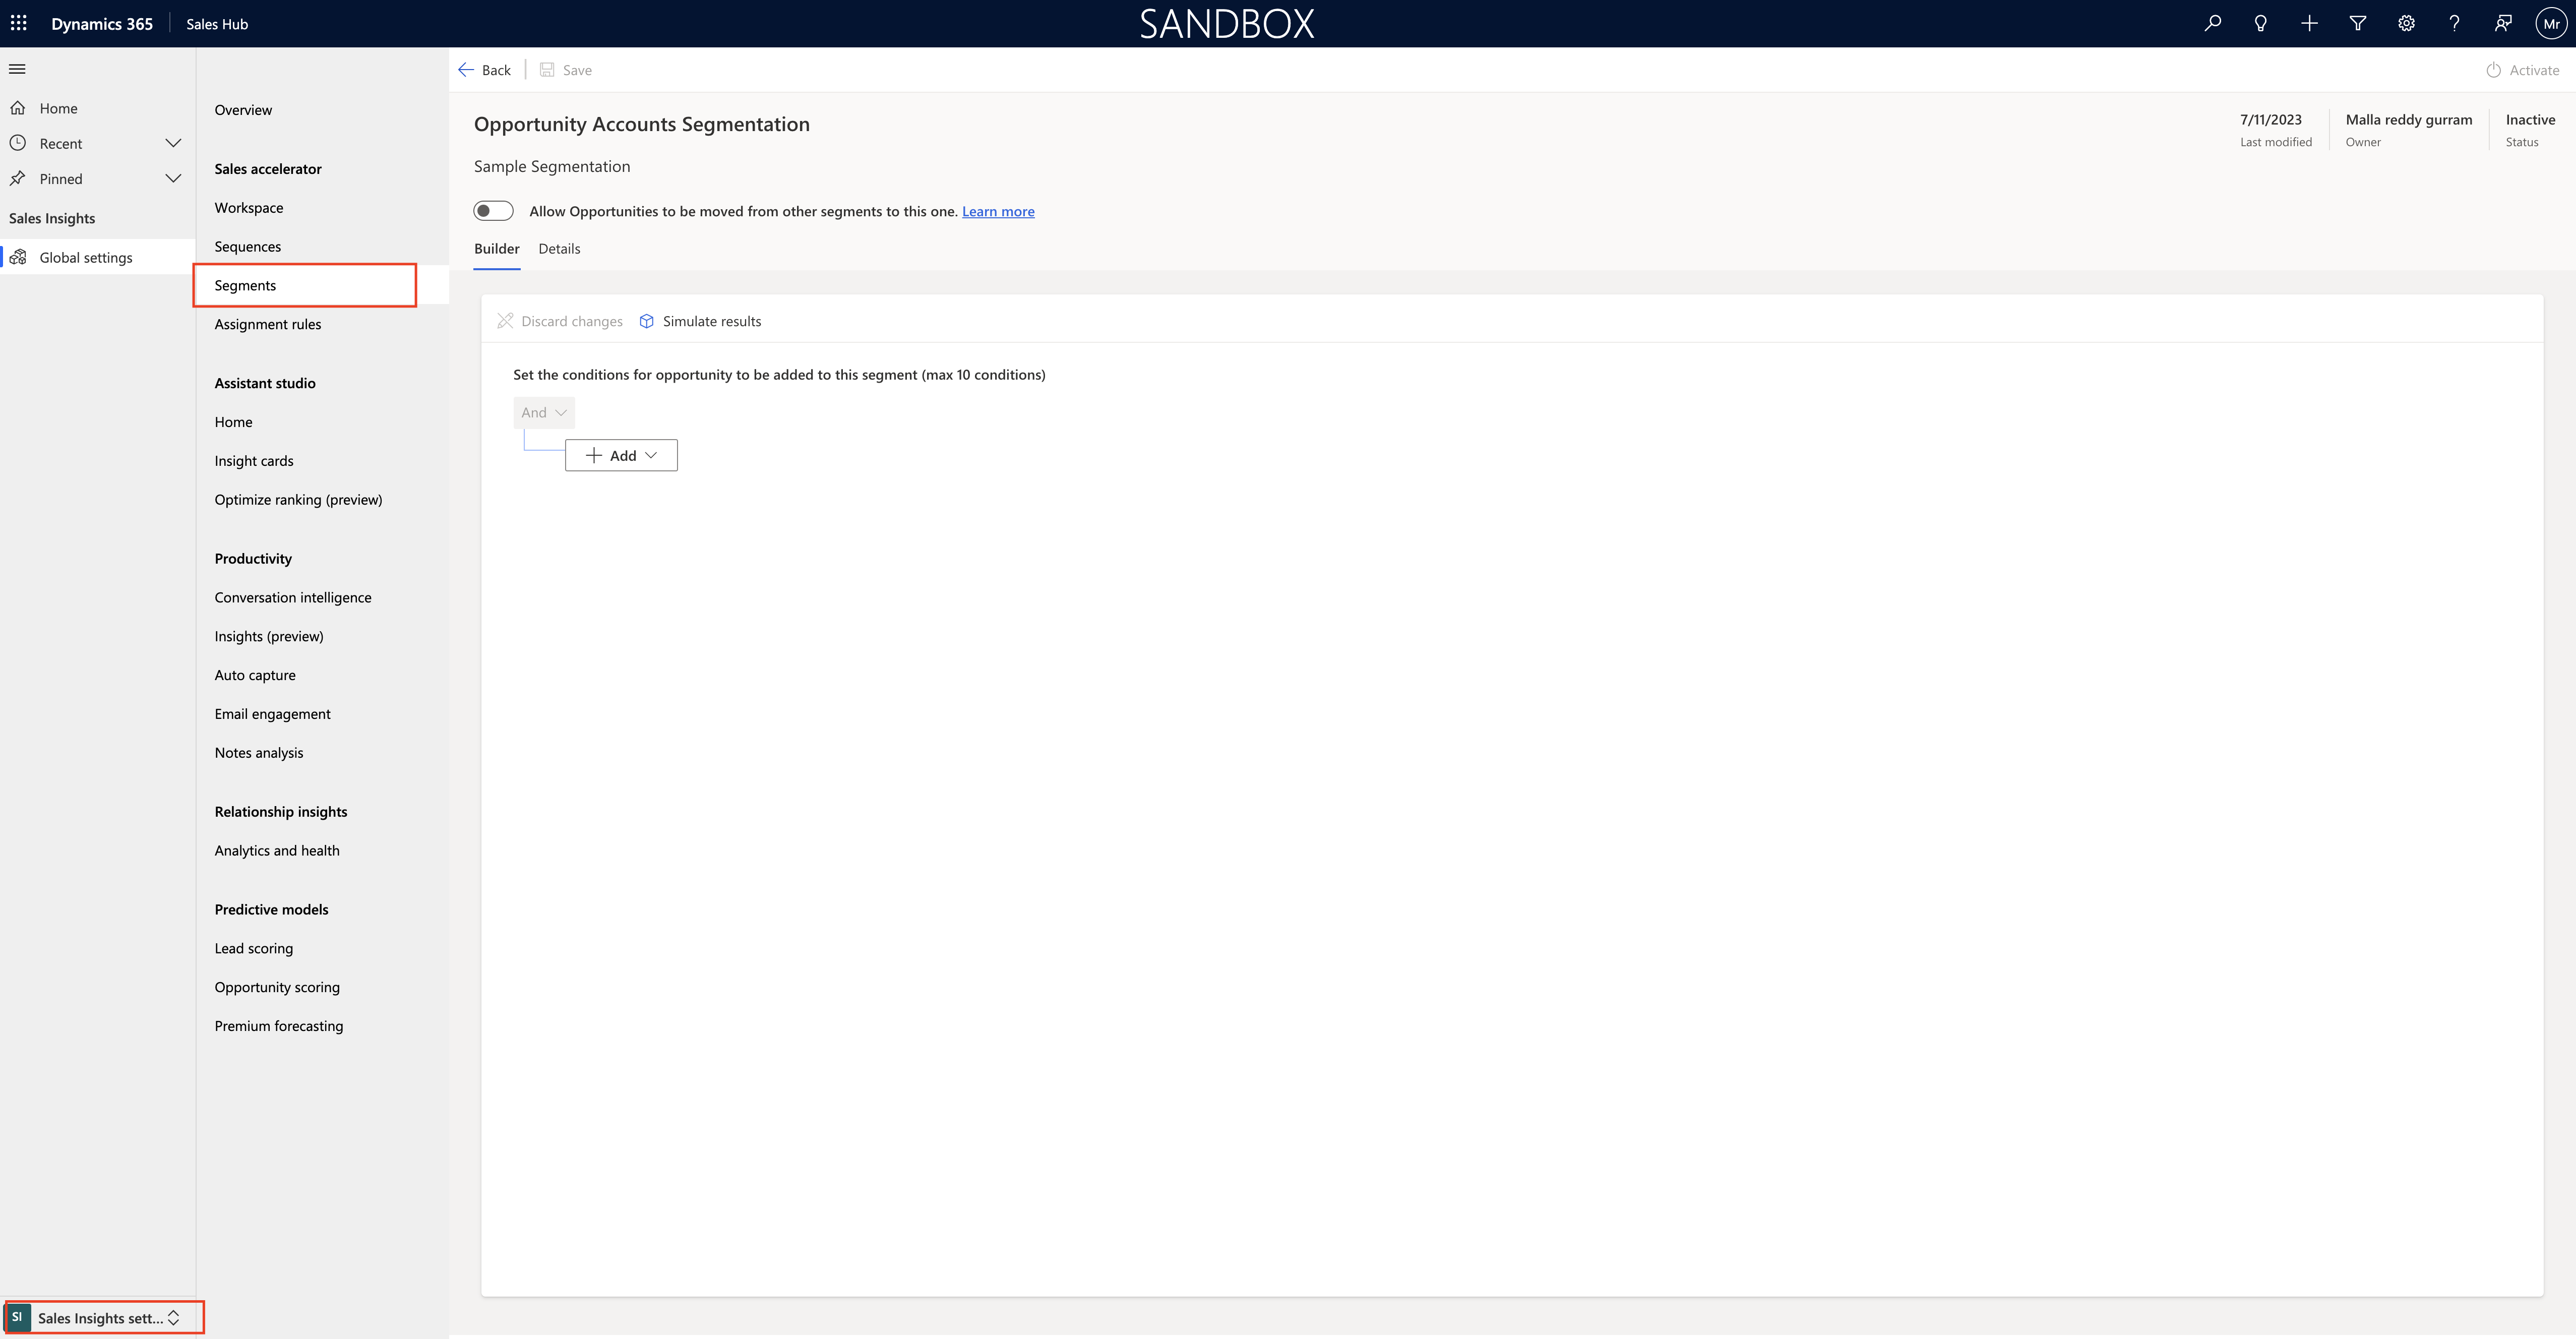
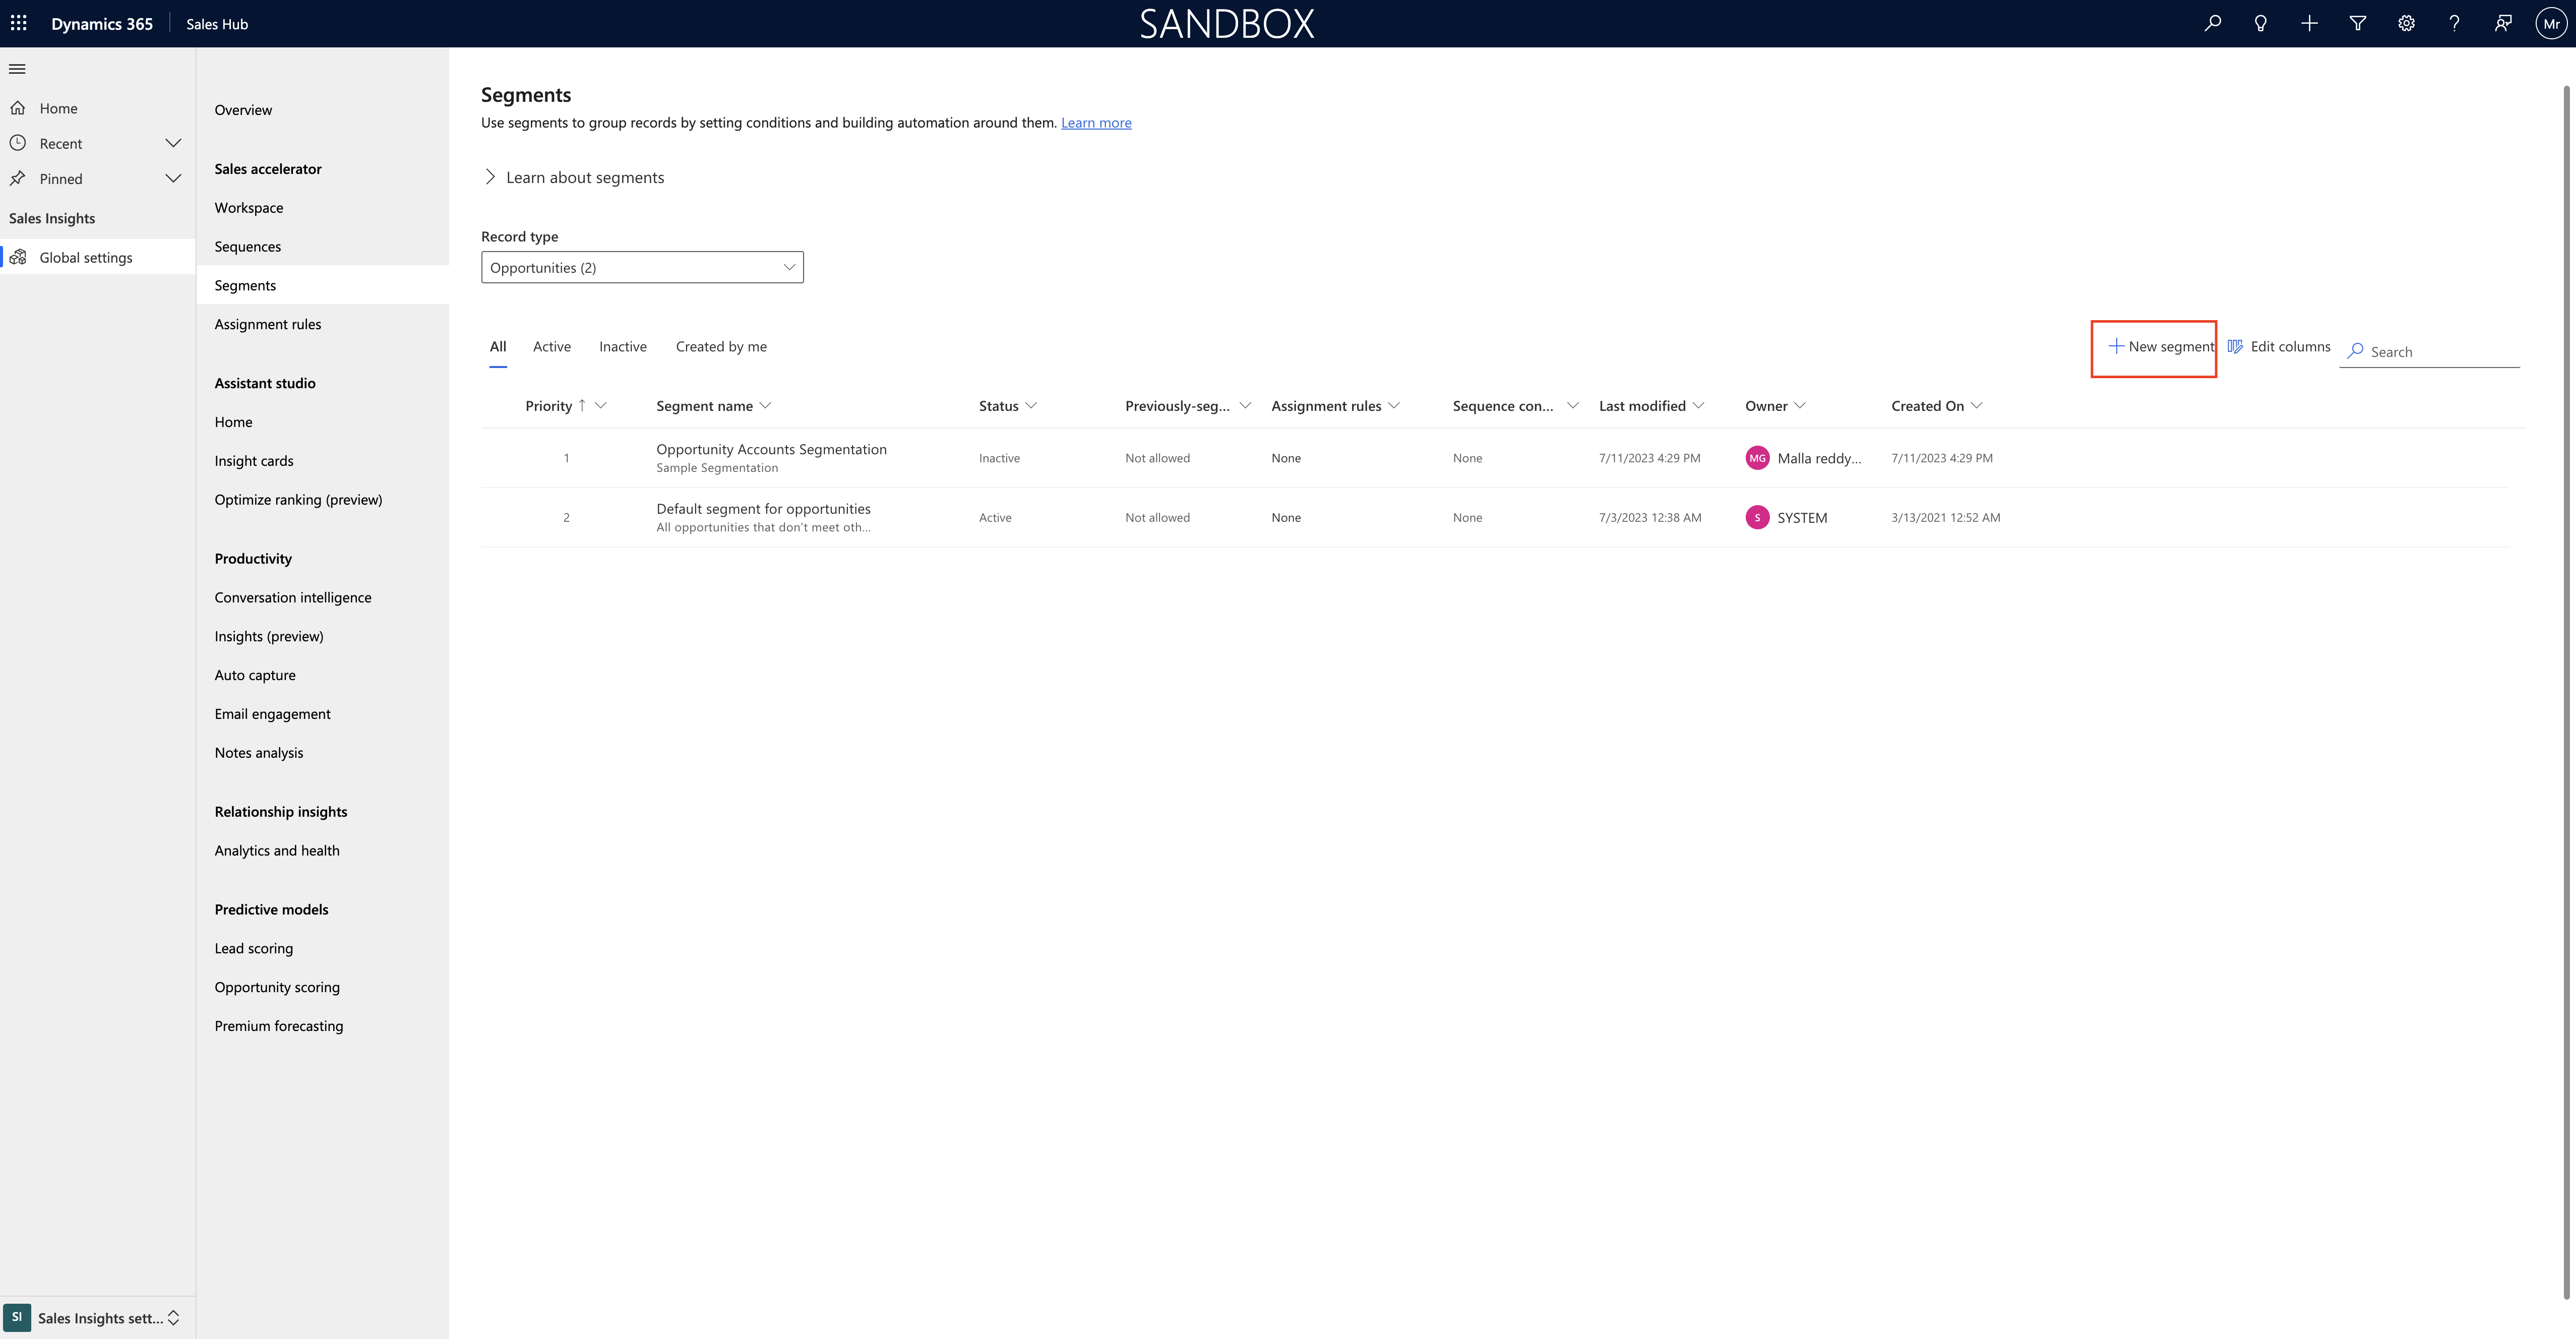
Then change the settings to sales insights settings and click on the Segments underneath Sales Accelerator

Choose the Record type as Opportunity or Leas and Create a New Segment

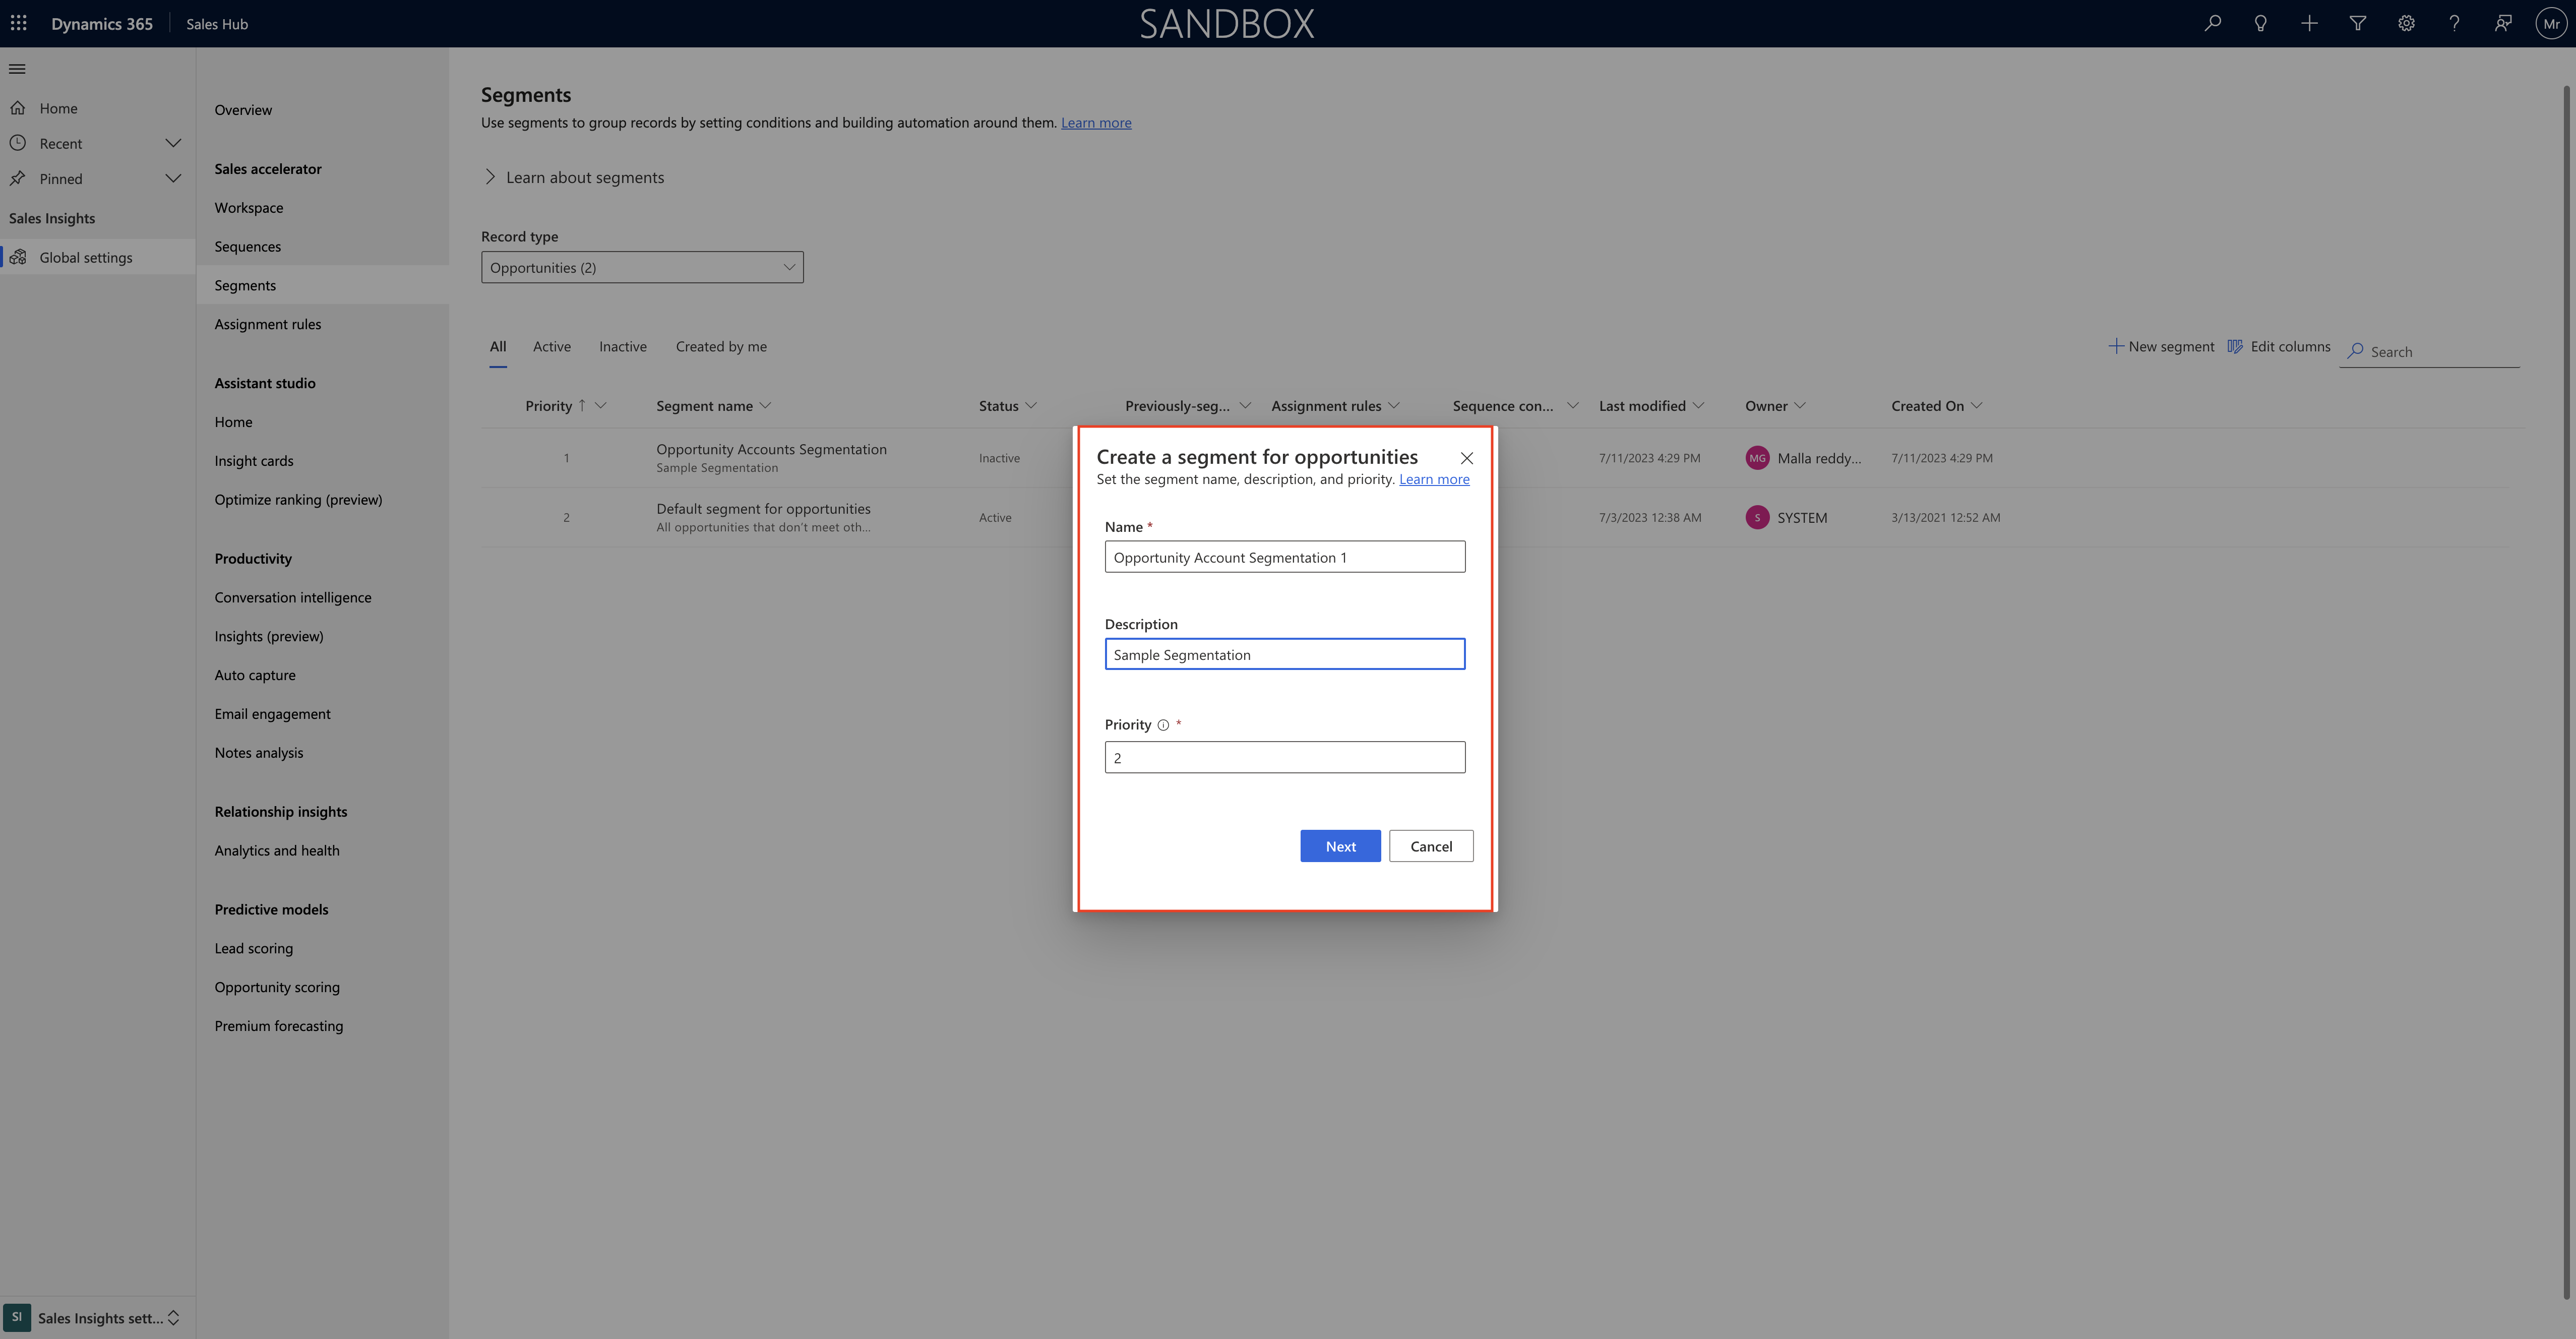
Create a segment for Opportunities:

Name, Description, Priority.

Then check the Allow Opportunities to be moved from other segments to this one and check the box of Update seller assignments as well.

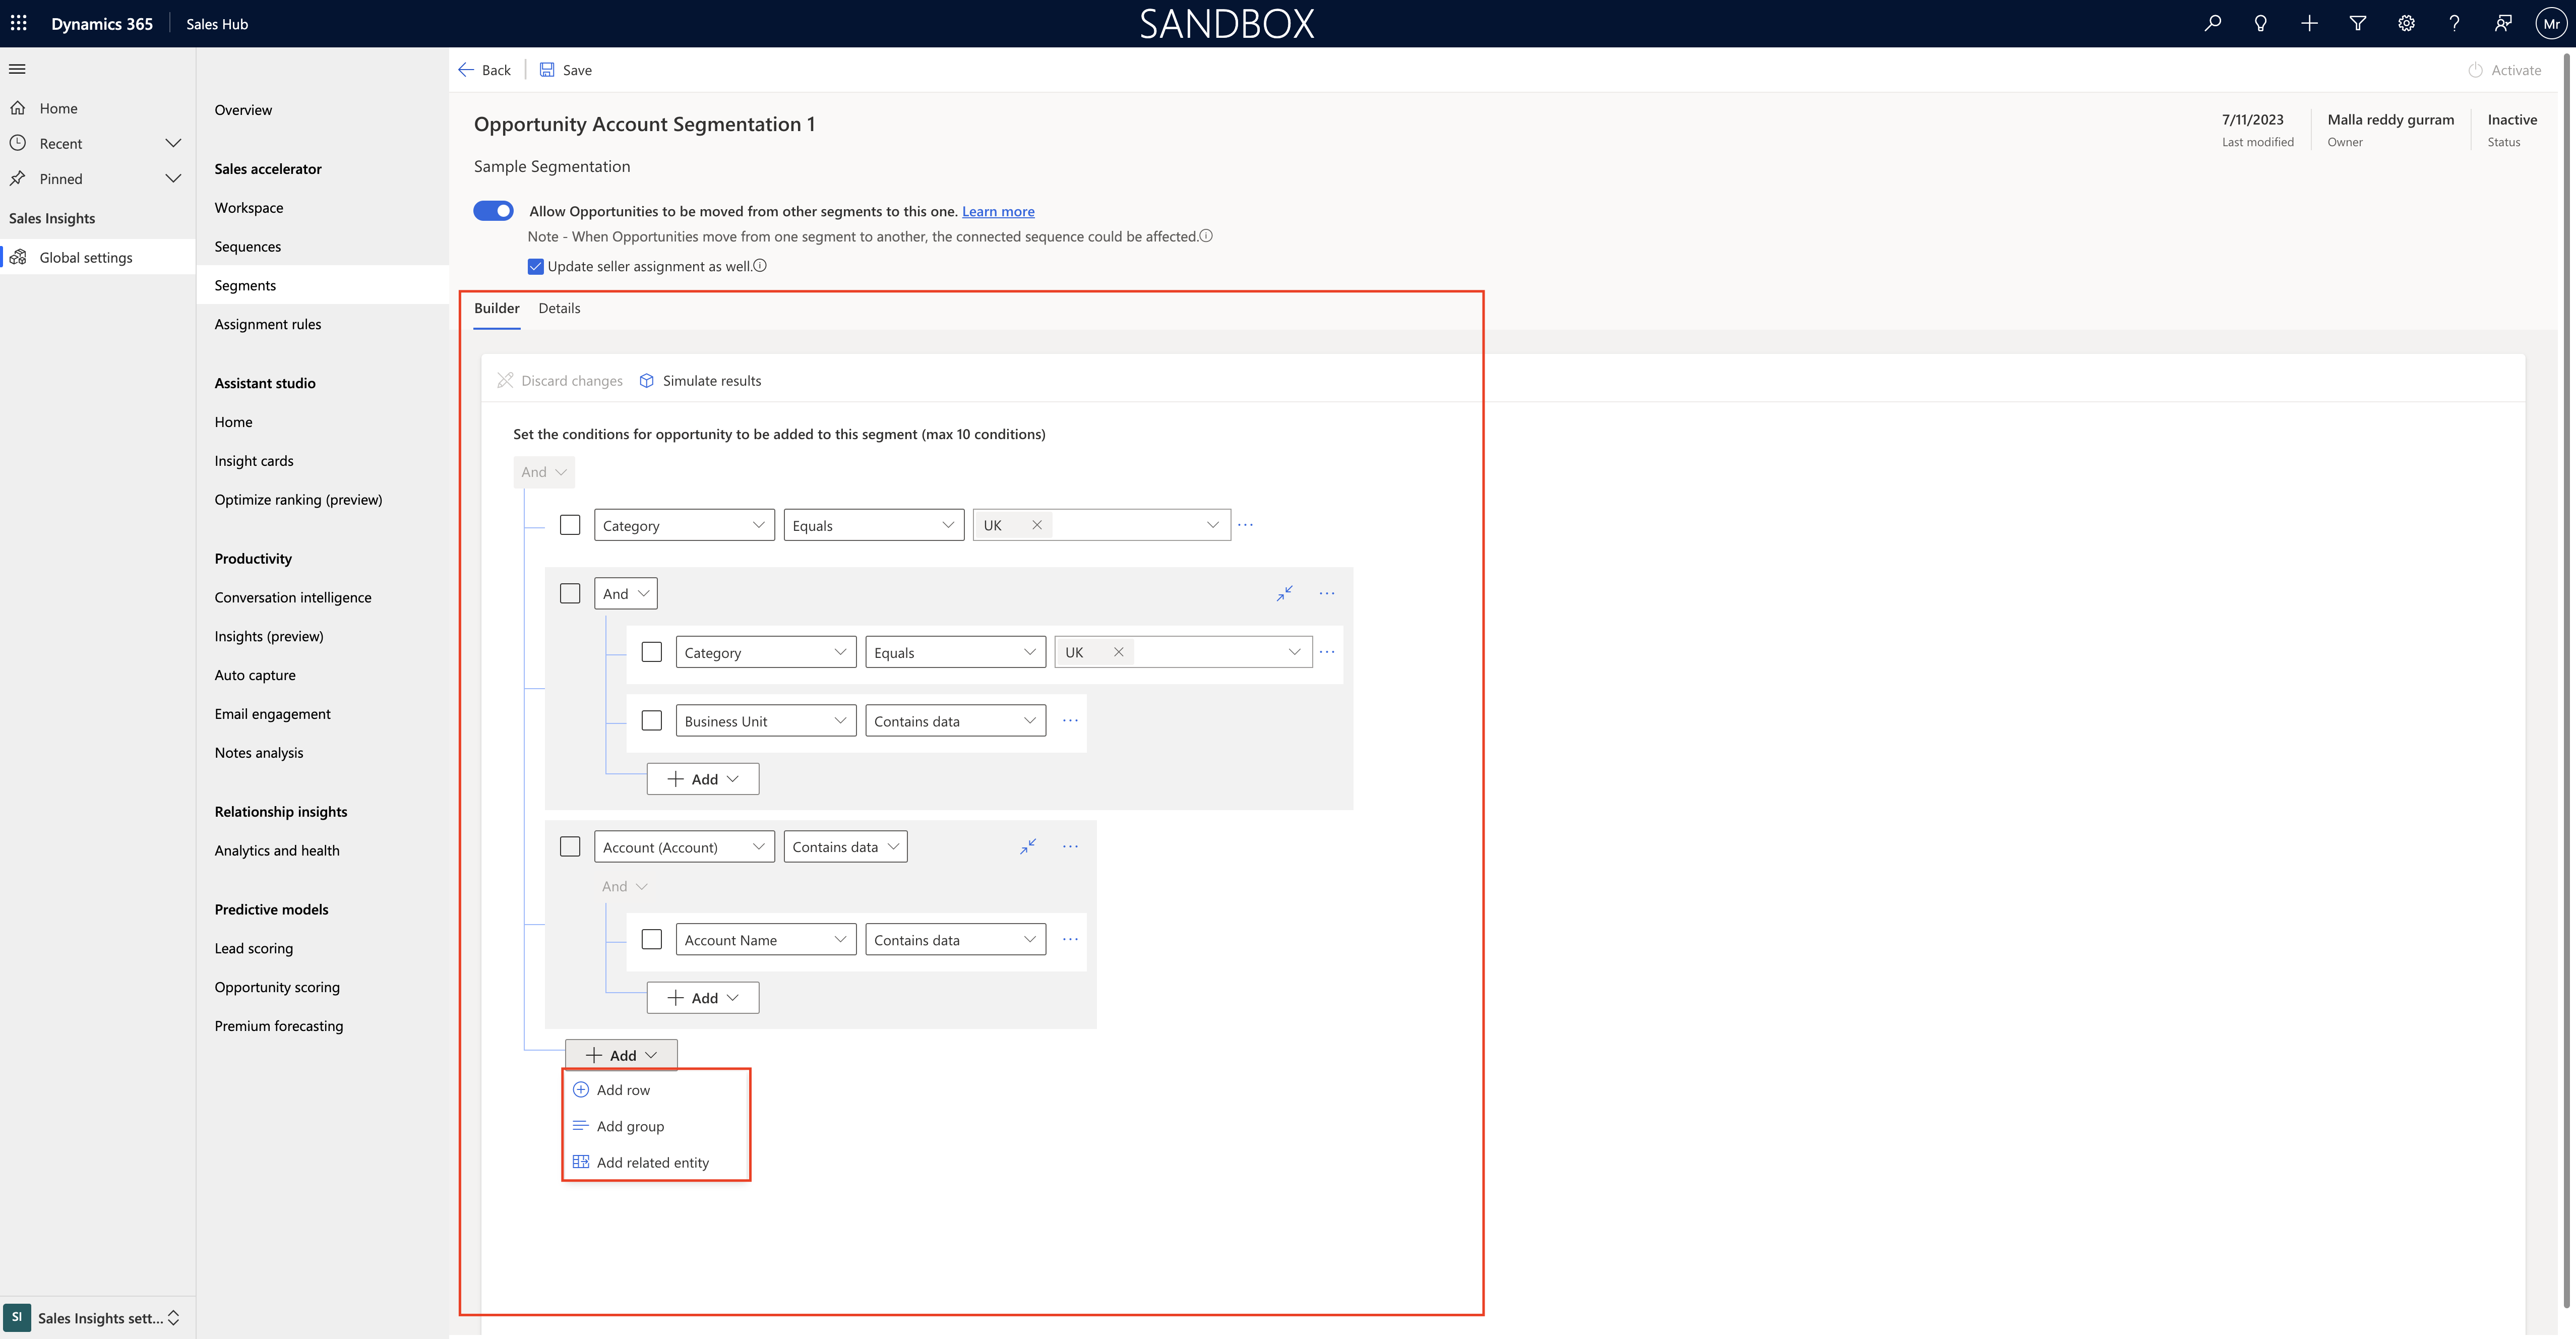
Start creating segmentation using ADD ROW, ADD GROUP, ADD RELATED ENTITY

Add row: you can add row conditon, add group or add related entity based on the segmentation condition you would like to see.

Note: you can only have 10 conditions per segment.

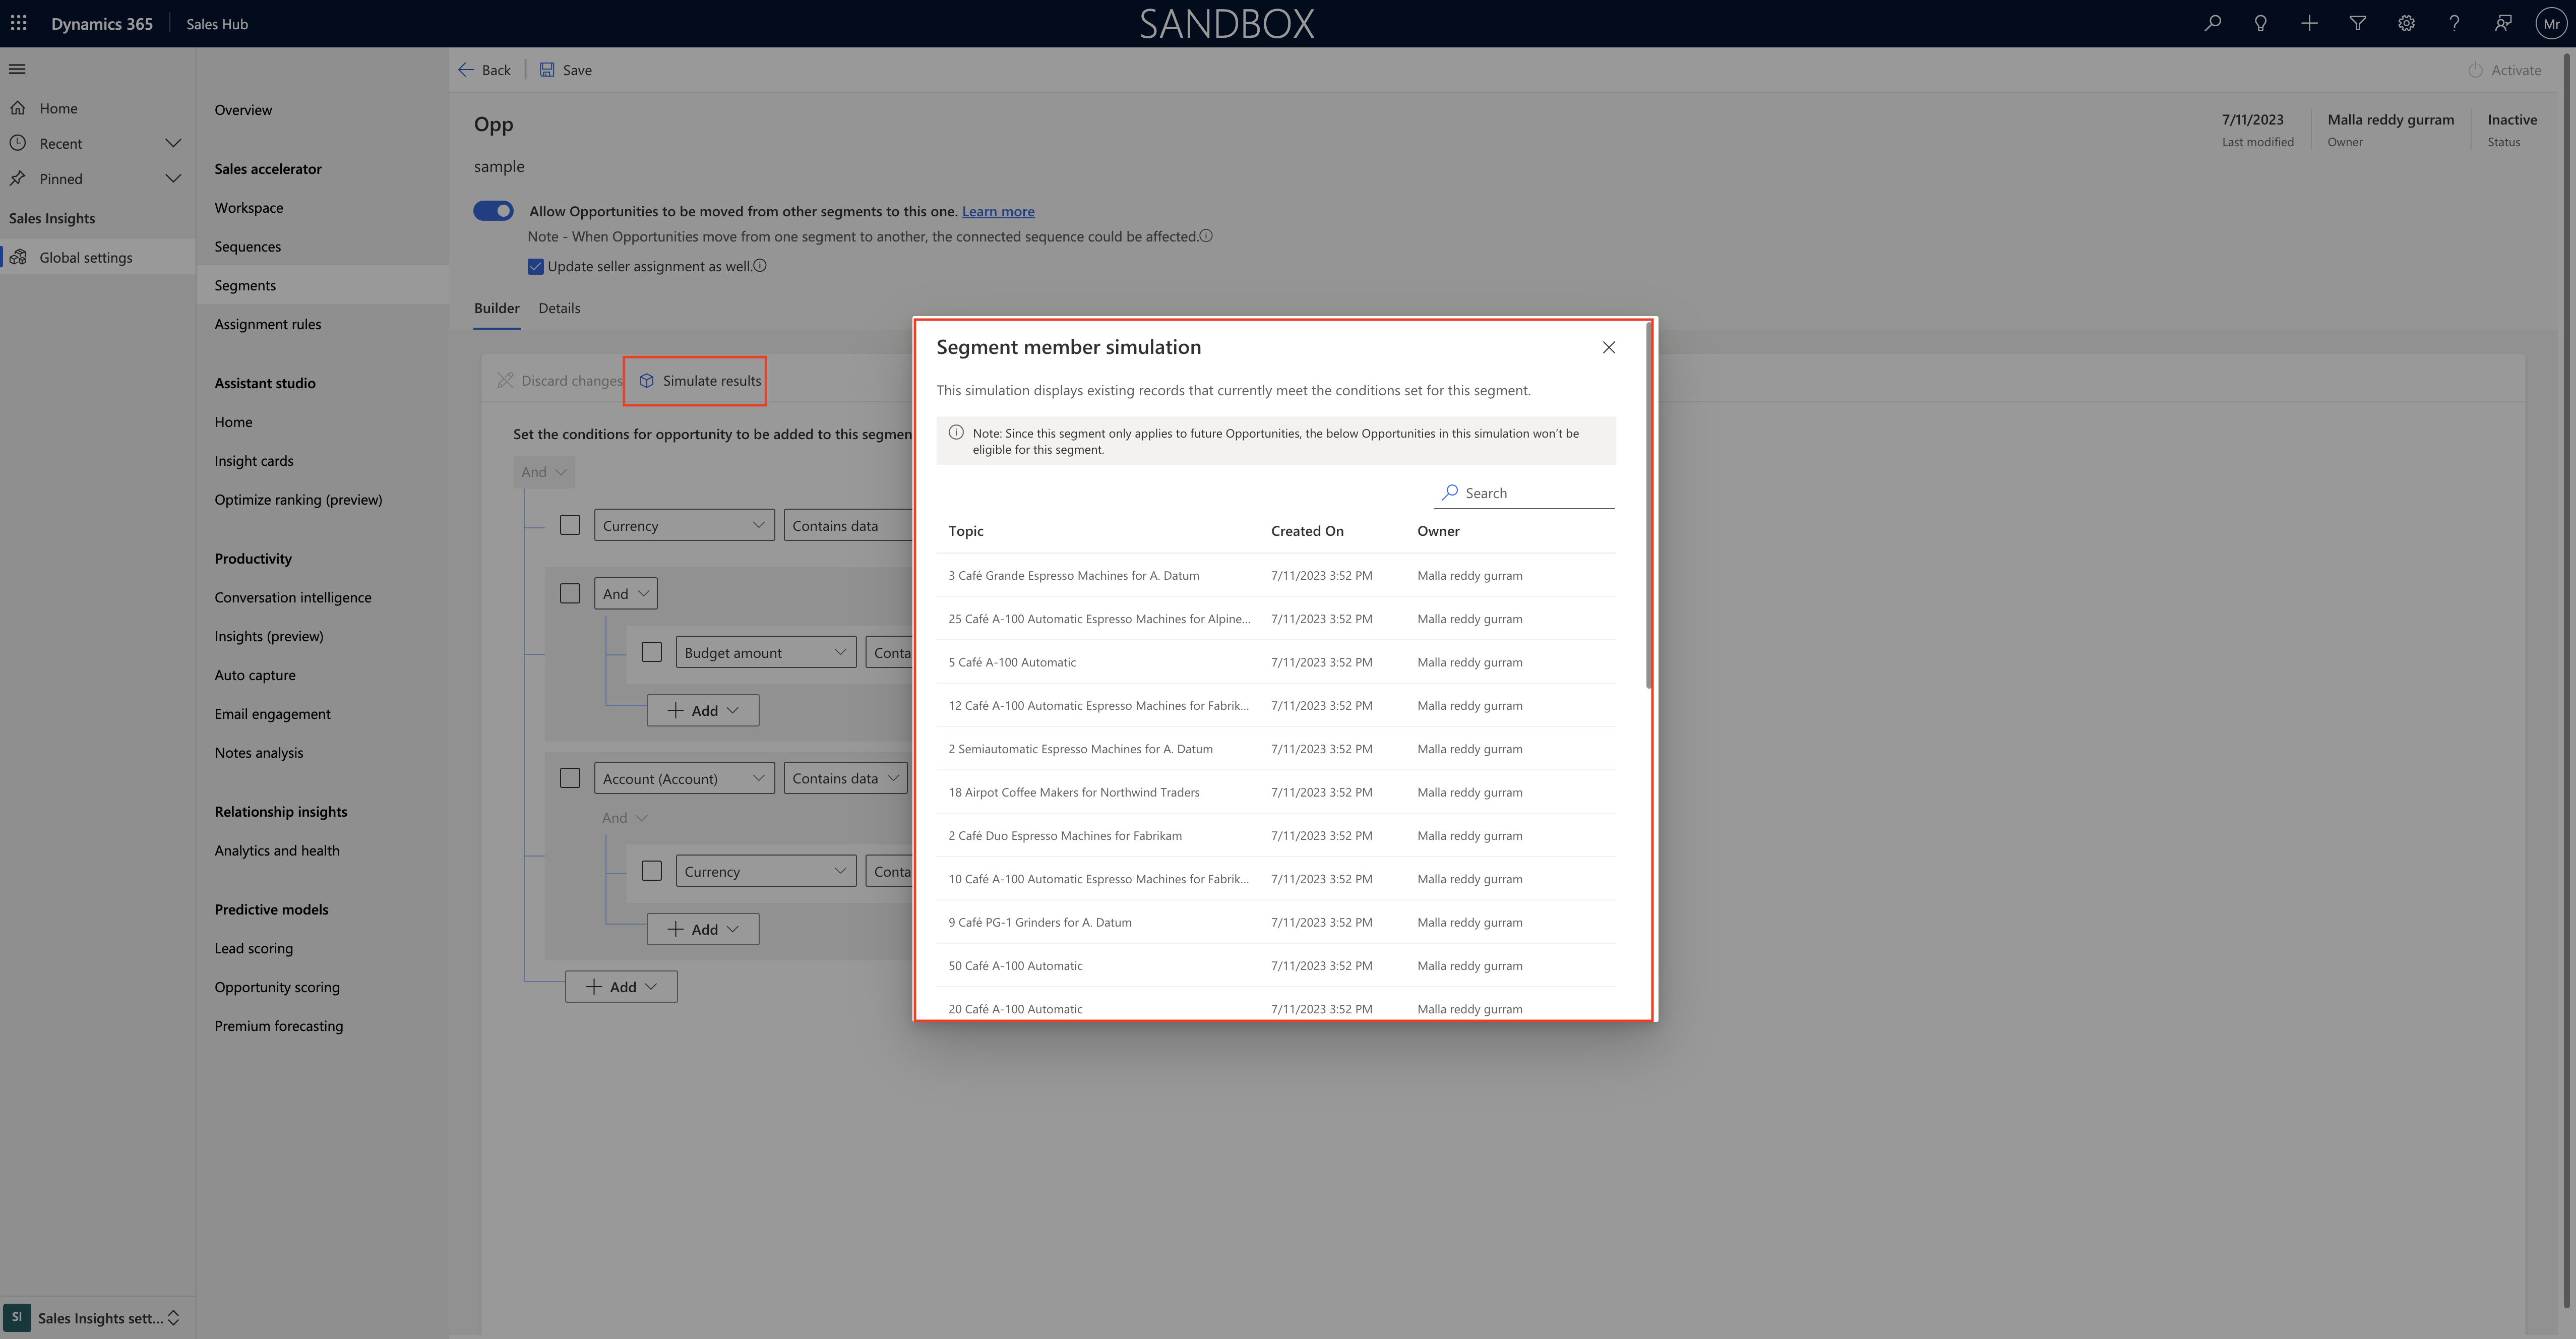
When you set up conditions and you can check whether there is data available for your conditions by clicking on Simulate results.

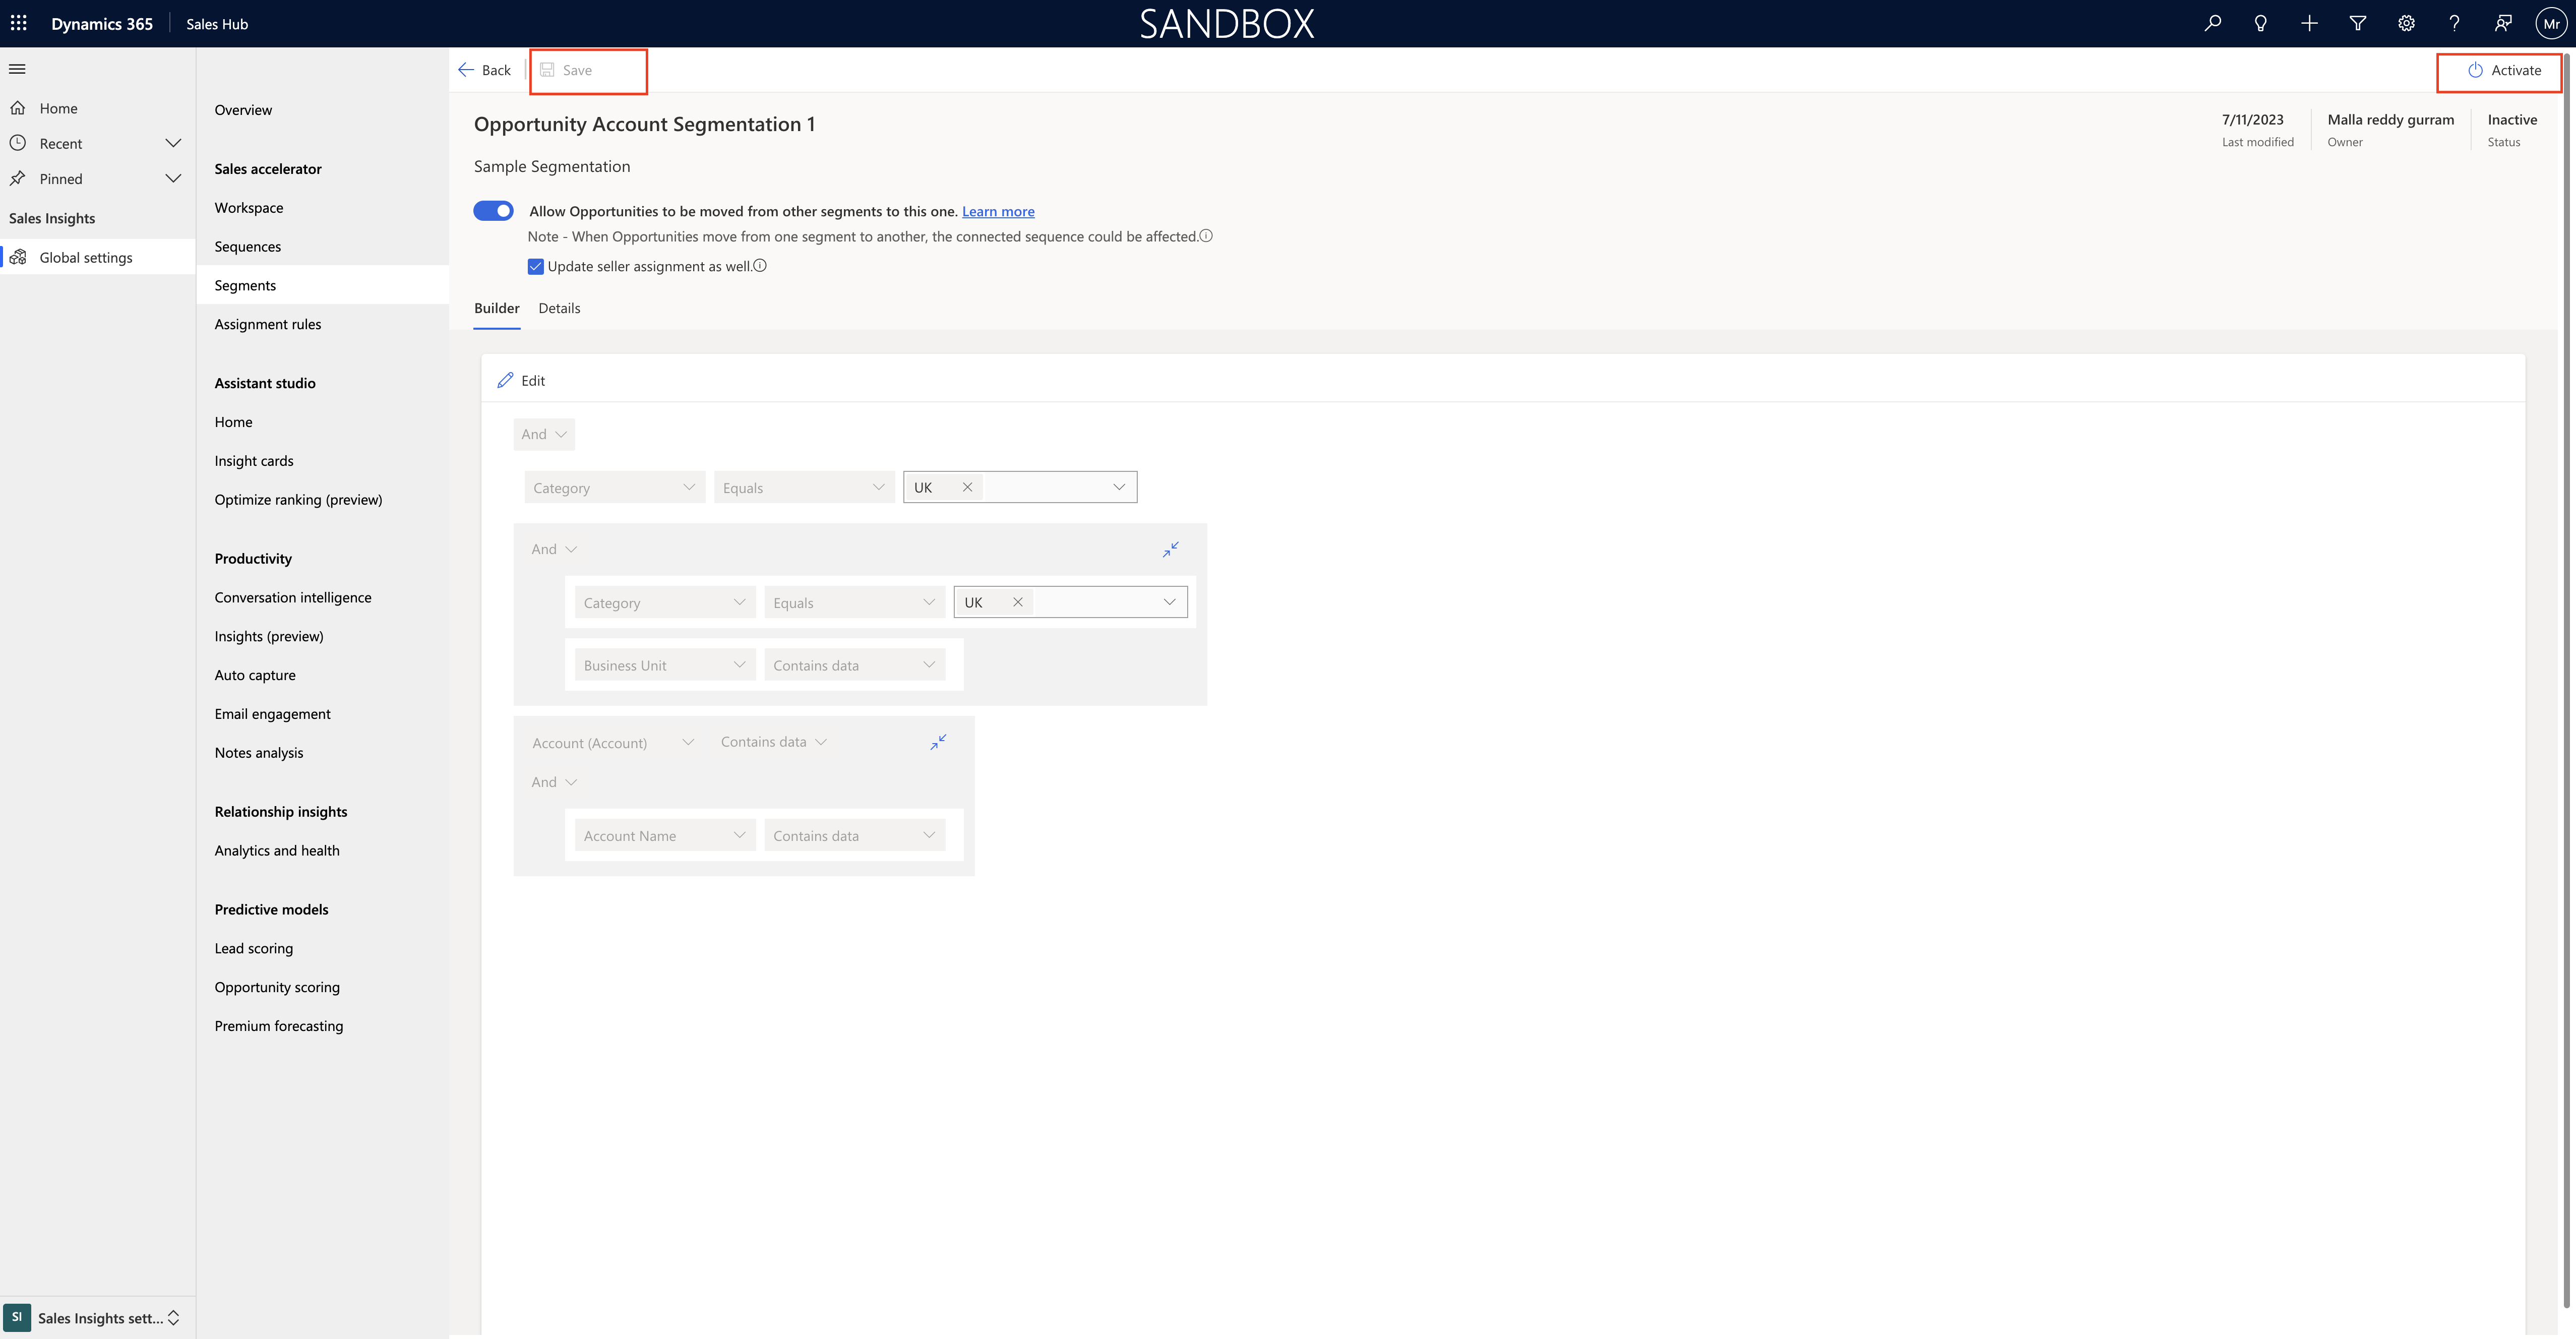
Once you finish the segmentation condition click SAVE and Activate the segment.

Once segment activated and your filter starting working for you.

Thats it for today.

I hope this helps
Malla Reddy(@UK365GUY)
#365BlogPostsin365Days
Share this: