Menu Close

Tag: #mallareddygurram

{How to} discover makers working on the Power Pages Site with Copresence

Hello Everyone,

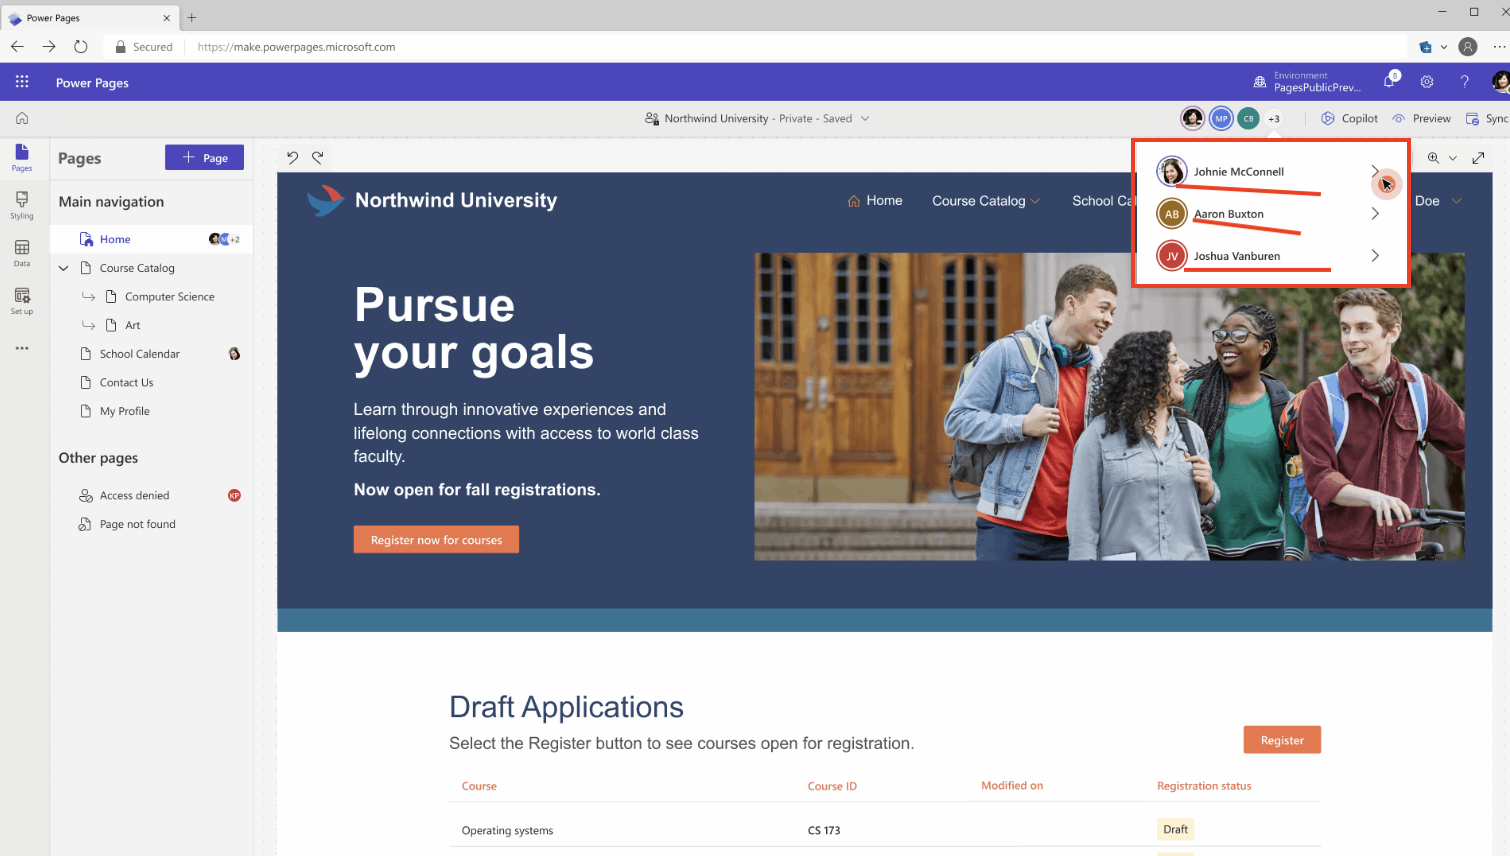
Today I am going to show how to find out multiple users working on the Power Page Site using Copresence.

Let’s get’s started.

Suppose you are working in a team on Power Pages Project and you are working on the site and if the other team members making changes to the same site then some of the changes done by the team may overwritten.

How to resolve this issue?

With the help of the Copresence user can see who is working on the site and make a communication via email or Microsoft Teams with the team.

So there will not be overwritten changes with the help of Copresence.

So Copresence is very useful feature on Power Pages.

That’s it for today.

I hope this helps

Malla Reddy Gurram(@UK365GUY)
#365BlogPostsin365Days

Share this:

Release Plans for Dynamics 365, Power Platform, Microsoft Cloud of Industry

Hello Everyone,

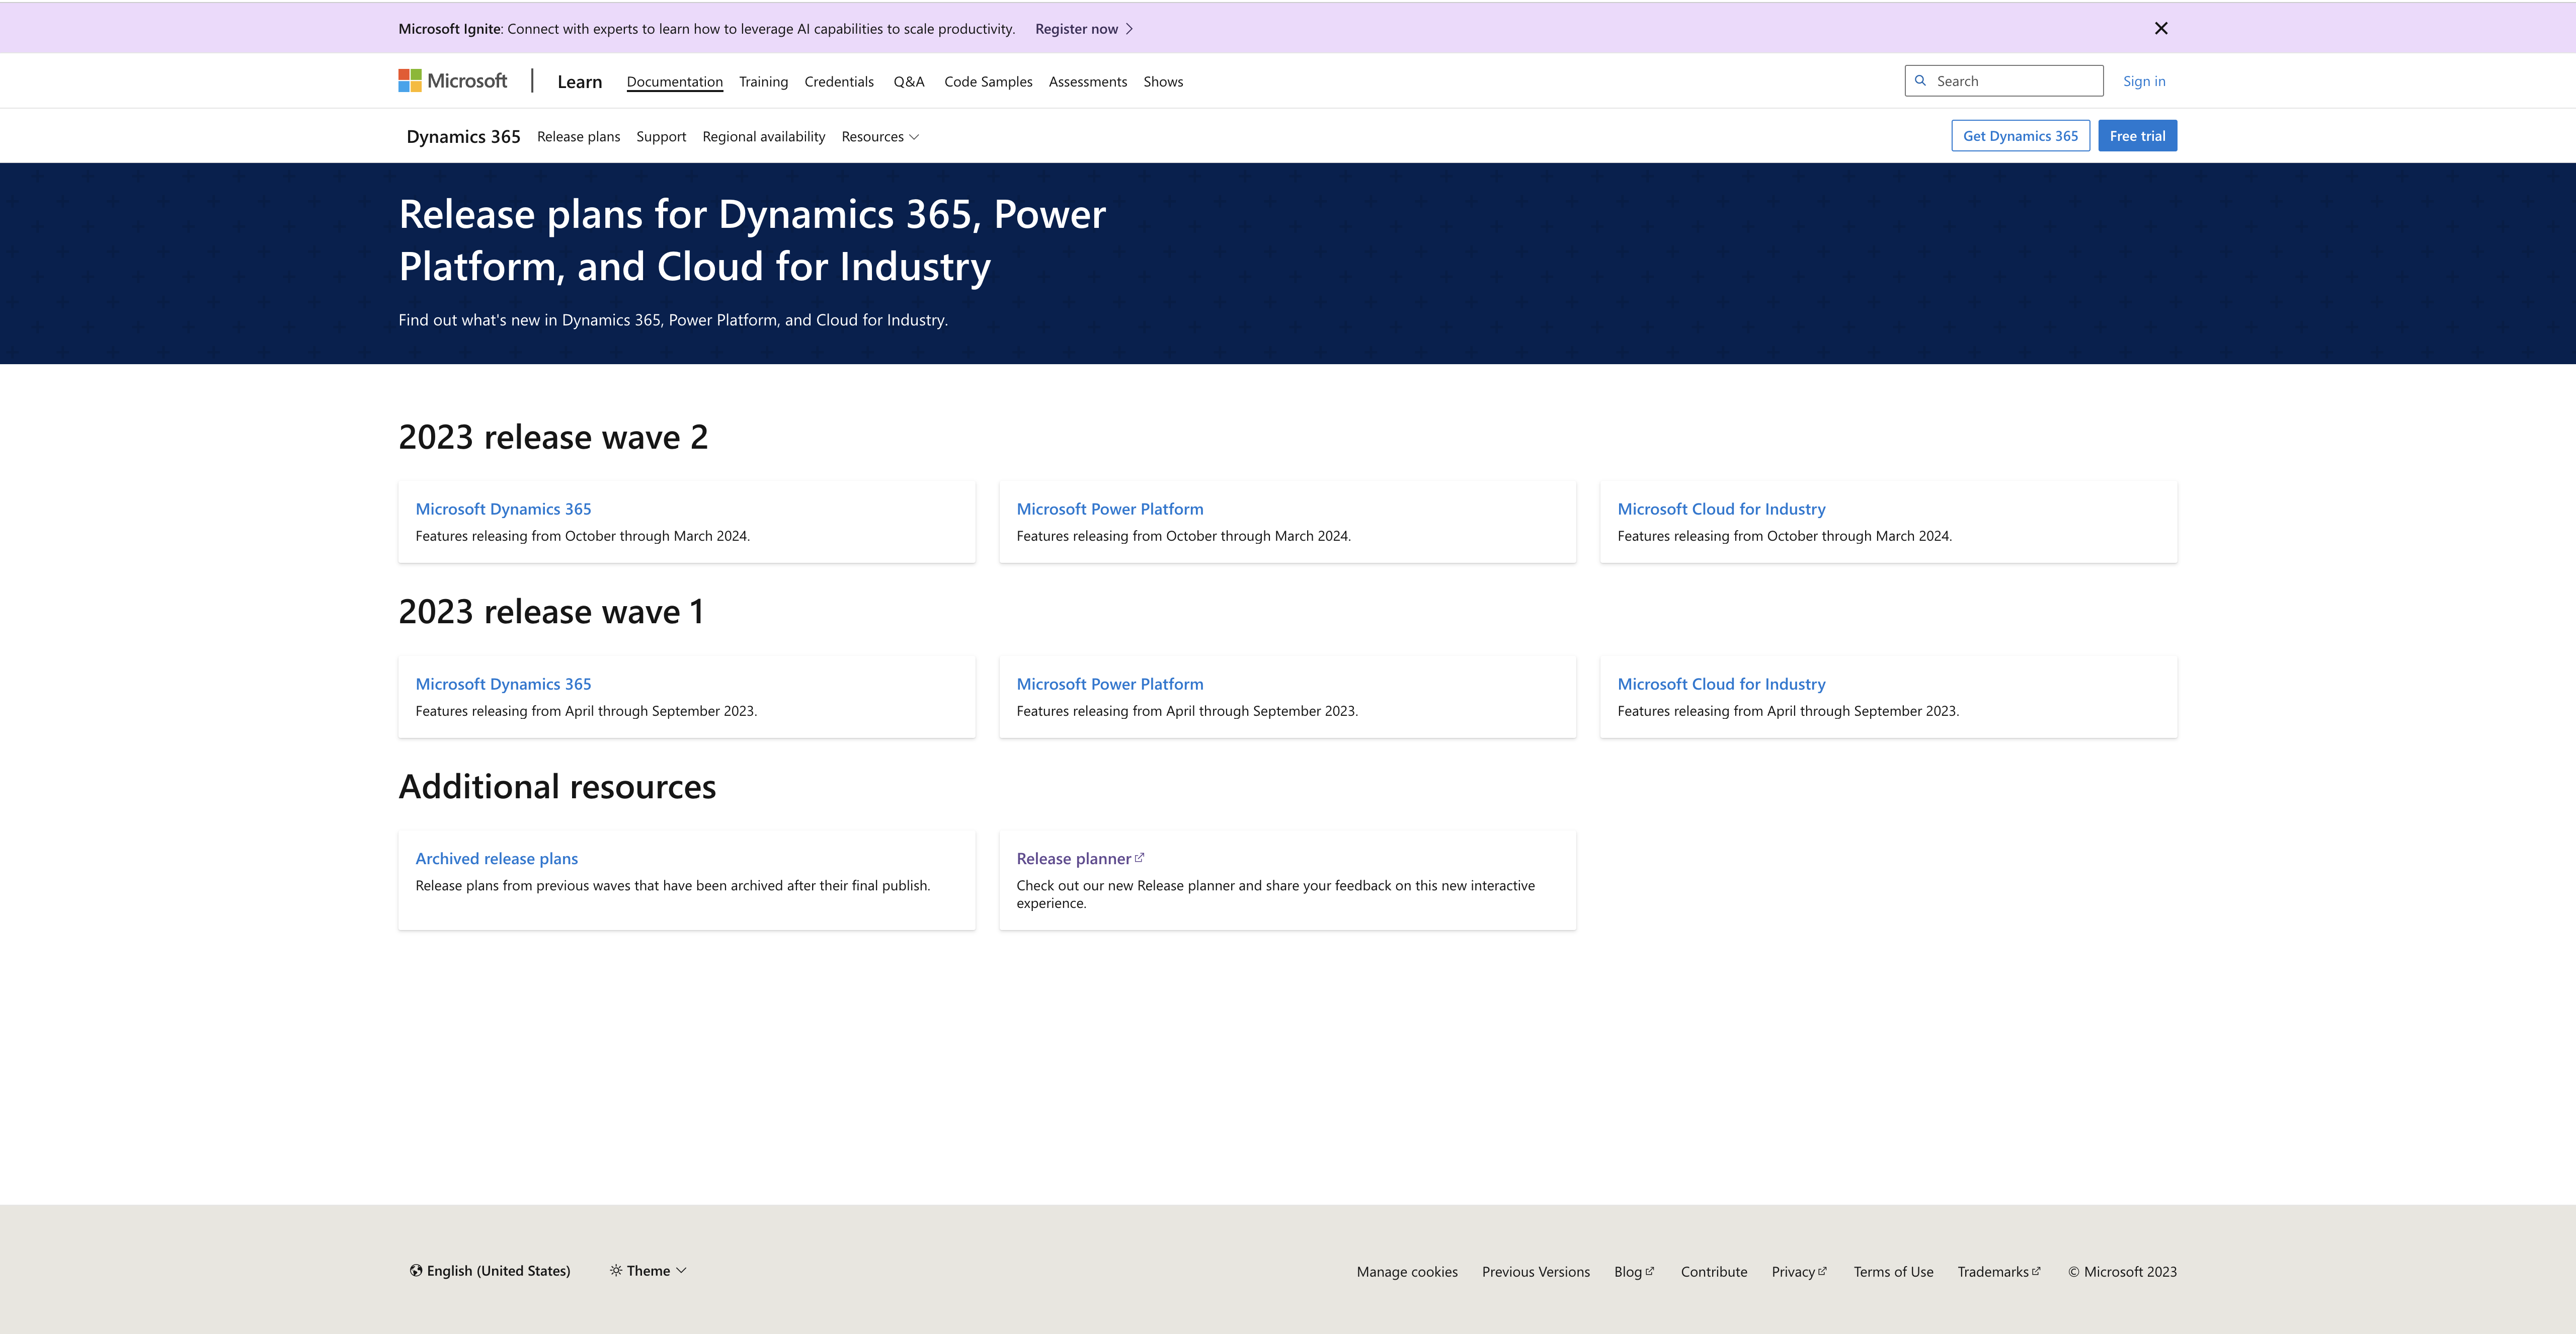
Today I am going to share microsoft all release plans i.e Dynamics 365, Power Platform, Microsoft Cloud of Industry.

Let’s get’s started.

Do you want to see all the release plans for wave1 and wave2 then click here

You can also see Archived release, and Release Planner too.

That’s it for today.

I hope this helps.

Malla Reddy Gurram(@UK365GUY)
#365BlogPostsin365Days

Share this:

{How to} Set Power Apps Standard Settings

Hello Everyone,

Today I am going to share how to set Power Apps Settings.
Let’s get’s started.

Power Apps behaves based on its settings, lets see what they are?

When you open power apps and on ribbon you will see the settings, click on it.

Settings:

1. General
2. Display
3. Upcoming features
4. Support

General :

General settings will have what is the name of Power App, description about it, App icon, icon your app image can be selected from it.

Icon background fill, icon fill, Auto save.

Data row limit: you can set how many records can be retrieved from the server.

Debug published app: this enables app expressions and additional debug information to be displayed in the monitor tool when debugging your published app.

Automatically create environment variables when adding data sources:

Enable the automatic creation of environment variables when connecting to data. Environment variables allow you to change data sources within solutions.

Enable App.OnStart property:

Use of the App.OnStart property can cause delays when loading an app and must be used with caution. New alternatives such as App.StartScreen offer a better way to accomolish the same thing. See documentation for guidance turn on ON.

2. Display
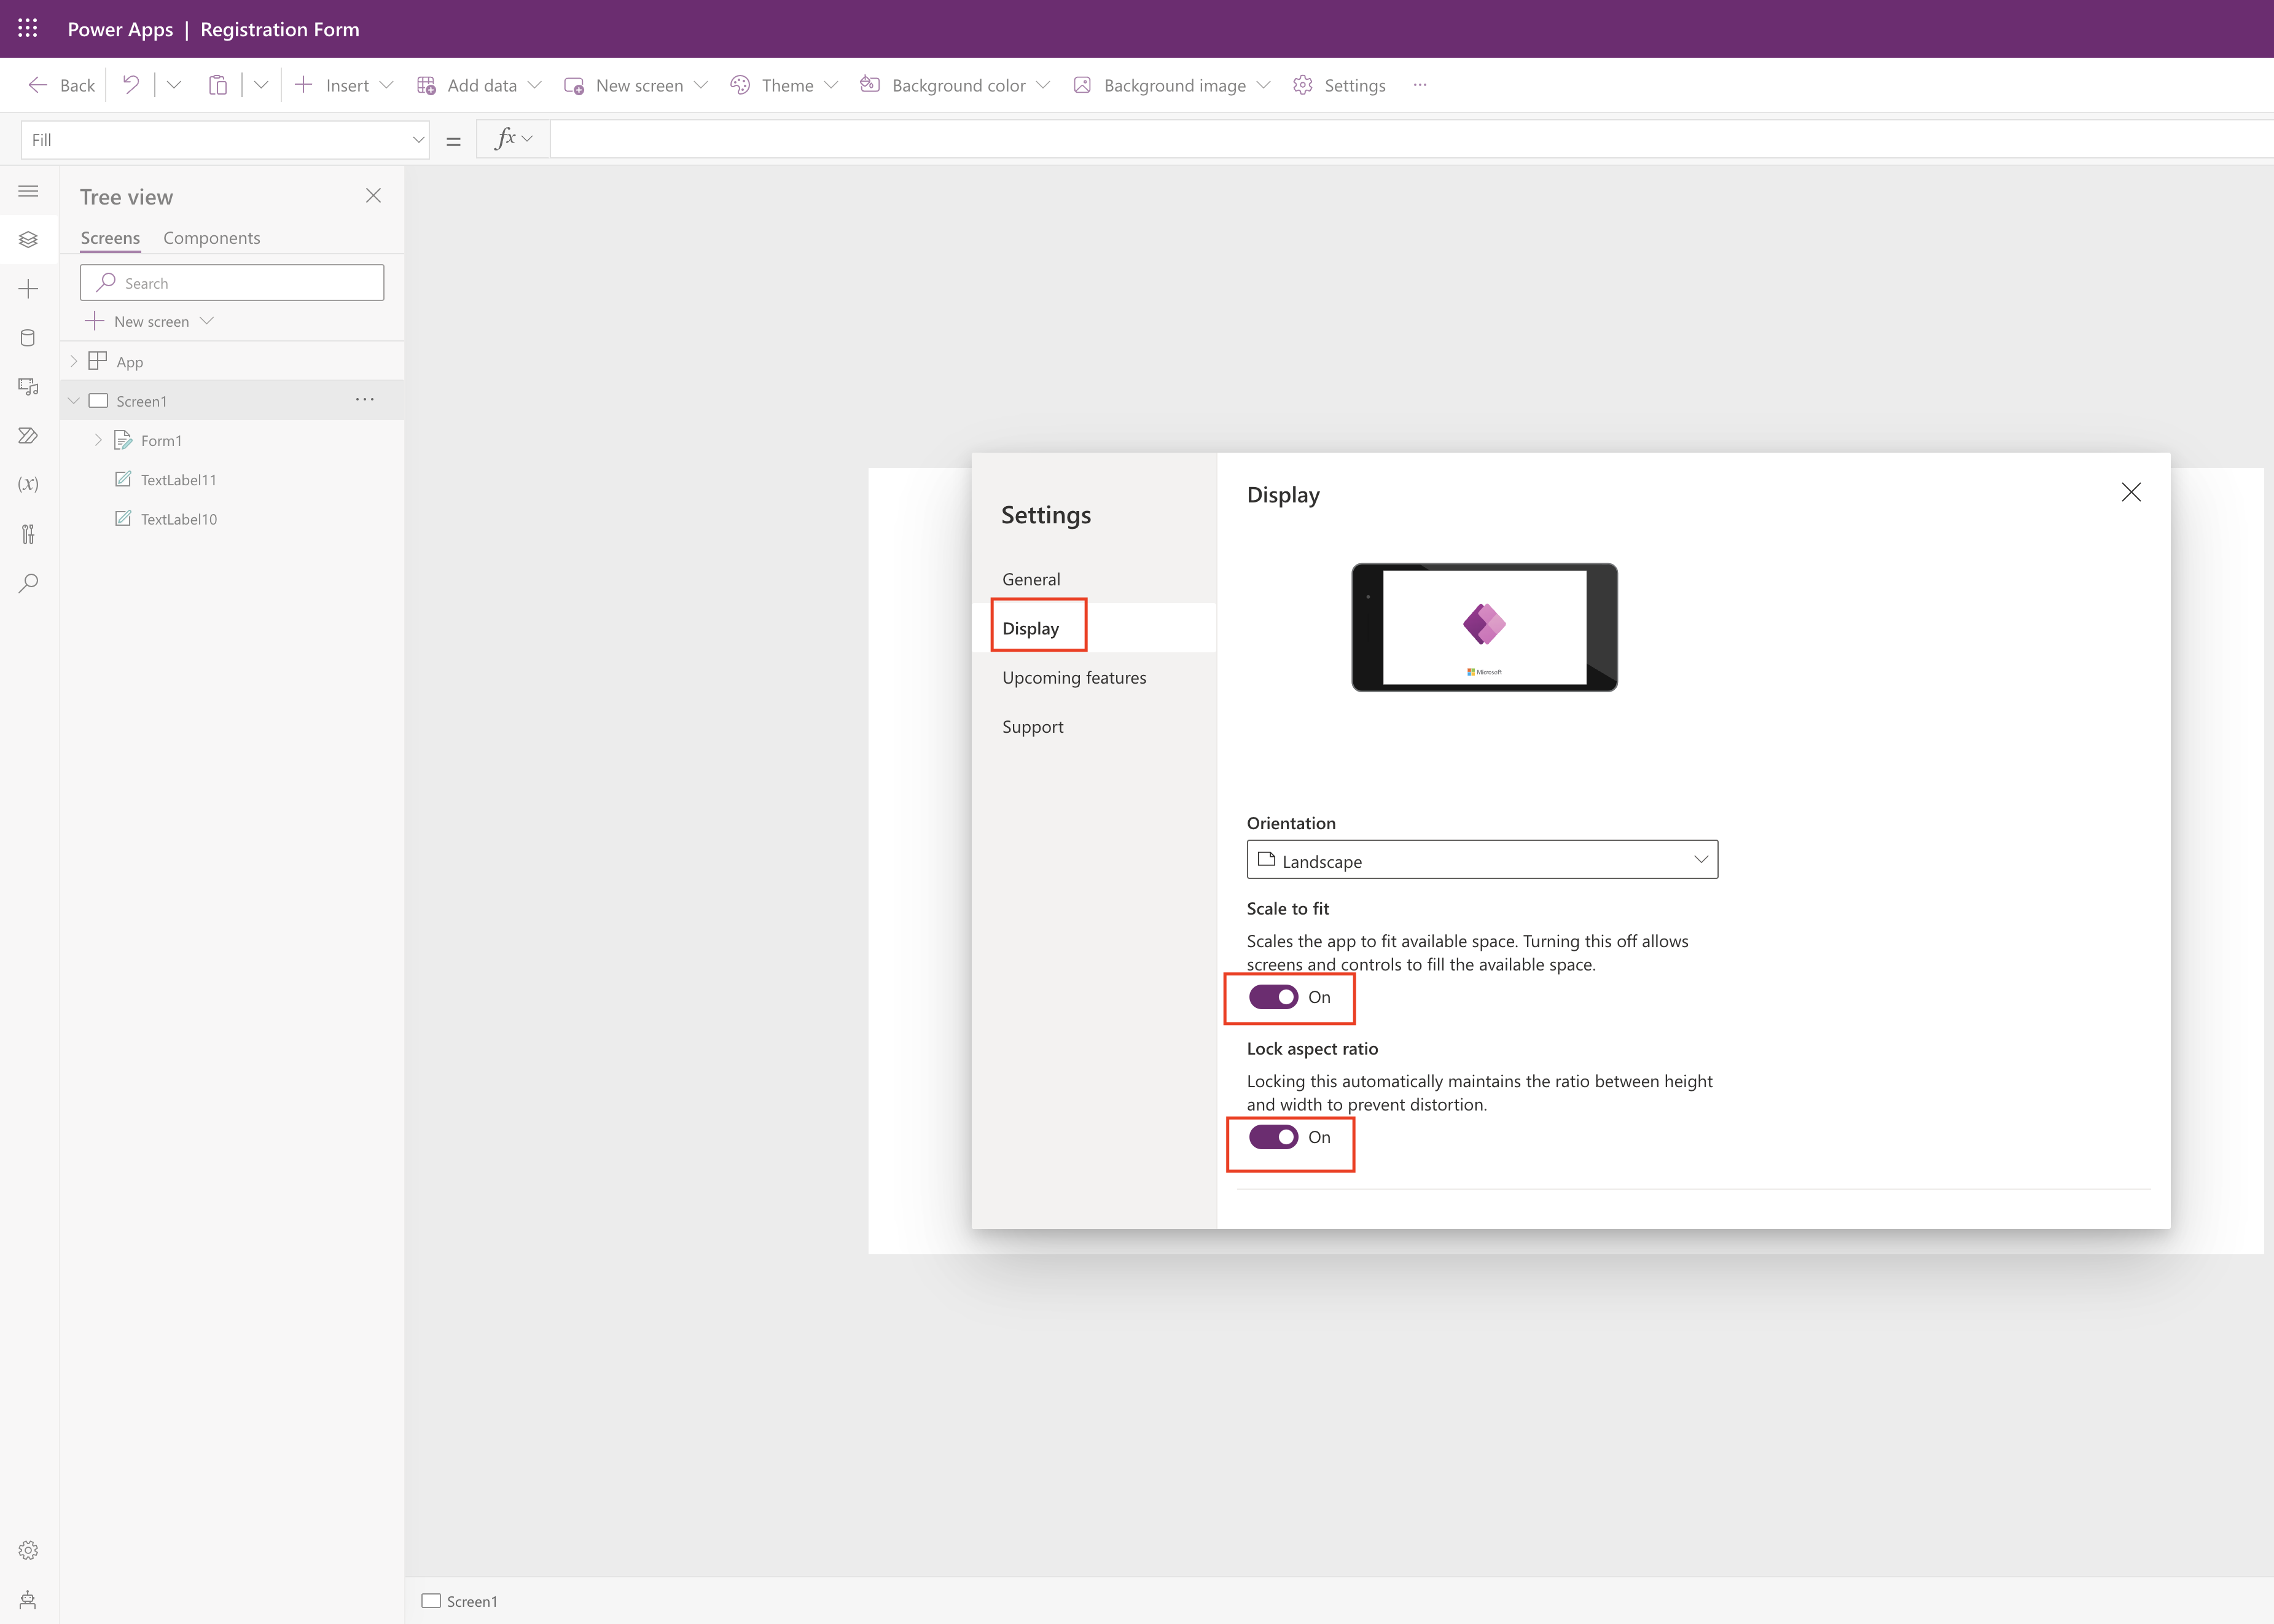
Display states how the power app looks based on this settings.

Screen Orientation can be either Potrait or Landscape.

Scale to fit:

Scale the app to fit available space. Turning this off allows screens and controls to fill available space.

Lock aspect ratio:

Locking this automatically maintains the ratio between height and width to prevent distortion.

what it mean is when it is turn on it will automatically adjust the height and width.

Lock orientation:

Lock orientation keeps the screen in its current orientation, even when the device is rotated.

Show mobile device notification area: When it is turned on an icon will show of the mobile operating system’s notifications, so any notifications user can see the time of messages.

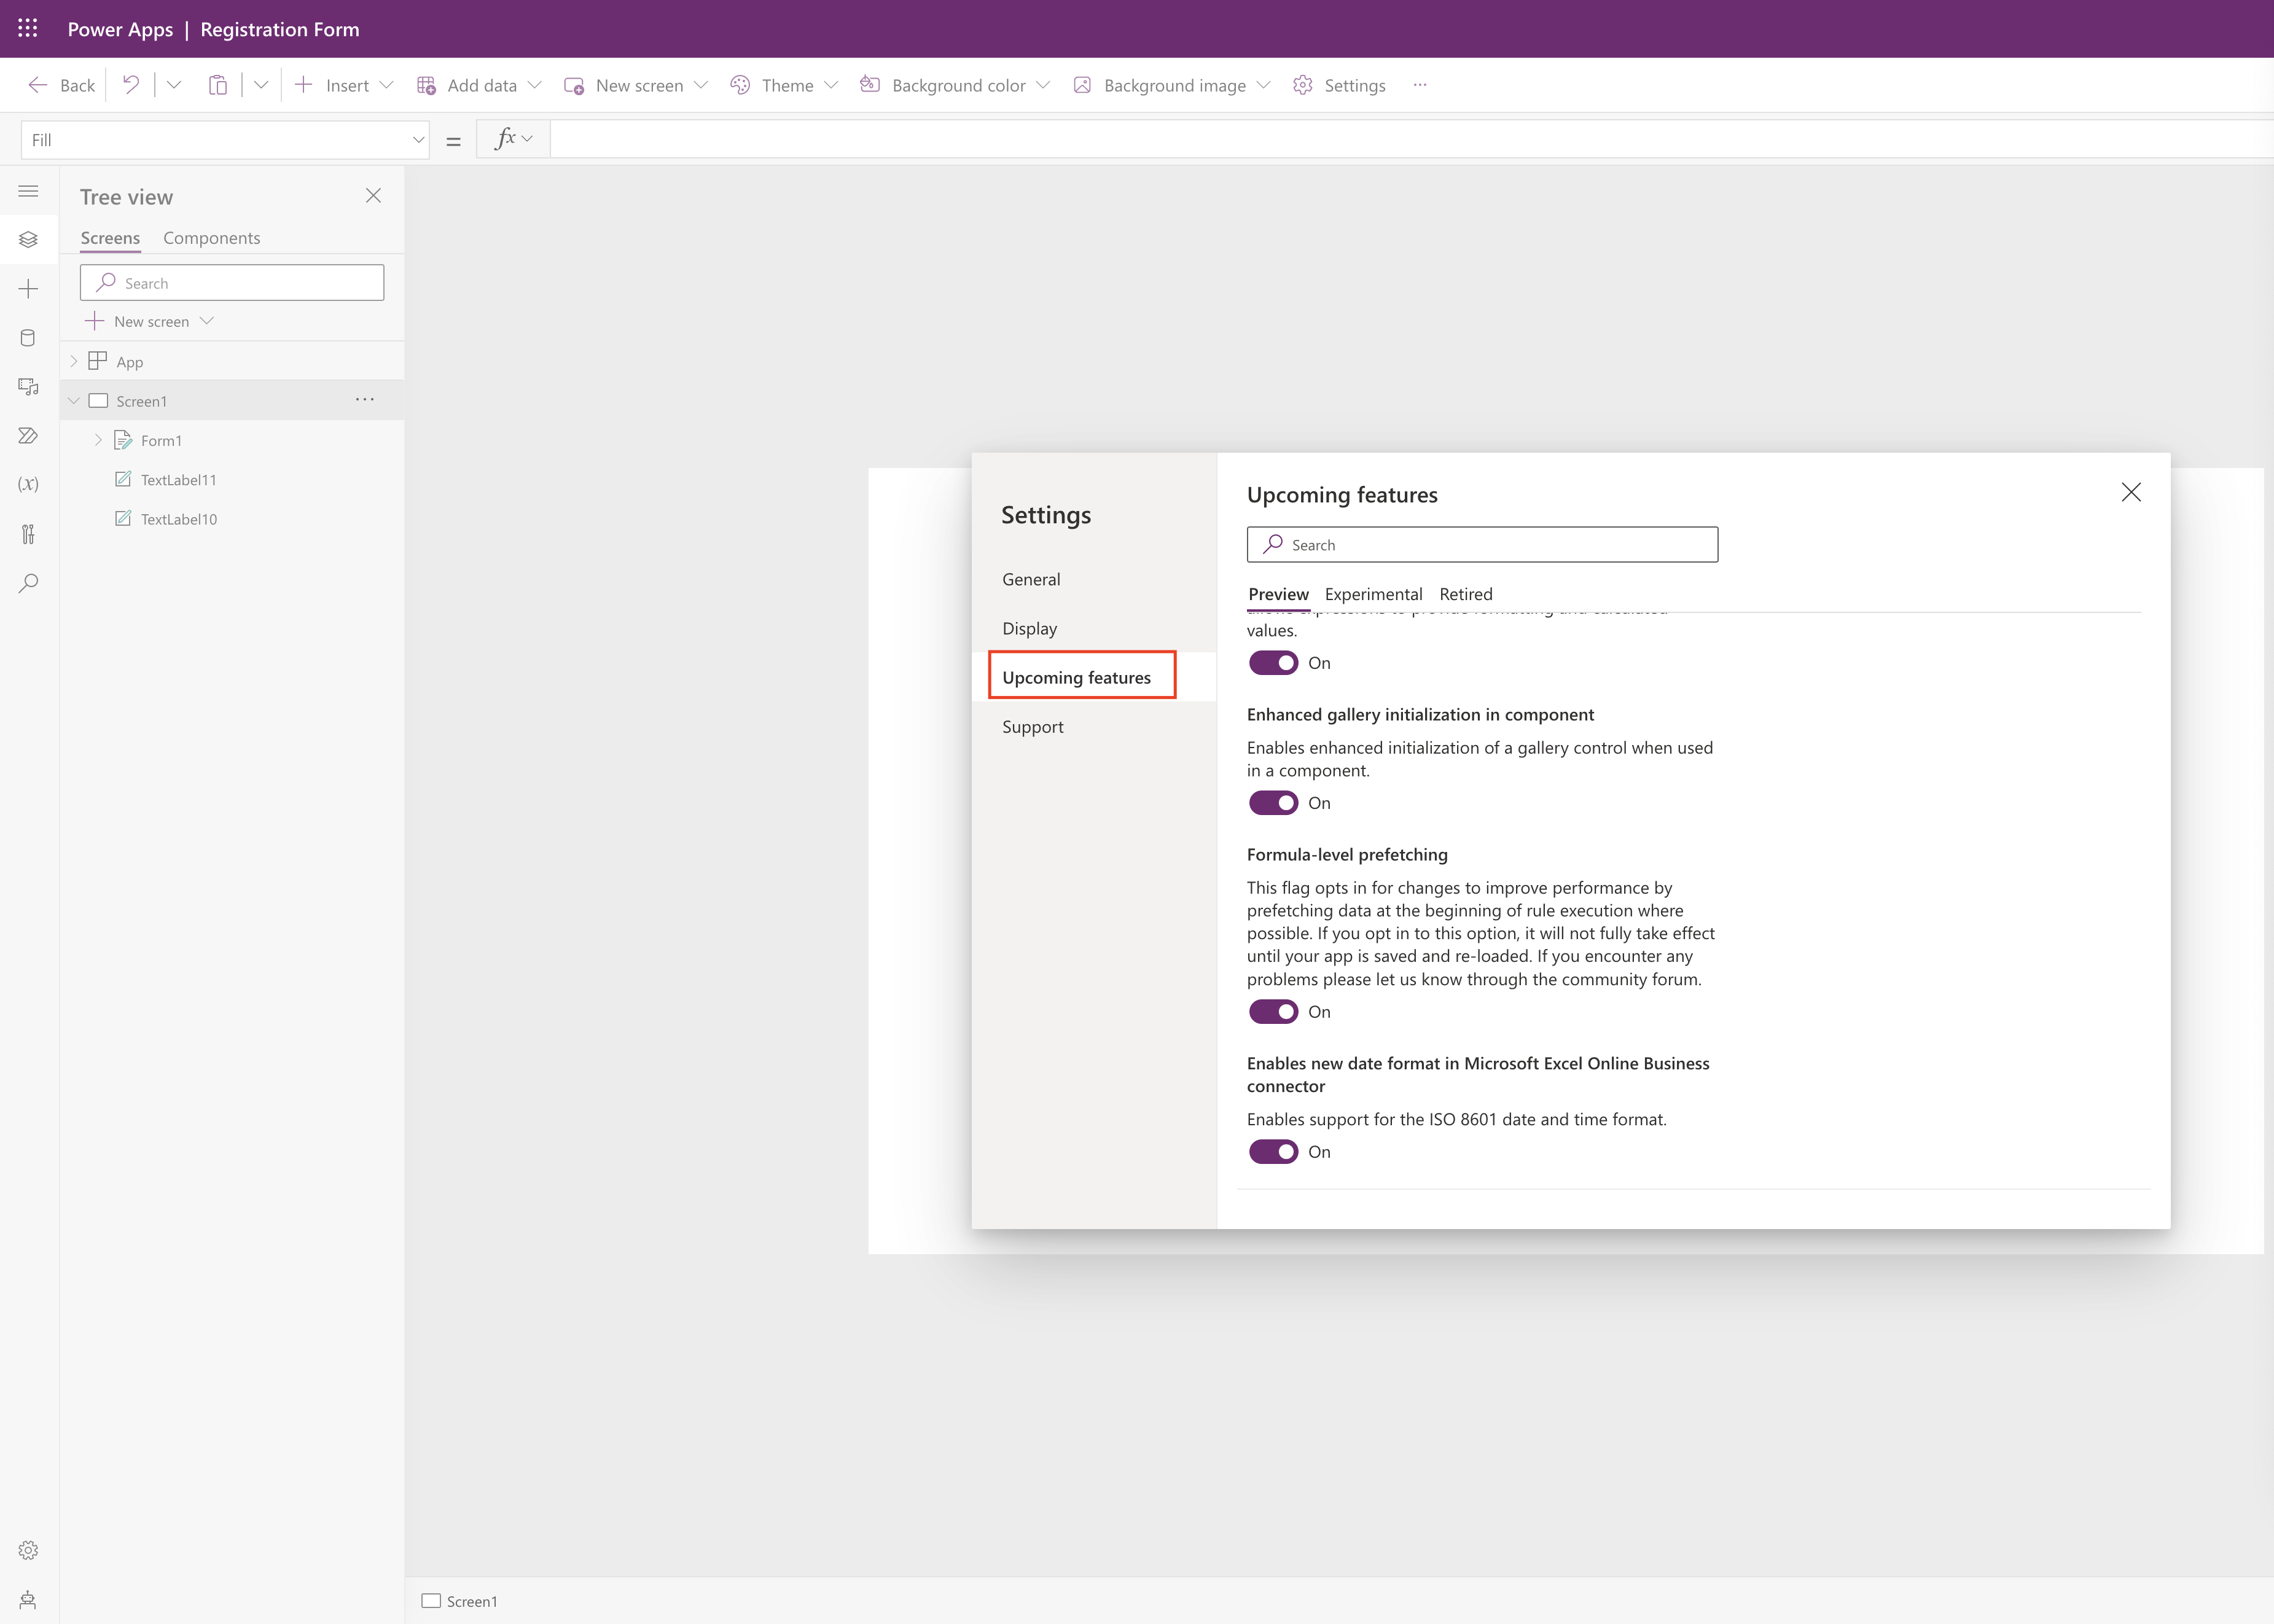
Upcoming features can be viewed with Preview, experimental and retired settings here, see below image.
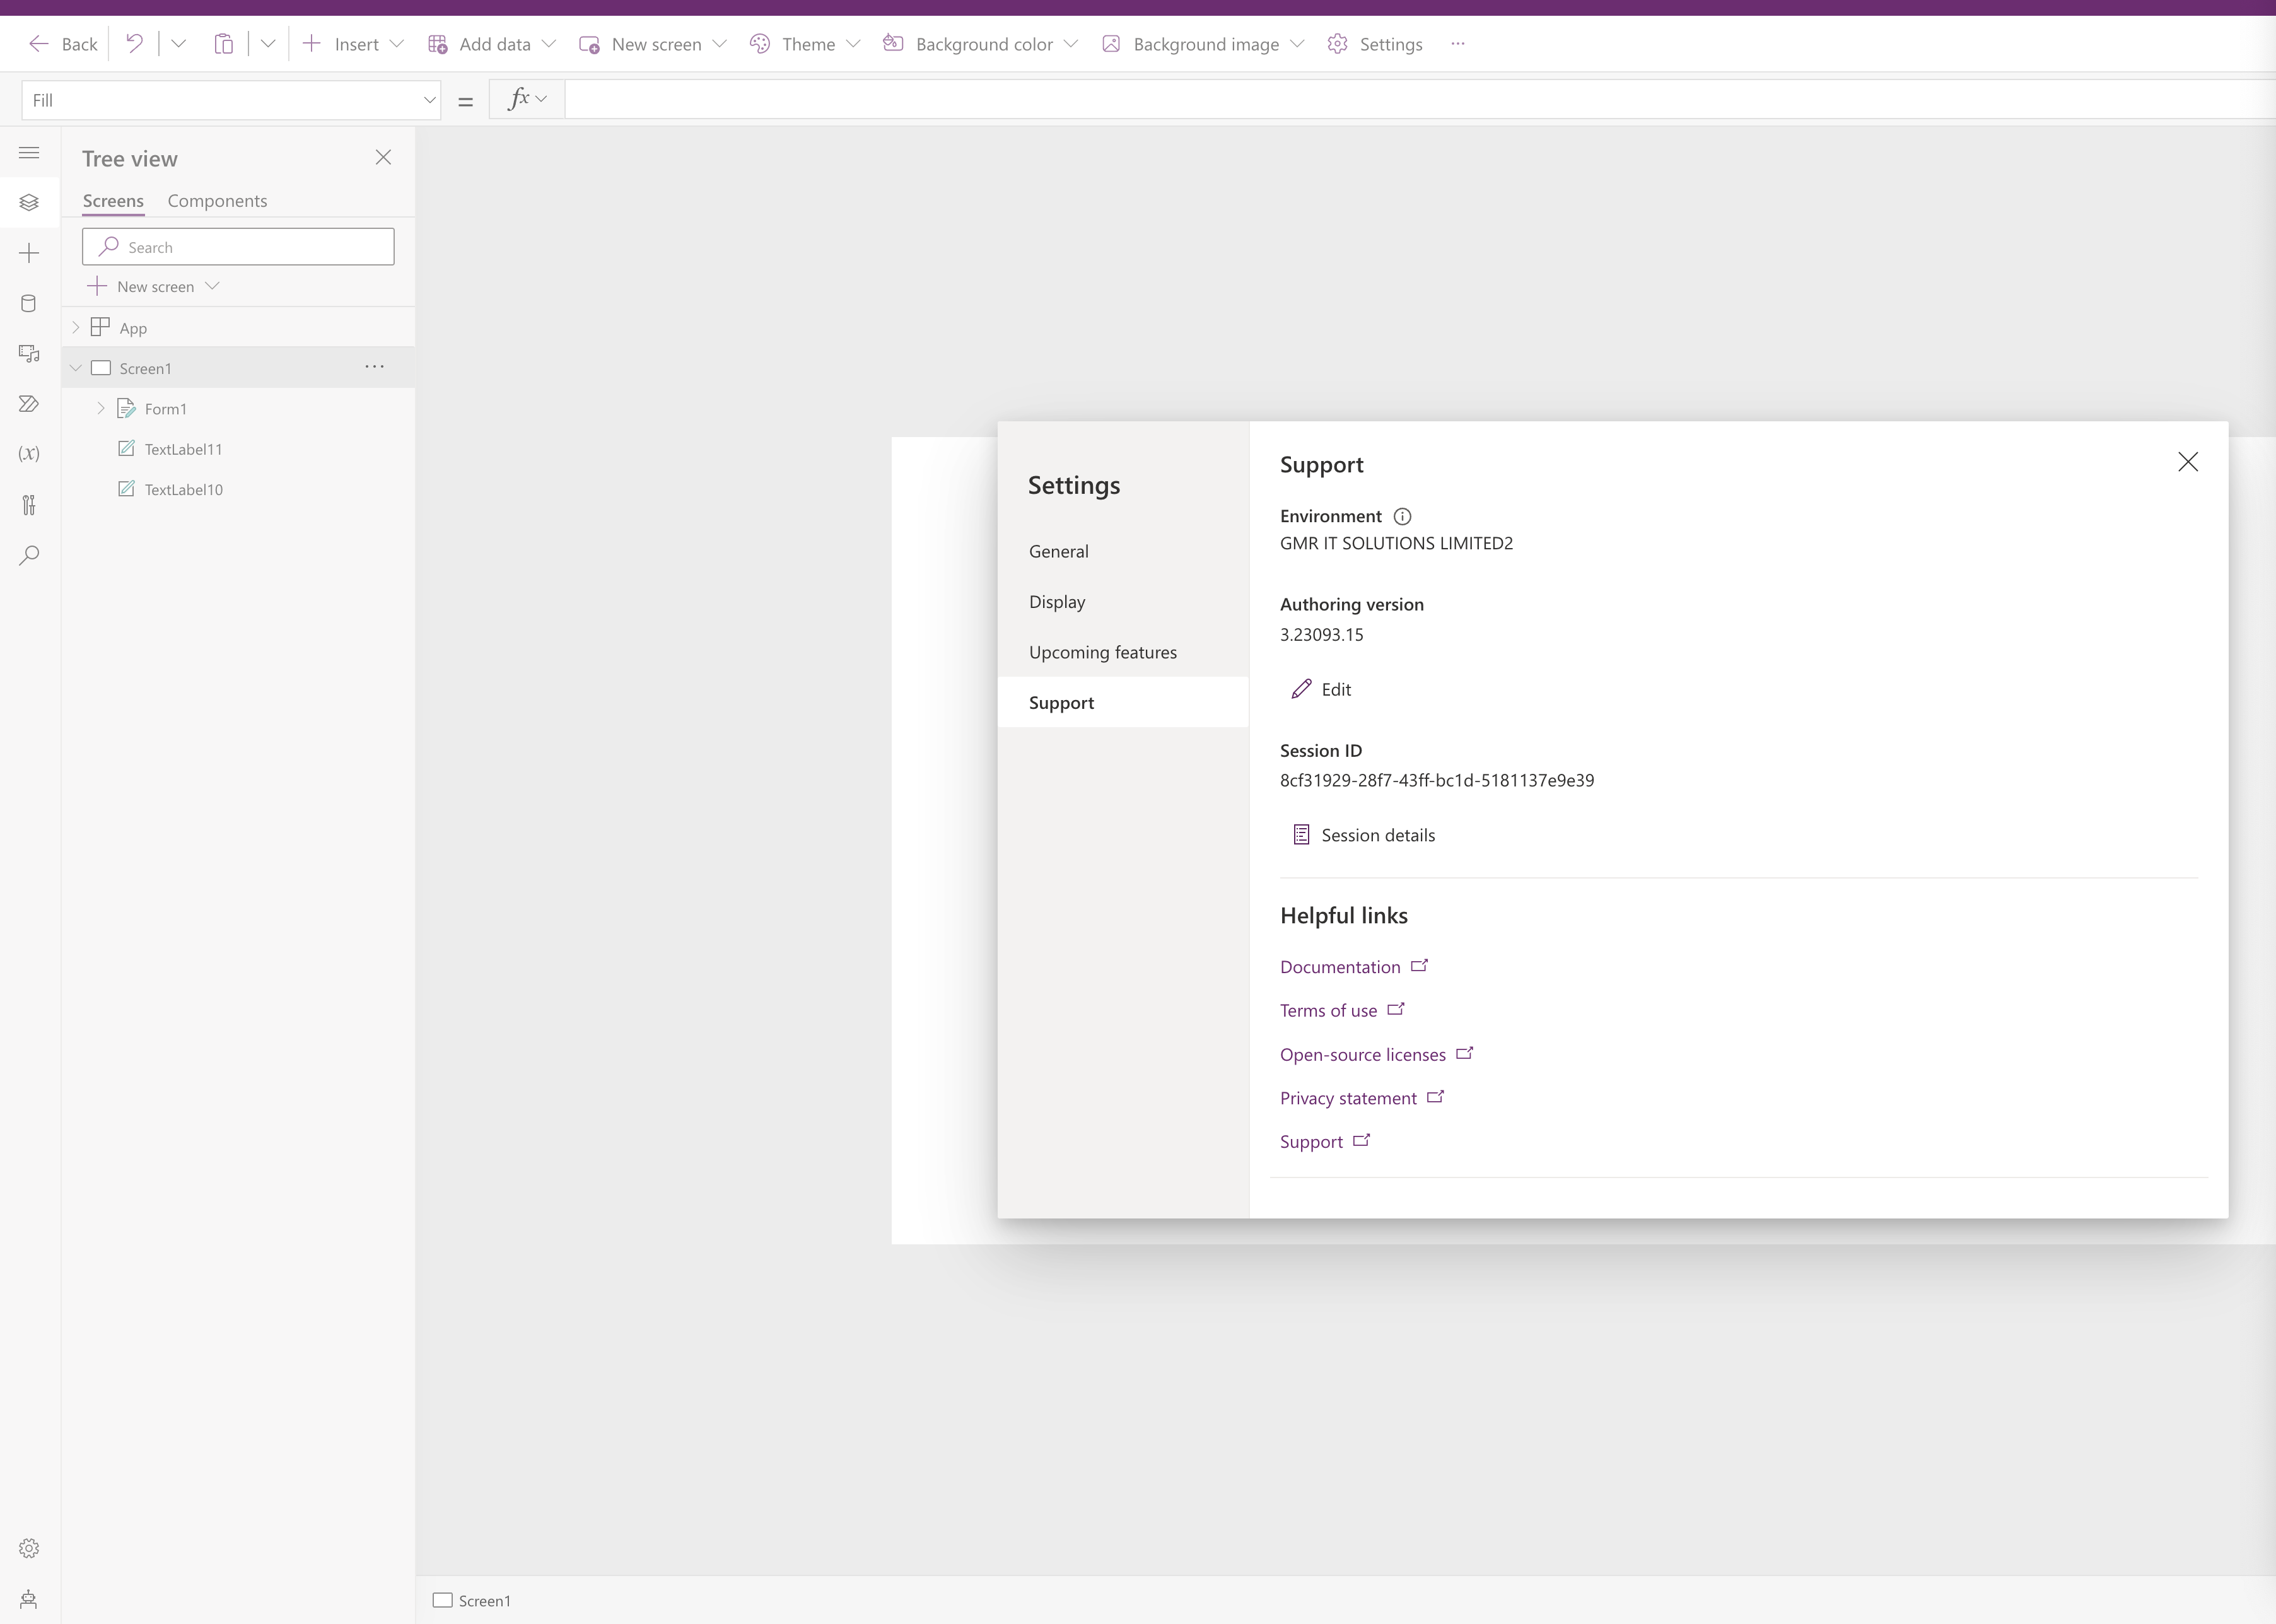
Support:

All about the Power App ennvironment, version, session id other useful links.
That’s it for today.

I hope this helps
Malla Reddy Gurram(@UK365GUY)
#365BlogPostsin365Days

Share this:

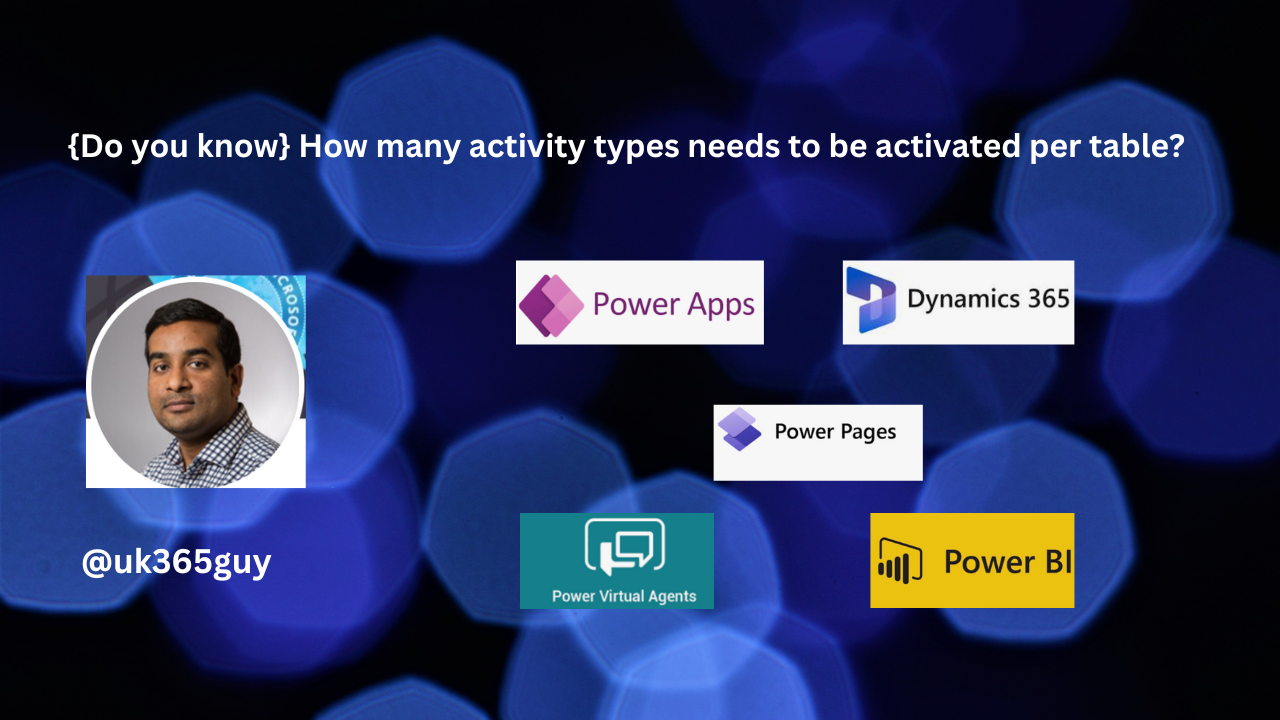
{Do you know} How many activity types needs to be activated per table?

Hello Everyone,

Today i am going to share how many activities types needs to be activated per table in Dynamics 365 CE Apps.

Let’s get’s started.

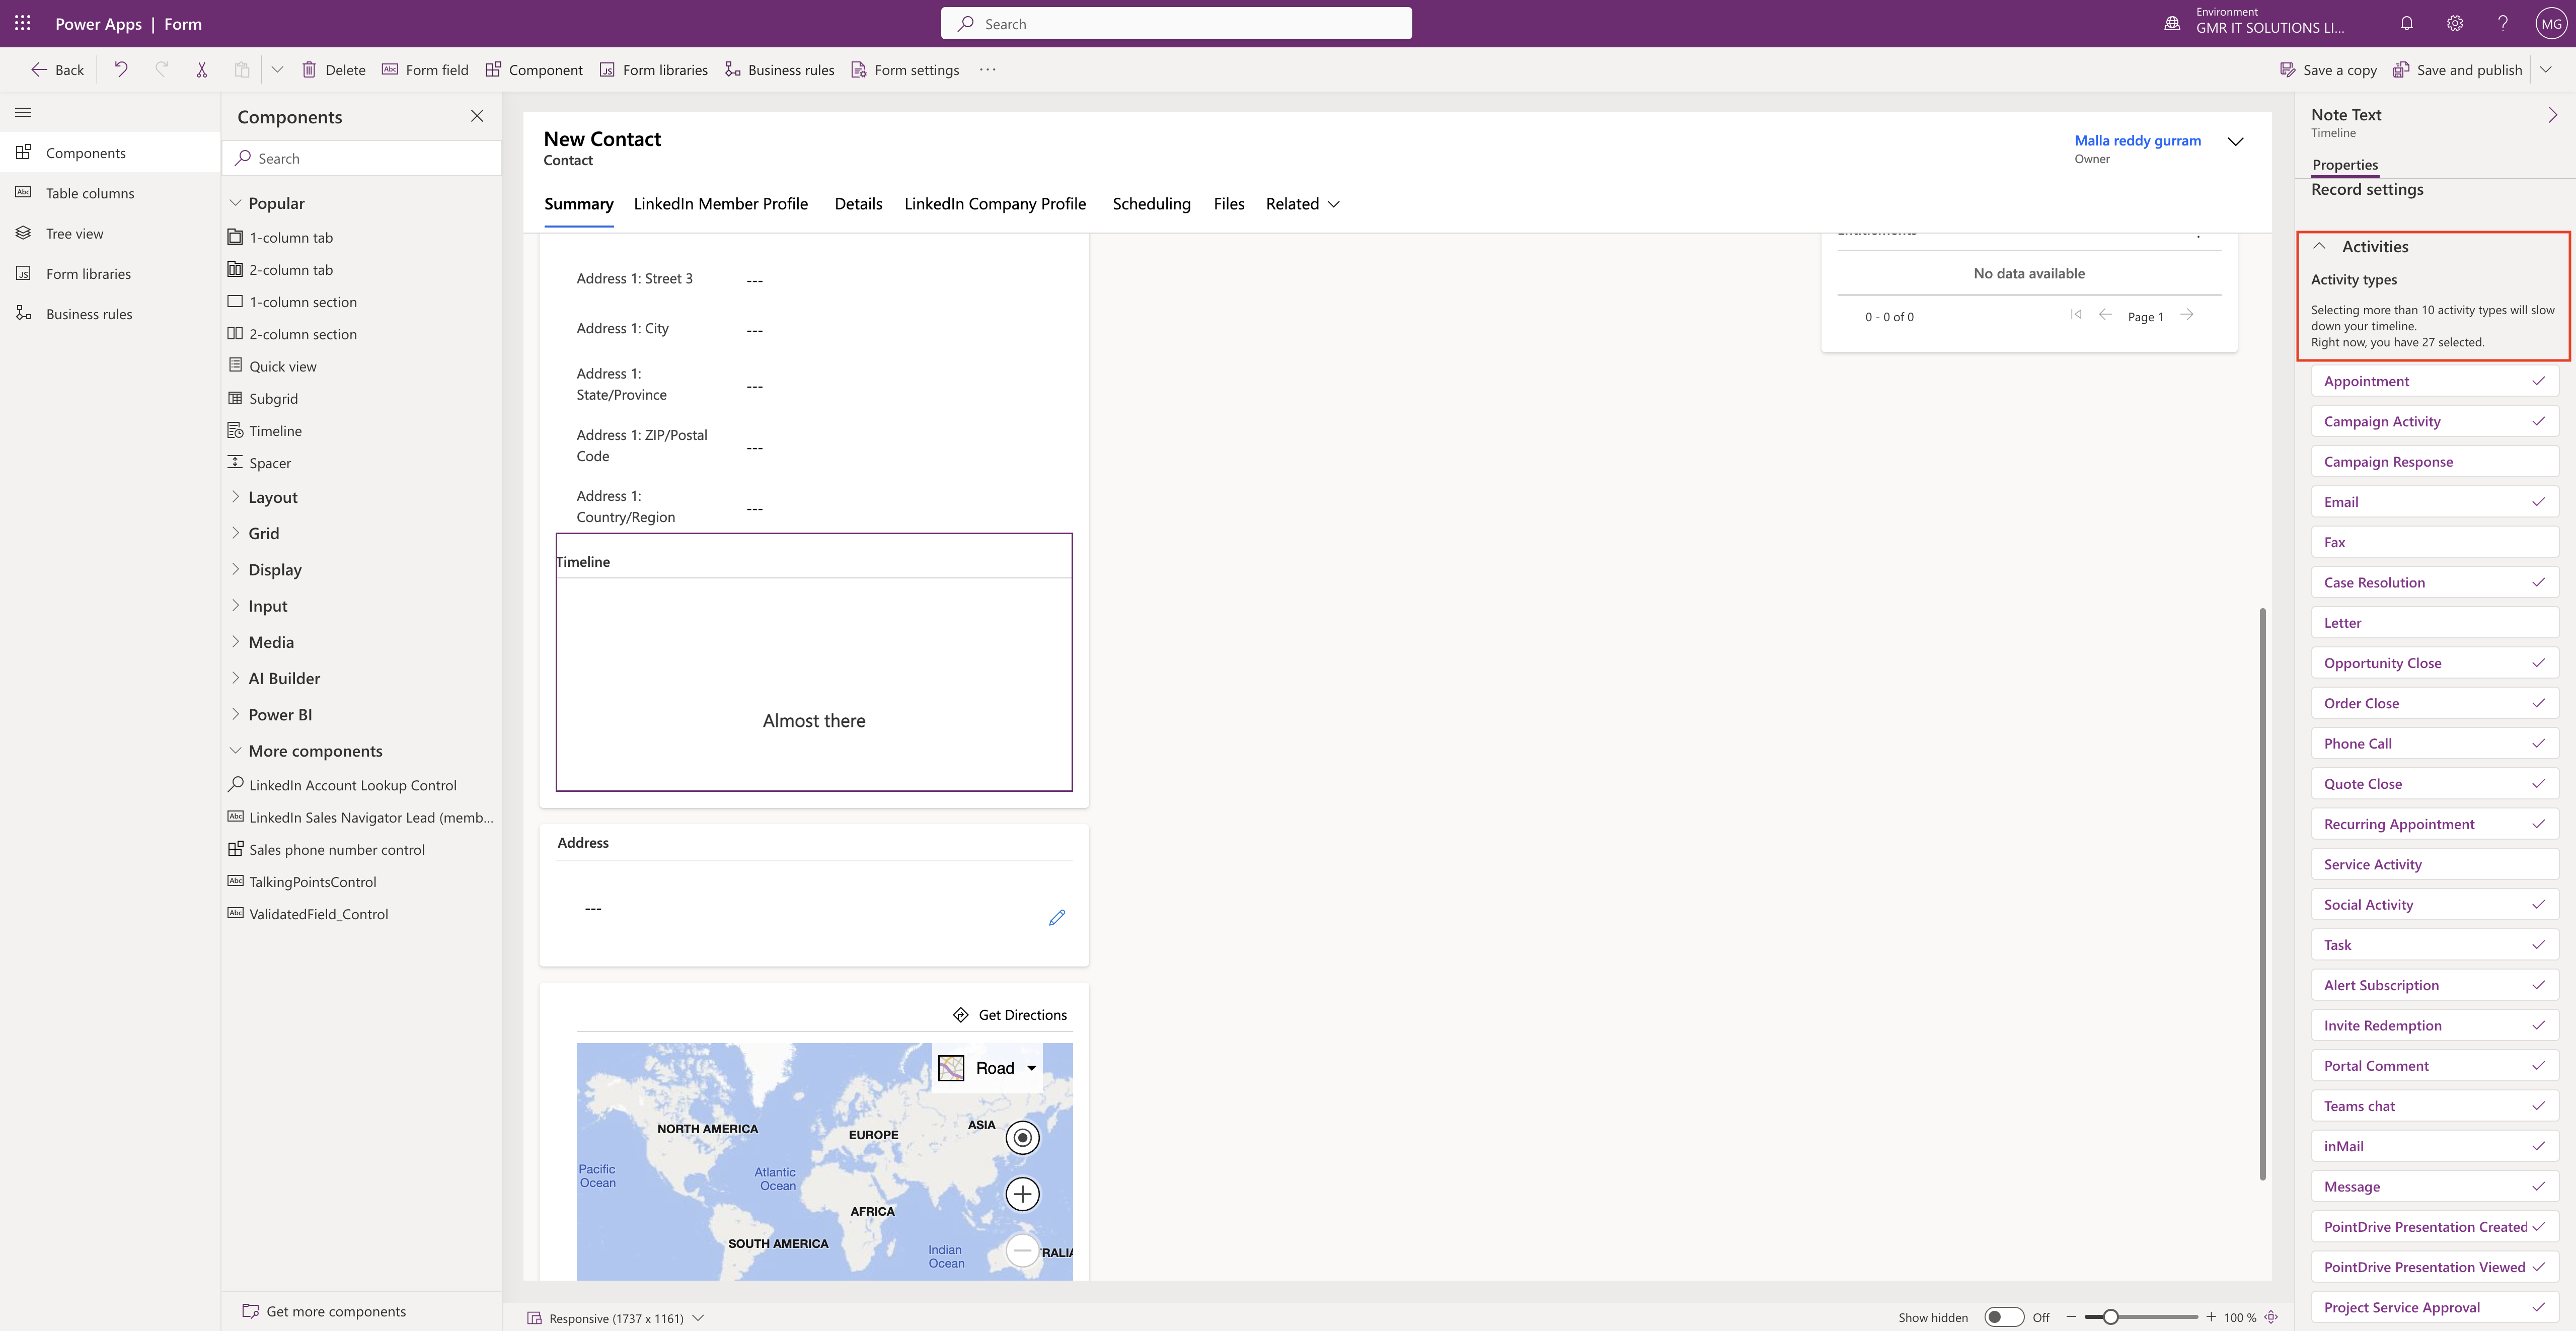
Have you ever faced delay in loading the timeline?

It is yes then according to Microsoft Selecting more than 10 activity types will slow down your timeline.

So always try to choose below 10 activity types per table.

That’s it for today.

I hope this helps
Malla Reddy Gurram(@UK365GUY)
#365BlogPostsin365Days
Share this:

{How to} set up Guided Channel Setup in Dynamics 365 Customer Service

Hello Everyone,

Today i am going to show how to set up Guided Channel Setup in Dynamics 365 Customer Service.

Let’s get’s started.

Suppose you want to configure how the customers can contact your business either Email or Case in Dynamics 365 Customer Service.

How do you do that?

Login into Customer Service Hub an choose the Customer Service Admin Center.

Then click on the Guided channel Setup.

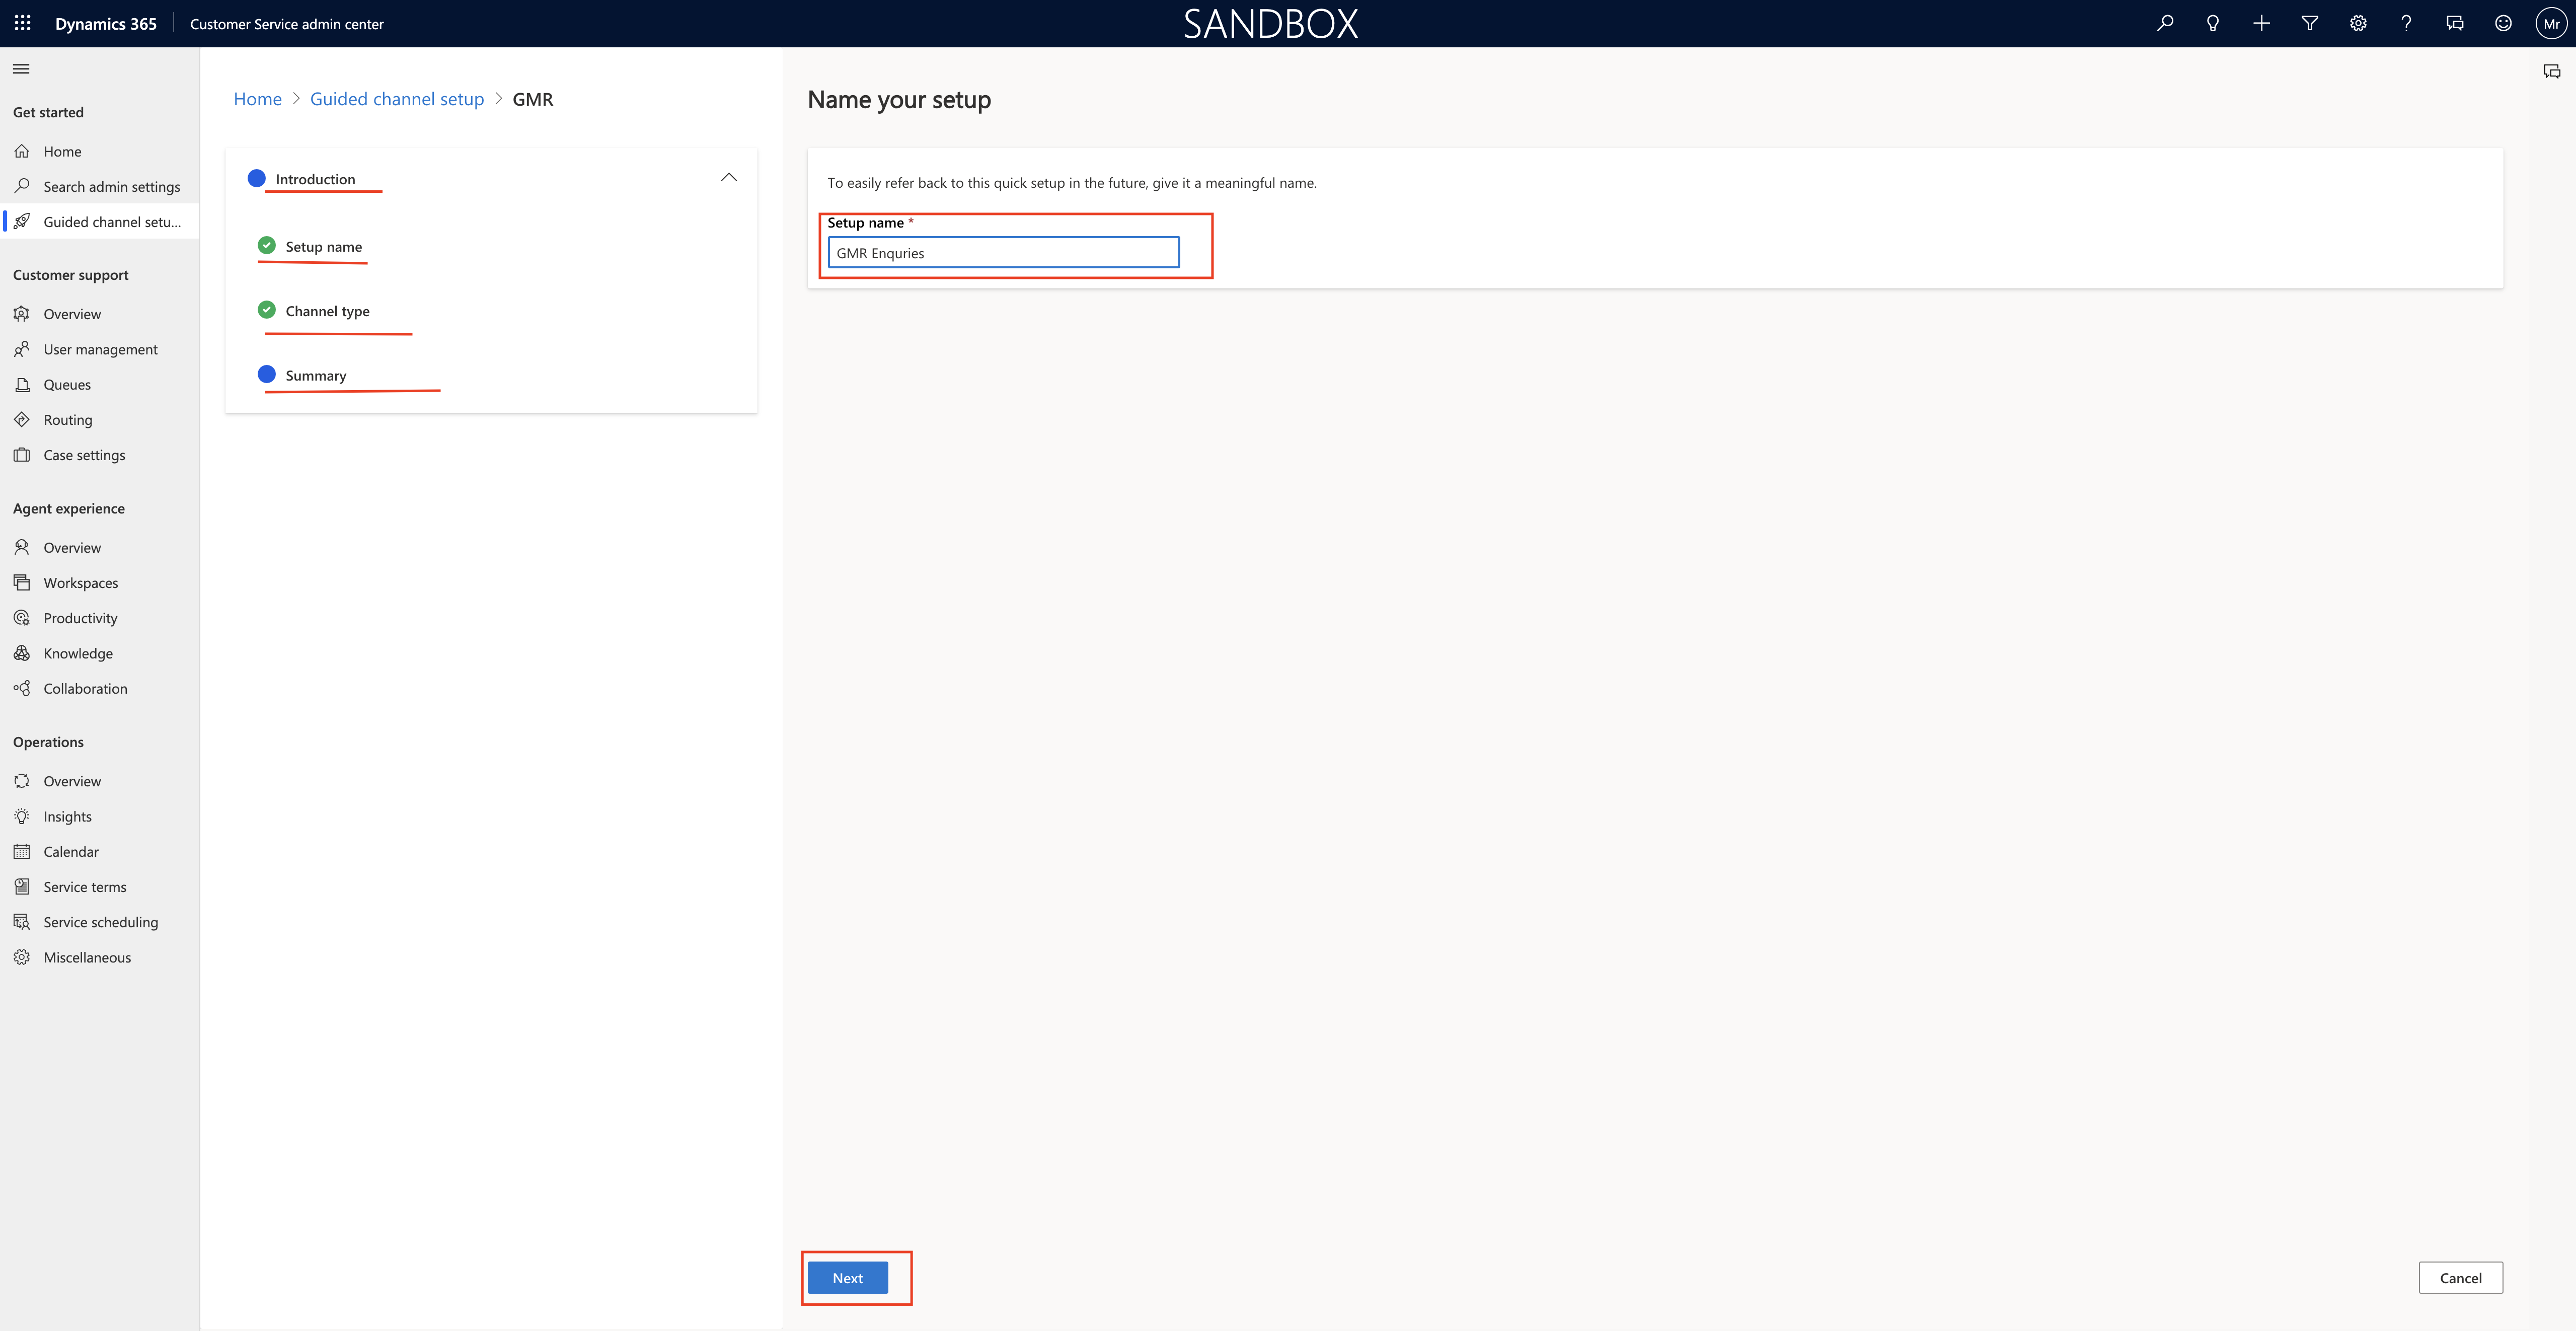
There are 4 steps which needs to be fulfilled in order to complete the set up.

1. Introduction
2. Setup name
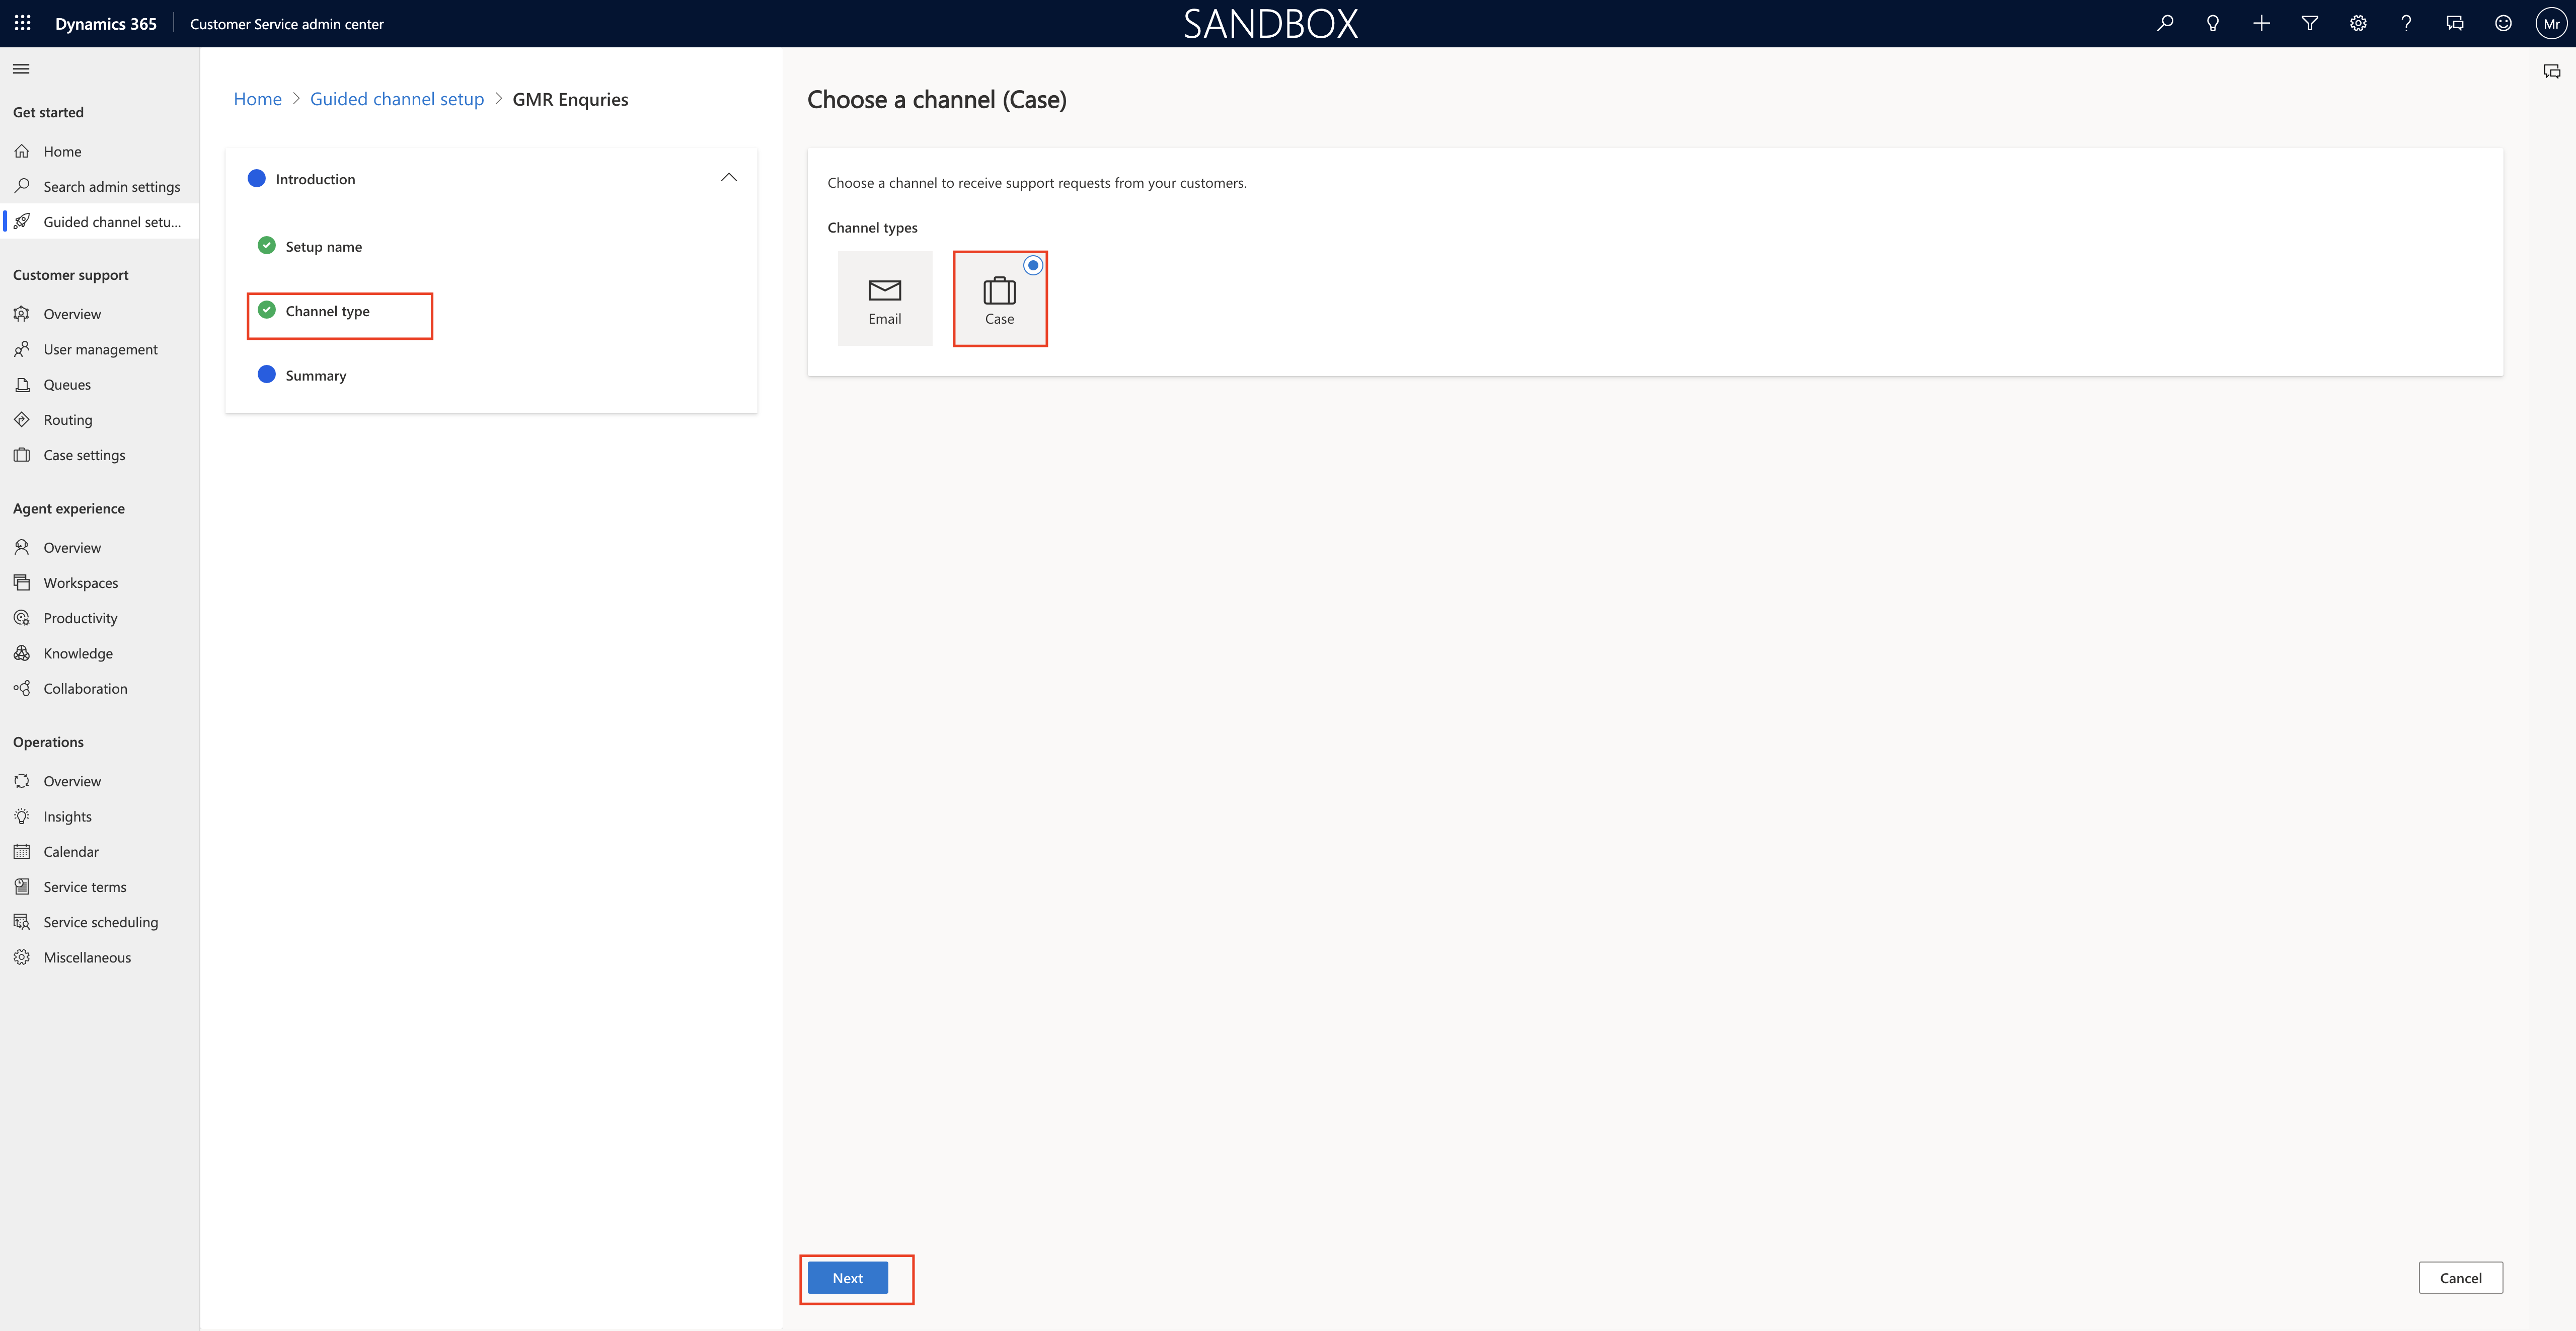
3.Channel type
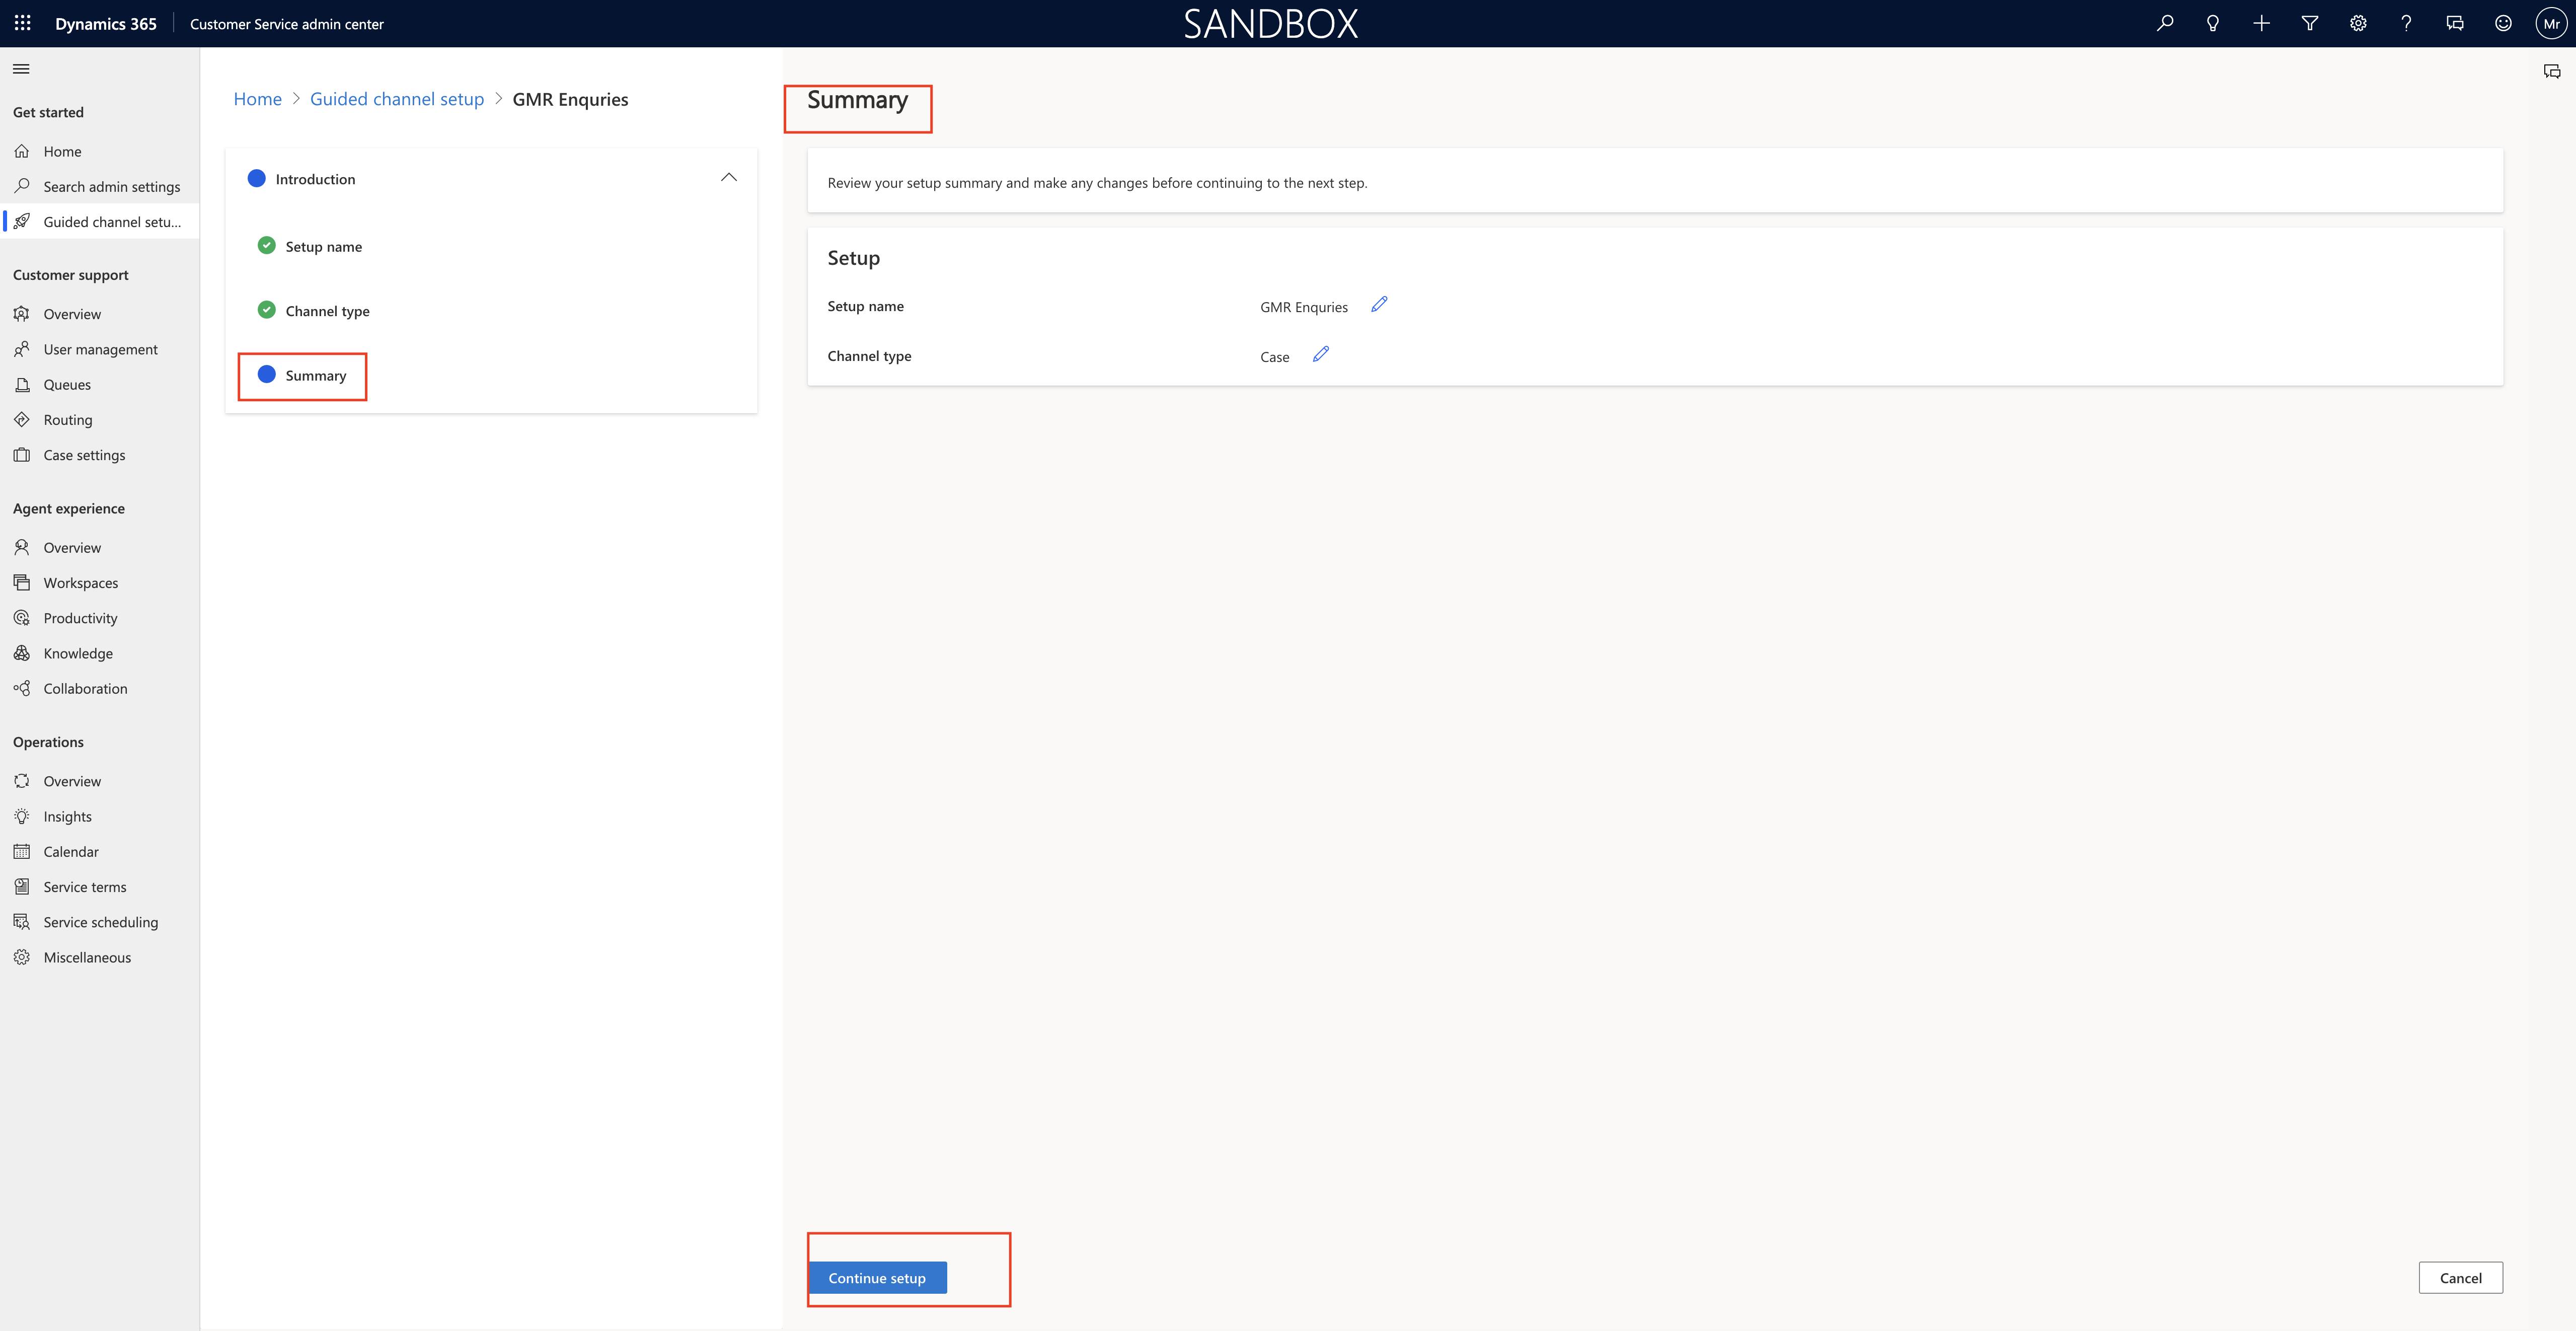
4. Summary

Setup name: Give it a name for the Channel and click next.

Channel Type: Here you can select either Email or Case and click next.

Summary: you can see the setup name and channel type and click on Continue Setup.

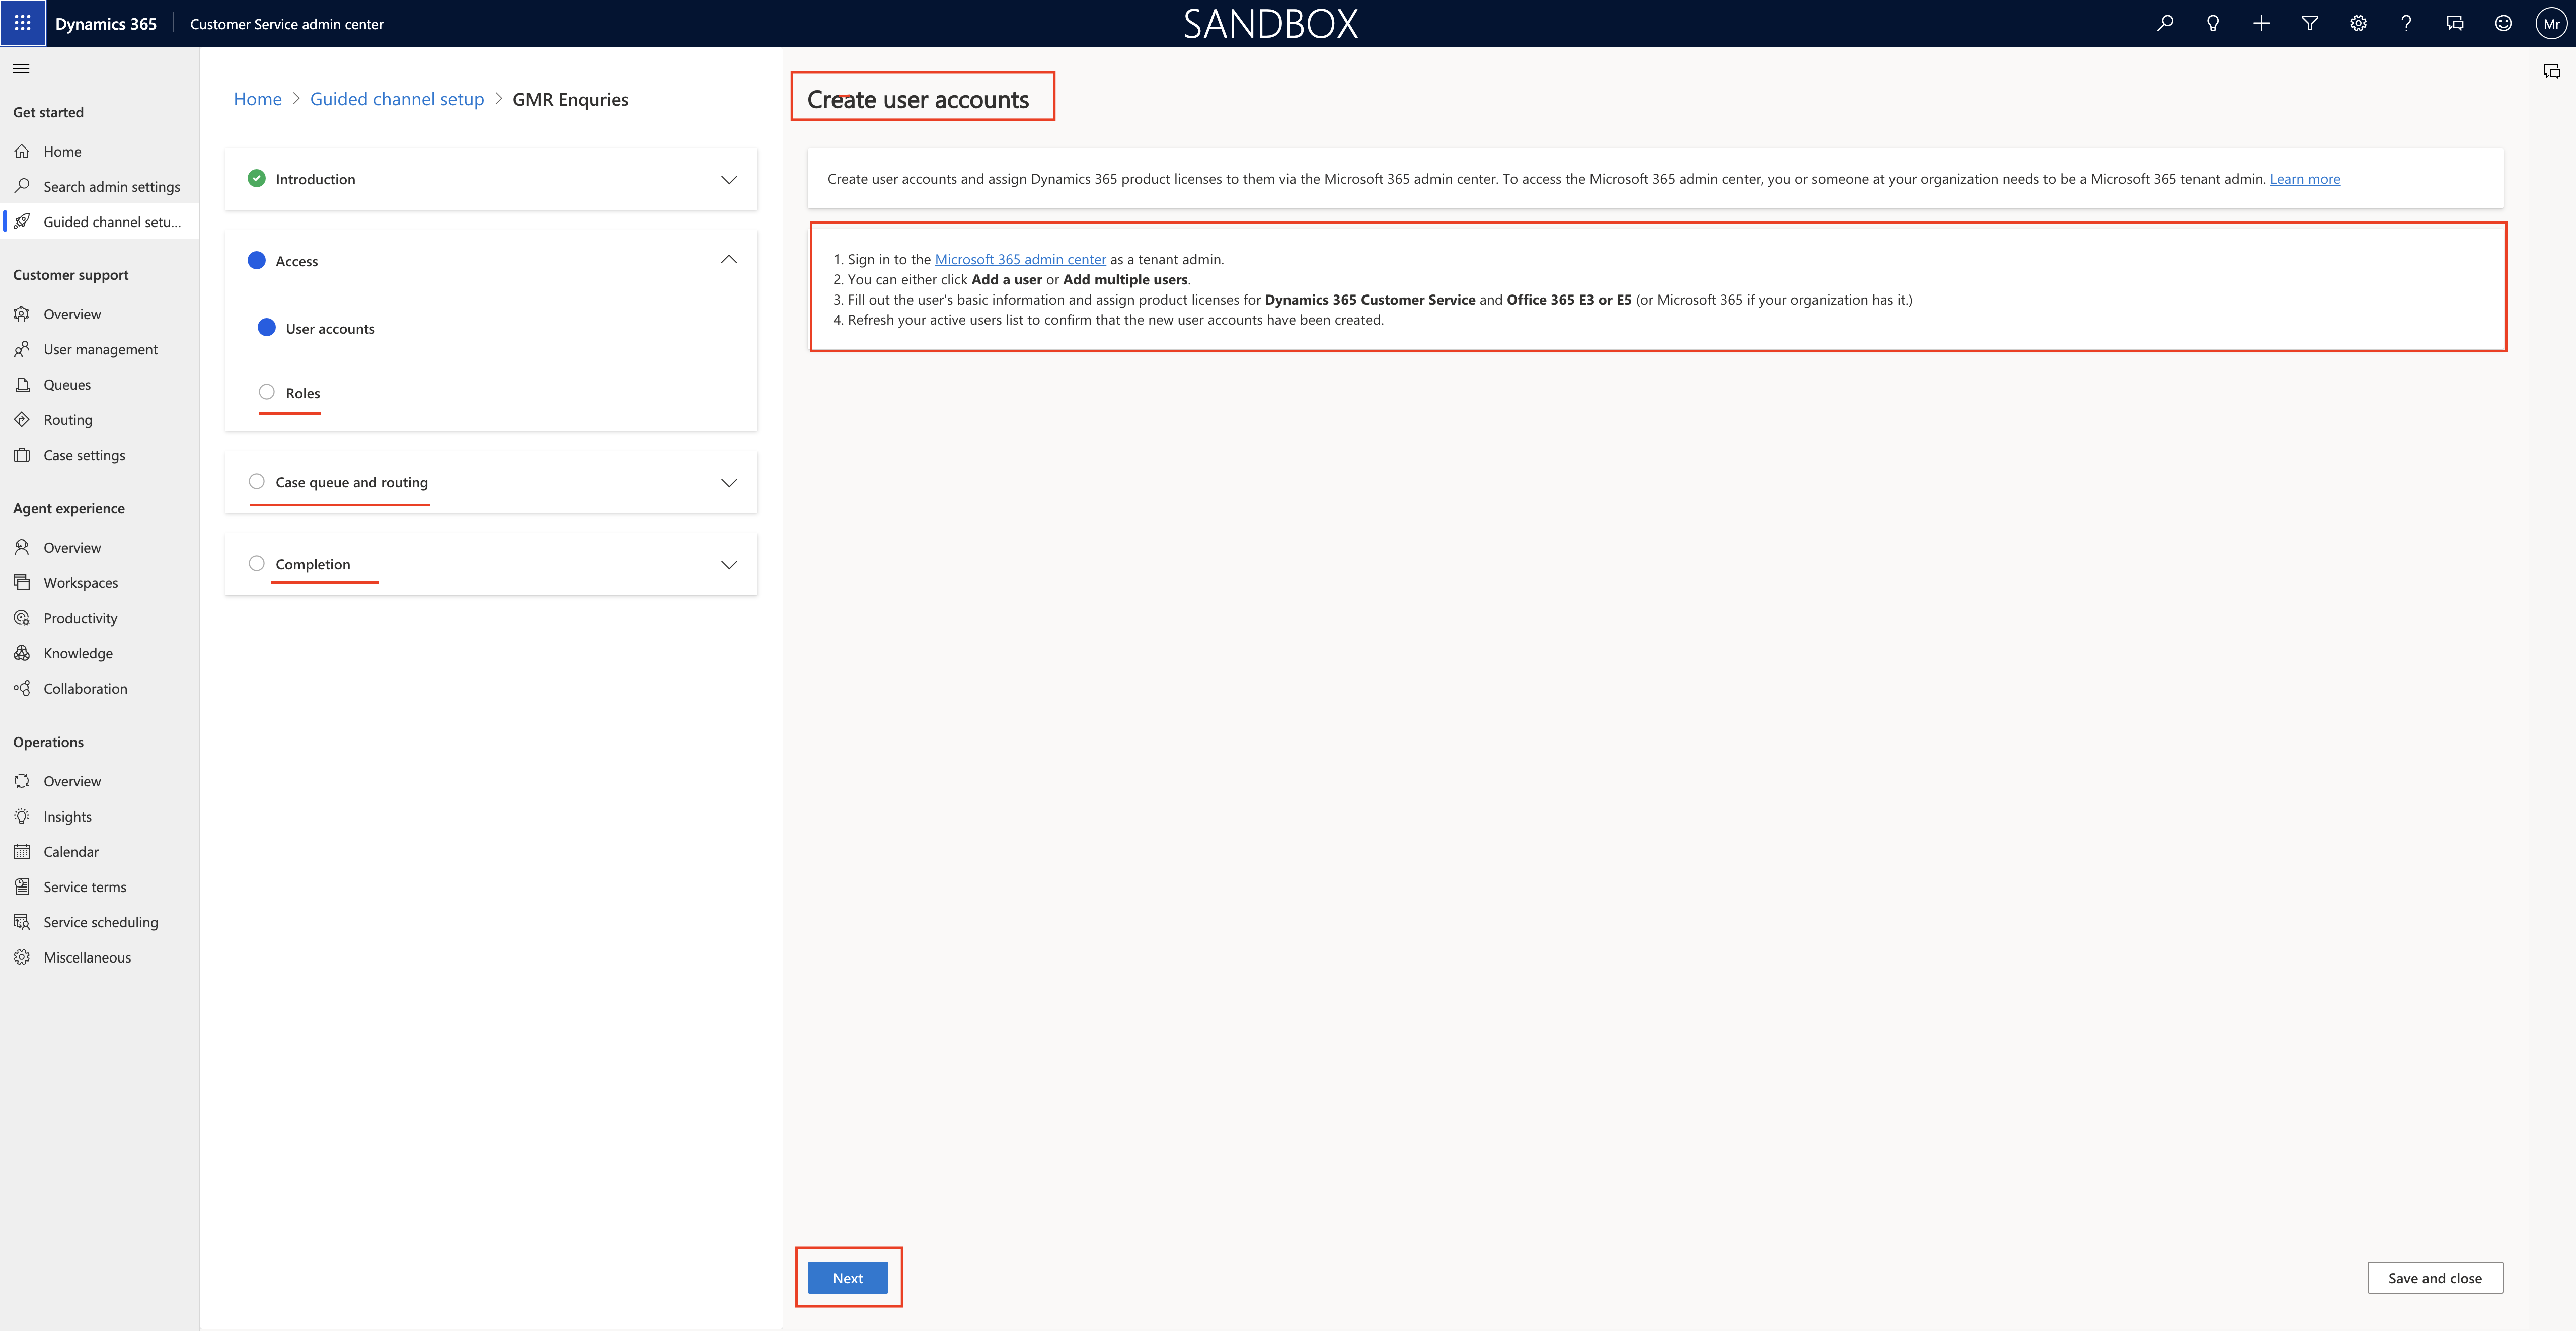
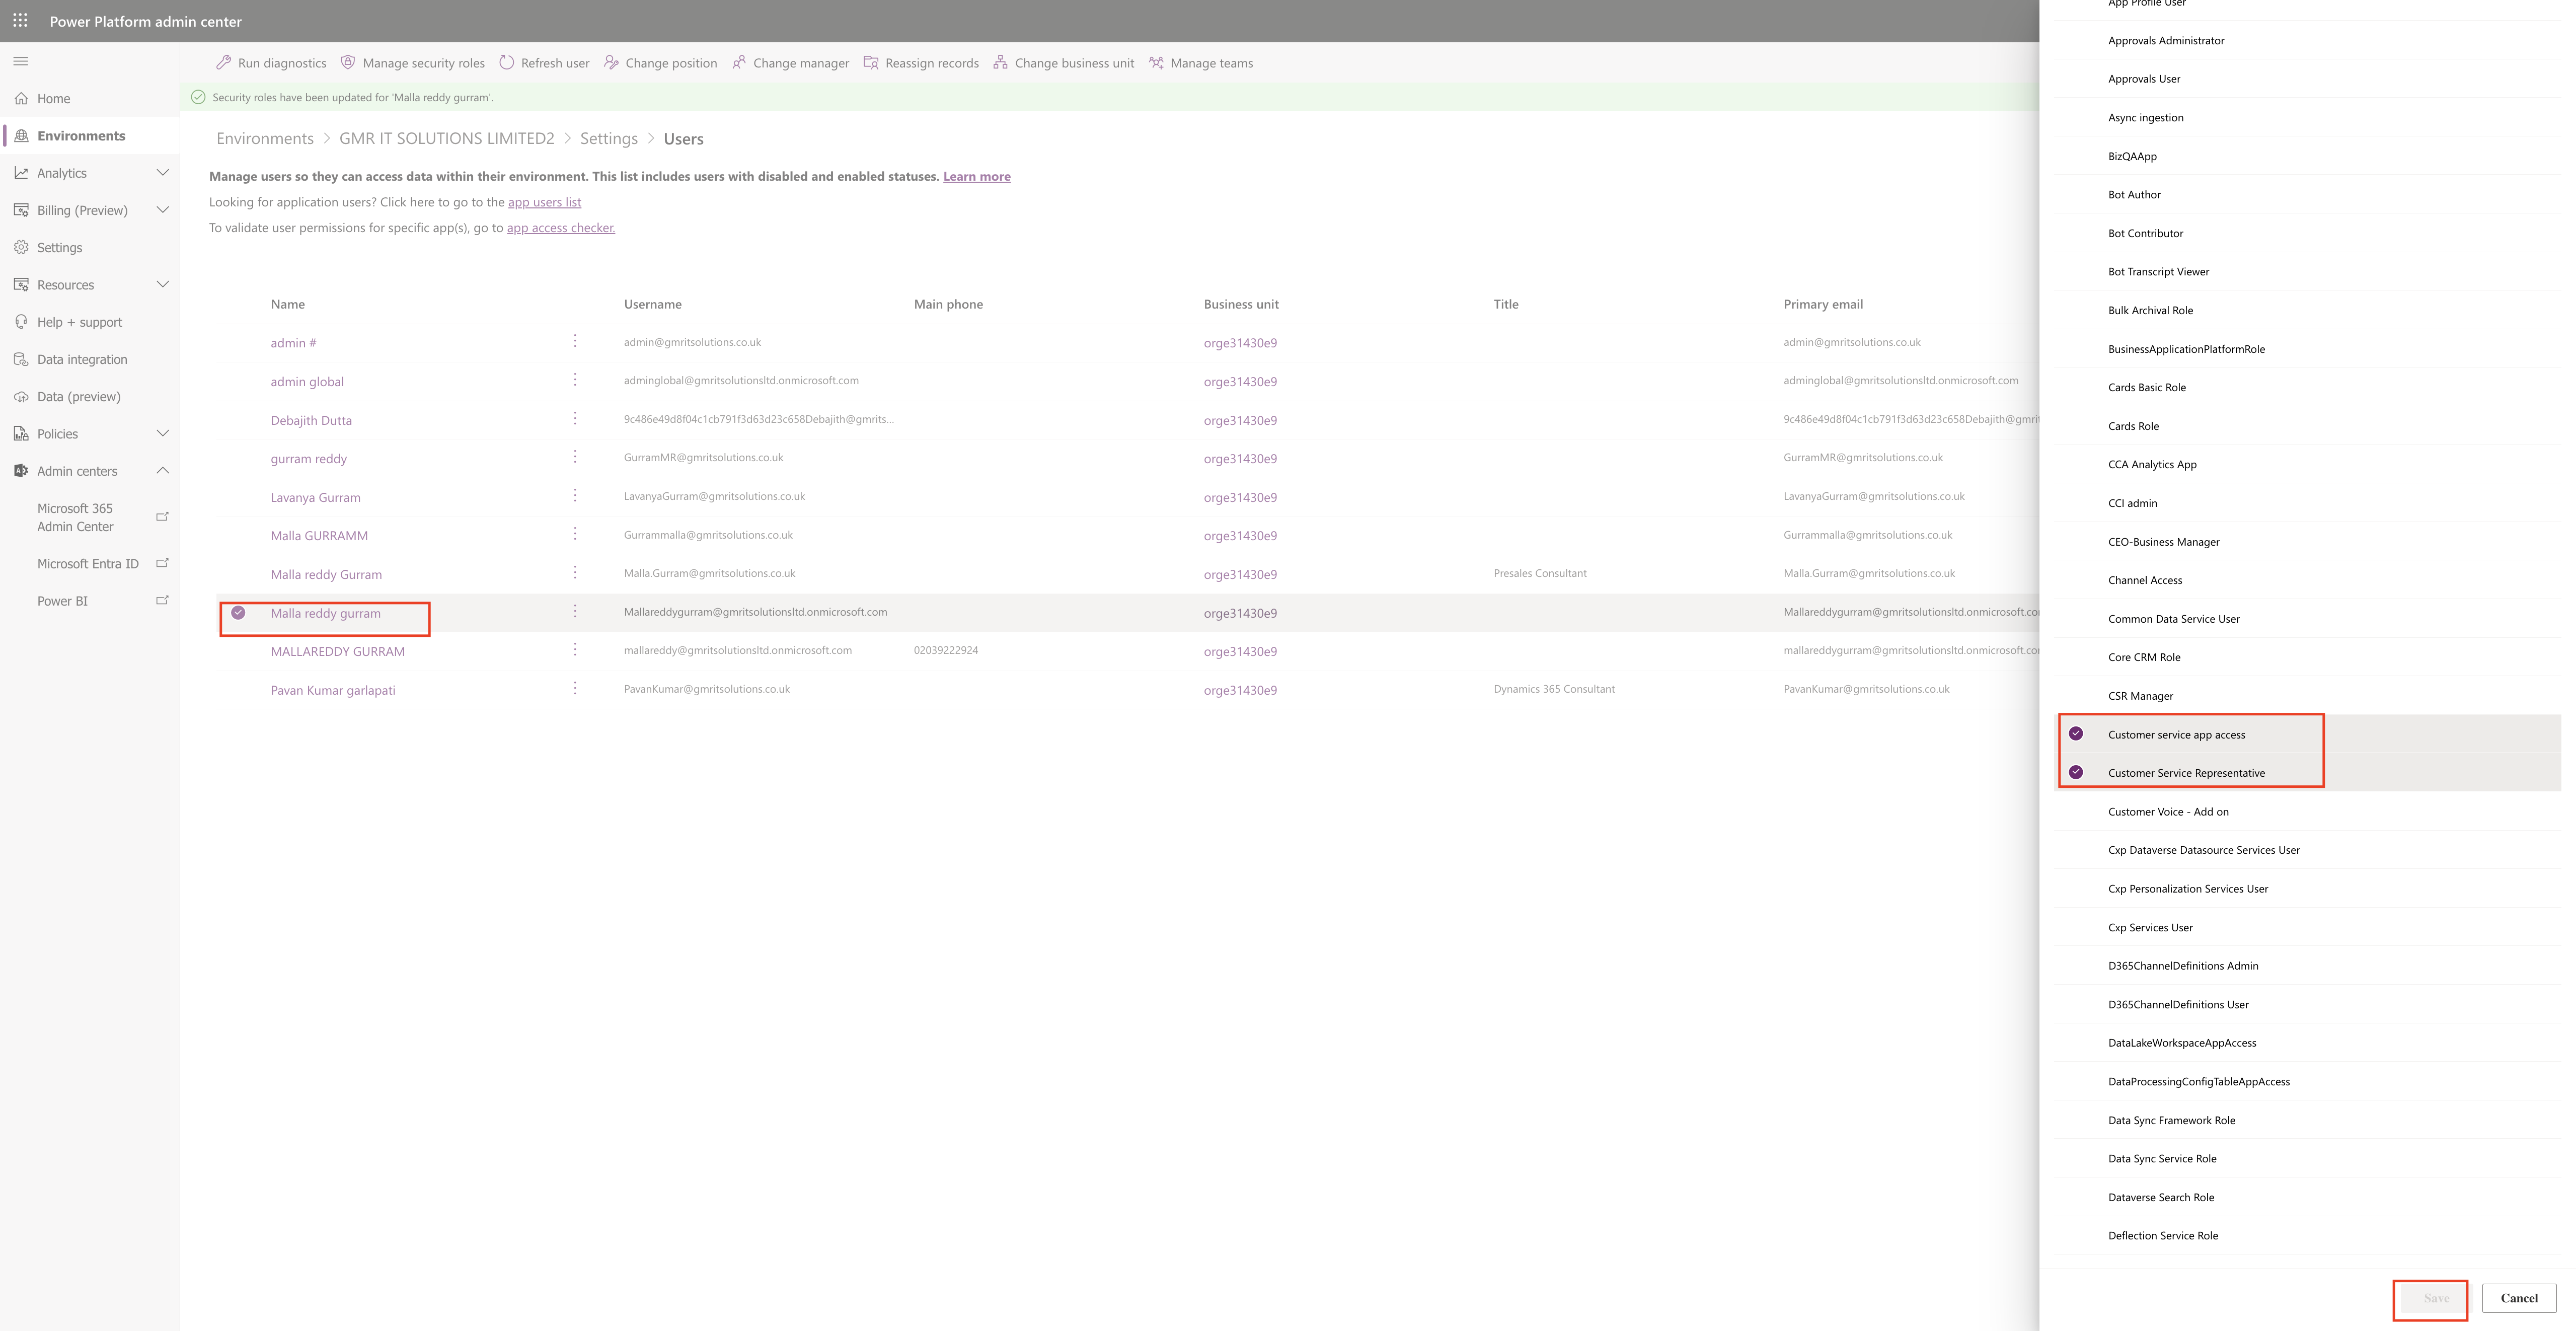
Then it will prompt with Create User Accounts and assign Dynamics 365 Product licenses to them via the Microsoft 365 Admin Center. To access the Microsoft 365 Admin Center, you or someone at your organizations needs to be a Microsoft 365 tenant admin.

Once you fulfil all the configuration steps, click NEXT.

Next steps to complete are:

1. Roles
2, Case Queue and routing
3. Completion.

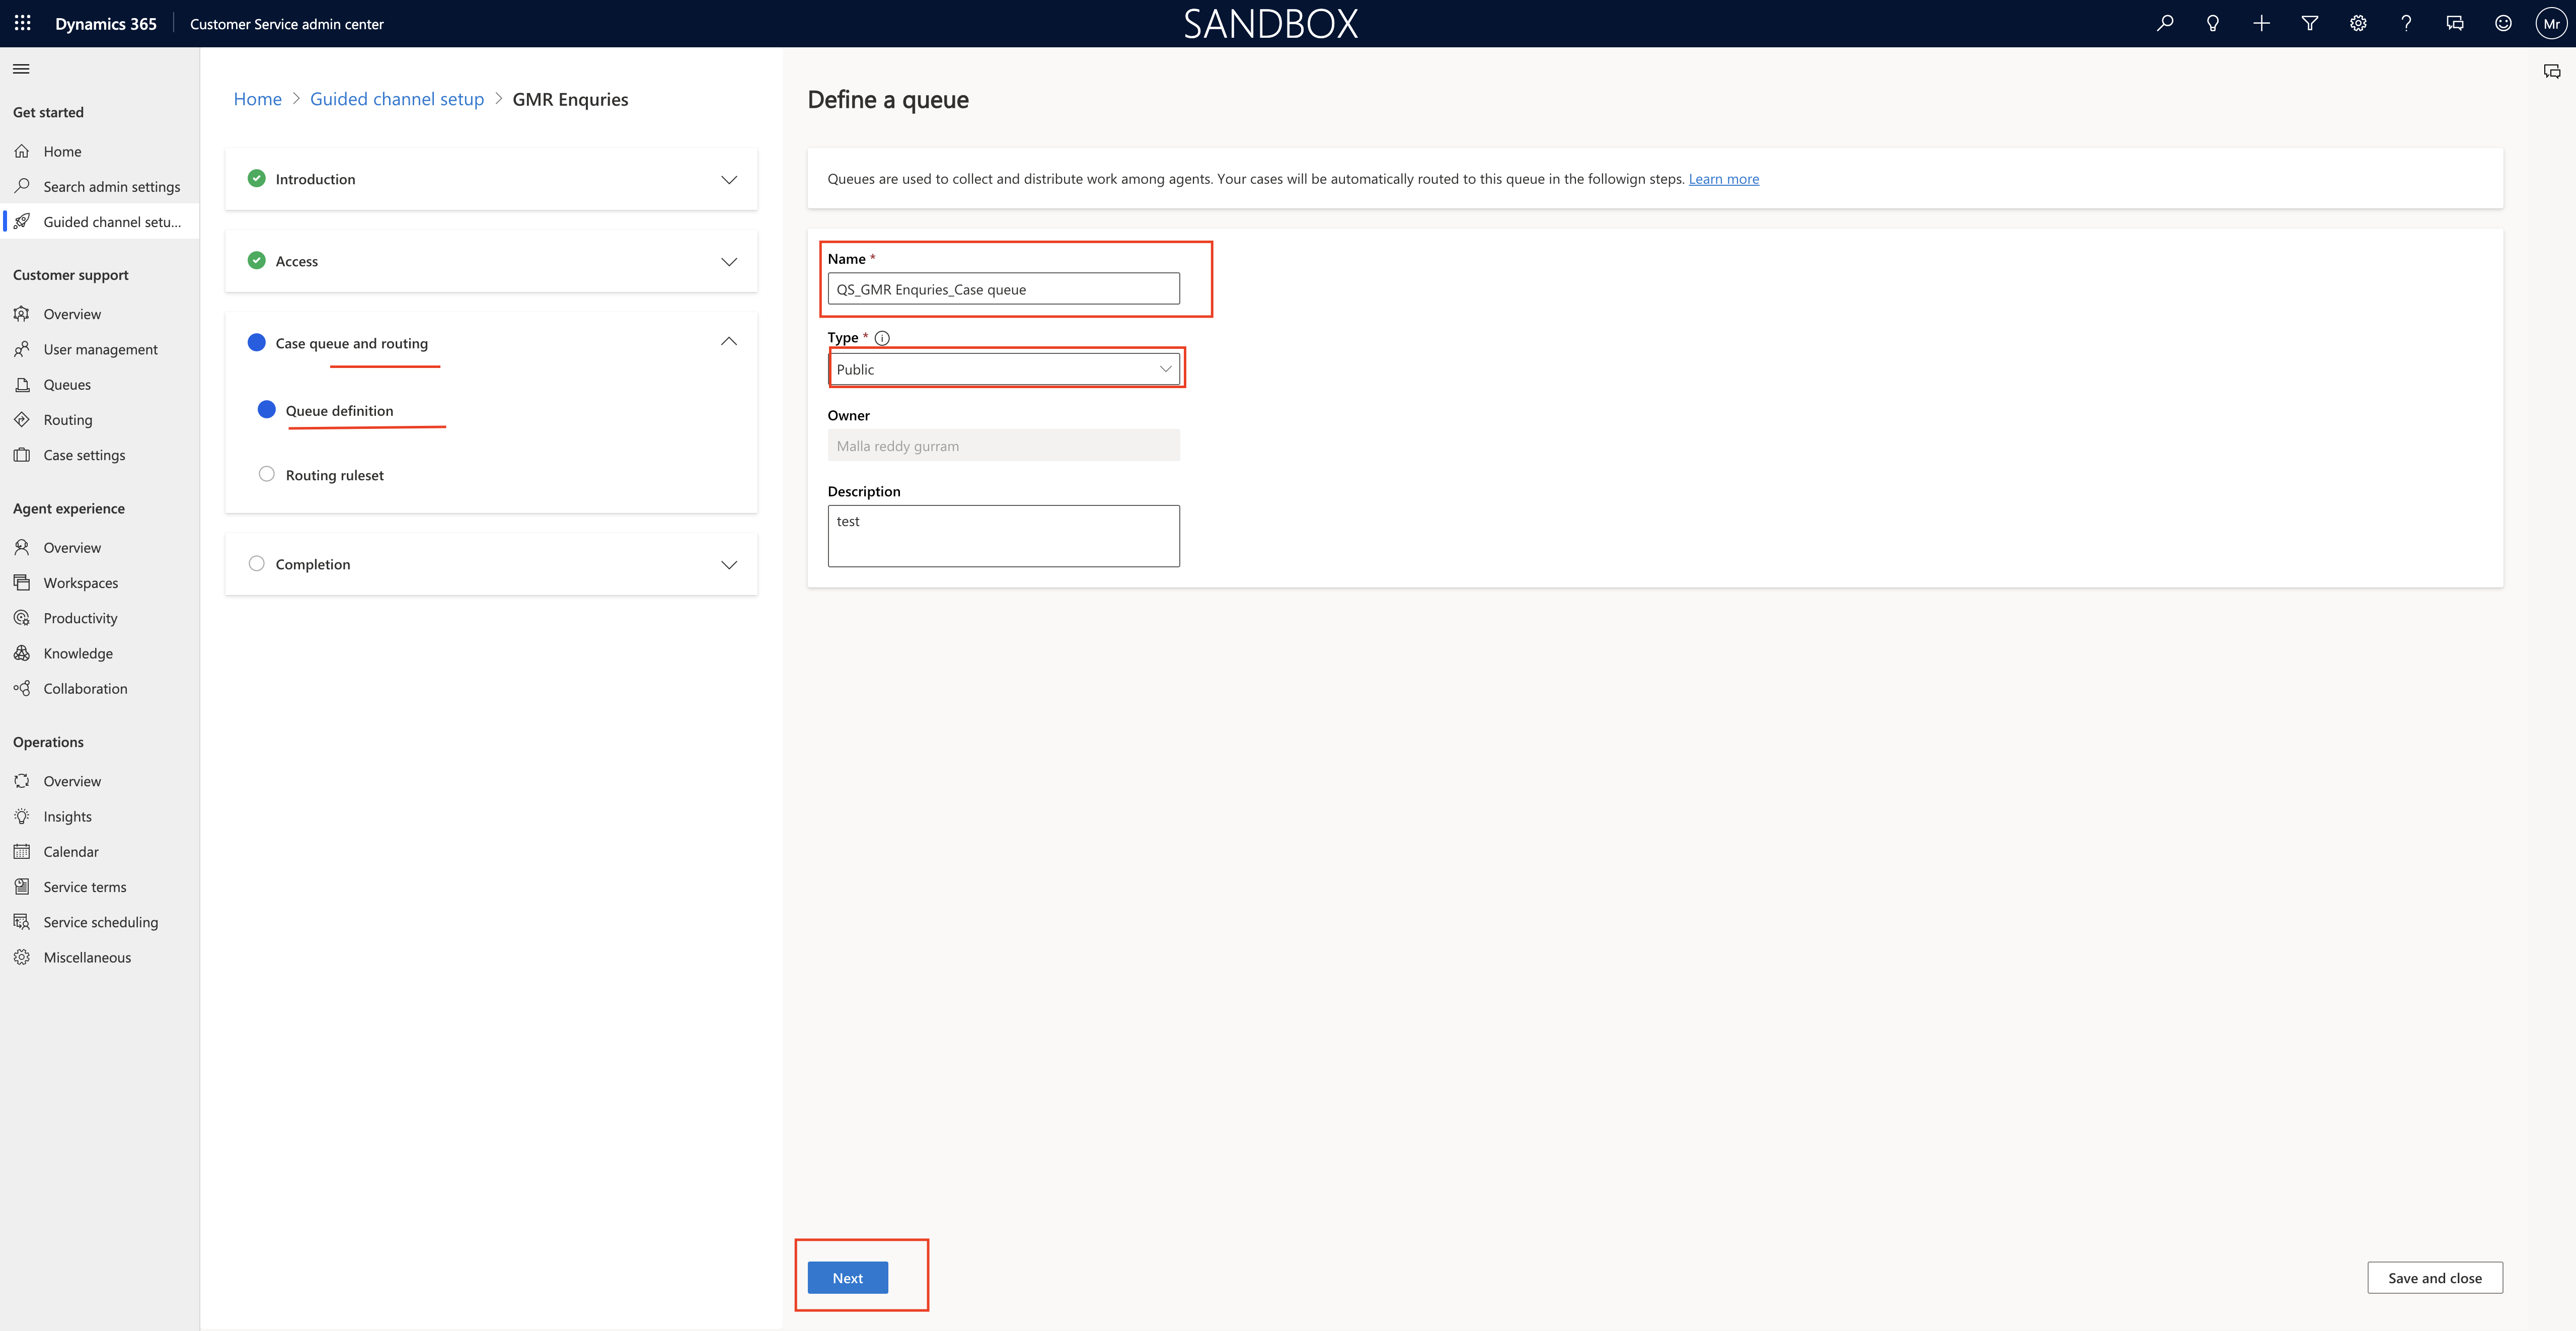
Now you need to define a queue: Name, type as public or private, owner, description and click NEXT.

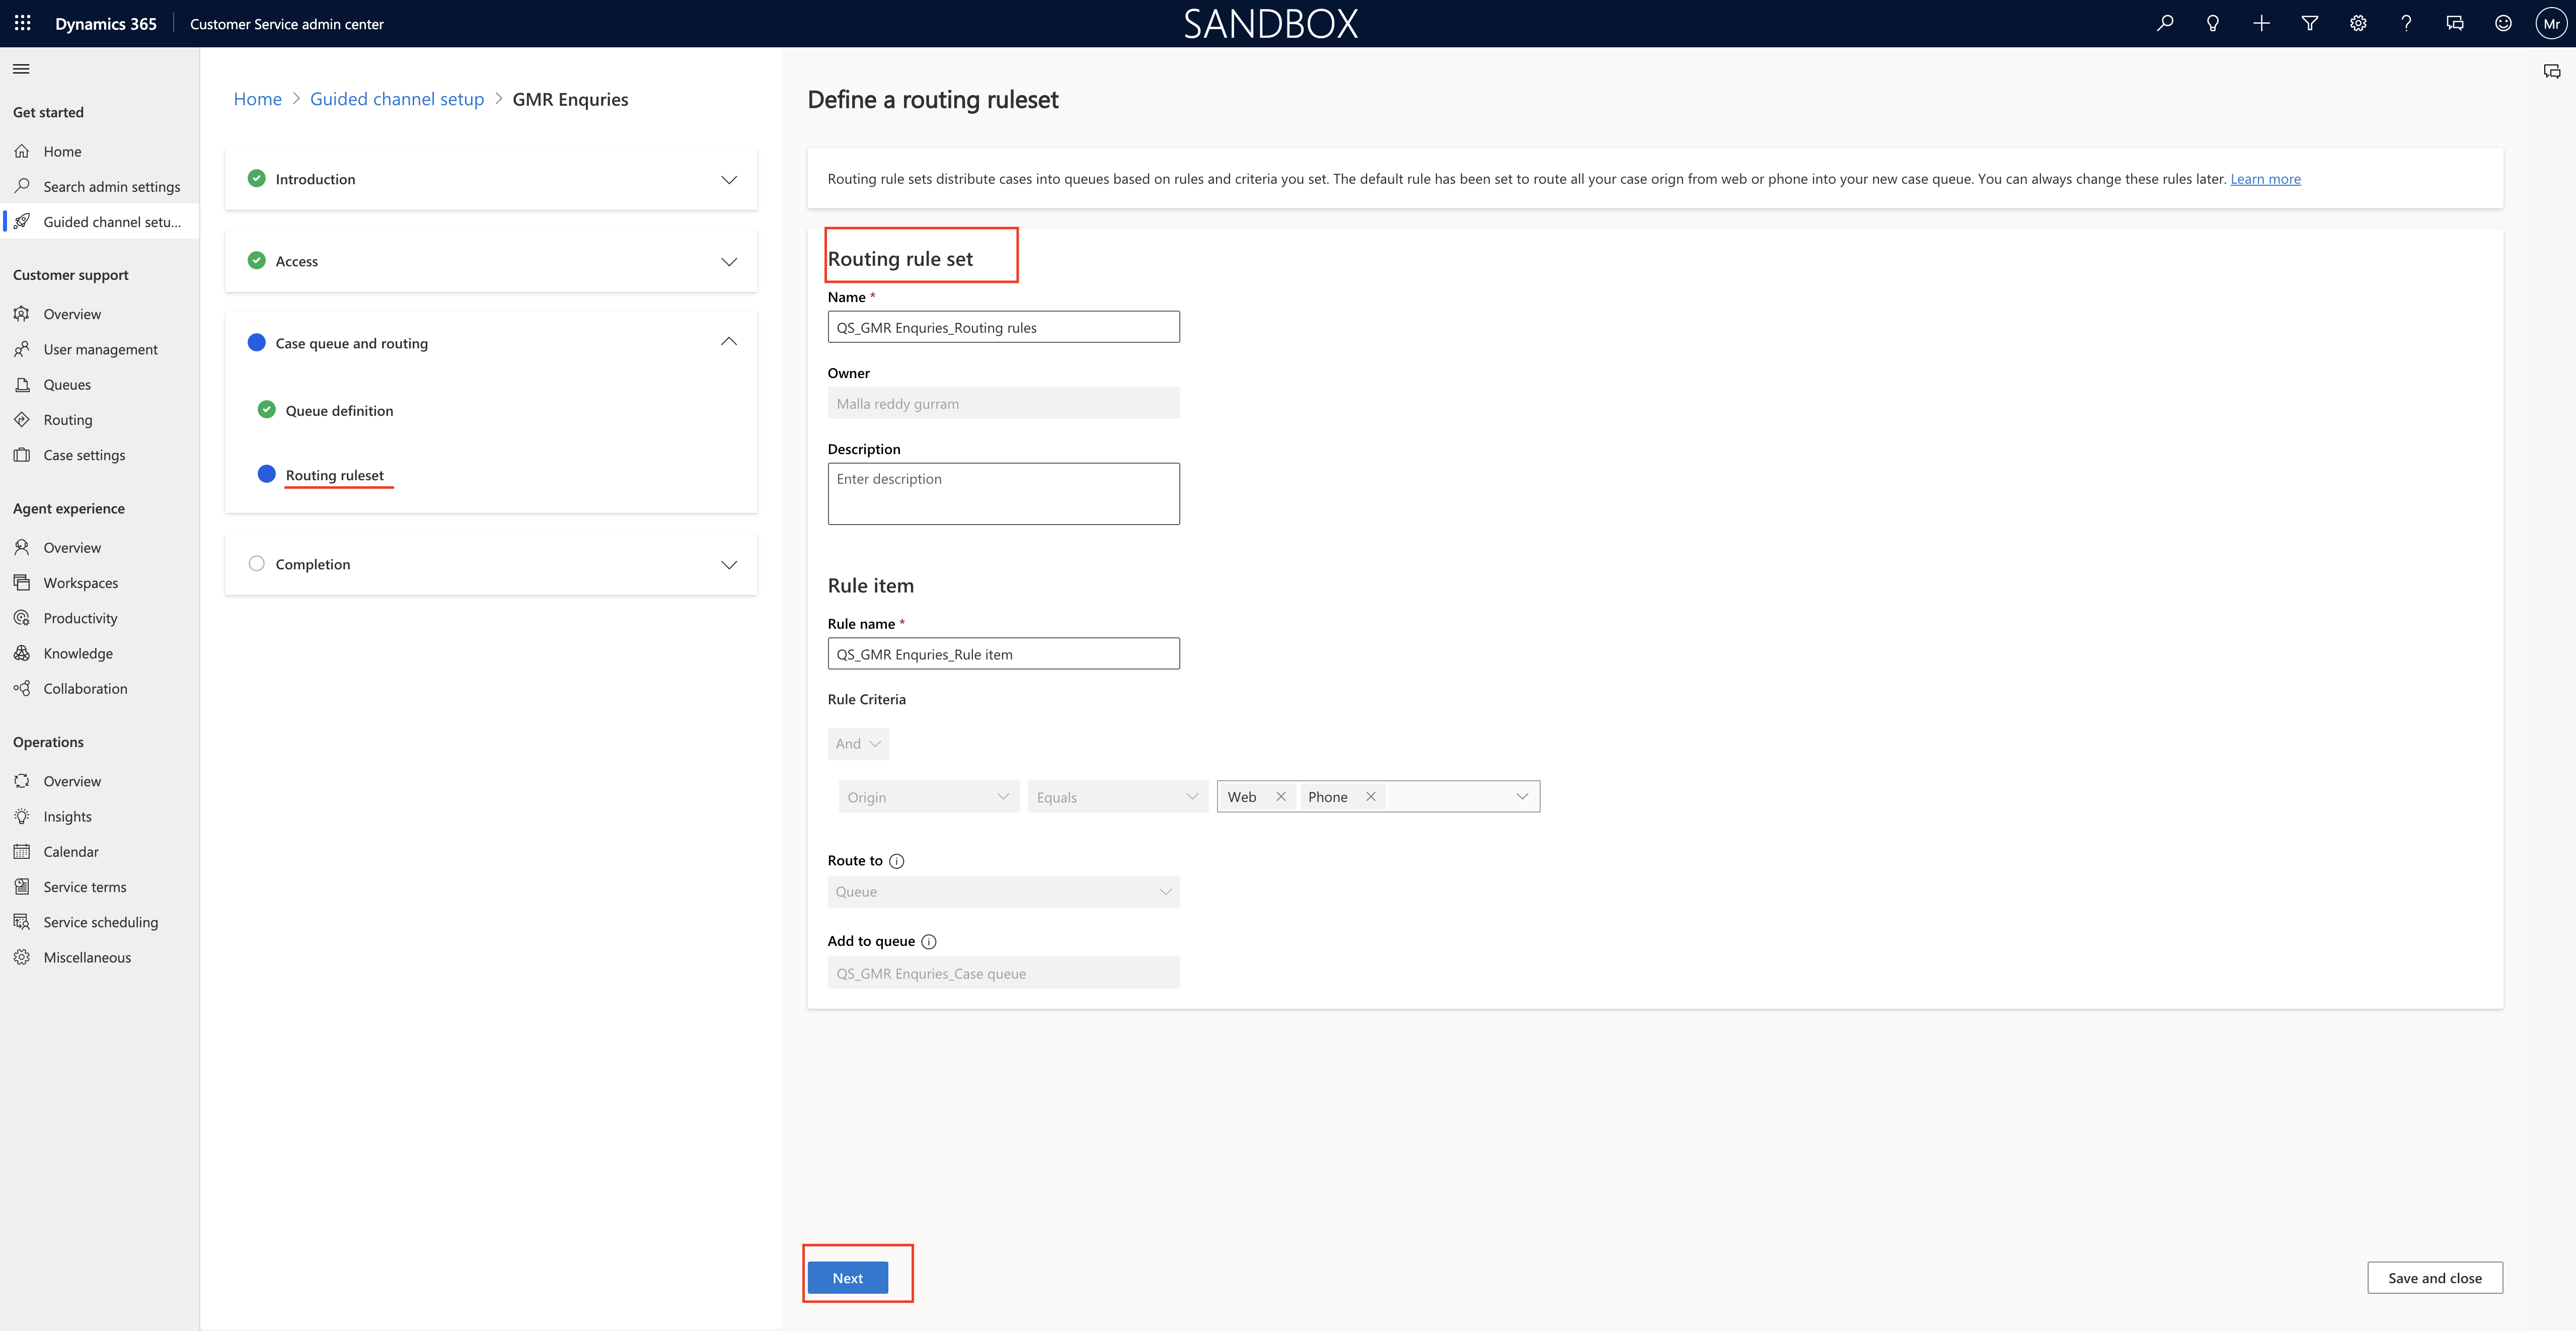
Define a routing ruleset:

Name, Description, Rule name, criteria, route to, add to queue and click Next.

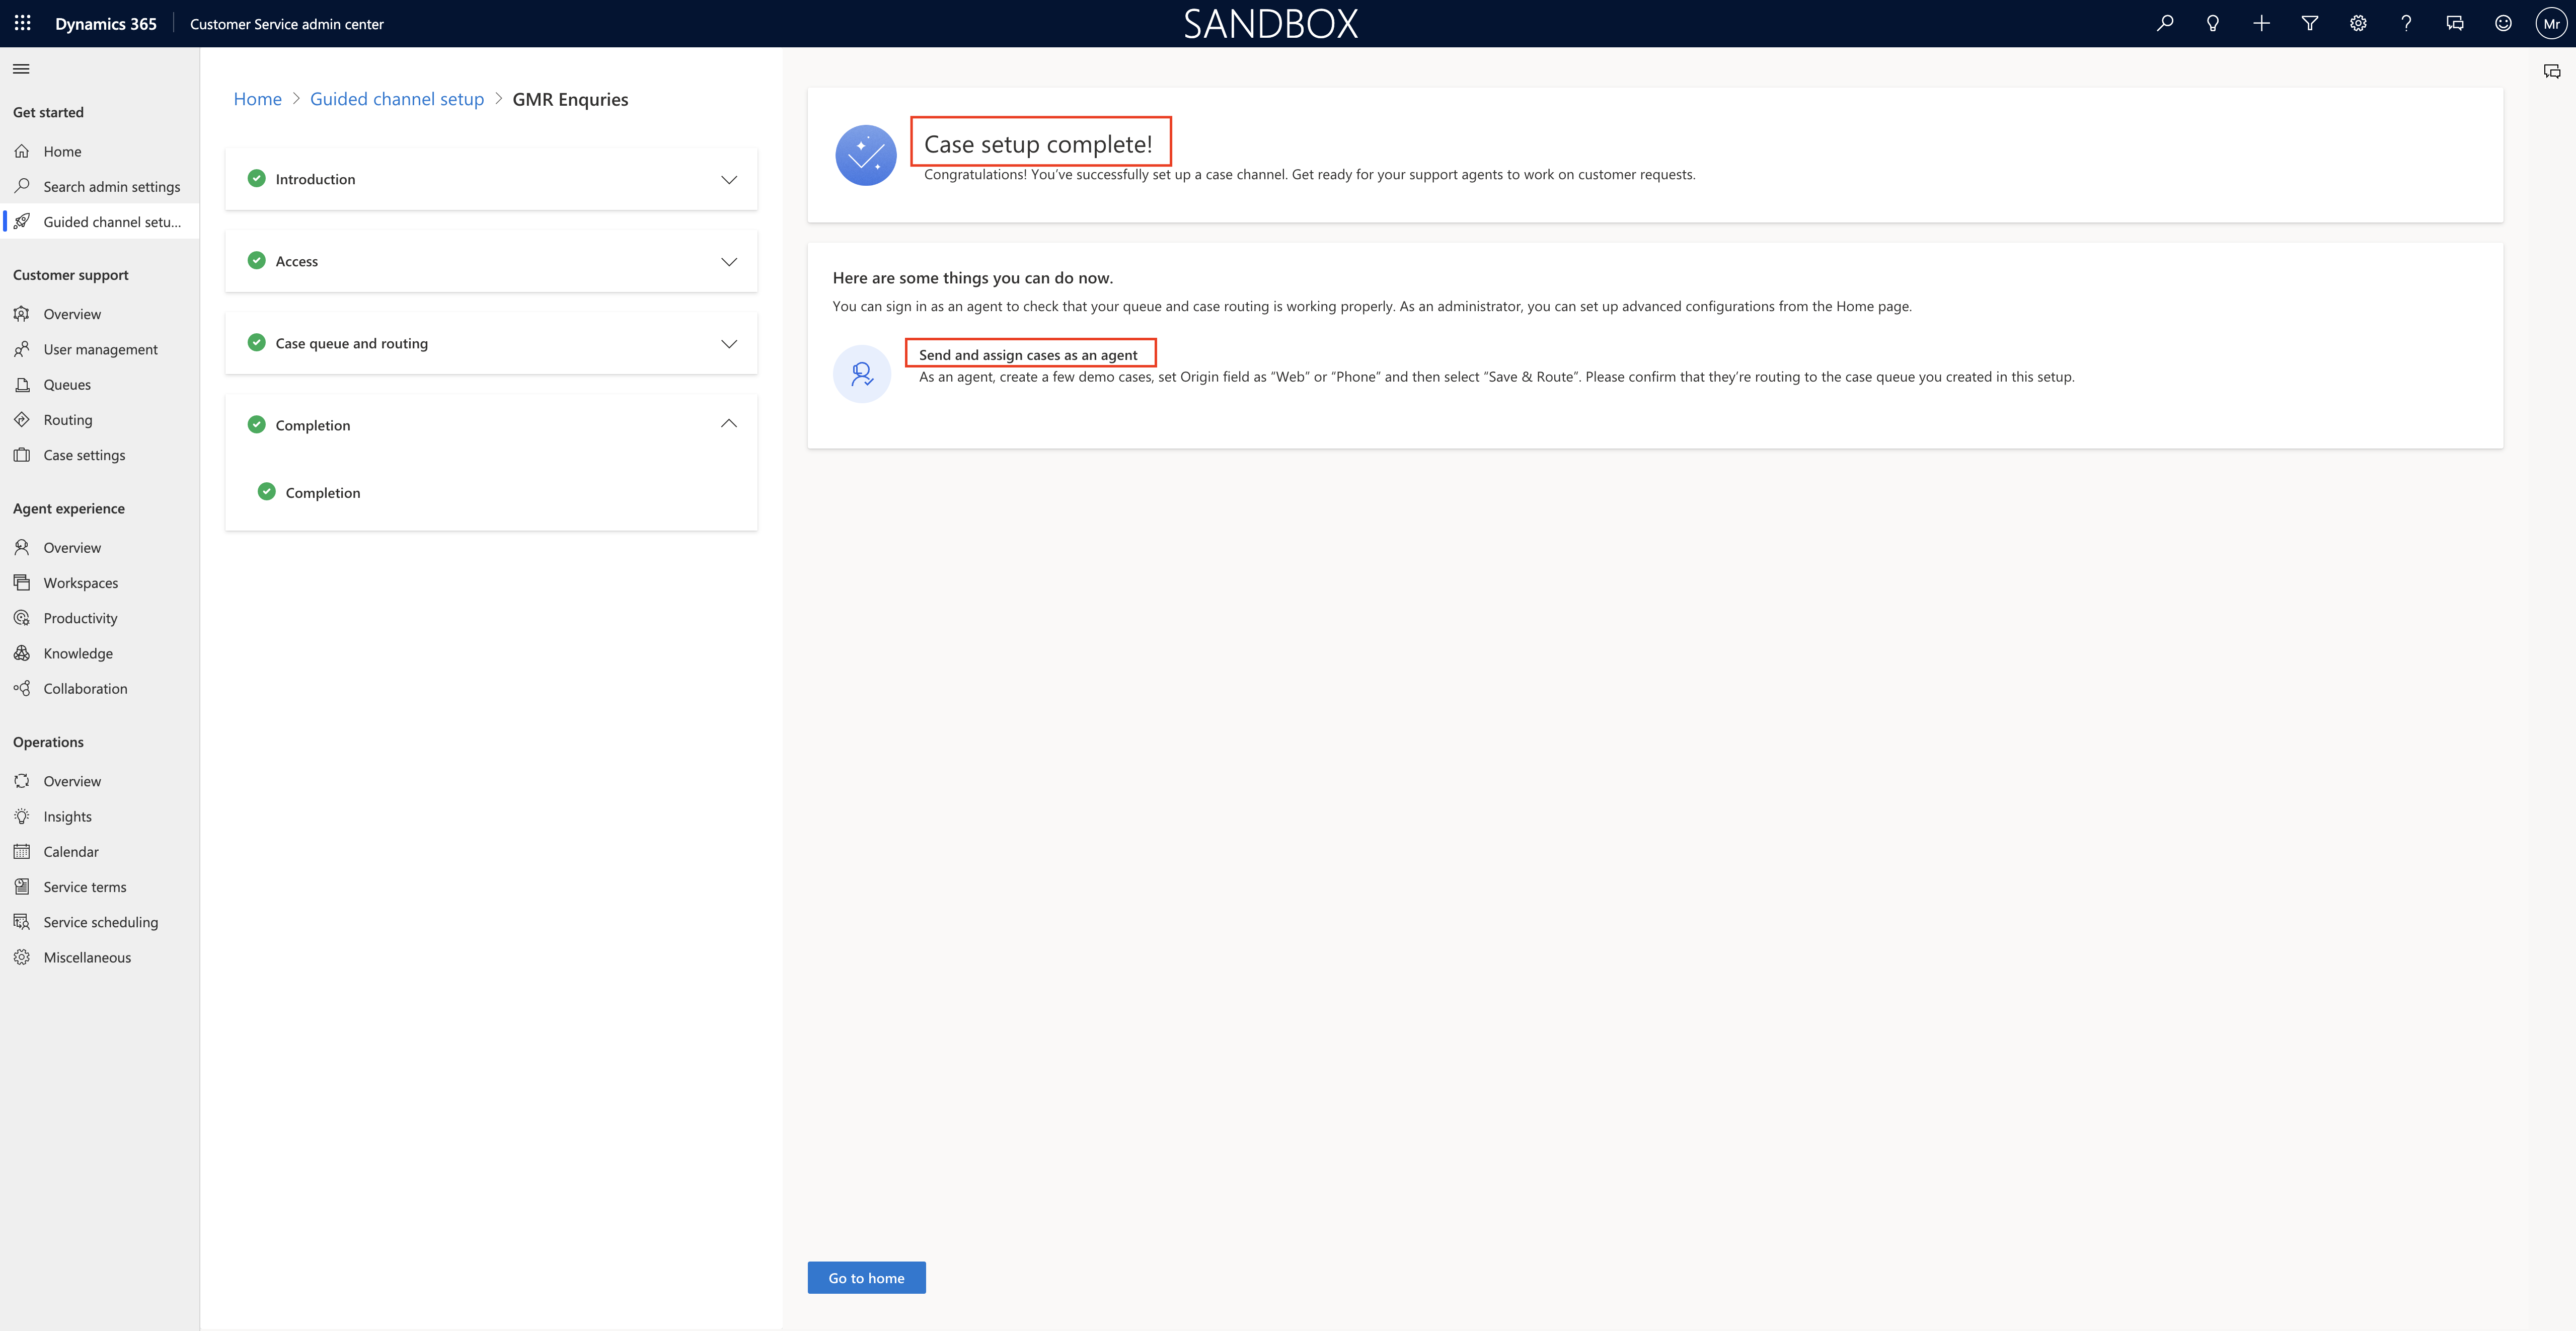
Final step to completion:

You can sign as an agent to check that your queue and case routing is working properly.

As a administrator, you can set up advanced configurations from the home page.

That’s it for today.

I hope this helps.

Malla Reddy Gurram(@UK365GUY)
#365BlogPostsin365Days

Share this: